Love this? Save it for later!
Share the inspiration with your friends
Homecoming week was in three days and I’d completely forgotten about the locker decorating contest. Everyone else would be bringing themed banners, fairy lights, and those magnetic photo frames. I had a half-empty bag of pretzels, some chocolate chips from a forgotten baking project, and about fifteen minutes before the school doors locked for the night. Let me tell you, standing in my kitchen at 9 PM on a Tuesday, staring at snack odds and ends, I was not feeling very creative. I was feeling, honestly, a little panicked.
My friend Maria texted asking what color scheme I was doing. I hadn’t even thought about a color scheme. I was thinking about how hungry I’d be between third period chemistry and fourth period English. That’s when it hit me—why not make a snack mix? Something that could live in a ziplock bag in the locker, survive the chaos of textbooks and gym shoes, and actually taste good. I dumped everything I had into a bowl, added some peanut butter I found in the back of the pantry, and microwaved it for thirty seconds. No bake, no fuss, no stress. Maybe you’ve been there—needing something fast that doesn’t look like you tried at all.
The next day, I brought a big batch to school. By lunch, three people had asked for the recipe. By the end of homecoming week, it was basically the unofficial snack of our hallway. That’s the thing about this quick high school locker snack mix—it started as a desperate kitchen experiment and turned into something I still make, years later, because it’s just that good. It’s the recipe that proves you don’t need fancy ingredients or hours of time to make something worth sharing.
Why You’ll Love This Recipe
This isn’t just another snack mix recipe you’ll bookmark and forget. I’ve tested this thing about a dozen times—with different chocolates, different nuts, different everything. Here’s why it keeps winning:
- Quick & Easy: Comes together in under 10 minutes, which is faster than deciding what to watch on Netflix. No oven, no stovetop, no waiting around.
- Simple Ingredients: You probably have everything in your pantry right now. No fancy grocery trips needed—I’ve made this with stuff I found in my dorm room at 11 PM.
- Perfect for On-the-Go: Lives in a locker, backpack, or glove compartment without going bad. Great for after-school activities, study sessions, or road trips.
- Crowd-Pleaser: Always gets rave reviews from teenagers and adults alike. I brought it to a teacher’s lounge once and it disappeared in fifteen minutes.
- Unbelievably Delicious: The combo of salty pretzels, sweet chocolate, and creamy peanut butter is next-level comfort food. It’s that perfect sweet-and-salty balance that makes you reach for another handful.
What makes this recipe different from the rest? It’s the technique—microwaving the peanut butter and chocolate together creates this silky coating that clings to every piece without being messy. No double boilers, no complicated tempering. Just honest, good food that tastes like you actually tried when you didn’t.
This recipe is the kind that makes you close your eyes after the first bite. It’s comfort food reimagined—faster, simpler, but with the same soul-soothing satisfaction. Perfect for impressing your friends without stress, or turning a boring afternoon into something memorable.
What Ingredients You Will Need
This recipe uses simple, pantry-friendly ingredients to deliver bold flavor and satisfying crunch without the fuss. Most of these are probably sitting in your kitchen right now, waiting for their moment to shine.
- Pretzels (3 cups, broken into bite-sized pieces) – I recommend Snyder’s of Hanover for that satisfying crunch. Mini pretzels work great too. If you only have pretzel sticks, just snap them in half.
- Peanut butter (½ cup, creamy) – Skippy or Jif work best here because they have stabilizers that keep the coating smooth. Natural peanut butter can separate and get oily, but you can use it if you stir really well first.
- Semi-sweet chocolate chips (1 cup) – Ghirardelli is my go-to for that rich flavor. Milk chocolate works if you want it sweeter, but semi-sweet balances the saltiness perfectly.
- Powdered sugar (¼ cup) – This is the secret ingredient that gives the mix that “bakery” look. It absorbs any extra moisture and adds a subtle sweetness.
- Butter (2 tablespoons, unsalted) – Adds richness and helps the chocolate coating stay glossy. If you only have salted butter, just skip adding any extra salt later.
- Vanilla extract (1 teaspoon) – Pure vanilla extract makes a difference here. The imitation stuff works in a pinch, but pure adds warmth you’ll notice.
- Optional mix-ins:
- Mini marshmallows (½ cup) – Adds a soft, chewy contrast to the crunch.
- Dried cranberries (¼ cup) – For a tart pop that cuts through the sweetness.
- Chopped nuts (¼ cup, almonds or peanuts) – Extra crunch and protein.
- Shredded coconut (¼ cup, unsweetened) – Gives it a tropical twist.
Substitution guidance: Use almond butter or sunflower seed butter for a nut-free version. Use dairy-free chocolate chips and vegan butter to make this vegan. For a gluten-free option, swap pretzels with gluten-free pretzels or crispy rice cereal.
Equipment Needed
You don’t need a fancy kitchen for this one. Here’s what you’ll actually use:
- Large microwave-safe bowl – A glass or ceramic bowl works best. I use a 2-quart Pyrex measuring cup because it’s easy to pour from.
- Rubber spatula – For scraping every last bit of chocolate goodness. A wooden spoon works too, just make sure it’s heat-safe.
- Parchment paper or silicone baking mat – For setting the mix. Wax paper works in a pinch, but parchment is less likely to stick.
- Baking sheet – Any standard half-sheet pan will do. If you don’t have one, a large plate or even a clean cutting board works.
- Measuring cups and spoons – Eyeballing works for experienced cooks, but measuring ensures consistency.
- Ziplock bags or airtight container – For storage. Mason jars work great too and look cute for gifting.
I’ve made this with just a bowl and a spoon in a college dorm microwave. Truly, you don’t need much. The parchment paper is the one thing I wouldn’t skip—it makes cleanup so much easier, and you won’t lose any of that delicious coating to the pan.
Preparation Method
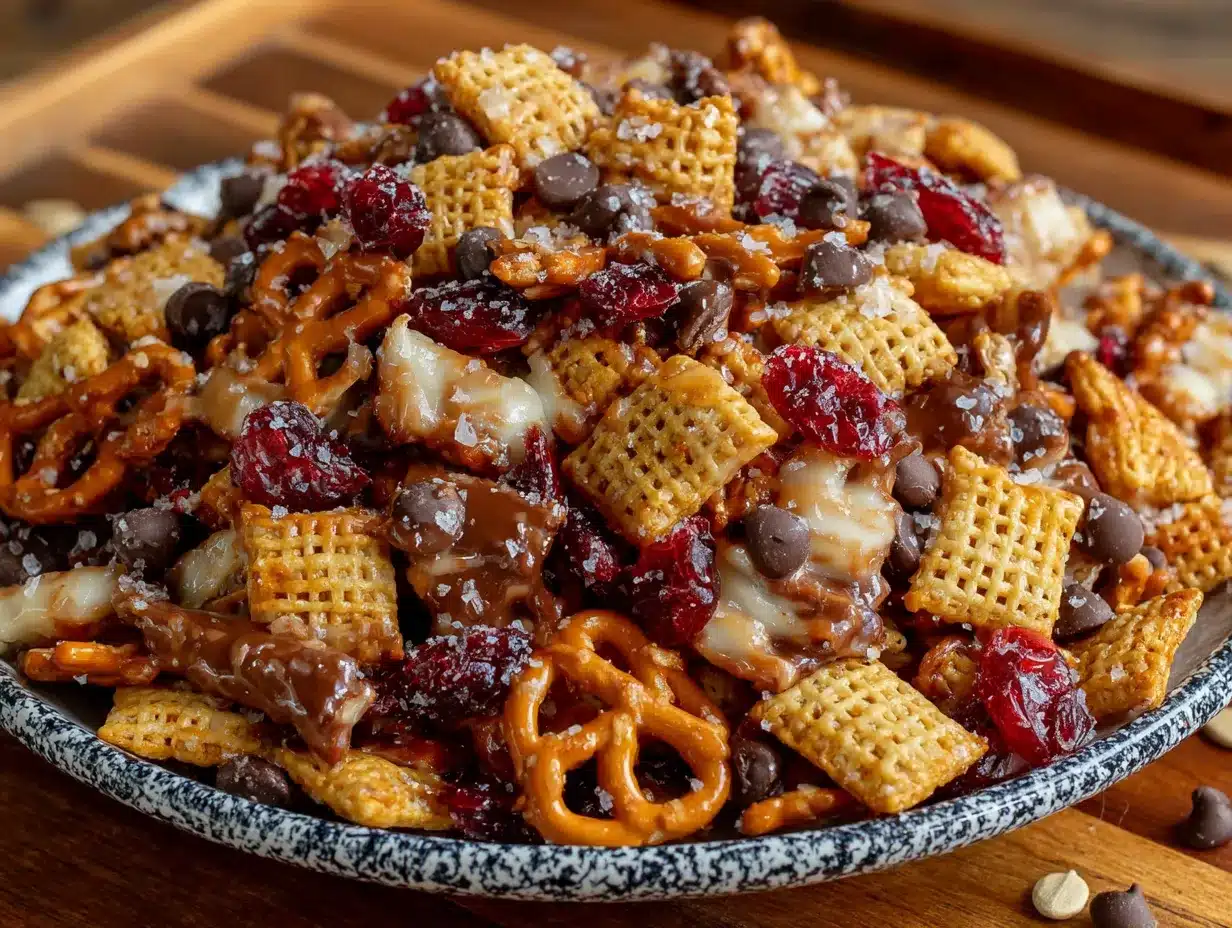
Let’s get to the good part. This whole process takes about 10 minutes, start to finish.
Step 1: Prep your workspace.
Line a baking sheet with parchment paper or a silicone mat. Set it aside. Break your pretzels into bite-sized pieces if they’re large. You want pieces that are easy to grab but not so small they get lost in the mix. Aim for about ½-inch chunks.
Step 2: Melt the chocolate and peanut butter.
In a large microwave-safe bowl, combine 1 cup semi-sweet chocolate chips, ½ cup creamy peanut butter, and 2 tablespoons unsalted butter. Microwave in 30-second intervals, stirring well between each. This usually takes about 1 minute to 1 minute 30 seconds total. The mixture should be smooth and glossy when you’re done. Don’t overheat it—chocolate can seize up if it gets too hot. If it looks grainy, you went too far. (I’ve done this. It’s fixable by adding a teaspoon of coconut oil and stirring vigorously.)
Step 3: Add the vanilla.
Stir in 1 teaspoon vanilla extract. The mixture will smell amazing at this point. Take a moment to appreciate it.
Step 4: Combine with pretzels.
Add the broken pretzels to the chocolate mixture. Gently fold everything together with your rubber spatula until every piece is evenly coated. Don’t overmix—you want the coating to cling, not get absorbed. The pretzels should look like they’re wearing a chocolate sweater. If you’re adding optional mix-ins like mini marshmallows or dried cranberries, fold them in now.
Step 5: Transfer to the baking sheet.
Spread the coated pretzel mixture onto your prepared baking sheet in an even layer. Don’t worry about making it perfect—clusters are good. Actually, clusters are great. They’re the best part.
Step 6: Dust with powdered sugar.
Using a fine-mesh sieve or a small strainer, sprinkle ¼ cup powdered sugar evenly over the mixture. This gives it that “snow-dusted” look that makes it feel fancy. If you don’t have a sieve, just tap the powdered sugar through a fork’s tines.
Step 7: Let it set.
Place the baking sheet in the refrigerator for 15-20 minutes, or until the chocolate is firm. If you’re in a hurry, the freezer works in 5-7 minutes. The mixture should be solid but not rock-hard—you want it to snap when you break it apart.
Step 8: Break into pieces.
Once set, break the mixture into clusters. I like leaving some pieces larger (about 2 inches) and some smaller. The variety in size makes it more interesting to eat. Store in an airtight container or ziplock bag.
Cooking Tips & Techniques
I’ve made this recipe more times than I can count, and I’ve definitely learned some things the hard way. Here’s what I wish someone had told me:
Don’t overheat the chocolate. This is the number one mistake. Chocolate burns easily and once it seizes, it’s game over. Always microwave in 30-second bursts and stir between each. The residual heat will continue melting the chocolate even after you take it out, so stop when there are still a few small lumps.
Use room temperature peanut butter. Cold peanut butter is harder to stir into melted chocolate. If your peanut butter lives in the fridge, let it sit out for 15 minutes first. Or microwave it for 10 seconds before adding it to the chocolate.
Break pretzels before you start. Trying to break pretzels with chocolate-coated hands is a mess. Trust me on this. Do all your prep work first so you can focus on the fun part.
Let it set completely. I know it’s tempting to dig in right away, but the texture is so much better when the chocolate has fully set. The crunch of the pretzel against the firm chocolate coating is what makes this snack mix addictive.
Double the batch. Seriously. This recipe disappears fast. I’ve never regretted making extra, but I’ve definitely regretted only making one batch. It keeps well for up to two weeks, so there’s no downside.
Add salt at the end. If you’re using unsalted pretzels, sprinkle a little flaky sea salt on top after the powdered sugar. That sweet-salty combo is unbeatable.
Variations & Adaptations
This recipe is incredibly flexible. Here are some ways I’ve changed it up over the years:
Chocolate Peanut Butter Cup Version: Swap the semi-sweet chips for milk chocolate chips and add ¼ cup chopped Reese’s cups at the end. It’s extra indulgent and perfect for when you need a serious treat.
White Chocolate Cranberry: Use white chocolate chips instead of semi-sweet, and add ½ cup dried cranberries along with the pretzels. The tartness of the cranberries cuts through the sweetness beautifully. I made this for a holiday party once and it was gone in minutes.
Spicy Sweet Mix: Add ½ teaspoon cayenne pepper and ¼ teaspoon cinnamon to the melted chocolate mixture. The heat sneaks up on you, and the cinnamon adds warmth. My neighbor tried this version and now requests it every time we have a gathering.
Vegan-Friendly: Use dairy-free chocolate chips and vegan butter. Replace peanut butter with almond butter or sunflower seed butter. Everything else is already plant-based. It tastes just as good—I promise.
Trail Mix Style: Add ¼ cup each of dried cherries, almonds, and pumpkin seeds. This version is great for hiking or long study sessions because it has more protein and staying power.
Serving & Storage Suggestions
This snack mix is best served at room temperature. The chocolate should be firm but not hard, and the pretzels should still have that satisfying crunch. If you’ve stored it in the fridge, let it sit out for 5-10 minutes before serving.
Presentation ideas: For a locker-friendly version, portion it into individual ziplock bags. For gifting, mason jars tied with a ribbon look adorable. For a party, serve it in a big wooden bowl with a scoop—it’ll be the first thing to disappear.
What to serve with it: This snack mix pairs beautifully with fresh fruit like apple slices or grapes. It’s also great alongside a cold glass of milk or a warm mug of hot chocolate. If you’re feeling fancy, serve it next to a cheese board—the sweet and salty notes complement sharp cheddar beautifully.
Storage: Keep in an airtight container at room temperature for up to 2 weeks. If your kitchen runs warm, store it in the fridge. Do not freeze—the texture gets weird when thawed. The flavors actually develop over the first day or two, so it might taste even better on day two than day one.
Reheating: You don’t need to reheat this. Just let it come to room temperature if it’s been in the fridge. If you absolutely want it warm, microwave a small portion for 10 seconds—but honestly, it’s best cold or room temp.
Nutritional Information & Benefits
Here’s the approximate nutritional breakdown for a ½-cup serving (based on the base recipe without optional mix-ins):
- Calories: 280
- Fat: 16g
- Carbohydrates: 32g
- Protein: 6g
- Fiber: 3g
- Sugar: 18g
Health benefits of key ingredients: Peanut butter provides healthy fats and protein that help keep you full and focused—perfect for those long school days. Dark chocolate contains antioxidants and can improve mood (science says so!). Pretzels offer quick energy from carbohydrates, making this a great pre-activity snack.
Dietary considerations: This recipe can easily be made gluten-free, vegan, or nut-free with simple substitutions. It’s not low-fat or low-sugar, but it’s real food made from real ingredients. I see it as a treat, not a health food—and that’s okay. Life needs treats.
Potential allergens: Contains peanuts (from peanut butter), dairy (from butter and chocolate), and gluten (from pretzels). Adjust substitutions as needed for your dietary needs.
Conclusion
This quick high school locker snack mix is proof that you don’t need a complicated recipe to make something memorable. It started as a last-minute panic snack and became a recipe I still reach for years later. It’s the kind of food that makes you feel taken care of—even if you’re the one who made it.
I’d love for you to try this and make it your own. Add your favorite mix-ins, adjust the sweetness, or double the batch for your next gathering. Snap a photo and tag me—I genuinely love seeing how people make recipes their own. And if you have a variation I haven’t tried, drop it in the comments. I’m always looking for new ideas.
Here’s to simple food, good memories, and never underestimating what you can make with what’s already in your pantry. Happy snacking!
Frequently Asked Questions
Can I use crunchy peanut butter instead of creamy?
Absolutely. Crunchy peanut butter adds extra texture and works great in this recipe. Just make sure it’s well-stirred before measuring.
How long does this snack mix stay fresh?
Stored in an airtight container at room temperature, it stays fresh for up to 2 weeks. In the fridge, it can last up to 3 weeks, but let it come to room temperature before eating for the best texture.
Can I make this without a microwave?
Yes! Use a double boiler or a heatproof bowl set over a pot of simmering water. Stir the chocolate, peanut butter, and butter until melted and smooth. It takes a few extra minutes but works perfectly.
Is this recipe safe for school nut-free policies?
Only if you use a nut-free alternative like sunflower seed butter or Wowbutter. Check all other ingredients for cross-contamination warnings if you’re sending it to a nut-free school.
Can I add cereal to this mix?
Definitely. Crispy rice cereal, Chex, or Cheerios all work well. Reduce the pretzels by 1 cup and add 1 cup of cereal for a lighter texture. Just fold it in gently so the cereal doesn’t break.
Pin This Recipe!
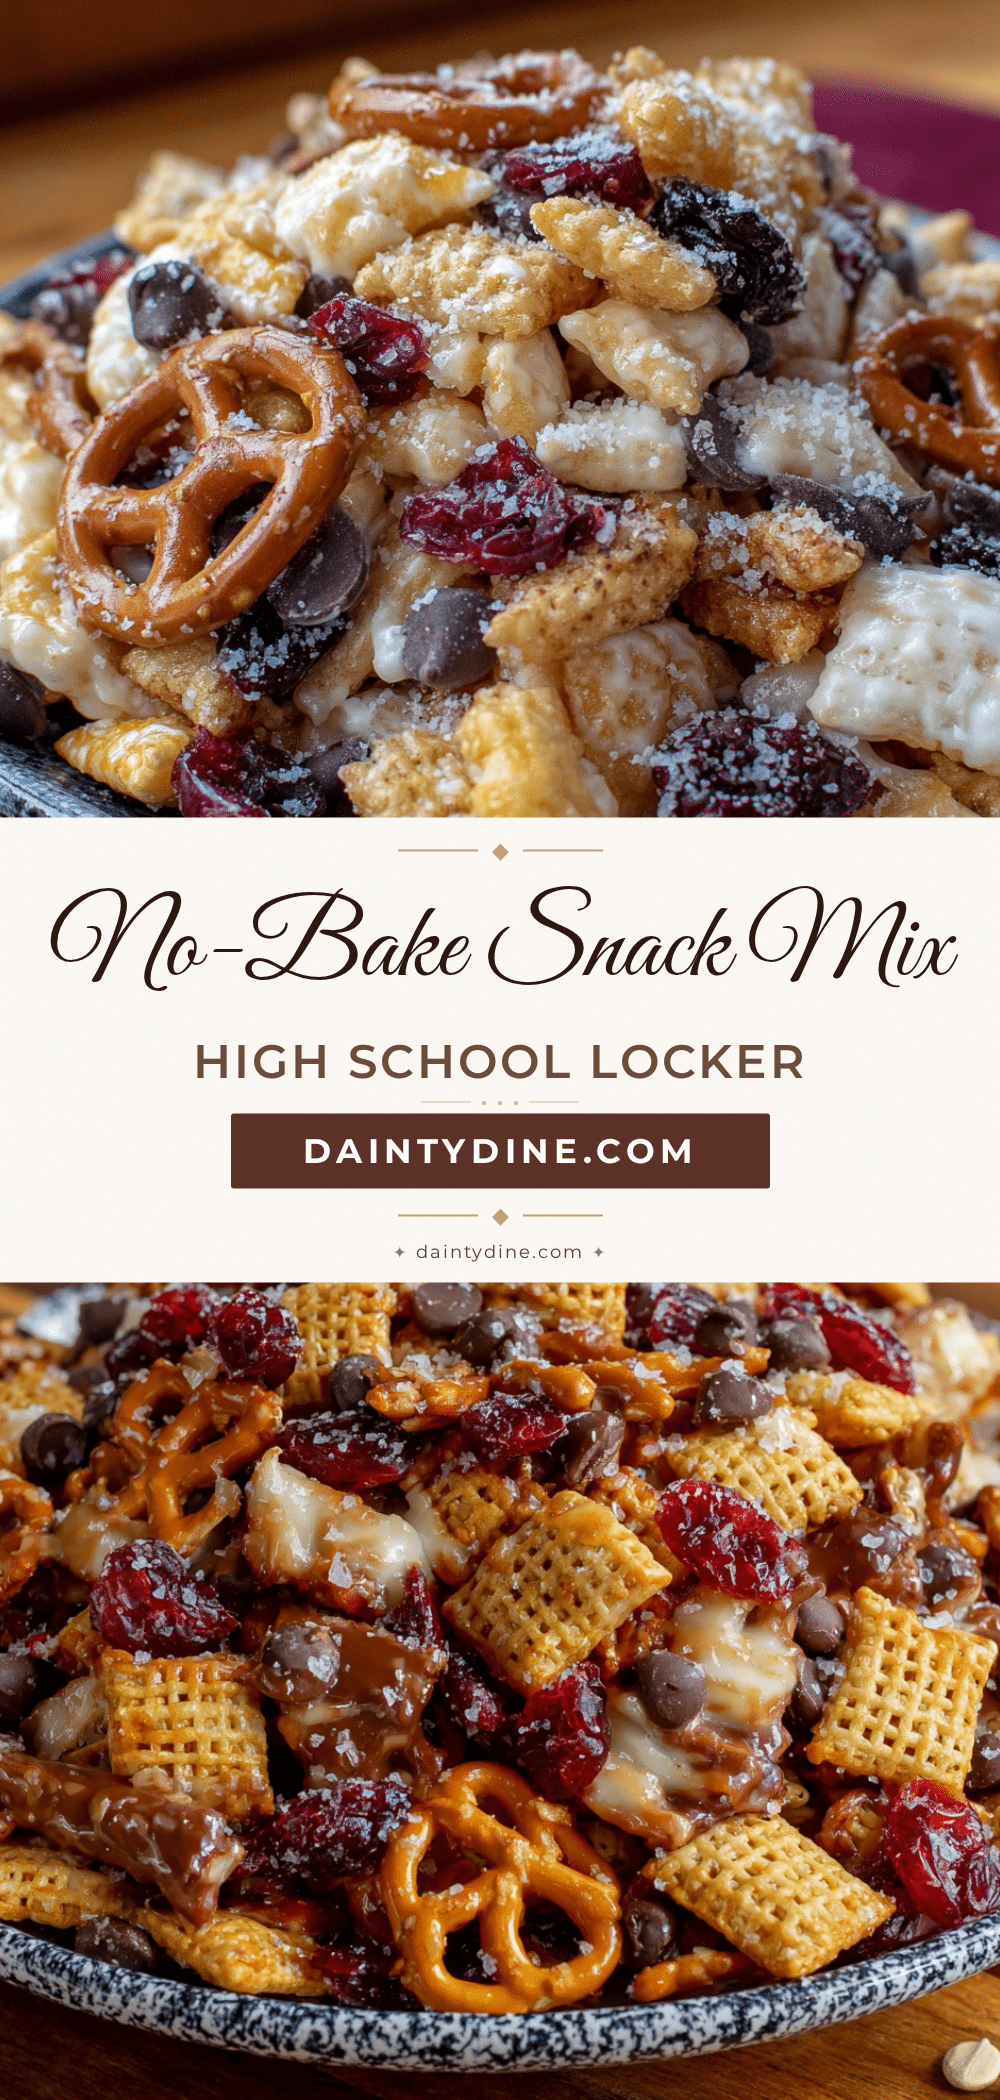
Quick High School Locker Snack Mix – No-Bake Easy Recipe
A no-bake snack mix made with pretzels, chocolate, and peanut butter that comes together in under 10 minutes. Perfect for on-the-go snacking, this sweet-and-salty treat is a crowd-pleaser that requires only simple pantry ingredients.
- Prep Time: 10 minutes
- Cook Time: 0 minutes
- Total Time: 10 minutes
- Yield: 8 servings 1x
- Category: Snack
- Cuisine: American
Ingredients
- 3 cups pretzels, broken into bite-sized pieces
- ½ cup creamy peanut butter
- 1 cup semi-sweet chocolate chips
- ¼ cup powdered sugar
- 2 tablespoons unsalted butter
- 1 teaspoon vanilla extract
- Optional mix-ins: ½ cup mini marshmallows, ¼ cup dried cranberries, ¼ cup chopped nuts (almonds or peanuts), ¼ cup shredded coconut (unsweetened)
Instructions
- Line a baking sheet with parchment paper or a silicone mat. Break pretzels into bite-sized pieces (about ½-inch chunks).
- In a large microwave-safe bowl, combine chocolate chips, peanut butter, and butter. Microwave in 30-second intervals, stirring well between each, until smooth and glossy (about 1 to 1½ minutes total).
- Stir in vanilla extract.
- Add broken pretzels to the chocolate mixture. Gently fold until every piece is evenly coated. If using optional mix-ins, fold them in now.
- Spread the coated pretzel mixture onto the prepared baking sheet in an even layer. Clusters are fine.
- Using a fine-mesh sieve, sprinkle powdered sugar evenly over the mixture.
- Refrigerate for 15-20 minutes (or freeze for 5-7 minutes) until the chocolate is firm.
- Break the mixture into clusters of varying sizes. Store in an airtight container or ziplock bag.
Notes
Don’t overheat the chocolate—microwave in 30-second bursts. Use room temperature peanut butter for easier mixing. Let the mix set completely for best texture. Double the batch as it disappears fast. For unsalted pretzels, sprinkle flaky sea salt on top after powdered sugar.
Nutrition
- Serving Size: ½ cup
- Calories: 280
- Sugar: 18
- Fat: 16
- Carbohydrates: 32
- Fiber: 3
- Protein: 6
Keywords: snack mix, no-bake, pretzel, chocolate, peanut butter, easy, quick, locker snack, on-the-go


