Love this? Save it for later!
Share the inspiration with your friends
My neighbor Dave watched me trying to wrangle a bag of frozen puff pastry on my front steps and didn’t say anything at first. Then he just shook his head and walked over with a package of crescent rolls from his own fridge. “Forget the fancy stuff,” he said, handing them over. “Halloween is about the fun, not the fuss.” That was three years ago, and honestly, I’ve never looked back. Dave isn’t a chef or a food blogger—he’s a retired electrician who makes the best chili in our building and throws a Halloween block party that the whole street talks about. That little exchange on a chilly October afternoon changed how I approach holiday cooking entirely.
These Spooky Mummy Pigs in a Blanket for Halloween are the direct result of that conversation. They’re not complicated, they’re not pretentious, and they’re absolutely perfect for a holiday that’s supposed to be a little bit silly. I mean, who wants to spend hours in the kitchen when there are costumes to sort out and candy bowls to fill? This recipe came from a place of practicality, but it stayed with me because of how much joy it brings. Every year, I make a big batch for Dave’s block party, and every year, they disappear faster than I can restock the platter. Maybe you’ve been there—running around on Halloween night, realizing you need something festive but quick, and feeling that familiar panic set in. These mummies are the answer.
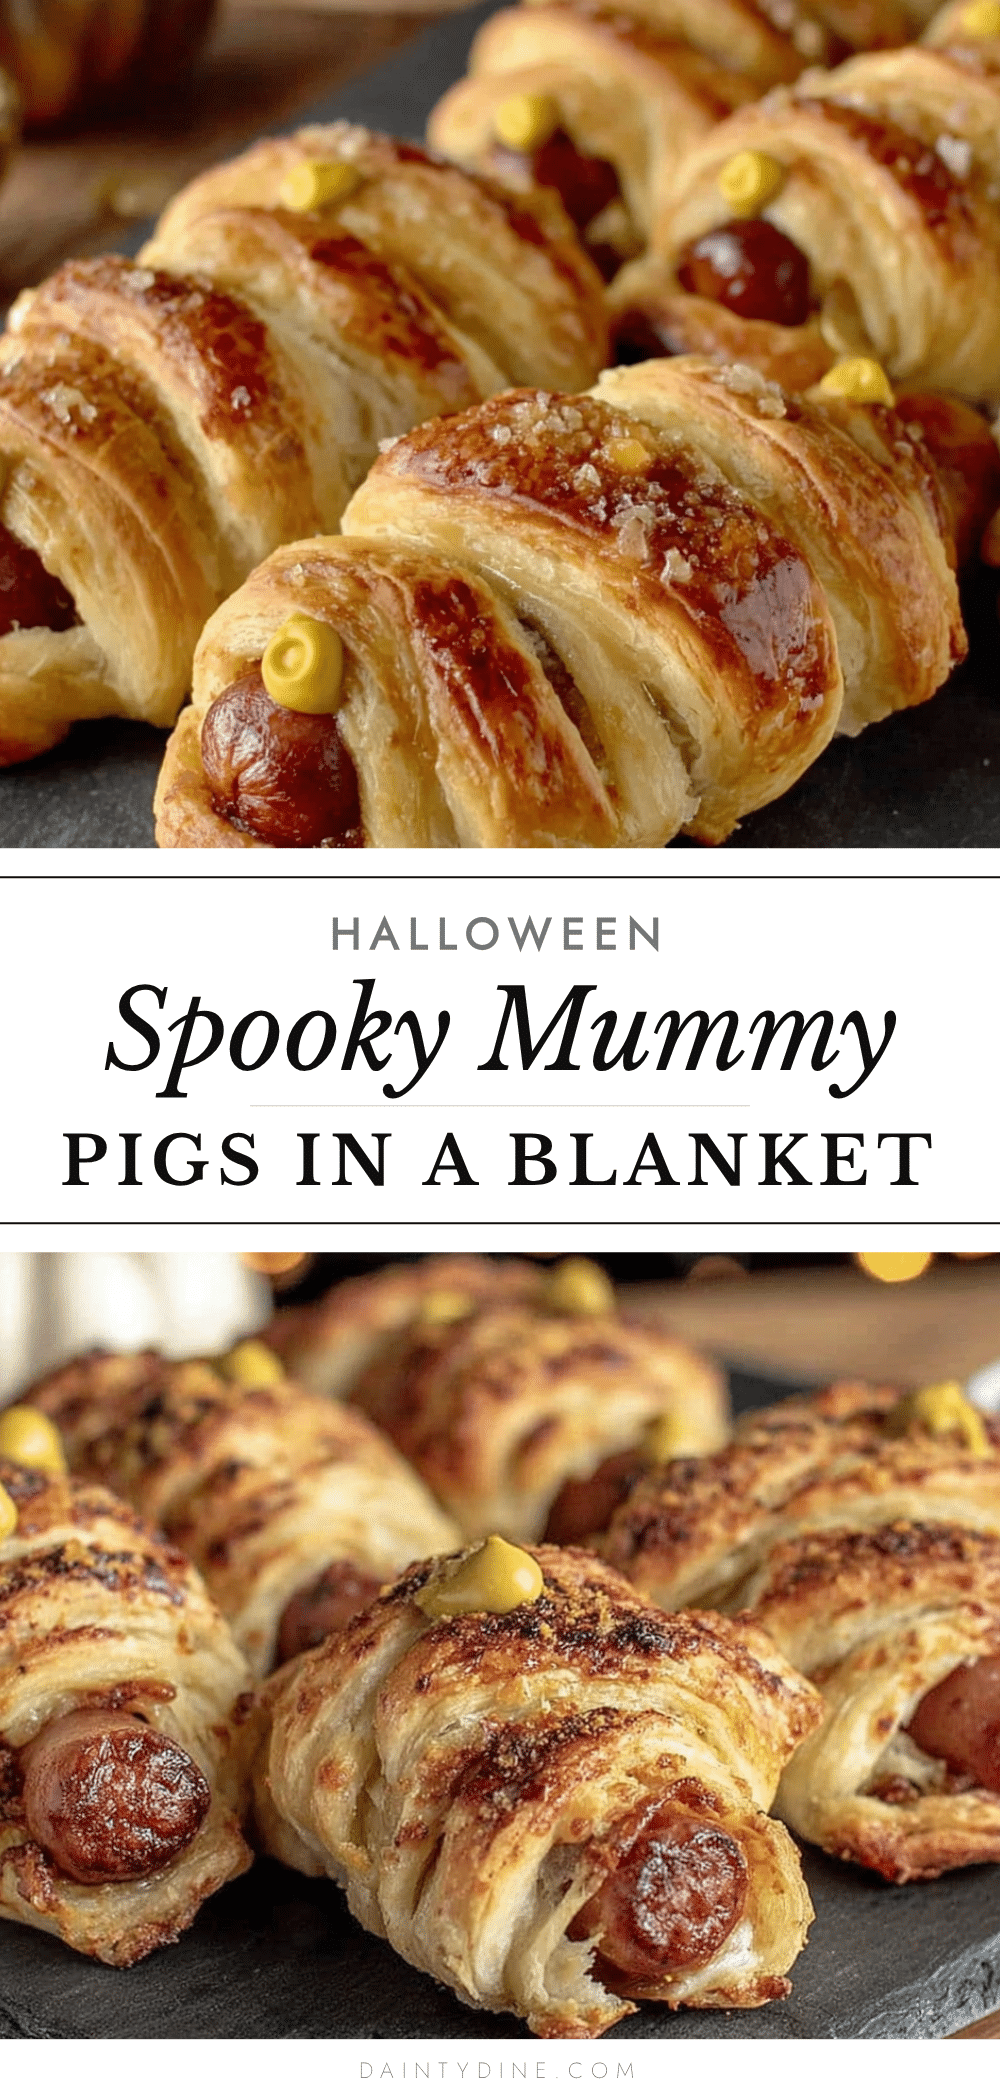
Let me tell you, there’s something deeply satisfying about turning simple pigs in a blanket into something that looks like it crawled out of a tomb. The little eyes peeking out from the dough wrappings, the slightly uneven strips that make each one unique—it’s the kind of imperfection that feels authentic. I’ll never forget the first time I made these and accidentally tore a dough strip in half. I thought I’d ruined it, but Dave just laughed and said, “Now it looks like a real mummy. They’re supposed to be a little raggedy.” That tiny human moment taught me to relax and let the food be what it is. These Spooky Mummy Pigs in a Blanket for Halloween are proof that the best recipes often come from letting go of perfection and embracing the messy, joyful spirit of the season.
Why You’ll Love This Recipe
I’ve tested this recipe more times than I care to admit, and I can tell you with absolute confidence that it delivers on every front. Here’s why this version stands out from the countless other Halloween appetizers out there:
- Quick & Easy: From start to finish, these come together in under 30 minutes. That’s faster than most costume changes, honestly. Perfect for those chaotic Halloween evenings when you’re juggling a dozen things at once.
- Simple Ingredients: You probably already have everything in your kitchen right now. No weird specialty items, no expensive imports—just basic ingredients that work together beautifully.
- Perfect for Halloween: These are tailor-made for spooky season. Whether it’s a classroom party, a workplace potluck, or your own pre-trick-or-treating dinner, they fit right in.
- Crowd-Pleaser: Kids absolutely lose their minds over these little guys, and adults sneak them off the platter when they think nobody’s watching. Trust me on that one.
- Unbelievably Delicious: The combination of flaky, buttery dough wrapped around savory little sausages is comfort food at its finest. Add those tiny mustard eyes, and you’ve got something that tastes as good as it looks.
What makes these different from every other pigs in a blanket recipe? It’s the wrapping technique. Most recipes just throw the dough on whole, but I’ve developed a method for cutting the dough into thin strips that wrap around the sausages like actual mummy bandages. It takes an extra two minutes and makes all the difference in the world visually. Plus, the gaps between the strips allow the sausages to brown beautifully, giving you that perfect contrast between golden dough and dark, crispy edges. It’s not just another version—it’s the best version.
This recipe isn’t just good—it is the kind that makes you close your eyes after the first bite. There’s something about the way the flaky crust gives way to that salty, savory sausage that just hits different. It’s comfort food reimagined for Halloween, and it delivers that same soul-soothing satisfaction every single time. Perfect for impressing guests without any stress, or turning a simple snack into something memorable.
What Ingredients You Will Need
This recipe uses simple, wholesome ingredients to deliver bold flavor and satisfying texture without the fuss. Everything here is a pantry staple or easy to find at any grocery store, which is exactly what you want when Halloween chaos is brewing.
- 1 can (8 oz) refrigerated crescent roll dough (I prefer Pillsbury for consistent results, but any brand works. The key is getting those perforated triangles.)
- 24 mini cocktail sausages or hot dogs (Look for the little smoked sausages—they hold up better during baking. I like Hillshire Farm Lit’l Smokies for their snappy texture.)
- 1 large egg, beaten (This creates that gorgeous golden-brown finish. Use a fork to whisk it until it’s uniform.)
- 1 tablespoon milk or water (To thin out the egg wash slightly. Whole milk gives the richest color, but water works fine.)
- Mustard for eyes (Yellow mustard gives the brightest, most cartoonish look. Dijon works too, but it’s a little more subtle. You can also use ketchup dots for a different vibe.)
- Optional: Everything bagel seasoning or sesame seeds (For sprinkling on top. Not traditional, but adds nice texture and visual interest.)
- Optional: Ranch dressing or marinara sauce for dipping (Because everything is better with dipping sauce. I’m partial to ranch for these.)
Let me talk about the crescent roll dough for a second because it really is the star here. I’ve tried making homemade dough for these, and while it’s delicious, it’s also a huge pain for something that’s supposed to be quick. The store-bought stuff is perfectly flaky and buttery, and it holds its shape beautifully during baking. Just make sure your dough is cold when you’re working with it—warm dough gets sticky and hard to cut into those thin strips. If your kitchen is warm, pop the can in the fridge for ten minutes before opening it.
For the sausages, I recommend the cocktail size rather than full-sized hot dogs. They’re the perfect one-bite size, and they cook through at the same rate as the dough. If you can only find full-sized hot dogs, just cut each one into three or four pieces. The important thing is that they’re roughly the same size so they cook evenly. I’ve also used vegetarian sausages for a plant-based version, and they work great—just check the cooking time on the package because some brands cook faster than others.
As for the mustard eyes, I’ve experimented with a bunch of different options. Squeeze bottles work best because you can control the size of the dots. If you don’t have a squeeze bottle, you can dip a toothpick in mustard and dab it on. The eyes don’t have to be perfect—in fact, slightly uneven eyes make the mummies look more characterful. I’ve had some that looked cross-eyed, and honestly, those were everyone’s favorites.
Equipment Needed
You don’t need much for this recipe, which is part of its beauty. Here’s what you’ll want to have on hand:
- Baking sheet (A standard half-sheet pan works perfectly. Line it with parchment paper for easy cleanup.)
- Parchment paper or silicone baking mat (I prefer parchment because it’s disposable and makes cleanup a breeze. Silicone mats work too, but they can sometimes prevent the bottoms from browning as nicely.)
- Sharp knife or pizza cutter (For cutting the dough into strips. A pizza cutter is my go-to because it makes clean, straight cuts without dragging the dough.)
- Pastry brush (For applying the egg wash. If you don’t have one, you can use a paper towel or even your fingers—just wash your hands first.)
- Small bowl (For beating the egg and milk together.)
- Toothpicks (For applying the mustard eyes, if you don’t have a squeeze bottle.)
- Cooling rack (Optional, but helps keep the bottoms from getting soggy if you’re making a big batch.)
I’ve made these with just a butter knife and my fingers before, and they turned out fine. Don’t let the equipment list intimidate you—this is a forgiving recipe that works with whatever you’ve got. That said, a good pizza cutter is worth its weight in gold for this particular application. I picked mine up at a dollar store three years ago, and it’s still going strong.
Preparation Method

Alright, let’s get these little mummies made. The whole process takes about 25 minutes from start to finish, so preheat your oven to 375°F (190°C) right now and let’s get moving.
- Prep your baking sheet: Line your baking sheet with parchment paper or a silicone mat. This isn’t strictly necessary, but it makes cleanup so much easier. Trust me on this one—you don’t want to be scrubbing baked-on cheese and dough off a pan when you could be passing out candy.
- Open the crescent roll dough: Carefully unroll the dough onto a clean cutting board. Don’t pull it apart along the perforations—we want the whole sheet intact. If the dough cracks a little, just press it back together with your fingers. It’s forgiving stuff.
- Cut the dough into strips: Using your sharp knife or pizza cutter, cut the dough lengthwise into thin strips about 1/4 inch (6 mm) wide. You should get about 12 to 15 strips from each sheet. Don’t worry if they’re not perfectly uniform—the mummies look better with some variation. I learned this the hard way after spending ten minutes trying to make perfect strips and then watching them all bake together anyway.
- Wrap the sausages: Take one strip of dough and wrap it around a cocktail sausage at an angle, leaving a small gap near the top for the eyes. The dough should overlap slightly as you go. Don’t wrap too tightly—the dough will expand as it bakes, and you want those gaps to stay visible. Think of it like wrapping a bandage: snug but not tight. Repeat with the remaining sausages and dough strips. If you run out of dough, you can cut the strips into smaller pieces and use them for the remaining sausages.
- Arrange on the baking sheet: Place the wrapped sausages on the prepared baking sheet, leaving about an inch (2.5 cm) between each one. They won’t spread much, so you can fit quite a few on one sheet. I usually do 12 per sheet to give them breathing room.
- Apply the egg wash: In your small bowl, beat the egg with the tablespoon of milk or water until it’s uniform. Using your pastry brush, lightly brush the tops of each mummy with the egg wash. This is what gives them that beautiful golden color. Don’t go overboard—a thin, even layer is all you need.
- Bake: Pop the baking sheet into your preheated oven and bake for 10 to 12 minutes, or until the dough is golden brown and the sausages are heated through. The exact time will depend on your oven and the size of your sausages. Start checking at 10 minutes—you’re looking for deep golden brown, not pale yellow. If the edges start to get too dark, they’re done.
- Cool slightly: Remove the baking sheet from the oven and let the mummies cool on the pan for about 2 minutes. This gives the dough time to set so it doesn’t fall apart when you move them. Transfer them to a serving platter or cooling rack.
- Add the eyes: Once the mummies are cool enough to handle but still warm, add the mustard eyes. Using your squeeze bottle or a toothpick, place two small dots of mustard in the gap you left near the top of each mummy. Don’t overthink this—just two little dots. If you’re feeling creative, you can make some of them cross-eyed or winking. The kids will love it.
A quick note on timing: the egg wash should be applied right before baking, not ahead of time. If you brush it on and then let the mummies sit, the dough can get soggy. I made this mistake once when I was trying to get ahead of the game, and the results were less than impressive. Lesson learned.
Also, if you’re making a large batch, you can assemble the mummies up to the egg wash stage and refrigerate them for a few hours. Just pull them out while the oven preheats, apply the egg wash, and bake as directed. This is a lifesaver for party prep.
Cooking Tips & Techniques
After making these Spooky Mummy Pigs in a Blanket for Halloween more times than I can count, I’ve picked up a few tricks that make the process smoother and the results better. Let me share what I’ve learned.
Keep the dough cold: This is the number one tip I can give you. Cold dough is firm and easy to cut into thin strips. Warm dough gets sticky and stretches out of shape. If your kitchen is warm, pop the can of dough in the fridge for 10 to 15 minutes before you start. It makes a world of difference.
Don’t overwork the dough: When you’re cutting and wrapping the strips, handle the dough as little as possible. The more you touch it, the tougher it gets. Cut your strips quickly, wrap them around the sausages, and move on. The dough will puff up beautifully in the oven if you leave it alone.
Leave space for the eyes: This seems obvious, but I’ve definitely wrapped a few mummies so thoroughly that there was no room for eyes. Leave a small gap near the top of each sausage where the dough doesn’t cover. This is where the mustard eyes go, and it also lets that part of the sausage brown nicely, creating a natural “face” area.
Watch the baking time: Every oven is different, and the size of your sausages matters too. Start checking at 10 minutes. The dough should be golden brown and the sausages should be hot all the way through. If you’re using larger sausages, you might need an extra minute or two. If the dough is browning too quickly, tent the pan loosely with foil.
Make ahead strategy: I learned this one the hard way during a particularly chaotic Halloween. You can assemble the mummies completely (minus the egg wash and eyes) and refrigerate them for up to 4 hours. When you’re ready to bake, just apply the egg wash and pop them in the oven. This is perfect for party prep—you can have everything ready to go and just bake when guests arrive.
The soggy bottom problem: If you find that the bottoms of your mummies are getting soggy, try baking them on a wire rack set inside your baking sheet. This allows air to circulate underneath and keeps the dough crisp. I don’t usually bother with this for small batches, but it’s a game-changer when I’m making a huge quantity.
One of my biggest failures with this recipe happened when I tried to double the batch and crammed everything onto one baking sheet. The mummies were crowded together, the dough didn’t crisp up properly, and they ended up steaming instead of baking. Lesson learned: give them space. Use two baking sheets if you need to, and rotate them halfway through baking for even results.
Variations & Adaptations
One of the best things about this recipe is how adaptable it is. I’ve tried several variations over the years, and they’ve all been hits in their own way.
Cheesy Mummies: Before wrapping the sausages, wrap each one with a thin strip of mozzarella or cheddar cheese. The cheese melts and oozes out slightly as it bakes, creating a gooey, delicious mess. Just make sure the cheese is fully enclosed by the dough so it doesn’t burn on the baking sheet. I tried this with pepper jack cheese once, and the spicy kick was incredible.
Spicy Mummies: Brush the sausages with a little hot sauce or sriracha before wrapping them in dough. The heat cuts through the richness of the dough and adds a nice kick. You can also mix some cayenne pepper into the egg wash for a subtle heat that builds as you eat. My neighbor Dave loves this version—he says it wakes up the taste buds.
Vegetarian Mummies: Use vegetarian cocktail sausages or even small pieces of firm tofu that have been marinated in soy sauce and liquid smoke. The wrapping technique is exactly the same, and the results are surprisingly good. I made these for a friend who doesn’t eat meat, and she couldn’t stop eating them. Just be aware that vegetarian sausages often cook faster than meat ones, so check them a minute or two early.
Sweet Mummies: This one sounds weird, but trust me—it works. Instead of sausages, use small pieces of banana or apple, and brush the dough with melted butter and cinnamon sugar before baking. Skip the mustard eyes and use mini chocolate chips instead. It’s a totally different dish, but it’s perfect for a Halloween breakfast or dessert table.
Gluten-Free Mummies: Use gluten-free crescent roll dough or puff pastry. The texture will be slightly different, but the visual effect is the same. I’ve also used gluten-free pizza dough rolled thin, and it worked beautifully. Just adjust the baking time as needed since gluten-free doughs can brown faster.
My personal favorite variation is the everything bagel version. Before baking, sprinkle the egg-washed mummies with everything bagel seasoning—sesame seeds, poppy seeds, dried garlic, dried onion, and salt. The savory crunch adds another layer of texture and flavor that complements the sausage perfectly. I stumbled on this combination by accident when I was out of plain sesame seeds and grabbed the everything seasoning instead. Best mistake I ever made.
Serving & Storage Suggestions
These Spooky Mummy Pigs in a Blanket for Halloween are best served warm, right out of the oven. The dough is at its flakiest and the sausages are at their juiciest when they’ve just come out of the oven. That said, they’re still delicious at room temperature, which makes them perfect for parties and buffets.
For presentation, I like to arrange them on a dark platter or a black serving board to make the golden dough and bright mustard eyes pop. You can scatter some fake spider webs around the platter for extra Halloween flair, or add a few plastic spiders for a creepy touch. If you’re serving them at a party, put out small bowls of dipping sauces—ranch dressing, marinara sauce, honey mustard, or even queso. The dipping options are endless, and people love having choices.
As for what to serve alongside these, I’d recommend keeping it simple. A vegetable platter with ranch dip balances out the richness of the mummies, and some popcorn or pretzels add crunch. If you’re making a full Halloween meal, pair these with a big pot of chili or a hearty soup. They also go great with a crisp apple cider or a pumpkin spice latte for the adults.
Storage: If you have leftovers (which is rare in my house, but it happens), store them in an airtight container in the refrigerator for up to 3 days. The dough will soften slightly, but they’ll still taste great. To reheat, pop them in a 350°F (175°C) oven for 5 to 7 minutes, or until heated through. The microwave works in a pinch, but the dough will be soft rather than crispy. I don’t recommend freezing these—the texture of the dough suffers too much.
One thing I’ve noticed is that these mummies actually taste better the next day if you’re eating them cold. The flavors meld together, and the dough takes on a denser, more satisfying texture. I’ve been known to sneak a few straight from the fridge the morning after Halloween. Don’t judge me.
Nutritional Information & Benefits
Let’s be real—these are a treat, not a health food. But I believe in being transparent about what you’re eating so you can make informed choices. Here’s the estimated nutritional breakdown for one mummy (based on using standard crescent roll dough and cocktail sausages):
| Nutrient | Amount per serving (1 mummy) |
|---|---|
| Calories | 85-100 |
| Total Fat | 5-7g |
| Saturated Fat | 2-3g |
| Cholesterol | 15-20mg |
| Sodium | 200-250mg |
| Total Carbohydrates | 7-9g |
| Protein | 3-4g |
Now, here’s the good news: these are relatively small, so it’s easy to control portions. A serving of 3 to 4 mummies is satisfying without being over-the-top. Plus, the sausages do provide some protein, which helps keep you full longer than a purely carb-based snack.
If you’re looking to make these a little healthier, you can use turkey sausages instead of pork, or opt for reduced-fat crescent roll dough. The flavor will be slightly different, but the overall experience is still fantastic. I’ve also made these with chicken sausages, and they were a hit with everyone who tried them.
As for allergens, this recipe contains wheat (in the dough), eggs (in the egg wash), and milk (if you use milk in the egg wash). The sausages may also contain soy or other allergens depending on the brand. Always check labels if you’re cooking for someone with food sensitivities.
From a wellness perspective, I think it’s important to enjoy treats like this in moderation. Halloween comes once a year, and these mummies are part of the fun. I’d rather have a few of these made with real ingredients than a whole plate of something processed and artificial. Food should bring joy, and these definitely do that.
Conclusion
These Spooky Mummy Pigs in a Blanket for Halloween have become a tradition in my home, and I hope they become one in yours too. They’re quick, they’re fun, and they deliver that perfect combination of nostalgia and novelty that makes Halloween so special. Whether you’re hosting a party, feeding hungry trick-or-treaters before they head out, or just looking for something festive to snack on while you hand out candy, these little mummies are the answer.
What I love most about this recipe is how customizable it is. You can make them spicy, cheesy, vegetarian, or even sweet—the possibilities are endless. Don’t be afraid to experiment and make them your own. That’s what cooking is all about, after all. And if your dough strips aren’t perfectly even or your mustard eyes are a little crooked, that’s okay. Real mummies aren’t perfect either.
I’d love to hear how yours turn out! Drop a comment below and let me know if you tried any variations, or share a photo of your mummy creations. Did your kids help wrap them? Did you come up with a new dipping sauce combination? I want to hear all about it. And if you’re looking for more Halloween inspiration, be sure to check out my other spooky recipes. Happy Halloween, and happy cooking!
Frequently Asked Questions
Can I make these ahead of time for a party?
Absolutely! You can assemble the mummies completely (minus the egg wash and eyes) and refrigerate them for up to 4 hours before baking. When you’re ready to serve, just apply the egg wash and bake as directed. This is a huge time-saver when you’re hosting a party.
Can I use puff pastry instead of crescent roll dough?
Yes, puff pastry works great! Just thaw it according to the package directions, cut it into thin strips, and wrap as usual. Puff pastry will give you a flakier, more buttery result. Keep in mind that puff pastry may need an extra minute or two in the oven to fully crisp up.
What can I use instead of mustard for the eyes?
You’ve got options! Ketchup works well and gives a slightly different look. You can also use sriracha for a spicy kick, or even small dots of cream cheese for a milder flavor. For a totally different approach, use mini chocolate chips or candy eyes—just press them in before baking.
Can I freeze these mummies?
I don’t recommend freezing them after baking, as the texture of the dough suffers. However, you can freeze the unbaked mummies (without the egg wash) for up to 1 month. Place them on a baking sheet in the freezer until solid, then transfer to a freezer bag. Bake from frozen, adding 2 to 3 minutes to the baking time.
How do I prevent the dough from getting soggy?
The key is to not overwork the dough and to apply the egg wash right before baking. If you’re making a large batch, work in batches so the assembled mummies don’t sit too long before going in the oven. Also, make sure your sausages are patted dry before wrapping—excess moisture is the enemy of crispy dough.
Pin This Recipe!
Spooky Mummy Pigs in a Blanket: Easy Halloween Recipe

These Spooky Mummy Pigs in a Blanket are quick, fun, and perfect for Halloween. Made with crescent roll dough and cocktail sausages, they come together in under 30 minutes and are sure to be a crowd-pleaser.
- Prep Time: 15 minutes
- Cook Time: 12 minutes
- Total Time: 27 minutes
- Yield: 24 servings 1x
- Category: Appetizer
- Cuisine: American
Ingredients
- 1 can (8 oz) refrigerated crescent roll dough
- 24 mini cocktail sausages or hot dogs
- 1 large egg, beaten
- 1 tablespoon milk or water
- Mustard for eyes
- Optional: Everything bagel seasoning or sesame seeds
- Optional: Ranch dressing or marinara sauce for dipping
Instructions
- Preheat oven to 375°F (190°C). Line a baking sheet with parchment paper or a silicone mat.
- Carefully unroll the crescent roll dough onto a clean cutting board, keeping the sheet intact.
- Using a sharp knife or pizza cutter, cut the dough lengthwise into thin strips about 1/4 inch (6 mm) wide. You should get about 12 to 15 strips.
- Take one strip of dough and wrap it around a cocktail sausage at an angle, leaving a small gap near the top for the eyes. Repeat with remaining sausages and dough strips.
- Place the wrapped sausages on the prepared baking sheet, leaving about an inch (2.5 cm) between each one.
- In a small bowl, beat the egg with the tablespoon of milk or water. Lightly brush the tops of each mummy with the egg wash.
- Bake for 10 to 12 minutes, or until the dough is golden brown and the sausages are heated through.
- Remove from oven and let cool on the pan for about 2 minutes. Transfer to a serving platter or cooling rack.
- Once cool enough to handle but still warm, add mustard eyes using a squeeze bottle or toothpick.
Notes
Keep the dough cold for easier handling. Leave a small gap near the top of each sausage for the eyes. For make-ahead, assemble mummies (minus egg wash and eyes) and refrigerate up to 4 hours. Apply egg wash just before baking.
Nutrition
- Serving Size: 1 mummy
- Calories: 85100
- Sodium: 200250
- Fat: 57
- Saturated Fat: 23
- Carbohydrates: 79
- Protein: 34
Keywords: Halloween, pigs in a blanket, mummy, appetizer, party food, crescent rolls, cocktail sausages


