Love this? Save it for later!
Share the inspiration with your friends
I was at the hardware store last Tuesday, of all places, picking up a new caulk gun for a bathroom project I’d been putting off. The man in front of me in line, a retired plumber named Frank with hands that looked like they’d seen fifty years of pipe wrenches, turned around and noticed a smear of what I thought was dirt on my shirt. “That’s not dirt,” he said, pointing. “That’s over-mixed banana bread batter. You’re working it too hard, young lady.” I was stunned. I hadn’t even made banana bread that week, but somehow, Frank the Plumber knew exactly what I’d been doing wrong for the last decade. He scribbled his wife’s recipe on the back of a receipt for a toilet flange—a real one-bowl situation, no mixer needed, and he swore it was the only way to get kids to actually eat a whole slice. I stood there holding a caulk gun, completely baffled, but also genuinely intrigued. Honestly, I thought he was crazy. But I also thought, what the heck do I have to lose?
I went home, tossed the receipt on the counter, and forgot about it for three days. Then, on a rainy Thursday afternoon when my kids were bouncing off the walls and I had three overripe bananas that were basically begging for mercy, I remembered Frank. I dug the receipt out of my junk drawer—it was crumpled and had a coffee stain on it—and gave it a shot. The whole thing came together in one bowl, I used a wooden spoon, and there was zero mixer cleanup. The batter was thick and smelled like pure comfort. When the loaf came out of the oven, golden and perfectly domed, my kids actually fought over the end piece. Let me tell you, that never happens. I mean, never. I called my mom to tell her about the plumber’s banana bread, and she laughed so hard she almost dropped the phone. But she also asked for the recipe. That’s when I knew Frank was onto something real.
Maybe you’ve been there—standing in your kitchen, staring at sad, spotty bananas, wondering if you have the energy to drag out the stand mixer and make a mess of your entire counter. This recipe is the opposite of that. It’s forgiving, it’s fast, and it somehow makes everyone in the house happy. Honestly, I’ve made it six times since that day in the hardware store, and it’s never failed me. It’s the kind of recipe that feels like a secret handshake between you and a retired plumber who just happens to know his way around a loaf pan.
Why You’ll Love This Recipe
This isn’t just another banana bread recipe you’ll pin and forget about. This is the one that will actually get used, week after week, because it solves real problems for anyone feeding a family on a sensible budget. I’ve tested it with my own kids (who are brutally honest about baked goods), with my neighbor’s picky toddler, and even at a school bake sale where it sold out in twenty minutes. Here’s why it’s different:
- Quick & Easy: From bowl to oven in under ten minutes. No mixer, no sifting, no fuss. You can literally make this while your toddler is having a meltdown over a broken crayon. I’ve done it.
- Simple Ingredients: You probably have everything in your pantry right now. Butter, sugar, eggs, flour, baking soda, salt, and those sad bananas sitting on your counter. No buttermilk, no sour cream, no specialty flours.
- Perfect for Family Meals: It works for breakfast, snack time, lunchboxes, or dessert. It’s not too sweet, so you don’t feel guilty handing it to your kid at 10 AM.
- Crowd-Pleaser: I’ve yet to meet a kid who doesn’t ask for seconds. The texture is tender and moist, not dry or crumbly, and the flavor is pure banana without being overpowering.
- Unbelievably Delicious: The secret is in the technique—mashing the bananas really well and letting the batter rest for five minutes before baking. It sounds weird, but it makes the loaf incredibly soft and evenly baked.
What makes this recipe different from every other banana bread out there is the one-bowl, no-mixer approach that forces you to mix by hand. That gentle mixing is exactly what keeps the gluten from developing too much, which means your bread stays tender instead of turning tough and rubbery. I learned that from Frank the Plumber, of all people, and it changed everything. This isn’t just good banana bread—it’s the kind that makes you close your eyes after the first bite and think, “Why have I been making it any other way?” It’s comfort food reimagined: simpler, faster, and with the same soul-soothing satisfaction that makes you want to curl up on the couch with a warm slice and a cup of coffee.
What Ingredients You Will Need
This recipe uses simple, wholesome ingredients that you likely already have in your kitchen. The beauty of this banana bread is that it doesn’t rely on fancy additions—just good, honest staples that work together to create something special. Here’s what you’ll need and why each one matters:
- 3 large ripe bananas, mashed (about 1 ½ cups or 340g): The riper, the better. Look for bananas with lots of brown spots—they’re sweeter and easier to mash. If your bananas aren’t quite there, you can roast them in the oven at 300°F for 15 minutes to bring out the natural sugars.
- ⅓ cup (75g) unsalted butter, melted: I use salted butter in a pinch and just reduce the added salt slightly. Melt the butter gently—you don’t want it hot, just melted. Let it cool for a minute before mixing it with the eggs so you don’t accidentally scramble them.
- ¾ cup (150g) granulated sugar: Regular white sugar works perfectly. You can also use coconut sugar or a brown sugar blend for a deeper flavor, but the texture will be slightly denser. I’ve tested it with both, and my family prefers the classic white sugar version.
- 1 large egg, at room temperature: A room-temperature egg mixes more evenly into the batter and creates a smoother texture. If you forgot to take it out of the fridge, just place it in a bowl of warm water for 5 minutes.
- 1 teaspoon vanilla extract: Pure vanilla extract makes a difference, but imitation vanilla works fine in a pinch. I recommend Nielsen-Massey for the best flavor—it’s pricier, but a little goes a long way.
- 1 ½ cups (190g) all-purpose flour: Spoon and level your flour into the measuring cup—don’t scoop directly from the bag, or you’ll end up with too much flour and a dry loaf. For a gluten-free option, use a 1:1 gluten-free baking flour blend (I like Bob’s Red Mill).
- 1 teaspoon baking soda: This is the only leavening agent you need. Make sure your baking soda is fresh—test it by dropping a tiny bit into vinegar; if it fizzes vigorously, it’s good.
- ¼ teaspoon salt: Salt balances the sweetness and enhances the banana flavor. I use fine sea salt, but table salt works too.
- Optional mix-ins: ½ cup (90g) chocolate chips, chopped walnuts, or dried fruit. My kids insist on chocolate chips, but I personally love it with a handful of toasted walnuts for crunch. You can also add a tablespoon of flaxseed meal for extra fiber—your kids won’t even notice.
One thing I’ve learned from making this recipe over and over: don’t over-mash the bananas if you want some texture in the bread, or mash them completely smooth if you prefer a uniform crumb. I like to leave a few small chunks because it feels more rustic and homemade. Also, if you’re using frozen bananas, thaw them completely and drain off any excess liquid before mashing. Too much liquid will make your bread gummy.
Equipment Needed
You don’t need a fancy kitchen setup for this recipe, which is part of why I love it. Here’s what you’ll need:
- One large mixing bowl: Any bowl will do, but a wide, shallow bowl makes mashing and mixing easier. I use my grandmother’s old ceramic mixing bowl, but a stainless steel one works just as well.
- A fork or potato masher: For mashing the bananas. A fork works perfectly, but a potato masher is faster if you’re making a double batch.
- A wooden spoon or rubber spatula: For mixing the batter. A wooden spoon is my go-to because it’s sturdy and doesn’t bend. A silicone spatula is great for scraping the sides of the bowl.
- A 9×5-inch (23×13 cm) loaf pan: Standard size works best. If you use a smaller pan, your bread will take longer to bake and might dome too much. If you use a larger pan, the bread will be shallower and bake faster.
- Parchment paper or non-stick cooking spray: I line my pan with parchment paper, leaving an overhang on the long sides, so I can lift the bread out easily. Non-stick spray works too, but parchment is foolproof.
- Cooling rack: Essential for letting the bread cool evenly. If you don’t have one, you can use the wire rack from your oven, or just prop the loaf pan up on two wooden spoons to let air circulate underneath.
I used to think I needed a stand mixer for good banana bread, but honestly, using a bowl and a spoon is actually better. It forces you to mix gently, which is the secret to a tender crumb. Plus, there’s only one bowl to wash at the end. That’s a win in my book.
Preparation Method
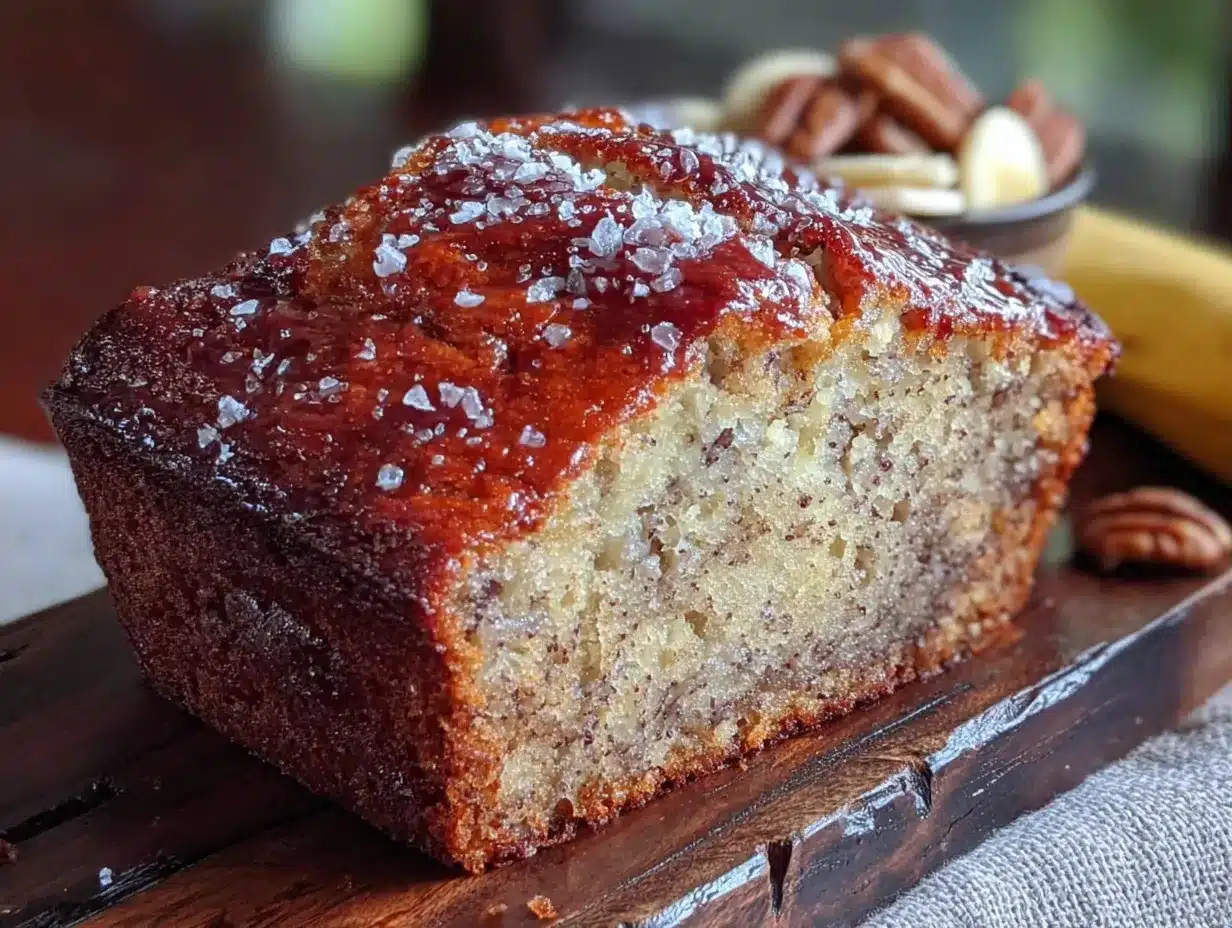
This is where the magic happens. Follow these steps carefully, and you’ll have a perfect loaf every time. I’ve included all my little tricks and warnings so you don’t make the same mistakes I did.
- Preheat your oven to 350°F (175°C). Position the rack in the center of the oven. While the oven is heating, grease your loaf pan with butter or non-stick spray, or line it with parchment paper. I prefer parchment because it makes cleanup a breeze—just lift the bread out and slice.
- Mash the bananas. In your large mixing bowl, add the three ripe bananas. Use a fork or potato masher to mash them until they’re mostly smooth with a few small lumps. You want about 1 ½ cups (340g) of mashed banana. Don’t over-mash if you like texture, but make sure there aren’t any large chunks that will create holes in your bread. Sensory cue: The bananas should look like a thick, chunky puree with a sweet, fruity smell.
- Add the melted butter. Pour the cooled melted butter over the mashed bananas and stir until combined. The mixture will look a bit separated at first, but keep stirring gently until it comes together. Personal tip: If your butter is too hot, it will cook the bananas slightly and change the texture. Let it cool for at least 2 minutes after melting.
- Mix in the sugar, egg, and vanilla. Add the granulated sugar, room-temperature egg, and vanilla extract to the bowl. Stir with your wooden spoon until everything is well incorporated. The batter should be smooth and slightly glossy. Don’t over-mix here—just until you can’t see streaks of egg anymore. Warning: If your egg is cold, it will seize the butter and create a lumpy batter. Always use room-temperature eggs.
- Add the dry ingredients. Sprinkle the all-purpose flour, baking soda, and salt over the wet mixture. Use your spoon to gently fold the dry ingredients into the wet ingredients. Stir just until you can’t see any more flour—about 10 to 12 strokes. A few small lumps are perfectly fine. Over-mixing at this stage will develop gluten and make your bread tough. Sensory cue: The batter should be thick and slightly lumpy, like a muffin batter. It should smell sweet and buttery.
- Fold in any mix-ins (optional). If you’re using chocolate chips, nuts, or dried fruit, gently fold them in now. Use about 5 to 6 strokes, just enough to distribute them evenly. Don’t over-mix, or your chocolate chips might sink to the bottom during baking.
- Let the batter rest. This is the step Frank the Plumber swore by, and I’ll never skip it again. Let the batter sit in the bowl for 5 minutes at room temperature. This allows the flour to fully hydrate and the baking soda to start activating, which results in a more even rise and a tender crumb. Personal note: I usually use this time to wash the fork and spoon I used, or to set out my cooling rack. It feels like a waste of time, but trust me, it makes a difference.
- Pour the batter into the prepared loaf pan. Use your rubber spatula to scrape every last bit of batter into the pan. Spread it evenly with the back of the spatula. Tap the pan gently on the counter two or three times to release any air bubbles.
- Bake for 55 to 65 minutes. Place the pan in the preheated oven and bake until the top is golden brown and a toothpick inserted into the center comes out clean or with a few moist crumbs. Start checking at 50 minutes if your oven runs hot. Sensory cue: Your kitchen should smell like a bakery—warm, sweet, and comforting. The bread will pull away slightly from the edges of the pan when it’s done.
- Cool in the pan for 10 minutes. Remove the pan from the oven and place it on a cooling rack. Let the bread cool in the pan for exactly 10 minutes. This allows it to set so it doesn’t fall apart when you remove it.
- Transfer to the cooling rack. After 10 minutes, run a butter knife around the edges if you didn’t use parchment. Then lift the bread out using the parchment overhang, or carefully turn it out onto the cooling rack. Let it cool completely before slicing—about 1 hour. I know it’s tempting to cut into it warm, but it will be too fragile and might crumble. Personal failure moment: The first time I made this, I sliced it after 20 minutes and ended up with a pile of warm banana bread crumbs. Delicious, but not very presentable.
Cooking Tips & Techniques
Over the many loaves I’ve made since that hardware store encounter, I’ve picked up a few tricks that make this recipe even more foolproof. Here’s what I wish I’d known from the start:
- Don’t over-mix the batter. This is the number one mistake people make. Mixing develops gluten, and too much gluten makes your bread tough and rubbery. Stir just until the flour disappears. A few lumps are your friend. Honestly, I’ve made loaves where I was distracted and mixed a little too much, and they were noticeably denser. Gentle mixing is the key to that light, tender crumb.
- Use a kitchen scale for accuracy. I know it sounds fussy, but measuring your flour by weight (190g) instead of volume gives you consistent results every time. If you don’t have a scale, spoon the flour into your measuring cup and level it off with a knife. Never scoop directly from the bag—you’ll pack in too much flour and end up with a dry loaf.
- Let the bananas get really ripe. I’m talking black spots, soft to the touch, and smelling intensely sweet. If your bananas aren’t ripe enough, your bread will be less flavorful and might need extra sugar. I keep a bag of overripe bananas in my freezer at all times—just thaw them on the counter for an hour before using, and drain off any excess liquid.
- Check your oven temperature. Ovens can be off by 25°F or more. I use an inexpensive oven thermometer to make sure my oven is actually at 350°F. An oven that’s too hot will brown the outside before the inside is cooked, while a cool oven will give you a pale, dense loaf.
- Rotate the pan halfway through. About 30 minutes into baking, quickly rotate the pan 180 degrees. This ensures even browning, especially if your oven has hot spots. I learned this the hard way when I kept getting lopsided loaves with one dark corner.
- Use the toothpick test correctly. Insert a toothpick into the center of the bread—if it comes out clean or with just a few moist crumbs, it’s done. If there’s wet batter on it, bake for another 5 minutes and check again. Don’t over-bake, or your bread will be dry.
Variations & Adaptations
One of the best things about this banana bread is how easily it adapts to different tastes and dietary needs. Here are some variations I’ve tried and loved:
- Chocolate Chip Banana Bread: Fold in ½ cup (90g) of semisweet or dark chocolate chips with the dry ingredients. My kids insist this is the only acceptable version. For a fun twist, use mini chocolate chips so you get chocolate in every bite.
- Nutty Banana Bread: Add ½ cup (60g) of chopped walnuts or pecans. Toast the nuts in a dry skillet over medium heat for 3-4 minutes first—it brings out their flavor and keeps them crunchy. I love this version with a smear of salted butter on a warm slice.
- Gluten-Free Banana Bread: Substitute the all-purpose flour with a 1:1 gluten-free baking flour blend. I’ve used Bob’s Red Mill and King Arthur Measure for Measure, and both work perfectly. Add 1 teaspoon of xanthan gum if your blend doesn’t already include it. The texture is slightly more delicate, but still delicious.
- Vegan Banana Bread: Replace the egg with a flax egg (1 tablespoon ground flaxseed mixed with 3 tablespoons water, let sit for 5 minutes) and use melted coconut oil or vegan butter instead of regular butter. The bread will be a bit denser, but still moist and flavorful. I’ve made this for a friend with egg allergies, and she couldn’t tell the difference.
- Spiced Banana Bread: Add 1 teaspoon of ground cinnamon and ¼ teaspoon of ground nutmeg to the dry ingredients. This gives the bread a warm, cozy flavor that’s perfect for fall. I sometimes add a pinch of ground ginger too, for a little kick.
- Mini Loaves or Muffins: Pour the batter into greased mini loaf pans or a muffin tin. For mini loaves, bake for 25-30 minutes. For muffins, bake for 18-22 minutes. This is great for lunchboxes or freezing individual portions.
Serving & Storage Suggestions
This banana bread is incredibly versatile when it comes to serving and storing. Here’s how I handle it in my house:
- Serving Temperature: Banana bread is best at room temperature or slightly warm. If you’re serving it fresh out of the oven, let it cool for at least 20 minutes so it holds its shape. I love it with a pat of salted butter that melts into the warm bread, or a drizzle of honey for extra sweetness.
- Presentation Ideas: Slice the bread into thick, even pieces (about 1 inch thick) and arrange them on a wooden board or a simple white plate. Sprinkle a little powdered sugar on top for a pretty finish, or add a few fresh banana slices on the side. For a breakfast spread, serve it alongside fresh fruit and yogurt.
- Complementary Dishes: This banana bread pairs beautifully with a hot cup of coffee or tea. For a more indulgent treat, serve it with a scoop of vanilla ice cream or a dollop of whipped cream. It also makes a great addition to a brunch table alongside scrambled eggs and bacon.
- Storage Instructions: Store leftover banana bread in an airtight container at room temperature for up to 3 days. The moisture from the bananas actually helps keep it soft. If your kitchen is very warm, you can store it in the refrigerator, but it will dry out slightly faster. To keep it extra moist, place a slice of bread or a paper towel in the container to absorb excess moisture.
- Freezing Instructions: This bread freezes beautifully. Wrap the cooled loaf tightly in plastic wrap, then in a layer of aluminum foil, and freeze for up to 3 months. You can also freeze individual slices—just wrap each slice in plastic wrap and place them in a freezer bag. To thaw, leave the wrapped bread at room temperature for 2-3 hours, or pop a frozen slice in the toaster for a quick treat. The flavor actually seems to deepen after freezing!
- Reheating Tips: For that fresh-from-the-oven taste, warm individual slices in the microwave for 15-20 seconds, or in a 300°F oven for 5-7 minutes. Toaster ovens work great too—just keep an eye on it so it doesn’t burn.
Nutritional Information & Benefits
While this banana bread is definitely a treat, it does have some redeeming nutritional qualities, especially compared to store-bought versions loaded with preservatives and excess sugar. Here’s a rough breakdown per slice (based on 12 slices):
- Calories: Approximately 210-230 calories per slice
- Fat: 8-9g (mostly from butter, with a small amount of healthy fat from the bananas)
- Carbohydrates: 33-35g
- Fiber: 2-3g (thanks to the bananas, especially if you leave some chunks)
- Sugar: 16-18g (naturally occurring from bananas plus added sugar)
- Protein: 3-4g
Bananas are a great source of potassium, vitamin B6, and vitamin C, which support heart health and immune function. They also contain resistant starch, especially when they’re less ripe, which acts as a prebiotic and supports gut health. The butter in this recipe provides a small amount of vitamin A, and if you add nuts, you’ll get a boost of healthy fats and protein.
For those with dietary concerns, this recipe can be easily adapted: use a gluten-free flour blend for gluten sensitivity, or swap the egg and butter for vegan alternatives. It’s naturally nut-free if you skip the walnuts, and you can reduce the sugar to ½ cup (100g) for a less sweet version without sacrificing too much texture. Just keep in mind that reducing sugar will make the bread slightly less moist and tender.
From a personal wellness perspective, I love that this banana bread feels like a wholesome indulgence. It’s not health food, but it’s made with real ingredients that I can feel good about feeding my family. And honestly, the joy on my kids’ faces when they come home to a warm loaf is worth every calorie.
Conclusion
This kid-approved one-bowl banana bread has become a staple in my kitchen, and I have a retired plumber named Frank to thank for it. It’s simple, forgiving, and always delivers a moist, tender loaf that makes everyone happy. Whether you’re a seasoned baker or someone who’s never made banana bread before, this recipe is for you. It doesn’t require any fancy equipment, it uses ingredients you probably already have, and it comes together in minutes. Plus, the cleanup is practically non-existent—one bowl, one spoon, and you’re done.
I encourage you to make this recipe your own. Add chocolate chips for the kids, throw in some walnuts for crunch, or experiment with spices to find your perfect combination. The beauty of this bread is that it’s a blank canvas for whatever you’re craving. And if you have a picky eater at home, this is a great way to sneak in some fruit without any complaints. Honestly, my kids have no idea they’re eating bananas when it’s in bread form. They just know it’s delicious.
I’d love to hear how this recipe turns out for you. Did you add any fun mix-ins? Did your kids fight over the end piece like mine do? Drop a comment below and let me know! And if you loved this recipe, please share it with a friend who could use a little comfort in their kitchen. Happy baking, and remember—sometimes the best recipes come from the most unexpected places. Like a hardware store line on a Tuesday afternoon.
Frequently Asked Questions
Can I use frozen bananas for this recipe?
Yes, absolutely! Frozen bananas work perfectly. Just thaw them completely at room temperature or in the refrigerator, then drain off any excess liquid before mashing. The thawed bananas will be very soft and sweet, which actually makes for an even more flavorful bread.
Why did my banana bread sink in the middle?
A sunken middle is usually a sign of under-baking or over-mixing. Make sure you’re baking the bread long enough—check it with a toothpick inserted into the center. If it comes out clean, it’s done. Also, be gentle with your mixing; over-mixing can create too much air, which then collapses as the bread cools.
Can I make this recipe without eggs?
Yes, you can make a vegan version by replacing the egg with a flax egg (1 tablespoon ground flaxseed mixed with 3 tablespoons water, let sit for 5 minutes). The bread will be slightly denser, but still moist and delicious. You can also use a commercial egg replacer if you prefer.
How do I know when the bananas are ripe enough?
Look for bananas with lots of brown or black spots on the peel. They should feel soft to the touch and smell very sweet. The peels might even look a bit shriveled. If your bananas aren’t ripe enough, you can speed up the process by baking them in a 300°F oven for 15-20 minutes until the peels turn black.
Can I double this recipe?
Yes, this recipe doubles beautifully. Simply use a larger bowl and double all the ingredients. You can bake the batter in two loaf pans or one large 10×5-inch pan (increase the baking time by 10-15 minutes). Just make sure not to overfill the pans—leave at least an inch of space at the top for the bread to rise.
Pin This Recipe!
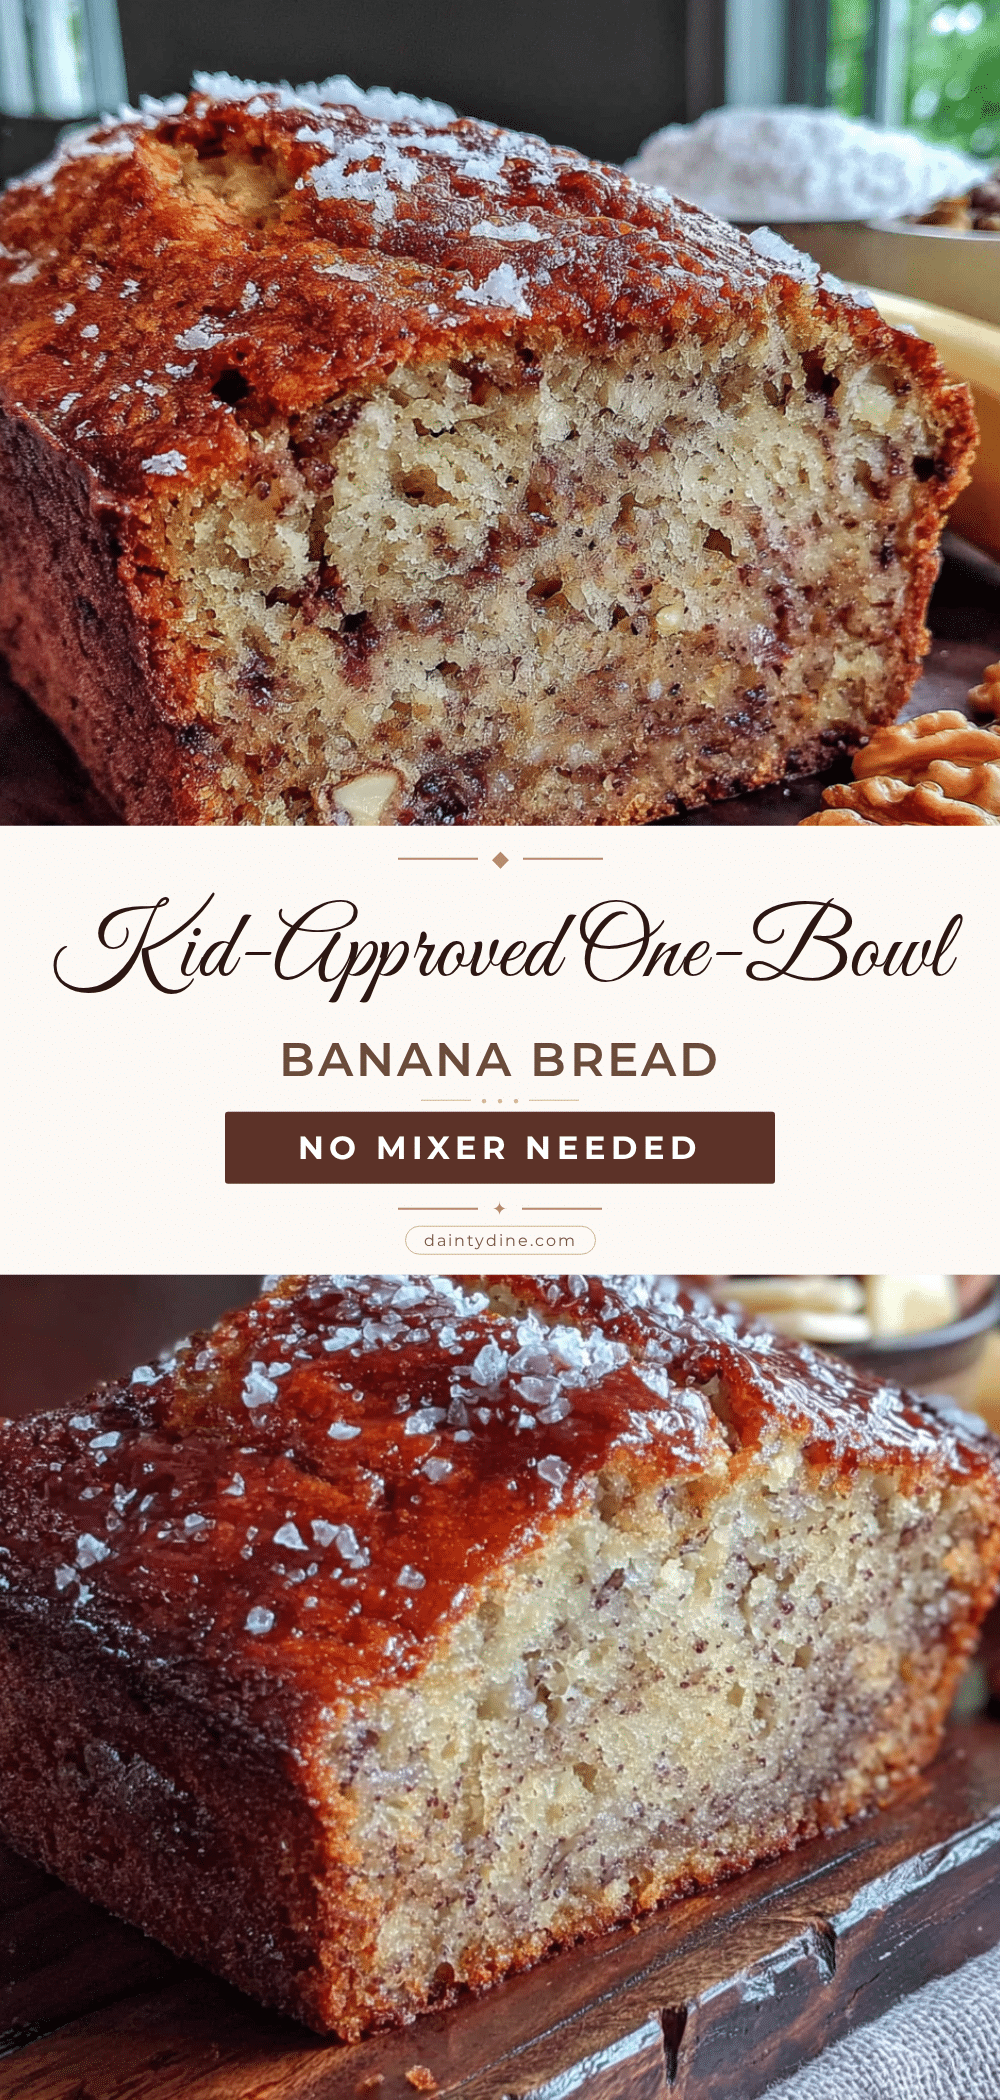
Kid-Approved One-Bowl Banana Bread (No Mixer)
This easy, one-bowl banana bread requires no mixer and comes together in minutes. It’s moist, tender, and perfectly sweet—a family favorite that even picky kids love.
- Prep Time: 10 minutes
- Cook Time: 55 minutes
- Total Time: 1 hour 5 minutes
- Yield: 12 servings 1x
- Category: Dessert
- Cuisine: American
Ingredients
- 3 large ripe bananas, mashed (about 1 ½ cups or 340g)
- ⅓ cup (75g) unsalted butter, melted
- ¾ cup (150g) granulated sugar
- 1 large egg, at room temperature
- 1 teaspoon vanilla extract
- 1 ½ cups (190g) all-purpose flour
- 1 teaspoon baking soda
- ¼ teaspoon salt
- ½ cup (90g) chocolate chips, chopped walnuts, or dried fruit (optional)
Instructions
- Preheat your oven to 350°F (175°C). Grease a 9×5-inch loaf pan with butter or non-stick spray, or line with parchment paper.
- In a large mixing bowl, mash the bananas with a fork or potato masher until mostly smooth with a few small lumps.
- Add the melted butter and stir until combined.
- Mix in the sugar, egg, and vanilla extract until well incorporated and smooth.
- Sprinkle the flour, baking soda, and salt over the wet mixture. Fold gently with a wooden spoon or rubber spatula until just combined—about 10 to 12 strokes. Do not over-mix.
- If using, fold in chocolate chips, nuts, or dried fruit with 5 to 6 strokes.
- Let the batter rest for 5 minutes at room temperature.
- Pour the batter into the prepared loaf pan and spread evenly. Tap the pan gently on the counter to release air bubbles.
- Bake for 55 to 65 minutes, until the top is golden brown and a toothpick inserted into the center comes out clean or with a few moist crumbs. Start checking at 50 minutes.
- Cool in the pan for 10 minutes, then transfer to a wire rack to cool completely before slicing.
Notes
For best results, use very ripe bananas with brown spots. Let the batter rest for 5 minutes before baking to ensure a tender crumb. Do not over-mix the batter. For a gluten-free version, use a 1:1 gluten-free flour blend. For a vegan version, replace the egg with a flax egg and use melted coconut oil or vegan butter.
Nutrition
- Serving Size: 1 slice
- Calories: 220
- Sugar: 17
- Sodium: 180
- Fat: 8.5
- Saturated Fat: 5
- Carbohydrates: 34
- Fiber: 2.5
- Protein: 3.5
Keywords: banana bread, one-bowl, no mixer, kid-friendly, easy banana bread, moist banana bread


