Love this? Save it for later!
Share the inspiration with your friends
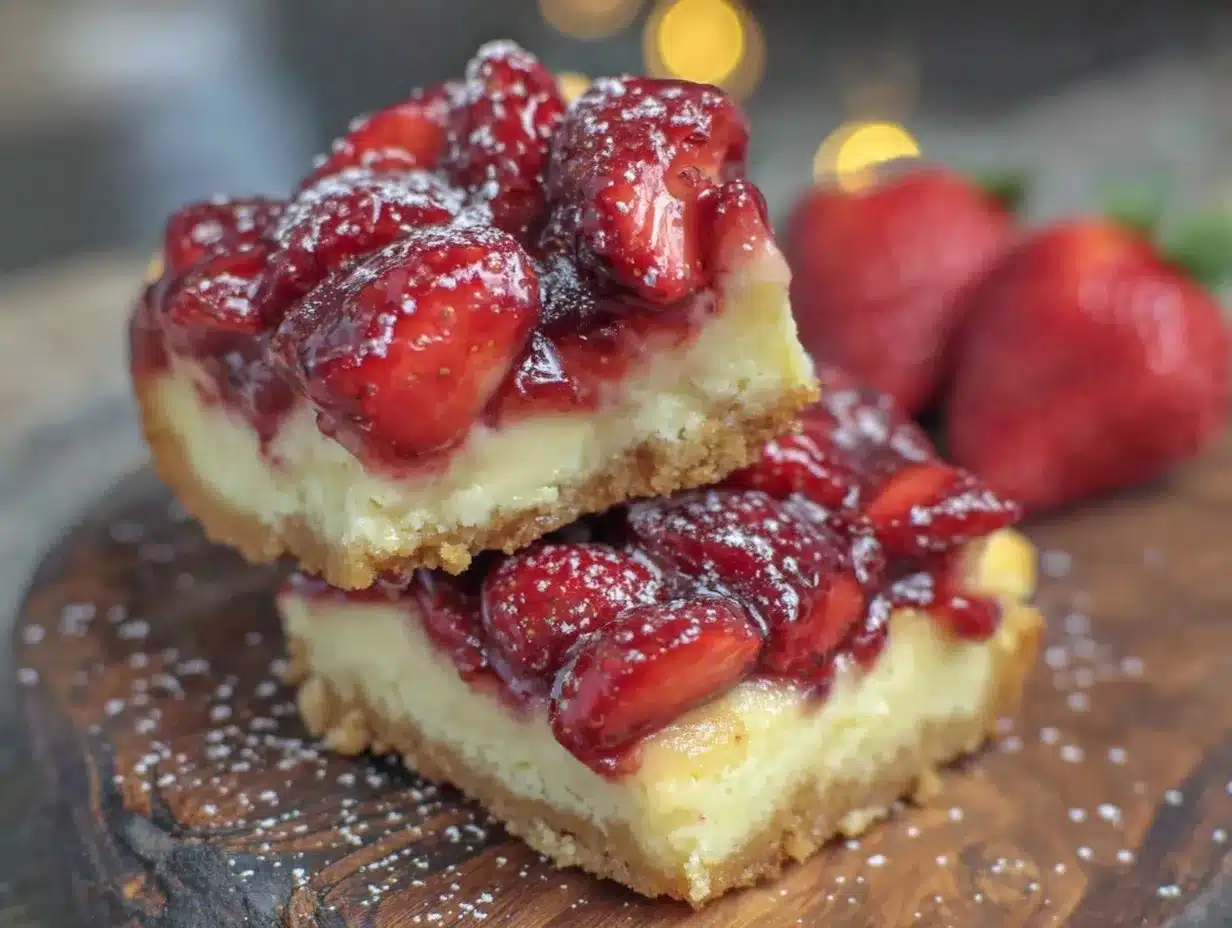
That moment when you realize Memorial Day is just around the corner and you want something show-stopping but fuss-free for the gathering? Yeah, that was me two years ago, scrambling to find a dessert that could survive a day in the fridge, travel well, and still wow a crowd. Enter these Make-Ahead Strawberry Cheesecake Bars. I first whipped them up last Memorial Day after a few too many attempts at fragile, tricky cheesecakes that never seemed to set right or travel well. These bars were a game-changer: creamy, fruity, and sturdy enough to hold their shape without a hitch. Plus, you can make them days in advance, which means less stress and more time soaking up the sunshine with friends and family.
Since that first batch, I’ve made these bars at every summer get-together—Memorial Day, Fourth of July, you name it. The fresh strawberry topping feels like a celebration in every bite, and the creamy cheesecake layer hits that perfect balance between rich and light. If you’re wondering how to pull off a dessert that’s both impressive and easy, this recipe is your new best friend. And bonus? You don’t need to be a baking pro. I’ve tested this recipe a dozen times, tweaking it until it was foolproof and delicious every single time.
Why This Recipe Works
This recipe has completely changed how I approach desserts for big summer gatherings.
- Make-Ahead Magic — Prepare these bars up to 3 days before your event. I love making them the night before Memorial Day; it frees me up to enjoy the party instead of stressing in the kitchen.
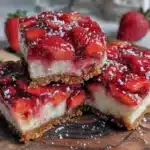
- Perfect Texture — The crust is buttery and crisp without being crumbly, while the cheesecake layer is silky smooth but firm enough to slice cleanly. No messy, wobbly slices here.
- Fresh Strawberry Topping — It’s the bright, juicy finish that makes these bars scream summer. Plus, it’s easy to swap in other fruits if you want to mix things up.
- Travel-Friendly — I’ve taken these to picnics, potlucks, and even beach days. They travel well in a cooler and don’t require last-minute assembly.
- Kid and Adult Approved — Everyone loves these bars. I’ve had even the pickiest eaters go back for seconds, no questions asked.
This is my go-to dessert when I want something that tastes like I spent hours baking but actually lets me kick back and savor the day. No last-minute hustle, just sweet, creamy bars that bring people together.
Ingredients Breakdown
Here’s the thing about this recipe: it probably already has most of the ingredients in your pantry or fridge. But a few are worth a little extra attention.
For the Crust:
- Graham cracker crumbs (1 ½ cups / 150g) — This gives the crust that classic slightly sweet, crunchy base. I crush mine in a food processor for the best texture, but you can also use store-bought crumbs.
- Granulated sugar (2 tablespoons / 25g) — Adds just a touch of sweetness to balance the tartness of the strawberries later.
- Melted unsalted butter (6 tablespoons / 85g) — Binds the crumbs together and adds richness. Using unsalted lets me control the salt level.
For the Cheesecake Layer:
- Cream cheese (16 ounces / 450g, softened) — The star of the show. Make sure it’s room temperature so it blends smoothly without lumps.
- Granulated sugar (¾ cup / 150g) — Sweetens the cheesecake just right.
- Sour cream (½ cup / 120g) — Adds tang and creaminess, keeping the texture light and luscious. I don’t skip this.
- Vanilla extract (1 teaspoon) — Brings depth to the cheesecake flavor.
- Large eggs (2) — They set the cheesecake layer without making it rubbery. Room temperature is best here too.
For the Strawberry Topping:
- Fresh strawberries (2 cups / 300g, hulled and sliced) — Fresh and juicy is the way to go. If strawberries aren’t in season, frozen (thawed and drained) works in a pinch.
- Granulated sugar (3 tablespoons / 38g) — Macerates the strawberries, drawing out their natural juices and turning them into a sweet syrup.
- Lemon juice (1 tablespoon) — Brightens the fruit topping and balances the sweetness.
- Cornstarch (1 teaspoon) — Thickens the syrup so it doesn’t run all over your bars.
Pro tip: If you’re new to working with cream cheese, warm it on the counter for at least an hour before starting. That smooth texture makes all the difference. Also, when making the crust, I like to press it firmly into the pan using the bottom of a measuring cup—helps it hold together perfectly.
Equipment You’ll Need
You don’t need anything fancy, but having the right tools makes a difference.
- 9×13-inch baking pan — This recipe fits perfectly here. I use a glass pan because I love seeing the layers, but metal works too.
- Mixing bowls — One for the crust, another for the cheesecake, and a small bowl for the strawberry topping.
- Electric hand mixer or stand mixer — Blending cream cheese and sugar smooth is much easier with a mixer, but a sturdy whisk works if you have the patience.
- Rubber spatula — Essential for scraping the sides of your bowl and folding ingredients gently.
- Measuring cups and spoons — For precise baking (trust me, it matters).
- Small saucepan — To cook down the strawberry topping slightly.
- Plastic wrap or foil — For covering the bars while chilling.
If you’re short on tools, you can crush graham crackers in a sealed plastic bag with a rolling pin, and use a fork or wooden spoon to mix the cheesecake. I’ve done it both ways during busy potlucks and it works just fine.
Step-by-Step Instructions
- Preheat and Prep (10 minutes)
Preheat your oven to 325°F (160°C). Line your 9×13-inch pan with parchment paper, leaving an overhang on two sides. This makes lifting the bars out so much easier once they’re chilled. - Make the Crust (5 minutes)
In a medium bowl, mix the graham cracker crumbs, sugar, and melted butter until the mixture looks like wet sand. Press it firmly into the bottom of your prepared pan using the bottom of a glass or measuring cup. Bake for 10 minutes, then let it cool while you make the cheesecake layer. - Prepare the Cheesecake Layer (10 minutes)
In a large bowl, beat the softened cream cheese with a hand mixer on medium speed until smooth and creamy (about 2 minutes). Add the sugar and beat until combined. Mix in the sour cream and vanilla extract. Add the eggs one at a time, beating just until combined after each. Don’t overmix—stop when the batter is smooth and silky. - Assemble and Bake (40-45 minutes)
Pour the cheesecake batter over the cooled crust and smooth the top with a spatula. Bake for 40-45 minutes, or until the edges are set but the center still jiggles slightly when you gently shake the pan. This ensures a creamy texture without cracks. - Make the Strawberry Topping (10 minutes)
While the cheesecake bakes, combine sliced strawberries, sugar, and lemon juice in a small saucepan over medium heat. Cook, stirring occasionally, until the strawberries release their juices and the mixture thickens slightly, about 5-7 minutes. Stir in the cornstarch dissolved in 1 tablespoon water, and cook for another minute until syrupy. Remove from heat and let cool. - Cool and Chill (Minimum 4 hours, preferably overnight)
Let the cheesecake cool to room temperature, then spread the strawberry topping evenly over the top. Cover tightly with plastic wrap and chill for at least 4 hours or overnight to set fully. - Slice and Serve
Use the parchment overhang to lift the bars out of the pan. Slice into squares with a sharp knife, wiping it clean between cuts for neat edges. Serve chilled or slightly warmed (I prefer chilled for Memorial Day gatherings).
Active time here is about 30 minutes, plus baking and chilling. The hardest part? Waiting for them to set.
Expert Tips & Troubleshooting
After making these bars over a dozen times, here’s what I’ve learned:
- Softened cream cheese is non-negotiable. If it’s cold, you’ll get lumps in your cheesecake layer. I learned this the hard way when I tried to rush the process.
- Don’t overbake. The center should still jiggle slightly when you take the bars out. They firm up fully while chilling. Overbaking makes the cheesecake dry and crumbly.
- Use fresh strawberries. Frozen work in a pinch, but fresh give the best flavor and texture. If you use frozen, thaw and drain them well before cooking.
- Press the crust firmly. If it’s loose, the bars will crumble when you slice. Use the bottom of a glass or measuring cup to pack it tightly.
- Chill time is key. I never skip the overnight chill if I want perfect slices. If you’re short on time, 4 hours is the absolute minimum.
- Make it your own. I sometimes add a handful of chopped pistachios or a drizzle of balsamic glaze on top for a grown-up twist.
Variations & Substitutions
Once you’ve nailed the classic, these twists are fun to try:
- Berry Mix-Up: Swap strawberries for a mix of blueberries, raspberries, and blackberries. Make the topping the same way—a berry medley is stunning and delicious.
- Chocolate Swirl: Add ½ cup melted semi-sweet chocolate to the cheesecake batter before baking. Swirl with a knife for a marbled effect.
- Crust Alternatives: Use crushed vanilla wafers or gingersnaps instead of graham crackers for a different flavor base.
- Gluten-Free: Use gluten-free graham cracker crumbs or almond flour for the crust. I’ve tried this and it still comes out great.
- Dairy-Free: Substitute cream cheese with a dairy-free cream cheese alternative, and use coconut yogurt instead of sour cream. I haven’t tested this personally but have heard good things.
For a quick lunch idea to pair with these bars, you might like my quick rotisserie chicken Caesar wrap—easy, fresh, and perfect for Memorial Day picnics.
Serving & Storage
These cheesecake bars are best served chilled, straight from the fridge. I sometimes let them sit at room temperature for 10 minutes before serving if I want the flavors to pop a bit more.
Serving ideas:
- Serve as-is with a fork at your Memorial Day spread.
- Top with extra fresh strawberries or a dollop of whipped cream for extra indulgence.
- Pair with a light salad like this smashed cucumber avocado salad for a refreshing combo.
Storage:
- Keep covered tightly in the refrigerator for up to 5 days. They actually taste better after a day or two.
- You can freeze uncut bars for up to 2 months. Thaw overnight in the fridge before serving.
- If frozen with the strawberry topping, the texture of the berries can change slightly, but it’s still delicious.
Nutrition Information
| Nutrient | Per Serving (1 bar, based on 16 bars) |
|---|---|
| Calories | 280 |
| Protein | 5g |
| Total Carbohydrates | 32g |
| Dietary Fiber | 1g |
| Sugars | 21g |
| Total Fat | 15g |
| Saturated Fat | 9g |
| Cholesterol | 55mg |
| Sodium | 190mg |
Keep in mind this is a dessert, so it’s indulgent but balanced by fresh fruit. Compared to store-bought cheesecake bars, this homemade version uses real ingredients and feels less heavy.
Final Thoughts
So that’s the scoop on these Make-Ahead Strawberry Cheesecake Bars. Honestly, they’ve become my go-to dessert for any summer celebration where I want to impress without waking up at dawn to bake. The creamy cheesecake, buttery crust, and fresh strawberry topping hit all the right notes, and the fact that you can make them ahead means less stress and more fun.
If you’re planning your Memorial Day menu, these bars should definitely be on your radar. They pair beautifully with everything from grilled classics to fresh salads, and trust me, they disappear fast. I’d love to hear how yours turn out—drop a comment below if you tweak the recipe or try a variation. I check every comment and love swapping tips.
Happy Memorial Day, happy baking, and here’s to easy, delicious desserts that bring everyone to the table!
FAQs
- Can I make these strawberry cheesecake bars a day or two in advance?
- Absolutely! In fact, I recommend making them at least the night before so the cheesecake sets perfectly and the flavors meld. They keep well in the fridge for up to 5 days.
- What if I don’t have fresh strawberries? Can I use frozen?
- Yes, frozen strawberries work fine. Just thaw them completely and drain off any extra juice before cooking the topping. The texture might be slightly softer, but the flavor is still great.
- Can I make these bars without a mixer?
- You can! Cream cheese is easier to mix with a hand or stand mixer, but if you don’t have one, just make sure the cream cheese is super soft and use a sturdy whisk or wooden spoon. It might take a bit longer to get smooth, but it’s doable.
- How do I get clean slices when cutting the bars?
- Use a sharp knife and wipe it clean between each cut. If the bars are very chilled, slicing is easier. I sometimes warm the knife under hot water and dry it before slicing for extra clean edges.
- Can I freeze these bars?
- Yes! Freeze uncut bars wrapped tightly in plastic wrap and foil for up to 2 months. Thaw overnight in the fridge before slicing and serving. If frozen with the topping, the texture of the strawberries may soften some.
- Can I swap the graham cracker crust for something else?
- Definitely. Crushed vanilla wafers, gingersnaps, or even digestive biscuits make great alternatives. Just press the crumbs firmly and bake as usual.
- Are there any make-ahead sides or snacks that go well with these bars?
- If you’re planning a full Memorial Day spread, my fresh smashed cucumber avocado salad is a refreshing, no-cook dish that pairs beautifully with these rich bars.
Pin This Recipe!
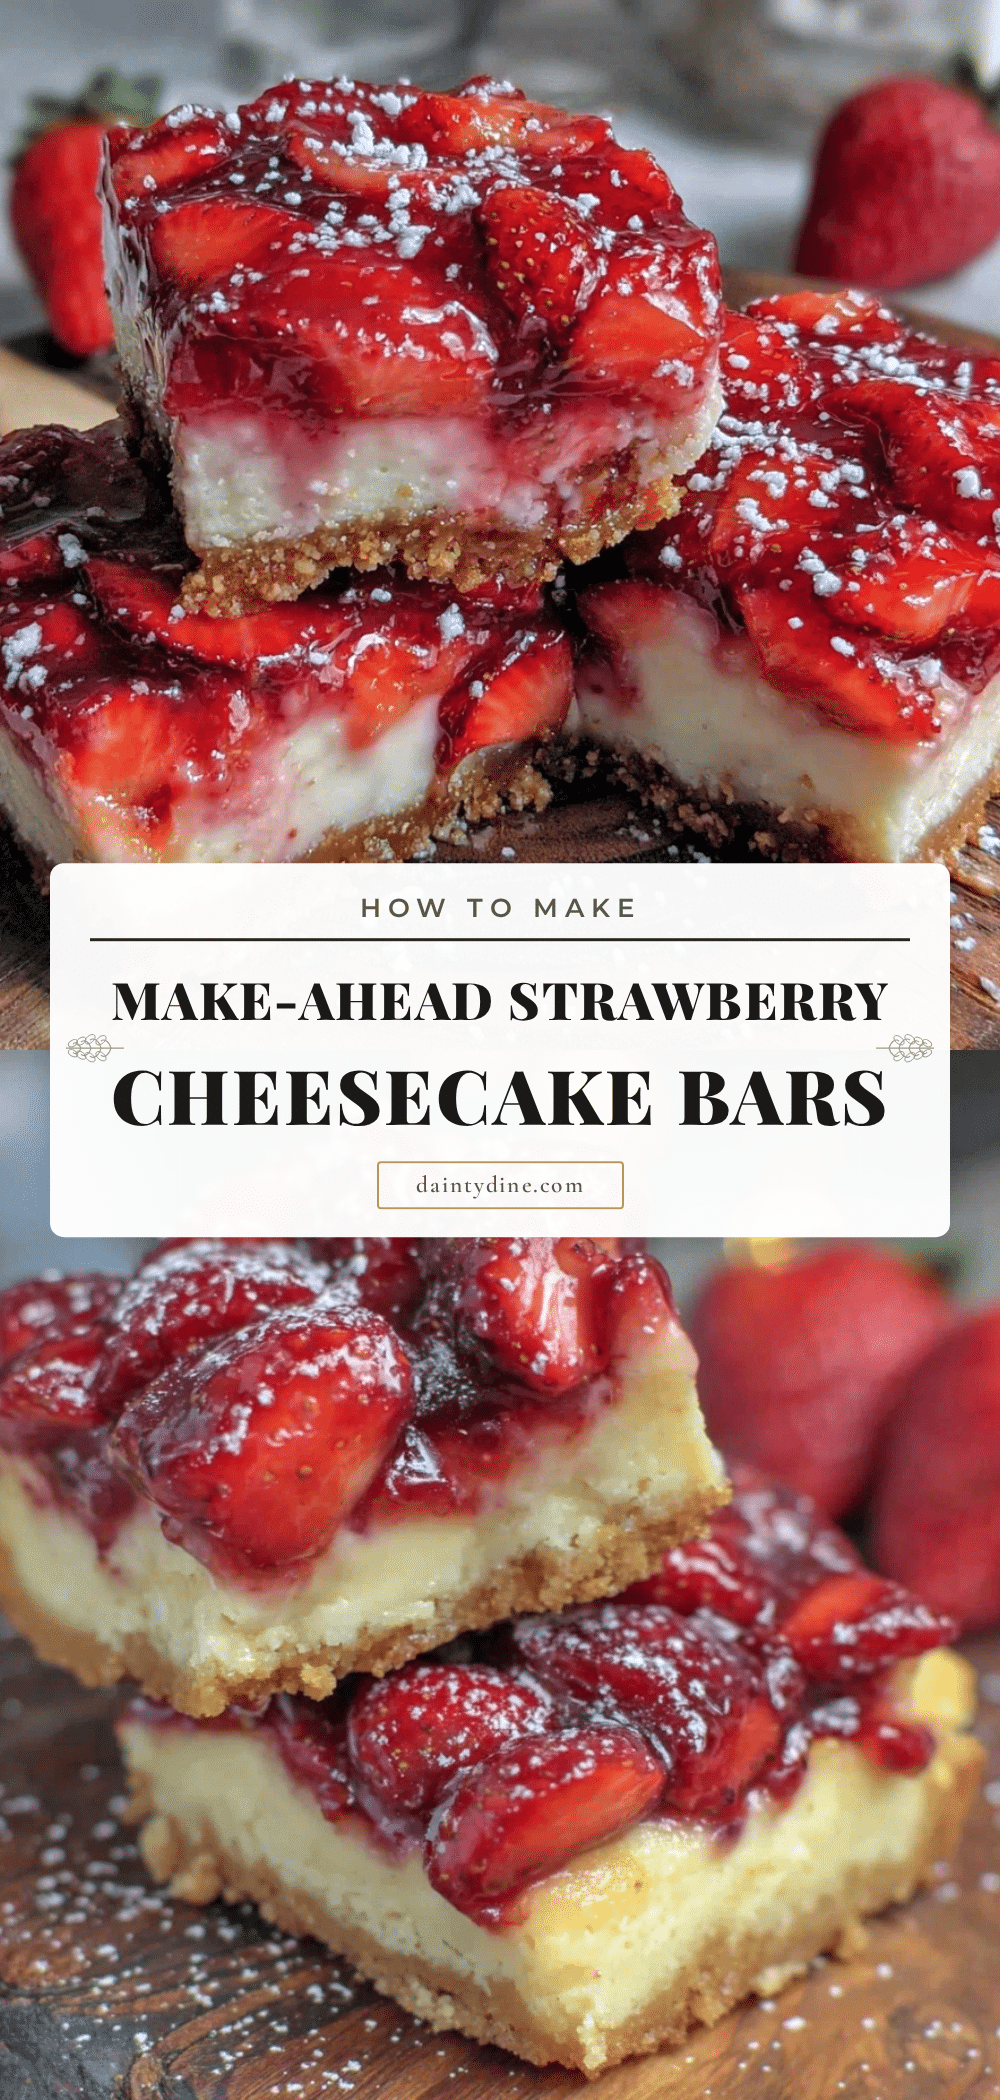
Make-Ahead Strawberry Cheesecake Bars
Creamy, fruity, and sturdy strawberry cheesecake bars that can be made days in advance, perfect for Memorial Day gatherings and summer celebrations.
- Prep Time: 30 minutes
- Cook Time: 50-55 minutes
- Total Time: 4 hours 30 minutes to overnight (including chilling)
- Yield: 16 servings 1x
- Category: Dessert
- Cuisine: American
Ingredients
- 1 ½ cups graham cracker crumbs (150g)
- 2 tablespoons granulated sugar (25g)
- 6 tablespoons melted unsalted butter (85g)
- 16 ounces cream cheese, softened (450g)
- ¾ cup granulated sugar (150g)
- ½ cup sour cream (120g)
- 1 teaspoon vanilla extract
- 2 large eggs
- 2 cups fresh strawberries, hulled and sliced (300g)
- 3 tablespoons granulated sugar (38g)
- 1 tablespoon lemon juice
- 1 teaspoon cornstarch
Instructions
- Preheat your oven to 325°F (160°C). Line your 9×13-inch pan with parchment paper, leaving an overhang on two sides.
- In a medium bowl, mix the graham cracker crumbs, sugar, and melted butter until the mixture looks like wet sand. Press it firmly into the bottom of your prepared pan using the bottom of a glass or measuring cup. Bake for 10 minutes, then let it cool.
- In a large bowl, beat the softened cream cheese with a hand mixer on medium speed until smooth and creamy (about 2 minutes). Add the sugar and beat until combined. Mix in the sour cream and vanilla extract. Add the eggs one at a time, beating just until combined after each. Do not overmix.
- Pour the cheesecake batter over the cooled crust and smooth the top with a spatula. Bake for 40-45 minutes, or until the edges are set but the center still jiggles slightly when you gently shake the pan.
- While the cheesecake bakes, combine sliced strawberries, sugar, and lemon juice in a small saucepan over medium heat. Cook, stirring occasionally, until the strawberries release their juices and the mixture thickens slightly, about 5-7 minutes. Stir in the cornstarch dissolved in 1 tablespoon water, and cook for another minute until syrupy. Remove from heat and let cool.
- Let the cheesecake cool to room temperature, then spread the strawberry topping evenly over the top. Cover tightly with plastic wrap and chill for at least 4 hours or overnight to set fully.
- Use the parchment overhang to lift the bars out of the pan. Slice into squares with a sharp knife, wiping it clean between cuts for neat edges. Serve chilled or slightly warmed.
Notes
Use softened cream cheese to avoid lumps. Do not overbake; the center should jiggle slightly when done. Press crust firmly to prevent crumbling. Chill bars overnight for best slicing and flavor. Fresh strawberries preferred but frozen can be used if thawed and drained. Variations include berry mix, chocolate swirl, and crust alternatives like vanilla wafers or gingersnaps. Gluten-free and dairy-free substitutions are possible.
Nutrition
- Serving Size: 1 bar (1/16th of the
- Calories: 280
- Sugar: 21
- Sodium: 190
- Fat: 15
- Saturated Fat: 9
- Carbohydrates: 32
- Fiber: 1
- Protein: 5
Keywords: strawberry cheesecake bars, make-ahead dessert, Memorial Day dessert, easy cheesecake bars, summer dessert, no-fuss cheesecake