Love this? Save it for later!
Share the inspiration with your friends
Megan wasn’t trying to impress anyone. I’d stopped by her place on a Tuesday afternoon to pick up a book I’d lent her, and the smell of butter and something slightly sweet hit me before I even got inside. She was standing at the kitchen counter with her two little boys, both of them covered in a suspicious amount of flour, and she was laughing. Not the kind of laugh you do when you’re hosting and trying to seem relaxed, but the real, messy, “I’ve-given-up-on-the-kitchen-looking-presentable” kind of laugh. On the baking sheet in front of them were these little hot dogs wrapped in what looked like strips of dough, with tiny dots for eyes. They looked ridiculous. They looked perfect. “It’s just hot dogs,” she said, shrugging. “The kids call them mummies.”
Honestly, I almost walked out without asking for the recipe. I mean, it’s hot dogs wrapped in crescent roll dough, right? How special could it be? But I couldn’t stop thinking about how happy those boys looked. They weren’t just eating dinner; they had made something. There was a sense of ownership in the way the older one pointed and said, “That one’s mine, see the crooked eye?” And you know that feeling when you realize something simple is actually kind of brilliant? That was the moment. These mummy hot dogs weren’t about fancy cooking or impressing anyone. They were about making a Wednesday night feel like a tiny celebration.
I asked for the recipe, and Megan—still covered in flour—just pointed at the crescent roll can on the counter. “That’s it. That’s the secret.” She made it sound like nothing. But I’ve made them about a dozen times since that Tuesday, and I keep coming back to them because they work. They’re the kind of recipe that makes you look like a hero to a five-year-old without breaking a sweat. And let’s face it, that’s a pretty good feeling.
Why You’ll Love This Recipe
I’ve tested this recipe more times than I care to admit, tweaking the bake time, trying different hot dog brands, and even experimenting with the eye placement. So when I tell you these are the real deal, I mean it. Here’s what makes them stand out:
- Kid-Approved and Parent-Friendly: These are the ultimate Halloween dinner. Kids love the mummy look, and you’ll love how fast they come together. We’re talking 20 minutes from fridge to table.
- Simple Ingredients, No Fuss: You only need three main ingredients—hot dogs, crescent roll dough, and mustard for the eyes. No specialty stores, no weird spices. Just pantry staples.
- Perfect for Picky Eaters: Let’s be honest, getting kids to eat dinner on Halloween is a miracle. These are familiar (hot dogs!) with a fun twist. My nephew, who usually survives on air and goldfish crackers, ate three.
- Budget-Friendly Fun: This whole recipe costs less than a fast-food run. You can feed a crowd of little mummies without emptying your wallet.
- Unbelievably Easy: If you can open a can and wrap dough around a hot dog, you can make these. There’s no rolling, no cutting, no stress.
What makes this version different from the other mummy hot dog recipes out there? It’s the little details I figured out through trial and error. Like how to space the dough strips so the hot dog peeks through just right, making them look authentically wrapped. Or the best way to get the mustard eyes to stay put without sliding off. I’ve made the mistakes so you don’t have to.
What Ingredients You Will Need
This recipe is beautifully simple. The ingredients are few, but each one plays a role in creating that perfect little mummy. Here’s what you’ll need to grab from your fridge and pantry.
- 1 can (8 oz) refrigerated crescent roll dough: This is the backbone of the recipe. I’ve tried a few brands, and honestly, Pillsbury is my go-to for consistency. The dough is soft, buttery, and easy to work with. Look for the seamless kind if you can find it—it makes cutting the strips much easier. If you only have the perforated kind, just pinch the seams together before cutting.
- 8 hot dogs: This is where you can get personal. I prefer all-beef hot dogs for flavor, but any kind works. Turkey dogs, chicken dogs, even plant-based options—they all work beautifully. Just make sure they’re regular size, not jumbo. Jumbo hot dogs throw off the mummy proportions and take longer to cook through.
- Mustard (yellow or Dijon) for the eyes: This is the fun part. Yellow mustard gives you that classic, bright look, but Dijon works if you want a slightly more sophisticated mummy. You can also use ketchup or even tiny dots of cream cheese if your kids aren’t mustard fans. I’ve used sriracha for adult versions, but that’s definitely not kid-approved.
- Optional: Cooking spray or parchment paper: The crescent dough has plenty of butter, but I’ve had sticking issues on older baking sheets. A quick spritz of non-stick spray or a sheet of parchment paper is cheap insurance.
Ingredient Selection Tips: For the best texture, make sure your crescent roll dough is cold when you start. If it gets too warm, it becomes sticky and hard to cut. Also, check the expiration date on your hot dogs—fresh hot dogs have better snap and flavor. And here’s a little trick: if you’re serving these at a Halloween party, you can prep the mummies a few hours ahead and keep them in the fridge, unbaked, until you’re ready to pop them in the oven.
Substitution Guidance: Need a gluten-free option? There are gluten-free crescent roll doughs available now, though they can be a bit more fragile. Work with them cold and handle gently. For a lower-sodium version, use turkey hot dogs and reduced-sodium crescent rolls. And if you’re out of mustard? No problem. I’ve used small dots of barbecue sauce in a pinch, and the kids didn’t notice the difference.
Equipment Needed
You don’t need a fancy kitchen to make these mummy hot dogs. Honestly, I’ve made them in a friend’s apartment with nothing but a butter knife and a toaster oven. Here’s what you’ll actually need:
- Baking sheet: A standard half-sheet pan works perfectly. If you’re making a double batch, you might need two.
- Parchment paper or silicone baking mat: This isn’t strictly necessary, but it makes cleanup a breeze. I learned this the hard way after scraping burnt-on dough from a pan. Trust me on this one.
- A sharp knife or pizza cutter: You’ll be cutting the crescent dough into thin strips. A pizza cutter is my favorite tool for this—it glides through the dough without dragging. A sharp chef’s knife works too. A dull knife will squish the dough and make a mess.
- A ruler (optional but helpful): I don’t use one anymore, but when I first started, I measured my strips to make sure they were even. It’s a nice touch if you’re a perfectionist, but honestly, uneven strips make the mummies look more authentic. Real mummies aren’t wrapped perfectly.
- Small bowl for the mustard eyes: You’ll need a tiny dish to put a dollop of mustard in. I use a ramekin. A toothpick or the tip of a knife works great for applying the eyes.
Budget-Friendly Options: If you don’t have a pizza cutter, a butter knife works in a pinch—just use a sawing motion. No baking sheet? A cast-iron skillet or even a toaster oven tray can work. The key is getting even heat distribution. And if you’re really in a bind, you can use a clean pair of kitchen scissors to cut the dough. I’ve done it. It’s not pretty, but it gets the job done.
Preparation Method
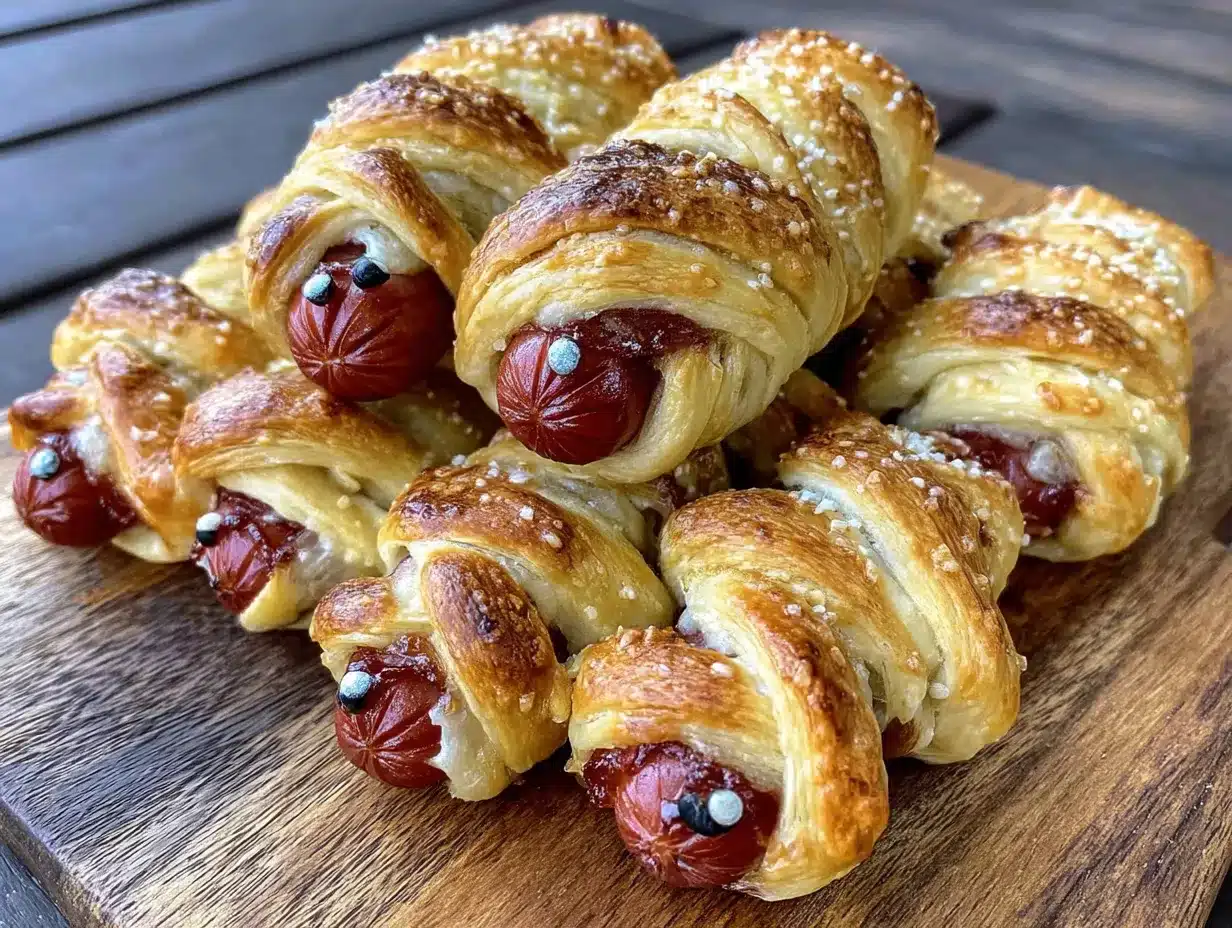
Alright, let’s get to the fun part. Here’s how to make these mummy hot dogs from start to finish. I’ll walk you through every step, including the little tricks I’ve picked up along the way.
- Preheat your oven to 375°F (190°C). Line a baking sheet with parchment paper or a silicone mat. This is one of those steps that seems optional until you have to scrub a baking sheet. Trust me, just do it.
- Unroll the crescent roll dough. Lay it flat on a clean cutting board. If you’re using the perforated kind, gently press the seams together to create one solid sheet of dough. Don’t press too hard—you just want to seal the seams, not compress the dough into a flat pancake.
- Cut the dough into thin strips. Using a sharp knife or pizza cutter, slice the dough lengthwise into about 8 to 10 strips. They should be about 1/4 to 1/2 inch wide. Don’t worry about making them perfectly even. I’ve made mummies with strips of wildly different widths, and they all looked great. The uneven ones actually look more like authentic wrappings.
- Wrap the hot dogs. Take one hot dog and start wrapping a strip of dough around it, leaving a small gap at the top for the “face.” The dough should overlap slightly as you go around. Don’t wrap too tightly—the dough will expand as it bakes, and if it’s too tight, it might tear. Leave about an inch of the hot dog exposed at the top for the eyes. The bottom can be fully covered or left exposed; I prefer fully covered because it looks more mummy-like.
- Place on the baking sheet. Put the wrapped hot dogs on the prepared baking sheet, leaving about an inch of space between each one. They won’t spread much, but they need a little room for the heat to circulate.
- Bake for 12-15 minutes. The exact time depends on your oven and how brown you like your dough. I start checking at 12 minutes. You’re looking for the dough to be golden brown and puffed up. The hot dogs should be heated through and starting to sizzle a little. If you’re using turkey or chicken hot dogs, they might cook faster, so check a minute or two earlier.
- Let them cool slightly. This is important. When they come out of the oven, the dough is hot and the mustard will slide right off if you try to add the eyes immediately. Let them sit on the baking sheet for 2-3 minutes. They’ll still be warm, but cool enough to handle.
- Add the eyes. Put a small dollop of mustard in a bowl. Dip a toothpick or the tip of a knife into the mustard and place two tiny dots on the exposed part of the hot dog to create the eyes. Don’t make them too big—mummies have small, beady eyes. If you want to get fancy, you can make the eyes look in different directions for a goofy effect. My kids love this.
- Serve immediately. These are best eaten warm, right out of the oven. The dough is soft and buttery, the hot dog is juicy, and the mustard gives a little tangy pop. They’re also good at room temperature, which makes them perfect for Halloween parties.
Sensory Cues: When the dough is properly baked, it should be a deep golden brown on the outside and soft and flaky on the inside. You should be able to see the hot dog peeking through the gaps in the wrapping. If the dough looks pale and doughy, give it another minute or two. The smell is incredible—buttery, slightly salty, with that unmistakable crescent roll aroma that reminds me of holiday mornings.
Personal Tip for Efficiency: I like to cut all the dough strips first, then wrap all the hot dogs in an assembly line. It’s faster than wrapping one at a time. Also, if the dough gets too warm and sticky, pop it in the fridge for 5 minutes. Cold dough is much easier to work with.
Cooking Tips & Techniques
I’ve made these mummy hot dogs at least a dozen times, and I’ve made every mistake in the book. Here’s what I’ve learned so you don’t have to repeat my failures.
Don’t Overwrap the Hot Dogs. The first time I made these, I wrapped the dough so tightly around the hot dogs that they looked like little sausages in a straight jacket. When they baked, the dough tore in places and the hot dogs bulged out in weird spots. The trick is to wrap loosely enough that the dough has room to expand. Think of it like wrapping a gift—you want the paper to cover it, but not squeeze it.
Space the Strips Evenly (But Not Perfectly). You want about 1/4 inch of space between each strip of dough. This lets the hot dog show through and gives it that mummy look. If the strips are too close together, it looks like a solid dough tube. Too far apart, and it doesn’t look wrapped at all. I aim for about 3-4 wraps per hot dog. That’s usually enough to look authentic without overdoing it.
The Mustard Eye Trick. I learned this the hard way: don’t put the mustard eyes on before baking. The heat will make the mustard spread and turn into weird yellow blobs. Always add the eyes after baking, when the hot dogs have cooled slightly. And use a toothpick, not a squeeze bottle. A toothpick gives you much more control over the size and placement.
Timing and Multitasking. These come together fast, so I like to prep everything before I start. Unwrap the hot dogs, unroll the dough, cut the strips, and have the baking sheet ready. The actual assembly takes about 5 minutes. Then you’ve got 12-15 minutes of bake time to clean up and set the table. I’ve made these on school nights when we had 20 minutes between soccer practice and homework, and they saved the day.
Consistency Tips: For the most consistent results, use the same brand of hot dogs and crescent rolls every time. Different brands have different moisture levels and bake times. I’ve noticed that some store-brand crescent rolls are thinner and bake faster, so keep an eye on them. Also, let the hot dogs come to room temperature for about 5 minutes before wrapping. Cold hot dogs can make the dough shrink during baking.
Variations & Adaptations
One of the things I love about this recipe is how easy it is to customize. Here are some variations I’ve tried and loved.
Spider Hot Dogs: Instead of wrapping the dough around the entire hot dog, cut the hot dog in half crosswise. Wrap the dough around the middle of each half, leaving the ends exposed. Add eight small slits on each side of the dough to create “legs.” Bake as directed. These look like little spiders and are perfect for a Halloween party.
Cheesy Mummies: Before wrapping the hot dogs, cut a slit lengthwise down the center and stuff it with a thin strip of cheddar cheese. Wrap as usual and bake. The cheese melts inside and creates a gooey, delicious center. My kids went crazy for these. Just be careful—the cheese gets very hot, so let them cool a bit before serving.
Veggie Mummies: For a slightly healthier option, use veggie hot dogs or even pre-cooked chicken sausages. I’ve used MorningStar Farms veggie dogs, and they work perfectly. The bake time is the same. You can also add a thin strip of roasted red pepper under the dough for color.
Breakfast Mummies: Swap the hot dogs for breakfast sausages or even pre-cooked bacon. Use the same crescent dough and bake at 375°F for 12 minutes. Serve with ketchup or maple syrup for dipping. I made these for a Halloween-themed breakfast, and they were a huge hit.
Gluten-Free Version: There are gluten-free crescent roll options available now. I’ve tried the Schär brand, and while the dough is a bit more delicate, it works. Handle it gently and keep it cold. The bake time might be a minute or two shorter, so keep an eye on them.
Serving & Storage Suggestions
These mummy hot dogs are best served warm, right after the eyes are added. But they’re also surprisingly good at room temperature, which makes them perfect for parties and potlucks.
Serving Ideas: Arrange the mummies on a platter with a bowl of ketchup or mustard for dipping. You can add a side of apple slices or carrot sticks for a balanced meal. For a Halloween party, serve them alongside “witch fingers” (breadsticks with almond nails) or “pumpkin hummus” (hummus dyed orange with paprika). The presentation is half the fun.
Storage: If you have leftovers (unlikely, but possible), let them cool completely. Store them in an airtight container in the refrigerator for up to 3 days. The dough will soften a bit, but they’ll still taste good.
Reheating: The best way to reheat these is in the oven or toaster oven at 350°F for 5-7 minutes. This crisps the dough back up. The microwave works in a pinch, but the dough will be soft and chewy, not flaky. If you’re reheating for a party, I recommend the oven method.
How Flavors Develop: Honestly, these are best fresh. The dough loses its crispness after a few hours. But I’ve eaten them cold the next day, and they’re still pretty good—like a hot dog wrapped in a slightly soggy croissant. Not gourmet, but satisfying in a guilty-pleasure kind of way.
Nutritional Information & Benefits
Let’s be real—these are not health food. They’re a fun treat for Halloween. But here’s a rough estimate of what you’re looking at per mummy hot dog (based on one serving):
- Calories: Approximately 220-250
- Protein: 8-10 grams
- Fat: 14-16 grams
- Carbohydrates: 16-18 grams
- Sodium: 500-600 mg
Health Benefits: Hot dogs are a source of protein, and the crescent roll provides carbohydrates for energy. If you use turkey hot dogs, you’ll reduce the fat and calories. The mustard adds a tiny bit of antioxidants from turmeric. But honestly, the biggest benefit here is the joy of making something fun with your kids. The memories you create in the kitchen are worth more than any nutritional metric.
Dietary Considerations: These are not gluten-free unless you use a gluten-free dough. They’re not vegetarian unless you use veggie dogs. They contain dairy (from the dough). If you have allergies, check the labels on your hot dogs and crescent rolls—some brands contain soy or other allergens.
Conclusion
These mummy hot dogs are the definition of a low-effort, high-reward recipe. They’re silly, they’re simple, and they make kids feel like kitchen superheroes. I’ve made them for Halloween parties, school lunches, and random Tuesday nights when we needed a little fun. Every single time, they disappear fast.
Here’s my challenge to you: don’t overthink them. Open the can, wrap the dough, and let the kids help. Let them make the eyes crooked. Let them argue over which mummy looks the scariest. That’s the whole point. This recipe isn’t about perfection—it’s about having a little fun with your food. And honestly, isn’t that what Halloween is all about?
I’d love to hear how yours turn out. Did your kids come up with their own variations? Did you try the spider version? Drop a comment below and let me know. And if you’re looking for more kid-friendly Halloween ideas, check out our Halloween pizza spiders or these ghost banana pops for a healthier treat.
Frequently Asked Questions
Can I make these mummy hot dogs ahead of time?
Yes! You can assemble them up to 24 hours in advance. Just wrap the hot dogs with the dough, place them on the baking sheet, cover with plastic wrap, and refrigerate. Bake them right before serving. You might need to add 1-2 minutes to the bake time since they’re starting from cold.
Can I freeze these mummy hot dogs?
Absolutely. Assemble them completely, then place the baking sheet in the freezer for about an hour until the mummies are frozen solid. Transfer them to a freezer bag or container. They’ll keep for up to 3 months. Bake from frozen at 375°F for 15-18 minutes, or until golden brown.
What can I use instead of mustard for the eyes?
Ketchup works great for red eyes. Cream cheese or sour cream give white eyes. You can also use tiny dots of sriracha for spicy eyes (adults only). My kids actually prefer ketchup eyes because they don’t like mustard. Get creative with it.
Can I use a different type of dough?
Yes! Puff pastry works beautifully—it’s flakier and more buttery. Just cut it into strips and wrap the same way. Pizza dough also works, but you’ll need to par-bake it for a few minutes first. Crescent roll dough is the easiest and most forgiving option, so I’d start there.
How do I make these for a large group?
Double or triple the recipe easily. You’ll need multiple baking sheets, so rotate them in the oven. Bake one sheet at a time on the middle rack for the most even results. You can keep the first batch warm in a 200°F oven while the others bake. Just don’t add the mustard eyes until you’re ready to serve.
Pin This Recipe!
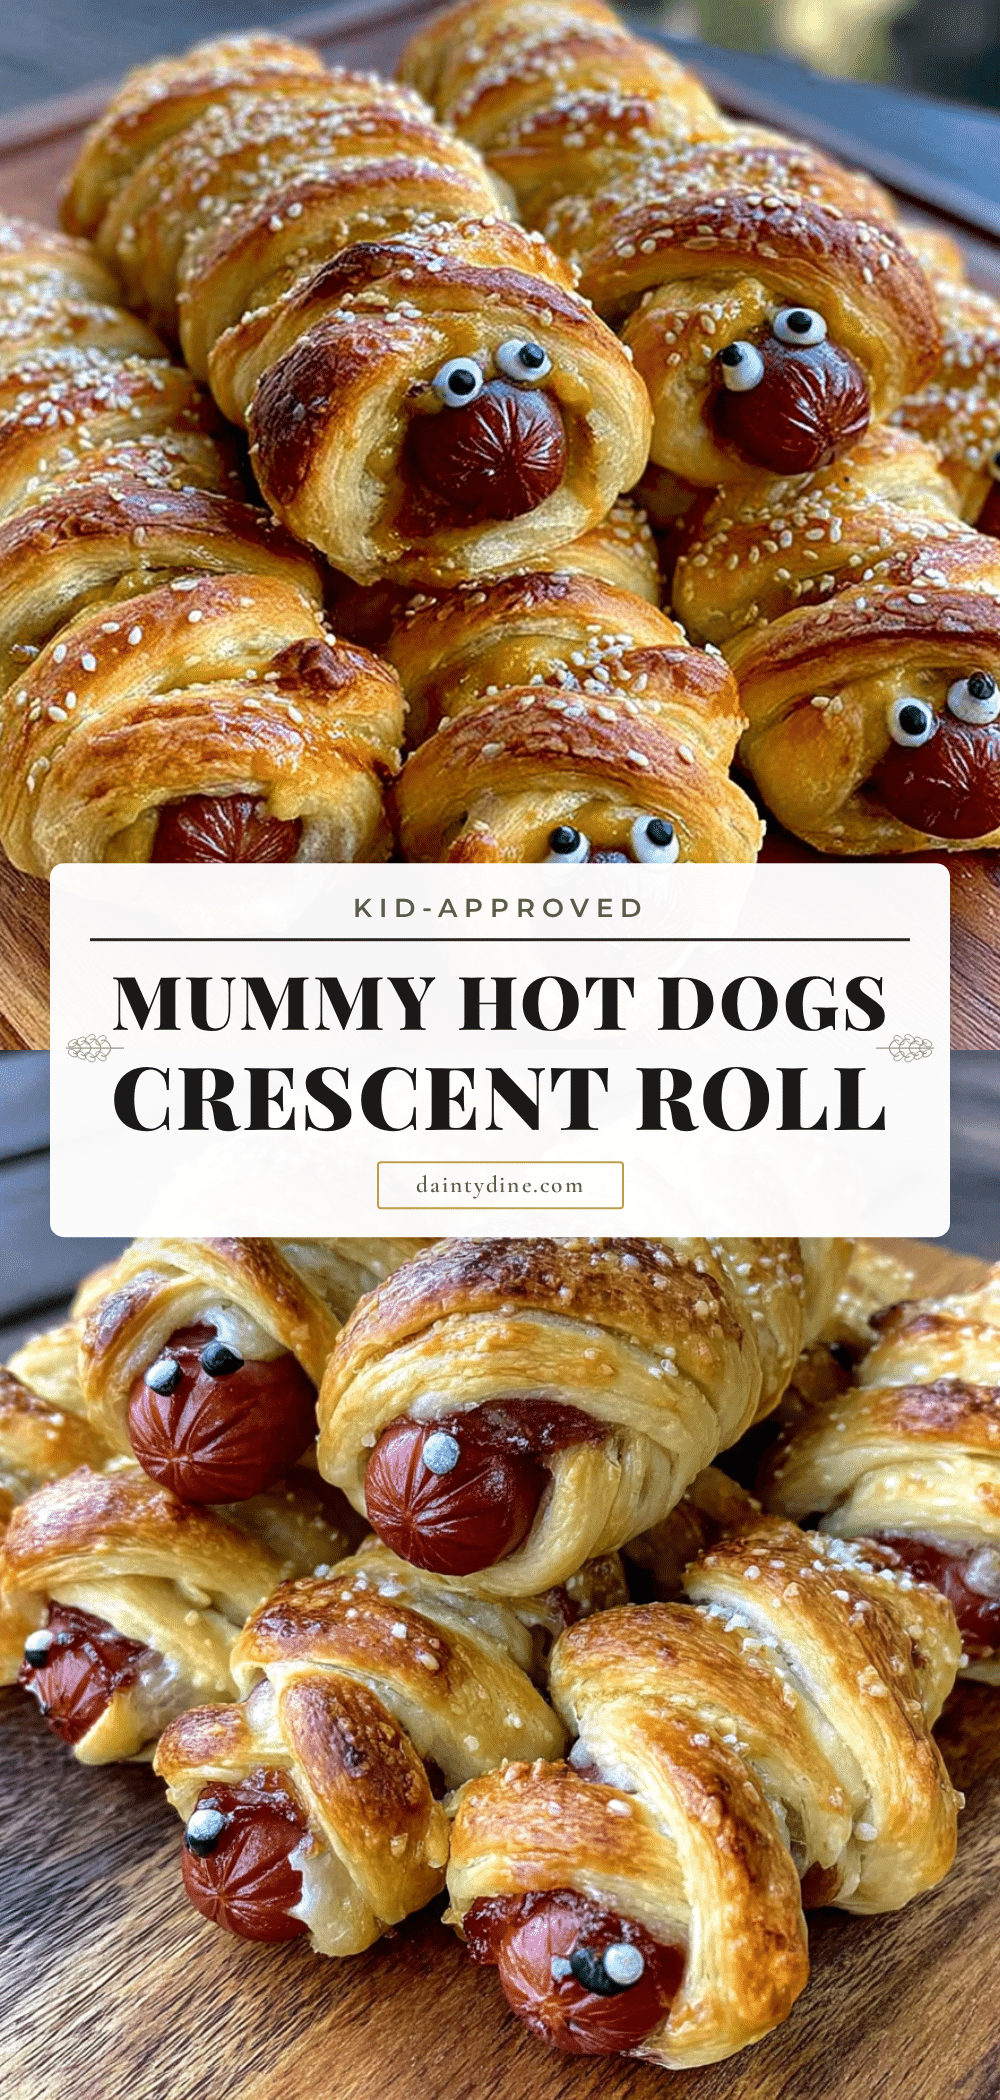
Kid-Approved Mummy Hot Dogs: Easy Halloween Crescent Recipe
These mummy hot dogs are a fun, kid-friendly Halloween dinner made with just three ingredients: hot dogs, crescent roll dough, and mustard for eyes. Ready in 20 minutes, they’re perfect for picky eaters and budget-friendly.
- Prep Time: 5 minutes
- Cook Time: 15 minutes
- Total Time: 20 minutes
- Yield: 8 servings 1x
- Category: Main Course
- Cuisine: American
Ingredients
- 1 can (8 oz) refrigerated crescent roll dough
- 8 hot dogs
- Mustard (yellow or Dijon) for the eyes
- Optional: Cooking spray or parchment paper
Instructions
- Preheat your oven to 375°F (190°C). Line a baking sheet with parchment paper or a silicone mat.
- Unroll the crescent roll dough. Lay it flat on a clean cutting board. If using perforated dough, gently press the seams together to create one solid sheet.
- Cut the dough into thin strips, about 1/4 to 1/2 inch wide, using a sharp knife or pizza cutter. Aim for 8 to 10 strips.
- Wrap each hot dog with a strip of dough, leaving about an inch exposed at the top for the face. Wrap loosely so the dough can expand during baking. Overlap the dough slightly as you go.
- Place the wrapped hot dogs on the prepared baking sheet, leaving about an inch of space between each.
- Bake for 12-15 minutes, until the dough is golden brown and puffed up. Check at 12 minutes.
- Let the mummy hot dogs cool on the baking sheet for 2-3 minutes before adding the eyes.
- Put a small dollop of mustard in a bowl. Dip a toothpick or the tip of a knife into the mustard and place two tiny dots on the exposed part of each hot dog to create the eyes.
- Serve immediately while warm.
Notes
For best results, keep crescent dough cold. If dough gets too warm and sticky, refrigerate for 5 minutes. Don’t overwrap the hot dogs; wrap loosely. Add mustard eyes after baking, not before. For a gluten-free version, use gluten-free crescent roll dough. For cheesy mummies, slit hot dogs lengthwise and stuff with cheddar before wrapping. To make ahead, assemble up to 24 hours in advance and refrigerate unbaked. To freeze, assemble, freeze solid, then store in a freezer bag for up to 3 months; bake from frozen at 375°F for 15-18 minutes.
Nutrition
- Serving Size: 1 mummy hot dog
- Calories: 235
- Sugar: 3
- Sodium: 550
- Fat: 15
- Saturated Fat: 5
- Carbohydrates: 17
- Protein: 9
Keywords: mummy hot dogs, Halloween recipe, kid-friendly, crescent roll, easy dinner, hot dog recipe, Halloween dinner