Love this? Save it for later!
Share the inspiration with your friends
The PTA bake sale was in twelve hours and I’d completely forgotten. Everyone else would be bringing those elaborate Pinterest-perfect creations—you know the ones, with the fondant and the six-hour prep times. I had a can of pumpkin puree in the pantry, a block of cream cheese that was about to expire, and a bag of gingersnaps my toddler had been using as teething biscuits. Not exactly award-winning material.
Honestly, I almost just brought store-bought cookies. But then I remembered this pumpkin cheesecake bar recipe my neighbor had scribbled on a napkin months ago. I’d never even tested it. The gingersnaps were already crushed (thanks to my two-year-old’s “help”), the cream cheese was softening on the counter, and I figured—worst case scenario—we’d have dessert for a week.
The bake sale started at 8 AM. I pulled the pan out of the oven at 11:30 PM, let them cool on the counter overnight, and cut them into squares while still half-asleep. I didn’t even taste one. I just dropped them off, apologized to the coordinator for my “rushed contribution,” and went home to deal with a toddler who’d found my lipstick.
You know that feeling when you show up to something underprepared and just hope nobody notices? That was me. But my phone started buzzing around noon. Three different moms texted asking for the recipe. The coordinator called to say the bars sold out in twenty minutes. One dad offered to trade his famous chili recipe for the cheesecake bar recipe. I was genuinely confused—had I accidentally made something good?
I made another batch that weekend to actually taste them. And let me tell you, I finally understood the hype. The creamy pumpkin filling, the tangy cheesecake layer, that crunchy, spicy gingersnap crust—it all comes together in this ridiculous, perfect way. Now I make these pumpkin cheesecake bars for every fall gathering, every potluck, every time I need to bring something that’ll disappear fast. And I always pretend I planned it.
Why You’ll Love This Recipe
These pumpkin cheesecake bars are the kind of dessert that makes you look like a hero without spending all day in the kitchen. I’ve tested this recipe at least a dozen times—through two moves, a toddler who “helps” stir, and one memorable incident where I forgot the sugar entirely (don’t ask). Every single time, they come out perfectly.
- Budget-Friendly Ingredients: You probably have most of these in your pantry right now. Canned pumpkin, cream cheese, eggs, sugar—nothing fancy, nothing expensive. This is real-people cooking.
- Kid-Approved and Parent-Approved: My kids devour these bars. So do their friends. So do the adults who pretend they’re only having “one small piece.” The gingersnap crust adds just enough spice without being overwhelming.
- Make-Ahead Magic: These bars actually taste better the next day. You can make them two days ahead for a party, and nobody will know they weren’t baked that morning. The flavors meld together beautifully overnight.
- No Fancy Equipment Needed: One bowl, one pan, your hands (for crushing the cookies), and a mixer. That’s it. No double boilers, no water baths, no special gadgets.
- Crowd-Pleaser Guaranteed: I’ve brought these to church potlucks, school events, family reunions, and casual get-togethers. They always get rave reviews. Always.
What makes these different from every other pumpkin cheesecake bar recipe? It’s the crust. Most recipes use graham crackers, which are fine, but gingersnaps bring a whole other level of warmth and depth. The molasses and ginger in the cookies complement the pumpkin spice perfectly. Plus, the texture stays crunchy even after a couple days in the fridge—no soggy bottoms here.
This isn’t just another fall dessert. It’s the one that makes people close their eyes after the first bite. It’s comfort food that feels special but doesn’t require a culinary degree. And honestly? It’s the recipe that saved me at that bake sale, and it’s been saving me ever since.
What Ingredients You Will Need
This recipe uses simple, wholesome ingredients to deliver that perfect balance of creamy, tangy, and spiced. Most of these are pantry staples or easy to find at any grocery store. Let me walk you through what you’ll need and why each ingredient matters.
For the Gingersnap Crust
- 2 cups (about 200g) crushed gingersnap cookies — I use Nabisco brand because they’re widely available and have that perfect snap. You can crush them in a food processor or, honestly, in a zip-top bag with a rolling pin. Let the kids help with this part—it’s therapeutic.
- 1/4 cup (50g) granulated sugar — Just regular white sugar. Adds a bit of sweetness to balance the spicy cookies.
- 6 tablespoons (85g) unsalted butter, melted — Use real butter here, not margarine. It makes a huge difference in flavor and helps the crust hold together. Salted butter works too—just skip adding any extra salt.
For the Cheesecake Layer
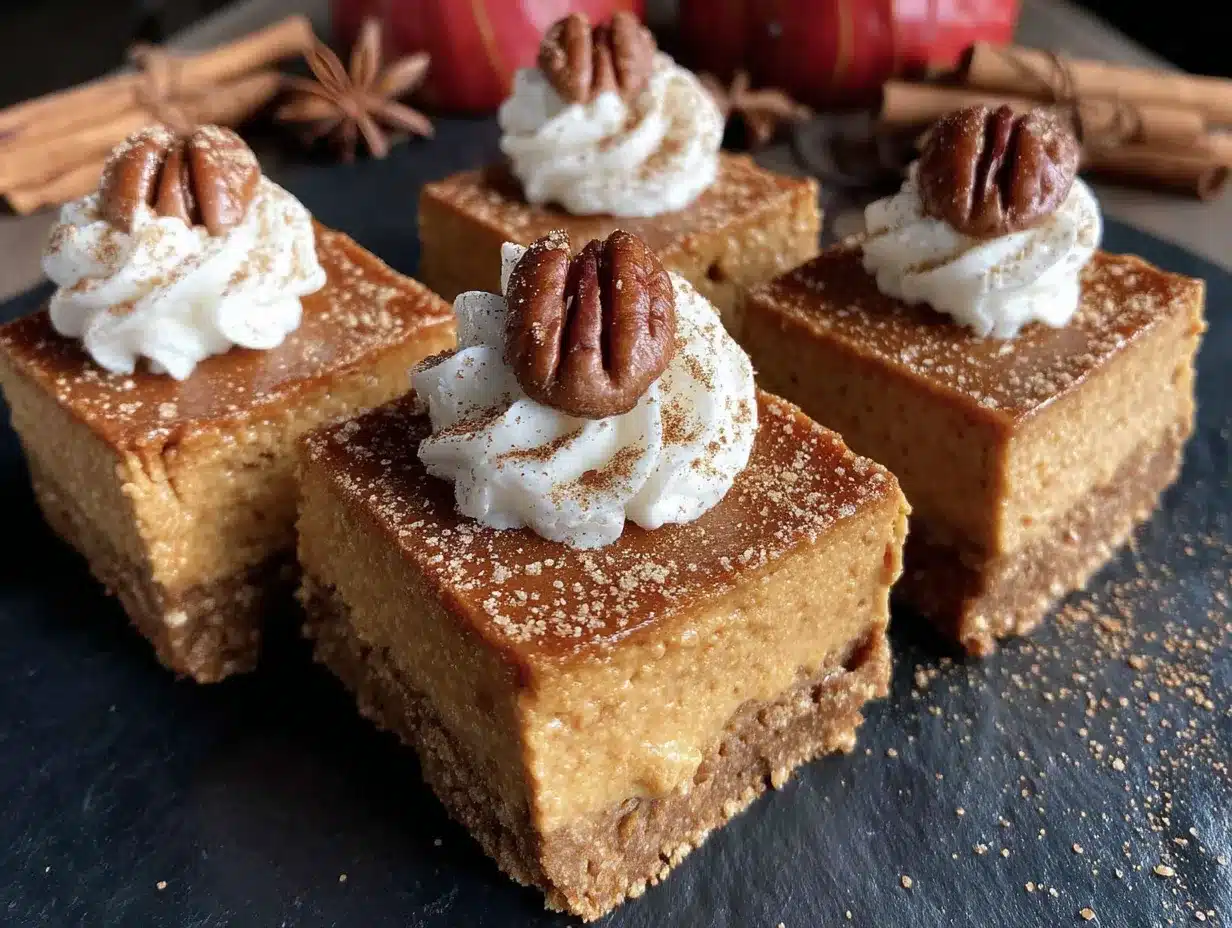
- 16 ounces (450g) cream cheese, softened — Full-fat cream cheese gives the best texture. I’ve tried low-fat versions and they work, but the bars are less creamy. Philadelphia brand is my go-to. Let it sit on the counter for at least an hour before starting.
- 3/4 cup (150g) granulated sugar — Enough to sweeten without making it cloying. You can reduce this to 1/2 cup if you prefer less sweetness.
- 2 large eggs, room temperature — Room temperature eggs blend more smoothly into the batter. If you forgot to take them out early, place them in a bowl of warm water for 5 minutes.
- 1 teaspoon vanilla extract — Pure vanilla extract adds depth. Imitation works in a pinch, but pure is better.
For the Pumpkin Layer
- 1 can (15 ounces or 425g) pumpkin puree — Make sure you’re buying pumpkin puree, not pumpkin pie filling. The pie filling has sugar and spices already added, which will throw off the balance. Libby’s is my trusted brand.
- 1/2 cup (100g) granulated sugar — This layer needs a bit more sweetness to balance the earthy pumpkin.
- 2 large eggs, room temperature — Same deal as the cheesecake layer. Room temperature is key for a smooth batter.
- 1 teaspoon vanilla extract — Again, pure is best.
- 1 teaspoon pumpkin pie spice — You can buy this pre-mixed or make your own with cinnamon, nutmeg, ginger, and cloves. I make my own because I’m fancy like that. (I’m not fancy. I just ran out once and had to improvise.)
- 1/2 teaspoon ground cinnamon — Extra warmth. Never enough cinnamon.
- 1/4 teaspoon salt — Just a pinch to balance the sweetness and bring out the flavors.
Optional Toppings
- Whipped cream — Homemade or store-bought, either works. A dollop on top makes these feel extra special.
- Caramel drizzle — Store-bought caramel sauce works beautifully. Drizzle over the top before serving.
- Crushed gingersnaps — A sprinkle of extra crushed cookies on top adds texture and looks pretty.
Equipment Needed
You don’t need a professional kitchen to make these pumpkin cheesecake bars. Here’s what I use every time:
- 9×13-inch baking pan — This is the sweet spot for these bars. You can use a metal or glass pan, but metal gives a slightly crisper crust. If you only have an 8×8 pan, the bars will be thicker—just increase the baking time by 5-10 minutes.
- Electric mixer — Handheld or stand mixer both work. You want the cream cheese to be perfectly smooth, and doing that by hand is a workout I don’t recommend.
- Mixing bowls — You’ll need at least two medium bowls. One for the crust ingredients, one for the cheesecake batter, and you can reuse one for the pumpkin layer.
- Food processor or zip-top bag with rolling pin — For crushing the gingersnaps. The food processor is faster, but the bag-and-rolling-pin method is great for releasing frustration. I’ve done both.
- Parchment paper — Line your pan with parchment paper, leaving some overhang on the sides. This makes lifting the bars out so much easier. Trust me on this one.
- Measuring cups and spoons — Standard kitchen equipment. Nothing fancy needed.
- Spatula — For spreading the batter evenly and scraping every last bit of cheesecake goodness out of the bowl.
I bought my 9×13 pan at a discount store for eight dollars, and it’s still going strong after five years. You don’t need expensive equipment. You just need what works.
Preparation Method
Let me walk you through this step by step. I’ve made these pumpkin cheesecake bars so many times that I could do it in my sleep—and honestly, I might have, given some of those early mornings with a baby.
- Preheat your oven to 350°F (175°C). Line a 9×13-inch baking pan with parchment paper, leaving an overhang on two opposite sides. This will help you lift the bars out later. I learned this the hard way after a particularly sticky situation with a spatula and a lot of cursing.
- Make the crust. In a medium bowl, combine 2 cups crushed gingersnap cookies and 1/4 cup granulated sugar. Pour in 6 tablespoons melted butter and stir until the mixture looks like wet sand. Every crumb should be coated. Press this mixture firmly into the bottom of your prepared pan. I use the bottom of a measuring cup to get it really compact. Bake for 10 minutes, then set aside to cool slightly while you make the fillings.
- Make the cheesecake layer. In a large bowl, beat 16 ounces softened cream cheese with 3/4 cup sugar until smooth and creamy. This takes about 2-3 minutes with an electric mixer. Scrape down the sides of the bowl halfway through. Add 2 room-temperature eggs, one at a time, beating well after each addition. Stir in 1 teaspoon vanilla extract. Set this mixture aside.
- Make the pumpkin layer. In another bowl, combine 1 can pumpkin puree, 1/2 cup sugar, 2 eggs, 1 teaspoon vanilla extract, 1 teaspoon pumpkin pie spice, 1/2 teaspoon cinnamon, and 1/4 teaspoon salt. Beat until smooth and well combined. The mixture should be a beautiful deep orange color—like fall in a bowl.
- Layer the fillings. Pour the cheesecake mixture over the pre-baked crust and spread it evenly. Then carefully spoon the pumpkin mixture over the top. Here’s the fun part: use a knife or spatula to gently swirl the two layers together. Don’t overdo it—you want distinct ribbons of cheesecake and pumpkin, not a muddy mess. About 5-6 swirls is perfect.
- Bake. Place the pan in the preheated oven and bake for 35-40 minutes. The edges should be set and slightly golden, but the center will still jiggle a little when you shake the pan. That’s okay—it will continue to set as it cools. If you overbake it, the cheesecake can crack. I’ve done that. It still tastes good, but it’s not as pretty.
- Cool completely. This is the hardest part, I know. Let the bars cool on a wire rack for about an hour at room temperature. Then transfer the pan to the refrigerator and chill for at least 4 hours, preferably overnight. The bars need this time to set properly. Cutting them too early results in a gooey mess. I speak from experience.
- Cut and serve. Once fully chilled, use the parchment paper overhang to lift the entire block of bars out of the pan. Place on a cutting board. Use a sharp knife to cut into squares—I usually do 12 large bars or 24 smaller ones. Wipe the knife clean between cuts for neat edges. Serve cold or at room temperature.
One thing I always tell people: don’t skip the chilling step. I know you’re excited, I know the house smells amazing, but these bars need that time in the fridge to become sliceable. The first time I made them, I tried to cut them after two hours and ended up with pumpkin cheesecake soup. Delicious soup, but not exactly presentable.
Cooking Tips & Techniques
After making these pumpkin cheesecake bars more times than I can count, I’ve picked up a few tricks that make the process smoother and the results better. Let me share what I’ve learned—including the mistakes I’ve made so you don’t have to repeat them.
Room temperature ingredients are non-negotiable. I know, I know, you’re busy and you forgot to take the cream cheese out. But cold cream cheese creates lumps that no amount of mixing will fix. Your filling will be grainy instead of silky smooth. If you’re in a hurry, cut the cream cheese into small cubes and let it sit for 20 minutes. For eggs, place them in a bowl of warm water for 5 minutes. It’s not perfect, but it helps.
Don’t overmix the cheesecake batter. Once you add the eggs, mix just until combined. Overmixing incorporates too much air, which can cause the cheesecake to puff up and then crack as it cools. You want it dense and creamy, not airy. I learned this after making a batch that looked like the surface of the moon.
Press the crust firmly. This is crucial. If the crust is too loose, it will crumble when you cut the bars. Use the bottom of a glass or measuring cup to really pack it down. I press until it feels solid and compact—like a cookie that’s been compressed into a pan. The pre-baking step also helps the crust hold together.
Use a water bath if you’re nervous about cracking. I don’t always do this, but if you want extra insurance against cracks, place your baking pan inside a larger pan and pour hot water into the outer pan until it comes about halfway up the sides. The steam creates a moist environment that prevents the cheesecake from drying out and cracking. I skip this step most of the time because I’m lazy, and honestly, the bars turn out fine.
Let the bars cool gradually. After baking, turn off the oven and crack the door open. Let the bars sit in the cooling oven for about 30 minutes before removing them. This gradual cooling prevents the sudden temperature change that causes cracks. Then move them to the counter to cool completely before refrigerating.
Timing is everything. I usually make these the day before I need them. The overnight chill in the fridge makes them slice beautifully and the flavors meld together. Plus, it’s one less thing to do on a busy day. Future you will thank present you for being organized.
Variations & Adaptations
One of the best things about this recipe is how flexible it is. I’ve tried several variations over the years, and they’ve all been delicious in their own way. Here are some ideas to make these pumpkin cheesecake bars your own.
Gluten-Free Version: Use gluten-free gingersnap cookies for the crust. There are several good brands available now—I’ve used Pamela’s and they work perfectly. The rest of the ingredients are naturally gluten-free, so this is an easy swap. My sister-in-law has celiac disease, and she devours these bars every Thanksgiving without any issues.
Dairy-Free Adaptation: Substitute the cream cheese with a dairy-free alternative like Kite Hill or Tofutti. Use vegan butter or coconut oil in the crust. The texture will be slightly different—a bit less creamy—but the flavor is still fantastic. I tested this version for a friend’s dairy-free birthday party, and nobody complained.
Lower Sugar Option: Reduce the sugar in both the cheesecake and pumpkin layers by about 1/4 cup each. The bars will be less sweet but still delicious, especially if you’re serving them with whipped cream or caramel sauce. I’ve done this for my mom, who’s watching her sugar intake, and she loved them.
Spice It Up: Add 1/4 teaspoon of ground ginger or cardamom to the pumpkin layer for extra warmth. Or use a pinch of cayenne pepper for a subtle heat that catches you by surprise. My husband loves this version—he says it makes the bars “interesting.” I think he just likes watching people’s faces when they get that unexpected kick.
Chocolate Twist: Melt 1/2 cup of dark chocolate chips and drizzle it over the crust before adding the cheesecake layer. Or swirl melted chocolate into the pumpkin layer before baking. Chocolate and pumpkin are a surprisingly good combination. I tried this on a whim one rainy afternoon and it was a happy accident.
Mini Version: Use a muffin tin lined with paper cups. Press the crust into the bottom of each cup, then divide the fillings evenly. Bake for about 18-20 minutes. These are perfect for parties or lunchboxes. My kids love finding these in their lunch—they think they’re getting away with something.
Serving & Storage Suggestions
These pumpkin cheesecake bars are versatile when it comes to serving. Here’s how I handle them from the kitchen to the table.
Serving Temperature: I prefer these bars cold, straight from the fridge. The texture is firmer and the flavors are more pronounced. But they’re also delicious at room temperature—just let them sit out for about 15 minutes before serving. My family is divided on this issue, so I usually serve half cold and half at room temperature. Everyone wins.
Presentation Ideas: Cut the bars into clean squares and arrange them on a platter. Add a dollop of whipped cream on each one, a drizzle of caramel sauce, and a sprinkle of crushed gingersnaps. For holidays, I sometimes dust them with a little cinnamon or nutmeg. They look beautiful on a dessert table.
What to Serve With Them: A cup of hot coffee or spiced tea is perfect alongside these bars. For a full dessert spread, pair them with apple crisp or a simple vanilla ice cream. I’ve also served them after a heavy meal—they’re rich but not too heavy, so they work as a satisfying finish.
Storage Instructions: Store the bars in an airtight container in the refrigerator for up to 5 days. Place a layer of parchment paper between stacked bars to prevent sticking. I use a glass container with a tight-fitting lid, and they stay fresh and delicious.
Freezing Instructions: These bars freeze beautifully. Cut them into individual squares and place them on a baking sheet in the freezer for about an hour. Once frozen solid, transfer them to a freezer-safe bag or container. They’ll keep for up to 3 months. To thaw, transfer to the refrigerator overnight or let sit at room temperature for about 30 minutes. I always keep a stash in my freezer for unexpected guests or late-night cravings.
Flavor Development: These bars actually taste better on day two or three. The flavors meld together and the texture becomes even creamier. So don’t worry about making them ahead—they’ll only improve. I’ve had people ask me what my “secret ingredient” is, and honestly, it’s just time.
Nutritional Information & Benefits
Let’s be real—these are dessert bars, not health food. But they do have some redeeming qualities, and I think it’s worth knowing what’s in them.
| Nutrient | Per Serving (1/12 of recipe) |
|---|---|
| Calories | 380 |
| Total Fat | 22g |
| Saturated Fat | 12g |
| Cholesterol | 105mg |
| Sodium | 320mg |
| Total Carbohydrates | 42g |
| Dietary Fiber | 2g |
| Sugars | 30g |
| Protein | 6g |
| Vitamin A | 120% DV |
| Calcium | 8% DV |
| Iron | 6% DV |
Health Highlights: Pumpkin is packed with vitamin A, which is great for eye health and immune function. It’s also a good source of fiber, which helps with digestion and keeps you feeling full. The cream cheese provides calcium for strong bones, though it also brings the fat content up. The gingersnaps add a bit of iron from the molasses.
Dietary Considerations: This recipe contains gluten (from the cookies), dairy (from the cream cheese and butter), and eggs. It’s not suitable for vegans or those with dairy or egg allergies without modifications. For a gluten-free version, use gluten-free gingersnaps. For a dairy-free version, use dairy-free cream cheese and vegan butter.
My Take: I don’t pretend these are health food. They’re a treat, and that’s okay. But knowing that there’s real pumpkin in there—with actual nutrients—makes me feel a little better about having a second bar. Everything in moderation, right? I’d rather enjoy a truly satisfying dessert than waste calories on something mediocre.
Conclusion
These pumpkin cheesecake bars with gingersnap crust have become my go-to fall dessert for a reason. They’re simple enough for a weeknight treat, impressive enough for a holiday gathering, and affordable enough to make on a regular basis. The combination of creamy cheesecake, spiced pumpkin, and crunchy, molasses-rich crust is something special.
I love that this recipe started as a panic-induced bake sale contribution and turned into a family favorite. It reminds me that sometimes the best things come from chaos. You don’t need fancy ingredients or hours of prep time to create something memorable. You just need a good recipe and a little bit of faith.
I hope you make these bars and love them as much as my family does. Don’t be afraid to customize them—swap the spices, try different toppings, make them your own. That’s what cooking is all about. And when someone asks for the recipe, tell them it was a happy accident. That’s the best kind of story.
Have you made these pumpkin cheesecake bars? I’d love to hear how they turned out. Drop a comment below and let me know what variations you tried. And if you share them on social media, tag me—I want to see your beautiful creations. Happy baking, friends!
Frequently Asked Questions
Can I use fresh pumpkin instead of canned?
Yes, you can use fresh pumpkin puree. Roast a small sugar pumpkin at 400°F until tender, then scoop out the flesh and blend until smooth. Just be aware that fresh pumpkin has more water content than canned, so you may need to drain it through a cheesecloth for about 30 minutes before using. I’ve done this, and it works, but canned is honestly more consistent and convenient.
Why did my cheesecake layer crack?
Cracks usually happen from overbaking or sudden temperature changes. Make sure you take the bars out while the center is still slightly jiggly. Also, let them cool gradually—don’t move them from a hot oven directly to a cold counter. Cracks don’t affect the taste at all, so don’t stress about it. You can always cover them with whipped cream or caramel sauce.
Can I make these bars without a mixer?
You can, but it takes some elbow grease. Make sure your cream cheese is very soft—leave it out for at least two hours. Use a wooden spoon and a lot of patience. The crust doesn’t need a mixer at all, so that’s easy. For the fillings, you can whisk by hand, but the texture won’t be as smooth. A hand mixer is worth the effort if you have one.
How do I get clean, neat slices?
Chill the bars completely—at least 4 hours, preferably overnight. Use a sharp knife and wipe it clean between each cut with a damp paper towel. Run the knife under hot water before cutting for even cleaner edges. I also recommend lifting the entire block out of the pan using the parchment paper and cutting on a flat cutting board.
Can I double this recipe for a crowd?
Absolutely. Double all the ingredients and use a half-sheet pan (about 13×18 inches). You’ll need to increase the baking time by about 10-15 minutes. Keep an eye on it—the edges should be set and the center should still have a slight jiggle. This is perfect for large gatherings or holiday parties.
Pin This Recipe!
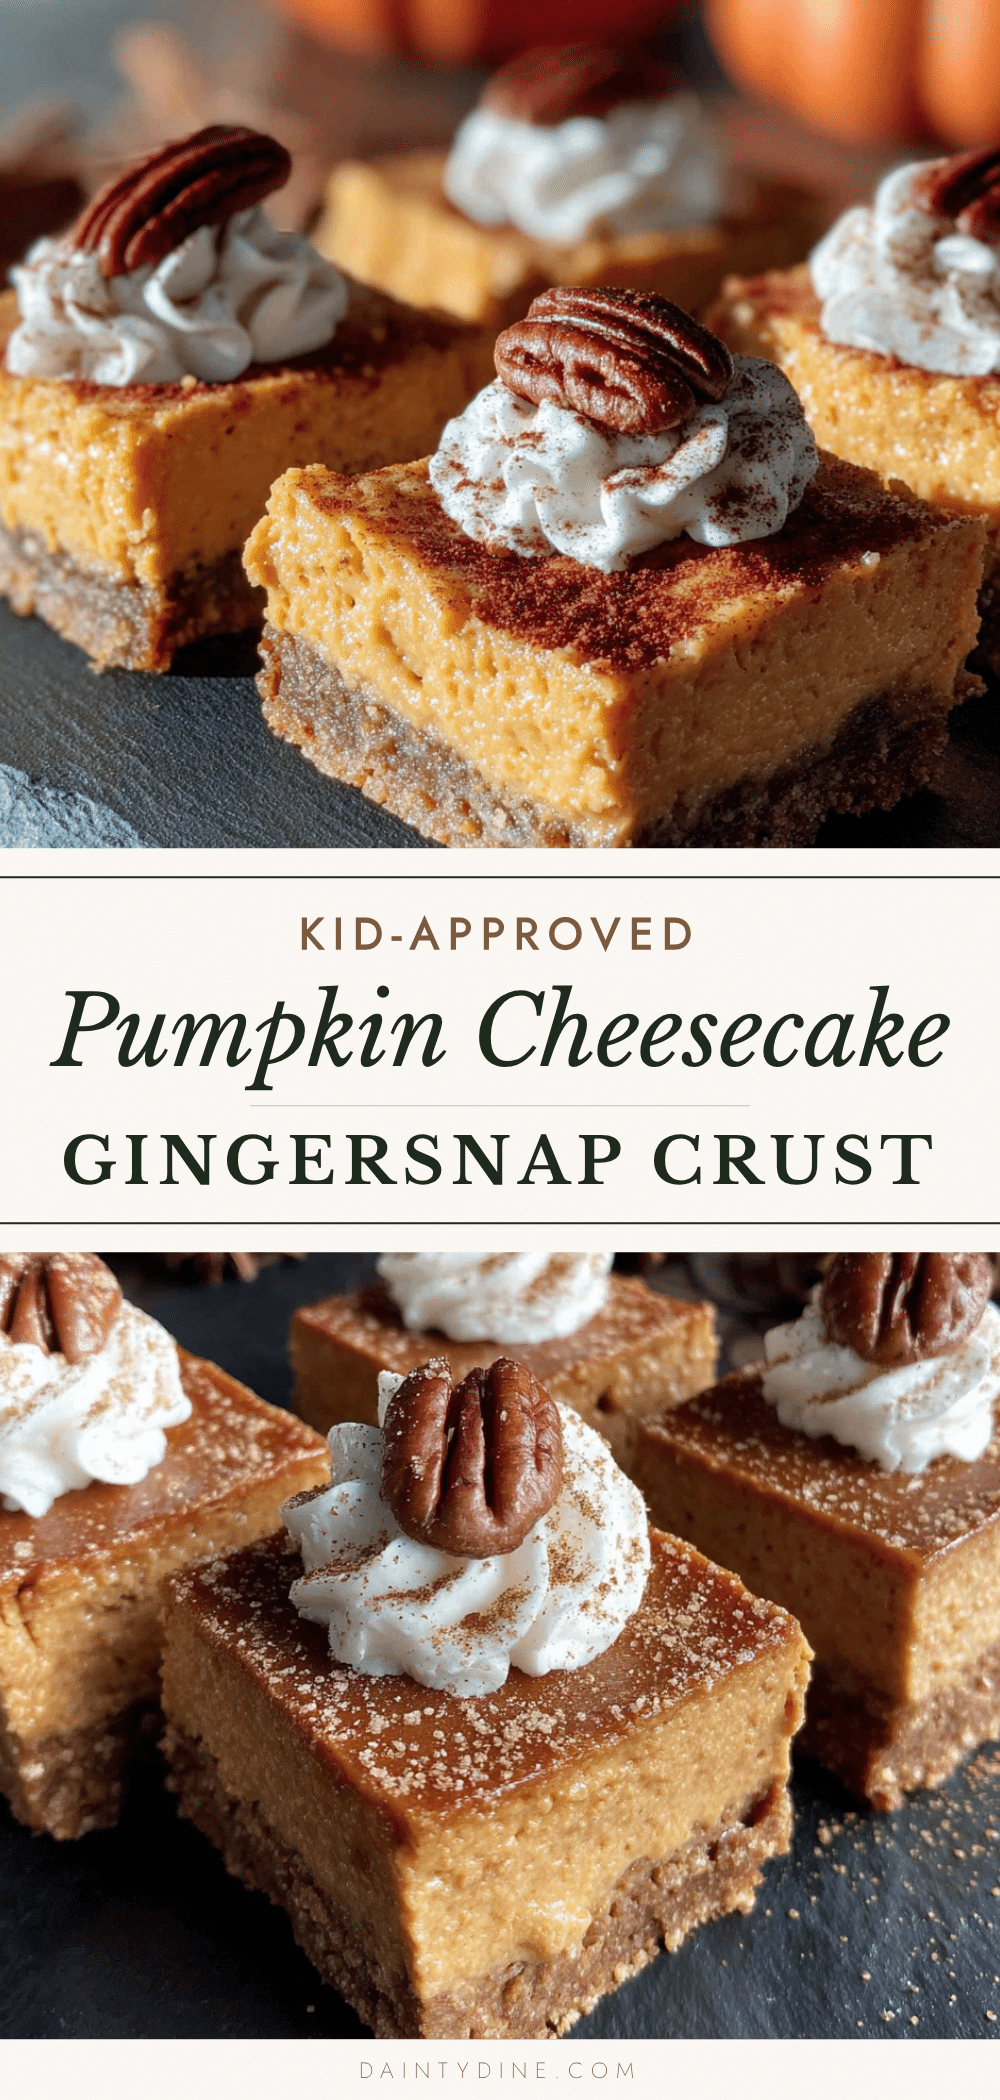
Perfect Pumpkin Cheesecake Bars with Gingersnap Crust
These pumpkin cheesecake bars feature a creamy pumpkin filling, a tangy cheesecake layer, and a crunchy, spicy gingersnap crust. They’re a crowd-pleasing fall dessert that’s simple to make and perfect for bake sales, potlucks, or holiday gatherings.
- Prep Time: 20 minutes
- Cook Time: 40 minutes
- Total Time: 5 hours (including chilling)
- Yield: 12 servings 1x
- Category: Dessert
- Cuisine: American
Ingredients
- 2 cups (about 200g) crushed gingersnap cookies
- 1/4 cup (50g) granulated sugar
- 6 tablespoons (85g) unsalted butter, melted
- 16 ounces (450g) cream cheese, softened
- 3/4 cup (150g) granulated sugar
- 2 large eggs, room temperature
- 1 teaspoon vanilla extract
- 1 can (15 ounces or 425g) pumpkin puree
- 1/2 cup (100g) granulated sugar
- 2 large eggs, room temperature
- 1 teaspoon vanilla extract
- 1 teaspoon pumpkin pie spice
- 1/2 teaspoon ground cinnamon
- 1/4 teaspoon salt
- Whipped cream (optional, for topping)
- Caramel drizzle (optional, for topping)
- Crushed gingersnaps (optional, for topping)
Instructions
- Preheat your oven to 350°F (175°C). Line a 9×13-inch baking pan with parchment paper, leaving an overhang on two opposite sides.
- Make the crust: In a medium bowl, combine 2 cups crushed gingersnap cookies and 1/4 cup granulated sugar. Pour in 6 tablespoons melted butter and stir until the mixture looks like wet sand. Press this mixture firmly into the bottom of your prepared pan. Bake for 10 minutes, then set aside to cool slightly.
- Make the cheesecake layer: In a large bowl, beat 16 ounces softened cream cheese with 3/4 cup sugar until smooth and creamy, about 2-3 minutes. Add 2 room-temperature eggs, one at a time, beating well after each addition. Stir in 1 teaspoon vanilla extract. Set aside.
- Make the pumpkin layer: In another bowl, combine 1 can pumpkin puree, 1/2 cup sugar, 2 eggs, 1 teaspoon vanilla extract, 1 teaspoon pumpkin pie spice, 1/2 teaspoon cinnamon, and 1/4 teaspoon salt. Beat until smooth and well combined.
- Layer the fillings: Pour the cheesecake mixture over the pre-baked crust and spread it evenly. Carefully spoon the pumpkin mixture over the top. Use a knife or spatula to gently swirl the two layers together with about 5-6 swirls.
- Bake: Place the pan in the preheated oven and bake for 35-40 minutes. The edges should be set and slightly golden, but the center will still jiggle a little when you shake the pan.
- Cool completely: Let the bars cool on a wire rack for about an hour at room temperature. Then transfer the pan to the refrigerator and chill for at least 4 hours, preferably overnight.
- Cut and serve: Once fully chilled, use the parchment paper overhang to lift the entire block of bars out of the pan. Place on a cutting board. Use a sharp knife to cut into squares. Serve cold or at room temperature.
Notes
Don’t skip the chilling step; the bars need at least 4 hours in the fridge to set properly. Room temperature ingredients are key for a smooth batter. For clean slices, chill completely and wipe the knife between cuts.
Nutrition
- Serving Size: 1 bar (1/12 of recip
- Calories: 380
- Sugar: 30
- Sodium: 320
- Fat: 22
- Saturated Fat: 12
- Carbohydrates: 42
- Fiber: 2
- Protein: 6
Keywords: pumpkin cheesecake bars, gingersnap crust, fall dessert, bake sale, pumpkin dessert, cheesecake bars


