Love this? Save it for later!
Share the inspiration with your friends
I wasn’t expecting gardening advice from my accountant, but there I was, knee-deep in marigolds last September, listening to Mr. Henderson describe exactly how to make a punch that would steal the show at any Halloween party. The man wears suspenders and drives a minivan—the least likely source of a crowd-pleasing party drink you could imagine. But as he wiped soil off his hands and told me about the “witches’ brew” his grandkids beg for every October, something clicked. He wasn’t talking about complicated mixology or fancy garnishes. He was talking about something simple, visually dramatic, and absolutely delicious. I mean, I almost laughed when he said the secret ingredient, but then I tried it. Honestly, I’ve never looked back.
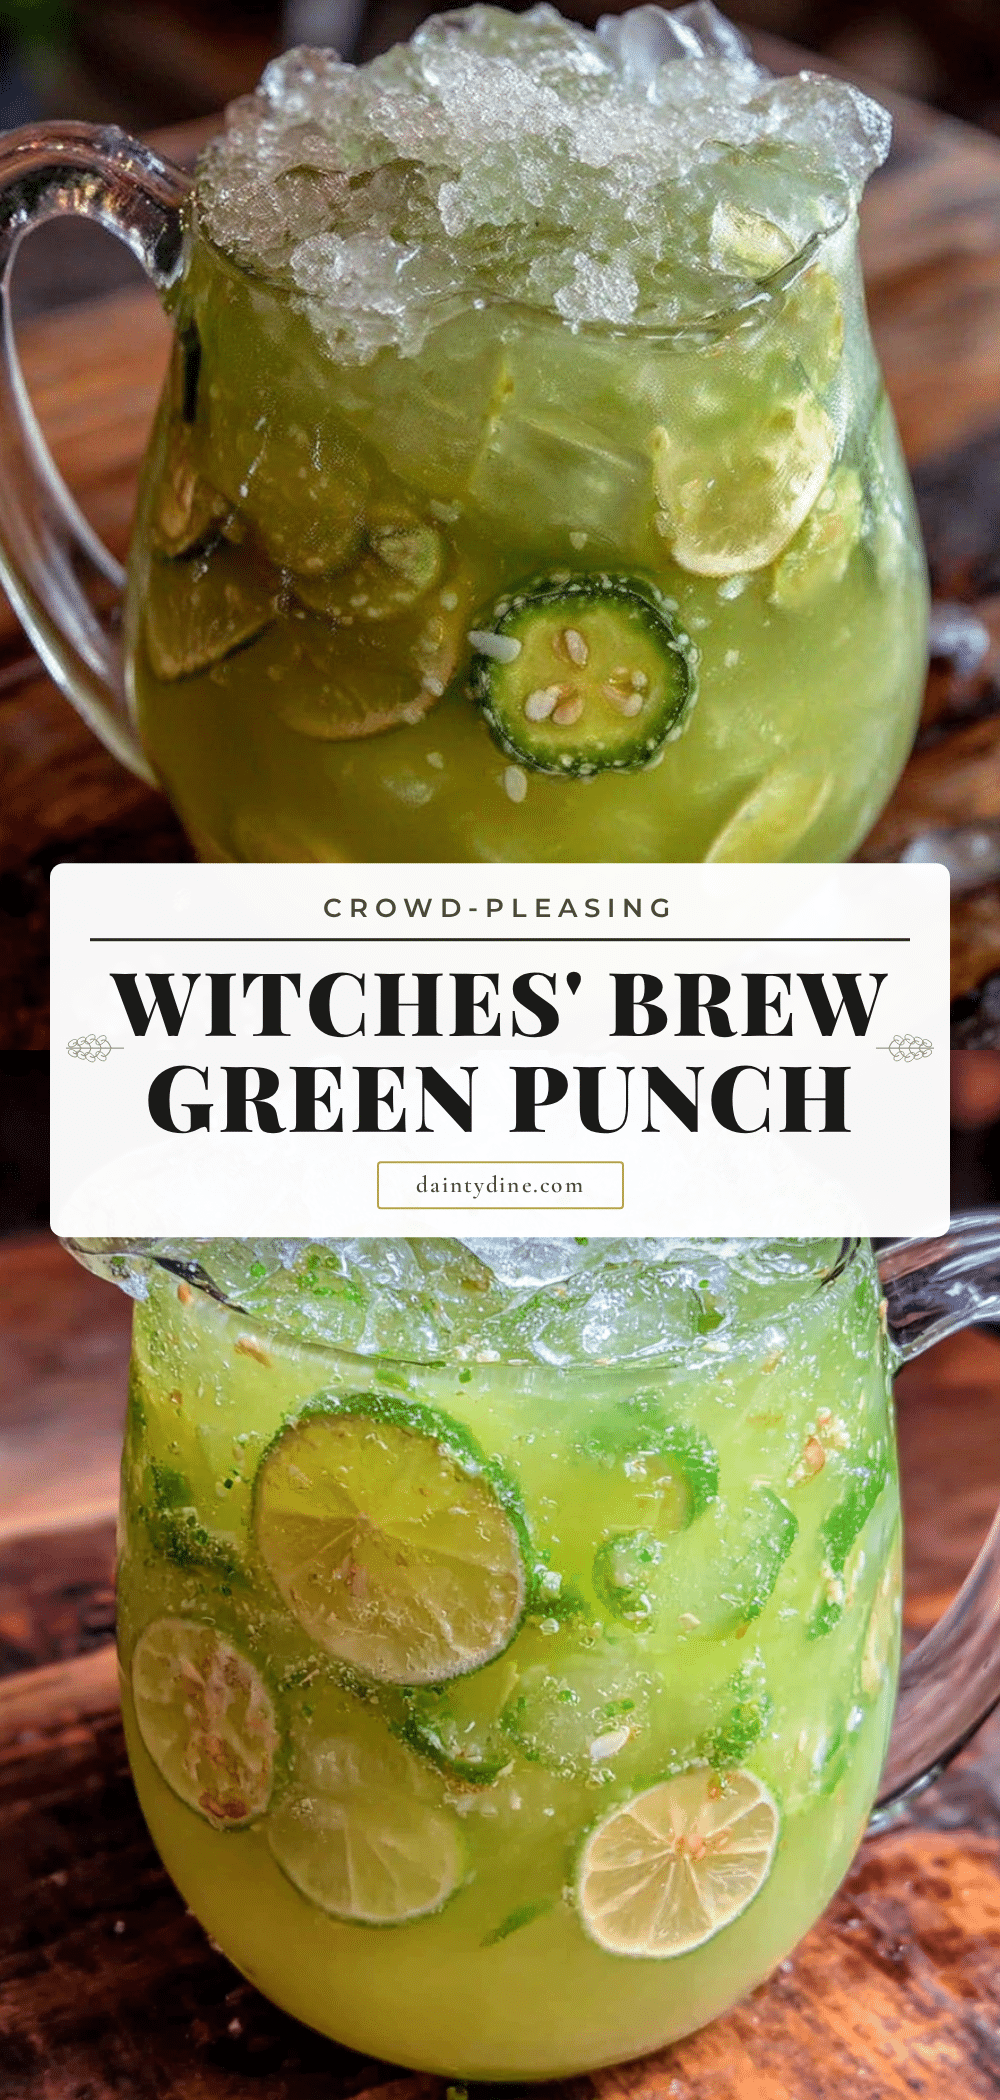
The thing about hosting a Halloween gathering is that you need a centerpiece drink. Something that looks like it bubbled up from a cauldron but tastes like something you’d actually want to sip. This witches’ brew green punch delivers on both fronts. It’s got that eerie, glowing green color that screams Halloween, but the flavor is a bright, citrusy, tropical blast that keeps people coming back for more. You know that feeling when you serve something and everyone asks for the recipe before the party’s even over? That’s this punch.
Maybe you’ve been there—scrolling through Pinterest at 11 PM, panicking about what to serve at your Halloween party, wondering if you can pull off something impressive without spending a fortune or slaving over a stove. Let me tell you, this is your answer. It takes about ten minutes to throw together, uses ingredients you can grab at any grocery store, and the presentation is pure theater. I’ve made it for potlucks, costume parties, and even my neighbor’s annual block party, and it never fails to get that delighted gasp when people see it for the first time. The best part? It scales up effortlessly. Need to serve twenty people? Double it. Need to serve fifty? Triple it. Mr. Henderson’s simple formula holds up no matter how much you make, and that’s the kind of recipe you hold onto.
Why You’ll Love This Recipe
This isn’t just another Halloween punch recipe you’ll find floating around the internet. I’ve tested this one at least a dozen times, tweaking ratios and trying different combinations, and I can tell you with confidence—this version is the one. Here’s why it works so well for hosting:
- Quick & Easy: Comes together in under 10 minutes, perfect for last-minute party prep or when you’re already juggling decorations and costumes.
- Simple Ingredients: No fancy grocery trips needed. You likely already have most of these in your kitchen or can grab them in one aisle at the store.
- Perfect for Halloween Gatherings: Great for costume parties, trunk-or-treat events, family dinners, or spooky movie nights with friends.
- Crowd-Pleaser: Always gets rave reviews from kids and adults alike. The flavor is universally loved—bright, sweet, and refreshing.
- Unbelievably Visual: The glowing green color and optional “spooky” add-ins make it a showstopper that people will photograph before they drink it.
- Make-Ahead Friendly: You can prep this hours before your guests arrive, which is a lifesaver when you’re hosting.
What makes this recipe different from the rest? It’s the balance. Most green punches are either too sweet, too artificial-tasting, or they separate into a watery mess after an hour. This one stays vibrant and delicious for the entire party. The trick is using a specific combination of citrus and tropical flavors that complement each other perfectly, plus a little something unexpected that keeps people guessing. I’ve had guests swear there’s pineapple in here (there isn’t), and others insist it must have some secret herb (nope). It’s just smart ingredient pairing that tastes like you put way more effort into it than you actually did.
This recipe isn’t just good—it is the kind that makes you close your eyes after the first sip. It’s Halloween fun reimagined—simpler, faster, but with the same spooky satisfaction. Perfect for impressing guests without stress, or turning a simple gathering into something memorable.
What Ingredients You Will Need
This recipe uses simple, everyday ingredients to deliver that iconic green color and crowd-pleasing flavor without any fuss. Most of these are pantry staples or easily found at your local grocery store.
- 1 (64 oz) bottle of lemon-lime soda (like Sprite or 7-Up) – This provides the base fizz and sweetness. I recommend using a name brand for the most consistent carbonation, but store brands work fine too. For a less sweet version, use a diet or zero-sugar option.
- 1 (64 oz) bottle of pineapple juice – This is the secret to that smooth, tropical flavor that balances the citrus. Look for a brand that’s 100% juice with no added sugar for the cleanest taste. I prefer Dole or Lakewood.
- 1 (12 oz) can of frozen limeade concentrate, thawed – This is Mr. Henderson’s magic ingredient. It adds intense lime flavor and that beautiful tartness that keeps the punch from being cloyingly sweet. Don’t skip this or substitute with bottled lime juice—the concentrate is key.
- 1 (4 oz) package of lime-flavored gelatin mix – This is what gives the punch its signature glowing green color and a subtle lime flavor boost. Yes, it sounds weird, but trust me on this. Use the regular sugar version, not sugar-free, for the best texture and color.
- Green food coloring (optional) – Depending on your gelatin brand, you might want a drop or two to deepen the color. I use gel-based food coloring for the most vibrant results.
- Ice – Lots of it. You’ll need enough to fill your punch bowl or dispenser. Consider making a block of ice or using large ice cubes so they melt slower and don’t water down the punch.
- For garnish (optional but recommended): Sliced limes, green apple slices, fresh mint sprigs, or gummy worms for a spooky touch.
- For a “smoky” effect (optional): Dry ice (food-grade only!) or a small block of dry ice for that bubbling cauldron look. Handle with extreme care and never let guests touch or ingest it.
Ingredient Selection Tips: When choosing your pineapple juice, look for a brand that’s not from concentrate if possible—the flavor is noticeably brighter. For the limeade, I’ve found that Minute Maid consistently delivers the best tartness. If you’re using this for a party with kids, you can reduce or omit the green food coloring since the gelatin already gives a nice green hue. For a completely natural version, you can try using matcha powder or spirulina for color, but honestly, the flavor changes significantly, and the gelatin method is just so much easier for a crowd.
Substitution Guidance: For a non-carbonated version, replace the lemon-lime soda with a combination of ginger ale and white grape juice. For a dairy-free option (though there’s no dairy in this), no substitutions needed—it’s naturally dairy-free. For a lower-sugar version, use diet lemon-lime soda and sugar-free lime gelatin, though the color won’t be quite as vibrant.
Equipment Needed
You don’t need anything fancy for this punch, which is part of its charm. Here’s what you’ll want to have on hand:
- Large punch bowl or drink dispenser – A clear glass or plastic one is best so everyone can see that eerie green color. I use a vintage glass punch bowl I found at a thrift store, but a plastic one from the party supply store works just as well.
- Large pitcher or mixing container – For mixing the gelatin with hot water before adding it to the punch. A 2-quart glass measuring cup works great.
- Whisk – To ensure the gelatin dissolves completely without lumps.
- Measuring cups and spoons – For precise amounts, especially with the limeade concentrate.
- Ladle – For serving, unless you’re using a dispenser with a spigot.
- Small bowl – For dissolving the gelatin if you’re doing it separately.
- Knife and cutting board – For slicing garnishes.
Budget-Friendly Options: If you don’t own a punch bowl, a clean plastic Halloween cauldron from the dollar store works perfectly and adds to the theme. I’ve also used a large glass salad bowl in a pinch. For the dispenser, a simple plastic drink dispenser with a spigot costs around $10 and makes serving so much easier, especially for larger parties.
Maintenance Tip: If you’re using dry ice, never put it directly into a glass punch bowl without a heat-safe container underneath. The extreme cold can crack glass. Use a metal or plastic bowl, or place the dry ice in a separate container that sits inside the punch bowl.
Preparation Method
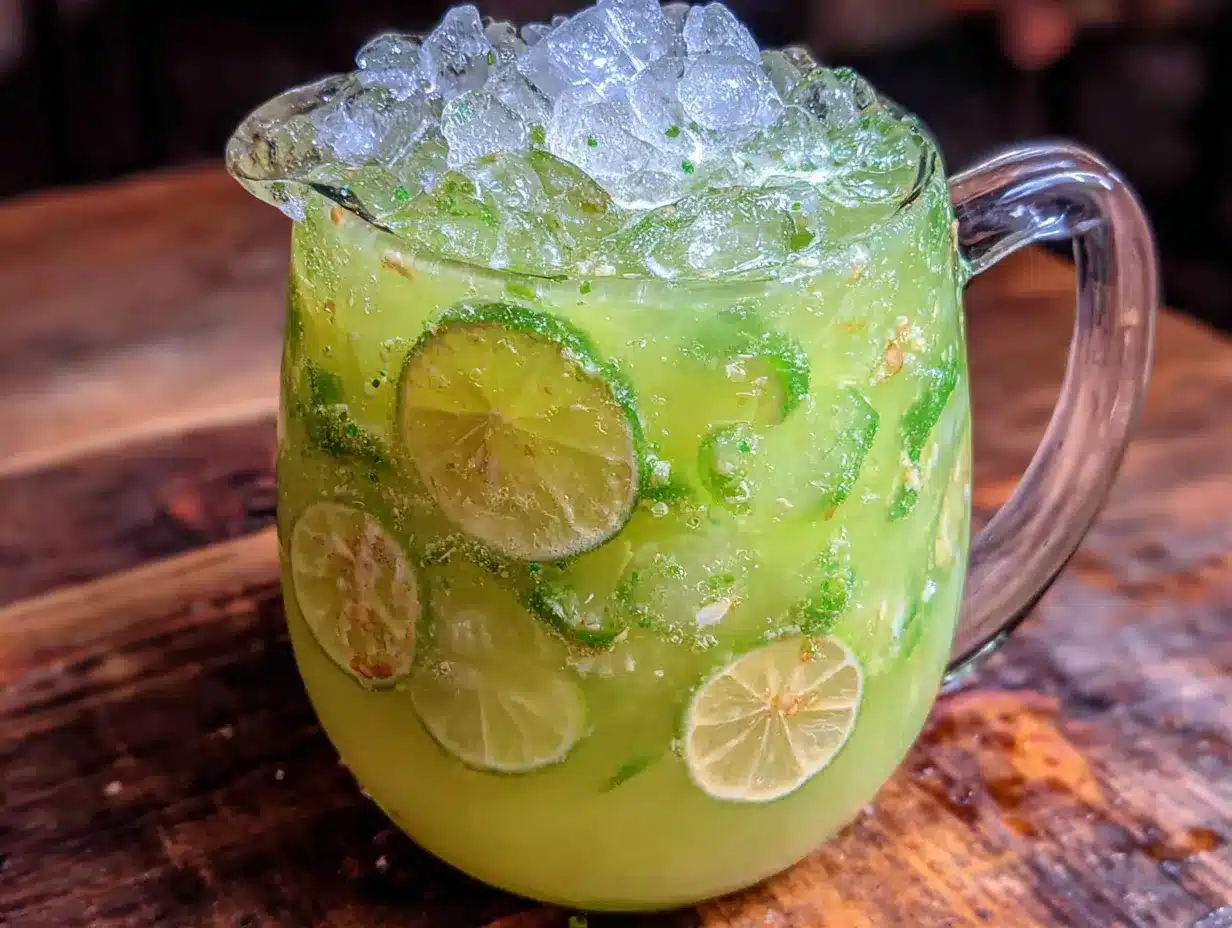
This comes together so fast, you’ll wonder why you ever stressed about party drinks. Here’s the step-by-step process:
- Dissolve the gelatin. In a small bowl or large measuring cup, empty the packet of lime gelatin. Add 1 cup of boiling water and whisk until the gelatin is completely dissolved. There should be no granules left at the bottom. Set it aside to cool for about 5 minutes. (I once skipped this step and dumped the powder straight into the cold punch—it clumped into weird green blobs. Learn from my mistake!)
- Combine the liquid base. In your large pitcher or mixing container, combine the thawed limeade concentrate and the pineapple juice. Stir well to combine. The mixture should be a pale, murky yellow at this point—don’t worry, the green is coming.
- Add the gelatin mixture. Slowly pour the cooled gelatin mixture into the juice mixture while stirring constantly. You’ll see the color start to shift immediately. It should turn a vibrant, almost neon green. If it looks more like swamp water than witches’ brew, add a drop or two of green food coloring. I usually add one drop of gel food coloring just to deepen it.
- Chill the base. Cover the pitcher and refrigerate for at least 2 hours, or up to 24 hours. This step is crucial—the punch needs to be thoroughly chilled so the ice doesn’t melt too fast when you add it later. I like to make this base the morning of the party.
- Prepare your punch bowl. When you’re ready to serve, fill your punch bowl or dispenser about halfway with ice. If you’re feeling fancy, you can make an ice ring with lime slices and gummy worms frozen inside—it looks amazing and keeps the punch cold without diluting it as much.
- Combine and serve. Pour the chilled base over the ice. Then slowly add the lemon-lime soda. Stir gently to combine—you want to keep as much carbonation as possible. The soda will lighten the color slightly, giving it that perfect eerie green hue.
- Add garnishes. Float lime slices, green apple slices, or fresh mint on top. If you’re using gummy worms, drape a few over the edge of the bowl or dispenser for a creepy touch.
- Optional dry ice effect. If you’re using dry ice, place it in a separate container (like a small metal bowl) that sits inside your punch bowl. Never put it directly in the punch where guests might accidentally scoop it up. The fog effect is incredible and really sells the “witches’ brew” theme.
Sensory Cues: When you add the gelatin mixture, you should see the liquid transform from a cloudy yellow to a bright, almost electric green. The smell at this point is intensely citrusy with that unmistakable limeade tartness. When you add the soda, you’ll hear that satisfying fizz and see bubbles rising through the green liquid. The finished punch should look like something from a fantasy movie—glowing, bubbly, and slightly mysterious.
Time Estimates: Active prep time is about 10 minutes. Chilling time is 2 hours minimum (overnight is better). Total time from start to serving: about 2 hours and 10 minutes.
Cooking Tips & Techniques
I’ve made this punch for more Halloween parties than I can count, and I’ve learned a few things the hard way. Here are my best tips for getting it right every time:
The ice situation is more important than you think. Regular ice cubes melt fast and water down your punch within an hour. For parties, I make a large ice block using a bread loaf pan or a clean plastic container. It melts much slower and keeps the punch cold without turning it into green-tinted water. You can also freeze some of the punch base into ice cubes—that way, even when they melt, they’re just adding more flavor instead of diluting it.
Don’t skip the gelatin step. I know it sounds weird. I had the same reaction when Mr. Henderson told me. But the gelatin does two things: it gives the punch that incredible neon color that looks so dramatic in a punch bowl, and it adds a tiny bit of body to the liquid. It’s not thick like Jell-O, but it has a slightly fuller mouthfeel than plain juice. Just make sure you dissolve it completely in hot water first. I learned that lesson the messy way.
Scale wisely. This recipe makes about 16 cups (1 gallon), which serves about 16-20 people with 6-8 ounce servings. For larger parties, I make two batches separately rather than trying to double everything in one container. It’s easier to mix and you get better carbonation that way. For smaller gatherings, you can halve the recipe easily—just use half the gelatin packet and half the limeade.
Timing is everything. Add the soda right before serving. If you add it too early, the carbonation will fizzle out and you’ll have flat, sad punch. I mix everything else ahead of time and keep the soda in the fridge until the last minute. When guests start arriving, I pour the base over ice and add the soda right there in front of them—it creates a little moment of theater that gets everyone excited.
The color can vary. Different brands of lime gelatin produce slightly different shades of green. If yours looks more yellow-green than neon, add a drop of blue food coloring along with the green to get that perfect eerie shade. I’ve also found that adding a splash of blue sports drink (like a tiny bit of blue Gatorade) can deepen the color without affecting the flavor much.
Variations & Adaptations
One of the best things about this punch is how customizable it is. Here are some variations I’ve tried and loved:
Spiked Adult Version: For an adults-only gathering, add 1-2 cups of vodka or white rum to the base before chilling. The citrus flavors mask the alcohol beautifully, so be careful—this version goes down dangerously easy. I’ve also tried it with coconut rum, and the tropical flavor combination is fantastic. Just label it clearly so kids don’t accidentally grab it.
Dairy-Free “Witch’s Milk” Version: This is already dairy-free, but for a creamier variation that looks even more magical, stir in a can of chilled coconut milk right before serving. The coconut milk creates swirls of white that look like ghostly tendrils in the green punch. It’s stunning and adds a subtle coconut flavor that pairs beautifully with the pineapple.
Non-Carbonated Version: If you’re serving this at a school event or somewhere where fizzy drinks aren’t practical, replace the lemon-lime soda with an equal amount of white grape juice or apple juice. The flavor will be sweeter and less bright, but it’s still delicious. Add an extra tablespoon of lime juice to compensate for the lost tartness.
Berry “Blood” Swirl: For an extra spooky effect, make a separate batch of red punch (cranberry juice, ginger ale, and raspberry gelatin) and pour it into the green punch in a thin stream. The red will sink and create a creepy “blood at the bottom of the cauldron” effect. I did this for a Halloween party last year and people couldn’t stop talking about it.
Freeze Pop Ice Cubes: Freeze green and orange colored juice or sports drink into ice cube trays. These colorful cubes look festive and add flavor as they melt instead of watering down the punch. For a really fun touch, freeze gummy worms inside the ice cubes—they look trapped and creepy.
Serving & Storage Suggestions
This punch is all about presentation, so let’s talk about how to serve it for maximum impact.
Serving Temperature: Serve this punch very cold—almost icy. The colder it is, the more refreshing it tastes and the slower the ice melts. I keep the base in the refrigerator until the last possible minute and use plenty of ice in the serving bowl. If you’re using a dispenser with a spigot, add ice to the dispenser itself, not just to individual cups.
Presentation Ideas: A clear punch bowl is non-negotiable—you want people to see that green color. Surround the bowl with battery-operated tealights or string lights for a magical glow. If you’re using dry ice, place the whole setup on a dark tablecloth with some fake cobwebs and plastic spiders for a truly spooky display. I’ve also used a small fog machine behind the punch bowl for an extra layer of atmosphere.
What to Serve Alongside: This punch pairs beautifully with savory snacks like popcorn balls, pretzel sticks (they look like witches’ fingers!), cheese platters with orange cheddar and red grapes, and spicy buffalo wings. The sweetness of the punch balances out salty and spicy foods perfectly. For a full Halloween menu, I serve it alongside ghost-shaped pizzas and mummy hot dogs.
Storage Instructions: You can store the base (without the soda) in a sealed container in the refrigerator for up to 3 days. Do not add the soda until you’re ready to serve. Once the soda is added and the punch has been sitting out, it’s best to discard any leftovers after 2 hours at room temperature. If you have leftover base, you can use it as a marinade for chicken or pork—the citrus and pineapple make an excellent tenderizer.
Reheating (Not Applicable): This is a cold drink, so no reheating needed! But if your punch gets too warm during the party, you can drop in a few frozen juice cubes (made from the base) to cool it back down without diluting it.
Flavor Development: Interestingly, the flavors meld and improve after about an hour in the refrigerator. The lime and pineapple become more harmonious, and the gelatin fully incorporates into the liquid. I actually prefer the punch after it’s been sitting for a while, but the carbonation does fade, so it’s a trade-off.
Nutritional Information & Benefits
Let’s be real—this is a party drink, not a health elixir. But here’s what you should know:
Estimated Nutritional Values (per 8-ounce serving): Approximately 180 calories, 0g fat, 45g carbohydrates, 44g sugar, 0g protein, 0g fiber. These values will vary based on the specific brands you use and whether you add alcohol or other mix-ins.
Health Benefits: The pineapple juice provides a good dose of vitamin C and manganese, which support immune function and bone health. Lime juice adds additional vitamin C and antioxidants. The hydration from the liquid base is certainly better than no fluids at all, though the sugar content means it should be enjoyed in moderation.
Dietary Considerations: This punch is naturally dairy-free, egg-free, nut-free, and soy-free, making it suitable for many common dietary restrictions. It is not gluten-free if you’re sensitive to trace amounts (though none of the ingredients contain gluten, cross-contamination is possible with some brands). For a vegan version, ensure your gelatin is plant-based—most standard gelatin is made from animal products, but there are agar-agar versions available.
Potential Allergens: None of the common allergens (dairy, eggs, peanuts, tree nuts, fish, shellfish, soy, wheat) are present in the ingredients, but always check labels if you’re serving someone with severe allergies. Some brands of food coloring may contain corn-derived ingredients.
Personal Wellness Perspective: I’m not a nutritionist, but I believe in balance. This punch is a treat for special occasions, not an everyday drink. I serve it alongside plenty of water and savory snacks, and I make sure there are non-sugary options available for guests who prefer them. The joy of sharing something fun and festive with friends and family is part of a healthy life too.
Conclusion
Look, I know there are a million Halloween punch recipes out there. But this one—the one I got from my accountant while he was planting petunias—is the one I keep coming back to. It’s simple enough that you can throw it together in ten minutes flat, yet impressive enough that your guests will think you spent hours on it. The color is absolutely spot-on for a witches’ brew, the flavor is bright and refreshing without being cloying, and it scales up effortlessly for any size gathering.
What I love most about this recipe is how it brings people together. There’s something about that glowing green punch that makes everyone smile. Kids love it, adults love it, and even people who claim they don’t like sweet drinks end up going back for seconds. It’s become a tradition in my house, and I hope it becomes one in yours too.
So go ahead—make this for your Halloween party, your trunk-or-treat event, or your spooky movie night. Customize it with the variations I’ve shared, or come up with your own twist. And when your guests ask for the recipe (and they will), tell them it came from the most unexpected source. That’s half the fun.
I’d love to hear how yours turns out! Drop a comment below and let me know what variations you tried, or tag me in your photos on social media. Happy Halloween, and cheers to good food, good friends, and a little bit of magic!
Frequently Asked Questions
Can I make this punch ahead of time?
Absolutely! You can prepare the base (pineapple juice, limeade concentrate, and dissolved gelatin) up to 3 days in advance and store it in the refrigerator. Just don’t add the lemon-lime soda or ice until you’re ready to serve. The carbonation will go flat if you add it too early.
How do I get that bright green color without artificial dye?
The lime gelatin does most of the work for color. If you want to avoid artificial dyes entirely, you can use a natural green food coloring made from spirulina or matcha powder mixed with a little water. Keep in mind that matcha will add a slight earthy flavor, while spirulina is more neutral. The color won’t be as neon, but it will still be a nice green.
Is this punch safe for kids?
Yes, this recipe as written is completely kid-friendly. The only concern would be if you add dry ice for the smoky effect—never let children handle dry ice, and make sure it’s in a separate container where they can’t accidentally scoop it into their cups. If you’re serving the spiked adult version, be sure to label it clearly and keep it separate from the kid-friendly batch.
Can I use fresh lime juice instead of limeade concentrate?
You can, but the flavor won’t be quite the same. Limeade concentrate has a specific sweetness and intensity that balances the pineapple juice perfectly. If you use fresh lime juice, you’ll need to add extra sugar (about 1/2 cup) to compensate for the lost sweetness. I’ve tried it both ways, and the concentrate version is noticeably better.
How do I keep the punch cold without it getting watery?
The best trick is to make ice cubes or an ice ring from the punch base itself. Freeze some of the prepared base (without the soda) in ice cube trays or a loaf pan. When you add these to the punch, they keep it cold without diluting the flavor. Another option is to use a large block of ice, which melts much slower than small cubes.
Pin This Recipe!
Best Witches Brew Green Punch – Easy Halloween Recipe
A simple, visually dramatic, and delicious Halloween punch with a glowing green color and bright, citrusy, tropical flavor. Perfect for parties, it comes together in under 10 minutes and is a guaranteed crowd-pleaser.
- Prep Time: 10 minutes
- Cook Time: 0 minutes
- Total Time: 2 hours 10 minutes (includes 2 hours chilling)
- Yield: 16-20 servings 1x
- Category: Beverage
- Cuisine: American
Ingredients
- 1 (64 oz) bottle of lemon-lime soda (like Sprite or 7-Up)
- 1 (64 oz) bottle of pineapple juice (100% juice, no added sugar)
- 1 (12 oz) can of frozen limeade concentrate, thawed
- 1 (4 oz) package of lime-flavored gelatin mix
- Green food coloring (optional, gel-based recommended)
- Ice (enough to fill punch bowl or dispenser)
- For garnish (optional): sliced limes, green apple slices, fresh mint sprigs, or gummy worms
- For a ‘smoky’ effect (optional): food-grade dry ice
Instructions
- Dissolve the gelatin: In a small bowl or large measuring cup, empty the packet of lime gelatin. Add 1 cup of boiling water and whisk until completely dissolved. Set aside to cool for about 5 minutes.
- Combine the liquid base: In a large pitcher or mixing container, combine the thawed limeade concentrate and the pineapple juice. Stir well.
- Add the gelatin mixture: Slowly pour the cooled gelatin mixture into the juice mixture while stirring constantly. Add a drop or two of green food coloring if desired to deepen the color.
- Chill the base: Cover the pitcher and refrigerate for at least 2 hours, or up to 24 hours.
- Prepare your punch bowl: When ready to serve, fill your punch bowl or dispenser about halfway with ice.
- Combine and serve: Pour the chilled base over the ice. Slowly add the lemon-lime soda. Stir gently to combine.
- Add garnishes: Float lime slices, green apple slices, or fresh mint on top. Drape gummy worms over the edge for a creepy touch.
- Optional dry ice effect: Place dry ice in a separate container that sits inside the punch bowl. Never put it directly in the punch.
Notes
For a less sweet version, use diet or zero-sugar lemon-lime soda. For a non-carbonated version, replace soda with white grape juice or apple juice. For an adult version, add 1-2 cups of vodka or white rum. The base can be stored in the refrigerator for up to 3 days. Add soda just before serving to maintain carbonation.
Nutrition
- Serving Size: 8 ounces
- Calories: 180
- Sugar: 44
- Sodium: 25
- Carbohydrates: 45
Keywords: Halloween punch, green punch, witches brew, party drink, easy Halloween recipe, spooky drink, citrus punch, tropical punch