Love this? Save it for later!
Share the inspiration with your friends
My grandmother claimed to hate pumpkin for sixty-three years. Sixty-three years of avoiding pumpkin pie at Thanksgiving, wrinkling her nose at pumpkin bread, and pushing pumpkin muffins to the edge of the plate. Then one October afternoon, I caught her sneaking a second cookie off the cooling rack. She froze mid-reach, caught red-handed with crumbs on her sweater. “These don’t taste like pumpkin,” she muttered defensively. And that’s when I knew I’d stumbled onto something special.
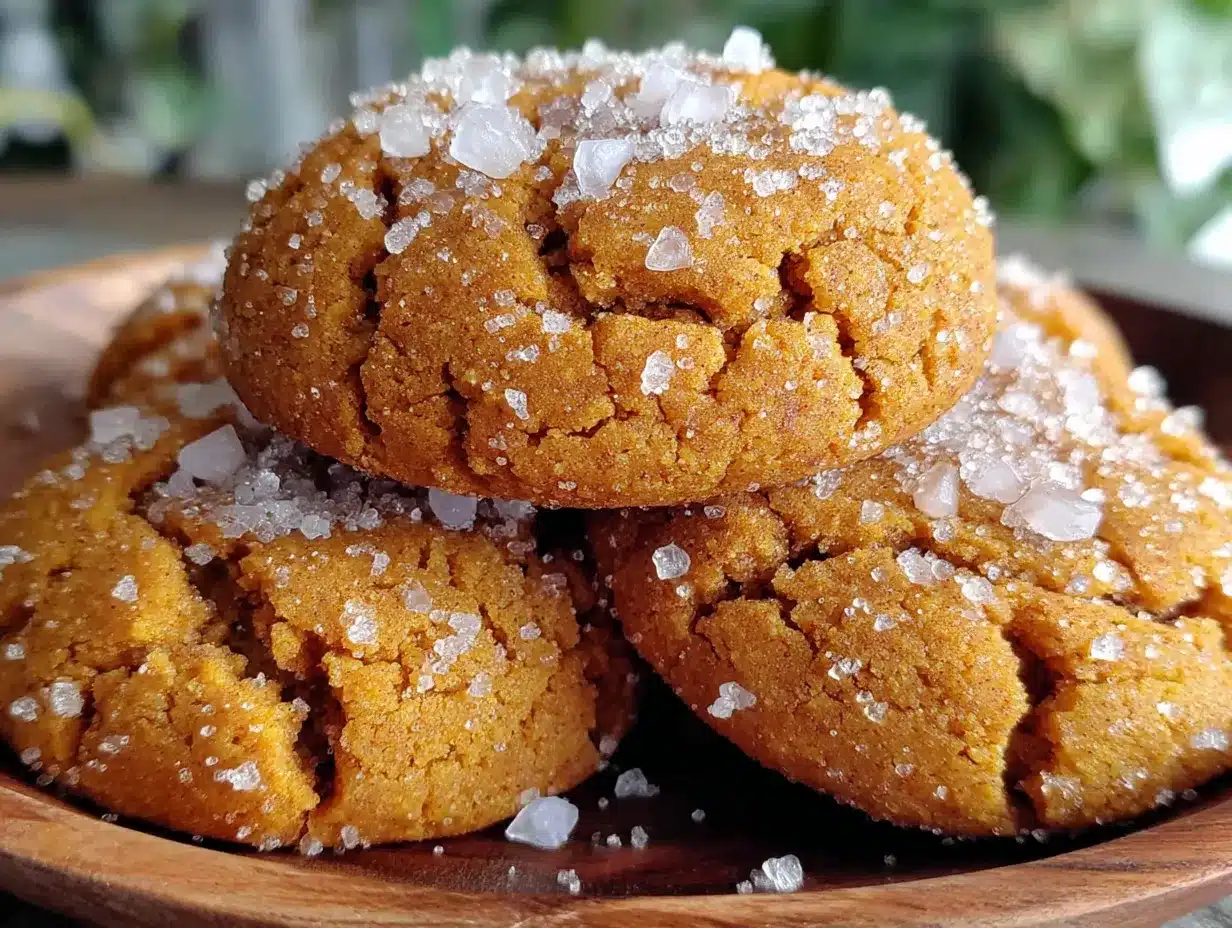
These Cozy Small-Batch Pumpkin Snickerdoodle Cookies aren’t trying to be a pumpkin pie in cookie form. They’re something quieter—a little cinnamon, a little nutmeg, a little something warm that makes you pause mid-bite. I developed this recipe on a Tuesday when the rain wouldn’t stop and I needed something to fill the kitchen with that particular smell. You know the one. The smell that says everything’s going to be okay, even if the laundry’s piled up and you forgot to defrost dinner.
The batter comes together in one bowl, which honestly is the only way I cook when I’m feeling lazy. And let me tell you, there’s something deeply satisfying about rolling those little dough balls in cinnamon sugar, watching them puff up in the oven, and knowing you didn’t have to commit to three dozen cookies. Just eight. Eight perfect cookies, warm and slightly puffed, with that signature snickerdoodle crackle on top.
Maybe you’ve been there too—wanting something homemade but not wanting to deal with a mountain of leftovers. Or maybe you’re skeptical about pumpkin in cookies, like my grandmother was. Either way, these little guys have a way of changing minds. I keep making them because they remind me that sometimes the best recipes come from not trying too hard. Just butter, sugar, pumpkin, and a little patience.
Why You’ll Love This Recipe
Let me tell you why these cookies have earned a permanent spot in my fall baking rotation. I’ve tested this recipe at least seven times—once with too much pumpkin (disaster, they turned into puddles), once with not enough cinnamon (boring), and once at 3 AM when I couldn’t sleep and needed something to do with my hands. This version is the one that works every single time.
- Quick & Easy: From start to finish, you’re looking at about 25 minutes. That’s less time than it takes to decide what to order for delivery.
- Simple Ingredients: You probably have everything except maybe the pumpkin puree. No weird specialty flours or obscure spices.
- Perfect for Cozy Evenings: When the weather turns cold and you want something warm without the commitment of a full batch, these are your answer.
- Small-Batch Magic: Eight cookies. That’s it. No Tupperware of stale cookies staring at you from the counter a week later.
- Crowd-Pleaser: My grandmother ate three. Three! A woman who “hates pumpkin.” Need I say more?
What makes these different from every other pumpkin cookie recipe out there? It’s the texture. Most pumpkin cookies turn out cakey and soft—which is fine, but these have that snickerdoodle chewiness on the edges with a tender center. The trick is using just enough pumpkin for flavor and moisture without turning them into little cakes. Plus that cinnamon-sugar coating creates a crunchy shell that contrasts beautifully with the soft inside.
These aren’t just cookies. They’re the kind of thing that makes you close your eyes after the first bite. They’re comfort food reimagined—faster, smaller-batch, but with the same soul-soothing satisfaction. Perfect for impressing yourself on a quiet night in.
What Ingredients You Will Need
This recipe keeps things simple. You don’t need to hunt down specialty stores or spend a fortune. Just good, basic ingredients that work together beautifully.
For the Cookie Dough:
- Unsalted butter, 1/4 cup (4 tablespoons), softened to room temperature. I use Land O’Lakes for consistent results. Let it sit out for about 30 minutes—don’t microwave it unless you absolutely have to, and if you do, go in 5-second bursts.
- Granulated sugar, 1/2 cup. Regular white sugar works perfectly here. It helps create that signature crackly top.
- Pumpkin puree, 3 tablespoons. Not pumpkin pie filling! Make sure you grab 100% pure pumpkin. Libby’s is my go-to. I always open a small can and use the rest for smoothies or oatmeal.
- Large egg yolk, 1. Just the yolk, not the white. The yolk adds richness and helps with that soft texture. Save the white for scrambled eggs tomorrow morning.
- Vanilla extract, 1/2 teaspoon. Pure vanilla if you have it, imitation works fine too. I’ve used both and honestly can’t tell the difference in these cookies.
- All-purpose flour, 1 cup plus 2 tablespoons. Spoon and level it—don’t scoop directly from the bag or you’ll get too much flour and dry cookies.
- Cream of tartar, 1/2 teaspoon. This is the secret ingredient that gives snickerdoodles their signature tangy flavor and chewy texture. Don’t skip it!
- Baking soda, 1/4 teaspoon. Helps the cookies puff up just enough.
- Salt, 1/4 teaspoon. Balances the sweetness and brings out the pumpkin flavor.
- Ground cinnamon, 1/2 teaspoon. Warm and cozy, the backbone of this recipe.
- Ground nutmeg, 1/4 teaspoon. Freshly grated if you’re feeling fancy, pre-ground works great too.
- Ground ginger, 1/8 teaspoon. Just a whisper. You won’t taste it directly, but you’ll miss it if it’s not there.
- Ground cloves, 1/8 teaspoon. Same as the ginger—a tiny amount that rounds everything out.
For the Cinnamon-Sugar Coating:
- Granulated sugar, 2 tablespoons
- Ground cinnamon, 1 teaspoon
That’s it. Eight simple ingredients for the dough, two for the coating. If you’re gluten-free, you can substitute a 1:1 gluten-free flour blend—I’ve had good luck with Bob’s Red Mill. For dairy-free, use vegan butter sticks, not the spreadable kind from a tub.
Equipment Needed
You don’t need fancy equipment for these cookies. Here’s what I use:
- Mixing bowls—one medium bowl for the wet ingredients, one small bowl for the dry ingredients. I use glass bowls because they don’t hold onto smells.
- Hand mixer or stand mixer—a hand mixer works perfectly. You can also do this by hand with a wooden spoon if you need a little arm workout.
- Measuring cups and spoons—get a set of dry measuring cups for the flour and sugar. Liquid measuring cups for the pumpkin.
- Baking sheet—a standard half-sheet pan works great. I like the ones with a light finish because dark pans can burn the bottoms.
- Parchment paper or silicone baking mat—parchment paper is cheaper and easier to clean up. Silicone mats work too but sometimes cookies spread a little more.
- Cooling rack—wire rack for letting the cookies cool properly. If you leave them on the hot pan, they’ll keep cooking.
- Spatula—for transferring cookies to the cooling rack. A thin metal spatula works best.
- Small bowl—for mixing the cinnamon-sugar coating.
- Cookie scoop—optional but helpful for getting even-sized cookies. I use a 1.5-tablespoon scoop.
If you don’t have a cookie scoop, just use two spoons—one to scoop, one to scrape. That’s how my grandmother did it, and her cookies were always perfect.
Preparation Method
Alright, let’s make some cookies. Put on some music, pour yourself a cup of tea, and let’s get to it.
- Preheat your oven to 350°F (175°C). Line a baking sheet with parchment paper. This is important—don’t skip the parchment unless you want to scrub cookie residue off your pan later.
- Cream the butter and sugar together. In a medium bowl, beat the softened butter and 1/2 cup granulated sugar together until light and fluffy. This takes about 2 minutes with a hand mixer on medium speed. You’re looking for a pale, creamy texture. Scrape down the sides of the bowl halfway through.
- Add the wet ingredients. Beat in the pumpkin puree, egg yolk, and vanilla extract until combined. The mixture might look a little separated at this point—that’s totally normal. Don’t panic. It will come together when you add the flour.
- Whisk the dry ingredients together. In a separate small bowl, whisk together the flour, cream of tartar, baking soda, salt, cinnamon, nutmeg, ginger, and cloves. Make sure everything is evenly distributed. I like to use a fork for this because it breaks up any clumps.
- Combine wet and dry. Gradually add the dry ingredients to the wet mixture, mixing on low speed or stirring with a wooden spoon until just combined. Stop as soon as you don’t see any more streaks of flour. Overmixing will make the cookies tough. The dough will be soft and slightly sticky—that’s exactly what you want.
- Make the cinnamon-sugar coating. In a small bowl, mix together the 2 tablespoons of sugar and 1 teaspoon of cinnamon. Set aside.
- Shape the cookies. Using a cookie scoop or two spoons, portion out about 1.5 tablespoons of dough per cookie. Roll each portion into a ball between your palms. The dough is soft, so don’t squeeze too hard. Just gentle rolling motions.
- Coat the dough balls. Roll each dough ball in the cinnamon-sugar mixture until fully coated. Place them on the prepared baking sheet, spacing them about 2 inches apart. You should get 8 cookies total.
- Bake. Bake for 10-12 minutes. At 10 minutes, the cookies will look puffy and slightly underdone in the center. That’s perfect. The edges should be set and just starting to turn golden. If you like crisper cookies, go to 12 minutes, but watch them carefully—they go from perfect to overdone fast.
- Cool on the pan. Let the cookies cool on the baking sheet for 5 minutes. This is crucial. They’re very soft when they come out of the oven and need time to set up. After 5 minutes, transfer them to a wire rack to cool completely. Or eat one warm. I won’t tell.
A few things to watch for: If your dough feels too sticky to roll, pop it in the fridge for 10 minutes. If your cookies spread too much, your butter was probably too soft. If they’re too puffy and cakey, you might have used too much flour. Every oven runs a little different, so check at 10 minutes and adjust from there.
Cooking Tips & Techniques
I’ve made plenty of mistakes with these cookies so you don’t have to. Here’s what I’ve learned the hard way.
Don’t overmix the dough. I know I said this already, but it’s worth repeating. The more you mix, the more gluten develops, and the tougher your cookies get. Mix until the flour disappears, then stop. A few streaks are better than tough cookies.
Chill the dough if needed. The first time I made these, I used butter that was too warm, and the dough was practically soup. I popped it in the fridge for 20 minutes, and it rolled perfectly. If your kitchen is warm or your butter got away from you, chilling is your friend.
Use a light-colored baking sheet. Dark pans absorb more heat and can burn the bottoms of your cookies before the centers are done. If you only have dark pans, reduce the oven temperature by 25°F and check a minute or two earlier.
Rotate the pan halfway through. Halfway through baking, give the pan a quarter turn. Ovens have hot spots, and this helps everything bake evenly. I learned this after burning one batch on the left side while the right side was still pale.
Let them cool properly. I know it’s tempting to grab a cookie right out of the oven, but those 5 minutes on the pan are non-negotiable. The cookies are fragile when hot and need time to set their structure. I once tried to move one too early and ended up with a mangled blob. Lesson learned.
Measure flour correctly. Spoon the flour into your measuring cup and level it off with a knife. If you scoop directly from the bag, you can pack in up to 25% more flour than the recipe calls for. That’s the difference between soft cookies and dry, crumbly ones.
Variations & Adaptations
One of the best things about this recipe is how adaptable it is. Here are some variations I’ve tried and loved.
Gluten-Free Version: Substitute the all-purpose flour with a 1:1 gluten-free baking flour. I’ve used Bob’s Red Mill and King Arthur Measure for Measure with great results. The texture is slightly more delicate, so handle the dough gently. Add an extra tablespoon of flour if the dough seems too sticky.
Dairy-Free Version: Use vegan butter sticks. I like Miyoko’s or Country Crock Plant Butter. Avoid the spreadable vegan butters in tubs—they have too much water and your cookies will spread into flat puddles. Also check that your cream of tartar is dairy-free (it usually is).
Extra Pumpkin Spice: If you’re a pumpkin spice fanatic, increase the cinnamon to 1 teaspoon and add 1/4 teaspoon of allspice. You can also use pumpkin pie spice instead of the individual spices—use 1 teaspoon total.
Chocolate Chip Addition: Fold in 1/3 cup of mini chocolate chips after mixing the dough. The chocolate pairs beautifully with the pumpkin and cinnamon. I use dark chocolate chips because I like the contrast, but semi-sweet works too.
Maple Glaze Variation: Whisk together 1/2 cup powdered sugar, 1 tablespoon maple syrup, and 1-2 teaspoons milk until smooth. Drizzle over cooled cookies. It adds a lovely sweetness and makes them look fancy for company.
Vegan Version: Use vegan butter and replace the egg yolk with 1 tablespoon of aquafaba (the liquid from a can of chickpeas) mixed with 1/2 teaspoon of cornstarch. The texture won’t be quite as tender, but it’s surprisingly close. I tested this for a friend who’s vegan and she couldn’t tell the difference.
Spiced Sugar Coating: Add a pinch of nutmeg or ginger to the cinnamon-sugar coating for extra warmth. I sometimes do this in December when I want them to taste extra festive.
Serving & Storage Suggestions
These cookies are best enjoyed warm, about 10 minutes after they come out of the oven. The edges are still slightly crisp, the center is soft, and the cinnamon-sugar coating is at its crunchiest. Pair them with a cold glass of milk, a warm chai latte, or a cup of spiced apple cider for the ultimate cozy experience.
For a dessert spread, arrange them on a rustic wooden board with apple slices, a small bowl of honey, and maybe some sharp cheddar cheese. The sweet-salty combo is surprisingly good—don’t knock it till you try it.
Storage: Keep leftover cookies in an airtight container at room temperature for up to 3 days. Place a piece of bread in the container to keep them soft—the cookies will absorb moisture from the bread, and the bread will get stale. It’s an old trick that works beautifully.
Freezing: You can freeze the baked cookies for up to 3 months. Wrap them individually in plastic wrap, then place in a freezer bag. Thaw at room temperature for about 30 minutes. To refresh them, pop them in a 300°F oven for 3-4 minutes.
Freezing the Dough: This is my preferred method. Roll the dough into balls, coat in cinnamon sugar, and place on a parchment-lined baking sheet. Freeze until solid, then transfer to a freezer bag. Bake from frozen at 350°F, adding 2-3 minutes to the bake time. Fresh cookies anytime you want them.
Reheating: Microwave a single cookie for 10-15 seconds for that just-baked softness. For multiple cookies, warm them in a 300°F oven for 5 minutes. The cinnamon-sugar coating will crisp back up nicely.
Flavors actually develop over time with these cookies. Day two, the pumpkin and spice flavors meld together more deeply. They won’t be as crisp, but the flavor is arguably better. If you can resist eating them all on day one, you’re stronger than I am.
Nutritional Information & Benefits
Here’s the honest truth: these are cookies, not health food. But they’re made with real ingredients, and there’s something to be said for that. One cookie (based on 8 servings) contains approximately:
- Calories: 185
- Fat: 7g
- Carbohydrates: 28g
- Sugar: 16g
- Protein: 2g
- Fiber: 1g
Pumpkin puree adds a small amount of vitamin A and fiber, which is more than most cookies can claim. The butter provides vitamin A and healthy fats. And honestly, there’s something to be said for the mental health benefits of taking 25 minutes to make something warm and delicious for yourself.
These cookies are vegetarian and can be made gluten-free and dairy-free with the substitutions I mentioned. They contain dairy (butter) and eggs (egg yolk), so they’re not vegan as written. If you have allergies, please check your specific ingredients—some brands of cream of tartar may contain traces of other allergens.
My personal perspective? Life is short. Eat the cookie. Just maybe don’t eat all eight in one sitting. Or do. I’m not here to judge.
Conclusion
These Cozy Small-Batch Pumpkin Snickerdoodle Cookies are proof that you don’t need a complicated recipe or a dozen ingredients to make something truly special. They’re the kind of cookies that fill your kitchen with warmth, your home with that unmistakable fall smell, and your belly with exactly what it needed.
I love this recipe because it meets me where I am. Some days that’s a stressed-out person who needs 25 minutes of quiet baking therapy. Other days it’s someone who just wants a couple cookies without committing to a full batch. Either way, these cookies deliver.
I encourage you to make them your own. Add chocolate chips if that’s your thing. Double the cinnamon if you’re feeling bold. Drizzle them with maple glaze when you want to impress someone. The recipe is a starting point, not a rulebook.
I’d love to hear how they turn out for you. Leave a comment below and tell me about your experience—did you make any changes? Did you catch someone sneaking one who claimed to hate pumpkin? Share this recipe with a friend who needs a little cozy in their life. And most importantly, enjoy every single bite.
Happy baking, friends.
Frequently Asked Questions
Can I use pumpkin pie filling instead of pumpkin puree?
No, please don’t. Pumpkin pie filling has added sugar and spices, and it will throw off the balance of this recipe. Stick with 100% pure pumpkin puree. Your cookies will thank you.
Why do my cookies look puffy and not spreading?
This usually means there’s too much flour in the dough. Make sure you’re spooning and leveling your flour rather than scooping directly from the bag. Also check that your butter was properly softened—too cold and the cookies won’t spread properly.
Can I double this recipe?
Absolutely. This recipe doubles beautifully. Just use a whole egg instead of two yolks if you’re doubling. The white adds a bit of structure that helps with the larger batch.
My cookies turned out dry. What went wrong?
Most likely overbaking or too much flour. Check your oven temperature with an oven thermometer—many run hot. Also make sure you’re measuring flour correctly and not overmixing the dough. Try pulling them out a minute earlier next time.
Can I make these without cream of tartar?
You can substitute 1/2 teaspoon of lemon juice or white vinegar for the cream of tartar. The cream of tartar gives snickerdoodles their distinctive tangy flavor and chewy texture, but the acid in lemon juice will help activate the baking soda similarly. The cookies won’t taste exactly the same, but they’ll still be good.
Pin This Recipe!
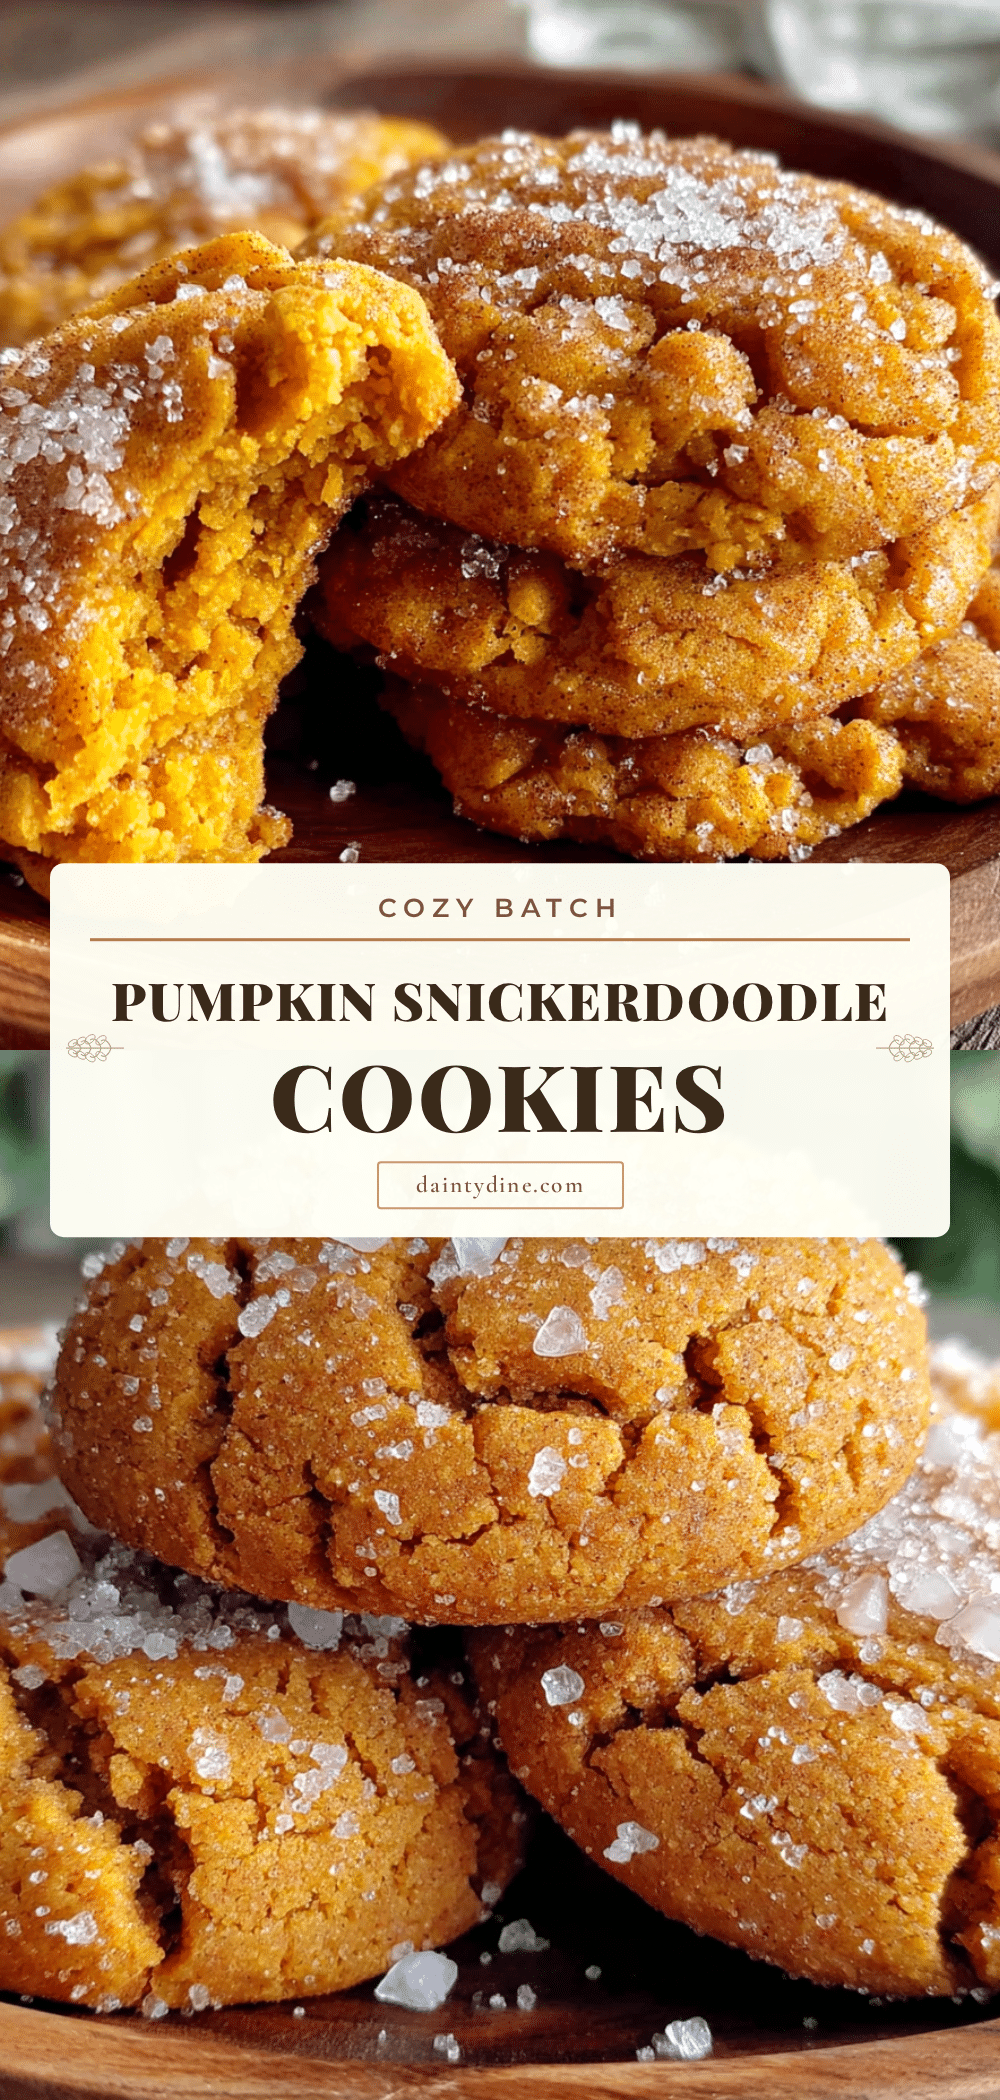
Cozy Small-Batch Pumpkin Snickerdoodle Cookies
These soft and chewy pumpkin snickerdoodle cookies are made in a small batch of eight, with warm spices and a cinnamon-sugar coating. Perfect for a cozy fall evening when you want something homemade without a mountain of leftovers.
- Prep Time: 15 minutes
- Cook Time: 10-12 minutes
- Total Time: 25 minutes
- Yield: 8 cookies 1x
- Category: Dessert
- Cuisine: American
Ingredients
- 1/4 cup (4 tablespoons) unsalted butter, softened to room temperature
- 1/2 cup granulated sugar
- 3 tablespoons pumpkin puree (not pumpkin pie filling)
- 1 large egg yolk
- 1/2 teaspoon vanilla extract
- 1 cup plus 2 tablespoons all-purpose flour, spooned and leveled
- 1/2 teaspoon cream of tartar
- 1/4 teaspoon baking soda
- 1/4 teaspoon salt
- 1/2 teaspoon ground cinnamon
- 1/4 teaspoon ground nutmeg
- 1/8 teaspoon ground ginger
- 1/8 teaspoon ground cloves
- 2 tablespoons granulated sugar (for coating)
- 1 teaspoon ground cinnamon (for coating)
Instructions
- Preheat your oven to 350°F (175°C). Line a baking sheet with parchment paper.
- In a medium bowl, beat the softened butter and 1/2 cup granulated sugar together until light and fluffy, about 2 minutes with a hand mixer on medium speed. Scrape down the sides of the bowl halfway through.
- Beat in the pumpkin puree, egg yolk, and vanilla extract until combined. The mixture may look slightly separated; that’s normal.
- In a separate small bowl, whisk together the flour, cream of tartar, baking soda, salt, cinnamon, nutmeg, ginger, and cloves until evenly distributed.
- Gradually add the dry ingredients to the wet mixture, mixing on low speed or stirring with a wooden spoon until just combined. Do not overmix. The dough will be soft and slightly sticky.
- In a small bowl, mix together the 2 tablespoons of sugar and 1 teaspoon of cinnamon for the coating.
- Using a cookie scoop or two spoons, portion out about 1.5 tablespoons of dough per cookie. Roll each portion into a ball between your palms.
- Roll each dough ball in the cinnamon-sugar mixture until fully coated. Place them on the prepared baking sheet, spacing them about 2 inches apart. You should get 8 cookies total.
- Bake for 10-12 minutes. At 10 minutes, the cookies will look puffy and slightly underdone in the center. The edges should be set and just starting to turn golden. For crisper cookies, bake up to 12 minutes.
- Let the cookies cool on the baking sheet for 5 minutes. This is crucial for them to set. After 5 minutes, transfer them to a wire rack to cool completely.
Notes
If the dough is too sticky to roll, chill it in the refrigerator for 10 minutes. Use a light-colored baking sheet to prevent burning the bottoms. Rotate the pan halfway through baking for even results. For best texture, do not overmix the dough. Store leftovers in an airtight container at room temperature for up to 3 days; place a piece of bread in the container to keep them soft. Freeze baked cookies for up to 3 months or freeze unbaked dough balls for fresh cookies anytime.
Nutrition
- Serving Size: 1 cookie
- Calories: 185
- Sugar: 16
- Sodium: 120
- Fat: 7
- Saturated Fat: 4
- Carbohydrates: 28
- Fiber: 1
- Protein: 2
Keywords: pumpkin snickerdoodle cookies, small batch cookies, pumpkin cookies, snickerdoodle recipe, fall cookies, easy pumpkin cookies


