Love this? Save it for later!
Share the inspiration with your friends
It was 11:45 PM on a rainy Thursday, and the craving for something warm, sweet, and deeply comforting hit me with the force of a physical blow. I didn’t have the luxury of time to brown butter properly, or so I thought, but I had three overripe bananas that were begging to be used and a stick of butter sitting in its wrapper like a challenge. I mean, honestly, who am I to argue with fruit that’s turning black? The kitchen was quiet, just the hum of the refrigerator and the sound of rain tapping against the window, which usually signals a night of minimal effort cooking. But this wasn’t minimal effort; this was an opportunity to make magic in the dark.
I usually stick to the standard creaming method for my banana bread, but late at night, you get these weird ideas that wouldn’t survive the daylight scrutiny. What if I just melted the butter until it smelled like nuts? It sounded risky, maybe even a bit messy, but I was already halfway there. I poured the butter into my smallest saucepan and watched it foam and spit, listening for that specific sizzle that tells you the milk solids are caramelizing. It’s a sound that’s almost hypnotic when you’re alone in the kitchen at midnight.
I didn’t have a fancy stand mixer, nor did I have the energy to wash a dozen bowls. So I grabbed the one large mixing bowl I hadn’t washed yet from lunch prep. It had a small chip on the rim, but it held up fine. I dumped the bananas in, added the sugars, and then poured in that golden, nutty brown butter. The steam rose up and hit my face, smelling like a bakery that closed hours ago. I whisked it all together, one bowl, one mess, one perfect batter.
I know that feeling when you’re too tired to care about perfection, but you want the result to be perfect anyway. That’s what this one-bowl browned butter banana bread became. It wasn’t just a snack; it was a vindication of my poor life choices. The bread came out of the oven with a crust that crackled softly as it cooled, and the inside was moist enough to make me close my eyes. I ate a slice straight from the pan, still warm, and realized that sometimes the best recipes are born from exhaustion and improvisation. This is the one I keep making, even on normal days, because it’s easier, richer, and infinitely more satisfying than anything I had before.
Why You’ll Love This One-Bowl Browned Butter Banana Bread
Let’s be real for a second. Most banana bread recipes feel like a lot of work. You’re whisking eggs, creaming butter and sugar separately, folding in dry ingredients, and then washing a sink full of bowls. I get it. Life is busy, and you just want a slice of bread that tastes like a hug. This recipe changes the game by using browned butter, which adds a deep, nutty complexity that regular melted butter just can’t match. It’s not just banana bread; it’s banana bread with a soul. The browning process creates those toasty notes that make you wonder where you’ve tasted it before, like in a fancy French patisserie.
Here is why this version is going to become your new go-to:
* **Quick & Easy**: You only need one bowl to mix the entire batter. No electric mixer required, no separate pans for melting butter. It comes together in about 15 minutes of prep time, which is perfect for those chaotic mornings or late-night emergencies.
* **Simple Ingredients**: You probably have everything in your kitchen right now. Bananas, butter, sugar, eggs, flour, baking soda, and salt. No fancy grocery trips or obscure ingredients that sit in your pantry for years.
* **Perfect for Meal Prep**: This bread keeps well in the fridge for up to a week, making it an ideal breakfast option for busy weekdays. Slice it up, wrap it, and you’re set.
* **Crowd-Pleaser**: Whether you serve it to family, friends, or your cat (don’t actually feed it to your cat, but you know what I mean), it always gets rave reviews. The texture is dense yet tender, and the flavor is bold without being overwhelming.
* **Unbelievably Delicious**: The contrast between the crispy, caramelized edges and the soft, moist center is next-level comfort food. It’s the kind of bread that makes you pause and appreciate the simple things in life.
What makes this recipe different from the rest is the technique of browning the butter. Most people skip this step because it takes extra effort, but it’s worth every second. The Maillard reaction that occurs when butter browns creates hundreds of new flavor compounds that add depth and richness. It’s a small tweak that makes a massive difference in the final product. This isn’t just another banana bread recipe; it’s the best version because it balances ease with gourmet flavor. It’s comfort food reimagined—faster, simpler, but with the same soul-soothing satisfaction. Perfect for impressing guests without stress, or turning a simple Tuesday dinner into something memorable.
What Ingredients You Will Need
This recipe uses simple, wholesome ingredients to deliver bold flavor and satisfying texture without the fuss. The key here is quality over quantity. Since there are so few components, each one plays a critical role in the final outcome. You want bananas that are truly overripe, as their sweetness and moisture level are vital for the texture. The butter needs to be unsalted so you can control the sodium content, and the flour should be all-purpose for that classic tender crumb.
Here is what you’ll need to gather before you start:
* **Overripe Bananas**: 3 medium-large bananas, peeled and mashed. Look for bananas with black spots on the peel. The darker they are, the sweeter and more flavorful they will be. (adds natural sweetness and moisture)
* **Unsalted Butter**: ½ cup (113g) unsalted butter. You need enough to create that nutty brown butter flavor. I recommend using a high-quality European-style butter if you can find it, as it has a richer taste. (creates the nutty base)
* **Granulated Sugar**: ¾ cup (150g) granulated white sugar. This provides structure and helps create the crispy top. (adds sweetness and crunch)
* **Brown Sugar**: ½ cup (100g) packed light brown sugar. This adds a hint of molasses flavor and keeps the bread moist. (adds moisture and depth)
* **Large Eggs**: 2 large eggs, room temperature. Room temperature eggs emulsify better into the batter, creating a smoother mixture. (binds the ingredients)
* **Vanilla Extract**: 1 teaspoon pure vanilla extract. Don’t skimp on this; it enhances the banana flavor. (adds aromatic warmth)
* **All-Purpose Flour**: 1 ½ cups (190g) all-purpose flour. This is the standard flour for most baking and provides the right amount of gluten for structure. (provides structure)
* **Baking Soda**: 1 teaspoon baking soda. This is the leavening agent that helps the bread rise. Make sure it’s not old, or it won’t work properly. (helps the bread rise)
* **Salt**: ½ teaspoon kosher salt. Salt is crucial for balancing the sweetness and enhancing the other flavors. (balances sweetness)
* **Optional Add-ins**: ½ cup chocolate chips or chopped walnuts. If you want to add some texture, fold these in at the end. (adds crunch and extra flavor)
For the best texture, I personally prefer using a digital scale to measure my flour, as scooping can lead to packing too much in. However, if you don’t have a scale, fluff the flour with a spoon before scooping and level it off with a knife. For the bananas, if yours aren’t quite black enough, you can speed up the process by baking them on a sheet pan at 300°F (150°C) for 15-20 minutes until the skins turn completely black. In summer, you might find bananas ripen faster, so keep an eye on them. If you need a dairy-free option, you can swap the butter for a high-quality plant-based butter that browns well, though the flavor will be slightly different.
Equipment Needed
You don’t need a fancy kitchen to make this bread. In fact, the beauty of this recipe is how little equipment you actually need. Here is what you’ll have on hand:
* **Medium Saucepan**: A small to medium-sized saucepan with a heavy bottom is ideal for browning the butter. It allows you to watch the color change closely without burning. If your saucepan is too large, the butter will spread out too thin and might burn faster.
* **Large Mixing Bowl**: A bowl large enough to hold all the wet and dry ingredients comfortably. A glass or ceramic bowl works well, but a sturdy plastic one is fine too. Just make sure it’s clean and dry.
* **Whisk**: A standard wire whisk is perfect for combining the wet ingredients and incorporating the flour without overmixing. Avoid using a spoon, as it won’t mix as evenly.
* **Rubber Spatula**: Essential for scraping down the sides of the bowl and folding in any optional add-ins. It also helps get every bit of batter into the loaf pan.
* **Loaf Pan**: A standard 9×5-inch loaf pan. Non-stick pans are great for easy release, but if you’re using a metal or glass pan, you’ll need to grease it well or line it with parchment paper.
* **Parchment Paper**: Highly recommended for lining the loaf pan. It ensures the bread doesn’t stick and makes cleanup a breeze. You can also use it to lift the bread out of the pan once it’s cooled.
I’ve tried using muffin tins for this recipe, and while they work for individual portions, the browning effect is more pronounced in a loaf pan. If you don’t have a loaf pan, a square baking dish can work, but you’ll need to adjust the baking time. For budget-friendly options, a simple metal loaf pan from a discount store works just as well as expensive ceramic ones. Just remember to check your saucepan for scratches, as burnt bits can stick to damaged surfaces and ruin the flavor of your butter.
Preparation Method
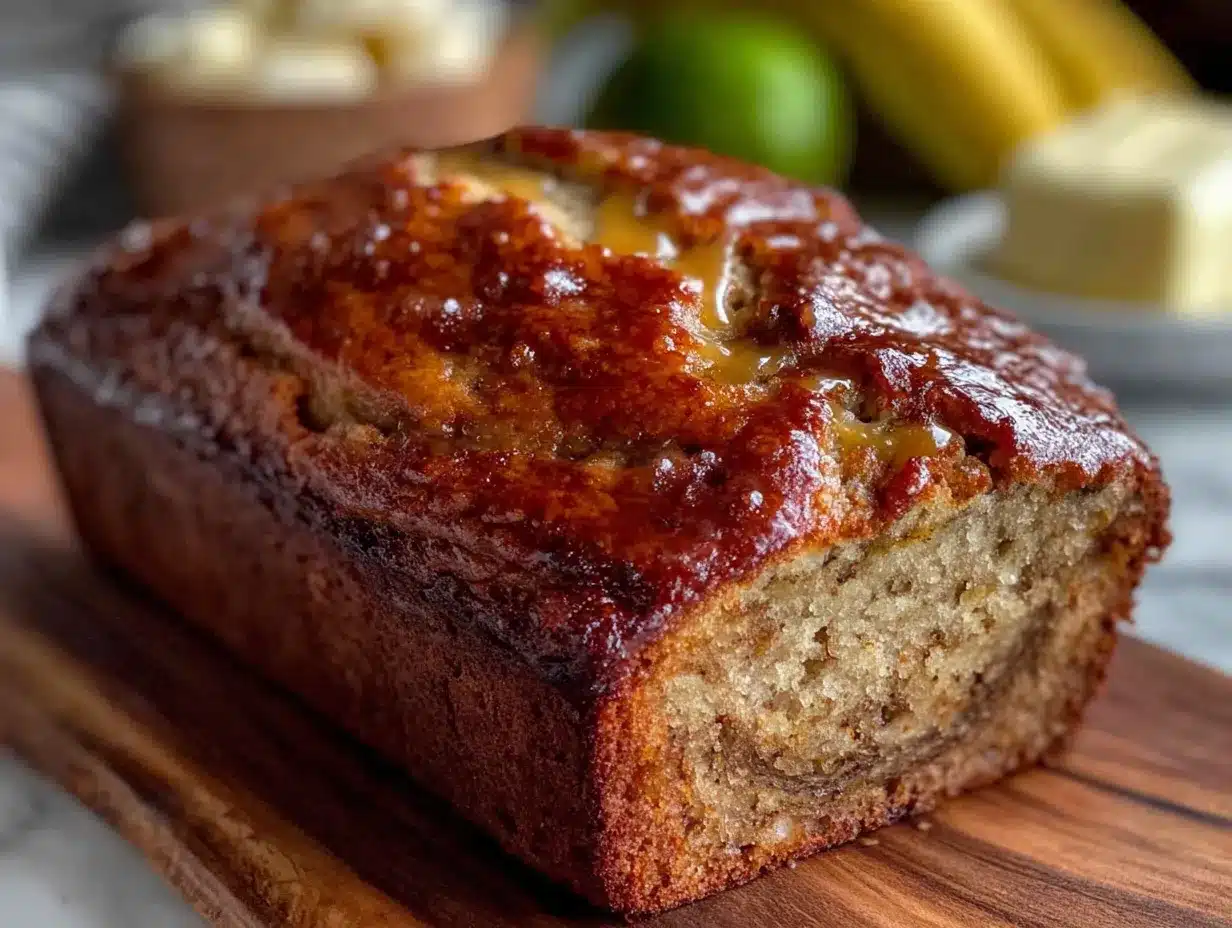
Getting this bread together is straightforward, but there are a few key steps to follow to ensure success. Let’s break it down step by step.
1. **Preheat and Prep**: Preheat your oven to 350°F (175°C). Grease a 9×5-inch loaf pan with butter or cooking spray, or line it with parchment paper, leaving an overhang on the sides for easy removal. This takes about 2 minutes.
2. **Brown the Butter**: In a medium saucepan over medium heat, melt the butter. Swirl the pan occasionally and watch closely. Once it stops foaming and starts to sizzle quietly, you’ll see brown specks at the bottom and smell a nutty aroma. This should take about 5-7 minutes. Immediately pour the brown butter into a heat-safe bowl to stop the cooking process. Let it cool for 5 minutes so it doesn’t scramble the eggs.
3. **Mash the Bananas**: In your large mixing bowl, mash the overripe bananas with a fork until they are mostly smooth, with a few small lumps remaining for texture. This takes about 2 minutes.
4. **Mix Wet Ingredients**: Add the cooled brown butter, granulated sugar, brown sugar, eggs, and vanilla extract to the mashed bananas. Whisk vigorously until the mixture is smooth and well combined. The batter might look slightly curdled at first, but that’s normal. This step takes about 3 minutes.
5. **Add Dry Ingredients**: Sprinkle the flour, baking soda, and salt over the wet mixture. Using a rubber spatula, gently fold the dry ingredients into the wet until just combined. Do not overmix! A few streaks of flour are okay. Overmixing will make the bread tough. This takes about 2 minutes.
6. **Add Mix-ins (Optional)**: If you’re using chocolate chips or nuts, fold them in now. Be gentle to avoid breaking the chips.
7. **Bake**: Pour the batter into the prepared loaf pan and smooth the top with the spatula. Bake for 55-65 minutes. The bread is done when a toothpick inserted into the center comes out clean or with a few moist crumbs. Check at 50 minutes to avoid overbaking.
8. **Cool**: Let the bread cool in the pan for 10 minutes, then transfer it to a wire rack to cool completely. This is the hardest part, but it prevents the bread from becoming gummy.
Cooking Tips & Techniques
Browning butter can be intimidating if you’ve never done it before, but it’s really just about paying attention. The key is to not walk away. Butter goes from perfect to burnt in seconds. If you smell something acrid, you’ve gone too far. When it smells like toasted hazelnuts, it’s ready. Also, remember that the butter will continue to cook slightly after you remove it from the heat, so take it off just before it reaches your desired color.
One common mistake people make is using under-ripe bananas. If your bananas are still yellow or only have a few brown spots, the bread will be bland and dense. Wait until they are completely black. Another tip is to let the brown butter cool slightly before adding the eggs. If the butter is too hot, it will cook the eggs, creating little egg ribbons in your batter.
I once tried to rush this process by putting the brown butter in the fridge to cool it down quickly. That was a mistake. The butter solidified into chunks, and I ended up with a lumpy batter. Letting it sit at room temperature for a few minutes is the safest bet. Also, when folding in the flour, use a gentle hand. Think of it as folding a letter, not stirring a soup. You want to incorporate the ingredients without developing too much gluten.
Timing is everything. If you live at a high altitude, you may need to adjust the baking time or temperature slightly. Generally, you might need to increase the oven temperature by 15°F and decrease the baking time by 5-10 minutes. Test for doneness frequently. Finally, don’t skip the cooling step. Cutting into warm banana bread often results in a mushy texture because the starches haven’t set yet. Patience pays off.
Variations & Adaptations
This recipe is a fantastic base for many variations. Here are a few ideas to keep things interesting:
* **Gluten-Free Option**: Swap the all-purpose flour for a 1:1 gluten-free baking flour blend. Make sure it contains xanthan gum, or add ½ teaspoon to help with structure. The texture will be slightly more delicate but still delicious.
* **Dairy-Free Version**: Use a plant-based butter that browns well, such as Miyoko’s or Earth Balance. Note that some plant butters have higher water content, so you might need to brown them a bit longer to evaporate the water.
* **Nutty Twist**: Add ½ cup of toasted pecans or walnuts to the batter. Toasting the nuts in a dry pan for 5 minutes before adding them enhances their flavor significantly.
* **Spiced Banana Bread**: Add 1 teaspoon of cinnamon, ¼ teaspoon of nutmeg, and a pinch of cardamom to the dry ingredients. This adds a warm, cozy flavor that pairs beautifully with the brown butter.
* **Zucchini Banana Bread**: Replace ½ cup of the mashed bananas with grated zucchini (squeezed dry). This adds moisture and nutrients without changing the flavor profile much.
I personally love adding a streusel topping made with flour, brown sugar, and cold butter for extra crunch. Just sprinkle it on top before baking. You can also add a swirl of cream cheese filling by layering sweetened cream cheese between the batter in the pan.
Serving & Storage Suggestions
This bread is best served slightly warm, but it’s also delicious at room temperature. Pair it with a cup of coffee or tea for a complete breakfast or snack. For a special touch, serve slices with a dollop of whipped cream or a scoop of vanilla ice cream.
To store, wrap the cooled bread tightly in plastic wrap or aluminum foil. It will keep at room temperature for up to 3 days. For longer storage, refrigerate for up to a week or freeze for up to 3 months. If freezing, slice the bread first for easy thawing. To reheat, microwave a slice for 20-30 seconds or warm it in the oven at 300°F for 10 minutes. The flavors actually develop and meld together over the first 24 hours, so it often tastes better the next day.
Nutritional Information & Benefits
While this is definitely a treat, bananas offer some nutritional benefits. They are a good source of potassium, vitamin B6, and fiber. The brown butter adds healthy fats, though it is calorie-dense. One slice (approx. 1/12 of the loaf) contains roughly 250 calories, 12g of fat, 35g of carbohydrates, and 3g of protein. For those watching their sugar intake, you can reduce the sugar by ¼ cup without significantly affecting the texture. This recipe is not naturally gluten-free or dairy-free, but adaptations are easy. It’s a balanced indulgence that satisfies sweet cravings while providing some energy-boosting nutrients.
Conclusion
This one-bowl browned butter banana bread is more than just a recipe; it’s a testament to the power of simplicity and a little bit of improvisation. It’s easy to make, incredibly flavorful, and perfect for any time of day. I hope you give it a try and find your own late-night moments of culinary joy. Don’t be afraid to customize it with your favorite add-ins or spices. Once you make it, you’ll understand why it’s become my absolute favorite. Let me know in the comments how you like to enjoy your banana bread!
Frequently Asked Questions
Can I use frozen bananas for this recipe?
Yes, frozen bananas work great. Just thaw them completely and drain any excess liquid before mashing. They tend to be even sweeter and moister, which is perfect for this bread.
Why did my bread turn out dense?
This usually happens if you overmix the batter or use too much flour. Make sure to measure your flour correctly and fold the ingredients gently until just combined. Also, ensure your baking soda is fresh.
Can I make this in a mini loaf pan?
Yes, you can. Reduce the baking time to 30-40 minutes and check for doneness with a toothpick. Keep an eye on them as they bake faster than the full-size loaf.
Is it okay if the brown butter is slightly warm when I add the eggs?
It’s best if it’s cooled to room temperature. If it’s too warm, it can partially cook the eggs. If you’re in a rush, you can place the bowl of butter in an ice bath for a minute to cool it down quickly.
Can I add chocolate chips to this recipe?
Absolutely! Fold in ½ cup of semi-sweet chocolate chips after the dry ingredients are incorporated. They add a lovely contrast to the nutty brown butter flavor.
Pin This Recipe!
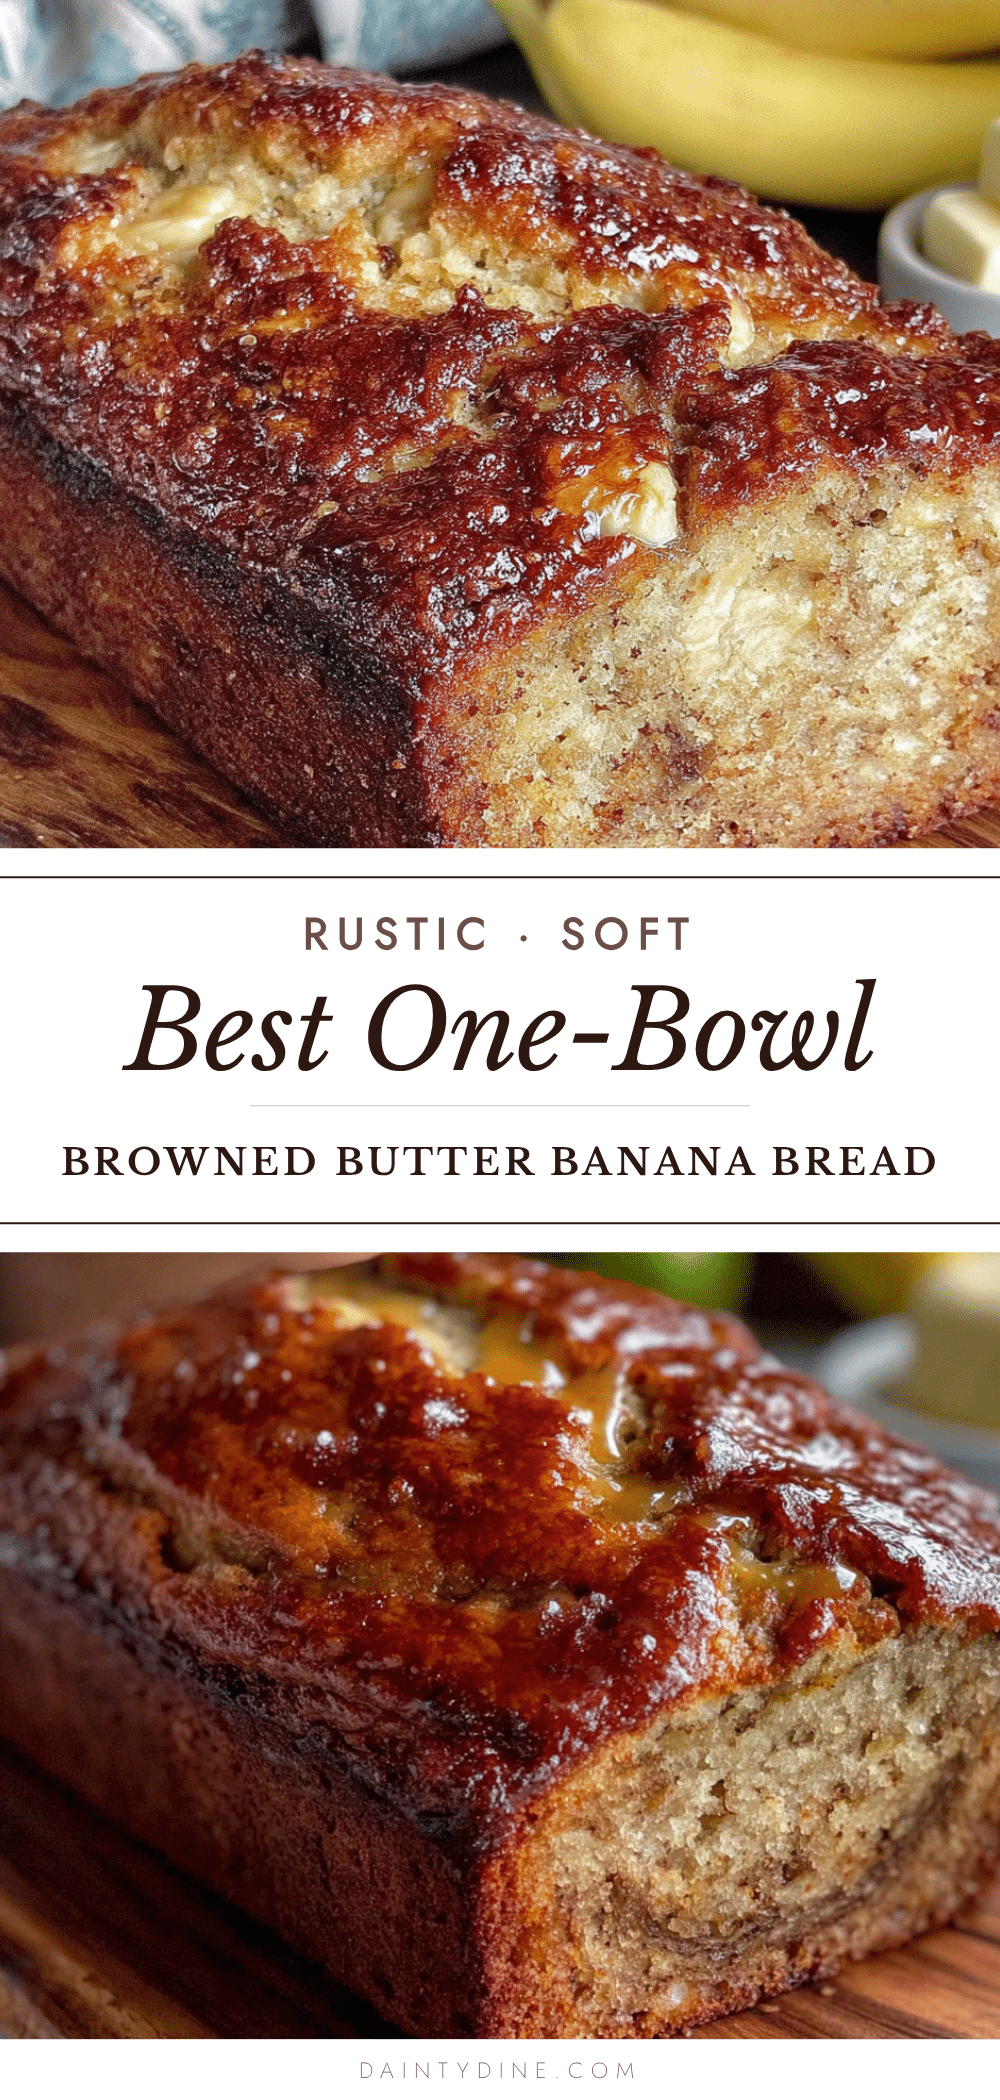
One-Bowl Browned Butter Banana Bread
A rich, moist banana bread made with nutty browned butter, requiring only one bowl for mixing. This easy recipe delivers gourmet flavor with minimal effort and cleanup.
- Prep Time: 15 minutes
- Cook Time: 55-65 minutes
- Total Time: 1 hour 15 minutes
- Yield: 12 servings 1x
- Category: Dessert
- Cuisine: American
Ingredients
- 3 medium-large overripe bananas, peeled and mashed
- 1/2 cup (113g) unsalted butter
- 3/4 cup (150g) granulated white sugar
- 1/2 cup (100g) packed light brown sugar
- 2 large eggs, room temperature
- 1 teaspoon pure vanilla extract
- 1 1/2 cups (190g) all-purpose flour
- 1 teaspoon baking soda
- 1/2 teaspoon kosher salt
- 1/2 cup chocolate chips or chopped walnuts (optional)
Instructions
- Preheat oven to 350°F (175°C). Grease a 9×5-inch loaf pan or line with parchment paper.
- Melt butter in a medium saucepan over medium heat. Swirl occasionally until it foams, then sizzles quietly with brown specks and a nutty aroma (5-7 minutes). Pour into a heat-safe bowl and cool for 5 minutes.
- In a large mixing bowl, mash bananas with a fork until mostly smooth.
- Add cooled brown butter, granulated sugar, brown sugar, eggs, and vanilla to the bananas. Whisk vigorously until smooth.
- Sprinkle flour, baking soda, and salt over the wet mixture. Gently fold with a rubber spatula until just combined; do not overmix.
- Fold in optional add-ins like chocolate chips or nuts.
- Pour batter into the prepared loaf pan and smooth the top.
- Bake for 55-65 minutes, or until a toothpick inserted into the center comes out clean.
- Cool in the pan for 10 minutes, then transfer to a wire rack to cool completely.
Notes
Ensure bananas are very ripe (black spots) for maximum sweetness and moisture. Do not overmix the batter to avoid a tough texture. Let the brown butter cool slightly before adding eggs to prevent scrambling. For gluten-free, use a 1:1 gluten-free flour blend. For dairy-free, use a plant-based butter that browns well.
Nutrition
- Serving Size: 1 slice (approx. 1/1
- Calories: 250
- Sugar: 22
- Sodium: 200
- Fat: 12
- Saturated Fat: 7
- Carbohydrates: 35
- Fiber: 1
- Protein: 3
Keywords: banana bread, browned butter, one bowl, easy recipe, quick bread, baking, comfort food


