Love this? Save it for later!
Share the inspiration with your friends
My husband had claimed to hate pumpkin for years. I mean, he didn’t just dislike it; he actively avoided it. He’d walk right past the pumpkin spice lattes, eyeing the seasonal displays with a look of pure suspicion. He thought it was just sugar disguised as a vegetable, a hollow trend that ruined good fall flavors. I used to roll my eyes when he made those faces, but honestly, I stopped trying to convince him. Let’s face it, you can’t force someone to love a flavor profile that just isn’t clicking for them.
Then last Tuesday, I made these creamy pumpkin baked oatmeal cups “just for myself.” I was running late, grabbed a muffin tin, and threw together a batch before heading to work. I left the rest on the counter, assuming they’d sit there until I remembered them later. When I got home, the kitchen smelled like a cozy cabin in the woods. I found him standing by the counter, holding a slightly crumbled cup, looking guilty as sin.
He didn’t say a word. He just took another bite, then asked for the recipe.
It wasn’t just that they were soft. It was the texture. Most pumpkin dishes are either too dense or too watery. These cups? They held their shape but melted on your tongue. The pumpkin wasn’t overpowering; it was sweet, earthy, and perfectly balanced with warm spices. I caught him in the act of proving himself wrong, sneaking a second one while I was in the shower. He later admitted it was the first pumpkin thing he’d actually enjoyed in a decade.
That moment stuck with me. It’s not just about the taste; it’s about that quiet satisfaction of changing someone’s mind without trying. These creamy pumpkin baked oatmeal cups aren’t just breakfast; they’re a peace treaty. I keep making them because they remind me that sometimes, all it takes is one perfect bite to shift your entire perspective. Maybe you’ve been there, stuck on your own food biases, waiting for that one dish to crack the armor.
Why You’ll Love This Recipe
There are plenty of baked oatmeal recipes out there, but this specific version of creamy pumpkin baked oatmeal cups hits a sweet spot that most others miss. After testing dozens of batches—some too dry, some too eggy, some that collapsed into sad puddles—I finally nailed the ratio that gives you that rich, custard-like interior with a slightly crisp edge. It’s not just good; it’s the kind of breakfast that makes you close your eyes after the first bite.
Here is why this recipe has become a staple in my kitchen:
- Quick & Easy: The prep time is under 10 minutes. You just mix, pour, and bake. It’s perfect for busy weeknights when you want to prep ahead for the next morning or for those chaotic Sunday mornings.
- Simple Ingredients: No fancy grocery trips needed. You likely already have oats, pumpkin puree, milk, and spices in your kitchen. This recipe relies on wholesome, accessible staples.
- Perfect for Meal Prep: These cups freeze beautifully. I make a batch on Sunday, and I have breakfast sorted for the entire week. They reheat in the microwave in under a minute, still tasting fresh.
- Crowd-Pleaser: Whether it’s for kids who usually turn their noses up at vegetables or adults craving a comforting carb, these get rave reviews. The texture is universally loved.
- Unbelievably Delicious: The combination of creamy pumpkin and warm cinnamon creates a flavor profile that feels like dessert but fuels you like a proper meal. It’s comfort food reimagined.
What makes this recipe different from the rest is the moisture balance. Many baked oatmeal recipes rely heavily on applesauce or extra eggs to stay moist, which can make them rubbery. Here, the pumpkin puree does the heavy lifting, creating a dense, pudding-like center. It’s healthier, faster, but with the same soul-soothing satisfaction as a heavy pancake. Perfect for impressing guests without stress, or turning a simple meal into something memorable.
What Ingredients You Will Need
This recipe uses simple, wholesome ingredients to deliver bold flavor and satisfying texture without the fuss. The magic lies in the ratio of wet to dry ingredients, ensuring that creamy pumpkin baked oatmeal cups stay moist for days. You don’t need anything exotic, just high-quality basics that you can trust.
- Old-Fashioned Rolled Oats (3 cups / 270g): Do not use quick oats or steel-cut oats. Old-fashioned oats hold their structure better and provide that chewy, satisfying texture. I prefer brands like Bob’s Red Mill for their consistent grind.
- Pumpkin Puree (1 cup / 245g): Make sure you use 100% pure pumpkin puree, not pumpkin pie filling. Pie filling has added sugar and spices that will throw off the balance. Look for a firm, smooth puree for the best texture.
- Milk of Choice (1 ½ cups / 360ml): Dairy milk works great, but for extra creaminess, I recommend using oat milk or almond milk. If you want a richer flavor, whole milk is excellent. Use dairy-free milk if needed for vegan adaptations.
- Eggs (2 large / room temperature): These act as the binder. Room temperature eggs incorporate more easily into the batter, ensuring a smooth mix without lumps.
- Maple Syrup (¼ cup / 60ml): Use pure maple syrup for a natural, complex sweetness. Brown sugar can be used as a substitute, but maple syrup keeps it slightly more refined and less cloying.
- Melted Coconut Oil or Butter (2 tablespoons): This adds richness and helps bind the oats. Coconut oil adds a subtle tropical note that pairs well with pumpkin, while butter gives a classic, savory-sweet depth.
- Vanilla Extract (1 teaspoon): Don’t skip this. It rounds out the spices and adds a floral aroma that makes the pumpkin taste more vibrant.
- Cinnamon (1 ½ teaspoons): The star spice. Use ground cinnamon for consistent flavor. If you have fresh sticks, you can steep them in the warm milk, but ground is easier for quick prep.
- Nutmeg (½ teaspoon): A pinch of nutmeg adds warmth and complexity. It’s subtle but essential for that classic pumpkin pie vibe.
- Ginger (½ teaspoon): Ground ginger adds a slight zing that cuts through the sweetness. It’s optional but highly recommended for depth.
- Salt (½ teaspoon): Essential for balancing the sweetness. Never underestimate the power of salt in a sweet dish.
- Chopped Walnuts or Pecans (½ cup): For crunch. Toasting them first enhances their flavor, but raw nuts work too if you’re in a hurry.
Equipment Needed
To make these creamy pumpkin baked oatmeal cups successfully, you need a few basic tools. The most important piece of equipment is a standard 12-cup muffin tin. I recommend using a non-stick tin if you have one, as it makes removing the cups much easier. If you don’t have non-stick, you’ll need to grease the cups generously with butter or oil.
You will also need a large mixing bowl. A bowl with a pouring spout is helpful, but not strictly necessary. A whisk is better than a spoon for combining the wet ingredients, as it breaks up the eggs and incorporates the oil smoothly. For the dry ingredients, a fork or a small whisk works fine.
If you prefer a smoother texture, a blender or food processor can be used to puree the oats into a flour-like consistency before adding the liquids, but this is optional. I usually skip this step to keep the texture hearty.
For storage, airtight containers are key. Glass containers are my preference because they don’t retain odors and can go from fridge to microwave without issue. Plastic containers work too, but they can stain if the pumpkin puree is very orange.
Budget-friendly options include using a standard muffin tin instead of a specialty mini-muffin tin. The baking time will just need to be adjusted slightly. Also, using generic store-brand oats and spices works perfectly fine. You don’t need expensive ingredients to get great results.
Preparation Method
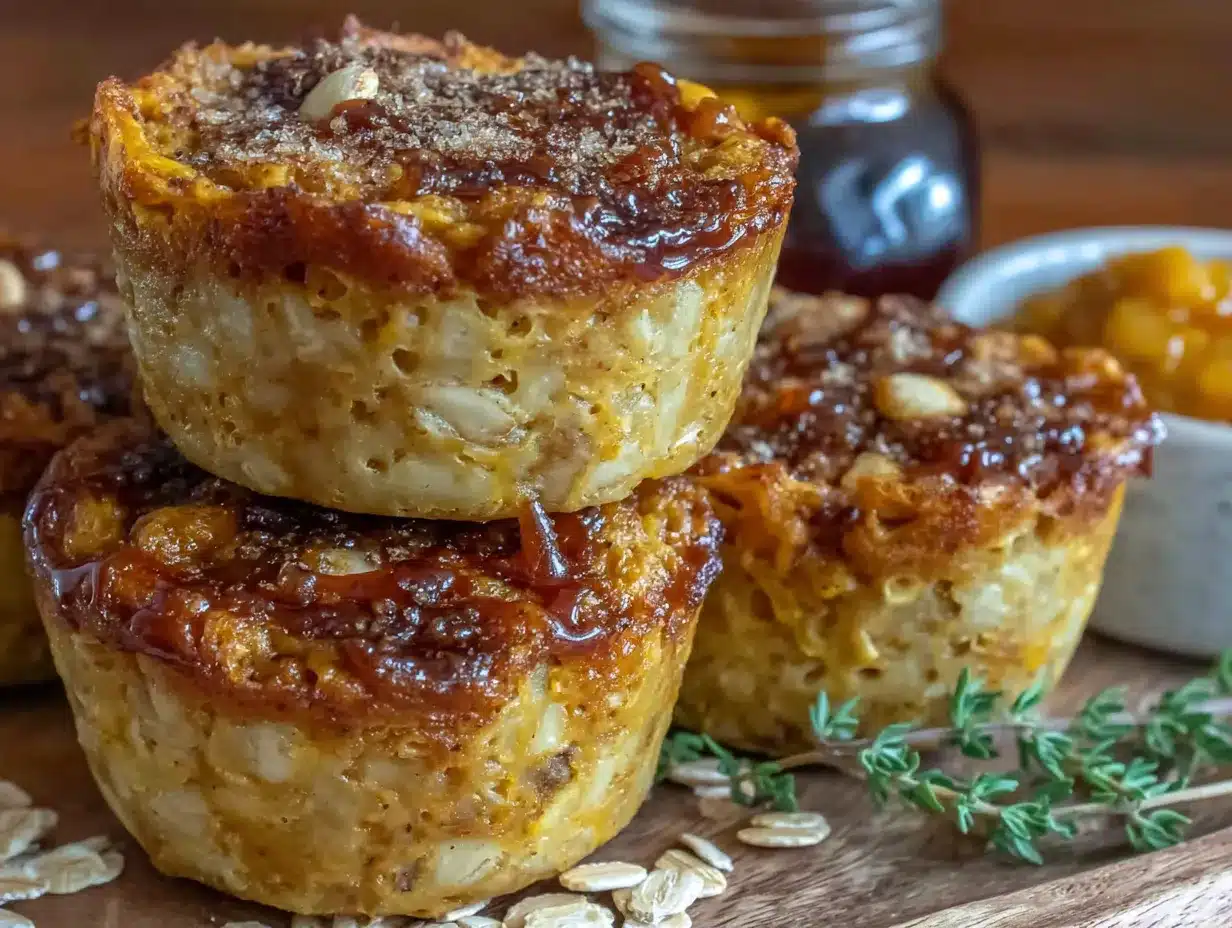
Let’s break down the steps to make these creamy pumpkin baked oatmeal cups. This process is straightforward, but attention to detail ensures the best texture.
- Preheat and Prep (5 minutes): Preheat your oven to 350°F (175°C). Grease your 12-cup muffin tin generously with butter, coconut oil, or non-stick spray. If you’re using paper liners, spray those too to ensure easy release.
- Mix Dry Ingredients (2 minutes): In a large bowl, combine the rolled oats, cinnamon, nutmeg, ginger, and salt. Whisk them together to distribute the spices evenly. This prevents clumps of pure cinnamon in your final cup.
- Mix Wet Ingredients (3 minutes): In a separate bowl, whisk the eggs until they are beaten. Add the milk, maple syrup, melted coconut oil, vanilla extract, and pumpkin puree. Whisk vigorously until the mixture is smooth and uniform. The pumpkin should be fully integrated, with no streaks of orange or white.
- Combine Wet and Dry (2 minutes): Pour the wet mixture over the dry ingredients. Stir gently with a spatula or spoon until just combined. Do not overmix. You want the oats to be evenly coated, but the batter will be thick. Fold in the chopped nuts at this stage if you are using them.
- Rest the Batter (5 minutes): Let the batter sit for about 5 minutes. This allows the oats to absorb some of the liquid, which helps them soften and prevents a gritty texture in the final product. You’ll notice the mixture thickening slightly.
- Fill the Muffin Tin (3 minutes): Divide the batter evenly among the 12 muffin cups. Use a measuring cup or a large spoon to ensure each cup has the same amount. Fill them about ¾ full to allow for slight rising.
- Bake (20-25 minutes): Place the tin in the preheated oven. Bake for 20-25 minutes. The cups are done when the edges are set and slightly golden, and the centers are just barely jiggly. They will firm up as they cool. Avoid overbaking, or they will become dry.
- Cool and Store (15 minutes): Let the cups cool in the pan for 5 minutes, then transfer them to a wire rack to cool completely. This step is crucial for them to set properly. Once cool, store in an airtight container.
Cooking Tips & Techniques
I’ve made my fair share of mistakes with baked oatmeal, so here are some tips to help you avoid common pitfalls. First, don’t rush the resting step. Letting the batter sit for 5-10 minutes is non-negotiable if you want a tender texture. Without it, the oats remain hard and chewy in the center.
Secondly, keep an eye on your oven. Every oven runs differently. If your oven runs hot, check the cups at the 18-minute mark. Overbaking is the number one reason baked oatmeal becomes dry and crumbly. You want the centers to remain slightly soft, as they will continue to cook from residual heat after you take them out.
Multitasking is key here. While the oats rest, you can prep your storage containers. If you’re adding toppings like extra nuts or seeds, sprinkle them on top before baking for a nice crunch, or add them after for a softer texture. I usually add half before and half after.
For consistency, use a kitchen scale for the oats if possible. Volume measurements can vary depending on how packed the oats are. Weighing them ensures every batch turns out the same. If you must use cups, fluff the oats before measuring to avoid packing them down.
Finally, don’t skip the salt. It might seem small, but it balances the sweetness of the maple syrup and enhances the pumpkin flavor. Without it, the cups taste flat and one-dimensional. Trust me on this one; it makes a huge difference.
Variations & Adaptations
One of the best things about this recipe is its flexibility. You can adapt it to suit different dietary needs or flavor preferences. Here are a few variations I’ve tried:
- Vegan Option: Swap the eggs for two flax eggs (2 tablespoons ground flaxseed mixed with 5 tablespoons water). Let the flax eggs sit for 5 minutes to gel before adding them to the mix. Use maple syrup instead of honey if you prefer.
- Gluten-Free: Use certified gluten-free rolled oats. Ensure your baking powder and spices are also certified gluten-free to avoid cross-contamination.
- Chocolate Chip: Add ½ cup of dairy-free chocolate chips to the batter. The chocolate pairs wonderfully with the pumpkin and spices, making it feel like a treat.
- Protein Boost: Stir in 1-2 scoops of vanilla protein powder. You may need to add an extra ¼ cup of milk, as protein powder absorbs more liquid.
- Low Sugar: Reduce the maple syrup to 2 tablespoons and use mashed ripe banana for natural sweetness. Add a pinch of stevia or monk fruit if needed.
I personally love adding a swirl of peanut butter into the batter before baking. It creates a marbled effect and adds healthy fats. It’s a simple tweak that makes the cups feel more like a dessert.
Serving & Storage Suggestions
These creamy pumpkin baked oatmeal cups are delicious warm or cold. I often eat them straight from the fridge for a quick, cold breakfast on busy mornings. If you prefer them warm, microwave them for 30-60 seconds. They come out soft and gooey, almost like a pudding.
For storage, keep them in an airtight container in the refrigerator for up to 5 days. They actually taste better on day two as the flavors meld together. For longer storage, freeze them for up to 3 months. Place them on a baking sheet to freeze individually, then transfer to a freezer bag. To reheat from frozen, microwave for 1-2 minutes.
They pair well with a cup of black coffee or a glass of cold milk. For a more complete meal, serve with a side of fresh fruit or a dollop of Greek yogurt. The flavors develop over time, becoming richer and more complex as they sit in the fridge.
Nutritional Information & Benefits
Each cup contains approximately 180 calories, 6g of protein, 4g of fat, and 30g of carbohydrates. They are a good source of fiber, thanks to the oats, which helps with digestion and keeps you full longer. Pumpkin is rich in Vitamin A and antioxidants, making this a nutrient-dense breakfast.
For those watching their sugar intake, the natural sweetness from the maple syrup and pumpkin keeps the glycemic load moderate. They are naturally gluten-free if you use GF oats, and easily made vegan. They are a great option for anyone looking for a balanced, satisfying start to the day without the crash of sugary cereals.
Conclusion
These creamy pumpkin baked oatmeal cups are worth trying because they combine convenience with incredible flavor. They are easy to make, healthy, and satisfying. I encourage you to customize them with your favorite add-ins, whether that’s nuts, seeds, or chocolate.
I love this recipe because it brings a sense of comfort and warmth to my mornings. It’s a reminder that healthy eating doesn’t have to be boring. Try making them this weekend and let me know how you like them. I’d love to hear your variations and tips in the comments below.
Happy baking!
FAQs
Can I use quick oats instead of rolled oats?
It’s not recommended. Quick oats are more processed and will turn into a mushy, paste-like consistency. Rolled oats provide the necessary chew and structure.
How do I reheat frozen oatmeal cups?
You can microwave them directly from the freezer for 1-2 minutes. Alternatively, let them thaw in the fridge overnight and reheat for 30-60 seconds.
Can I make these in a loaf pan?
Yes, you can pour the batter into a greased loaf pan. Bake at 350°F for 35-40 minutes. The internal temperature should reach 165°F.
Are these suitable for meal prep?
Absolutely. They are designed for meal prep. They stay moist in the fridge for up to 5 days and freeze well for longer storage.
Can I add other fruits?
Yes, you can add diced apples, pears, or blueberries. Just fold them into the batter gently before baking. Keep in mind that wet fruits may add extra moisture, so you might need to adjust the baking time slightly.
Pin This Recipe!
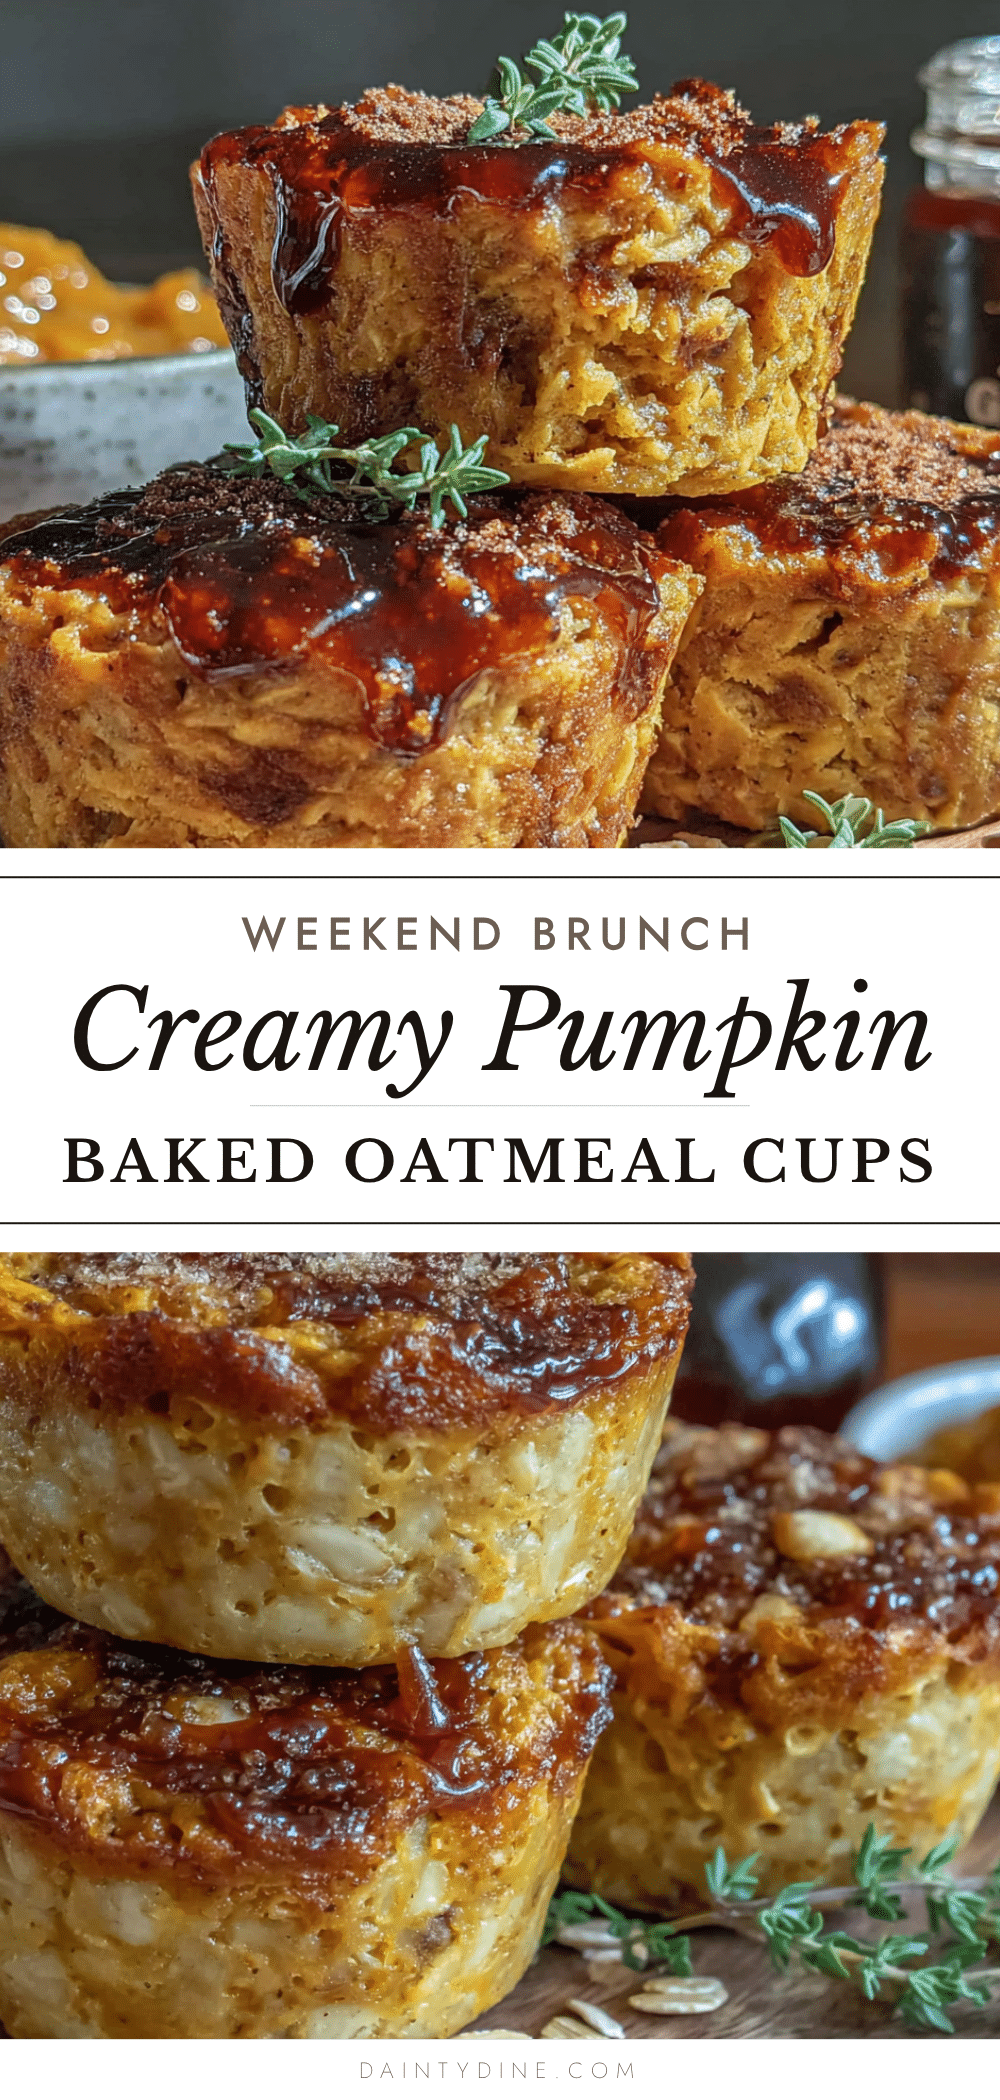
Creamy Pumpkin Baked Oatmeal Cups

Soft, custard-like baked oatmeal cups infused with pumpkin puree and warm spices. These easy-to-make breakfast treats are perfect for meal prep, freezing well for busy mornings.
- Prep Time: 10 minutes
- Cook Time: 25 minutes
- Total Time: 35 minutes
- Yield: 12 servings 1x
- Category: Breakfast
- Cuisine: American
Ingredients
- 3 cups Old-Fashioned Rolled Oats
- 1 cup 100% Pure Pumpkin Puree
- 1 ½ cups Milk (dairy or non-dairy)
- 2 large Eggs, room temperature
- ¼ cup Maple Syrup
- 2 tablespoons Melted Coconut Oil or Butter
- 1 teaspoon Vanilla Extract
- 1 ½ teaspoons Cinnamon
- ½ teaspoon Nutmeg
- ½ teaspoon Ground Ginger
- ½ teaspoon Salt
- ½ cup Chopped Walnuts or Pecans (optional)
Instructions
- Preheat oven to 350°F (175°C). Grease a 12-cup muffin tin generously with butter, oil, or non-stick spray.
- In a large bowl, whisk together the rolled oats, cinnamon, nutmeg, ginger, and salt.
- In a separate bowl, whisk the eggs until beaten. Add the milk, maple syrup, melted coconut oil, vanilla extract, and pumpkin puree. Whisk vigorously until smooth and uniform.
- Pour the wet mixture over the dry ingredients. Stir gently with a spatula until just combined. Do not overmix. Fold in chopped nuts if using.
- Let the batter rest for 5 minutes to allow oats to absorb liquid.
- Divide the batter evenly among the 12 muffin cups, filling them about ¾ full.
- Bake for 20-25 minutes, or until edges are set and slightly golden, and centers are just barely jiggly.
- Let cups cool in the pan for 5 minutes, then transfer to a wire rack to cool completely before storing.
Notes
Do not use quick oats or steel-cut oats as they will alter the texture. Ensure you use pure pumpkin puree, not pumpkin pie filling. Letting the batter rest for 5 minutes is crucial for a tender texture. These freeze well for up to 3 months.
Nutrition
- Serving Size: 1 cup
- Calories: 180
- Sugar: 12
- Sodium: 150
- Fat: 4
- Saturated Fat: 2
- Carbohydrates: 30
- Fiber: 4
- Protein: 6
Keywords: pumpkin oatmeal, baked oatmeal cups, breakfast meal prep, healthy breakfast, gluten-free breakfast, vegan breakfast options, pumpkin spice


