Love this? Save it for later!
Share the inspiration with your friends
I was standing in the canned goods aisle last October, staring at a stack of pumpkin puree cans, when the smell hit me. It wasn’t pumpkin, actually—it was the weird mix of cinnamon and vanilla from someone’s candle aisle display drifting over. But in that instant, I was eleven years old again, sitting cross-legged on my aunt Carol’s linoleum kitchen floor, watching her crush graham crackers with a rolling pin because her food processor had broken the week before.
She wasn’t fancy with her desserts. Aunt Carol believed in shortcuts—store-bought crusts, instant pudding, the good stuff. But her no-bake pies? Those were legendary in our family. She’d pass them off as effortless, but I remember the way she’d tap the filling with her finger, tilt her head, and frown until the texture felt just right. She passed away a few years back, and honestly, I’ve been chasing that feeling ever since. That cool, creamy bite that somehow tasted like fall but didn’t require turning on the oven.
So when I landed on this creamy no-bake pumpkin cheesecake pie, I knew I had something special. It’s not her recipe exactly—I’ve tweaked it, modernized it a bit—but the soul is the same. Maybe you’ve been there, trying to recreate a taste from your past. This one gets pretty close. I mean, I actually teared up a little the first time I tested it. Don’t tell anyone.
Why You’ll Love This Recipe
Let me tell you why this creamy no-bake pumpkin cheesecake pie has become my most-requested dessert for every fall gathering. It’s not just another pumpkin recipe—it’s the one that makes people stop mid-conversation and ask for the recipe before they’ve even finished their slice.
- 10-Minute Prep: No kidding. If you can stir, you can make this pie. The hardest part is waiting for it to chill.
- Simple Pantry Ingredients: You probably have most of this stuff already. No weird specialty items or expensive extracts.
- Perfect for Thanksgiving: Frees up your oven for the turkey and sides. This pie sits pretty in the fridge while everything else cooks.
- Crowd-Pleaser: I’ve served this to pumpkin purists and cheesecake snobs alike. Everyone loves it. Kids devour it. Adults sneak second slices.
- Unbelievably Creamy Texture: The secret is blending cream cheese with pumpkin and a touch of whipped topping. It’s light but rich, if that makes sense.
This isn’t one of those dense, heavy cheesecakes that sits in your stomach like a brick. It’s silky, almost mousse-like, with that warm pumpkin spice flavor that just feels like a hug. I tested this recipe five times before I got the texture exactly right—not too firm, not too soft, just that perfect sliceable creaminess. And because there’s no baking, you can’t overdo it. No cracked tops, no water bath drama. Just stir, pour, chill, and impress everyone.
What Ingredients You Will Need
This recipe uses simple, wholesome ingredients that come together to create something genuinely special. Most of these are pantry staples during fall, and I’ve included notes on substitutions where they work well.
For the Crust
- 1 ½ cups graham cracker crumbs (about 12 full sheets, crushed fine—I prefer Honey Maid brand for consistent texture)
- ¼ cup granulated sugar
- 6 tablespoons unsalted butter, melted (salted butter works too, just skip the pinch of salt later)
- Pinch of salt (only if using unsalted butter)
- ½ teaspoon ground cinnamon (optional, but adds a lovely warmth to the crust)
For the Filling
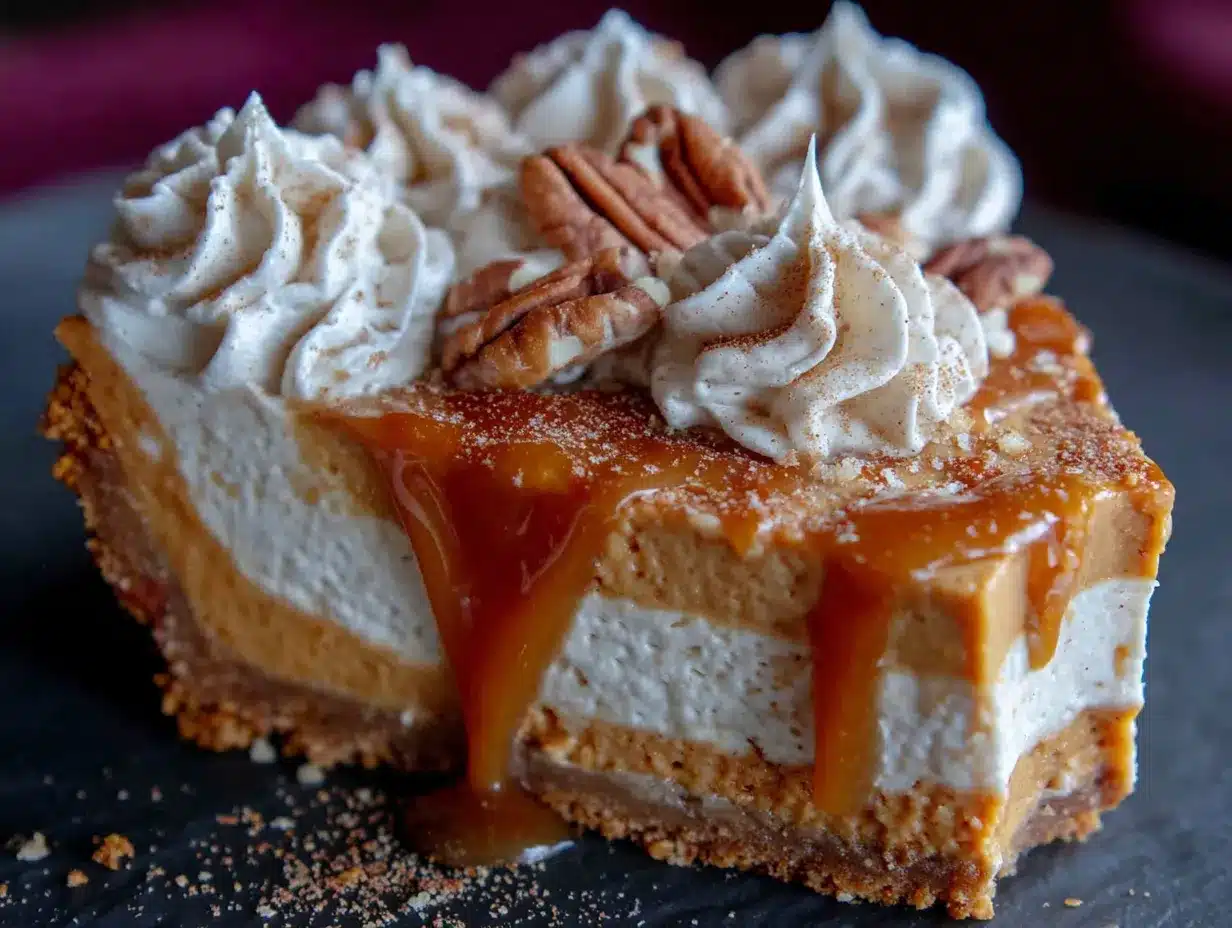
- 16 ounces cream cheese, softened to room temperature (full-fat is best for texture, but reduced-fat works in a pinch)
- 1 cup canned pumpkin puree (not pumpkin pie filling—make sure it’s 100% pure pumpkin. Libby’s is my go-to)
- ¾ cup packed light brown sugar (dark brown sugar adds deeper molasses flavor if you have it)
- 1 teaspoon vanilla extract
- 1 ½ teaspoons pumpkin pie spice (or make your own: ½ tsp cinnamon, ¼ tsp nutmeg, ¼ tsp ginger, ⅛ tsp cloves, ⅛ tsp allspice)
- ½ teaspoon ground cinnamon (extra because we love cinnamon)
- 1 ½ cups heavy whipping cream, cold (or 8 ounces of thawed frozen whipped topping like Cool Whip for convenience)
For the Topping (Optional but Recommended)
- 1 cup heavy whipping cream, cold
- 2 tablespoons powdered sugar
- ½ teaspoon vanilla extract
- Ground cinnamon or pumpkin pie spice for dusting
A quick note on cream cheese: let it sit on the counter for at least 30 minutes before you start. Cold cream cheese makes lumpy filling, and nobody wants that. Also, if you’re using real whipped cream instead of Cool Whip, make sure your bowl and beaters are cold—pop them in the freezer for 10 minutes before whipping.
Equipment Needed
You don’t need a fancy kitchen to pull this off. Here’s what you’ll actually use:
- 9-inch pie dish (standard glass or ceramic works great. I use a deep-dish Pyrex one)
- Large mixing bowls (at least two—one for filling, one for whipped cream)
- Electric hand mixer or stand mixer (hand mixer is totally fine, I actually prefer it for this recipe)
- Measuring cups and spoons
- Spatula (for scraping every last bit of filling—don’t waste a drop)
- Ziploc bag or rolling pin (for crushing graham crackers if you don’t have pre-made crumbs)
- Plastic wrap (for covering the pie while it chills)
If you don’t have a pie dish, a 9-inch springform pan works beautifully and makes for prettier slices. I’ve even used a deep-dish disposable aluminum pan for potlucks—works fine, just press the crust up the sides a bit higher. My first attempt at this recipe, I used a regular 8-inch cake pan and it worked, but the slices were a little short. Learn from my mistakes.
Preparation Method
- Make the crust (5 minutes): In a medium bowl, combine graham cracker crumbs, sugar, cinnamon (if using), and salt. Pour in the melted butter and stir with a fork until every crumb is moistened. It should look like wet sand. Press the mixture firmly into the bottom and up the sides of your 9-inch pie dish. Use the bottom of a measuring cup to really pack it down—this prevents crumbly slices later. Pop it in the fridge while you make the filling.
- Whip the cream (3 minutes): In a chilled bowl, pour in 1 ½ cups cold heavy cream. Beat on medium-high speed until stiff peaks form—this takes about 2-3 minutes. You’ll know it’s ready when you lift the beaters and the cream stands up in peaks without flopping over. Set it in the fridge for now. Don’t overbeat or you’ll end up with butter.
- Beat the cream cheese (3 minutes): In a large bowl, beat the softened cream cheese with an electric mixer on medium speed until smooth and fluffy—about 2 minutes. Scrape down the sides and bottom of the bowl with a spatula. Add the brown sugar and beat for another minute until combined and creamy.
- Add the pumpkin and spices (2 minutes): Add the pumpkin puree, vanilla extract, pumpkin pie spice, and cinnamon to the cream cheese mixture. Beat on medium-low until fully combined and smooth. Scrape the bowl again. Taste the filling at this point—it should be sweet, spiced, and delicious. Adjust spices if you like more kick.
- Fold in the whipped cream (2 minutes): Remove the whipped cream from the fridge. Add about one-third of it to the pumpkin mixture and stir gently to lighten the batter. Then add the remaining whipped cream and fold it in using a spatula. Use a gentle, sweeping motion—fold from the bottom up, rotating the bowl. Don’t stir vigorously or you’ll deflate all that air. The final mixture should be light, fluffy, and uniform in color.
- Assemble the pie (2 minutes): Retrieve the crust from the fridge. Spoon the filling into the crust and spread it evenly with a spatula. Give the pie dish a few gentle taps on the counter to release any air bubbles. Smooth the top as best you can.
- Chill the pie (at least 6 hours, preferably overnight): Cover the pie loosely with plastic wrap and refrigerate for at least 6 hours. Overnight is better—the filling sets up firmer and the flavors meld together beautifully. Don’t rush this step. I’ve tried a 4-hour chill and the slices were a bit soft. Patience pays off here.
- Make the topping (5 minutes, right before serving): When you’re ready to serve, whip the remaining 1 cup heavy cream with powdered sugar and vanilla until stiff peaks form. Spread or pipe the whipped cream over the set pie. Dust with a light sprinkle of cinnamon or pumpkin pie spice.
Cooking Tips & Techniques
After testing this recipe multiple times (and failing a few times), here’s what I learned the hard way:
Room temperature cream cheese is non-negotiable. I know, I know, you’re in a hurry. But cold cream cheese creates lumps that no amount of beating will fix. Leave it on the counter for 30-45 minutes. If you forgot, cut it into small cubes and microwave in 10-second bursts until just softened—not melted.
Don’t skip the crust chilling step. A warm crust will make the filling slide around and get soggy. Give it at least 15 minutes in the fridge before adding the filling. I once got distracted and forgot—the crust basically dissolved into the filling. Texture disaster.
Fold, don’t stir. When combining the whipped cream with the pumpkin mixture, use a gentle folding motion. Stirring aggressively deflates the air and gives you a dense, heavy pie. You want it light and airy, like a cloud made of pumpkin.
Patience with chilling is everything. This pie needs a solid 6 hours minimum to set properly. Overnight is ideal. I made the mistake of serving it after only 4 hours once, and let me tell you, it was more like pumpkin soup in a graham cracker bowl. Still tasted good, but presentation was embarrassing.
Use a sharp knife for clean slices. Run your knife under hot water, wipe it dry, then slice. Clean the blade between cuts. This gives you those beautiful, Instagram-worthy slices.
Variations & Adaptations
This creamy no-bake pumpkin cheesecake pie is wonderfully adaptable. Here are some ways I’ve changed it up:
Gluten-Free Version: Use gluten-free graham crackers or crushed gluten-free gingersnaps for the crust. The filling is naturally gluten-free, so this is an easy swap that nobody will notice.
Dairy-Free Option: Use dairy-free cream cheese (Kite Hill or Violife work well) and canned coconut cream (chilled, with the solid part only) instead of heavy cream. The texture will be slightly different—a bit softer—but still delicious. I tested this for a friend with dairy issues and it got thumbs up.
Bourbon Pumpkin Cheesecake Pie: Add 2 tablespoons of bourbon to the filling along with the vanilla. The warmth of bourbon pairs beautifully with pumpkin and spice. I tried this for a grown-up Thanksgiving and it was a hit.
Chocolate Pumpkin Swirl: Melt ½ cup of semi-sweet chocolate chips and let it cool slightly. After filling the crust, drop spoonfuls of melted chocolate on top and swirl with a knife. It looks fancy but takes 30 seconds.
Maple Pecan Topping: Instead of whipped cream, top the set pie with toasted pecans and a drizzle of maple syrup. The crunch adds a lovely contrast to the creamy filling.
Mini Version: Make these in a muffin tin with a regular muffin liner. Press the crust into each liner, fill, and chill. Perfect for parties or portion control. You’ll get about 12 mini pies.
Serving & Storage Suggestions
This pie is best served cold, straight from the fridge. I like to take it out about 10 minutes before slicing—just enough to take the chill off but not so long that it softens. Add the whipped cream topping right before serving, not ahead of time, or it will deflate and get watery.
For presentation, I dust the top with a light sprinkle of cinnamon through a fine-mesh sieve. Sometimes I add a few candied pecans or a drizzle of caramel sauce for extra flair. It pairs beautifully with a hot cup of coffee or spiced apple cider.
Storage: Cover the pie tightly with plastic wrap or transfer slices to an airtight container. It will keep in the refrigerator for up to 5 days. The flavor actually gets better after day two—the spices mellow and meld together. Just don’t add the whipped cream topping until you’re ready to serve each slice.
Freezing: This pie freezes beautifully. Make it without the topping, wrap it tightly in plastic wrap, then foil, and freeze for up to 3 months. Thaw overnight in the refrigerator before serving. I always keep one in the freezer for unexpected guests or last-minute holiday cravings.
Reheating: Don’t. This is a no-bake cheesecake—it’s meant to be served cold. If you want a warm dessert, try a different recipe. The beauty of this pie is its cool, creamy texture.
Nutritional Information & Benefits
Here’s the nutritional breakdown per slice (assuming 10 servings):
| Nutrient | Amount per Slice |
|---|---|
| Calories | 385 |
| Total Fat | 28g |
| Saturated Fat | 17g |
| Cholesterol | 95mg |
| Sodium | 290mg |
| Total Carbohydrates | 31g |
| Dietary Fiber | 2g |
| Sugars | 22g |
| Protein | 5g |
| Vitamin A | 85% DV |
| Calcium | 8% DV |
Pumpkin is packed with vitamin A, which supports eye health and immune function. It’s also a good source of fiber and potassium. The cream cheese adds calcium and protein, though yes, this is definitely a treat, not a health food. I like to think of it as a dessert that happens to have some redeeming qualities. Everything in moderation, right?
This recipe contains dairy and gluten. For dietary restrictions, see the variations section above.
Frequently Asked Questions
Can I use pumpkin pie filling instead of pumpkin puree?
No, don’t do that. Pumpkin pie filling is already sweetened and spiced, so it will throw off the sugar and spice balance completely. Stick with 100% pure pumpkin puree. Your pie will taste much better.
Why is my filling runny?
This usually happens for one of three reasons: your cream cheese wasn’t fully softened, you didn’t whip the cream to stiff peaks, or you didn’t chill the pie long enough. Make sure to follow each step carefully, and give it a full 6 hours in the fridge minimum.
Can I make this pie a day ahead?
Absolutely! In fact, I recommend it. Making it the day before gives the flavors time to meld and the texture sets up perfectly. Just hold off on the whipped cream topping until you’re ready to serve.
How do I get clean slices?
Use a sharp knife and run it under hot water between each cut. Wipe the blade dry before slicing. This gives you those beautiful, clean edges instead of a messy, smeared slice.
Can I use a store-bought graham cracker crust?
You can, but honestly, homemade tastes so much better. Store-bought crusts are often too sweet and not as buttery. The homemade version takes 5 minutes and makes a noticeable difference in flavor and texture.
Conclusion
This creamy no-bake pumpkin cheesecake pie is the kind of dessert that makes you look like a hero without actually working like one. It’s easy enough for a weekday treat but impressive enough for Thanksgiving dinner. The silky texture, the warm spices, the buttery crust—it all comes together in a way that feels special without being fussy.
I love this recipe because it reminds me that good food doesn’t have to be complicated. Sometimes the simplest things—a few ingredients, a little patience, and a willingness to wait—create the most memorable moments. Every time I make this pie, I think of Aunt Carol and her rolling pin and her belief that shortcuts were just smart cooking. She’d approve of this one.
Try it for your next fall gathering, or just because it’s Tuesday and you deserve something delicious. If you make it, I’d love to hear how it turned out. Drop a comment below, share your photos, and let me know if you added your own twist. Happy baking—or rather, happy no-baking!
Pin This Recipe!
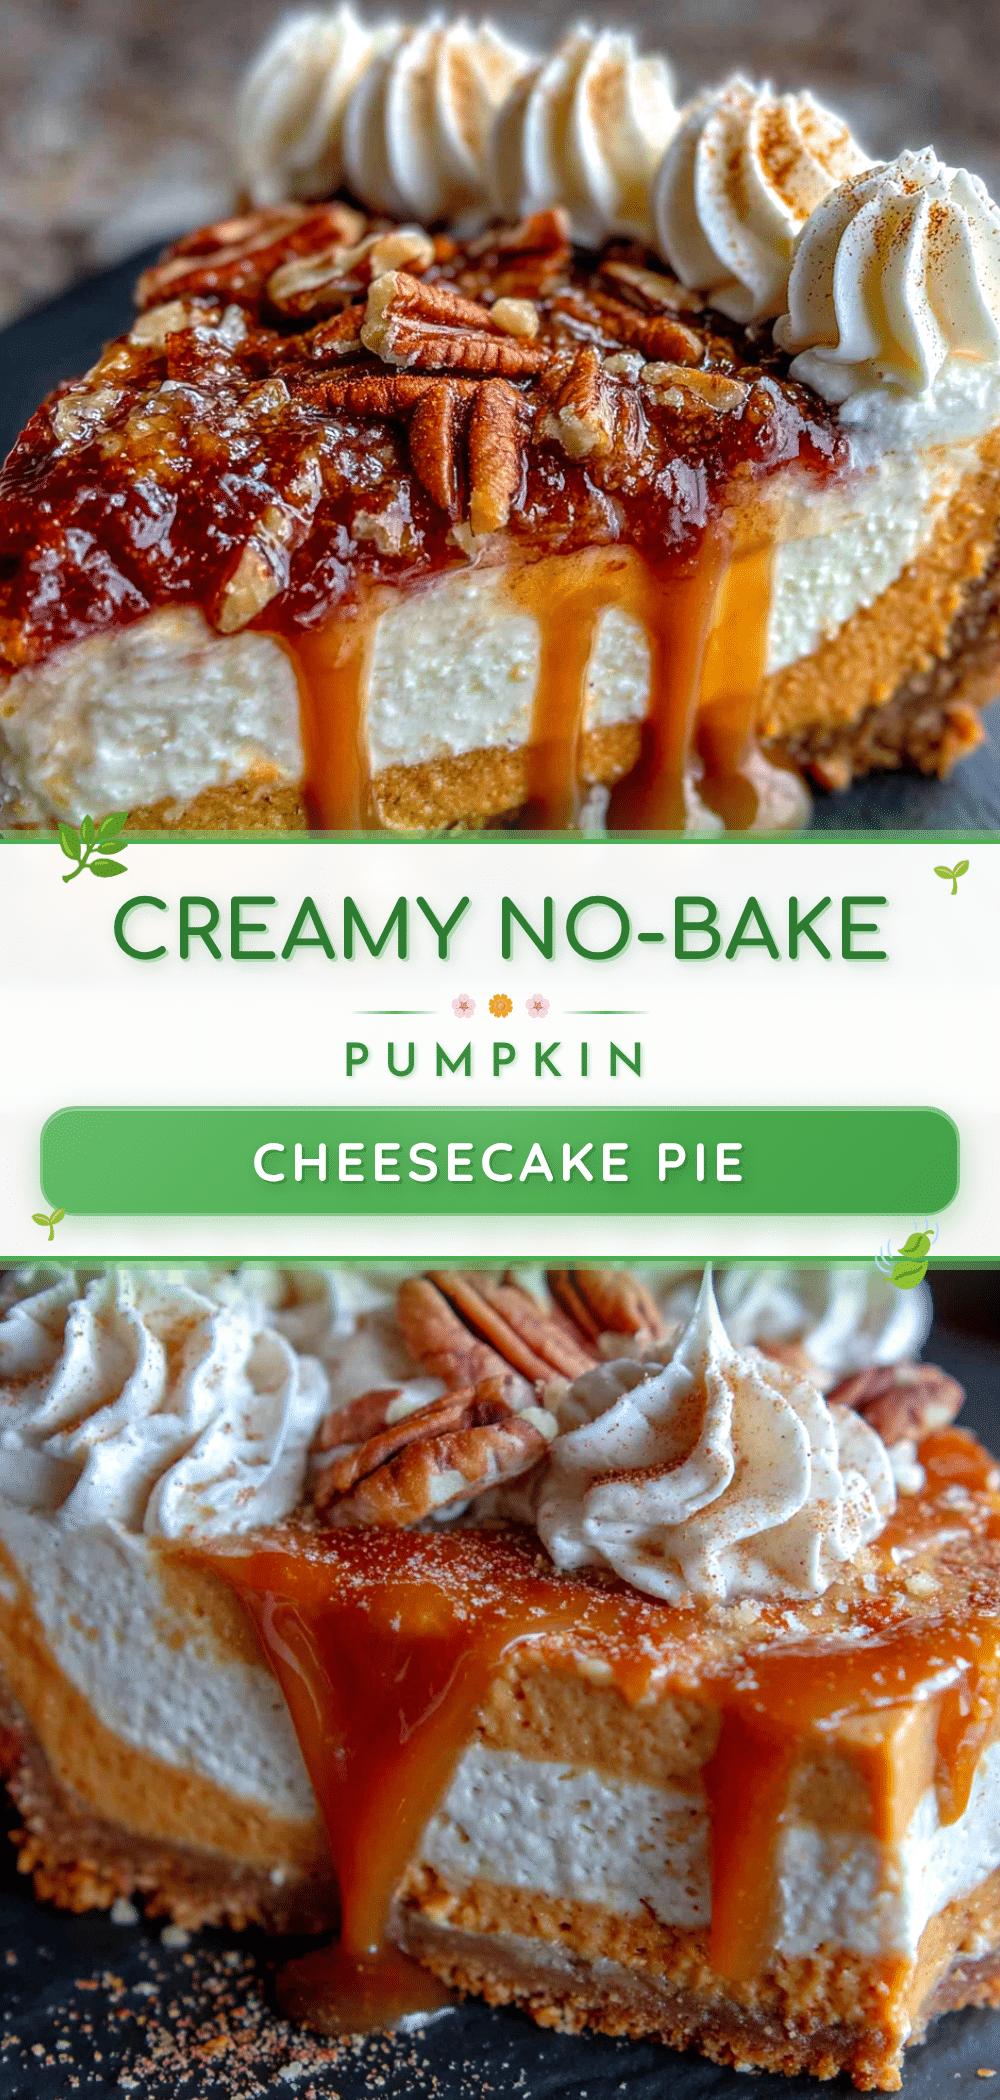
Creamy No-Bake Pumpkin Cheesecake Pie (Easy 10-Min Prep)
A silky, no-bake pumpkin cheesecake pie with a buttery graham cracker crust. Ready in just 10 minutes of prep, this creamy dessert is perfect for Thanksgiving or any fall gathering.
- Prep Time: 10 minutes
- Cook Time: 0 minutes
- Total Time: 6 hours 10 minutes (includes chilling)
- Yield: 10 servings 1x
- Category: Dessert
- Cuisine: American
Ingredients
- 1 ½ cups graham cracker crumbs (about 12 full sheets)
- ¼ cup granulated sugar
- 6 tablespoons unsalted butter, melted
- Pinch of salt (if using unsalted butter)
- ½ teaspoon ground cinnamon (optional)
- 16 ounces cream cheese, softened to room temperature
- 1 cup canned pumpkin puree (not pumpkin pie filling)
- ¾ cup packed light brown sugar
- 1 teaspoon vanilla extract
- 1 ½ teaspoons pumpkin pie spice
- ½ teaspoon ground cinnamon
- 1 ½ cups heavy whipping cream, cold
- 1 cup heavy whipping cream, cold (for topping)
- 2 tablespoons powdered sugar (for topping)
- ½ teaspoon vanilla extract (for topping)
- Ground cinnamon or pumpkin pie spice for dusting (for topping)
Instructions
- Make the crust: In a medium bowl, combine graham cracker crumbs, sugar, cinnamon (if using), and salt. Pour in the melted butter and stir with a fork until every crumb is moistened. Press the mixture firmly into the bottom and up the sides of a 9-inch pie dish. Refrigerate while making the filling.
- Whip the cream: In a chilled bowl, pour in 1 ½ cups cold heavy cream. Beat on medium-high speed until stiff peaks form, about 2-3 minutes. Set in the fridge.
- Beat the cream cheese: In a large bowl, beat the softened cream cheese with an electric mixer on medium speed until smooth and fluffy, about 2 minutes. Add the brown sugar and beat for another minute until combined.
- Add the pumpkin and spices: Add the pumpkin puree, vanilla extract, pumpkin pie spice, and cinnamon to the cream cheese mixture. Beat on medium-low until fully combined and smooth.
- Fold in the whipped cream: Add about one-third of the whipped cream to the pumpkin mixture and stir gently. Then add the remaining whipped cream and fold it in using a spatula until uniform in color.
- Assemble the pie: Retrieve the crust from the fridge. Spoon the filling into the crust and spread evenly. Tap the pie dish gently on the counter to release air bubbles.
- Chill the pie: Cover loosely with plastic wrap and refrigerate for at least 6 hours, preferably overnight.
- Make the topping: When ready to serve, whip the remaining 1 cup heavy cream with powdered sugar and vanilla until stiff peaks form. Spread or pipe over the set pie. Dust with cinnamon or pumpkin pie spice.
Notes
Cream cheese must be at room temperature to avoid lumps. Chill the pie for at least 6 hours, preferably overnight, for best texture. Add whipped cream topping just before serving. For clean slices, run a sharp knife under hot water and wipe dry between cuts.
Nutrition
- Serving Size: 1 slice
- Calories: 385
- Sugar: 22
- Sodium: 290
- Fat: 28
- Saturated Fat: 17
- Carbohydrates: 31
- Fiber: 2
- Protein: 5
Keywords: no-bake pumpkin cheesecake, pumpkin pie, easy dessert, Thanksgiving dessert, no-bake pie, pumpkin cheesecake


