Love this? Save it for later!
Share the inspiration with your friends
There used to be a tiny bakery tucked inside a gas station off Highway 49 that made a peanut butter poke cake so good it ruined me for all other desserts. When they closed—just vanished one day with a handwritten sign taped to the door—I actually sat in my car for a minute feeling genuinely lost. After twelve tries—some so dry they crumbled into dust, others so soggy they collapsed under their own weight—I finally got it. This is that cake.
The first time I walked into that gas station bakery, I was skeptical. I mean, gas station cake? But the woman behind the counter handed me a sample on a napkin, and honestly, that first bite stopped me mid-sentence. The chocolate was deep without being bitter, the peanut butter was swirled through every single bite, and the texture—somehow both light and ridiculously indulgent—made no sense coming from a convenience store. I went back every Thursday for months. It became my little ritual.
When they closed, I tried everything to recreate that experience. I called other bakeries. I scoured old forums. I even tried reverse-engineering it by taste alone, which led to some truly questionable results. But the thing I kept coming back to was the poke method—pouring warm cream right into holes poked in the cake so every forkful gets that peanut butter-chocolate magic. Maybe you’ve been there, chasing a food memory that feels just out of reach. This is the version that finally brought me peace.
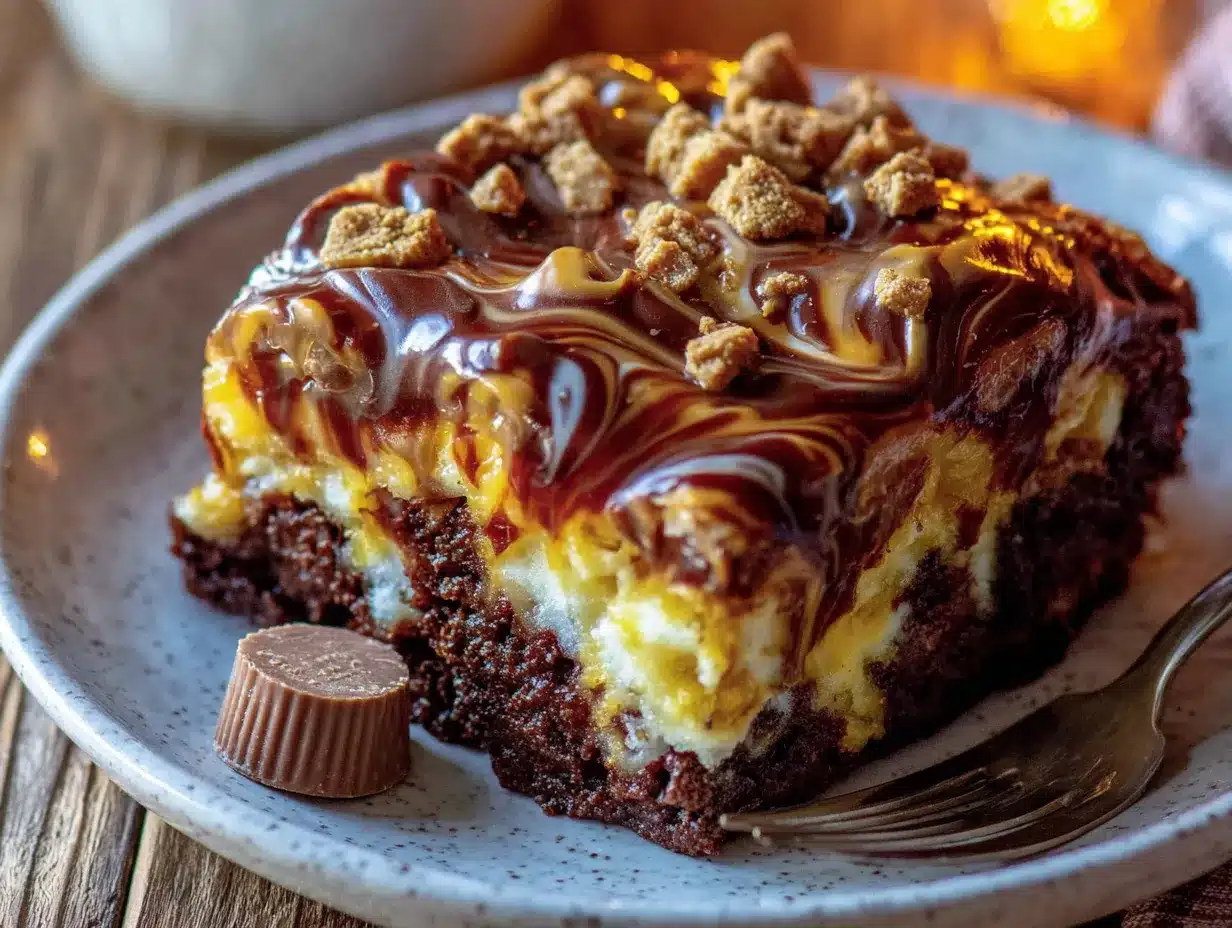
What makes this the ultimate Reese’s peanut butter poke cake isn’t just the ingredients—it’s the technique. The way the sweetened condensed milk soaks into the warm cake. The way the chocolate ganache sets just enough to crack when you cut into it. The way the chopped Reese’s cups stay slightly melty on top. It took me months to get every detail right, and now I’m sharing every single one of them with you.
Why You’ll Love This Recipe
Let me tell you why this cake has become my most-requested dessert for every gathering. After testing this recipe on neighbors, coworkers, and my very honest mother-in-law, I can say with confidence that this is the one.
- Incredibly Easy : This comes together in about 20 minutes of active prep time. The oven does most of the work, and the poke method means you don’t need any fancy decorating skills. If you can poke holes and pour, you’ve got this.
- Simple Ingredients : You likely have most of these in your pantry right now. A boxed cake mix, peanut butter, sweetened condensed milk—nothing weird or hard to find. I tested this with generic brands and name brands, and honestly, it works beautifully either way.
- Perfect for Celebrations : Birthdays, potlucks, game days, or just a Tuesday that needs a little extra joy. This cake feeds a crowd and travels surprisingly well. I’ve brought it to barbecues and holiday dinners, and it always disappears first.
- Crowd-Pleaser : Kids go crazy for it. Adults sneak seconds when they think no one is watching. Even people who claim they don’t have a sweet tooth find themselves reaching for another slice. The combination of chocolate and peanut butter is basically irresistible.
- Unbelievably Decadent : The texture here is what makes it special. The cake stays incredibly moist from the sweetened condensed milk soak, the peanut butter layer adds this creamy richness, and the chocolate ganache on top creates that perfect crackly shell. Every bite has a little bit of everything.
What sets this apart from other poke cakes is the layering technique. Instead of just pouring one mixture over the cake, you’re building flavor in stages. The sweetened condensed milk soaks in first, then the peanut butter mixture gets gently spread on top, and finally the ganache seals everything together. It’s not just another version—it’s the version I spent months perfecting.
This is one of those desserts that makes people close their eyes after the first bite. It’s comfort food at its finest—rich, nostalgic, and completely satisfying. Whether you’re impressing guests or treating yourself, this cake delivers every single time.
What Ingredients You Will Need
This recipe uses simple, accessible ingredients to create something that tastes anything but ordinary. Most of these are pantry staples, and the ones that aren’t are worth the trip to the store.
For the Cake Base
- 1 box (15.25 oz) chocolate cake mix (I prefer Duncan Hines Devil’s Food for the richest flavor, but any brand works)
- Ingredients listed on the cake mix box (typically eggs, oil, and water—use these exactly as directed)
- 1/2 cup creamy peanut butter (melted slightly for easier mixing—avoid natural peanut butter that separates, as it can make the cake greasy)
For the Poke Filling
- 1 can (14 oz) sweetened condensed milk (this is non-negotiable for that ultra-moist texture—don’t substitute evaporated milk)
- 1/2 cup creamy peanut butter (warmed so it blends smoothly into the condensed milk)
- 1 teaspoon vanilla extract (pure vanilla adds warmth, but imitation works in a pinch)
For the Peanut Butter Layer
- 1/2 cup creamy peanut butter (melted until smooth and pourable)
- 1/4 cup powdered sugar (this helps the peanut butter layer set slightly so it doesn’t just soak into the cake)
- 2-3 tablespoons milk (to thin the mixture to a spreadable consistency—start with 2 and add more if needed)
For the Chocolate Ganache Topping
- 1 cup semi-sweet chocolate chips (I recommend Ghirardelli for the smoothest melt, but store brand works great too)
- 1/2 cup heavy cream (this creates that glossy, pourable ganache—half-and-half can work but won’t set as firmly)
- 1 tablespoon butter (optional, but adds a beautiful shine and helps the ganache cut cleanly)
For Garnish
- 1 cup chopped Reese’s peanut butter cups (about 8 mini cups or 4 regular-sized—chop them while cold for cleaner cuts)
- 2 tablespoons melted peanut butter (for drizzling on top)
- Flaky sea salt (optional, but that salty-sweet contrast is absolutely worth it)
A note on peanut butter: I tested this with both creamy and crunchy, and creamy wins every time for texture. The crunchy bits get lost in the cake and don’t provide the consistent peanut butter experience you want. Also, use a brand like Jif or Skippy—the stabilizers in these help the layers set properly. Natural peanut butter tends to separate during baking and can leave oily spots on your cake.
For the chocolate chips, semi-sweet is ideal because it balances the sweetness of the condensed milk and powdered sugar. Milk chocolate makes the whole thing too sweet, and dark chocolate can be a little intense for this indulgent dessert. Semi-sweet hits that perfect middle ground.
Equipment Needed
You don’t need a professional bakery setup for this cake, but having the right tools makes the process smoother. Here’s what you’ll need:
- 9×13 inch baking pan (metal pans work best for even baking—glass can take longer and may result in a soggy bottom)
- Hand mixer or stand mixer (for beating the cake batter and mixing the fillings—a whisk works but your arm will thank you for the mixer)
- Mixing bowls (at least 3—one for the cake, one for the poke filling, and one for the ganache)
- Wooden spoon or spatula handle (for poking holes—the rounder the handle, the better. I actually use the back of a chopstick for perfect-sized holes)
- Small saucepan (for making the ganache and melting peanut butter)
- Measuring cups and spoons (accurate measurements matter here, especially for the ganache)
- Offset spatula or butter knife (for spreading the peanut butter layer evenly)
- Wire cooling rack (essential for even cooling—don’t skip this or your cake might get soggy on the bottom)
- Sharp knife (for clean slices—a serrated knife works best for cutting through the ganache without dragging it)
If you don’t have an offset spatula, don’t worry. A regular butter knife works fine—just go slowly and let the peanut butter mixture warm up slightly if it’s too thick to spread. I’ve also used the back of a spoon in a pinch, and it worked beautifully.
One tip: invest in a good 9×13 pan if you bake often. I learned this the hard way after a cheap pan warped in the oven and my cake came out uneven. A sturdy metal pan distributes heat more evenly and gives you a better final texture.
Preparation Method
Let’s walk through this step by step. I’ve included all the little details that make the difference between a good cake and a show-stopping one.
Step 1: Prepare and Bake the Cake
Preheat your oven to 350°F (175°C). Grease your 9×13 baking pan thoroughly with butter or non-stick spray. In a large bowl, prepare the chocolate cake mix according to the package directions. Add the 1/2 cup melted peanut butter to the batter and mix until just combined—don’t overmix, or the cake will be dense. Pour the batter into the prepared pan and spread it evenly. Bake for 28-32 minutes, or until a toothpick inserted in the center comes out with just a few moist crumbs. The cake should spring back when lightly touched. Let it cool in the pan on a wire rack for 10 minutes—no longer, because you want the cake still warm for the next step.
Step 2: Poke Those Holes
While the cake is still warm, use the handle of a wooden spoon or a chopstick to poke holes all over the cake. Space them about 1 inch apart, and poke all the way to the bottom of the pan. Don’t be shy here—more holes mean more filling gets absorbed. I usually poke about 30-40 holes across the entire cake. The holes will close up slightly as the cake cools, so work quickly while it’s warm.
Step 3: Make the Poke Filling
In a medium bowl, combine the can of sweetened condensed milk, 1/2 cup warmed peanut butter, and 1 teaspoon vanilla extract. Whisk until completely smooth. The mixture should be thick but pourable. If it’s too thick to pour, microwave it for 10-15 seconds and stir again. Pour this mixture evenly over the warm cake, making sure it fills all the holes. Use a spatula to gently spread it across the surface. Let the cake sit for 10 minutes to absorb the filling.
Step 4: Add the Peanut Butter Layer
In a small bowl, combine 1/2 cup melted peanut butter, 1/4 cup powdered sugar, and 2 tablespoons milk. Stir until smooth. The mixture should be spreadable but not runny—add the extra tablespoon of milk if needed. Gently spread this over the top of the cake, being careful not to disturb the filling underneath. This layer creates that beautiful peanut butter ribbon throughout the cake. Let the cake cool completely at room temperature, about 1 hour.
Step 5: Make the Ganache
Place 1 cup chocolate chips in a heat-safe bowl. In a small saucepan, heat 1/2 cup heavy cream over medium heat until it just begins to simmer—small bubbles around the edges, not a rolling boil. Pour the hot cream over the chocolate chips and let it sit for 2 minutes without stirring. Then gently stir until the chocolate is completely melted and the mixture is smooth. Stir in 1 tablespoon butter if using, until glossy. Let the ganache cool for 5-10 minutes until it thickens slightly but is still pourable.
Step 6: Top and Garnish
Pour the ganache over the cooled cake and spread it evenly with a spatula. While the ganache is still wet, sprinkle the chopped Reese’s cups evenly over the top. Drizzle with the remaining 2 tablespoons melted peanut butter. If using flaky sea salt, sprinkle a small pinch over the top now—the salt cuts through the sweetness beautifully. Refrigerate the cake for at least 2 hours before serving. This allows the layers to set properly and makes slicing much easier.
Cooking Tips & Techniques
After making this cake more times than I care to count, I’ve collected some hard-won wisdom. Here are the tips that make the biggest difference:
Don’t overbake the cake. I know it’s tempting to leave it in a few extra minutes for safety, but an overbaked cake won’t absorb the filling as well. Check it at 28 minutes and trust the toothpick test. A few moist crumbs are perfect. I once left mine in for 35 minutes and ended up with a dry cake that the sweetened condensed milk couldn’t save.
Poke holes while the cake is warm. This is crucial. If you wait until the cake is completely cool, the holes won’t open properly and the filling won’t penetrate as deeply. The warmth also helps the sweetened condensed milk mixture flow into every crevice. I learned this the hard way when I got distracted by a phone call and came back to a cool cake—the filling just sat on top.
Use room temperature ingredients for the ganache. Cold cream can seize the chocolate and leave you with a grainy mess. Let your cream come to room temperature before heating, and make sure your bowl is completely dry—any water can cause the chocolate to seize. If your ganache does seize, don’t panic. Stir in a tablespoon of warm milk and whisk vigorously until smooth.
Let the cake chill completely. I know it’s hard to wait, but this cake truly needs that 2-hour chill time. The layers need to set so you get clean slices. Cutting into it too early results in a messy, goopy cake that still tastes amazing but doesn’t look as pretty. I’ve made this mistake at 11 PM when I wanted a midnight snack, and the next day the leftovers were so much better.
Use a serrated knife for slicing. A straight-edged knife will drag through the ganache and mess up your beautiful top layer. A serrated knife cuts cleanly through the chocolate without pulling. Run the knife under hot water and wipe it dry between slices for the cleanest cuts.
Double the ganache if you’re a chocolate lover. The recipe as written gives a nice, thin layer of ganache that perfectly balances the peanut butter. But if you want a thicker chocolate crust, go ahead and use 1.5 cups of chocolate chips and 3/4 cup of cream. I’ve done this for special occasions and no one has ever complained.
Variations & Adaptations
One of the best things about this cake is how adaptable it is. Here are some variations I’ve tested and loved:
Gluten-Free Version
Use a gluten-free chocolate cake mix—King Arthur Flour makes an excellent one. Double-check that your peanut butter and chocolate chips are certified gluten-free, as some brands process them in facilities that also handle wheat. The rest of the ingredients are naturally gluten-free. I’ve made this for celiac friends and they couldn’t tell the difference.
Peanut Butter Lover’s Extreme
If you’re like me and can’t get enough peanut butter, add 1/2 cup peanut butter chips to the cake batter before baking. You can also swirl extra peanut butter into the ganache before pouring it over the cake. For the ultimate peanut butter experience, use crunchy peanut butter for the filling layer and top with chopped peanut butter cookies instead of Reese’s cups.
Chocolate Peanut Butter Cup Fantasy
Press mini Reese’s cups into the top of the cake right after pouring the ganache, spacing them evenly across the surface. When you slice the cake, each piece gets a whole peanut butter cup in the middle. I did this for a Super Bowl party and people went absolutely crazy for it.
Healthier-ish Version
Use a sugar-free chocolate cake mix and sugar-free sweetened condensed milk. Swap the heavy cream in the ganache for coconut cream (the thick part from a can of full-fat coconut milk). Use natural peanut butter with no added sugar—just make sure it’s well-stirred before using. The texture will be slightly different, but the flavor is still incredible. I’ve made this for a friend who was watching her sugar intake, and she asked for the recipe.
Different Cake Base
Try this with a yellow cake mix for a lighter, more traditional poke cake experience. The chocolate-peanut butter combination still works beautifully, but the yellow cake lets the peanut butter flavor shine even more. You can also use a marble cake mix for the best of both worlds.
Serving & Storage Suggestions
This cake is incredibly versatile when it comes to serving. Here’s how to make the most of it:
Serving Temperature: Serve this cake cold or at room temperature—both are delicious but offer different experiences. Cold, the ganache is firmer and the layers are more distinct. At room temperature, the peanut butter layer softens slightly and the cake becomes even more decadent. I personally prefer it cold for the first day and room temperature for leftovers.
Presentation: For the prettiest slices, use that serrated knife I mentioned earlier and wipe it clean between cuts. Serve on white plates to make the chocolate and peanut butter colors pop. A small dollop of whipped cream on the side adds a lovely contrast, both visually and in flavor.
Perfect Pairings: A cold glass of milk is the classic companion, and for good reason. The creaminess cuts through the richness of the cake perfectly. For a more grown-up pairing, try it with a dark roast coffee or a vanilla milkshake. I’ve also served this with vanilla ice cream on the side, and the warm-cold contrast is absolutely divine.
Storage: Store this cake in the refrigerator, tightly covered, for up to 5 days. The flavors actually deepen and meld together over time, so day two and three are often even better than day one. I’ve kept it for a full week and it was still moist and delicious, though the ganache may start to soften after day 4.
Freezing: This cake freezes beautifully. Wrap individual slices tightly in plastic wrap, then place them in a freezer-safe bag or container. They’ll keep for up to 3 months. To thaw, move a slice to the refrigerator overnight or let it sit at room temperature for about 30 minutes. I always keep a few slices in the freezer for emergencies—like when I need a last-minute dessert for unexpected guests.
Reheating: If you prefer your cake warm, microwave individual slices for 15-20 seconds. The ganache will get slightly melty and the peanut butter layer will soften into something almost like a sauce. Just don’t overdo it, or the cake can become mushy.
Nutritional Information & Benefits
Let’s be real—this is an indulgent dessert, and it’s meant to be enjoyed as such. But here’s what you should know:
| Nutrient | Per Slice (1/12 of cake) |
|---|---|
| Calories | 485 |
| Total Fat | 28g |
| Saturated Fat | 12g |
| Cholesterol | 35mg |
| Sodium | 420mg |
| Total Carbohydrates | 55g |
| Dietary Fiber | 3g |
| Sugars | 40g |
| Protein | 10g |
On the positive side, peanut butter provides protein and healthy fats. The chocolate offers antioxidants (yes, really!), and the eggs in the cake mix contribute some protein as well. This cake also contains iron from the chocolate and calcium from the milk and cream.
This recipe contains peanuts, dairy, gluten, and soy (from the cake mix). For allergen-friendly versions, check the variations section above. As always, please consult with a healthcare professional about your specific dietary needs.
I believe in enjoying treats like this in moderation. A slice of this cake won’t derail your health goals—it’s about balance. I make this for celebrations and special occasions, and I savor every single bite without guilt. Life is too short for bad cake, you know?
Conclusion
This ultimate Reese’s peanut butter poke cake is the dessert that keeps on giving. It’s the cake I bring to every potluck, the one friends request for their birthdays, and the one I make when I need a guaranteed crowd-pleaser. After those twelve failed attempts chasing a memory from a gas station bakery, this recipe finally gave me peace. It’s better than the original—I can say that now with confidence.
The beauty of this recipe is that it works for everyone. Beginners will love how forgiving it is, and experienced bakers will appreciate the layering technique that creates something truly special. Whether you’re making it for a holiday dinner, a summer barbecue, or just because it’s Tuesday, this cake delivers every single time.
I want to hear about your experience! Did you try any of the variations? Did you add your own twist? Drop a comment below and tell me how it turned out. And if you loved this recipe as much as I do, share it with a friend who needs a little dessert magic in their life. Happy baking, friends—you’ve got this!
Frequently Asked Questions
Can I make this cake ahead of time?
Absolutely! This cake actually gets better after a day in the refrigerator. Make it a day ahead, cover it tightly, and let the flavors meld overnight. Just add the Reese’s cup topping right before serving for the best texture and appearance.
Can I use a different flavor of cake mix?
Yes, you can. Yellow cake mix creates a lighter, more traditional poke cake experience. Marble cake mix gives you the best of both worlds. I wouldn’t recommend white cake mix, as it can get lost under all that chocolate and peanut butter.
Why did my ganache turn out grainy?
Grainy ganache usually happens when the cream is too hot or a tiny bit of water gets into the chocolate. Make sure your cream is just simmering, not boiling, and that all your tools are completely dry. If your ganache does seize, whisk in a tablespoon of warm milk to bring it back to smoothness.
Can I freeze this cake?
Yes, and it freezes beautifully! Wrap individual slices tightly in plastic wrap and store them in a freezer bag for up to 3 months. Thaw overnight in the refrigerator or at room temperature for about 30 minutes. I always keep a few slices in the freezer for emergencies.
How do I get clean slices?
Use a serrated knife and run it under hot water before each cut. Wipe the blade dry between slices. This prevents the ganache from dragging and gives you those beautiful, clean slices that look like they came from a bakery. Also, make sure the cake is fully chilled before cutting.
Pin This Recipe!
The Best Ultimate Reese’s Peanut Butter Poke Cake

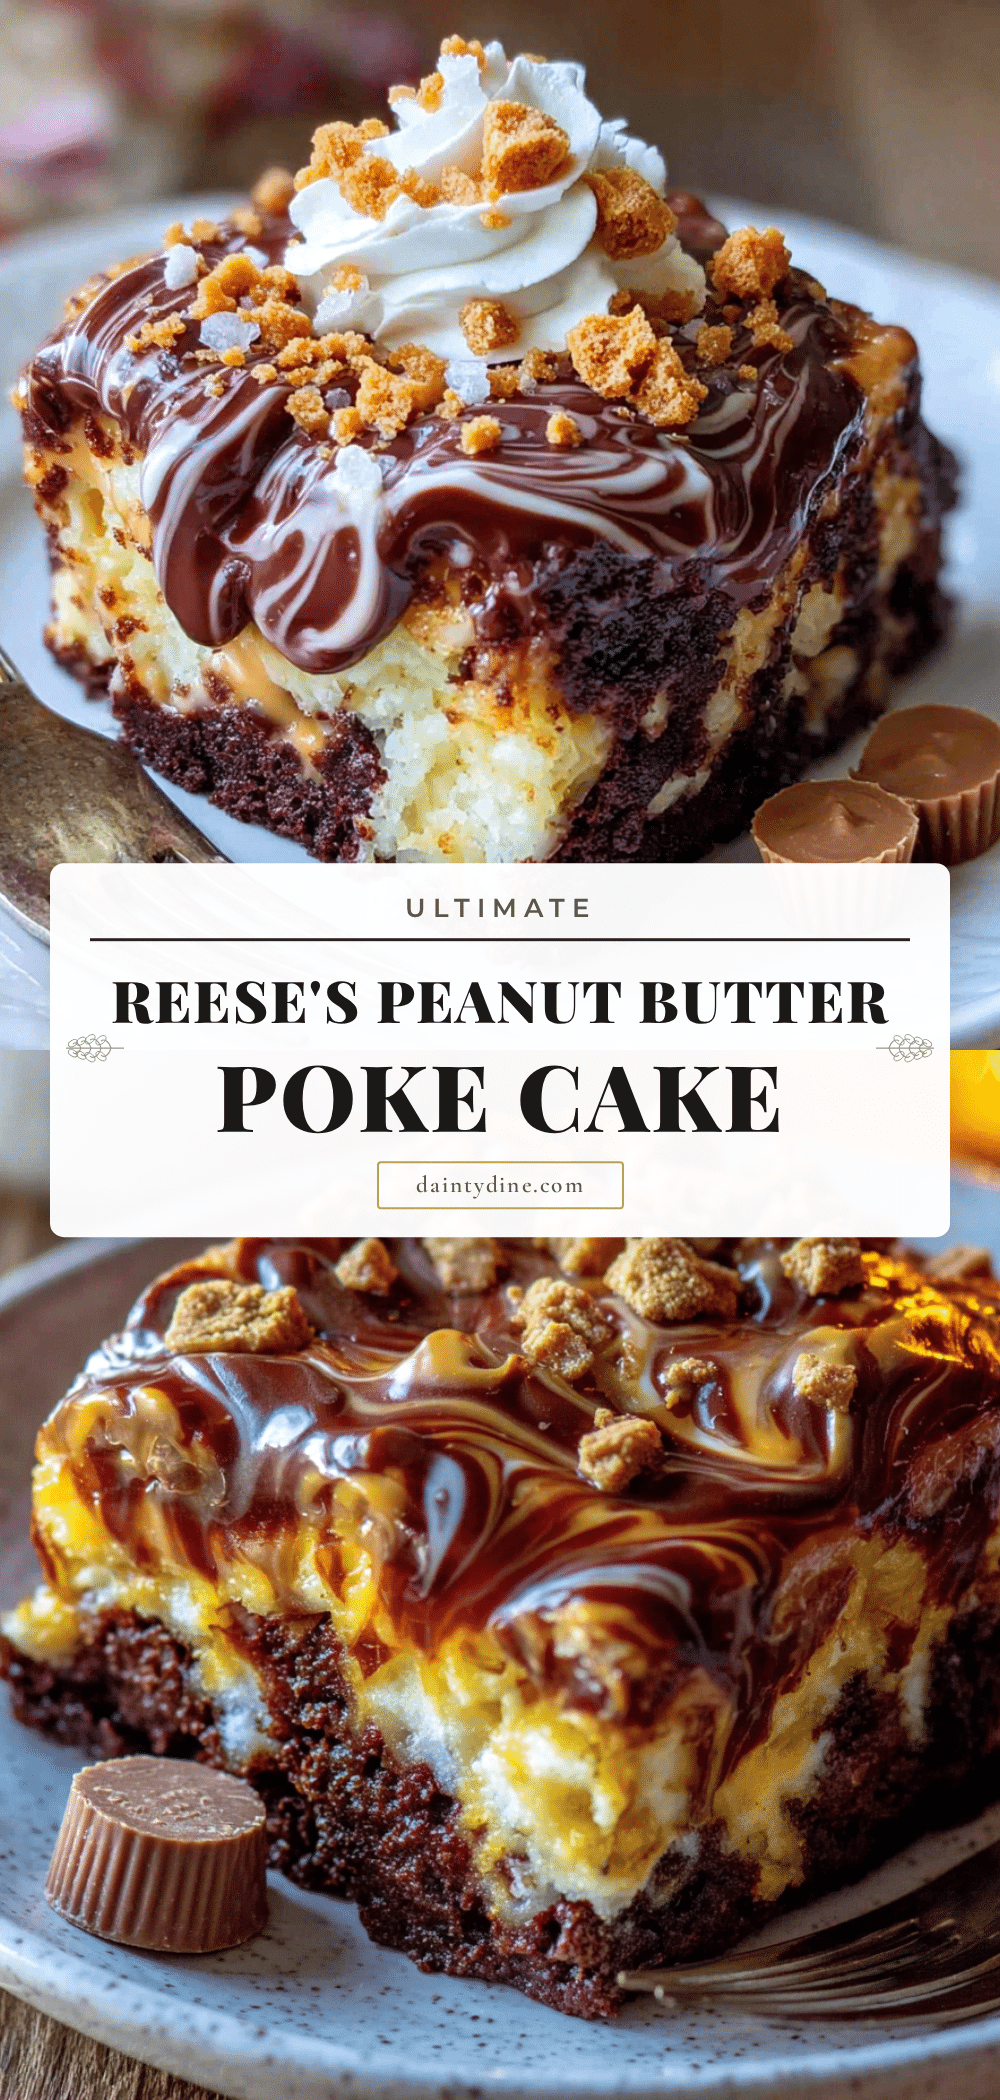
This ultimate Reese’s peanut butter poke cake is incredibly moist, decadent, and layered with chocolate, peanut butter, and sweetened condensed milk. It’s the perfect crowd-pleasing dessert for any celebration.
- Prep Time: 20 minutes
- Cook Time: 30 minutes
- Total Time: 2 hours 50 minutes (includes cooling and chilling)
- Yield: 12 servings 1x
- Category: Dessert
- Cuisine: American
Ingredients
- 1 box (15.25 oz) chocolate cake mix (preferably Duncan Hines Devil’s Food)
- Ingredients listed on the cake mix box (eggs, oil, water)
- 1/2 cup creamy peanut butter (melted, for the cake batter)
- 1 can (14 oz) sweetened condensed milk
- 1/2 cup creamy peanut butter (warmed, for the poke filling)
- 1 teaspoon vanilla extract
- 1/2 cup creamy peanut butter (melted, for the peanut butter layer)
- 1/4 cup powdered sugar
- 2–3 tablespoons milk (for the peanut butter layer)
- 1 cup semi-sweet chocolate chips
- 1/2 cup heavy cream
- 1 tablespoon butter (optional, for ganache)
- 1 cup chopped Reese’s peanut butter cups (about 8 mini or 4 regular)
- 2 tablespoons melted peanut butter (for drizzling)
- Flaky sea salt (optional)
Instructions
- Preheat oven to 350°F (175°C). Grease a 9×13 inch baking pan.
- Prepare the chocolate cake mix according to package directions. Add 1/2 cup melted peanut butter and mix until just combined. Pour into prepared pan and bake for 28-32 minutes, until a toothpick inserted in the center comes out with a few moist crumbs. Let cool in pan on a wire rack for 10 minutes.
- While the cake is still warm, poke holes all over the cake using the handle of a wooden spoon or a chopstick, spacing them about 1 inch apart and poking all the way to the bottom.
- In a medium bowl, whisk together the sweetened condensed milk, 1/2 cup warmed peanut butter, and vanilla extract until smooth. Pour evenly over the warm cake, filling the holes. Let sit for 10 minutes.
- In a small bowl, combine 1/2 cup melted peanut butter, powdered sugar, and 2 tablespoons milk. Stir until smooth, adding the extra tablespoon of milk if needed for spreadable consistency. Gently spread over the cake. Let cool completely at room temperature, about 1 hour.
- Place chocolate chips in a heat-safe bowl. Heat heavy cream in a small saucepan over medium heat until it just begins to simmer. Pour over chocolate chips, let sit 2 minutes, then stir until smooth. Stir in butter if using. Let cool 5-10 minutes until slightly thickened but still pourable.
- Pour ganache over the cooled cake and spread evenly. While ganache is still wet, sprinkle chopped Reese’s cups on top. Drizzle with melted peanut butter and sprinkle with flaky sea salt if desired. Refrigerate for at least 2 hours before serving.
Notes
For best results, use creamy peanut butter like Jif or Skippy (not natural). Poke holes while cake is warm. Let cake chill completely before slicing for clean cuts. Use a serrated knife for slicing. Cake can be stored in the refrigerator for up to 5 days or frozen for up to 3 months.
Nutrition
- Serving Size: 1 slice (1/12 of cak
- Calories: 485
- Sugar: 40
- Sodium: 420
- Fat: 28
- Saturated Fat: 12
- Carbohydrates: 55
- Fiber: 3
- Protein: 10
Keywords: Reese's, peanut butter, poke cake, chocolate, dessert, easy, crowd-pleaser