Love this? Save it for later!
Share the inspiration with your friends
I was elbow-deep in a box of vintage Christmas ornaments at a dusty estate sale when the plumber—the one who’d been hired to fix the old radiator in the corner—started talking about Halloween. “You know what my kids go nuts for every year?” he said, not looking up from the pipe he was wrestling with. “Those little ghost treats. Rice Krispies, shaped like sheets. Nothing fancy.” I stopped mid-reach for a tarnished angel and just stared at him. A plumber. In a cobwebbed basement. Giving me the best Halloween dessert idea I’d heard in years. Honestly, it was the last place I expected to find culinary inspiration, but there I was, scribbling his instructions on the back of a receipt while he described exactly how to make these ghost-shaped Rice Krispie treats.
He told me his wife had been making them for a decade, ever since she’d seen a photo in a magazine. “She just uses a cookie cutter,” he said, shrugging. “But the trick is the butter. Don’t skimp on the butter.” I mean, that’s the kind of advice you remember. So I bought a bag of marshmallows on the way home, dug out a ghost-shaped cookie cutter I’d forgotten I owned, and gave it a shot. The first batch was a little wonky—I used too much vanilla and the shapes didn’t hold—but by the third try, I had a platter of adorable little ghosts that my neighbors fought over at our block party.
Maybe you’ve been there, standing in the baking aisle, overwhelmed by all the complicated Halloween recipes that require fondant or food coloring or three different types of chocolate. These ghost-shaped Rice Krispie treats are the opposite of that. They’re simple, they’re fast, and they’re so ridiculously cute that people will think you spent hours on them. I’ve been making them every October since that estate sale, and honestly, they’ve become my most-requested holiday treat. Let me tell you—once you make these, you’ll understand why a plumber in a basement was so passionate about a marshmallow-based dessert.
Why You’ll Love This Recipe
Let’s be real for a second. Halloween baking can be a nightmare. Between the sticky caramel apples, the crumbling sugar cookies, and the cake pops that refuse to stay on their sticks, it’s easy to get frustrated and just buy a bag of candy. But these ghost-shaped Rice Krispie treats? They’re a game-changer. I’ve tested this recipe at least a dozen times over the years, tweaking the butter-to-marshmallow ratio until I got that perfect chewy-but-not-gummy texture. And I’m not a professional chef—I’m just a home cook who hates wasting ingredients. So trust me when I say this version works.
- Quick & Easy: From start to finish, these take about 20 minutes. That’s faster than a trip to the store for pre-made treats.
- Simple Ingredients: You probably already have butter, marshmallows, and Rice Krispies in your pantry. No fancy extracts or specialty sugars required.
- Perfect for Halloween: Whether you’re hosting a party, sending treats to school, or just want something fun for your own kids, these ghosts are a hit.
- Crowd-Pleaser: I’ve served these to toddlers, teenagers, and grandparents. Every single person smiled. Every single one.
- Unbelievably Delicious: The texture is spot-on—crispy on the outside, soft and chewy on the inside. And the ghost shape just makes them taste better. I swear it’s science.
What sets this recipe apart from other versions is the technique. Most recipes tell you to melt the butter and marshmallows together, then stir in the cereal. But I’ve found that adding a tiny pinch of salt and letting the mixture cool for just two minutes before cutting makes the treats hold their shape better. It’s a small tweak, but it makes a huge difference. This isn’t just another Rice Krispie treat recipe—it’s the best version for Halloween.
And here’s the thing: these treats have that magical quality of making you feel like a kid again. The first bite always takes me back to my grandmother’s kitchen, where she’d make a big pan of treats and let me cut them into whatever shapes I wanted. It’s comfort food in its purest form—nostalgic, simple, and deeply satisfying. Perfect for impressing guests without any stress, or turning a regular October evening into something memorable.
What Ingredients You Will Need
This recipe uses simple, wholesome ingredients to deliver bold flavor and satisfying texture without the fuss. Everything here is a pantry staple, which means you can whip up a batch of ghost-shaped treats on a whim—no special grocery run required.
- 3 tablespoons unsalted butter (I use Land O’Lakes for consistent results; the butter adds richness and helps the marshmallows melt smoothly)
- 1 package (10 ounces) regular marshmallows (or 4 cups mini marshmallows; avoid “jumbo” marshmallows as they melt unevenly)
- 6 cups Rice Krispies cereal (or any crispy rice cereal; store brands work fine, but the name brand gives the best crunch)
- ¼ teaspoon salt (optional but recommended—it balances the sweetness and enhances the buttery flavor)
- ½ teaspoon vanilla extract (use pure vanilla extract if you have it; imitation works too, but pure adds a deeper flavor)
- Non-stick cooking spray (for greasing the pan and your hands; butter or coconut oil also works)
- Mini chocolate chips or candy eyes (for decorating the ghosts; I prefer Wilton candy eyes for their size and stickiness)
Ingredient Selection Tips: For the best texture, use fresh marshmallows. Stale marshmallows can make the treats hard and crumbly. If you’re unsure, give the bag a squeeze—fresh marshmallows should be soft and springy. Also, look for butter that’s unsalted so you can control the salt level. I’ve tried this recipe with salted butter, and it works, but the flavor isn’t as clean.
Substitution Guidance: For a dairy-free version, use vegan butter and vegan marshmallows (Dandies brand works beautifully). For a gluten-free option, Rice Krispies are naturally gluten-free in the US, but check the label if you’re in another country where they may use malt flavoring. You can also swap the vanilla extract with almond extract for a nutty twist—just use ¼ teaspoon instead of ½, as almond extract is stronger.
Equipment Needed
You don’t need a fancy kitchen to make these ghost-shaped treats. I’ve made them in a college dorm kitchen and a fully-stocked home kitchen, and they turn out the same every time.
- Large saucepan or pot (at least 4 quarts; a non-stick pot makes cleanup easier, but any pot works)
- Spatula or wooden spoon (silicone spatulas are best for scraping every last bit of marshmallow mixture)
- 9×13-inch baking pan (an 8×8 pan will give you thicker treats; adjust cutting time accordingly)
- Ghost-shaped cookie cutter (about 3 inches tall; you can find these at craft stores or online for a few dollars)
- Parchment paper or wax paper (for lining the pan and preventing sticking)
- Sharp knife (if you don’t have a cookie cutter, you can freehand cut ghost shapes)
- Small bowl (for holding candy eyes or chocolate chips during decorating)
Budget-Friendly Options: If you don’t have a ghost-shaped cutter, use a small round cutter (like a biscuit cutter) and add a “tail” by cutting a small triangle at the bottom. Or just cut the treats into squares and decorate them with candy eyes—they’ll still look like ghosts. I’ve also used a paring knife to carve ghost shapes by hand. It takes a little longer, but it works.
Maintenance Tip: After cutting the treats, wipe your cookie cutter with a paper towel between cuts to prevent sticking. A quick spray of cooking spray on the cutter also helps.
Preparation Method
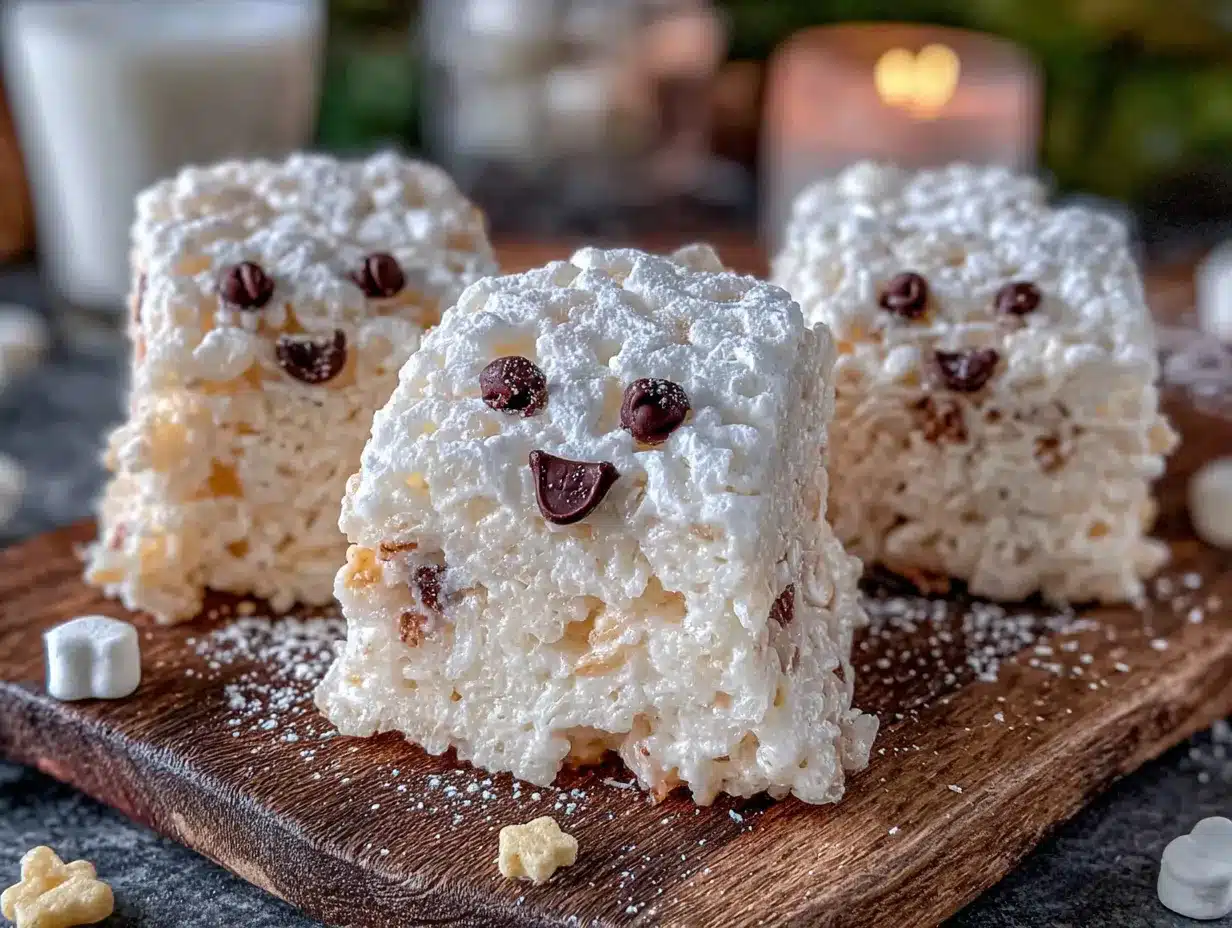
Follow these steps carefully, and you’ll have a platter of adorable ghosts in no time. I’ve included time estimates so you can plan your baking session.
- Prepare your pan (2 minutes): Line a 9×13-inch baking pan with parchment paper. Leave some overhang on the sides—this makes it easy to lift the treats out later. Lightly spray the parchment with non-stick cooking spray. Set aside.
- Melt the butter (3 minutes): In a large saucepan over medium-low heat, melt 3 tablespoons of unsalted butter. Stir occasionally with your spatula. The butter should be fully melted but not bubbling or browning. If it starts to brown, remove the pot from the heat immediately—browned butter will change the flavor. (I learned this the hard way when I made a batch that tasted like popcorn.)
- Add the marshmallows (4-5 minutes): Add the entire package of marshmallows to the melted butter. Stir constantly until the marshmallows are completely melted and smooth. This should take about 4 to 5 minutes. Don’t walk away during this step—marshmallows can burn quickly if left unattended. The mixture should be glossy and stretchy when you lift the spatula.
- Season and flavor (30 seconds): Remove the pot from the heat. Stir in ¼ teaspoon of salt and ½ teaspoon of vanilla extract. Mix until fully incorporated. The salt will dissolve into the warm mixture. You’ll smell the vanilla immediately—it’s a lovely, warm scent.
- Add the cereal (2 minutes): Pour in 6 cups of Rice Krispies cereal. Fold gently with your spatula until all the cereal is evenly coated. Be careful not to crush the cereal—you want those crispy squares intact. The mixture will look like a sticky, golden cloud. If it seems too dry, add a splash of water (about 1 teaspoon) and stir again. If it seems too wet, add a handful more cereal.
- Press into the pan (5 minutes): Transfer the mixture to the prepared pan. Spray your hands with cooking spray (or rub them with butter) and press the mixture firmly and evenly into the pan. Don’t press too hard—you want the treats to be dense enough to hold their shape but not so compressed that they’re hard. Aim for an even thickness of about ¾ inch. Let the treats cool at room temperature for 15 minutes. Don’t refrigerate them—cold treats can become too hard to cut cleanly.
- Cut the shapes (10 minutes): Once cooled but still slightly warm, lift the treats out of the pan using the parchment overhang. Place them on a cutting board. Dip your ghost-shaped cookie cutter in cold water (or spray with cooking spray) and press firmly into the treats. Wiggle the cutter slightly to release the shape. Repeat, spacing cuts close together to minimize waste. You should get about 12 to 15 ghosts from one batch, depending on cutter size. If the cutter sticks, dip it in water again between cuts.
- Decorate the ghosts (5 minutes): While the treats are still slightly tacky, press two mini chocolate chips or candy eyes onto each ghost for eyes. If the treats have cooled completely, use a tiny dab of frosting or melted chocolate as “glue.” I like to add a small smile using a toothpick dipped in melted chocolate, but that’s optional. Let the decorations set for 5 minutes before serving.
Troubleshooting Tip: If your treats are too crumbly when cutting, you may have under-melted the marshmallows or used too much cereal. Next time, melt the marshmallows a little longer and add the cereal in two batches. If the treats are too hard, you may have pressed them too firmly or overcooked the marshmallows. Remember: low and slow is the key.
Cooking Tips & Techniques
I’ve made these ghost-shaped treats more times than I can count, and I’ve definitely had my share of failures. One year, I forgot to add the vanilla and the treats tasted like sweetened cardboard. Another time, I used stale marshmallows and the mixture seized up into a hard, unworkable blob. Here’s what I’ve learned:
Use a heavy-bottomed pot. A thin pot can cause hot spots that scorch the marshmallows. I use a 5-quart enameled cast iron pot, and it distributes heat beautifully. If you don’t have one, just stir constantly and keep the heat low.
Don’t over-stir the cereal. Once you add the Rice Krispies, fold gently until just combined. Over-stirring crushes the cereal and makes the treats dense. You want to see distinct cereal pieces in the finished product.
Cool completely before cutting. I know it’s tempting to cut right away, but the treats need time to set. I let them cool for at least 20 minutes at room temperature. If you’re in a hurry, pop the pan in the fridge for 10 minutes—but don’t leave them there too long, or they’ll become brittle.
Multitasking strategy: While the marshmallow mixture is melting, line your pan with parchment and spray your cookie cutter. This saves time and keeps you organized. I also set out my candy eyes in a small bowl so I can grab them quickly.
Consistency tip: For the perfect texture, use a kitchen scale to measure your cereal. 6 cups of Rice Krispies is about 180 grams. Measuring by volume can vary depending on how tightly you pack the cup, but weight is always accurate.
Variations & Adaptations
One of the best things about this recipe is how easy it is to customize. I’ve tried several variations over the years, and each one has its own charm.
- Chocolate Ghosts: Add ¼ cup of cocoa powder to the marshmallow mixture after melting, or stir in ½ cup of mini chocolate chips with the cereal. The chocolate version is richer and feels more decadent—perfect for chocolate lovers.
- Vegan Version: Use vegan butter (like Earth Balance) and vegan marshmallows (Dandies are my go-to). The texture is slightly less chewy but still delicious. I’ve served these to vegan friends and they disappeared within minutes.
- Gluten-Free Option: Rice Krispies are naturally gluten-free in the US, but if you’re in the UK or Australia, look for a certified gluten-free crispy rice cereal. The treats taste the same—no one will know the difference.
- Spooky Color Twist: Add a few drops of orange or purple food coloring to the marshmallow mixture for a colorful Halloween treat. Gel food coloring works best—liquid coloring can make the mixture too wet. I made a batch of orange ghosts last year and they were a huge hit with my niece.
- Peanut Butter Ghosts: Stir in 2 tablespoons of creamy peanut butter with the vanilla. The peanut butter adds a savory note that balances the sweetness. Just be sure to use a smooth, no-stir variety for even mixing.
Seasonal Adaptation: While this recipe is perfect for Halloween, you can adapt it for other holidays. Use a heart-shaped cutter for Valentine’s Day, a tree-shaped cutter for Christmas, or a bunny-shaped cutter for Easter. The base recipe stays the same—just switch up the cutter and decorations.
Serving & Storage Suggestions
These ghost-shaped treats are best served at room temperature. I like to arrange them on a white platter to make the ghosts pop, with a few candy pumpkins scattered around for color. They’re perfect for Halloween parties, school bake sales, or just a fun after-school snack.
Complementary Dishes: Serve these alongside a warm mug of apple cider or a glass of cold milk. For a full Halloween spread, pair them with pumpkin-shaped sugar cookies, caramel apples, or a bowl of popcorn balls. The combination of textures and flavors is irresistible.
Storage Instructions: Store the treats in an airtight container at room temperature for up to 5 days. Layer them between sheets of wax paper to prevent sticking. Do not refrigerate—the cold air makes them hard and stale. If you live in a humid climate, add a silica gel packet to the container to absorb excess moisture.
Freezer Instructions: These treats freeze beautifully. Place the undecorated ghosts in a single layer on a baking sheet and freeze for 1 hour. Transfer to a freezer-safe bag or container, layering with parchment paper. Freeze for up to 3 months. To serve, thaw at room temperature for 15 minutes, then add the candy eyes. The texture will be just as good as fresh.
Reheating Tip: If the treats lose their chewiness after a day or two, microwave them for 5 to 10 seconds. This softens the marshmallow and restores the fresh-from-the-pan texture. Don’t overheat, or they’ll become gooey.
Flavor Development: Honestly, these treats taste best on the first day. The cereal stays crunchiest, and the marshmallow is perfectly chewy. By day three, the treats start to soften, but they’re still delicious. I’ve never had a batch last longer than four days in my house—they’re always gone before then.
Nutritional Information & Benefits
Let’s be honest—these are a treat, not a health food. But they’re made with simple, recognizable ingredients, and you can feel good about serving them to your family. Here’s the estimated nutritional breakdown per ghost (based on 12 servings):
| Nutrient | Amount per serving |
|---|---|
| Calories | 180 |
| Total Fat | 6g |
| Saturated Fat | 3.5g |
| Carbohydrates | 32g |
| Sugar | 16g |
| Protein | 2g |
| Sodium | 180mg |
Health Benefits of Key Ingredients: Rice Krispies are fortified with iron and B vitamins, which support energy metabolism. Butter provides vitamin A, important for eye health. And while marshmallows aren’t exactly a superfood, they do contain a small amount of collagen from gelatin, which is good for skin and joints. (I’m not saying this is a health food, but every little bit counts, right?)
Dietary Considerations: This recipe is vegetarian and can easily be made gluten-free and dairy-free with simple substitutions. It’s not suitable for vegans unless you use vegan marshmallows and butter. The treats contain no nuts or soy (check your marshmallow brand for soy lecithin if you have allergies).
Personal Wellness Perspective: I believe in balance. These treats are a once-a-year indulgence for me, and I don’t feel guilty about enjoying them. Life’s too short to skip the ghost-shaped Rice Krispie treats, you know?
Conclusion
These ghost-shaped Rice Krispie treats are proof that the best recipes often come from the most unexpected places. A plumber in a basement, a dusty estate sale, and a simple idea that turned into a Halloween tradition. I’ve made these treats for block parties, classroom celebrations, and quiet nights at home, and they’ve never failed to bring smiles. They’re quick, they’re easy, and they’re absolutely adorable—what more could you want from a Halloween dessert?
I’d love to hear how yours turn out. Did you add a twist? Use a different cutter? Forget the butter and have to start over? (Trust me, I’ve been there.) Drop a comment below and let me know. And if you share a photo on social media, tag me—I want to see your ghost creations. Until next time, happy baking, and may your marshmallows always melt smoothly.
Frequently Asked Questions
Can I use mini marshmallows instead of regular ones?
Yes, absolutely. Use 4 cups of mini marshmallows in place of one 10-ounce bag of regular marshmallows. Mini marshmallows actually melt faster and more evenly, which can save you a minute or two. Just keep stirring to prevent scorching.
Why did my treats turn out hard?
Hard treats usually mean you overcooked the marshmallows or pressed the mixture too firmly into the pan. Next time, melt the marshmallows over low heat and remove them from the stove as soon as they’re smooth. When pressing the mixture into the pan, use a gentle, even pressure.
Can I make these without a ghost-shaped cookie cutter?
Definitely. You can use a small round cutter and add a “tail” by cutting a small triangle at the bottom. Or simply cut the treats into squares and add candy eyes—they’ll still look like cute little ghosts. I’ve even used a paring knife to freehand ghost shapes. It takes a bit more time, but it works.
How do I keep the candy eyes from falling off?
The best time to add the eyes is when the treats are still slightly warm and tacky. If they’ve cooled completely, use a tiny dab of royal icing, melted chocolate, or even a bit of honey as glue. Press the eyes gently but firmly, and let them set for 5 minutes before moving the treats.
Can I double this recipe?
Yes, but use two separate pots or make the recipe in batches. Doubling the ingredients in one pot can make it difficult to stir evenly, and the marshmallows may not melt properly. I recommend making two batches separately—it only takes an extra 10 minutes, and the results are much more consistent.
Pin This Recipe!
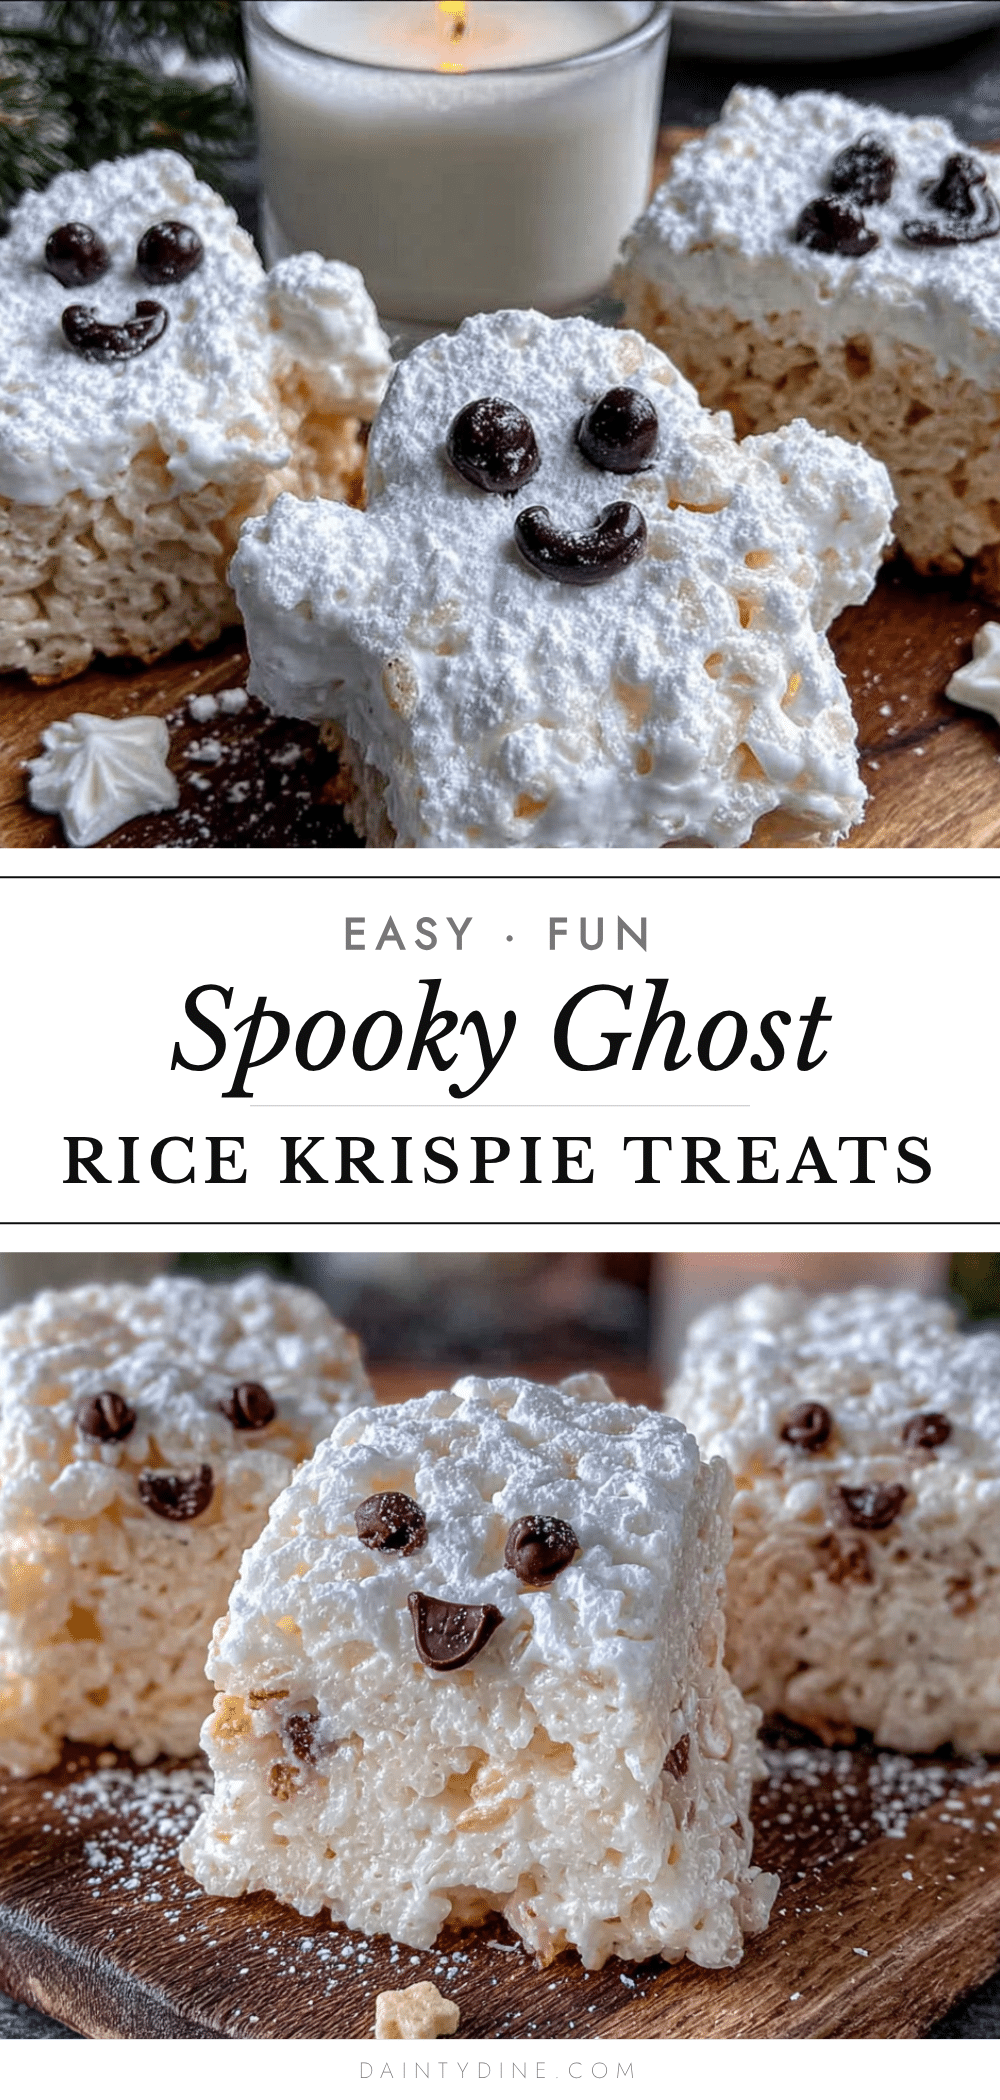
Easy Ghost-Shaped Rice Krispie Treats: Best Halloween Dessert
These ghost-shaped Rice Krispie treats are a quick, easy, and adorable Halloween dessert made with simple pantry ingredients. Perfect for parties, school treats, or a fun family activity, they deliver a crispy-chewy texture and a nostalgic, crowd-pleasing flavor.
- Prep Time: 10 minutes
- Cook Time: 10 minutes
- Total Time: 20 minutes
- Yield: 12-15 ghosts 1x
- Category: Dessert
- Cuisine: American
Ingredients
- 3 tablespoons unsalted butter
- 1 package (10 ounces) regular marshmallows (or 4 cups mini marshmallows)
- 6 cups Rice Krispies cereal
- ¼ teaspoon salt (optional)
- ½ teaspoon vanilla extract
- Non-stick cooking spray (for greasing)
- Mini chocolate chips or candy eyes (for decorating)
Instructions
- Prepare your pan: Line a 9×13-inch baking pan with parchment paper, leaving overhang on the sides. Lightly spray the parchment with non-stick cooking spray. Set aside.
- Melt the butter: In a large saucepan over medium-low heat, melt 3 tablespoons of unsalted butter, stirring occasionally. Do not let it brown.
- Add the marshmallows: Add the entire package of marshmallows to the melted butter. Stir constantly until completely melted and smooth, about 4-5 minutes.
- Season and flavor: Remove the pot from the heat. Stir in ¼ teaspoon salt and ½ teaspoon vanilla extract until fully incorporated.
- Add the cereal: Pour in 6 cups of Rice Krispies cereal. Fold gently with a spatula until all cereal is evenly coated, being careful not to crush the cereal.
- Press into the pan: Transfer the mixture to the prepared pan. Spray your hands with cooking spray and press the mixture firmly and evenly into the pan to about ¾-inch thickness. Let cool at room temperature for 15 minutes.
- Cut the shapes: Lift the treats out of the pan using the parchment overhang. Place on a cutting board. Dip a ghost-shaped cookie cutter in cold water or spray with cooking spray, then press firmly into the treats. Wiggle slightly to release. Repeat to get about 12-15 ghosts.
- Decorate the ghosts: While the treats are still slightly tacky, press two mini chocolate chips or candy eyes onto each ghost for eyes. If cooled completely, use a tiny dab of frosting or melted chocolate as glue. Let decorations set for 5 minutes before serving.
Notes
For best texture, use fresh marshmallows. Let the mixture cool for 2 minutes before cutting to help the treats hold their shape. If the treats are too crumbly, melt marshmallows a bit longer; if too hard, press less firmly or avoid overcooking. Store in an airtight container at room temperature for up to 5 days. Freeze undecorated ghosts for up to 3 months.
Nutrition
- Serving Size: 1 ghost
- Calories: 180
- Sugar: 16
- Sodium: 180
- Fat: 6
- Saturated Fat: 3.5
- Carbohydrates: 32
- Protein: 2
Keywords: Halloween treats, Rice Krispie treats, ghost-shaped, easy dessert, no-bake, kid-friendly, Halloween baking, marshmallow treats


