Love this? Save it for later!
Share the inspiration with your friends
I was standing in line at the hardware store last August, holding a bag of charcoal and a new spatula, when the guy in front of me turned around. He was maybe seventy, with a faded baseball cap and a grease-stained flannel shirt, and he was holding a single box of graham crackers. “You know,” he said, nodding at my charcoal bag, “if you’re gonna do s’mores this weekend, you’re doing ’em wrong.” I laughed, assuming he was about to lecture me on fire-building techniques. But he wasn’t. He told me about his wife’s s’mores bars—the ones she made every Labor Day for forty years until she passed. He described them like they were sacred: a thick, buttery crust, a layer of chocolate that melted into the graham, and a marshmallow topping that got all bubbly and bronzed. I mean, I was just there for a light bulb, honestly. But I left with a recipe scribbled on a receipt, a story about a woman named Marge, and a serious craving. I tweaked it a bit over the years—added a little salt, swapped the chocolate for something darker—but the heart of it is still hers. These Ultimate S’mores Bars for Labor Day are the kind of dessert that makes people stop talking mid-sentence. Maybe you’ve been there, trying to get that perfect campfire s’more without the smoke in your eyes or the burnt fingers. These bars give you all that nostalgic joy without the hassle. They’re the reason I look forward to the end of summer every single year.
Why You’ll Love This Recipe
Let me tell you, I’ve tested a lot of s’mores bar recipes. Some were too dry, some had a chocolate layer that just wasn’t generous enough, and a few were just a sticky mess. This one? It’s the Goldilocks of s’mores bars. I’ve made it for block parties, family reunions, and quiet Tuesday nights when I needed a little comfort. It’s the one recipe that gets requested before I even ask.
- Quick & Easy: These bars come together in about 30 minutes of active prep. No campfire, no skewers, no singed eyebrows. Just a 9×13 pan and an oven. Perfect for a busy Labor Day weekend when you’d rather be relaxing.
- Simple Ingredients: You probably have most of this in your pantry right now. Graham crackers, butter, chocolate chips, and marshmallows. No fancy grocery store trips required. I mean it.
- Perfect for Labor Day: This is the ultimate end-of-summer dessert. It’s portable, it feeds a crowd, and it tastes like the best parts of a camping trip without the mosquitoes.
- Crowd-Pleaser: I’ve watched kids and adults alike go back for thirds. There’s something about that combination of crunchy, gooey, and chocolatey that just hits every single time.
- Unbelievably Delicious: The crust is buttery and crisp, the chocolate layer is thick and melts into everything, and the marshmallow topping gets this incredible toasted flavor. It’s next-level comfort food, honestly.
What makes this different from the rest? It’s the technique. Instead of just layering ingredients, we par-bake the crust so it stays sturdy. We use a mix of milk and semi-sweet chocolate for a balanced sweetness. And we broil the marshmallows at the very end for that campfire-charred flavor without the risk of burning the whole pan. This isn’t just another version—it’s my best version, tested and approved by a hardware store stranger’s memory of his wife’s cooking. That’s a legacy I’m happy to carry on.
What Ingredients You Will Need
This recipe uses simple, pantry-friendly ingredients to deliver that classic s’mores experience with a bar cookie twist. Each component plays a specific role in creating the perfect texture and flavor balance.
- Graham Cracker Crumbs: 2 cups (about 14-16 full sheets). You can buy pre-crushed crumbs, but I prefer to crush my own in a zip-top bag with a rolling pin. It gives you a mix of fine and slightly chunky bits, which adds texture to the crust. (Honey-flavored grahams work best; cinnamon ones are a fun twist if you’re feeling adventurous.)
- Unsalted Butter: ½ cup (1 stick), melted. I use unsalted to control the salt level. If you only have salted, just skip the added salt in the crust.
- Granulated Sugar: ¼ cup. This helps the crust hold together and adds a little extra sweetness to balance the bitter notes from the chocolate.
- Salt: ¼ teaspoon (plus a flaky finishing salt, optional). A little salt in the crust and a pinch on top really makes the chocolate and caramelized marshmallow pop.
- Semi-Sweet Chocolate Chips: 1 ½ cups. I like Ghirardelli or Guittard for their melt quality. Semi-sweet gives you that classic s’mores chocolate flavor without being too sugary.
- Milk Chocolate Chips: ½ cup. This is my secret. The mix of semi-sweet and milk chocolate creates a more complex, creamy chocolate layer. (You can use all semi-sweet if you prefer a darker bar.)
- Sweetened Condensed Milk: 1 can (14 ounces). This is the magic ingredient for the chocolate layer. It makes the chocolate fudgy and soft, not hard and brittle like a chocolate bar. It also helps the chocolate layer set up perfectly.
- Vanilla Extract: 1 teaspoon. Pure, not imitation. It enhances the chocolate and adds warmth.
- Marshmallows: 4 cups (about 40-50 regular marshmallows, or 5 cups of mini marshmallows). I use regular-sized marshmallows because they create those beautiful, puffy, toasted peaks. Mini marshmallows work too, but they melt together more uniformly. (Pro tip: use the stale ones from the back of your pantry—they toast better than fresh, fluffy ones.)
- Optional Toppings: Flaky sea salt (like Maldon), a drizzle of melted peanut butter, or a sprinkle of crushed pretzels for a sweet-salty crunch.
Equipment Needed
You don’t need a professional kitchen to make these bars, but having the right tools makes the process smoother. Here’s what you’ll need:
- 9×13-inch Baking Pan: The standard size for this recipe. Glass, ceramic, or metal all work, but if you use a dark metal pan, keep an eye on the crust—it can brown faster.
- Parchment Paper or Aluminum Foil: Lining the pan is non-negotiable. It creates “handles” that let you lift the entire block of bars out for easy cutting. I’ve learned this the hard way—trust me, you don’t want to dig these out of the pan.
- Medium Mixing Bowl: For the crust ingredients.
- Saucepan or Microwave-Safe Bowl: For melting the chocolate mixture. I prefer a double boiler (a heatproof bowl over a pot of simmering water) because it gives you more control, but the microwave works in a pinch.
- Rubber Spatula: For folding and spreading. A good, sturdy one makes a difference.
- Rolling Pin or Food Processor: For crushing graham crackers. A rolling pin and a zip-top bag is my go-to—it’s satisfying and gives you a nice uneven texture. A food processor is faster but can turn the crumbs to dust.
- Measuring Cups and Spoons: Standard set for dry and wet ingredients.
- Cooling Rack: Essential for letting the bars cool completely before cutting. Patience is a virtue here.
Preparation Method
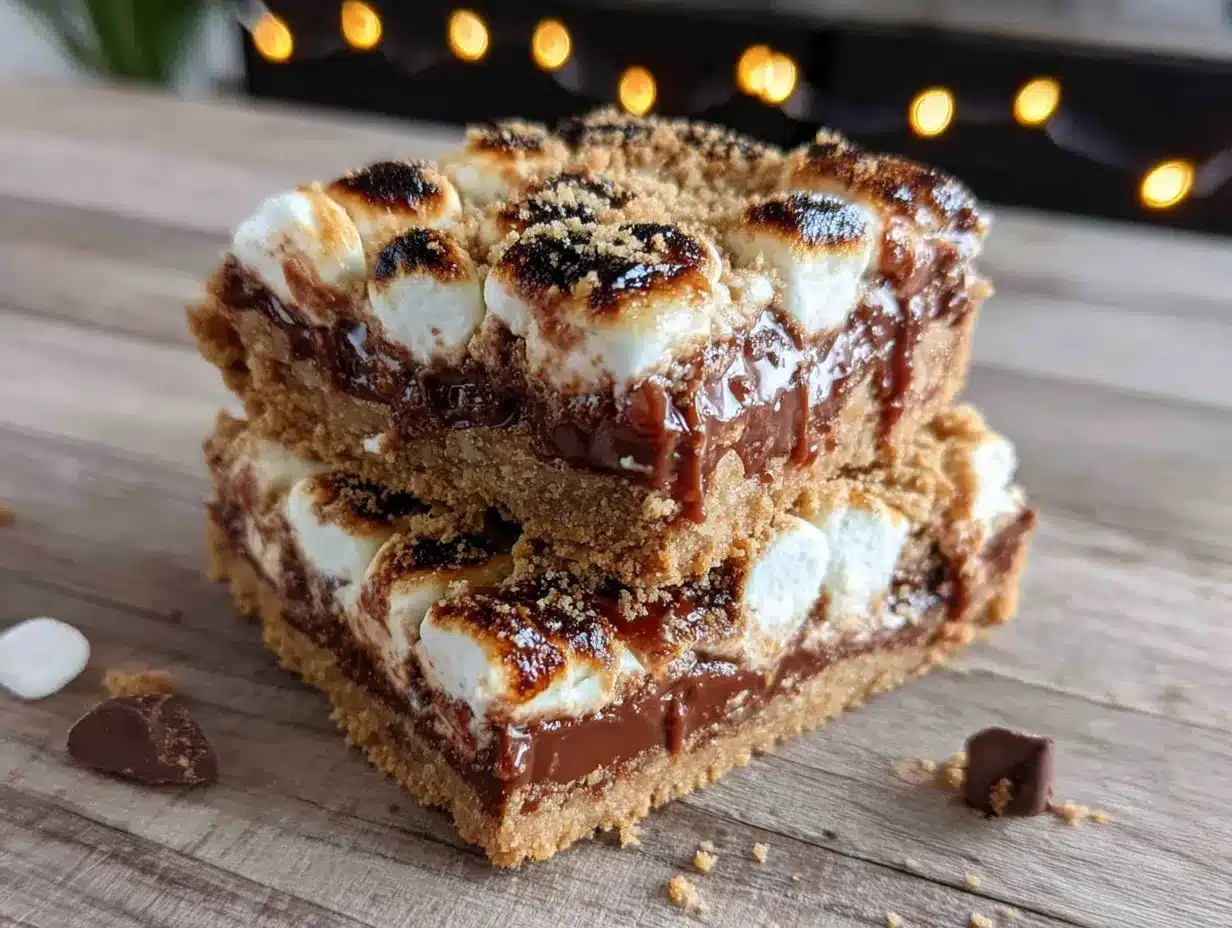
Alright, let’s get into the kitchen. This method is broken down into three simple stages: the crust, the chocolate layer, and the marshmallow topping. Follow these steps, and you’ll have a pan of bars that disappear in minutes.
- Preheat and Prep: Preheat your oven to 350°F (175°C). Line your 9×13-inch baking pan with parchment paper, leaving a 2-inch overhang on the two long sides. This is your “sling” for lifting the bars out later. Lightly grease the parchment with a little butter or non-stick spray.
- Make the Crust: In a medium bowl, combine 2 cups of graham cracker crumbs, ¼ cup of granulated sugar, and ¼ teaspoon of salt. Pour in ½ cup of melted unsalted butter and stir with a fork until the mixture looks like wet sand and holds together when you squeeze it. Don’t overmix—you want it just combined.
- Press and Par-Bake: Dump the crust mixture into the prepared pan. Use the bottom of a measuring cup or a flat glass to press it down evenly. I like to press firmly—this prevents the crust from crumbling when you cut the bars later. Bake for 10 minutes, until the edges are just starting to turn golden and the kitchen smells like a campfire. Remove from the oven and let it cool slightly on a wire rack while you make the filling.
- Make the Chocolate Layer: In a medium saucepan (or a microwave-safe bowl), combine 1 ½ cups semi-sweet chocolate chips, ½ cup milk chocolate chips, and 1 can (14 ounces) of sweetened condensed milk. If using a saucepan, cook over low heat, stirring constantly with a rubber spatula. This is important—low heat prevents the chocolate from seizing or burning. If using a microwave, heat in 30-second bursts, stirring well after each, until smooth. Once melted and smooth, stir in 1 teaspoon of vanilla extract. The mixture will be thick, shiny, and smell incredible.
- Spread the Chocolate: Pour the warm chocolate mixture over the pre-baked crust. Use your spatula to spread it evenly, all the way to the edges. It will be thick, so take your time. Tap the pan gently on the counter to release any air bubbles. Set aside for 5 minutes to let it set slightly—this helps the marshmallows stay on top.
- Top with Marshmallows: Arrange your marshmallows on top of the chocolate layer. If using regular marshmallows, place them in rows, slightly touching. If using mini marshmallows, just scatter them evenly. Don’t press them down—let them sit on top. I like to place them close together so the entire surface is covered, with no gaps of exposed chocolate. This gives you that perfect, gooey, marshmallow layer in every bite.
- Bake the Bars: Return the pan to the 350°F (175°C) oven. Bake for 15-18 minutes, until the marshmallows are puffed up, golden, and starting to brown in spots. The chocolate layer will bubble gently around the edges—that’s normal. Do not overbake, or the marshmallows will deflate and become hard.
- Broil for the Toast (Optional but Recommended): For that authentic campfire char, switch your oven to broil for the last 1-2 minutes. Watch it like a hawk—marshmallows go from golden to burnt in seconds. Rotate the pan halfway through for even toasting. Pull it out when the tops are a deep, spotty brown. (I once got distracted and had to scrape off a whole layer—learn from my mistake.)
- Cool Completely: Transfer the pan to a wire rack and let it cool for at least 1 hour at room temperature. Then, for the cleanest cuts, refrigerate for another 1-2 hours. This allows the chocolate layer to firm up. If you cut them while they’re warm, you’ll get a delicious but messy pile of goo. (Sometimes that’s okay, honestly.)
- Cut and Serve: Once fully cooled and set, use the parchment sling to lift the entire block of bars out of the pan. Place on a cutting board. Use a sharp, large knife to cut into squares. Wipe the knife clean between cuts for neat edges. I usually cut into 24 bars (4 rows by 6 rows), but you can go bigger if you want a more generous portion.
Cooking Tips & Techniques
Over the years, I’ve made a few mistakes with these bars so you don’t have to. Here are my best tips for perfect results every time.
- Don’t Skip the Par-Bake: The first time I made these, I just pressed the crust in and added the filling. The bottom came out soggy. Par-baking the crust for 10 minutes gives it a head start, ensuring it stays crisp and sturdy under the heavy chocolate layer.
- Low and Slow for the Chocolate: Melting chocolate with sweetened condensed milk is forgiving, but you still need to be gentle. High heat can cause the chocolate to seize into a grainy, clumpy mess. Keep the heat low and stir constantly. If it does seize, whisk in a tablespoon of hot water or heavy cream to bring it back.
- The Marshmallow Placement Trick: If you want those dramatic, toasted peaks, use regular marshmallows and place them standing up on their sides. If you want a more uniform, gooey layer, use mini marshmallows and scatter them. I prefer the regular ones for the visual appeal—they look like little clouds.
- Watch the Broiler: This is the most critical step. The difference between perfectly toasted and charcoal is about 30 seconds. I set a timer for 1 minute, then stand there and watch. The sugar in the marshmallows caramelizes quickly, so don’t walk away.
- Patience with Cooling: I know it’s hard, but letting these bars cool and set completely is the secret to clean cuts. If you’re in a rush, pop the pan in the freezer for 20 minutes after the initial cool-down. Just don’t forget them in there—I’ve done that, and they get rock hard.
Variations & Adaptations
This recipe is a fantastic base for experimentation. Here are a few ways I’ve changed it up over the years, depending on who I’m feeding or what I’m craving.
- Peanut Butter S’mores Bars: This is my personal favorite twist. Before adding the marshmallows, dollop ½ cup of creamy peanut butter over the chocolate layer and swirl it in with a knife. The salty, nutty flavor cuts through the sweetness beautifully. I made these for a football game party, and they were gone before the first quarter ended.
- Gluten-Free Version: Simply replace the graham cracker crumbs with a gluten-free graham cracker brand (like Schar or Kinnikinnick) or use crushed gluten-free shortbread cookies. The rest of the ingredients are naturally gluten-free, but always check your chocolate chips for cross-contamination if that’s a concern.
- Dark Chocolate Lovers: Swap both the semi-sweet and milk chocolate chips for dark chocolate (60-70% cacao). Use a full 2 cups of dark chips with the sweetened condensed milk. The result is a less sweet, more sophisticated bar that pairs wonderfully with a sprinkle of flaky sea salt.
- Seasonal Berry Twist: In the summer, I sometimes scatter ½ cup of fresh raspberries or sliced strawberries on top of the chocolate layer before adding the marshmallows. The berries burst as they bake, adding little pockets of tartness that brighten the whole bar.
- Vegan Option: Use a vegan butter stick (like Miyoko’s) for the crust, and replace the sweetened condensed milk with a vegan version (coconut-based works best). Use vegan chocolate chips and vegan marshmallows (Dandies are my favorite). The texture is slightly different—a bit more tender—but the flavor is still spot-on.
Serving & Storage Suggestions
These bars are best served at room temperature or slightly warm, when the marshmallow is still a bit stretchy and the chocolate is soft. If you’ve refrigerated them, let them sit on the counter for 20 minutes before serving.
- Presentation: Arrange the bars on a large platter or a wooden board. A light dusting of powdered sugar or a sprinkle of flaky sea salt right before serving makes them look extra special. For Labor Day, I like to serve them with a side of fresh berries and a pitcher of cold lemonade or iced tea.
- Complementary Dishes: These bars are rich, so they pair well with something light. A scoop of vanilla bean ice cream is the classic choice. For a non-dairy option, try coconut milk ice cream. A hot cup of black coffee also cuts through the sweetness beautifully.
- Storage: Store leftover bars in an airtight container at room temperature for up to 3 days. The marshmallow will soften over time, but they’ll still be delicious. For longer storage, layer them between sheets of parchment paper in an airtight container and refrigerate for up to a week.
- Freezing: These bars freeze surprisingly well. Wrap individual bars tightly in plastic wrap, then place them in a freezer-safe bag or container. They’ll keep for up to 3 months. To thaw, let them sit at room temperature for about 30 minutes, or pop them in a 300°F (150°C) oven for 5-7 minutes to re-toast the marshmallow slightly.
- Flavor Development: Honestly, these bars are at their best on the second day. The flavors meld together, and the crust absorbs a tiny bit of moisture from the chocolate, making every bite perfectly cohesive. So don’t feel bad if you make them a day ahead—it’s actually a good strategy.
Nutritional Information & Benefits
Let’s be real—these are a treat, not a health food. But knowing what’s in them can help you enjoy them mindfully. The following estimates are for one bar, assuming you cut the pan into 24 servings.
- Estimated Nutritional Values (per bar): Calories: 285, Fat: 14g, Saturated Fat: 8g, Carbohydrates: 38g, Sugar: 28g, Fiber: 1g, Protein: 3g, Sodium: 120mg.
- Health Benefits of Key Ingredients: Graham crackers provide a small amount of whole grains (if you use whole wheat versions). Dark chocolate (if you use it) contains antioxidants called flavonoids. Marshmallows are mostly sugar and air, but they make people happy—and that counts for something.
- Dietary Considerations: This recipe is not gluten-free, vegan, or low-carb in its standard form, but it can be adapted (see Variations section). It contains dairy (butter, milk chocolate, sweetened condensed milk) and gluten (graham crackers).
- Allergen Notes: Contains wheat, dairy, and possibly soy (check your chocolate chips). If you’re serving a crowd, it’s always good to label the bars with a note about the ingredients.
- Personal Wellness Perspective: I believe in balance. These bars are a celebration dessert—they’re meant for holidays, gatherings, and special moments. Enjoy a bar (or two), savor it, and don’t feel guilty. Life is too short for bad desserts and food guilt.
Conclusion
These Ultimate S’mores Bars for Labor Day are more than just a dessert—they’re a little piece of summer captured in a pan. They have the buttery crunch of the graham crust, the rich, fudgy depth of the chocolate layer, and the nostalgic, toasted sweetness of the marshmallows. Every time I make them, I think of that guy in the hardware store and his wife Marge, and I feel grateful that a stranger’s story became a tradition in my kitchen.
I hope you’ll make these bars for your own Labor Day celebration, or for any day that calls for a little extra comfort. Don’t be afraid to tweak them—add your favorite chocolate, throw in some nuts, or go wild with the toppings. The best recipes are the ones that become yours.
I’d love to hear how they turn out! Leave a comment below and let me know if you tried any variations, or tag me in your photos on social media. Until next time, happy baking and happy end of summer!
Frequently Asked Questions
Can I use a different size pan?
Yes, but the baking times will change. For a 9×9-inch pan, the bars will be thicker and may need an extra 5-7 minutes of baking. For a larger pan (like a 10×15 jelly roll pan), the bars will be thinner and will bake faster—start checking at 10 minutes.
Why did my chocolate layer turn out grainy?
This usually happens if the chocolate gets too hot or if a tiny bit of water gets into the mixture. Make sure your saucepan and spatula are completely dry. If you’re using the microwave, heat in short bursts and stir well each time. If it does seize, try whisking in a tablespoon of warm heavy cream or coconut milk to smooth it out.
Can I make these bars ahead of time?
Absolutely! In fact, they taste even better the next day. Prepare the bars completely, let them cool, and store them in an airtight container at room temperature for up to 3 days. You can also refrigerate them for up to a week. Just bring them to room temperature before serving for the best texture.
My marshmallows deflated after baking. What went wrong?
This can happen if you overbake them or if the oven temperature is too high. Marshmallows puff up as they heat, but if they stay in the oven too long after puffing, they collapse. Stick to the 15-18 minute bake time, and use the broiler only for the last 1-2 minutes. Also, make sure your marshmallows are fresh—stale ones hold their shape better.
Can I use a different type of cracker for the crust?
Yes! While graham crackers are traditional, you can use crushed vanilla wafers, shortbread cookies, or even chocolate wafer cookies for a different flavor profile. If you use a sweeter cookie, you might want to reduce the sugar in the crust. For a gluten-free option, use gluten-free graham crackers or gluten-free shortbread.
Pin This Recipe!
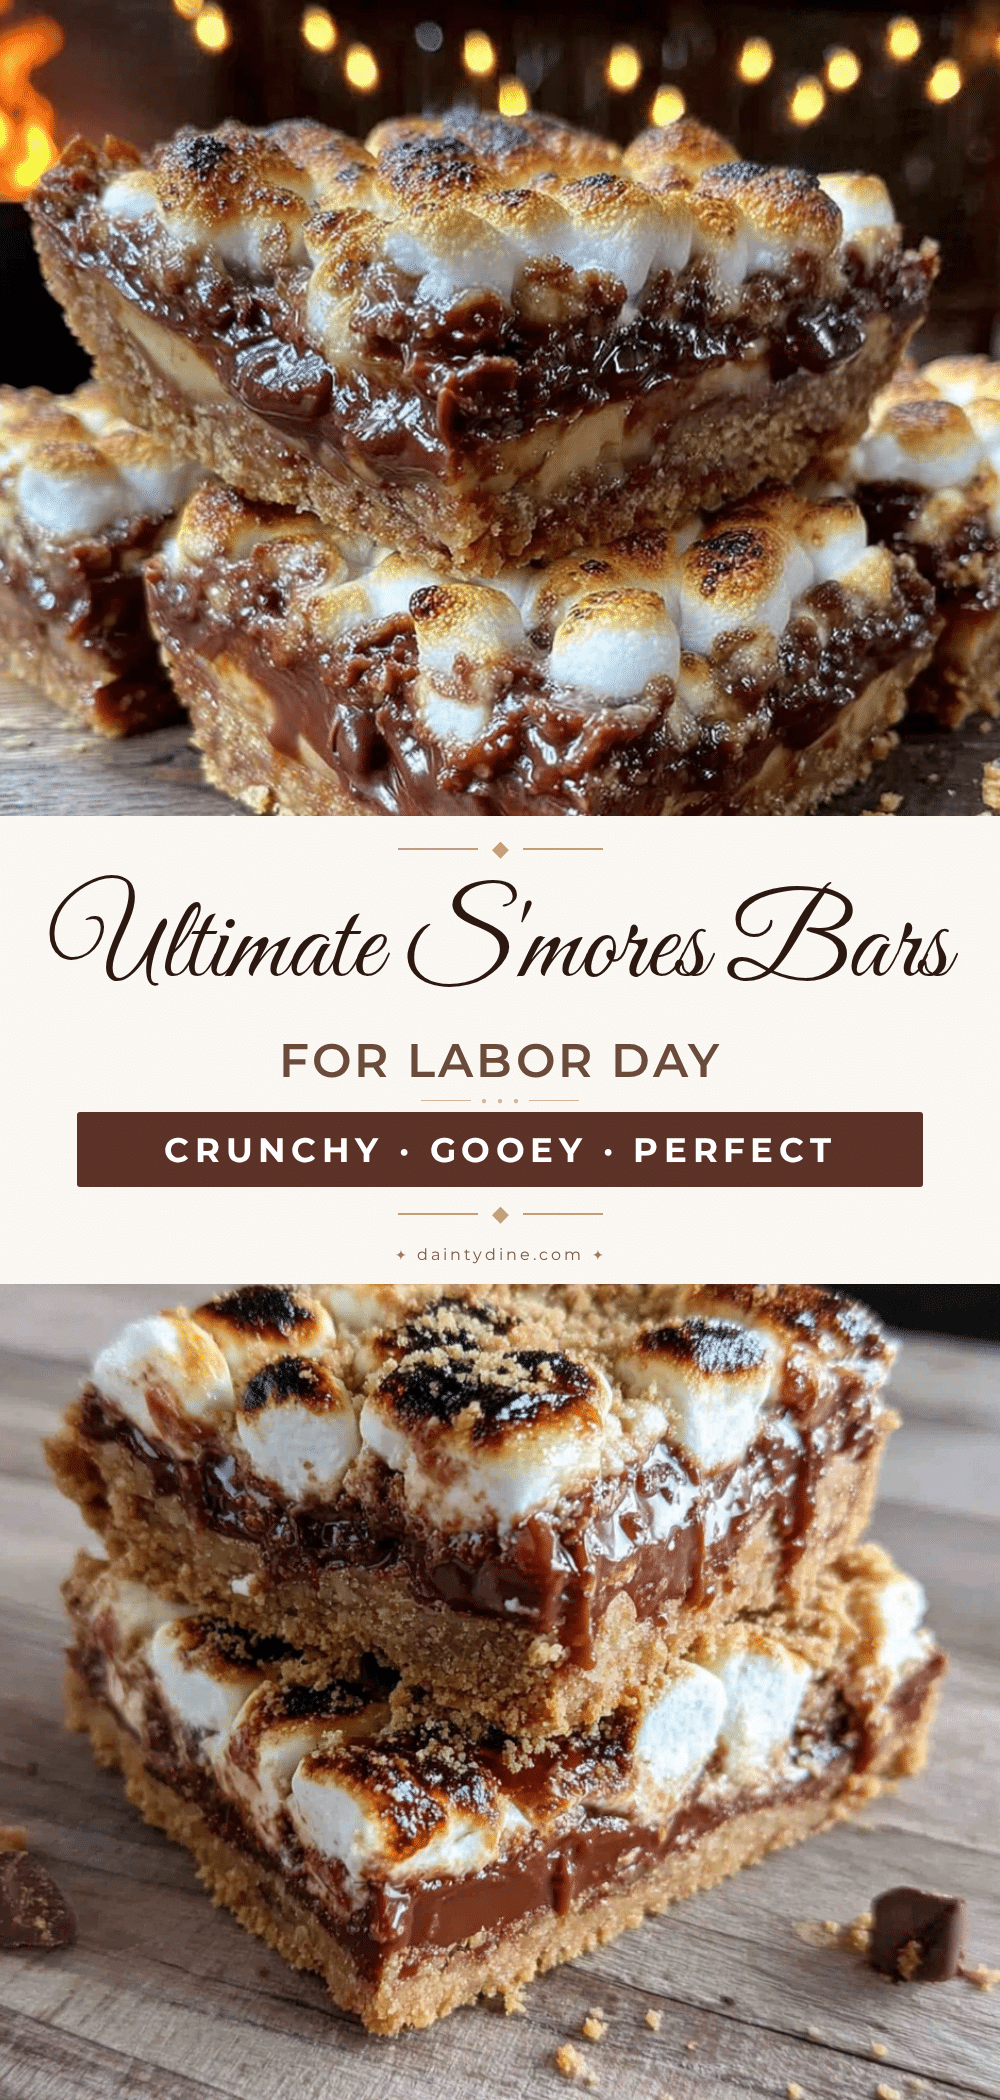
Ultimate S’mores Bars – Easy Labor Day Dessert
These Ultimate S’mores Bars deliver all the nostalgic joy of campfire s’mores without the hassle. A buttery graham cracker crust, a rich fudgy chocolate layer, and a toasted marshmallow topping come together in one easy bar that’s perfect for Labor Day or any summer celebration.
- Prep Time: 30 minutes
- Cook Time: 25-28 minutes
- Total Time: 1 hour 55 minutes (including cooling)
- Yield: 24 bars 1x
- Category: Dessert
- Cuisine: American
Ingredients
- 2 cups graham cracker crumbs (about 14–16 full sheets)
- ½ cup (1 stick) unsalted butter, melted
- ¼ cup granulated sugar
- ¼ teaspoon salt (plus flaky finishing salt, optional)
- 1 ½ cups semi-sweet chocolate chips
- ½ cup milk chocolate chips
- 1 can (14 ounces) sweetened condensed milk
- 1 teaspoon vanilla extract
- 4 cups regular marshmallows (about 40-50) or 5 cups mini marshmallows
- Optional toppings: flaky sea salt, melted peanut butter, crushed pretzels
Instructions
- Preheat oven to 350°F (175°C). Line a 9×13-inch baking pan with parchment paper, leaving a 2-inch overhang on the two long sides. Lightly grease the parchment.
- In a medium bowl, combine graham cracker crumbs, granulated sugar, and salt. Pour in melted butter and stir with a fork until the mixture looks like wet sand and holds together when squeezed.
- Press the crust mixture evenly into the prepared pan using the bottom of a measuring cup or flat glass. Bake for 10 minutes until edges are just golden. Remove and let cool slightly on a wire rack.
- In a medium saucepan over low heat (or microwave-safe bowl in 30-second bursts), combine semi-sweet chocolate chips, milk chocolate chips, and sweetened condensed milk. Stir constantly until smooth and melted. Stir in vanilla extract.
- Pour the warm chocolate mixture over the pre-baked crust and spread evenly to the edges. Tap the pan gently to release air bubbles. Let set for 5 minutes.
- Arrange marshmallows on top of the chocolate layer in rows, slightly touching, covering the entire surface. Do not press them down.
- Return the pan to the oven and bake for 15-18 minutes until marshmallows are puffed, golden, and starting to brown in spots.
- Optional: Switch oven to broil for the last 1-2 minutes, watching carefully, until marshmallows are deeply toasted. Rotate pan halfway through.
- Transfer pan to a wire rack and cool completely at room temperature for at least 1 hour. For cleanest cuts, refrigerate for another 1-2 hours.
- Use the parchment sling to lift the entire block out of the pan. Place on a cutting board and cut into 24 squares (4 rows by 6 rows) with a sharp knife, wiping clean between cuts.
Notes
Par-bake the crust to keep it crisp. Use a mix of semi-sweet and milk chocolate for balanced sweetness. Watch the broiler closely—marshmallows burn quickly. Cool completely before cutting for clean edges. Bars taste even better the next day.
Nutrition
- Serving Size: 1 bar
- Calories: 285
- Sugar: 28
- Sodium: 120
- Fat: 14
- Saturated Fat: 8
- Carbohydrates: 38
- Fiber: 1
- Protein: 3
Keywords: s'mores bars, Labor Day dessert, easy dessert, graham cracker crust, chocolate marshmallow bars, summer dessert, crowd-pleaser


