Love this? Save it for later!
Share the inspiration with your friends
It was 11:47 PM on a random Wednesday in November, and I was staring at a half-loaf of stale sourdough with the kind of desperate focus usually reserved for horror movies. The craving wasn’t for normal stuffing—the kind my aunt makes every Thanksgiving in that giant glass dish. No, I wanted something with edges so crispy they’d shatter, with butter so brown it smelled like toffee, and with sage that had been given a fighting chance to actually taste like itself. I didn’t have a roasting pan or a casserole dish clean, but I had a muffin tin, a stick of butter I was willing to sacrifice, and the wild idea that maybe—just maybe—stuffing wanted to be individual. Honestly, I almost talked myself out of it. “That’s ridiculous,” I said out loud to my cat, who did not care. But the butter was already in the pan, and once you start browning butter, there’s really no going back. You know that feeling when a recipe idea grabs you by the collar and refuses to let go? That was this. The result was so absurdly good I stood in my kitchen at midnight, eating a stuffing muffin with my hands, making noises that would have been embarrassing if anyone were awake. I’ve made them every year since, for every occasion that calls for comfort, and they’ve never let me down.
Why You’ll Love This Recipe
Let me tell you why these crispy brown butter sage stuffing muffins are going to change your side dish game forever. I’ve tested this recipe at least eight times across three different ovens, and I can say with total confidence that it works every single time.
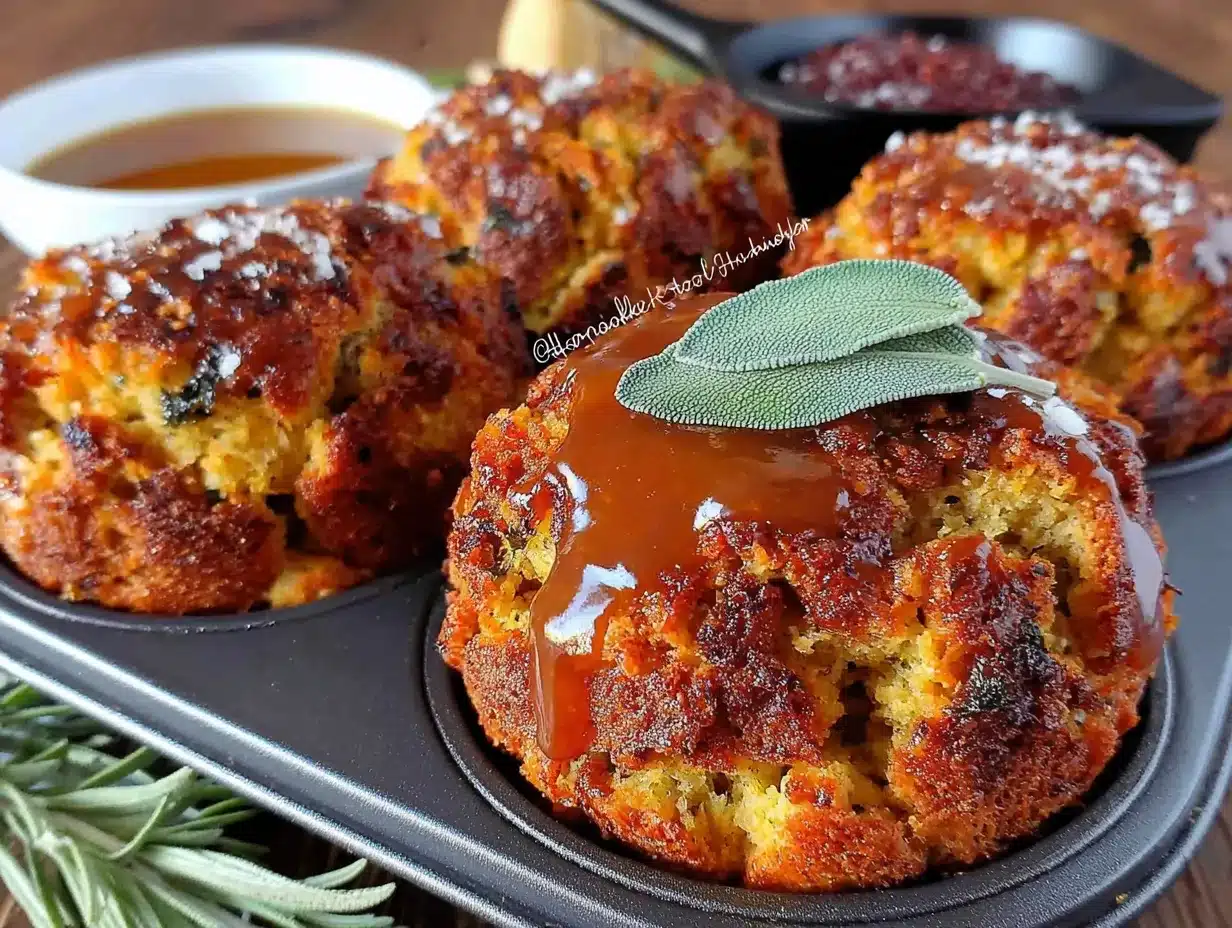
- Perfectly Crispy Edges: The muffin tin creates way more surface area than a traditional baking dish, meaning every single muffin gets those golden, shatter-crisp edges that people fight over.
- Bold Brown Butter Flavor: Taking five extra minutes to brown the butter transforms this from “good stuffing” to “what did you put in this” territory. It’s nutty, rich, and completely unforgettable.
- Individual Servings: No more scooping and serving from a communal dish. Everyone gets their own perfect little stuffing muffin, which means less mess and more crispy bits per person.
- Make-Ahead Friendly: You can prep these a day ahead and bake them right before dinner. The texture actually improves after resting overnight in the fridge.
- Endlessly Customizable: Add sausage, dried cranberries, mushrooms, or whatever you have in the pantry. The base recipe is bulletproof and welcomes adaptations.
- Holiday Showstopper: These look stunning on a platter and instantly elevate any holiday table without requiring advanced cooking skills.
I’m not saying these stuffing muffins will make you the hero of Thanksgiving, but I’ve had three different friends text me photos of their own batches with captions like “my family lost their minds.” So, you know. Do with that information what you will.
What Ingredients You Will Need
This recipe relies on simple, pantry-friendly ingredients that come together to create something truly special. Here’s what you’ll need:
For the Stuffing Muffins
- 1 loaf (about 12 cups) day-old sourdough bread, cut into ¾-inch cubes (stale bread is key—fresh bread will turn mushy)
- ½ cup (1 stick) unsalted butter (I prefer Kerrygold for its higher butterfat content, which browns beautifully)
- 2 tablespoons fresh sage leaves, finely chopped (plus extra whole leaves for garnish if you’re feeling fancy)
- 1 medium yellow onion, diced small (about 1½ cups)
- 3 celery stalks, diced small (about 1 cup)
- 3 cloves garlic, minced
- 2 large eggs, lightly beaten (these act as the binder, so don’t skip them)
- 1½ cups low-sodium chicken or vegetable broth (homemade is lovely, but boxed works great)
- 1 teaspoon kosher salt (plus more to taste)
- ½ teaspoon black pepper, freshly ground
- ½ teaspoon dried thyme (or 1 teaspoon fresh thyme leaves)
- ¼ cup fresh parsley, chopped (optional, but adds freshness)
Ingredient Tips & Substitutions
- Bread: Sourdough gives the best tang and texture, but French bread, ciabatta, or even a good country white loaf will work. Avoid anything too soft or sweet.
- Butter: You can use salted butter if that’s all you have—just reduce the added salt by ¼ teaspoon.
- Sage: Dried sage works in a pinch (use 1 tablespoon), but fresh sage really shines here and makes the brown butter sing.
- Broth: Use vegetable broth for a vegetarian version. If using homemade broth that’s already salted, taste before adding extra salt.
- Gluten-Free Option: Use a good quality gluten-free bread (I like Schar or Canyon Bakehouse) and let it dry out thoroughly.
Equipment Needed
Nothing too fancy here, which is part of the beauty of this recipe:
- 12-cup standard muffin tin (non-stick is ideal, but any metal tin works with good greasing)
- Large skillet or sauté pan (for browning butter and cooking vegetables)
- Large mixing bowl (big enough to toss all the bread cubes without spilling)
- Whisk (for beating the eggs)
- Measuring cups and spoons
- Chef’s knife and cutting board
- Spatula or wooden spoon
- Cooling rack (optional, but helps keep the bottoms crispy)
If you don’t have a muffin tin, you can absolutely bake this in a standard 9×13 casserole dish—just increase the baking time by about 10 minutes and expect fewer crispy edges. But honestly, the muffin tin is worth the investment for how it transforms the texture.
Preparation Method
Let’s get to the fun part. Follow these steps carefully, and you’ll have the best stuffing of your life.
Step 1: Dry the Bread (Do This First!)
Spread your bread cubes in a single layer on two large baking sheets. Leave them out on the counter overnight, or bake at 300°F (150°C) for 15-20 minutes, stirring halfway through, until dry and slightly toasted. They should feel stale and crisp, not soft. Pro tip: Don’t over-toast them—you want them dry, not golden brown, because they’ll absorb more flavor that way.
Step 2: Brown the Butter
In your large skillet, melt the butter over medium heat. Once melted, it will start to foam and bubble. Swirl the pan occasionally and watch carefully—the butter will go from pale yellow to golden to a deep amber color with brown specks at the bottom. This takes about 5-7 minutes. The second you smell a nutty, toasty aroma, remove the pan from the heat immediately. Don’t walk away—brown butter goes from perfect to burnt in about 30 seconds. Stir in the chopped fresh sage and let it sizzle in the hot butter for 30 seconds. Set aside.
Step 3: Cook the Vegetables
In the same skillet (don’t wipe it out—there’s flavor in those brown bits!), add the diced onion and celery. Cook over medium heat for 6-8 minutes, stirring occasionally, until the onions are translucent and the celery is softened. Add the minced garlic and cook for one more minute until fragrant. Remove from heat.
Step 4: Combine the Base
In your large mixing bowl, combine the dried bread cubes, cooked vegetables, salt, pepper, dried thyme, and parsley if using. Toss everything together with your hands (yes, your hands—it’s the best way) until the vegetables are evenly distributed.
Step 5: Make the Custard
In a separate small bowl, whisk together the beaten eggs and chicken broth until well combined. Pour the brown butter-sage mixture into the broth mixture and whisk again. This is your flavor-packed custard that’s going to make everything amazing.
Step 6: Assemble the Muffins
Pour the custard over the bread mixture and toss gently but thoroughly with a spatula or your hands. Let it sit for 5-10 minutes so the bread can absorb all that liquid. The mixture should be moist but not soupy—if it looks dry, add a splash more broth. Trust your eyes here, not the recipe.
Step 7: Fill the Muffin Tin
Preheat your oven to 375°F (190°C). Generously grease your muffin tin with butter or non-stick spray. Divide the stuffing mixture evenly among the 12 cups, pressing down gently with your fingers or the back of a spoon to compact each muffin. They should be mounded slightly above the rim—they’ll settle as they bake.
Step 8: Bake to Golden Perfection
Bake for 25-30 minutes, rotating the pan halfway through, until the tops are deep golden brown and crispy to the touch. Let them cool in the pan for 5 minutes, then run a knife around the edges and gently lift them out. Place on a cooling rack to keep the bottoms from getting soggy.
Cooking Tips & Techniques
I’ve made enough mistakes with this recipe to fill a small notebook, so let me save you some trouble.
Don’t skip drying the bread. The first time I made these, I was impatient and used fresh bread. The result was a dense, gummy interior that nobody wanted to eat. Dried bread acts like a sponge, soaking up all that brown butter goodness without turning to mush. It’s non-negotiable.
Watch your brown butter like a hawk. I once got distracted by a phone call and ended up with butter that looked more like dark chocolate sauce. The smell was… memorable. Set a timer, stay at the stove, and trust your nose more than your eyes. That nutty aroma is your signal.
Let the mixture rest before baking. This is the step everyone wants to skip, but it’s crucial. Giving the bread those 5-10 minutes to absorb the liquid means every bite will be evenly moist and flavorful. I learned this the hard way when my first batch came out with dry pockets.
Press the muffins firmly. If you don’t compact the mixture enough, the muffins will fall apart when you try to remove them from the tin. Think of it like packing a sandcastle—you want them tight enough to hold their shape but not so tight that they’re dense.
Make extra for snacking. Seriously. These things are addictive straight out of the oven, and they disappear fast. If you’re serving a crowd, I’d recommend doubling the recipe.
Variations & Adaptations
This recipe is a fantastic base for experimentation. Here are some of my favorite twists:
Sausage & Apple Stuffing Muffins
Brown ½ pound of bulk breakfast sausage in the skillet before cooking the vegetables. Remove the sausage, leave the rendered fat, and proceed with the recipe. Add one diced Granny Smith apple along with the celery. The sweetness of the apple and the savory sausage are a match made in heaven.
Mushroom & Leek Version
Swap the celery for two thinly sliced leeks (white and light green parts only) and add 8 ounces of cremini mushrooms, sliced, when you cook the onions. Cook until the mushrooms release their liquid and start to brown. This version is my go-to for vegetarian Thanksgivings.
Gluten-Free & Dairy-Free Adaptation
Use a good gluten-free bread (let it dry out thoroughly) and substitute the butter with a high-quality vegan butter like Miyoko’s or Melt. The texture will be slightly different, but the flavor is still incredible. Use vegetable broth to keep it fully plant-based.
Cranberry Pecan Twist
Fold in ½ cup dried cranberries and ½ cup toasted pecans (chopped) after adding the custard. The tart cranberries and crunchy pecans add wonderful texture and a festive touch that’s perfect for holiday tables.
Serving & Storage Suggestions
Serving: These stuffing muffins are best served warm, straight from the oven. Arrange them on a platter and garnish with a few fresh sage leaves or a sprinkle of flaky sea salt for a professional touch. They pair beautifully with roasted turkey, mashed potatoes, and a rich gravy. For a lighter meal, serve alongside a simple green salad with a tangy vinaigrette.
Storage: Leftover muffins keep well in an airtight container in the refrigerator for up to 4 days. The edges will soften slightly, but the flavor only gets better as the seasonings meld together.
Reheating: The best way to revive the crispiness is to reheat them in a 350°F (175°C) oven for 8-10 minutes. Avoid the microwave—it will make them soggy and sad. If you’re in a hurry, an air fryer at 350°F for 4-5 minutes works like magic.
Freezing: These freeze beautifully. Let them cool completely, then wrap each muffin individually in plastic wrap and place them in a freezer bag. They’ll keep for up to 3 months. To serve, thaw in the refrigerator overnight and reheat in the oven as directed.
Nutritional Information & Benefits
Per serving (1 muffin): Approximately 220 calories, 12g fat, 24g carbohydrates, 6g protein, 2g fiber, and 380mg sodium.
While this isn’t exactly health food, there are some redeeming qualities worth mentioning. The brown butter provides a small amount of vitamin A and healthy fats that help your body absorb fat-soluble vitamins from other foods on your plate. Sage contains antioxidants and has been traditionally used to support digestion—which, let’s be honest, we could all use after a big holiday meal. The onions and celery add fiber and essential nutrients like vitamin K and potassium.
For those watching their sodium, using low-sodium broth and unsalted butter gives you control over the salt content. You can also swap in whole wheat or multigrain bread for extra fiber, though the texture will be heartier.
This recipe is vegetarian as written (just use vegetable broth) and can be made gluten-free and dairy-free with the substitutions mentioned above. It contains eggs and dairy (butter), so it’s not suitable for vegan diets without modifications.
Conclusion
Look, I’m not going to tell you that these crispy brown butter sage stuffing muffins will solve all your holiday hosting problems. But I will tell you that they’ve made me look like a much better cook than I actually am on more than one occasion. There’s something about that individual serving size, those impossibly crispy edges, and that nutty, herbaceous flavor that just hits different.
I love this recipe because it takes something familiar—stuffing—and gives it a new shape and texture that feels special without being complicated. It’s the kind of dish that makes people pause mid-bite and say, “Wait, what’s in this?” in the best possible way.
So go ahead, give these a try. Make them your own by throwing in your favorite add-ins. Burn the butter once (it happens to the best of us) and try again. And when you make a batch that disappears in ten minutes flat—which you will—come back and tell me about it. I’d love to hear how they turned out for you.
Happy cooking, and save me a crispy edge!
Frequently Asked Questions
Can I make these stuffing muffins ahead of time?
Absolutely! You can assemble the muffins completely (without baking) up to 24 hours in advance. Cover the muffin tin with plastic wrap and refrigerate. When you’re ready to bake, add about 5-8 minutes to the baking time since the mixture will be cold from the fridge.
Why did my stuffing muffins fall apart?
This usually happens for one of three reasons: the bread wasn’t dry enough, you didn’t press the mixture firmly enough into the muffin cups, or the custard ratio was off. Make sure your bread is thoroughly dried, pack the muffins tightly, and let the mixture rest for the full 10 minutes to absorb the liquid.
Can I use pre-seasoned stuffing mix instead of fresh bread?
You can, but I don’t recommend it. Pre-seasoned mixes often contain preservatives and artificial flavors that won’t give you the same clean, rich taste as homemade. Plus, they’re usually too finely ground to create that nice chunky texture. If you’re in a pinch, look for a high-quality artisan bread and dry it yourself.
How do I get the muffins extra crispy on top?
For maximum crispiness, brush the tops with a little melted butter (or brown butter!) before baking. You can also place the muffin tin under the broiler for the last 1-2 minutes of cooking—just watch them closely so they don’t burn. And always cool them on a wire rack, not in the pan.
Can I make this recipe vegan?
Yes, with a few adjustments. Use vegan butter (I recommend Miyoko’s for browning), replace the eggs with a flax egg (1 tablespoon ground flaxseed mixed with 3 tablespoons water per egg, let sit for 5 minutes), and use vegetable broth. The texture will be slightly less sturdy, but the flavor will still be delicious.
Pin This Recipe!
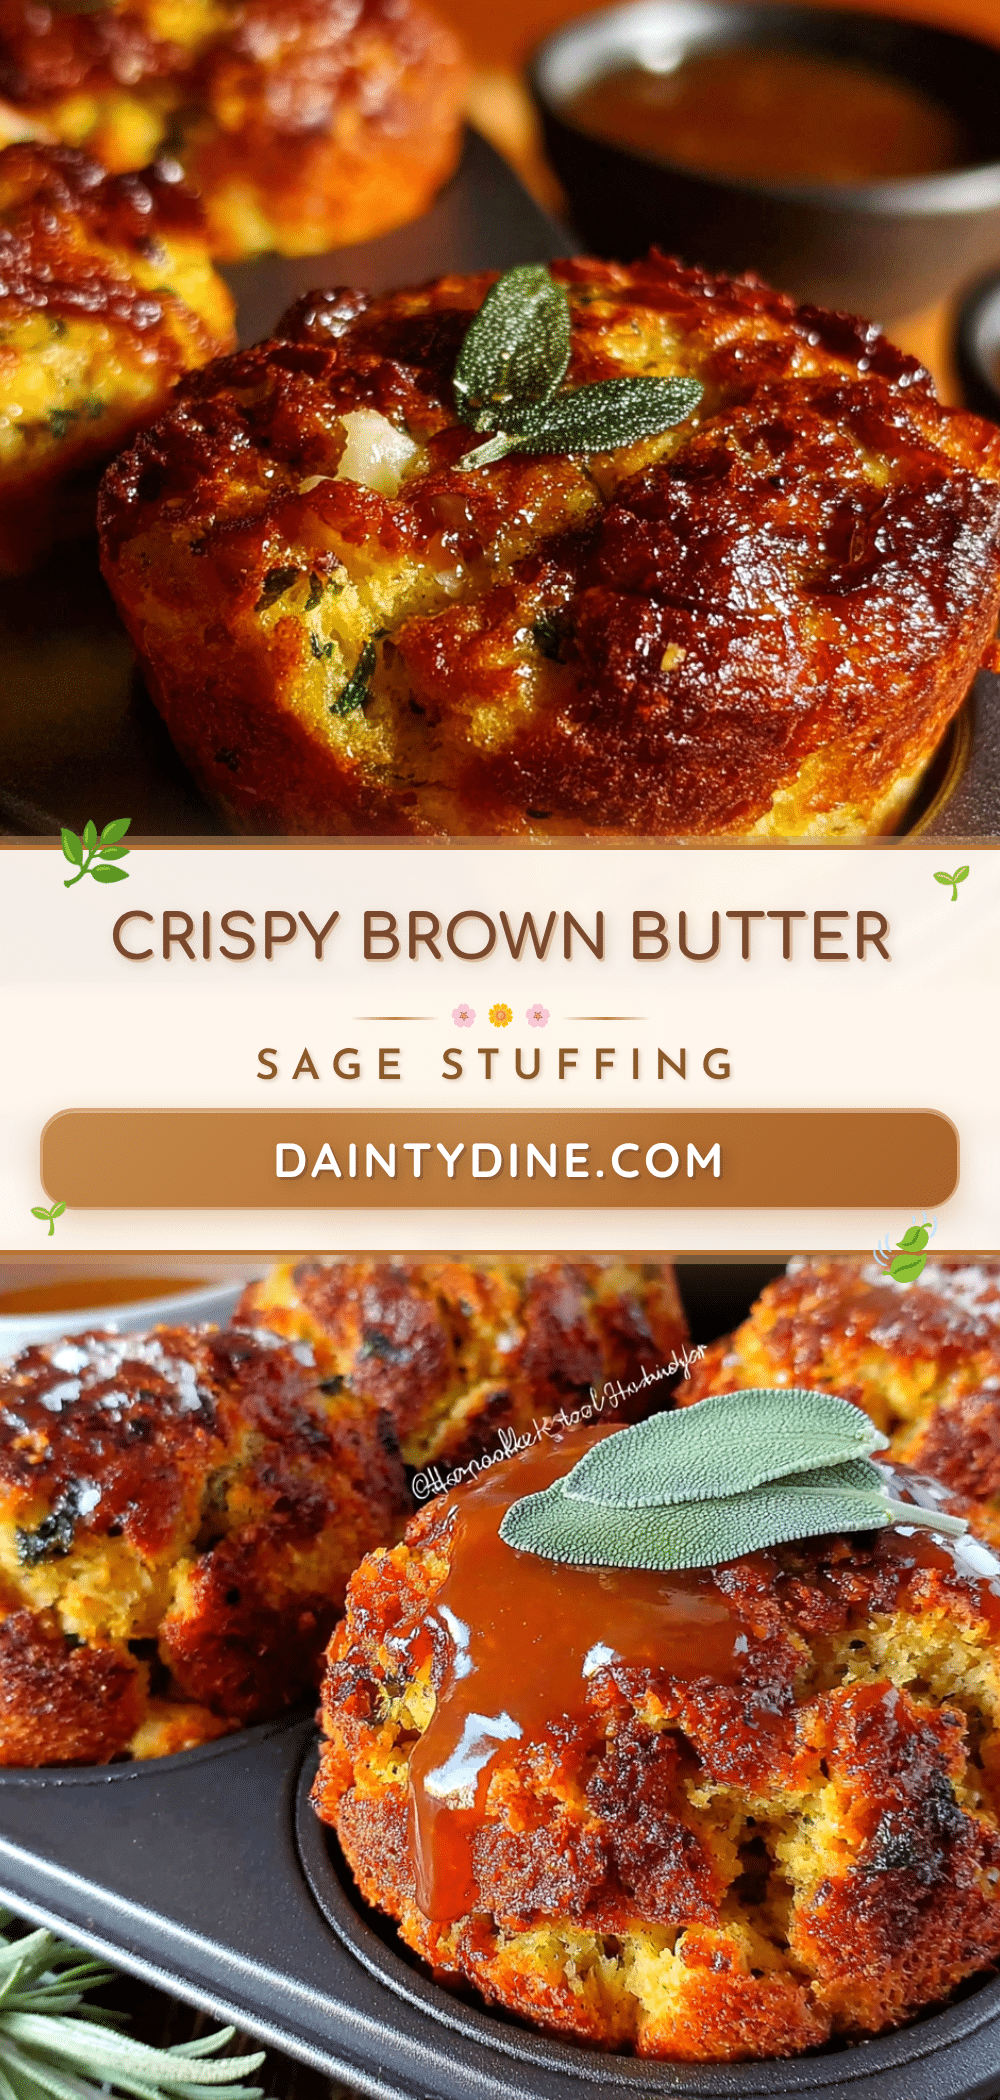
Crispy Brown Butter Sage Stuffing Muffins: Easy Holiday Recipe

These individual stuffing muffins feature perfectly crispy edges, bold brown butter flavor, and fresh sage. They’re make-ahead friendly, endlessly customizable, and a holiday showstopper.
- Prep Time: 20 minutes
- Cook Time: 30 minutes
- Total Time: 50 minutes
- Yield: 12 servings 1x
- Category: Side Dish
- Cuisine: American
Ingredients
- 1 loaf (about 12 cups) day-old sourdough bread, cut into ¾-inch cubes
- ½ cup (1 stick) unsalted butter
- 2 tablespoons fresh sage leaves, finely chopped
- 1 medium yellow onion, diced small (about 1½ cups)
- 3 celery stalks, diced small (about 1 cup)
- 3 cloves garlic, minced
- 2 large eggs, lightly beaten
- 1½ cups low-sodium chicken or vegetable broth
- 1 teaspoon kosher salt
- ½ teaspoon black pepper, freshly ground
- ½ teaspoon dried thyme
- ¼ cup fresh parsley, chopped (optional)
Instructions
- Dry the bread: Spread bread cubes on baking sheets. Leave out overnight or bake at 300°F (150°C) for 15-20 minutes, stirring halfway, until dry and slightly toasted.
- Brown the butter: In a large skillet, melt butter over medium heat. Swirl occasionally until it turns deep amber with brown specks and smells nutty (5-7 minutes). Remove from heat immediately. Stir in chopped sage and let sizzle 30 seconds. Set aside.
- Cook the vegetables: In the same skillet, cook onion and celery over medium heat for 6-8 minutes until translucent. Add garlic and cook 1 minute more. Remove from heat.
- Combine the base: In a large bowl, mix dried bread cubes, cooked vegetables, salt, pepper, thyme, and parsley (if using). Toss with hands until evenly distributed.
- Make the custard: In a small bowl, whisk together beaten eggs and broth. Pour in brown butter-sage mixture and whisk again.
- Assemble the muffins: Pour custard over bread mixture and toss gently. Let sit 5-10 minutes for bread to absorb liquid. Mixture should be moist but not soupy.
- Fill the muffin tin: Preheat oven to 375°F (190°C). Generously grease a 12-cup muffin tin. Divide mixture evenly among cups, pressing down gently to compact. Mound slightly above rim.
- Bake: Bake 25-30 minutes, rotating halfway, until tops are deep golden brown and crispy. Cool in pan 5 minutes, then run a knife around edges and lift out. Place on cooling rack.
Notes
Don’t skip drying the bread—fresh bread will turn gummy. Watch brown butter carefully; it goes from perfect to burnt in 30 seconds. Let mixture rest before baking for even moisture. Press muffins firmly to prevent falling apart. For extra crispy tops, brush with melted butter before baking or broil 1-2 minutes at the end.
Nutrition
- Serving Size: 1 muffin
- Calories: 220
- Sugar: 3
- Sodium: 380
- Fat: 12
- Saturated Fat: 7
- Carbohydrates: 24
- Fiber: 2
- Protein: 6
Keywords: stuffing muffins, brown butter sage stuffing, crispy stuffing, holiday side dish, Thanksgiving stuffing, individual stuffing, make-ahead stuffing


