Love this? Save it for later!
Share the inspiration with your friends
Honestly, I wasn’t trying to find a new salad. I’d stopped by my neighbor’s house last Tuesday to return her hedge clippers, and the smell hit me before I even made it past her screen door. It was warm, a little sweet, and completely unexpected for a Tuesday afternoon in late September. She was just puttering around her kitchen, not making a big deal of it at all. She had pears on a baking sheet, walnuts scattered around, and a little bowl of blue cheese that she was crumbling with her fingers like it was nothing special. “Oh, that?” she said when I asked, barely looking up. “Just throwing something together for lunch.” Just throwing something together. I mean, maybe you’ve been there—watching someone casually create something that stops you cold while they act like it’s no big deal. That’s how this Maple Roasted Pear and Walnut Salad with Blue Cheese came into my life. It wasn’t a dinner party or a holiday. It was a Tuesday, and she was in sweatpants. Let me tell you, I stood there in her kitchen doorway for a solid ten minutes, and she finally handed me a fork. That first bite had this unexpected warmth from the roasted pears and a little crunch from the walnuts, all balanced by the creamy, tangy blue cheese. I kept coming back to it. This salad stayed with me because it proved that something this good doesn’t need a special occasion. You can have it on a random Tuesday and feel like you’ve treated yourself to something extraordinary.
Why You’ll Love This Recipe
This isn’t just another salad. This Maple Roasted Pear and Walnut Salad with Blue Cheese is the kind that makes you close your eyes after the first bite. I’ve tested this recipe about six times now, tweaking the roasting time for the pears and the balance of the vinaigrette, and I can honestly say this version is the one.
- Quick & Easy: It comes together in under 30 minutes, perfect for a busy weeknight dinner or a last-minute lunch that feels special.
- Simple Ingredients: No fancy grocery trips needed. You likely already have the maple syrup, olive oil, and walnuts in your kitchen. The pears and blue cheese are easy to find at any grocery store.
- Perfect for Any Occasion: It’s great for a cozy fall dinner, a holiday side dish, or even a light lunch when you want something warm and satisfying.
- Crowd-Pleaser: I’ve served this to friends who “don’t like salad,” and they went back for seconds. The roasted pears win everyone over.
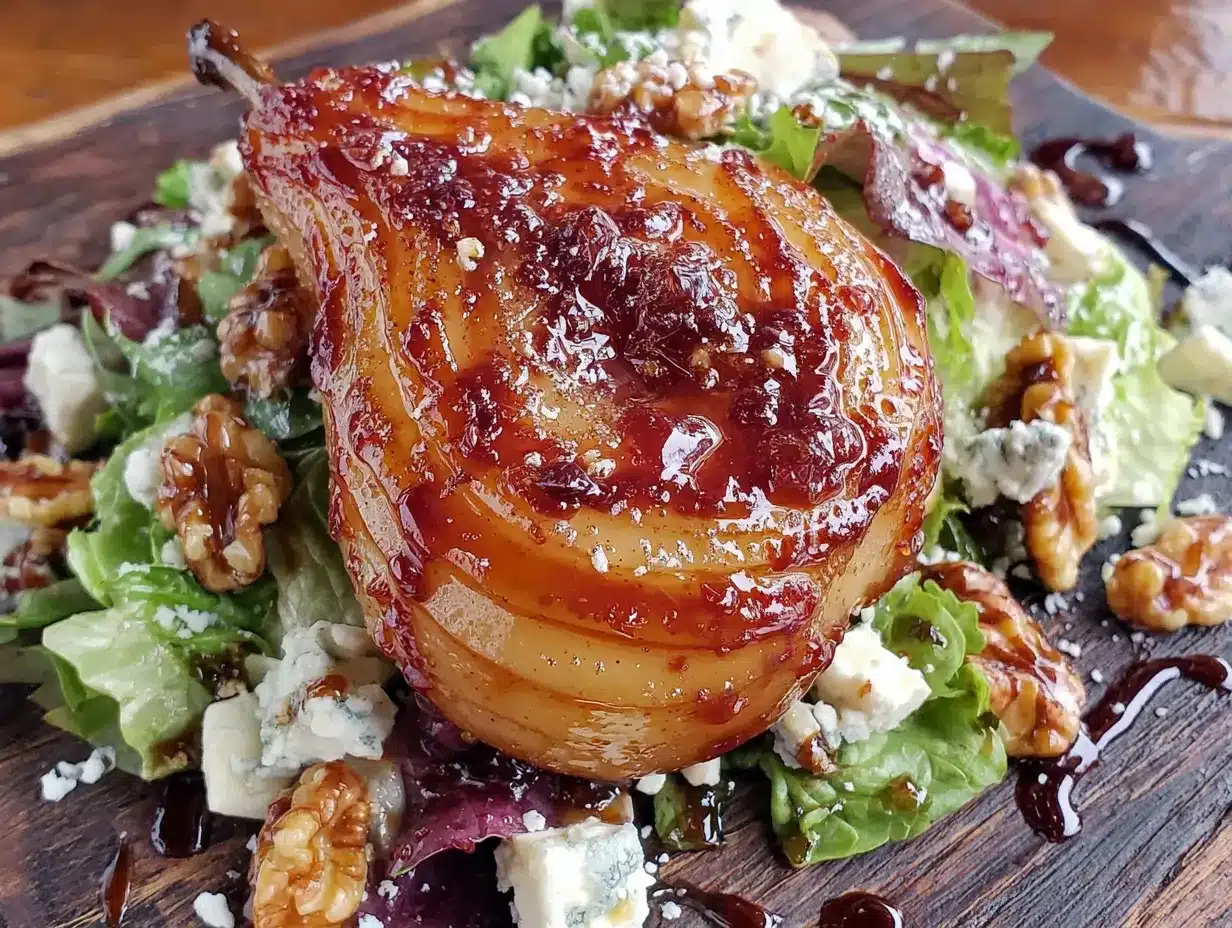
- Unbelievably Delicious: The combination of warm, caramelized pears, crunchy walnuts, and creamy blue cheese is next-level comfort food. The maple vinaigrette ties it all together perfectly.
What makes this recipe different from the rest? It’s the roasting technique. Roasting the pears brings out their natural sweetness and gives them a tender, almost buttery texture that raw pears just can’t match. The walnuts get toasted at the same time, which deepens their flavor and adds that essential crunch. This isn’t just another version of a pear salad—it’s my best version, perfected through trial and error, and it’s the one I keep coming back to.
What Ingredients You Will Need
This recipe uses simple, wholesome ingredients to deliver bold flavor and satisfying texture without the fuss. Most of these are pantry staples or easy to find at your local grocery store, especially during fall when pears are at their peak.
For the Salad
- 4 Bosc pears, firm but ripe (Bosc pears hold their shape beautifully when roasted and have a lovely floral sweetness)
- 1/2 cup walnut halves (I recommend buying raw walnuts and toasting them yourself for the best flavor and crunch)
- 1/2 cup crumbled blue cheese (look for a creamy, not too sharp variety like Gorgonzola or Roquefort for the best balance)
- 6 cups mixed salad greens (a mix of arugula, baby spinach, and frisée works wonderfully, adding peppery and bitter notes that contrast the sweet pears)
- 2 tablespoons olive oil, for roasting
- 2 tablespoons maple syrup, for roasting
- Pinch of salt
For the Maple Vinaigrette
- 3 tablespoons maple syrup (use pure maple syrup, not pancake syrup, for the richest flavor)
- 2 tablespoons apple cider vinegar (adds brightness that cuts through the richness of the blue cheese and walnuts)
- 1 teaspoon Dijon mustard (helps emulsify the dressing and adds a subtle tang)
- 1/3 cup extra virgin olive oil
- Salt and freshly ground black pepper, to taste
Ingredient Selection Tips: When choosing pears, look for ones that yield slightly to gentle pressure near the stem, but are still firm overall. Bosc pears are my go-to for roasting because they hold their shape well and don’t get mushy. For the walnuts, I prefer the raw ones from Trader Joe’s or a local bulk bin—they toast up perfectly in the oven alongside the pears. If you can’t find blue cheese, you can substitute crumbled feta or goat cheese for a milder flavor.
Equipment Needed
You don’t need any fancy equipment for this recipe, which is part of its charm. Here’s what you’ll need:
- Baking sheet: A rimmed baking sheet works best to catch any juices from the pears and to keep the walnuts from rolling off. I use a standard half-sheet pan.
- Parchment paper: Lining the baking sheet makes cleanup a breeze and prevents the pears from sticking.
- Sharp knife and cutting board: For slicing the pears and any other prep work.
- Small bowl or jar: For whisking together the vinaigrette. A mason jar with a tight-fitting lid works great for shaking it up.
- Whisk or fork: For emulsifying the dressing.
- Large salad bowl: For tossing everything together.
- Measuring spoons and cups: For accurate measurements.
If you don’t have a baking sheet, you can use any oven-safe dish or pan. A cast-iron skillet works surprisingly well for roasting the pears, giving them a slightly caramelized edge. I’ve even used a toaster oven for smaller batches, and it works just fine. No need to overthink the equipment here—just use what you have.
Preparation Method
Let me walk you through this step by step. I’ve made this salad so many times that I’ve got it down to a science, and I’ll share all the little tricks I’ve picked up along the way.
- Preheat your oven to 400°F (200°C). Line a baking sheet with parchment paper. This is a small step, but it saves you from scrubbing later. Trust me on this one.
- Prepare the pears. Wash the pears and pat them dry. Cut each pear in half lengthwise, then use a small spoon or melon baller to scoop out the core and seeds. Slice each half into 4 wedges, so you get 8 wedges per pear. Don’t peel them—the skin helps the wedges hold their shape during roasting and adds a nice texture. (I learned this the hard way after making a batch of mushy, skinless pears that fell apart.)
- Toss the pears with oil and maple syrup. In a medium bowl, gently toss the pear wedges with 2 tablespoons of olive oil and 2 tablespoons of maple syrup until they’re evenly coated. Add a pinch of salt. Arrange the pear wedges in a single layer on the prepared baking sheet, leaving a little space between each wedge so they caramelize rather than steam.
- Add the walnuts to the baking sheet. Sprinkle the walnut halves around the pears on the same baking sheet. Keep an eye on them—walnuts toast faster than pears roast, and they can burn quickly. I usually add them to the pan after the pears have been roasting for about 5 minutes, so everything finishes at the same time.
- Roast for 15-18 minutes. Place the baking sheet in the preheated oven and roast for 15 to 18 minutes, or until the pears are tender and slightly caramelized around the edges, and the walnuts are fragrant and lightly toasted. Halfway through, give the walnuts a quick toss so they toast evenly. The pears should be easy to pierce with a fork but still hold their shape. If they’re too soft, they’ll fall apart in the salad.
- Make the maple vinaigrette. While the pears and walnuts are roasting, make the dressing. In a small bowl or jar, whisk together 3 tablespoons of maple syrup, 2 tablespoons of apple cider vinegar, and 1 teaspoon of Dijon mustard. Slowly drizzle in 1/3 cup of extra virgin olive oil while whisking constantly until the dressing is emulsified and slightly thickened. Season with salt and pepper to taste. If you’re using a jar, just screw the lid on tight and shake it like crazy—it’s easier and more fun.
- Assemble the salad. Let the roasted pears and walnuts cool for about 5 minutes—you want them warm, not hot, so they don’t wilt the greens completely. Place the mixed salad greens in a large bowl. Drizzle about half the vinaigrette over the greens and toss gently to coat. Add the warm pears, toasted walnuts, and crumbled blue cheese on top. Drizzle with the remaining vinaigrette as desired.
- Serve immediately. This salad is best enjoyed warm, right after assembly. The contrast between the warm pears, cool greens, and creamy blue cheese is what makes it so special. Don’t let it sit too long, or the greens will get soggy.
Cooking Tips & Techniques
I’ve made a few mistakes with this salad so you don’t have to. Here are the things I’ve learned the hard way.
Don’t overcrowd the baking sheet. I made this mistake the first time I tried roasting pears. I crammed all the wedges onto one pan, and they ended up steaming instead of caramelizing. Give them some breathing room, and you’ll get those beautiful golden-brown edges that make all the difference.
Toast the walnuts separately if you’re nervous. Walnuts can go from perfectly toasted to burnt in about 30 seconds. If you’re multitasking and worried about forgetting them, toast them on a separate small baking sheet and pull them out when they’re done. They usually take 8-10 minutes at 400°F, so you can add them to the oven after the pears have been roasting for about 5 minutes.
Use room temperature ingredients for the vinaigrette. Cold olive oil doesn’t emulsify as well with the other ingredients. If your olive oil is straight from the fridge, let it sit out for a few minutes before making the dressing. It makes a noticeable difference in the texture.
Don’t overdress the salad. Start with half the vinaigrette and add more as needed. You can always add more, but you can’t take it away. The goal is to lightly coat the greens, not drown them. The warm pears and blue cheese add their own moisture and flavor, so you don’t need a heavy hand with the dressing.
Wait to add the blue cheese until just before serving. If you add it too early, it can get melty and lose its distinct texture. You want those little creamy pockets of cheese scattered throughout the salad, not a sad, smeary mess. Trust me, I’ve been there.
Variations & Adaptations
This salad is endlessly adaptable, and I’ve tried a few different versions over the years. Here are some of my favorites.
Dietary Variations
- Vegan Option: Skip the blue cheese and use a vegan feta or crumbled tofu marinated in nutritional yeast and lemon juice. The roasted pears and walnuts are so flavorful that you won’t miss the cheese much.
- Gluten-Free: This recipe is naturally gluten-free, so no changes needed. Just double-check that your blue cheese is gluten-free (most are, but some blue cheeses are aged on bread).
- Nut-Free: Replace the walnuts with roasted pumpkin seeds or sunflower seeds. They add a similar crunch and nutty flavor without the allergen.
Seasonal Adaptations
- Summer: Swap the pears for peaches or nectarines. Roast them the same way, and use a lighter cheese like fresh goat cheese or feta. Add some fresh basil leaves for a bright, summery twist.
- Winter: Add some dried cranberries or pomegranate arils for a pop of color and tartness. The sweetness of the dried fruit pairs beautifully with the roasted pears and blue cheese.
- Spring: Use sliced apples instead of pears, and add some fresh mint or tarragon to the vinaigrette. The herbs add a fresh, bright note that’s perfect for spring.
Flavor Twists
- Spicy Version: Add a pinch of cayenne pepper or red pepper flakes to the maple vinaigrette. The heat contrasts beautifully with the sweet pears and creamy cheese.
- Herb-Infused: Add a sprig of fresh rosemary or thyme to the baking sheet with the pears. The herbs infuse the pears with a subtle savory note that’s absolutely delicious.
- Extra Crunch: Top the salad with some crispy fried shallots or crumbled bacon. It adds another layer of texture and flavor that makes the salad even more satisfying.
I personally love the winter version with dried cranberries. The tartness of the cranberries against the sweet, warm pears is a combination I can’t get enough of. I’ve made it for Thanksgiving two years in a row, and it’s always the first dish to disappear.
Serving & Storage Suggestions
Serving Temperature: This salad is best served warm, right after assembly. The contrast between the warm roasted pears and the cool, crisp greens is what makes it so special. If you’re serving it as a side dish, let the pears and walnuts cool for about 5 minutes before adding them to the greens. If you’re serving it as a main dish, feel free to add some grilled chicken or roasted chickpeas for extra protein.
Presentation: For a beautiful presentation, arrange the salad on a large platter instead of tossing it in a bowl. Start with a bed of greens, then arrange the warm pears, toasted walnuts, and crumbled blue cheese on top. Drizzle the vinaigrette over everything just before serving. It looks stunning and makes it easy for guests to serve themselves.
Complementary Dishes: This salad pairs beautifully with roasted chicken, grilled steak, or a hearty soup like butternut squash or tomato basil. For a complete meal, serve it alongside a crusty baguette and a glass of crisp white wine like Sauvignon Blanc or a dry Riesling.
Storage: This salad is best enjoyed fresh, but if you have leftovers, store the components separately. Keep the greens, roasted pears, walnuts, and blue cheese in separate airtight containers in the refrigerator. The greens will last for 1-2 days, and the roasted pears and walnuts will keep for 3-4 days. The vinaigrette can be stored in a jar in the refrigerator for up to a week.
Reheating: To reheat the pears and walnuts, spread them on a baking sheet and warm them in a 350°F oven for 5-7 minutes, or until heated through. You can also microwave them for 30-60 seconds, but they won’t be as crisp. Assemble the salad fresh with the warmed pears and walnuts, and add the dressing just before serving.
Flavor Development: The vinaigrette actually gets better after a day or two in the fridge. The flavors meld together and become more harmonious. Just let it come to room temperature and give it a good shake before using it.
Nutritional Information & Benefits
This salad isn’t just delicious—it’s also packed with nutrients that are good for you. Here’s a rough estimate of the nutritional values per serving (based on 4 servings):
- Calories: Approximately 380-420 calories per serving
- Protein: 8-10 grams
- Fat: 28-32 grams (mostly healthy fats from olive oil, walnuts, and blue cheese)
- Carbohydrates: 28-32 grams
- Fiber: 6-8 grams
- Sugar: 18-22 grams (natural sugars from pears and maple syrup)
Health Benefits of Key Ingredients:
- Pears: Rich in fiber, vitamin C, and antioxidants. They support digestive health and help reduce inflammation.
- Walnuts: Packed with omega-3 fatty acids, which are great for heart and brain health. They also contain protein and fiber.
- Blue Cheese: A good source of calcium and protein. It also contains probiotics, which are beneficial for gut health.
- Olive Oil: Full of healthy monounsaturated fats and antioxidants that support heart health.
- Maple Syrup: Contains antioxidants and minerals like zinc and manganese. It’s a more natural sweetener than refined sugar.
Dietary Considerations: This salad is naturally gluten-free and can be made vegetarian or vegan with simple substitutions. It’s also relatively low in carbs compared to many salad options, making it suitable for low-carb or keto diets if you adjust the maple syrup amount. The main allergens to be aware of are dairy (blue cheese) and tree nuts (walnuts).
I love that this salad feels indulgent but is actually packed with good-for-you ingredients. It’s the kind of meal that leaves you feeling satisfied and energized, not heavy and sluggish.
Conclusion
This Maple Roasted Pear and Walnut Salad with Blue Cheese is proof that the best recipes often come from the most unexpected places—like a neighbor’s kitchen on a random Tuesday. It’s simple, it’s beautiful, and it’s absolutely delicious. The combination of warm, caramelized pears, crunchy toasted walnuts, and creamy blue cheese is one that I keep coming back to, and I think you will too.
Don’t be afraid to make this salad your own. Swap in different nuts, try a different cheese, or add some dried fruit for extra sweetness. The beauty of this recipe is that it’s forgiving and adaptable. The more you make it, the more you’ll discover what you love about it.
I’d love to hear how this salad turns out for you. Did you try any variations? Did it become a new favorite? Drop a comment below and let me know. And if you share it on social media, tag me so I can see your beautiful creation. Happy cooking, my friend—you’ve got this!
Frequently Asked Questions
Can I make this salad ahead of time?
I recommend assembling this salad just before serving for the best texture and flavor. However, you can prep the components ahead of time. Roast the pears and walnuts up to 2 days in advance and store them in separate airtight containers in the refrigerator. Make the vinaigrette up to a week ahead. When you’re ready to serve, warm the pears and walnuts in the oven for a few minutes, then assemble the salad fresh.
What type of pears work best for roasting?
Bosc pears are my top choice for roasting because they hold their shape well and have a lovely, floral sweetness. Anjou pears also work well. Avoid very ripe or soft varieties like Bartlett, as they can become mushy and fall apart during roasting. Look for pears that are firm but yield slightly to gentle pressure near the stem.
Can I use a different type of cheese?
Absolutely! If you’re not a fan of blue cheese, you can substitute crumbled feta, goat cheese, or even shaved Parmesan. Each cheese brings a different flavor profile—feta adds a salty tang, goat cheese is creamy and mild, and Parmesan offers a nutty, savory note. Feel free to experiment with what you have on hand.
How do I prevent the walnuts from burning?
Walnuts toast quickly and can burn easily, so keep a close eye on them. I recommend adding them to the baking sheet after the pears have been roasting for about 5 minutes. This way, they’ll finish toasting at the same time as the pears. If you’re worried about forgetting them, toast them on a separate pan and set a timer for 8-10 minutes.
Can I use a different sweetener instead of maple syrup?
Yes, you can substitute honey, agave nectar, or even brown sugar for the maple syrup in both the roasting and the vinaigrette. Keep in mind that each sweetener has a slightly different flavor profile. Honey is floral and rich, agave is mild and neutral, and brown sugar adds a deeper, molasses-like sweetness. Pure maple syrup gives this salad its signature flavor, so I recommend using it if you can.
Pin This Recipe!
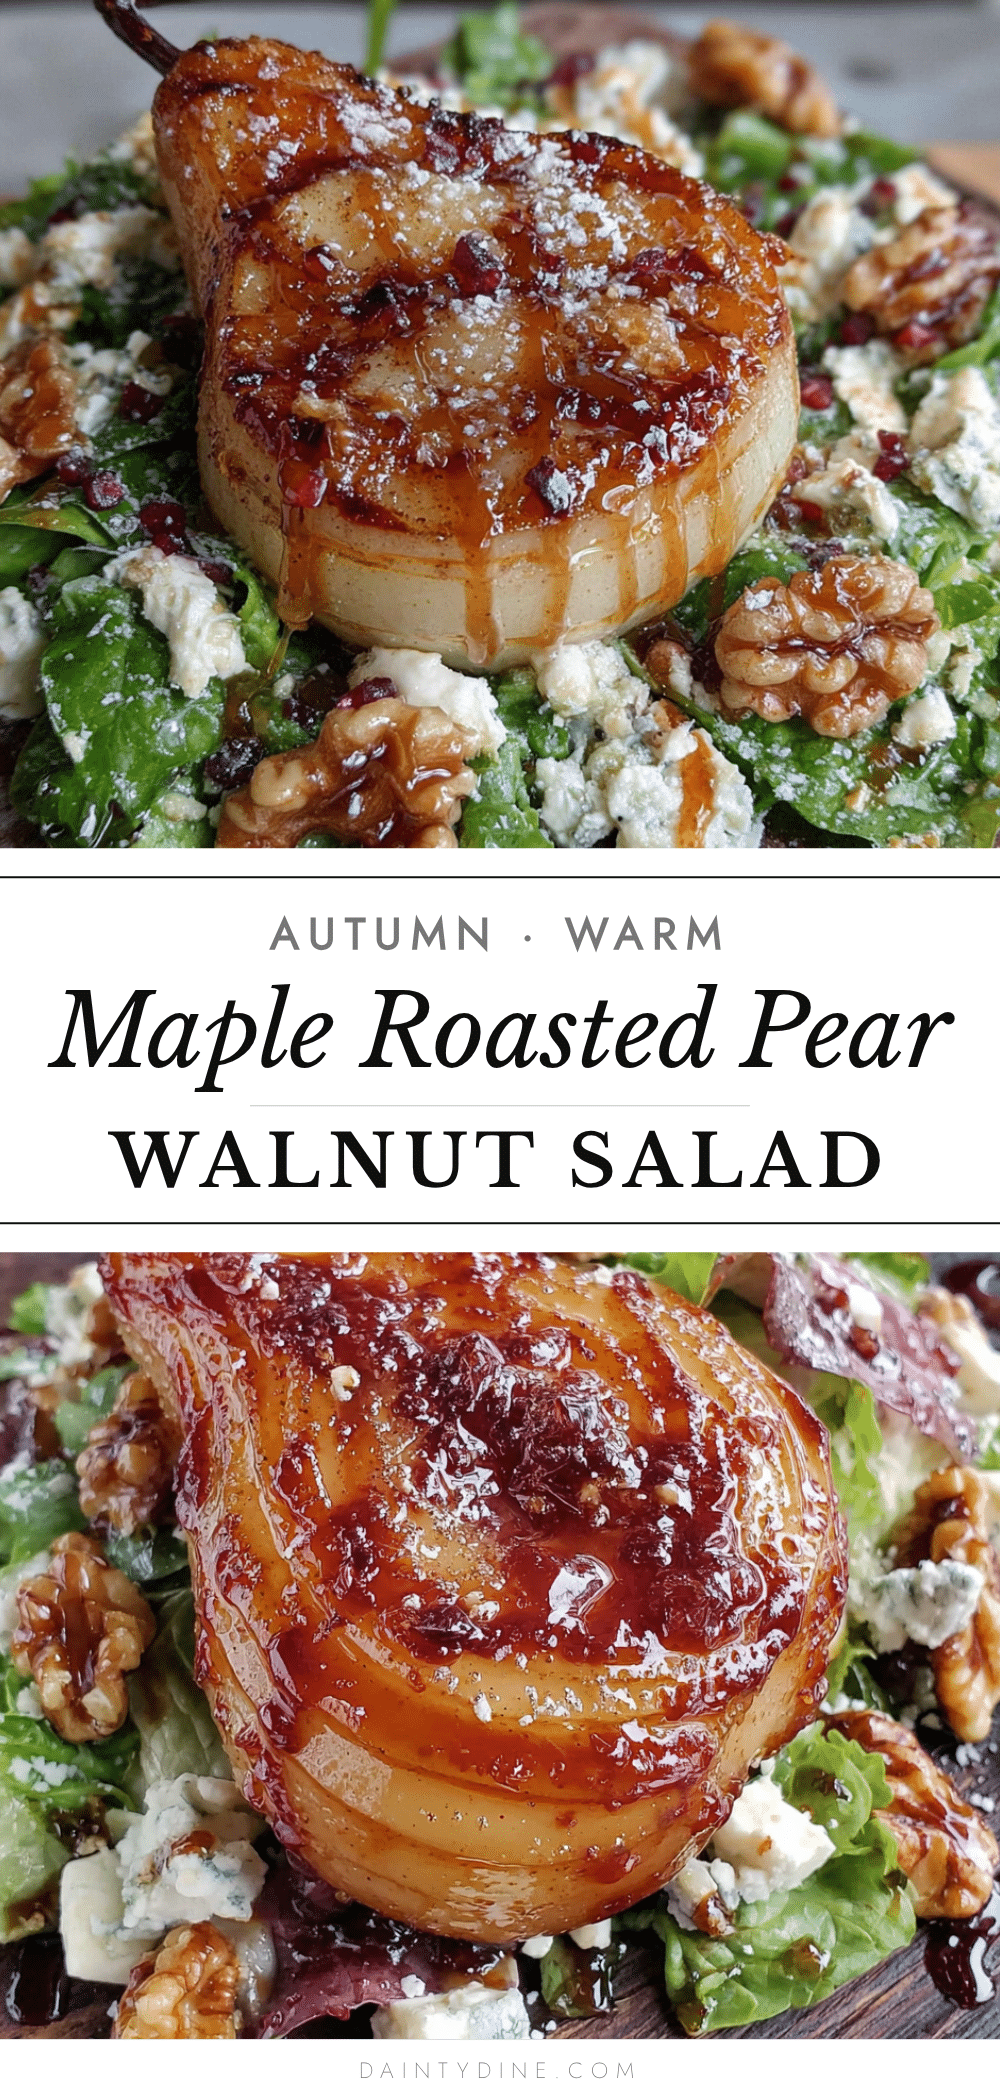
Best Maple Roasted Pear and Walnut Salad with Blue Cheese

This Maple Roasted Pear and Walnut Salad with Blue Cheese is a warm, satisfying salad that comes together in under 30 minutes. Roasted pears and toasted walnuts are tossed with mixed greens and creamy blue cheese, all dressed in a simple maple vinaigrette.
- Prep Time: 10 minutes
- Cook Time: 18 minutes
- Total Time: 28 minutes
- Yield: 4 servings 1x
- Category: Salad
- Cuisine: American
Ingredients
- 4 Bosc pears, firm but ripe
- 1/2 cup walnut halves
- 1/2 cup crumbled blue cheese (such as Gorgonzola or Roquefort)
- 6 cups mixed salad greens (arugula, baby spinach, and frisée)
- 2 tablespoons olive oil, for roasting
- 2 tablespoons maple syrup, for roasting
- Pinch of salt
- 3 tablespoons maple syrup (for vinaigrette)
- 2 tablespoons apple cider vinegar
- 1 teaspoon Dijon mustard
- 1/3 cup extra virgin olive oil
- Salt and freshly ground black pepper, to taste
Instructions
- Preheat your oven to 400°F (200°C). Line a baking sheet with parchment paper.
- Wash the pears and pat them dry. Cut each pear in half lengthwise, then use a small spoon or melon baller to scoop out the core and seeds. Slice each half into 4 wedges, so you get 8 wedges per pear. Do not peel.
- In a medium bowl, gently toss the pear wedges with 2 tablespoons of olive oil and 2 tablespoons of maple syrup until evenly coated. Add a pinch of salt. Arrange the pear wedges in a single layer on the prepared baking sheet, leaving space between each wedge.
- Sprinkle the walnut halves around the pears on the same baking sheet. (Alternatively, add them after the pears have roasted for 5 minutes to prevent burning.)
- Roast for 15-18 minutes, or until the pears are tender and slightly caramelized around the edges, and the walnuts are fragrant and lightly toasted. Halfway through, toss the walnuts for even toasting.
- While the pears and walnuts are roasting, make the vinaigrette. In a small bowl or jar, whisk together 3 tablespoons of maple syrup, 2 tablespoons of apple cider vinegar, and 1 teaspoon of Dijon mustard. Slowly drizzle in 1/3 cup of extra virgin olive oil while whisking constantly until emulsified. Season with salt and pepper to taste.
- Let the roasted pears and walnuts cool for about 5 minutes. Place the mixed salad greens in a large bowl. Drizzle about half the vinaigrette over the greens and toss gently to coat. Add the warm pears, toasted walnuts, and crumbled blue cheese on top. Drizzle with remaining vinaigrette as desired.
- Serve immediately.
Notes
For best results, use Bosc pears that are firm but ripe. Toast walnuts separately if you’re worried about burning. Use room temperature olive oil for the vinaigrette to help emulsify. Don’t overdress the salad; start with half the vinaigrette and add more as needed. Add blue cheese just before serving to maintain its texture.
Nutrition
- Serving Size: 1 serving
- Calories: 400
- Sugar: 20
- Sodium: 350
- Fat: 30
- Saturated Fat: 6
- Carbohydrates: 30
- Fiber: 7
- Protein: 9
Keywords: maple roasted pear, walnut salad, blue cheese, fall salad, easy salad, roasted pear salad


