Love this? Save it for later!
Share the inspiration with your friends
My neighbor, a retired baker named Frank, watched me struggle with a batch of Halloween sugar cookies one October afternoon from over the fence. He didn’t say anything at first. Then he just shook his head, walked into his garage, and came back holding a well-worn, flour-dusted 10-inch cake pan. “Forget the cookies,” he said, handing it over. “Make a cake that acts like a cookie. Less fuss, more fun.”
Honestly, I was a little offended at first. I mean, I had a vision—perfectly shaped bats and ghosts, all lined up with royal icing smiles. But Frank was right. By 7 PM, I was covered in flour, the kids had eaten half the dough, and I was ready to toss the whole batch. That’s when I remembered the pan. I scraped everything into it, baked it on a whim, and what came out was this glorious, chewy, shareable monster of a dessert—a Halloween Spider Web Cookie Cake.
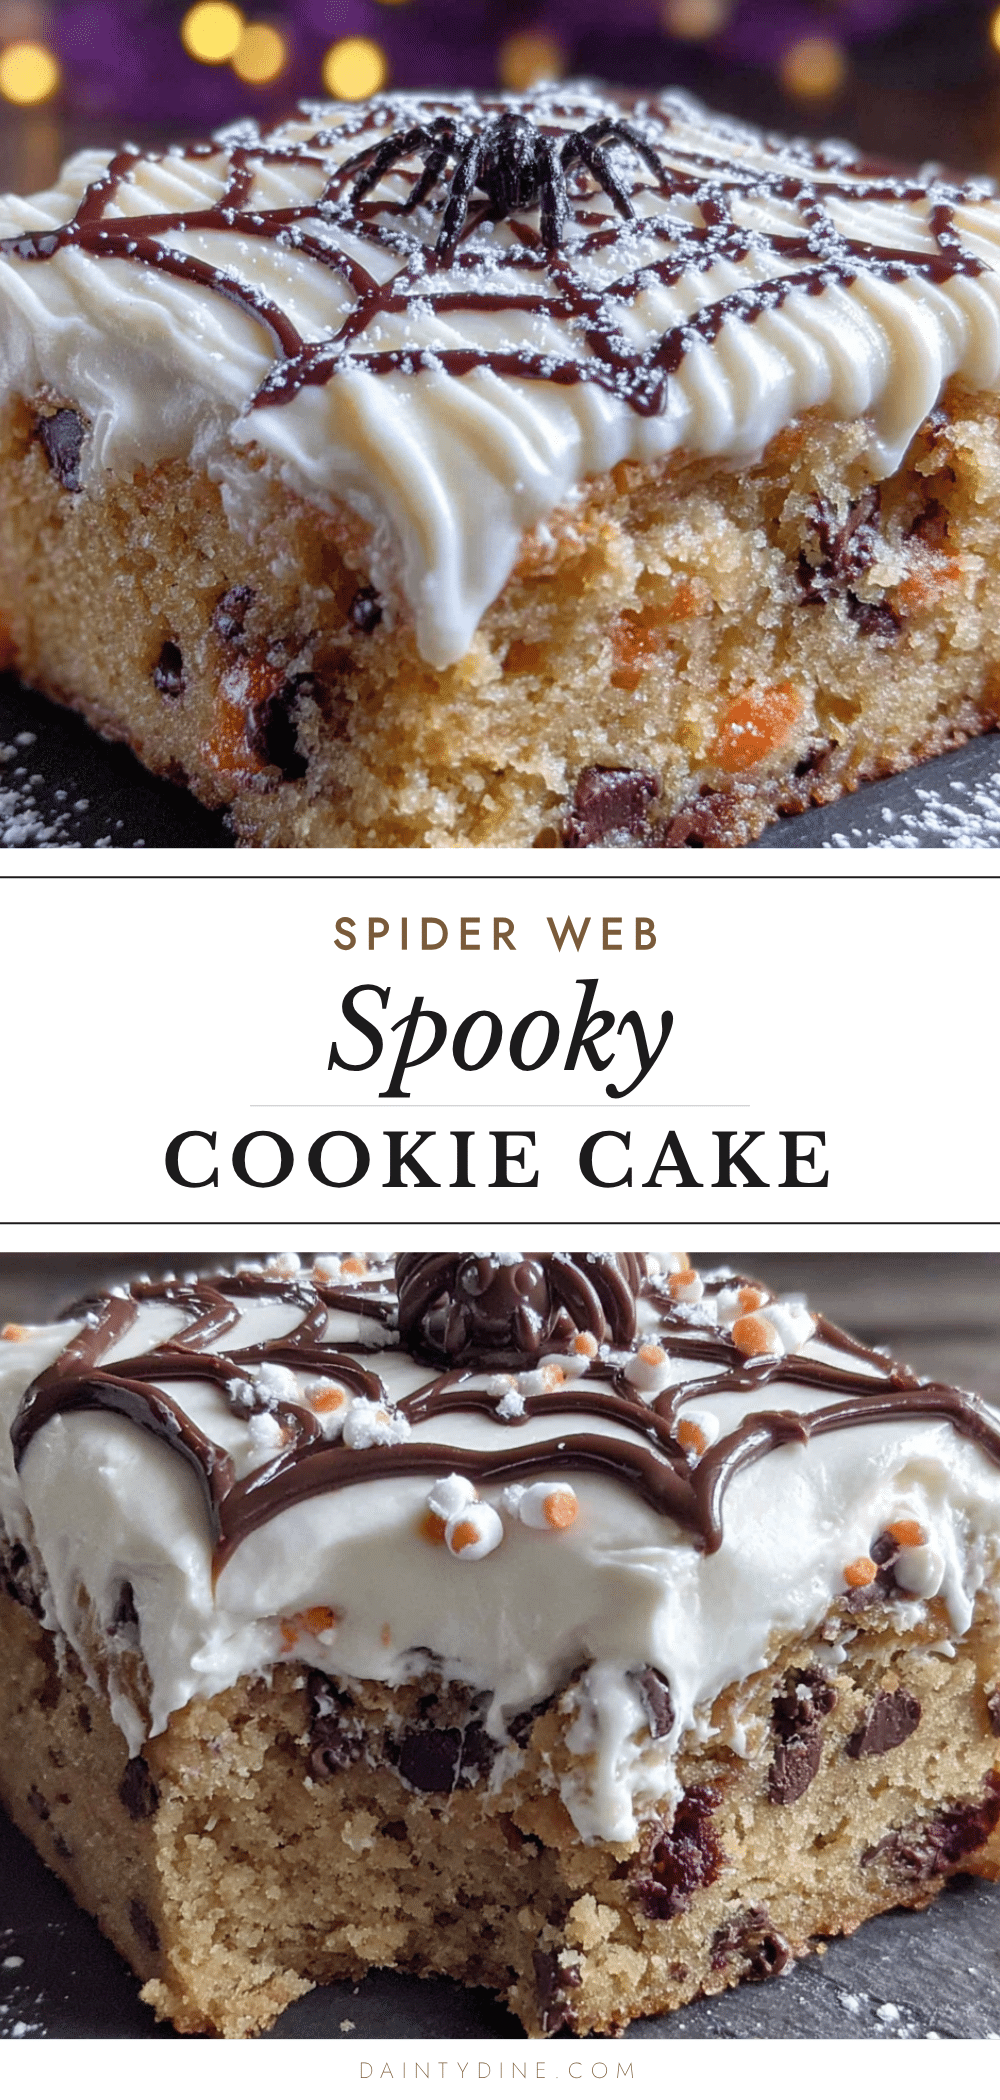
It was the kind of kitchen accident that you’re grateful for later. The cake had that perfect cookie texture—crispy around the edges, soft and almost gooey in the center—but it was way easier than rolling, cutting, and decorating a million individual cookies. I let it cool on the counter, and the next morning, I had a blank canvas. I whipped up a simple icing, piped a spider web on top, and dropped a plastic spider right in the middle. My kids thought I was a genius. Maybe you’ve been there, staring at a Pinterest fail and wondering where it all went wrong. This recipe is the fix.
That first batch of Spooky Halloween Cookie Cake disappeared in ten minutes at the school Halloween party. Frank got a slice, of course, and he just nodded. “Told you so.” And honestly, he was right. This recipe has stayed with me because it captures everything I love about Halloween baking—it’s fun, it’s a little bit spooky, and it’s forgiving. You don’t need to be a pastry chef to pull it off. You just need a pan, some guts, and maybe a plastic spider or two.
Why You’ll Love This Recipe
Let me tell you why this Spooky Halloween Cookie Cake has become my go-to for every October gathering. It’s not just another dessert—it’s the one that makes people stop and say, “Wait, you made that?”
- Quick & Easy : Forget spending hours rolling out dough and piping intricate designs. This cookie cake comes together in under 30 minutes of active time. The oven does the heavy lifting, and you get a show-stopping dessert without the drama.
- Simple Ingredients : You probably have everything in your pantry right now. Butter, sugar, flour, eggs, vanilla—the usual suspects. No trips to a specialty baking store for weird candy eyes or expensive sprinkles.
- Perfect for Halloween Parties : This is the star of any spooky spread. It’s big enough to feed a crowd, easy to slice, and the spider web design is an instant conversation starter. Great for classroom parties, potlucks, or a cozy night in with a scary movie.
- Crowd-Pleaser : I’ve served this to kids, adults, and even my picky mother-in-law. Everyone loves it. The texture is like the best part of a chocolate chip cookie, but in cake form. It’s comfort food with a spooky twist.
- Unbelievably Delicious : The edges get that perfect golden crisp, while the center stays soft and almost fudgy. The combination of the buttery cookie base and the sweet, glossy spider web icing is next-level. It’s the kind of dessert that makes you close your eyes after the first bite.
What makes this recipe different from every other cookie cake out there is the technique. I use a secret trick—a little bit of cornstarch in the dough—that keeps the cake soft for days. Plus, the icing isn’t just for looks; it adds a lovely sweetness that balances the rich, buttery cookie. This isn’t just another version of a cookie cake; it’s my best version, tested through years of Halloween baking failures and triumphs.
This recipe is the kind that makes you feel like a baking rockstar without the stress. It’s perfect for impressing guests at a Halloween bash, or for turning a simple Tuesday night into something memorable. Honestly, it’s the dessert equivalent of a perfect costume—easy to pull off, but everyone thinks you put in way more effort than you did.
What Ingredients You Will Need
This Spooky Halloween Cookie Cake uses simple, wholesome ingredients to deliver that signature chewy texture and rich flavor. Nothing fancy here, just the good stuff you probably already have in your kitchen.
For the Cookie Cake Base
- 1 cup (2 sticks) unsalted butter, softened — I always use unsalted so I can control the salt level. Let it sit out for about 30 minutes before you start. (Adds richness and that melt-in-your-mouth texture)
- 1 cup packed light brown sugar — Brown sugar is the secret to that chewy, almost caramel-like flavor. Don’t skip it, and make sure it’s packed tight in the measuring cup.
- 1/2 cup granulated sugar — This adds a little crunch to the edges. The combination of brown and white sugar is where the magic happens.
- 2 large eggs, room temperature — Cold eggs can seize the butter mixture. If you’re in a hurry, place them in a bowl of warm water for 5 minutes. (Helps create a smooth, emulsified batter)
- 2 teaspoons vanilla extract — Pure vanilla extract is worth it here. I prefer Nielsen-Massey or simply organic vanilla for the best flavor.
- 2 1/2 cups all-purpose flour — Spoon and level your flour; don’t scoop it directly from the bag. Too much flour makes a dry cake.
- 1 teaspoon baking soda — This gives the cake the right amount of lift without making it puffy like a regular cake.
- 1/2 teaspoon salt — Salt balances the sweetness. Use fine sea salt for even distribution.
- 1 tablespoon cornstarch — My secret ingredient! This keeps the cookie cake soft and tender for days. Trust me on this one.
- 1 1/2 cups semi-sweet chocolate chips — I use Ghirardelli or Toll House. Feel free to use milk chocolate or dark chocolate chips if that’s your thing.
For the Spider Web Icing
- 1 cup powdered sugar — Sifted to avoid lumps. (Creates a smooth, glossy icing)
- 2 tablespoons milk or heavy cream — Heavy cream makes a richer icing, but milk works perfectly fine. Add more if needed, one teaspoon at a time.
- 1/2 teaspoon vanilla extract — A little goes a long way.
- 1-2 drops black gel food coloring — Gel coloring is much better than liquid; it gives you a true black without thinning the icing. I recommend Americolor or Wilton.
For Decoration (Optional but Fun)
- Plastic spider rings or a large plastic spider — These are available at any dollar store or party supply shop. Wash them first!
- Orange or black sprinkles — For extra spooky flair.
Substitution Guidance: You can swap the all-purpose flour with a 1:1 gluten-free baking flour blend if needed. For a dairy-free version, use vegan butter and a plant-based milk like oat or almond milk for the icing. The texture might be slightly different, but it will still be delicious. If you don’t have cornstarch, you can skip it, but the cake won’t stay as soft the next day.
Equipment Needed
You don’t need a fancy bakery setup for this Spooky Halloween Cookie Cake. Here’s what you’ll need to get the job done.
- 10-inch round cake pan or a 12-inch cast-iron skillet — I prefer a light-colored metal pan for even baking. A dark pan will make the bottom brown faster, so keep an eye on it. Frank gave me an old aluminum pan, and it works perfectly.
- Electric hand mixer or stand mixer — You can cream the butter and sugar by hand, but it’ll take some elbow grease. A hand mixer is fine; you don’t need the fancy KitchenAid for this.
- Large mixing bowls — One for the dry ingredients, one for the wet. I use my grandmother’s old ceramic bowls, but any large bowl works.
- Parchment paper — Cut a circle to line the bottom of the pan. This is crucial for easy removal. Trust me, I learned this the hard way.
- Piping bag or a small zip-top bag — For the spider web icing. If you don’t have a piping bag, a sandwich bag with a tiny corner snipped off works like a charm.
- Cooling rack — You need the cake to cool completely before icing it. A wire rack is best for airflow.
- Measuring cups and spoons — Accurate measurements matter in baking. Use dry measuring cups for the flour and sugar, and a liquid measuring cup for the milk.
- Rubber spatula — For scraping every last bit of batter into the pan. A silicone spatula is my favorite.
Budget-friendly tip: If you don’t have a 10-inch cake pan, you can use a 9-inch pan. Just increase the baking time by 5-7 minutes and check for doneness. A disposable aluminum pie plate also works in a pinch, but the cake will be thinner and bake faster.
Preparation Method
Alright, let’s get spooky. Follow these steps carefully, and you’ll have a Spider Web Cookie Cake that would make even the Great Pumpkin proud.
- Preheat your oven to 350°F (175°C). Position the rack in the center of the oven. While it’s heating, cut a circle of parchment paper to fit the bottom of your 10-inch cake pan. Lightly grease the sides of the pan with butter or non-stick spray.
- Cream the butter and sugars. In a large mixing bowl, beat the softened butter, brown sugar, and granulated sugar together on medium speed for about 2-3 minutes. You want it light and fluffy, like a cloud. Don’t rush this step—proper creaming is what gives the cookie cake its tender texture. Scrape down the sides of the bowl with a spatula halfway through.
- Add the eggs and vanilla. Crack the eggs into a small bowl first (just in case you get a shell). Add them one at a time to the butter mixture, beating well after each addition. Pour in the vanilla extract and mix until combined. The batter should look smooth and glossy at this point.
- Whisk the dry ingredients. In a separate bowl, whisk together the flour, baking soda, salt, and cornstarch. This ensures everything is evenly distributed. I usually do this while the butter is creaming to save time.
- Combine wet and dry. Gradually add the dry ingredients to the wet mixture, mixing on low speed. Stop as soon as the flour disappears—overmixing will make the cake tough. Use a rubber spatula to fold in any remaining streaks of flour by hand.
- Fold in the chocolate chips. Gently stir in the chocolate chips with the spatula. Make sure they’re evenly distributed throughout the dough. The dough will be thick and slightly sticky—that’s exactly what you want.
- Press the dough into the pan. Transfer the dough to your prepared cake pan. Use your hands or the spatula to press it evenly into the pan. Don’t worry about making it perfect; a rustic edge is fine. The dough should be about 1-inch thick.
- Bake the cookie cake. Place the pan in the preheated oven and bake for 20-25 minutes. The edges should be golden brown and set, but the center will still look slightly soft and puffy. That’s the sign of a perfectly baked cookie cake. If you insert a toothpick into the center, it should come out with a few moist crumbs, not wet batter. For a 9-inch pan, start checking at 25 minutes.
- Cool completely. Let the cookie cake cool in the pan on a wire rack for 15 minutes. Then, carefully run a knife around the edges and invert the cake onto the rack to cool completely. This is crucial—if you ice it while it’s warm, the icing will melt into a puddle. Patience, my friend.
- Prepare the spider web icing. In a small bowl, whisk together the powdered sugar, milk, and vanilla extract. Start with 2 tablespoons of milk; you want a thick but pipeable consistency. If it’s too thick, add another teaspoon of milk. Once smooth, transfer about 2 tablespoons of the white icing to a separate bowl and add the black gel food coloring. Stir until you get a deep, dark black. You might need 2-3 drops.
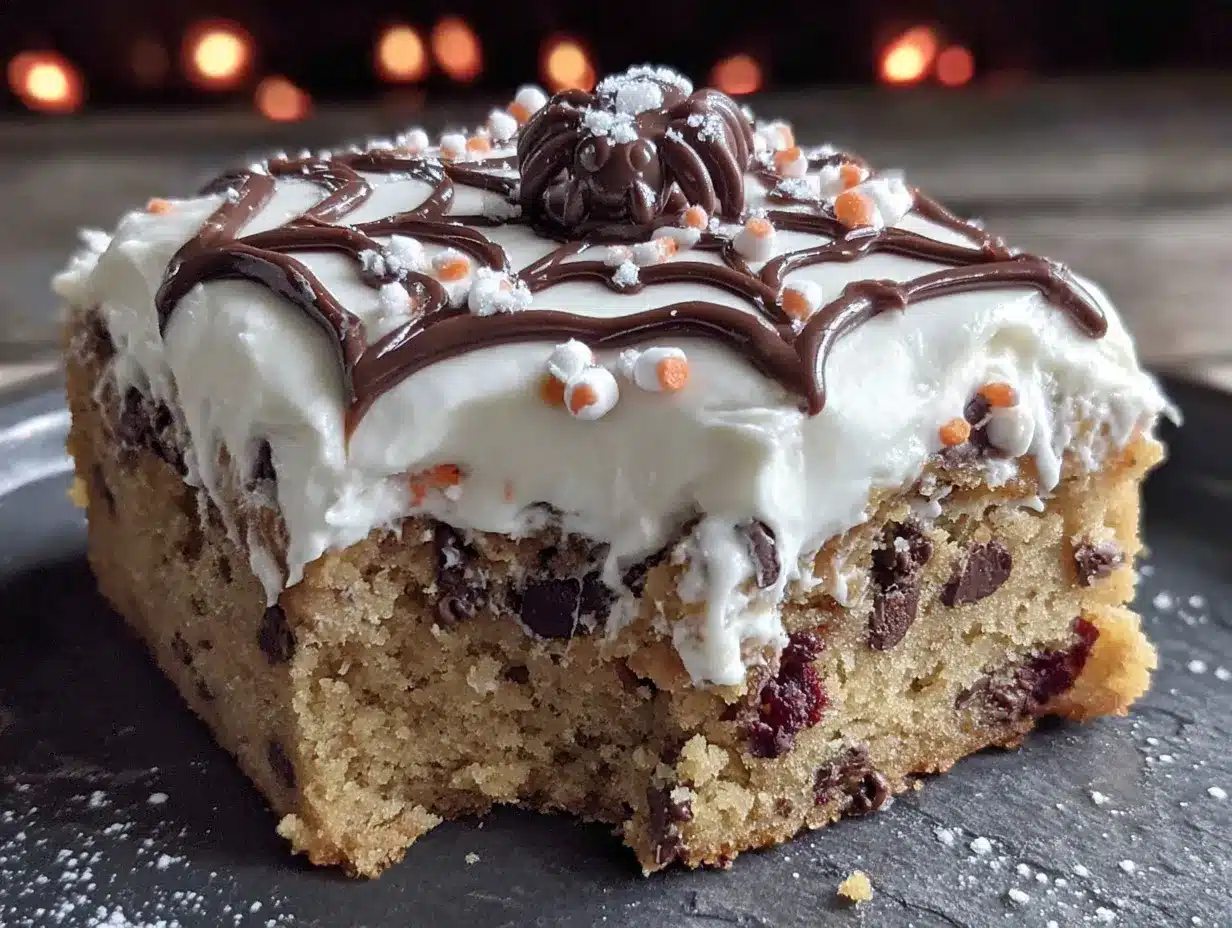
- Pipe the spider web. Place the black icing in a piping bag or a small zip-top bag with a tiny corner snipped off. Pipe a small circle in the center of the cooled cookie cake. Then, pipe a larger circle around it, and another larger circle near the edge. Use a toothpick or a knife to drag lines from the center outward, creating the web effect. Start from the center and drag outward, then wipe the toothpick clean and repeat. You’ll see the web pattern emerge magically.
- Add the spider. Place your plastic spider right in the center of the web, or arrange a few spider rings around the edge. Add some orange or black sprinkles for extra flair if you like. Let the icing set for about 15 minutes before slicing.
Sensory cue: When you press the dough into the pan, it should feel soft and pliable, like play-dough. When you pull the cake out of the oven, your kitchen will smell like a warm hug of butter and vanilla. The edges should look slightly cracked and golden, while the center will still be pale and puffy.
Cooking Tips & Techniques
I’ve made this Spooky Halloween Cookie Cake more times than I can count, and I’ve learned a few things along the way. Here are my best tips to make sure yours turns out perfect every time.
Don’t overbake it. This is the number one mistake people make. A cookie cake continues to cook from the residual heat of the pan after you pull it out of the oven. If you wait until the center is completely set, you’ll end up with a dry, crumbly cake. Pull it out when the center is still slightly soft and puffy. I once left mine in for an extra 3 minutes because I was distracted by a phone call, and it was noticeably less chewy. Learn from my mistake.
Use room temperature ingredients. This isn’t just a suggestion—it’s a rule. Cold eggs or cold butter won’t cream properly, and you’ll end up with a dense, greasy cake. Take your butter and eggs out of the fridge about 30 minutes before you start baking. If you forget, you can soften the butter in the microwave in 10-second bursts, but be careful not to melt it.
Line your pan with parchment paper. I cannot stress this enough. The first time I made this, I greased the pan but didn’t line it. The cake stuck to the bottom, and I had to serve it in crumbly chunks. It still tasted good, but it wasn’t pretty. A parchment paper circle makes removal effortless.
Pipe the web while the icing is fresh. Don’t let the black icing sit too long before piping it. Gel food coloring can thicken the icing over time. If it becomes too stiff, add a tiny drop of milk and stir. Also, wipe your toothpick clean after each drag line to keep the web pattern sharp and distinct.
Timing and multitasking. While the cookie cake is cooling, prepare your icing. This saves time and keeps you in the zone. I usually make the icing about 15 minutes before the cake is fully cool, so everything is ready to go.
Variations & Adaptations
One of the best things about this Spooky Halloween Cookie Cake is how easy it is to customize. Here are a few variations I’ve tried and loved.
- Gluten-Free Version : Swap the all-purpose flour with a 1:1 gluten-free baking flour blend that contains xanthan gum. I’ve used Bob’s Red Mill 1-to-1 Baking Flour with great results. The texture is slightly more crumbly, but the flavor is spot on. Make sure your chocolate chips are also gluten-free.
- Dairy-Free Version : Use vegan butter sticks (like Earth Balance) and a plant-based milk for the icing. I’ve tried this with oat milk, and it works beautifully. The cookie cake might be a little less rich, but it’s still deliciously spooky.
- Flavor Twist : Add 1/2 cup of white chocolate chips or butterscotch chips along with the chocolate chips for a different flavor profile. You can also add 1/2 teaspoon of pumpkin pie spice to the dough for a fall-inspired version. I tried this last year, and it was a hit at our Friendsgiving.
- Different Decorations : Instead of a spider web, you can pipe ghost faces, pumpkins, or bats on top. Use orange icing for the web and add candy corn around the edges. The base cookie cake is a blank canvas—let your creativity run wild.
- Individual Cookie Cakes : Press the dough into a jumbo muffin tin or small ramekins for personal-sized treats. Bake for 12-15 minutes, and adjust the icing design accordingly. These are perfect for party favors or lunchbox surprises.
Serving & Storage Suggestions
This Halloween Spider Web Cookie Cake is best served at room temperature. The texture is at its peak—chewy edges, soft center—when it hasn’t been refrigerated. Slice it like a pizza into wedges, and watch the smiles appear.
Serving Ideas: Pair a slice with a scoop of vanilla bean ice cream for an extra treat. The cold creaminess against the chewy cookie cake is a match made in heaven. You can also drizzle a little caramel sauce over the top for a salted caramel vibe. For a non-dairy option, try coconut milk ice cream.
Storage: Store any leftover cookie cake in an airtight container at room temperature for up to 3 days. Do not refrigerate it—the fridge will dry it out and make it hard. If you need to keep it longer, you can freeze it. Wrap the entire cake (or individual slices) tightly in plastic wrap, then in aluminum foil, and freeze for up to 3 months.
Reheating: To bring back that fresh-from-the-oven taste, pop a slice in the microwave for 10-15 seconds. For a crispier edge, warm it in a 300°F oven for 5 minutes. The icing might soften a little, but the flavor will be just as good.
Flavors actually develop over time. The cookie cake tastes even better the next day, as the flavors meld together. The cornstarch keeps it soft, so day-old cake is still a winner. Just keep it covered.
Nutritional Information & Benefits
Let’s be real—this is a treat, not a health food. But here’s a rough estimate of what you’re looking at per slice (based on 12 servings).
| Nutrient | Amount Per Serving |
|---|---|
| Calories | ~380 |
| Total Fat | 18g |
| Saturated Fat | 11g |
| Carbohydrates | 52g |
| Sugar | 35g |
| Protein | 4g |
| Fiber | 1g |
That said, there are a few small benefits hidden in this spooky treat. Dark chocolate chips contain antioxidants, and the butter provides a small amount of vitamin A. The eggs add a little protein. Is it a balanced meal? No. Is it a fun, spirit-lifting dessert that brings people together? Absolutely.
If you’re watching your sugar intake, you can reduce the granulated sugar to 1/4 cup, but it will affect the texture. For a lower-calorie option, use sugar-free chocolate chips and a sugar substitute like monk fruit. Just know the texture will be slightly different.
This recipe contains gluten, dairy, and eggs. It is not suitable for those with celiac disease unless you use a certified gluten-free flour blend. Always check your ingredient labels for potential allergens.
Conclusion
This Spooky Halloween Cookie Cake is more than just a dessert—it’s a tradition waiting to happen. It’s the recipe that saved my Halloween baking sanity, and I hope it does the same for you. The combination of a chewy, buttery cookie base and that dramatic spider web icing is pure magic. It’s impressive enough for a party, but simple enough for a weeknight bake with the kids.
I love this recipe because it reminds me that perfection isn’t the goal. That first messy batch, born out of frustration and a neighbor’s advice, taught me that the best recipes come from happy accidents. So go ahead—make a mess, press the dough in with your hands, and don’t stress about the web being perfectly symmetrical. It’s Halloween, after all. A little imperfection makes it spookier.
I’d love to see your creations! Share your Spider Web Cookie Cake on Pinterest or Instagram, and tag me so I can cheer you on. Leave a comment below and tell me about your favorite Halloween baking memory. And if you try a fun variation—like a pumpkin spice twist or a monster mash-up—I want to hear about it. Let’s make this Halloween deliciously unforgettable.
Frequently Asked Questions
Can I make this cookie cake ahead of time?
Absolutely! You can bake the cookie cake up to 2 days in advance. Store it in an airtight container at room temperature, and ice it on the day you plan to serve it. The icing is best when fresh.
Why did my cookie cake turn out too hard?
You likely overbaked it. Remember to pull it out when the center is still slightly soft. Also, make sure you measured your flour correctly—too much flour can make the cake dry and hard.
Can I use a different pan size?
Yes, you can use a 9-inch pan or even a 12-inch cast-iron skillet. Adjust the baking time accordingly. A 9-inch pan will need about 25-28 minutes, while a 12-inch skillet might only need 18-20 minutes. Keep an eye on it.
How do I get a perfect spider web design every time?
Practice makes perfect, but here’s a tip: start with a small circle in the center, then pipe concentric circles around it. Use a toothpick to drag lines from the center outward. Wipe the toothpick clean after each drag for the sharpest lines.
Can I freeze the decorated cookie cake?
Yes, but it’s best to freeze it without the icing. Wrap the cooled, un-iced cake tightly in plastic wrap and foil, and freeze for up to 3 months. When you’re ready to serve, thaw it at room temperature, then prepare and pipe the icing.
Pin This Recipe!
Halloween Spider Web Cookie Cake: Best Spooky Dessert
This Spooky Halloween Cookie Cake is a chewy, shareable monster of a dessert that’s way easier than rolling and decorating individual cookies. With a perfect cookie texture—crispy around the edges and soft in the center—topped with a dramatic spider web icing, it’s the star of any Halloween party.
- Prep Time: 15 minutes
- Cook Time: 25 minutes
- Total Time: 40 minutes
- Yield: 12 servings 1x
- Category: Dessert
- Cuisine: American
Ingredients
- 1 cup (2 sticks) unsalted butter, softened
- 1 cup packed light brown sugar
- 1/2 cup granulated sugar
- 2 large eggs, room temperature
- 2 teaspoons vanilla extract
- 2 1/2 cups all-purpose flour
- 1 teaspoon baking soda
- 1/2 teaspoon salt
- 1 tablespoon cornstarch
- 1 1/2 cups semi-sweet chocolate chips
- 1 cup powdered sugar, sifted
- 2 tablespoons milk or heavy cream
- 1/2 teaspoon vanilla extract
- 1–2 drops black gel food coloring
- Plastic spider rings or a large plastic spider (optional)
- Orange or black sprinkles (optional)
Instructions
- Preheat your oven to 350°F (175°C). Position the rack in the center of the oven. Cut a circle of parchment paper to fit the bottom of your 10-inch cake pan. Lightly grease the sides of the pan with butter or non-stick spray.
- In a large mixing bowl, beat the softened butter, brown sugar, and granulated sugar together on medium speed for about 2-3 minutes until light and fluffy. Scrape down the sides of the bowl halfway through.
- Crack the eggs into a small bowl, then add them one at a time to the butter mixture, beating well after each addition. Add the vanilla extract and mix until combined. The batter should look smooth and glossy.
- In a separate bowl, whisk together the flour, baking soda, salt, and cornstarch.
- Gradually add the dry ingredients to the wet mixture, mixing on low speed. Stop as soon as the flour disappears. Use a rubber spatula to fold in any remaining streaks of flour by hand.
- Gently stir in the chocolate chips with the spatula until evenly distributed. The dough will be thick and slightly sticky.
- Transfer the dough to the prepared cake pan. Use your hands or the spatula to press it evenly into the pan. The dough should be about 1-inch thick.
- Place the pan in the preheated oven and bake for 20-25 minutes. The edges should be golden brown and set, but the center will still look slightly soft and puffy. If you insert a toothpick into the center, it should come out with a few moist crumbs, not wet batter.
- Let the cookie cake cool in the pan on a wire rack for 15 minutes. Then, carefully run a knife around the edges and invert the cake onto the rack to cool completely.
- In a small bowl, whisk together the powdered sugar, milk, and vanilla extract. Start with 2 tablespoons of milk; you want a thick but pipeable consistency. If it’s too thick, add another teaspoon of milk. Once smooth, transfer about 2 tablespoons of the white icing to a separate bowl and add the black gel food coloring. Stir until you get a deep, dark black.
- Place the black icing in a piping bag or a small zip-top bag with a tiny corner snipped off. Pipe a small circle in the center of the cooled cookie cake. Then, pipe a larger circle around it, and another larger circle near the edge. Use a toothpick or a knife to drag lines from the center outward, creating the web effect. Start from the center and drag outward, then wipe the toothpick clean and repeat.
- Place your plastic spider right in the center of the web, or arrange a few spider rings around the edge. Add some orange or black sprinkles for extra flair if you like. Let the icing set for about 15 minutes before slicing.
Notes
Don’t overbake the cookie cake; it continues to cook from residual heat. Use room temperature ingredients for best results. Line your pan with parchment paper for easy removal. Pipe the web while the icing is fresh. The cookie cake tastes even better the next day as flavors meld together.
Nutrition
- Serving Size: 1 slice
- Calories: 380
- Sugar: 35
- Sodium: 200
- Fat: 18
- Saturated Fat: 11
- Carbohydrates: 52
- Fiber: 1
- Protein: 4
Keywords: Halloween cookie cake, spider web cake, spooky dessert, Halloween baking, cookie cake recipe, easy Halloween dessert