Love this? Save it for later!
Share the inspiration with your friends
It was 10:47 PM on a random Wednesday in July, and I was supposed to be packing for a weekend trip to my cousin’s lake house. Instead, I found myself staring into my fridge like it held the secrets to the universe. The craving hit me out of nowhere — I wanted something cold, creamy, and bursting with summer flavor. I didn’t have the fancy Italian ladyfingers or the expensive mascarpone that a traditional trifle would need, but I had a box of angel food cake that was about to go stale, a tub of Cool Whip I’d bought on a whim, and a bag of frozen mixed berries hiding in the back of the freezer. That’s when the idea arrived — why not make a dessert that looks like a fireworks display? Why not make it red, white, and blue?
Honestly, I was a little embarrassed by how excited I got. I mean, it was almost eleven o’clock and I was about to make a dessert I couldn’t even eat until the next day. But there’s something about the late night that loosens the usual rules, you know? The kitchen felt quiet and mine alone. I didn’t have anyone to impress, no photos to stage, no kids asking when dinner would be ready. So I just started layering — berries, cream, cake, berries, cream, cake — like I was building a tiny edible flag. I made a mess, of course. There was whipped cream on my counter and a few blueberries rolled under the fridge. But when I finally took that first cold, creamy, fruity bite the next afternoon, surrounded by family and the smell of barbecue smoke, I knew I had stumbled onto something special.
That’s the thing about this Perfect Red White and Blue Labor Day Trifle. It looks like you spent hours fussing over it, but the real secret is that it came together in a late-night moment of pure improvisation. It’s the dessert that says “I planned this” while secretly being the easiest thing you’ll make all summer. And maybe you’ve been there — staring into your own fridge, wanting something festive but not wanting to turn on your oven or break out your stand mixer. This one’s for you.
Why You’ll Love This Recipe
Let me tell you why this trifle has become my non-negotiable Labor Day dessert. After testing this recipe at three different cookouts — my neighbor’s barbecue, my sister’s pool party, and my own backyard gathering — I can say with confidence that this is the dessert that disappears first. Every single time.
- Quick & Easy: This comes together in under 20 minutes of active prep time. No baking, no complicated custards, no tempering eggs. If you can layer ingredients in a bowl, you can make this trifle.
- Simple Ingredients: You likely already have most of these in your kitchen. Angel food cake, pudding mix, whipped topping, and fresh or frozen berries — that’s it. No fancy grocery trips needed.
- Perfect for Labor Day: It’s patriotic without being kitschy, refreshing on a hot day, and impressive enough to be the centerpiece of your dessert table. Plus, it feeds a crowd.
- Crowd-Pleaser: I’ve watched kids go back for thirds and adults ask for the recipe before they’ve even finished their first serving. It’s that good.
- Unbelievably Delicious: The combination of light, fluffy cake, creamy vanilla pudding, and bright, tangy berries is next-level comfort food. The textures alone are worth the five minutes it takes to assemble.
What makes this recipe different from the rest? It’s the method. Instead of using a complicated homemade custard or a finicky pastry cream, I use instant vanilla pudding whipped with cream cheese for an ultra-creamy, stable filling that doesn’t get soggy. The cream cheese adds a subtle tang that cuts through the sweetness and keeps every layer distinct. This isn’t just another trifle — it’s my best version, perfected through trial and error (and a few sad, soggy attempts).
This recipe isn’t just good — it’s the kind that makes you close your eyes after the first bite. It’s comfort food reimagined for summer: lighter, faster, but with the same soul-soothing satisfaction. Perfect for impressing guests without stress, or turning a simple cookout into something memorable.
What Ingredients You Will Need
This recipe uses simple, wholesome ingredients to deliver big flavor and satisfying texture without any fuss. Most of these are pantry or freezer staples, which makes this perfect for last-minute gatherings.
For the Cream Layer
- 1 package (8 oz) cream cheese, softened to room temperature (this is crucial for a smooth texture — don’t skip the softening step)
- 1/2 cup granulated sugar
- 1 teaspoon vanilla extract (I recommend pure vanilla extract for the best flavor, but imitation works fine too)
- 2 cups cold whole milk (whole milk gives the richest texture, but 2% works well — avoid skim milk as the pudding won’t set as firmly)
- 2 packages (3.4 oz each) instant vanilla pudding mix (Jell-O brand is my go-to for consistent results, but store brands work too)
- 1 1/2 cups heavy whipping cream (for the topping layer — you can substitute with an 8 oz tub of Cool Whip if you’re short on time)
For the Fruit Layer
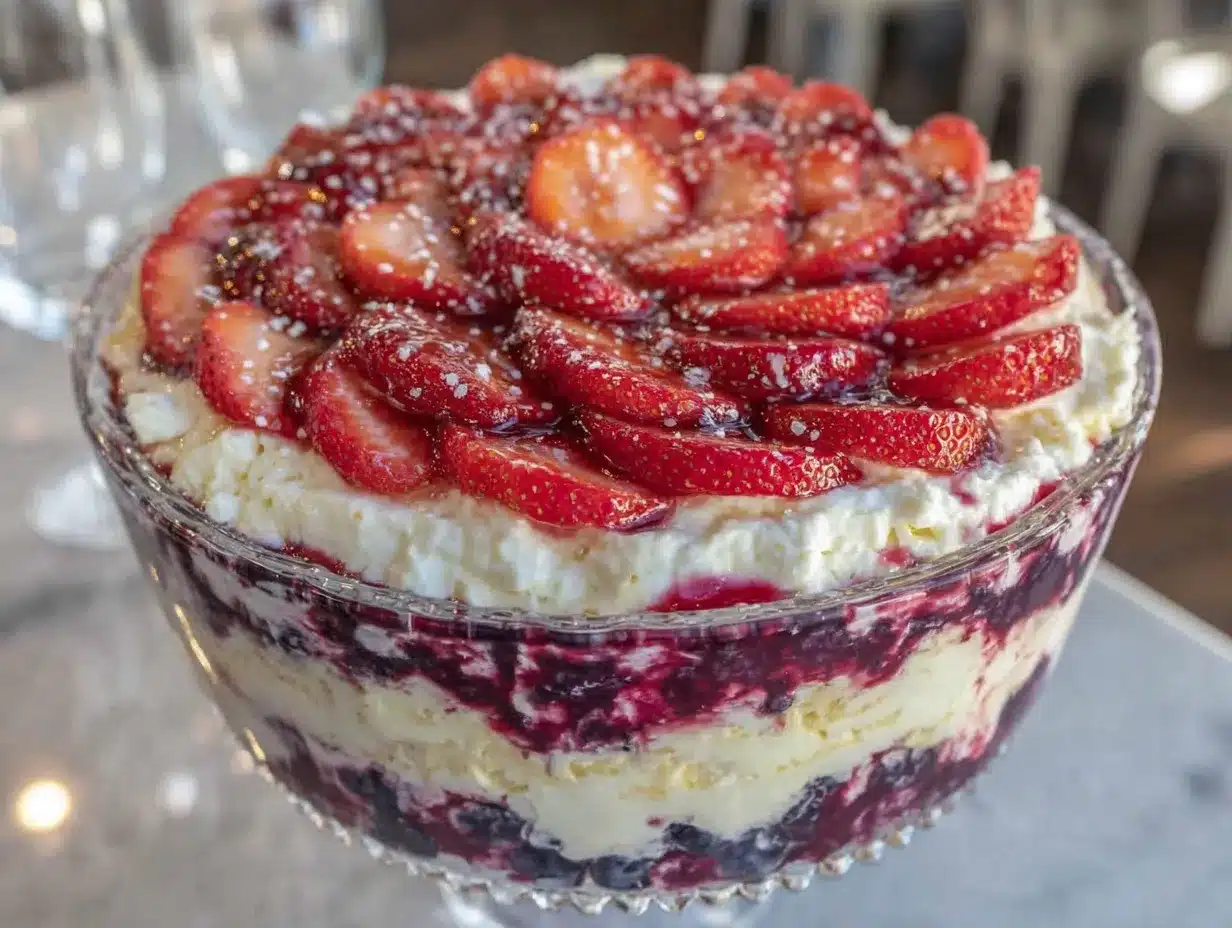
- 2 cups fresh strawberries, hulled and sliced (look for bright red, fragrant berries for the best flavor — avoid mushy or pale ones)
- 1 1/2 cups fresh blueberries (smaller wild blueberries work beautifully here and distribute more evenly)
- 1 1/2 cups fresh raspberries (if raspberries aren’t in season, you can use frozen and thawed — just drain them well first)
- 2 tablespoons granulated sugar (for macerating the berries — this draws out their natural juices and creates a syrupy layer)
- 1 tablespoon fresh lemon juice (this brightens the berries and balances the sweetness of the cream layers)
For the Cake Layer
- 1 store-bought angel food cake (about 10-12 oz), cut into 1-inch cubes (you can also use pound cake or sponge cake — see variations below)
- Optional: 2 tablespoons berry juice or simple syrup (for brushing the cake cubes if you want extra moisture and flavor)
Ingredient Selection Tips: When choosing your cream cheese, look for blocks rather than tubs of spread — the blocks have a better texture for this application. For the berries, I prefer fresh when they’re in season (June through August), but frozen berries work beautifully in a pinch. Just thaw them completely and drain off any excess liquid so your trifle doesn’t get watery.
Substitution Guidance: For a gluten-free version, ensure your pudding mix is certified gluten-free (most are, but check labels). For a lower-sugar option, use sugar-free pudding mix and reduce the sugar in the cream cheese mixture to 1/4 cup. You can also swap the angel food cake for gluten-free pound cake if needed.
Equipment Needed
You don’t need a ton of fancy equipment for this recipe, which is part of its charm. Here’s what you’ll need:
- A trifle dish or large glass bowl (at least 4-quart capacity) — a clear glass dish lets those beautiful red, white, and blue layers shine. If you don’t have a trifle dish, a large glass salad bowl works perfectly
- Electric hand mixer or stand mixer — you’ll need this to whip the cream and beat the cream cheese until smooth. A whisk and some elbow grease will work, but honestly, your arm will thank you for using a mixer
- Two large mixing bowls — one for the cream cheese mixture and one for whipping the cream
- Rubber spatula — for folding the whipped cream into the pudding mixture and for spreading layers evenly
- Sharp knife and cutting board — for hulling strawberries and cubing the angel food cake
- Measuring cups and spoons — accuracy matters, especially with the pudding mix
- Medium bowl — for macerating the berries with sugar and lemon juice
Budget-Friendly Tip: If you don’t own a trifle dish, check your local thrift store — I found my favorite one for three dollars. Alternatively, use a wide-mouth mason jar for individual trifles, which are perfect for picnics or portion control.
Preparation Method
Follow these steps carefully, and you’ll have a showstopping dessert that tastes as good as it looks. I’ve included sensory cues and troubleshooting tips throughout so you know exactly what to look for.
- Macerate the berries (15 minutes before assembly): In a medium bowl, combine the sliced strawberries, blueberries, and raspberries. Sprinkle with 2 tablespoons of sugar and 1 tablespoon of fresh lemon juice. Gently toss everything together with a rubber spatula until the sugar starts to dissolve. Let this sit at room temperature for at least 15 minutes. You’ll notice the berries releasing their juices and creating a beautiful ruby-colored syrup — that’s exactly what you want. Set aside.
- Make the cream cheese pudding layer (10 minutes): In a large mixing bowl, beat the softened cream cheese with an electric hand mixer on medium speed until it’s completely smooth and fluffy — about 2 minutes. There should be no lumps whatsoever. Add the 1/2 cup of sugar and vanilla extract, and beat for another minute until well combined. Scrape down the sides of the bowl with your spatula.
- Add the pudding mix: Pour in the 2 cups of cold milk and add both packages of instant vanilla pudding mix. Beat on low speed for about 30 seconds to incorporate the powder, then increase to medium speed and beat for 2 minutes. The mixture will thicken considerably — it should be thick enough that it holds its shape when you lift the beaters. If it seems too thin, let it sit for 2-3 minutes; instant pudding needs a moment to fully set.
- Whip the cream (5 minutes): In a separate clean mixing bowl, pour the 1 1/2 cups of heavy whipping cream. Using clean beaters, whip the cream on medium-high speed until stiff peaks form — about 3-4 minutes. You’re looking for peaks that stand straight up when you lift the beaters. Be careful not to overwhip, or you’ll end up with butter. Fold about 1 cup of the whipped cream into the cream cheese pudding mixture using your rubber spatula. This lightens the pudding and makes it extra creamy. Reserve the remaining whipped cream for the top layer.
- Prepare the cake (5 minutes): Cut the angel food cake into 1-inch cubes. If you want extra moisture, lightly brush the cubes with a little berry juice from the macerated berries or simple syrup. Don’t soak them — just a light brush will do.
- Assemble the first layer: Spoon about one-third of the cream cheese pudding mixture into the bottom of your trifle dish and spread it into an even layer. Top with half of the cake cubes, arranging them in a single layer as much as possible. Spoon half of the macerated berries (including some of the juice) evenly over the cake cubes.
- Build the second layer: Add another third of the pudding mixture over the berries and spread gently. Top with the remaining cake cubes, then the remaining berries and their juice.
- Finish with the top layer: Spread the final third of the pudding mixture over the top. Using the reserved whipped cream, dollop it over the top layer and spread gently into an even layer. For a decorative finish, use the back of a spoon to create swirls or peaks in the whipped cream.
- Garnish and chill: Arrange a few reserved berries on top for a pretty presentation — a few whole strawberries, a cluster of blueberries, and a couple of raspberries create a beautiful red, white, and blue pattern. Cover the trifle loosely with plastic wrap and refrigerate for at least 4 hours, or overnight. This chilling time is non-negotiable — it allows the flavors to meld and the cake to absorb some of the berry juices and cream, creating that perfect trifle texture. The pudding needs time to fully set, too.
Pro tip from my kitchen: I like to make this the night before I serve it. The next day, the layers have settled into this beautiful harmony, and the cake has softened to a tender, almost custard-like texture without being mushy. It’s honestly better on day two.
Cooking Tips & Techniques
After making this trifle more times than I can count (and learning from a few spectacular failures), here are my best tips for success:
The soggy trifle disaster: My first attempt at a fruit trifle was a sad, soupy mess. I learned two things that day. First, always macerate your berries and then drain off some of the excess juice before layering. Second, let the trifle chill for at least 4 hours, but not more than 24 hours — after that, the cake can start to break down too much. There’s a sweet spot between “perfectly softened” and “mushy.”
Room temperature cream cheese is non-negotiable: I know you’ve heard this before, but trust me on this one. Cold cream cheese will give you lumpy pudding, and no amount of beating will fix it completely. Take it out of the fridge 30-45 minutes before you start. If you forgot, cut it into small cubes and microwave it in 10-second bursts until it’s soft to the touch.
The layering technique matters: When spreading each layer, use a gentle hand. You want distinct stripes of red, white, and blue when you cut into the trifle. If you press down too hard, the layers will bleed into each other. Think of it as building a sandcastle — gentle pats rather than aggressive smushing.
Timing strategy: I always make the cream cheese pudding mixture first and let it sit while I prepare the berries and cake. This gives the pudding time to fully thicken, which makes layering much easier. Multitasking in the right order saves you from waiting around.
Variations & Adaptations
This trifle is incredibly forgiving and adaptable. Here are some of my favorite variations:
Individual Mason Jar Trifles: For a picnic or BBQ where you don’t want to deal with serving from a large dish, layer everything in 8-ounce mason jars. They’re portable, portion-controlled, and look adorable. Just alternate layers of pudding, cake, and berries until you reach the top, then finish with whipped cream and a berry on top.
Lemon Berry Trifle: Add 2 tablespoons of fresh lemon zest to the cream cheese pudding mixture, and use lemon curd as an extra layer between the cake and berries. The bright citrus flavor pairs beautifully with the berries and cuts through the richness. I made this version for Easter brunch and it was gone in ten minutes.
Chocolate Lover’s Trifle: Swap the angel food cake for chocolate pound cake, and use chocolate instant pudding instead of vanilla. The combination of chocolate and berries is a classic for a reason. Top with chocolate shavings for an extra touch.
Dairy-Free Version: Use dairy-free cream cheese (Kite Hill makes a great one), coconut cream instead of heavy cream (chill the can overnight and scoop out the solid part), and a plant-based milk like oat milk for the pudding. Most instant pudding mixes work with non-dairy milks — just check the package directions.
Seasonal Berry Swap: In early summer, use fresh strawberries and blueberries. In late summer, swap in blackberries and sliced peaches. In fall, try apples and pears with a sprinkle of cinnamon in the cream layer. The base recipe is endlessly adaptable.
Serving & Storage Suggestions
This trifle is best served cold, straight from the refrigerator. The contrast between the chilled cream layers and the juicy berries is what makes it so refreshing on a hot Labor Day afternoon.
Presentation Tips: Before serving, I like to add a few fresh berries on top for a pop of color. If you’re feeling fancy, a few sprigs of fresh mint or edible flowers make it look even more stunning. Serve with a large spoon or spatula that can reach the bottom of the dish — you want to get all the layers in every serving.
Complementary Dishes: This trifle pairs beautifully with grilled meats like burgers, hot dogs, or barbecue chicken. It’s also lovely alongside a fruit-forward white wine like a Moscato or a crisp rosé. For a non-alcoholic option, serve with sparkling water with a splash of cranberry juice.
Storage Instructions: Cover the trifle dish tightly with plastic wrap and store in the refrigerator for up to 2 days. The texture is best within the first 24 hours. After that, the cake continues to soften and the layers become less distinct — still delicious, just less photogenic.
Freezer Instructions: I don’t recommend freezing this trifle, as the texture of the cream and berries will suffer significantly upon thawing. If you have leftovers, they’ll keep in the fridge for a day or two. Honestly, leftovers of this dessert are rare in my house — it usually gets finished at the party.
Reheating: This is a cold dessert, so no reheating needed! If it’s been sitting out at a party for more than 2 hours, return any leftovers to the fridge promptly.
Nutritional Information & Benefits
Here’s the estimated nutritional breakdown for one serving (based on 12 servings):
| Nutrient | Amount per Serving |
|---|---|
| Calories | 385 |
| Total Fat | 22g |
| Saturated Fat | 13g |
| Cholesterol | 75mg |
| Sodium | 420mg |
| Total Carbohydrates | 44g |
| Dietary Fiber | 3g |
| Sugars | 32g |
| Protein | 5g |
Health Benefits: This dessert actually has some redeeming qualities! Berries are packed with antioxidants, vitamin C, and fiber. Blueberries are known for their brain-boosting properties, while strawberries provide a healthy dose of vitamin C. The cream cheese and milk add calcium and protein. Of course, it’s still a treat — but one that offers more nutritional value than a standard cake or pie.
Dietary Considerations: This recipe contains dairy and gluten (from the angel food cake). For a gluten-free version, use a gluten-free pound cake or gluten-free angel food cake. For a lower-sugar option, use sugar-free pudding mix and reduce the sugar in the cream cheese mixture. This recipe is nut-free and egg-free (angel food cake typically contains eggs, so check your specific brand).
Conclusion
This Perfect Red White and Blue Labor Day Trifle is more than just a pretty dessert — it’s the kind of recipe that makes you look like a hero with minimal effort. It’s the dessert that gets photographed, the one people ask for the recipe for, the one that somehow tastes even better than it looks. And honestly, that’s my favorite kind of recipe to share.
I love this recipe because it captures everything I want in a summer dessert: it’s cold, creamy, fruity, and festive without being fussy. It’s the dessert equivalent of a fireworks display — impressive, joyful, and over way too soon. Whether you’re hosting a backyard barbecue, heading to a potluck, or just want to celebrate the end of summer with something special, this trifle delivers every single time.
So go ahead and make this your own. Use whatever berries look best at the market, swap in your favorite cake, or add a personal twist with lemon zest or chocolate. The beauty of a trifle is that it’s forgiving — it wants you to experiment. And when you take that first cold, creamy, berry-filled bite, I hope you close your eyes and smile.
Have you made this trifle? I’d love to hear how it turned out! Drop a comment below and tell me about your version — did you add something unexpected? Did it disappear at your party? Share your photos and tag me so I can see your beautiful creation. Happy Labor Day, and happy layering!
Frequently Asked Questions
Can I make this trifle a day ahead?
Absolutely! In fact, I recommend it. Making this trifle the night before allows the flavors to meld and the cake to soften to that perfect, custard-like texture. Just cover it tightly with plastic wrap and refrigerate for up to 24 hours. Add any fresh berries for garnish right before serving so they stay bright and beautiful.
Can I use frozen berries instead of fresh?
Yes, you can use frozen berries, but there’s a trick to it. Thaw them completely in a colander set over a bowl, then gently press out the excess liquid. If you skip this step, your trifle will end up watery. Frozen berries also tend to be softer, so handle them gently when layering.
What can I use instead of angel food cake?
Plenty of options! Pound cake, sponge cake, ladyfingers, or even shortbread cookies work beautifully. If you use something denser like pound cake, you might want to brush the cubes with a little berry syrup or simple syrup to keep them moist. For a gluten-free option, use gluten-free pound cake or gluten-free ladyfingers.
How long will this trifle last in the refrigerator?
This trifle is best within 2 days of assembly. After 48 hours, the cake can become overly soft and the layers may start to blur together. It’s still safe to eat for up to 3 days, but the texture won’t be as nice. I honestly doubt you’ll have leftovers that long, though!
Can I use homemade whipped cream instead of Cool Whip?
Yes, and I actually prefer it! The recipe includes instructions for homemade whipped cream using heavy cream. It has a cleaner, less sweet flavor than Cool Whip and doesn’t contain any stabilizers or preservatives. Just make sure to whip it to stiff peaks so it holds its shape in the trifle.
Pin This Recipe!
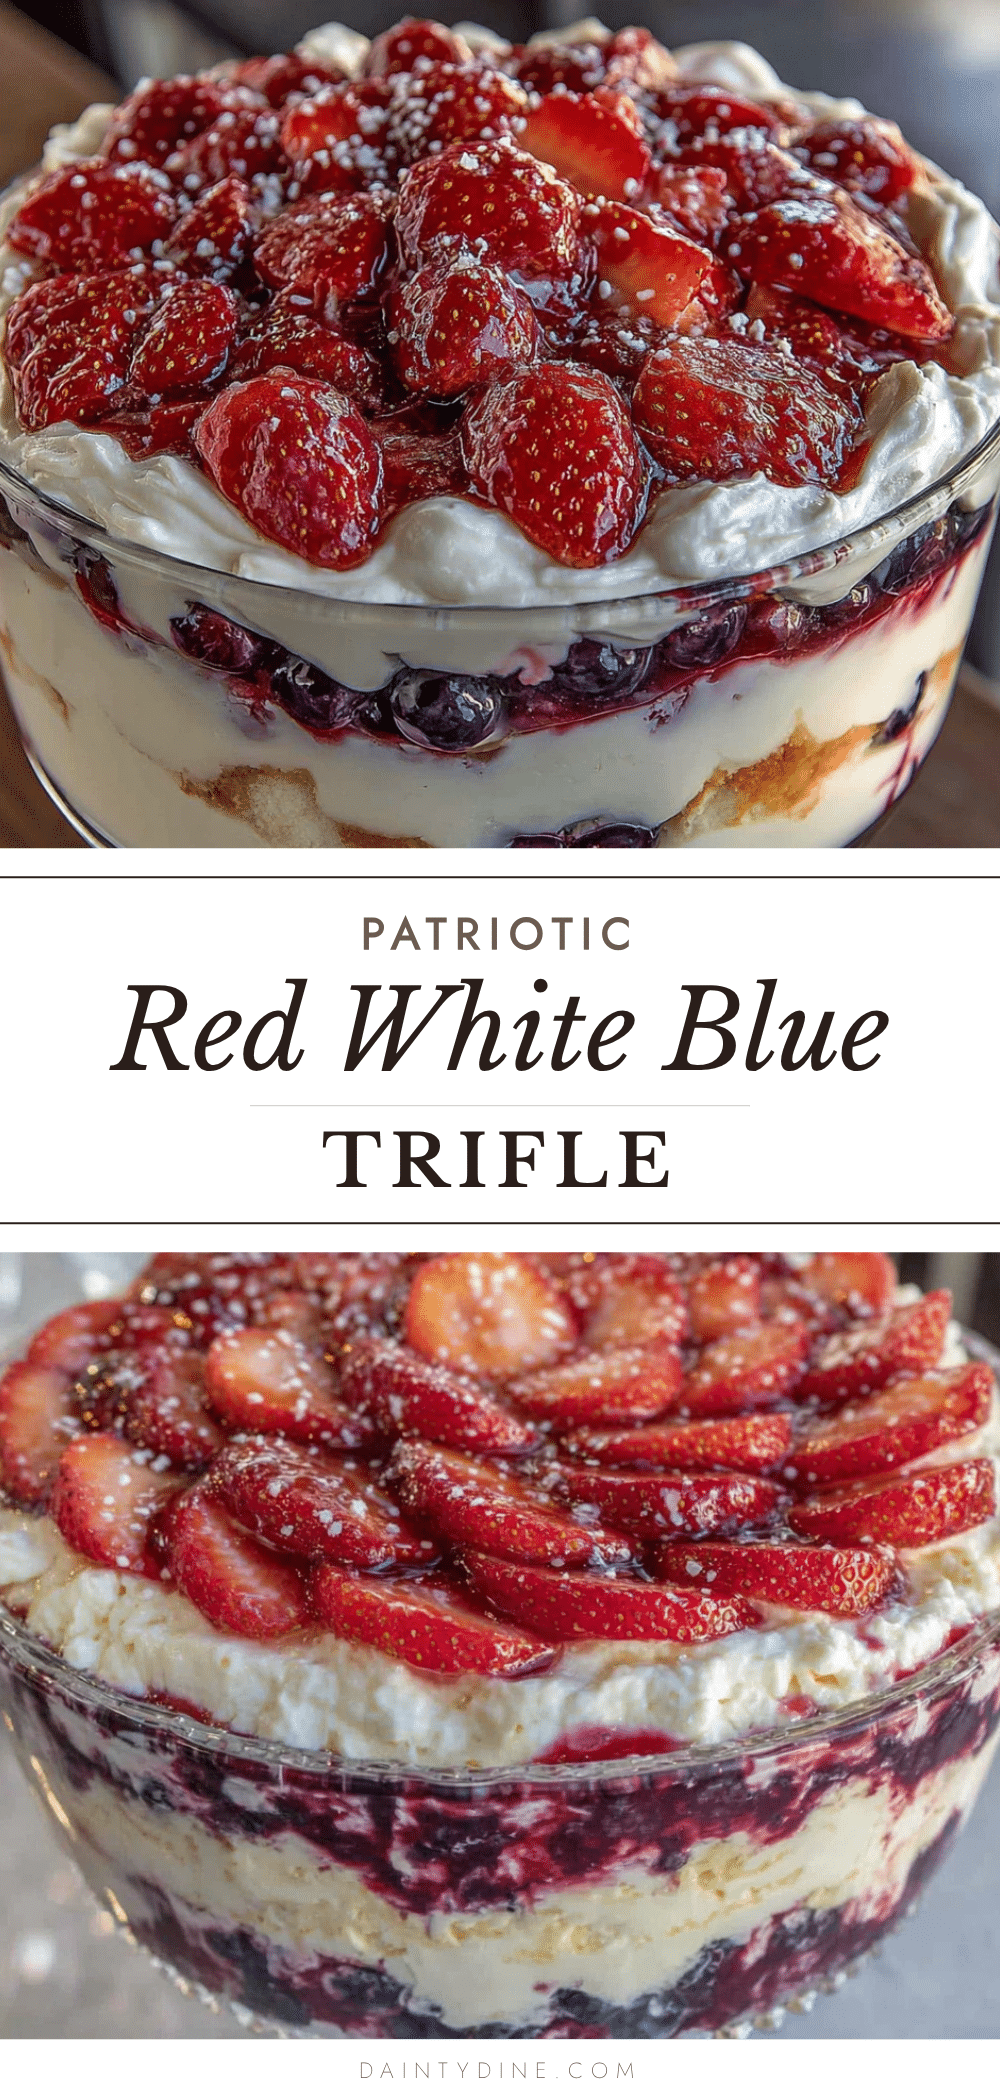
Perfect Red White and Blue Labor Day Trifle
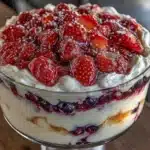
A no-bake, crowd-pleasing dessert featuring layers of angel food cake, creamy vanilla pudding, and fresh berries. Perfect for Labor Day celebrations, this easy trifle looks impressive but comes together in under 20 minutes.
- Prep Time: 20 minutes
- Cook Time: 0 minutes
- Total Time: 4 hours 20 minutes (includes chilling)
- Yield: 12 servings 1x
- Category: Dessert
- Cuisine: American
Ingredients
- 1 package (8 oz) cream cheese, softened
- 1/2 cup granulated sugar
- 1 teaspoon vanilla extract
- 2 cups cold whole milk
- 2 packages (3.4 oz each) instant vanilla pudding mix
- 1 1/2 cups heavy whipping cream
- 2 cups fresh strawberries, hulled and sliced
- 1 1/2 cups fresh blueberries
- 1 1/2 cups fresh raspberries
- 2 tablespoons granulated sugar
- 1 tablespoon fresh lemon juice
- 1 store-bought angel food cake (about 10–12 oz), cut into 1-inch cubes
- Optional: 2 tablespoons berry juice or simple syrup
Instructions
- Macerate the berries: In a medium bowl, combine strawberries, blueberries, and raspberries. Sprinkle with 2 tablespoons sugar and 1 tablespoon lemon juice. Gently toss and let sit at room temperature for at least 15 minutes.
- Make the cream cheese pudding layer: In a large bowl, beat softened cream cheese with an electric mixer on medium speed until smooth and fluffy (about 2 minutes). Add 1/2 cup sugar and vanilla extract, beat for 1 minute. Scrape down sides.
- Add the pudding mix: Pour in 2 cups cold milk and both packages of instant vanilla pudding mix. Beat on low for 30 seconds, then medium for 2 minutes until thickened. Let sit 2-3 minutes if needed.
- Whip the cream: In a separate clean bowl, whip 1 1/2 cups heavy cream on medium-high speed until stiff peaks form (3-4 minutes). Fold 1 cup of whipped cream into the pudding mixture. Reserve remaining whipped cream for topping.
- Prepare the cake: Cut angel food cake into 1-inch cubes. Optionally brush lightly with berry juice or simple syrup.
- Assemble first layer: Spoon one-third of the cream cheese pudding mixture into the bottom of a trifle dish. Top with half of the cake cubes, then half of the macerated berries (with some juice).
- Build second layer: Add another third of the pudding mixture. Top with remaining cake cubes, then remaining berries and juice.
- Finish with top layer: Spread the final third of the pudding mixture over the top. Dollop reserved whipped cream and spread gently. Create swirls or peaks with the back of a spoon.
- Garnish and chill: Arrange a few reserved berries on top. Cover loosely with plastic wrap and refrigerate for at least 4 hours, or overnight.
Notes
For best results, make the trifle the night before serving. The flavors meld and the cake softens to a perfect texture. Do not chill for more than 24 hours to avoid mushiness. Room temperature cream cheese is essential for a smooth pudding layer. If using frozen berries, thaw and drain well before using.
Nutrition
- Serving Size: 1 serving (1/12 of r
- Calories: 385
- Sugar: 32
- Sodium: 420
- Fat: 22
- Saturated Fat: 13
- Carbohydrates: 44
- Fiber: 3
- Protein: 5
Keywords: trifle, red white and blue, labor day, no-bake dessert, berry trifle, angel food cake, patriotic dessert, summer dessert