Love this? Save it for later!
Share the inspiration with your friends
My brother-in-law, a man who once spent a full ten minutes explaining why he “didn’t do” cold lunches, swore he hated rice balls. For years. Every time I’d mention onigiri or arancini, he’d make a face like I’d suggested eating a sponge. Then, last Tuesday, I was packing a bento box for my niece. I’d made a batch of these Easy Bento Box Edamame and Rice Balls for Kids just for her—a silly little experiment, really—and I walked into the kitchen to find him, mid-bite, with rice grains stuck to his mustache. “These are… acceptable,” he mumbled, reaching for another one. I didn’t say a word. I just smiled and handed him the container. Honestly, catching someone in the act of proving themselves wrong is one of life’s quietest, greatest joys.
That moment stuck with me. It wasn’t about winning some silly argument. It was about how a simple, slightly sticky, cheesy little rice ball could completely change someone’s mind. You know that feeling when you finally crack the code on a recipe that’s both incredibly easy and genuinely loved by everyone? That’s this recipe. These Easy Bento Box Edamame and Rice Balls for Kids are not just about getting lunch on the table; they’re about creating something that feels special but takes almost no effort. I mean, let’s be real—any recipe that uses leftover rice and a food processor is a win in my book.
These little guys are my secret weapon for busy mornings. They’re the thing I make when I want to feel like a Pinterest-perfect parent but I’m running on three hours of sleep and cold coffee. They’re forgiving, they’re fun, and they’re the kind of recipe that makes you look like a hero without breaking a sweat. And the best part? They actually work. No dry, crumbly mess. Just soft, flavorful, perfectly poppable bites that even the most skeptical eater will devour. That’s why this recipe stayed with me—it’s not just food; it’s a tiny, edible peace treaty.
Why You’ll Love This Recipe
Let’s be honest, finding a lunch that your kids will actually eat—and that won’t take you an hour to make—feels like winning the lottery. After countless trials (and a few tragic, mushy failures), I can tell you with confidence: these Easy Bento Box Edamame and Rice Balls for Kids are a game-changer. They’ve been tested by my own picky eaters, approved by my neighbor’s kindergarten class, and they’ve even made an appearance at a surprisingly chic adult potluck. Here’s why they work:
- Quick & Easy: Comes together in under 30 minutes. Seriously. If you have leftover rice, it’s more like 15. Perfect for those mornings when you hit the snooze button one too many times.
- Simple Ingredients: No fancy grocery trips needed. You likely have everything in your kitchen right now—cooked rice, frozen edamame, a little cheese, and maybe some furikake if you’re feeling fancy.
- Perfect for Lunchboxes: These are built for bento boxes. They hold their shape, don’t get soggy, and are the perfect size for little hands (and grown-up hands, too).
- Crowd-Pleaser: The combination of creamy edamame and sticky rice is a texture dream. Kids love the fun shape, and adults love the subtle, savory flavor. It’s a win-win.
- Unbelievably Delicious: The texture and flavor combo is next-level comfort food. The edamame adds a buttery, slightly sweet richness that makes these rice balls feel indulgent, even though they’re packed with protein and fiber.
What makes this recipe different from the rest? It’s the technique. Instead of just mixing everything together and hoping for the best, we’re blending the edamame into a smooth, almost creamy paste. This secret step ensures every bite is perfectly seasoned and holds the rice together without needing a ton of extra binder. It’s not just another version of a rice ball—it’s my best version. It’s comfort food reimagined: healthier, faster, but with the same soul-soothing satisfaction. Perfect for impressing lunchbox critics without the stress.
What Ingredients You Will Need
This recipe uses simple, wholesome ingredients to deliver bold flavor and satisfying texture without the fuss. Most of these are pantry staples or easy to find at any grocery store. I’ve tested this with a few different brands, and here are my honest thoughts on what works best.
- 2 cups cooked sushi rice (or short-grain white rice), cooled: This is your base. Sushi rice is ideal because it’s naturally sticky, but any short-grain white rice works beautifully. I’ve used leftover Chinese takeout rice with great results. Just make sure it’s fully cooled so it’s easier to handle. (Cold rice is less sticky and much easier to shape!)
- 1 cup frozen shelled edamame, thawed: The star of the show! Edamame adds a gorgeous pop of green, a buttery texture, and a solid dose of plant-based protein. I always buy the frozen bags—they’re just as good as fresh. Make sure to thaw them completely and pat them dry with a paper towel to remove excess moisture.
- 1/4 cup shredded mozzarella cheese (or dairy-free alternative): This is my secret ingredient for binding and creaminess. The cheese melts slightly as you mix, creating a cohesive, non-crumbly texture. I’ve used a plant-based mozzarella shred from Miyoko’s Creamery, and it worked perfectly. (Adds richness and helps the balls hold their shape.)
- 2 tablespoons cream cheese, softened: Another binding hero. It adds a subtle tang and a luxurious, smooth mouthfeel. Don’t skip it! If you’re dairy-free, Kite Hill makes a fantastic plain cream cheese alternative.
- 1 tablespoon furikake seasoning (optional but highly recommended): This Japanese rice seasoning is a flavor bomb. It usually contains sesame seeds, nori, salt, and sometimes dried fish or bonito flakes. It adds a savory, umami crunch that makes these rice balls addictive. I’m partial to the brand Nori-Fumi. (If you can’t find it, a sprinkle of toasted sesame seeds and a pinch of salt works in a pinch.)
- 1/2 teaspoon salt: Just a little to bring everything together. If your furikake is salty, you might want to use a little less.
- Optional: nori strips for wrapping: For a classic bento touch, cut a sheet of nori into thin strips and wrap one around each rice ball. It adds a lovely salty crunch and makes them look super cute.
Equipment Needed
You don’t need a fancy kitchen to make these. Here’s what you’ll need, along with some honest thoughts from my own trials.
- Food processor or high-speed blender: This is non-negotiable for getting that super-smooth edamame paste. I use my trusty Cuisinart 7-cup model. If you don’t have one, a potato masher and some elbow grease will work, but the texture won’t be quite as silky.
- Large mixing bowl: For combining everything. A glass or stainless steel bowl works great.
- Small bowl of water with a little salt: This is for wetting your hands to prevent the rice from sticking. It’s a classic onigiri trick that makes all the difference.
- Baking sheet or tray lined with parchment paper: To hold the shaped rice balls while you finish the batch. The parchment paper prevents them from sticking.
- Measuring cups and spoons: For accuracy. I’ve eyeballed it before, and the texture was never quite right.
- Sharp knife and cutting board: If you’re using nori strips to wrap the balls.
Budget-friendly tip: If you don’t have a food processor, you can mash the edamame with a fork or potato masher. It will take a few extra minutes and the texture will be a little chunkier, but it’s totally doable. Also, skip the furikake and just use a pinch of salt and some sesame seeds—it’s still delicious.
Preparation Method
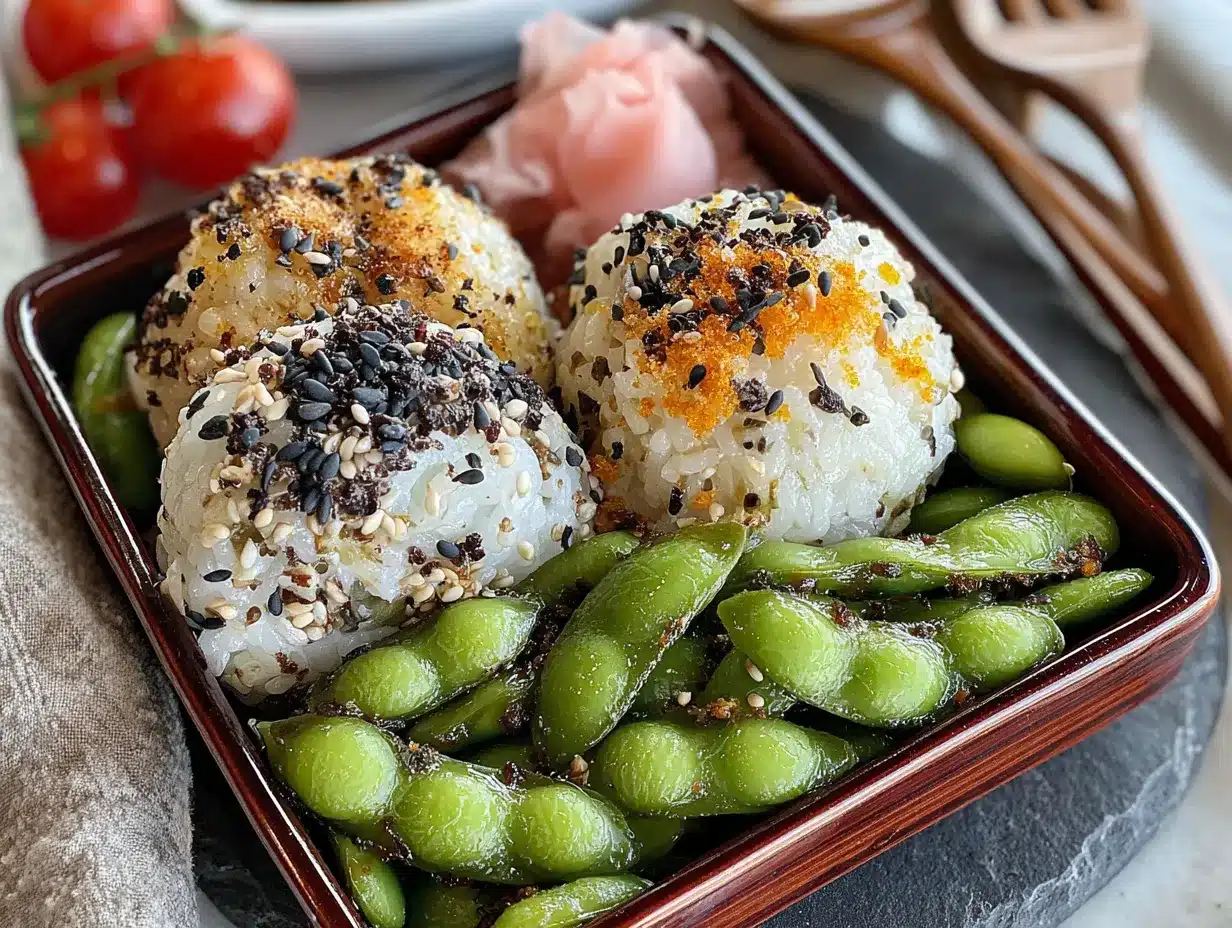
Alright, let’s get rolling! This recipe is straightforward, but a few key steps make all the difference. Follow these instructions, and you’ll have perfect, non-crumbly rice balls every time.
- Prepare the Edamame Paste: First, make sure your edamame is fully thawed. Pat it dry with a paper towel to remove any excess water—this is crucial for preventing a soggy paste. Add the thawed edamame, softened cream cheese, and shredded mozzarella to your food processor. Pulse until the mixture forms a smooth, almost creamy paste. It should look like a thick, chunky hummus. (It will smell amazing!) Scrape down the sides of the bowl as needed. This should take about 30-45 seconds.
- Combine with Rice: In a large mixing bowl, add your cooled sushi rice and the edamame paste. Use a rubber spatula or a rice paddle to gently fold the mixture together. Don’t overmix—you want the green paste to be evenly distributed, but you don’t want to break the rice grains. The goal is a uniform, speckled green color. (If the mixture seems too dry, add a tiny splash of water, one teaspoon at a time.)
- Season the Mixture: Sprinkle in the furikake seasoning and the salt. Fold again gently to distribute. Taste a tiny bit. Adjust the salt or furikake to your liking. (I always add a little extra furikake because I love the crunch.)
- Shape the Rice Balls: This is the fun part! Fill a small bowl with water and add a pinch of salt. Dip your hands into the salted water to wet them—this prevents the rice from sticking to your skin. Scoop about 2 tablespoons of the rice mixture into your palm. Gently squeeze and press the mixture into a tight ball, using both hands to shape it. It should hold together easily. (If it’s falling apart, your rice might be too dry or not sticky enough. Try adding a tiny bit more cream cheese.)
- Place on Tray: Place each shaped rice ball onto your parchment-lined baking sheet. Repeat until all the mixture is used. You should get about 12-14 rice balls, depending on size.
- Wrap with Nori (Optional): If you’re using nori strips, cut a sheet of nori into 1-inch wide strips. Wrap one strip around the middle of each rice ball. The moisture from the rice will help the nori stick. (I like to do this right before serving so the nori stays crisp.)
- Chill for 10 Minutes: Pop the tray of rice balls into the refrigerator for about 10 minutes. This helps them firm up and hold their shape even better, especially if you’re packing them for a lunchbox. (This step is optional but highly recommended for bento boxes.)
Preparation Note: If you’re making these for a school lunch, I recommend leaving the nori strips off until serving time. They can get a little chewy if they sit in the fridge for too long. Also, if your hands are getting too sticky while shaping, just re-wet them in the salted water.
Cooking Tips & Techniques
I’ve made these Easy Bento Box Edamame and Rice Balls for Kids about a dozen times now, and I’ve learned a few things the hard way. Here are my best tips to ensure success every single time.
The Rice is Everything. Seriously. Using freshly cooked, still-warm rice will result in a mushy, sticky mess. You need fully cooled rice—ideally, leftover rice that’s been sitting in the fridge for a few hours. The starches set as it cools, making it much easier to shape. If you’re in a rush, you can spread hot rice on a baking sheet and pop it in the freezer for 10 minutes to cool it down quickly.
Don’t Overprocess the Edamame. You want a paste, not a puree. If you run the food processor for too long, the edamame can become gummy and release too much water. Pulse it in short bursts and stop as soon as it looks like a cohesive, slightly chunky paste. A little texture is a good thing—it adds variety to the rice balls.
The Wet Hands Trick is a Lifesaver. I cannot stress this enough. Rice is incredibly sticky. If you don’t wet your hands, you’ll end up with a glob of rice stuck to your palm and a sad, misshapen ball. Keep that bowl of salted water nearby and re-wet your hands between every 3-4 balls. It’s the only way to get those perfect, smooth shapes.
My Biggest Failure: The first time I made these, I used hot rice and no cream cheese. The result was a sticky, unshapable mess that looked like green porridge. I tried to salvage it by adding more rice, which just made it worse. I ended up eating the whole bowl with a spoon (it was still tasty, honestly). The lesson? Cold rice and a little fat (like cream cheese) are your best friends for non-crumbly rice balls.
Timing Strategy: Make the edamame paste and mix it with the rice the night before. Store the mixture in the fridge overnight. In the morning, all you have to do is shape the balls and pack them. It saves so much time on busy school mornings!
Variations & Adaptations
One of the best things about this recipe is how versatile it is. Once you master the basic technique, the possibilities are endless. Here are a few of my favorite twists.
- Vegan & Dairy-Free: Swap the mozzarella and cream cheese for your favorite dairy-free alternatives. I’ve used Kite Hill cream cheese and Violife mozzarella shreds with fantastic results. The texture is slightly less creamy, but still delicious. Add a tablespoon of nutritional yeast for a cheesy flavor boost.
- Add Some Crunch: Fold in 1/4 cup of finely chopped, toasted almonds or sunflower seeds to the rice mixture. It adds a wonderful crunch and extra protein. My kids love the “hidden” crunch in these.
- Spicy Kick (for Adults): Add 1/2 teaspoon of sriracha or a pinch of red pepper flakes to the edamame paste before blending. It gives the rice balls a subtle warmth that’s really addictive. Perfect for an adult lunchbox or a snack with a beer.
- Veggie-Packed Version: Finely grate a small carrot or a handful of spinach and fold it into the rice mixture along with the edamame paste. It adds extra nutrients and a beautiful color. My niece calls these “rainbow rice balls.”
- Different Seasonings: Skip the furikake and try a different flavor profile. A dash of garlic powder and onion powder, or a sprinkle of everything bagel seasoning, works wonderfully. For a sweeter twist, add a teaspoon of miso paste to the edamame.
My Personal Variation: I once made a batch with leftover roasted sweet potato mashed into the edamame paste. The sweet, earthy flavor paired beautifully with the salty nori. It was a happy accident that turned into a new family favorite. Don’t be afraid to experiment with whatever you have in your fridge!
Serving & Storage Suggestions
These rice balls are incredibly versatile when it comes to serving and storing. Here’s how to get the most out of them.
Serving: These are best served at room temperature or slightly chilled. They’re perfect for bento boxes alongside some cherry tomatoes, cucumber slices, and a little fruit. I also love serving them as a fun appetizer for parties—they’re a huge hit with kids and adults alike. For a dipping sauce, try a little soy sauce, tamari, or a dollop of sriracha mayo. The flavors are mild and crowd-pleasing.
Storage: Store any leftover rice balls in an airtight container in the refrigerator. They will keep well for up to 3 days. I like to layer them between sheets of parchment paper so they don’t stick together. The flavors actually meld together beautifully overnight, making them even tastier the next day.
Reheating: I don’t recommend reheating these in the microwave, as it can make the rice tough and dry. Instead, if you want to serve them warm, you can gently steam them for 2-3 minutes, or pop them in a 300°F oven for about 5 minutes. But honestly, they’re fantastic cold straight from the fridge.
Freezing: Yes, you can freeze these! Place the shaped, uncooked rice balls on a baking sheet and freeze them for about an hour, or until solid. Transfer the frozen balls to a freezer-safe bag or container. They will keep for up to 2 months. To thaw, simply move them to the refrigerator overnight. They’re perfect for making a big batch on a Sunday for the week ahead.
Flavor Development: As I mentioned, these rice balls taste even better the next day. The edamame and seasoning have time to fully infuse the rice. I often make a double batch on purpose just so we can enjoy them for a few days.
Nutritional Information & Benefits
These Easy Bento Box Edamame and Rice Balls are not just delicious—they’re packed with good-for-you ingredients. Here’s a quick look at what you’re getting in each serving (based on a serving size of 3 rice balls).
- Estimated Calories: ~220 calories
- Protein: 10-12g (thanks to the edamame and cheese!)
- Fiber: 4-5g (edamame is a fiber superstar)
- Healthy Fats: 6-8g (from the cream cheese and edamame)
- Carbohydrates: 30-35g (complex carbs from the rice for sustained energy)
Health Benefits: Edamame is a complete plant-based protein, meaning it contains all nine essential amino acids. It’s also rich in folate, vitamin K, and iron. The rice provides sustained energy, making these a perfect pre-activity snack. Plus, the fiber helps keep little tummies full and happy until the next meal.
Dietary Considerations: This recipe is naturally vegetarian and can easily be made vegan and dairy-free with simple swaps. It’s also gluten-free as written (just make sure your furikake doesn’t contain wheat). If you’re watching your sodium, use low-sodium soy sauce or tamari in the dipping sauce and skip the extra salt.
Potential Allergens: This recipe contains dairy (cheese, cream cheese) and soy (edamame). It may also contain gluten depending on your furikake. Always check labels if you’re cooking for someone with allergies.
Personal Wellness Perspective: I love that I can pack these in my kids’ lunchboxes and feel good about what they’re eating. They’re getting protein, fiber, and healthy fats without any of the processed junk found in store-bought snacks. It’s a small win that makes a big difference in our day.
Conclusion
These Easy Bento Box Edamame and Rice Balls for Kids have honestly become a staple in our home. They’re the recipe I turn to when I want to feel like I’ve got my act together, even on the most chaotic mornings. They’re simple, forgiving, and so incredibly rewarding. The look on my niece’s face when she opens her lunchbox and sees these little green gems is priceless. And yes, even my brother-in-law now asks for them.
I encourage you to make this recipe your own. Play with the seasonings, try a different filling, or get the kids involved in the shaping process. It’s a fun, hands-on activity that makes lunchtime feel like a celebration. Don’t be afraid to experiment—that’s where the best kitchen discoveries happen.
I’d love to hear how yours turn out! Did you try a fun variation? Did your kids love them? Drop a comment below and share your experience. And if you found this recipe helpful, please share it with a friend who needs a little lunchbox inspiration. Happy cooking, friends!
Frequently Asked Questions
Can I use brown rice instead of white rice?
Absolutely! Brown rice works well, but it’s a little less sticky than white rice. You might need to add an extra tablespoon of cream cheese to help the balls hold together. The texture will be slightly nuttier and more chewy, which many people love.
How do I keep the rice balls from falling apart in a lunchbox?
The key is to make sure your mixture is well-bound. Don’t skip the cream cheese or mozzarella—they act as a binder. Also, chilling the shaped balls for at least 10 minutes before packing them helps them firm up. Pack them snugly in the bento box so they don’t roll around.
Can I make these ahead of time for a party?
Yes! You can make the mixture up to 2 days in advance and keep it in the fridge. Shape the balls the morning of your party and keep them chilled until serving. They’re perfect for a make-ahead appetizer. Just add the nori strips right before serving so they stay crisp.
My kids are picky eaters. Will they like these?
I’ve found that the fun, poppable shape and mild, cheesy flavor are a huge hit with even the pickiest eaters. The edamame is blended so smoothly that they can’t really see the green. If your kids are very hesitant, you can start by calling them “cheesy rice balls” and leave out the furikake until they’re used to the flavor.
Can I use canned edamame instead of frozen?
I don’t recommend it. Canned edamame is usually much softer and can be mushy, which will make your paste too wet and your rice balls soggy. Frozen edamame has a much better texture and flavor. If you only have canned, drain and rinse them very well, then pat them dry thoroughly before using.
Pin This Recipe!
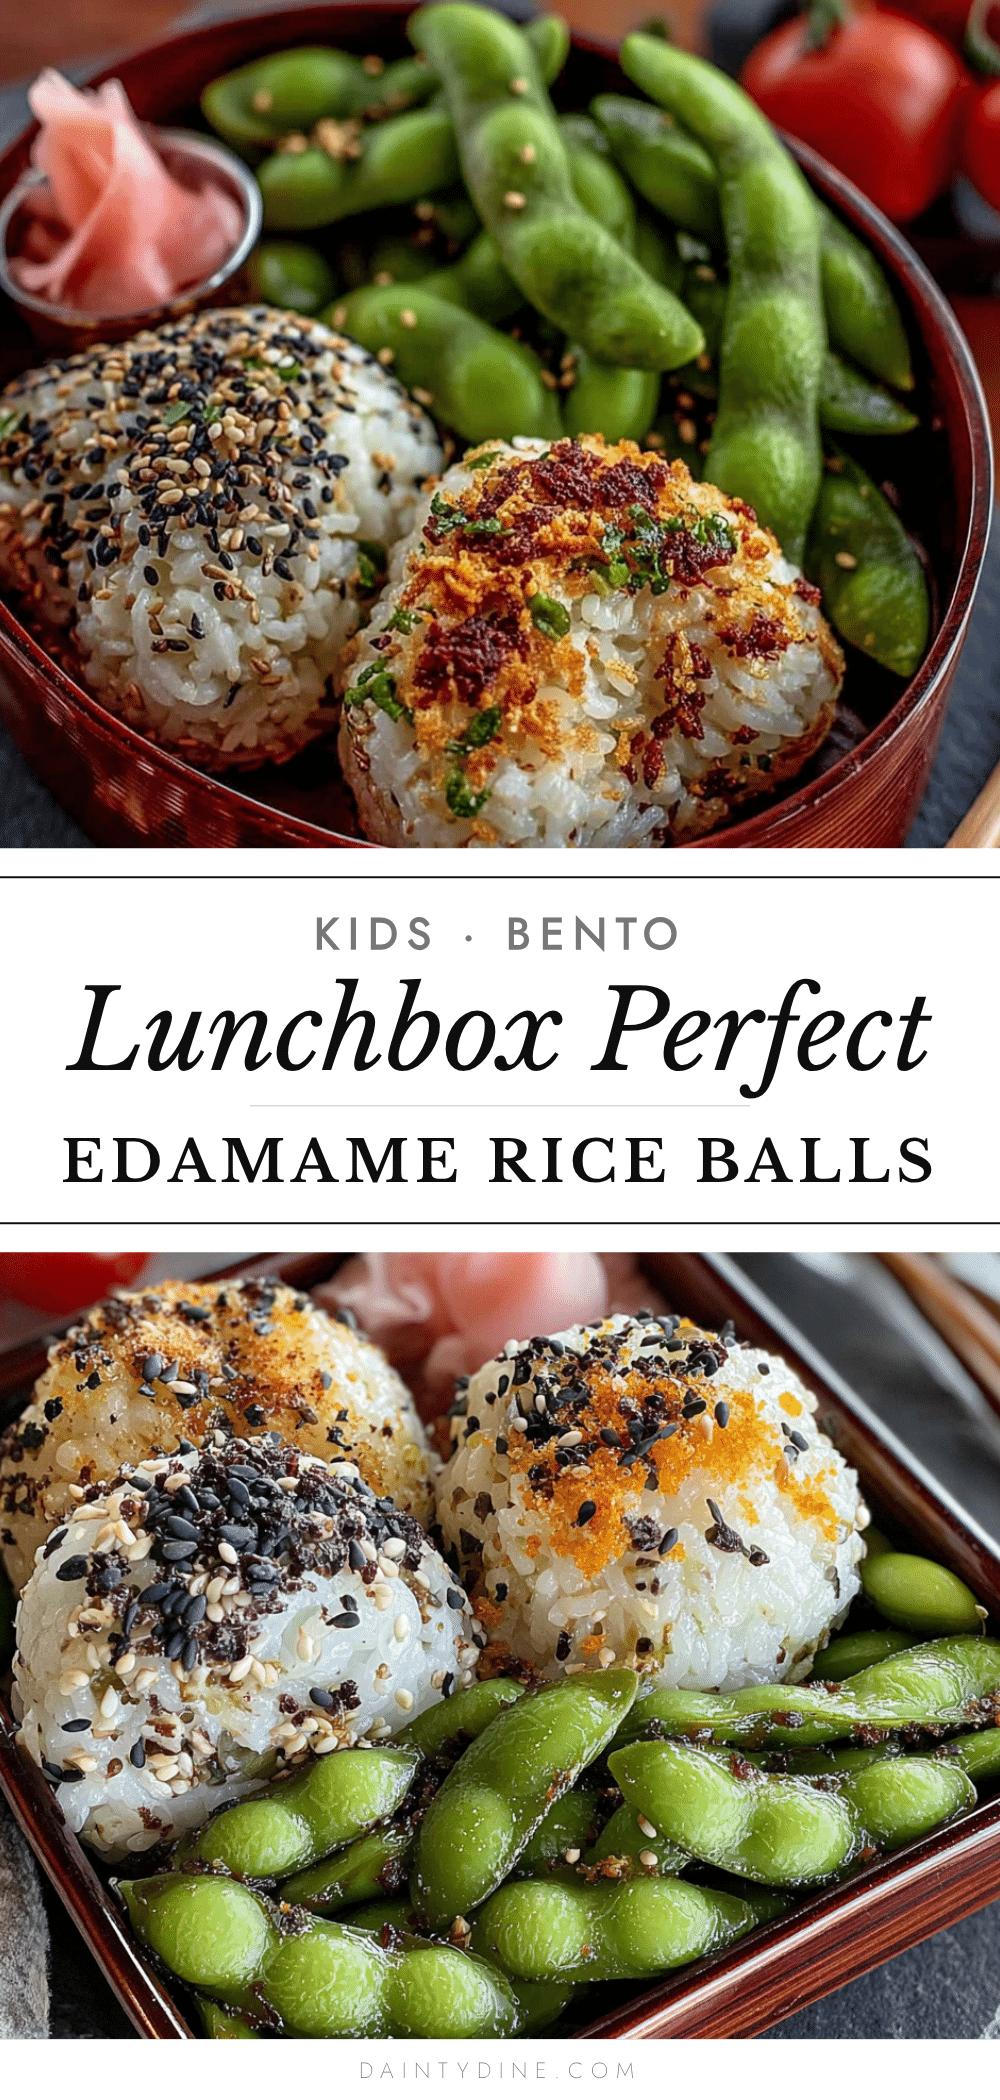
Easy Bento Box Edamame and Rice Balls

These easy bento box edamame and rice balls are a quick, kid-friendly lunch that even picky eaters love. Made with leftover rice and a creamy edamame paste, they’re perfect for lunchboxes and come together in under 30 minutes.
- Prep Time: 15 minutes
- Cook Time: 0 minutes
- Total Time: 25 minutes
- Yield: 4 servings (12-14 rice balls) 1x
- Category: Lunch
- Cuisine: Japanese
Ingredients
- 2 cups cooked sushi rice (or short-grain white rice), cooled
- 1 cup frozen shelled edamame, thawed
- 1/4 cup shredded mozzarella cheese (or dairy-free alternative)
- 2 tablespoons cream cheese, softened
- 1 tablespoon furikake seasoning (optional but highly recommended)
- 1/2 teaspoon salt
- Optional: nori strips for wrapping
Instructions
- Prepare the Edamame Paste: Pat thawed edamame dry with a paper towel. Add edamame, softened cream cheese, and shredded mozzarella to a food processor. Pulse until smooth and creamy, about 30-45 seconds, scraping down sides as needed.
- Combine with Rice: In a large mixing bowl, add cooled sushi rice and edamame paste. Gently fold together with a rubber spatula until evenly distributed and speckled green. If too dry, add a tiny splash of water, one teaspoon at a time.
- Season the Mixture: Sprinkle in furikake seasoning and salt. Fold gently to distribute. Taste and adjust seasoning as desired.
- Shape the Rice Balls: Fill a small bowl with water and add a pinch of salt. Wet your hands with the salted water. Scoop about 2 tablespoons of rice mixture into your palm. Gently squeeze and press into a tight ball using both hands. Repeat until all mixture is used (about 12-14 balls).
- Place on Tray: Place each shaped rice ball onto a parchment-lined baking sheet.
- Wrap with Nori (Optional): Cut nori sheets into 1-inch wide strips. Wrap one strip around the middle of each rice ball. The moisture from the rice helps it stick. Do this just before serving for crisp nori.
- Chill for 10 Minutes: Refrigerate the tray of rice balls for about 10 minutes to firm up before packing.
Notes
Use fully cooled rice for best results. Wet hands with salted water to prevent sticking. For make-ahead, prepare the edamame-rice mixture the night before and shape in the morning. Nori strips are best added just before serving to stay crisp. Leftover rice balls keep in the fridge for up to 3 days.
Nutrition
- Serving Size: 3 rice balls
- Calories: 220
- Sugar: 2
- Sodium: 350
- Fat: 7
- Saturated Fat: 3
- Carbohydrates: 33
- Fiber: 5
- Protein: 11
Keywords: bento box, edamame rice balls, onigiri, kid-friendly lunch, easy lunchbox recipe, vegetarian rice balls


