Love this? Save it for later!
Share the inspiration with your friends
There used to be a tiny deli on the corner of Elm and 4th in my old neighborhood that made a chicken salad so good it ruined me for all others. When they suddenly closed their doors three years ago—a “For Lease” sign in the window appeared overnight—I honestly felt a little dramatic about how upset I was. I mean, it was just chicken salad, right? Wrong. After at least seven tries—some embarrassingly bad, one that my husband politely called “interesting”—I finally cracked the code. And let me tell you, this version might actually be better than the original.
The secret wasn’t some fancy ingredient or complicated technique. It was realizing that the creamy, satisfying texture I was chasing came from a combination I’d never thought to try. No mayo, no weird substitutes that taste like sadness—just real ingredients doing their thing. The first time I made these Easy No-Mayo Chicken Salad Lunchbox Cups, I sat there on my kitchen floor (don’t judge, it had been a long day) eating straight from the bowl, and I knew. This was it.
What started as a personal quest to recreate a lost lunch turned into my most-requested meal prep recipe. These little cups are perfect for busy weeks when you want something that actually tastes good and keeps you full. Maybe you’ve been there—staring at another sad desk salad, wondering why lunch has to be such a letdown. These chicken salad cups solve that problem in about 15 minutes flat. Honestly, I keep making them because they make me feel like I’ve got my life together, even on days when I definitely don’t.
Why You’ll Love This Recipe
Let me tell you why this recipe has become my meal prep MVP. I’ve tested this at least a dozen times with different groups—my picky-eating nephew, my nutritionist friend, my husband’s coworkers who will eat anything—and the response is always the same: “Wait, there’s no mayo in this?” That moment of surprise is everything.
- Quick & Easy: Comes together in under 15 minutes, perfect for Sunday meal prep or a last-minute lunch crisis. No cooking required if you use rotisserie chicken.
- Simple Ingredients: Everything comes from a standard grocery store. No hunting down specialty items or weird health food stuff.
- Perfect for Meal Prep: Makes 6 individual portions that stay fresh all week. Grab and go—no assembly required in the morning.
- Crowd-Pleaser: Kids love the fun cup format, adults love the flavor, and everyone loves that it’s not another boring sandwich.
- Unbelievably Delicious: The texture is creamy without being heavy, and the flavor combo hits every note—tangy, savory, with just a little crunch.
What makes this different from every other chicken salad recipe? It’s the Greek yogurt and avocado base that creates that luscious texture without a drop of mayo. I spent months perfecting the ratio so it tastes indulgent but actually packs a protein punch. This isn’t just another version—it’s the version that makes you forget mayo ever existed.
This recipe isn’t just good—it’s the kind that makes you look forward to Monday lunch. It’s comfort food reimagined: healthier, faster, but with the same soul-soothing satisfaction. Perfect for impressing your meal-prep friends without stress, or turning a simple lunch into something you actually get excited about.
What Ingredients You Will Need
This recipe uses simple, wholesome ingredients that work together to create something surprisingly luxurious. Most of these are probably already in your kitchen, which makes this perfect for those “I have nothing for lunch” moments.
- Cooked chicken, shredded: 3 cups (about 1 rotisserie chicken or 3 large breasts). I prefer rotisserie for flavor, but any cooked chicken works. Shred it while it’s still warm for easiest handling.
- Plain Greek yogurt: ½ cup (full-fat gives the best texture, but 2% works too. I use Fage—it’s thick and never watery.)
- Ripe avocado: 1 medium (should be soft but not mushy. This replaces the mayo and adds healthy fats.)
- Celery, finely diced: 2 ribs (adds that essential crunch. Don’t skip this—it’s the texture hero.)
- Red onion, minced: ¼ cup (soak in cold water for 5 minutes if you want milder flavor)
- Fresh lemon juice: 2 tablespoons (bottled won’t give the same brightness—trust me on this one)
- Dijon mustard: 1 tablespoon (adds tang and depth without overpowering)
- Fresh dill, chopped: 2 tablespoons (or 1 teaspoon dried. Fresh is better here, but dried works in a pinch.)
- Salt: ½ teaspoon (adjust to taste)
- Black pepper: ¼ teaspoon (freshly ground if you have it)
- Garlic powder: ½ teaspoon (not fresh garlic—it’s too sharp for this application)
- Red grapes, halved: ½ cup (optional but highly recommended for that sweet pop)
- Slivered almonds: ¼ cup (toasted if you have time—adds amazing crunch)
Ingredient Tips: For the best texture, make sure your Greek yogurt is thick—if it’s watery, strain it through cheesecloth for 10 minutes. I’ve learned this the hard way after making a soupier version that was honestly sad. For the avocado, look for one that yields slightly to pressure but isn’t mushy. And please, please use fresh lemon juice—the bottled stuff has a chemical aftertaste that ruins the whole thing.
Substitution Options: Use dairy-free coconut yogurt for a dairy-free version (just make sure it’s unsweetened and thick). Swap almonds for walnuts or pecans. Add diced apple instead of grapes for a different sweetness. For a lower-carb option, serve in lettuce cups instead of cups.
Equipment Needed
You don’t need much for this recipe, which is honestly one of my favorite things about it. Here’s what you’ll need:
- Large mixing bowl: Any medium-to-large bowl works. I use my grandmother’s old ceramic one, but a stainless steel mixing bowl is fine.
- Sharp knife and cutting board: For dicing the celery, onion, and grapes. A dull knife makes this step frustrating—I learned this after nearly cutting myself on a cheap blade.
- Fork or potato masher: For mashing the avocado. A fork works perfectly; you don’t need anything fancy.
- Measuring cups and spoons: For accuracy, especially with the yogurt and lemon juice.
- 6 small containers or cups: I use 8-ounce glass meal prep containers with lids. Mason jars work great too. Just make sure they’re lunchbox-friendly.
- Citrus juicer: Optional but helpful for getting every drop of lemon juice without seeds.
Budget-Friendly Tip: You can use any container you already have—even small bowls covered with plastic wrap. The “cup” format is flexible. I’ve used repurposed yogurt containers in a pinch, and they work perfectly.
Preparation Method
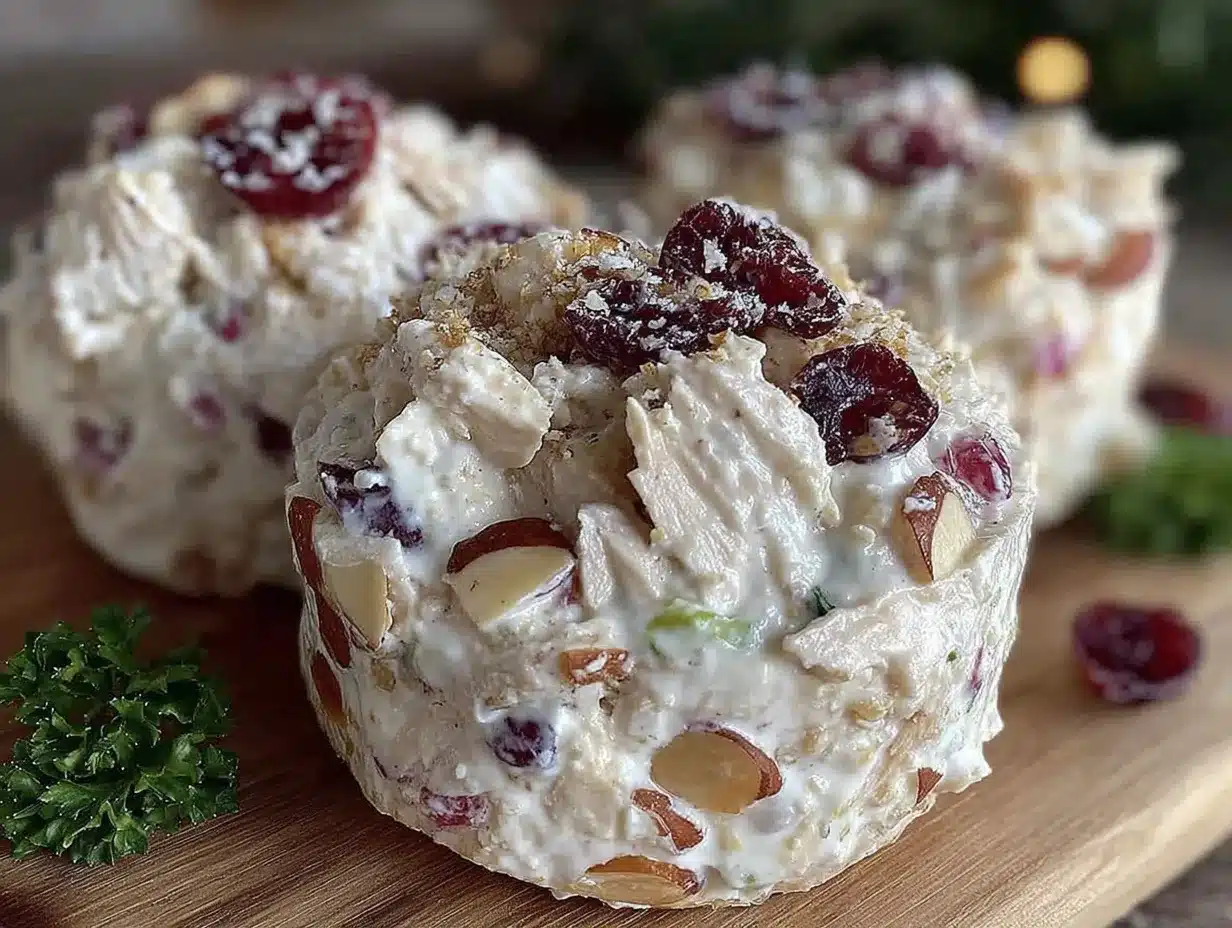
Here’s the step-by-step process. I’ve included all the little details I wish someone had told me the first time I made this.
- Prep your chicken (5 minutes): If using rotisserie chicken, remove the skin and shred the meat with two forks. You want bite-sized pieces, not strings. If using cooked chicken breasts, dice them into ½-inch cubes. You should have about 3 cups total. Pro tip: warm chicken mixes better with the other ingredients.
- Mash the avocado (2 minutes): Cut the avocado in half, remove the pit, and scoop the flesh into your large mixing bowl. Add the lemon juice immediately to prevent browning. Mash with a fork until mostly smooth but with a few small chunks—you want texture here.
- Build the base (2 minutes): Add the Greek yogurt, Dijon mustard, garlic powder, salt, and pepper to the mashed avocado. Stir until everything is well combined. Taste it here—this is your chance to adjust seasoning before adding the chicken. I always add a tiny bit more lemon juice at this stage because I love tangy things.
- Add the crunch (3 minutes): Fold in the diced celery, minced red onion, and fresh dill. Stir gently to combine. The mixture should look thick and creamy, like a really good dip. If it seems too thick, add a teaspoon of water or extra lemon juice.
- Add the chicken (2 minutes): Add the shredded chicken to the bowl. Fold everything together gently until the chicken is evenly coated. Be careful not to overmix—you want the chicken to stay in nice pieces, not turn into mush.
- Fold in extras (1 minute): If using grapes and almonds, fold them in now. The grapes add little bursts of sweetness that contrast beautifully with the savory base. The almonds add crunch that stays even after refrigeration.
- Portion into cups (2 minutes): Divide the mixture evenly among your 6 containers. I use about ½ cup per container. Press it down gently to remove air pockets. If you’re eating some immediately, go ahead and dig in. The rest go in the fridge.
- Chill and serve (optional, 30 minutes): While you can eat this immediately, I think it’s even better after 30 minutes in the fridge. The flavors meld together and everything gets more cohesive. Just don’t leave it longer than 4 days in the fridge.
Sensory Cues: At step 3, the mixture should look like a thick, pale green sauce—creamy but not runny. When you add the chicken, you should see every piece getting coated evenly. The final mixture should hold together when you scoop it but not be sticky. Smell it—the lemon and dill should be bright and fresh, not overpowering.
Cooking Tips & Techniques
I’ve made this recipe at least thirty times, and I’ve learned a few things the hard way. Here’s what I wish I’d known from the start:
Don’t overmix the avocado. I once got too enthusiastic with my mashing and ended up with a paste-like texture that was honestly unappetizing. Leave some small chunks—they add creaminess without making everything feel baby-food-adjacent.
Toast those almonds. I know, it’s an extra step. But throwing the slivered almonds in a dry pan over medium heat for 2-3 minutes until they’re golden and fragrant makes a huge difference. The first time I skipped this step, the raw almonds had a slightly bitter taste that clashed with everything.
Season in layers. Add salt at the beginning with the avocado, then taste again after adding the chicken. Different chicken has different salt levels—rotisserie chicken is usually saltier than boiled chicken breasts. I’ve ruined a batch by not tasting before adding extra salt.
Let the onion mellow. If you’re sensitive to raw onion flavor, soak the diced red onion in cold water for 5 minutes before adding it. Drain well and pat dry. This removes the harsh bite while keeping the flavor. I learned this trick from a chef friend, and it’s a game-changer.
Keep it cold. This recipe needs to stay refrigerated because of the avocado and yogurt. If you’re packing for lunch, use an ice pack in your lunchbox. I’ve made the mistake of leaving it at room temperature for a few hours, and the avocado started browning. Still safe to eat, but less pretty.
Variations & Adaptations
One of my favorite things about this recipe is how customizable it is. Here are some variations I’ve tried and loved:
Curry Chicken Salad: Add 1 tablespoon of curry powder and ¼ cup of golden raisins instead of grapes. Omit the dill. This version is incredible in a whole wheat pita. My neighbor tried this and now makes it every week.
Buffalo Chicken Salad: Mix in 3 tablespoons of buffalo sauce and 2 tablespoons of crumbled blue cheese. Use green onions instead of red onion. This is my husband’s favorite—he eats it with celery sticks for dipping.
Dairy-Free Version: Use a dairy-free yogurt alternative (I like unsweetened coconut yogurt) or increase the avocado to 1½ and omit the yogurt entirely. The texture will be a bit different but still delicious. Just eat it within 2 days since avocado browns faster without the yogurt.
Herb Garden Version: Swap the dill for a mix of fresh parsley, chives, and tarragon. This gives a more sophisticated flavor that’s perfect for serving to guests. I made this for a baby shower and got asked for the recipe six times.
Low-Carb Option: Serve the chicken salad in butter lettuce cups or endive spears instead of the cup format. You can also scoop it into halved bell peppers for a crunchy, colorful lunch.
Spicy Version: Add 1 finely chopped jalapeño (seeds removed) and a pinch of cayenne pepper. This is my personal go-to when I need a little kick in my afternoon.
Serving & Storage Suggestions
Serving: These cups are best served cold or at room temperature. If you’re eating them straight from the fridge, let them sit out for 5-10 minutes first—the flavors open up a bit when they’re not ice-cold. Serve with crackers, crusty bread, lettuce cups, or just eat it with a spoon (no judgment here).
What Goes With It: A simple side of fresh fruit, a handful of cherry tomatoes, or some crunchy veggie sticks. For a heartier meal, serve with a cup of tomato soup or a simple green salad. I personally love it with sourdough crackers for extra crunch.
Storage: Store in airtight containers in the refrigerator for up to 4 days. Do not freeze—the avocado will become watery and the texture will be ruined. I’ve tried it, and it’s not worth it.
Reheating: You don’t need to reheat this recipe—it’s meant to be served cold. If you prefer it at room temperature, just let it sit out for 10-15 minutes before serving.
Flavor Development: This actually gets better after a day in the fridge. The flavors meld together and everything becomes more cohesive. I often make it on Sunday for Monday through Thursday lunches, and Thursday’s portion is always the best. Just give it a quick stir before eating to redistribute any moisture that settled at the bottom.
Nutritional Information & Benefits
Here’s the approximate nutritional breakdown for one serving (about ½ cup):
- Calories: 285
- Protein: 28g
- Fat: 16g (mostly healthy fats from avocado and almonds)
- Carbohydrates: 8g
- Fiber: 3g
- Sugar: 3g (naturally occurring)
Health Benefits: This recipe is packed with lean protein from the chicken, which keeps you full and supports muscle health. The avocado provides heart-healthy monounsaturated fats and fiber. Greek yogurt adds probiotics for gut health and extra protein. Celery and red onion bring antioxidants and anti-inflammatory compounds. It’s naturally gluten-free and can easily be made dairy-free.
Dietary Considerations: This recipe is naturally gluten-free, nut-free if you omit the almonds, and can be made dairy-free with simple substitutions. It’s also low in added sugars. If you’re watching sodium, use low-sodium chicken and adjust the added salt accordingly.
I love that this recipe feels indulgent but is actually really good for you. It’s the kind of lunch that keeps you energized through the afternoon without that heavy, sluggish feeling you get from a lot of lunch options.
Conclusion
This Easy No-Mayo Chicken Salad Lunchbox Cups recipe is proof that you don’t need complicated ingredients or hours in the kitchen to make something truly delicious. It’s creamy, satisfying, and packed with protein—everything you want in a lunch that actually keeps you going. Whether you’re meal-prepping for a busy week, looking for a healthier lunch option, or just tired of the same old sandwiches, these little cups deliver every time.
I love that this recipe came from a place of loss—that little deli that closed—and turned into something I make more often than I ever ate there. It’s funny how recipes work that way, isn’t it? They carry memories and solve problems and make ordinary days feel a little bit special.
Now I want to hear from you! Have you tried making chicken salad without mayo? What’s your favorite mix-in? Drop a comment below and let me know—I’m always looking for new combinations to try. And if you make these, tag me in your photos. There’s nothing that makes my day like seeing someone else enjoying a recipe that started as a kitchen obsession.
Happy cooking, friends. Your lunchbox is about to get a whole lot more interesting.
Frequently Asked Questions
Can I use canned chicken for this recipe?
You can, but I don’t recommend it. Canned chicken has a different texture and flavor that doesn’t work as well here. If you’re in a pinch, drain it well and flake it with a fork. The result won’t be as good, but it’ll still be edible.
How long does this stay fresh in the fridge?
Up to 4 days in an airtight container. The avocado may darken slightly after day 2, but it’s still safe to eat. Give it a stir before serving and it’ll look fine.
Can I make this vegan?
Yes! Substitute the chicken with canned chickpeas (drained and mashed slightly) or cubed extra-firm tofu. Use a dairy-free yogurt. The texture will be different but still delicious.
Why did my chicken salad turn brown?
That’s the avocado oxidizing. The lemon juice helps prevent this, but it’s not foolproof. Pressing plastic wrap directly onto the surface before sealing the container helps keep it green longer.
Can I double this recipe?
Absolutely. Just double all ingredients. It’s perfect for feeding a crowd or prepping for two weeks of lunches. Just remember to eat it within 4 days, so maybe share with friends.
Pin This Recipe!
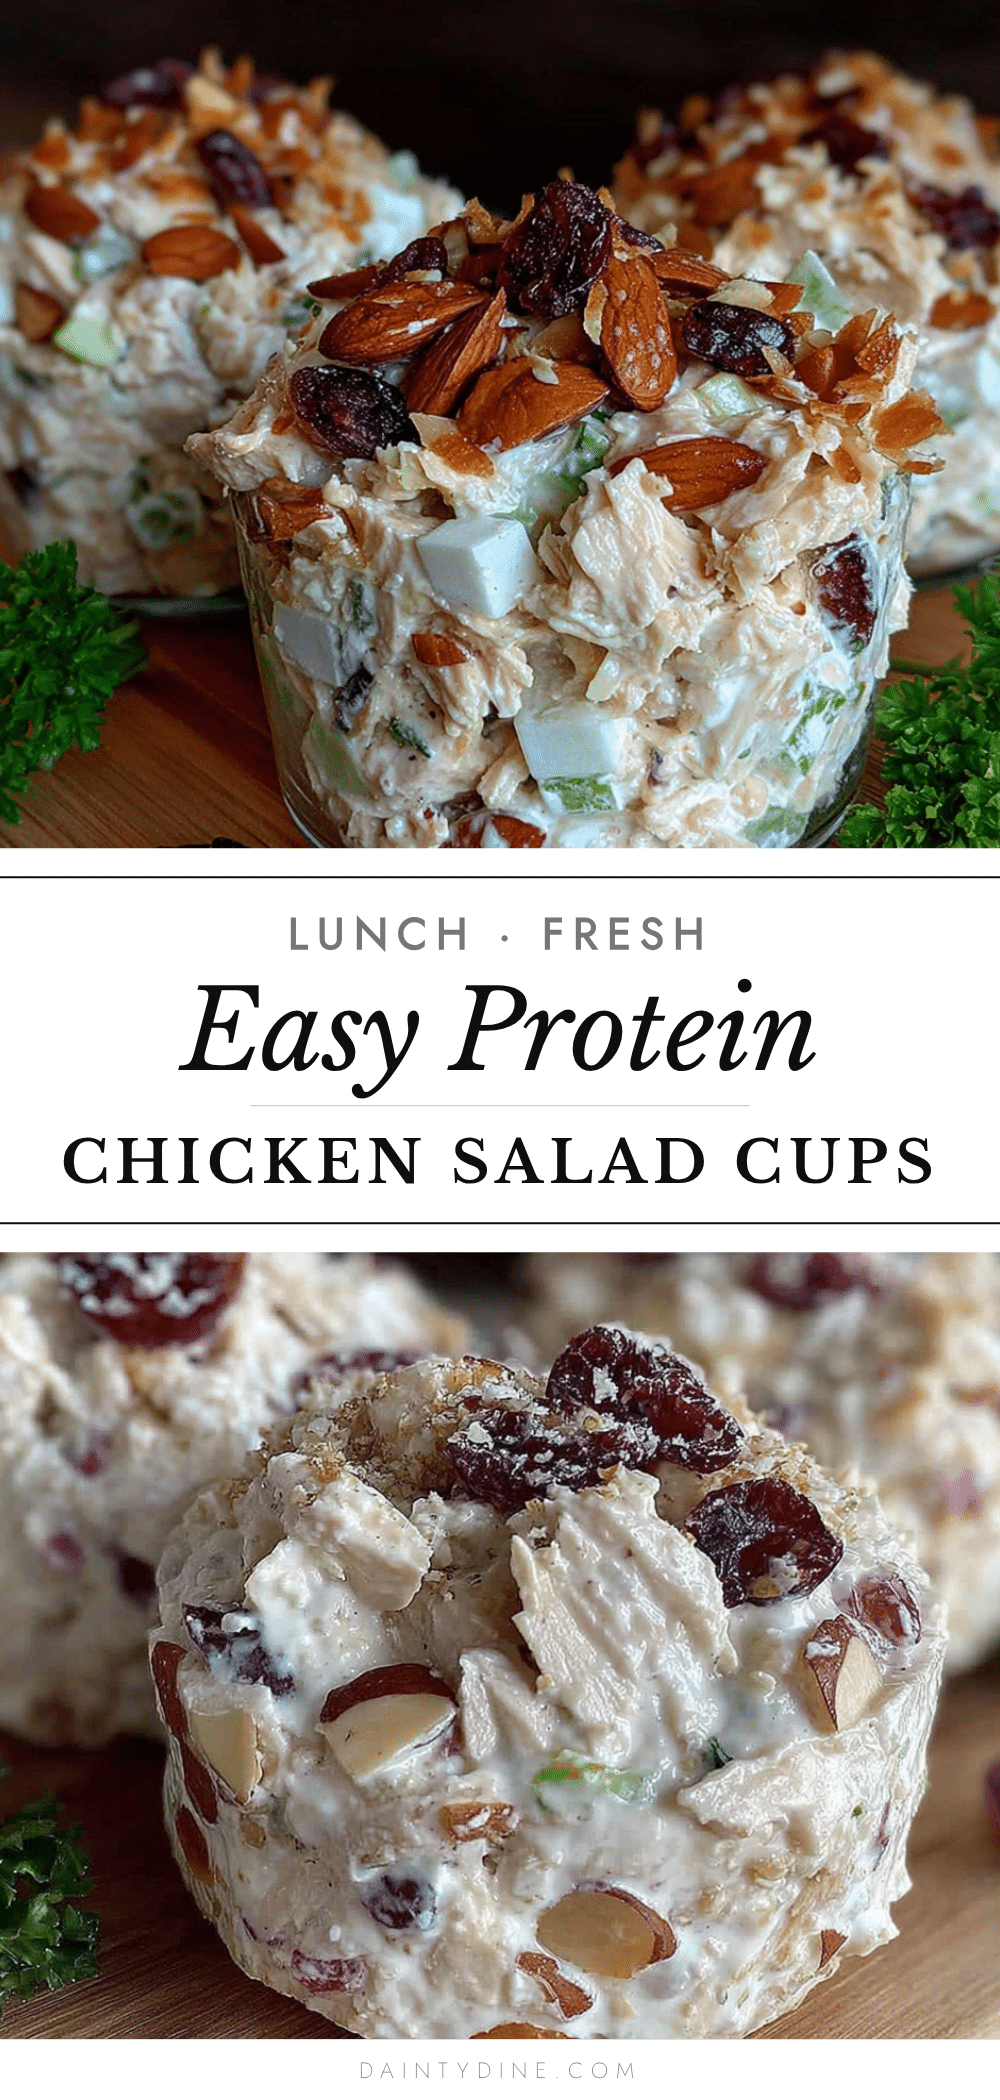
Easy No-Mayo Chicken Salad Lunchbox Cups
Creamy, protein-packed chicken salad cups made without mayo using Greek yogurt and avocado. Perfect for meal prep, ready in 15 minutes, and stays fresh all week.
- Prep Time: 15 minutes
- Cook Time: 0 minutes
- Total Time: 15 minutes
- Yield: 6 servings 1x
- Category: Lunch
- Cuisine: American
Ingredients
- 3 cups cooked chicken, shredded (about 1 rotisserie chicken or 3 large breasts)
- ½ cup plain Greek yogurt (full-fat preferred)
- 1 medium ripe avocado
- 2 ribs celery, finely diced
- ¼ cup red onion, minced
- 2 tablespoons fresh lemon juice
- 1 tablespoon Dijon mustard
- 2 tablespoons fresh dill, chopped (or 1 teaspoon dried)
- ½ teaspoon salt
- ¼ teaspoon black pepper
- ½ teaspoon garlic powder
- ½ cup red grapes, halved (optional)
- ¼ cup slivered almonds (optional, toasted if possible)
Instructions
- Prep your chicken: If using rotisserie chicken, remove skin and shred meat with two forks into bite-sized pieces. If using cooked chicken breasts, dice into ½-inch cubes. You should have about 3 cups total.
- Mash the avocado: Cut avocado in half, remove pit, and scoop flesh into a large mixing bowl. Add lemon juice immediately to prevent browning. Mash with a fork until mostly smooth with a few small chunks.
- Build the base: Add Greek yogurt, Dijon mustard, garlic powder, salt, and pepper to the mashed avocado. Stir until well combined. Taste and adjust seasoning if needed.
- Add the crunch: Fold in diced celery, minced red onion, and fresh dill. Stir gently to combine. The mixture should be thick and creamy.
- Add the chicken: Add shredded chicken to the bowl and fold gently until evenly coated. Be careful not to overmix.
- Fold in extras: If using grapes and almonds, fold them in now.
- Portion into cups: Divide mixture evenly among 6 containers (about ½ cup each). Press down gently to remove air pockets.
- Chill and serve: For best flavor, refrigerate for at least 30 minutes before serving. Store in airtight containers in the refrigerator for up to 4 days.
Notes
For best texture, use thick Greek yogurt (strain if watery). Soak red onion in cold water for 5 minutes for milder flavor. Toast almonds in a dry pan for 2-3 minutes for extra crunch. Season in layers—rotisserie chicken is saltier than boiled chicken. Keep refrigerated; use an ice pack for packed lunches. Do not freeze. Flavor improves after a day in the fridge.
Nutrition
- Serving Size: ½ cup
- Calories: 285
- Sugar: 3
- Sodium: 350
- Fat: 16
- Saturated Fat: 3
- Carbohydrates: 8
- Fiber: 3
- Protein: 28
Keywords: chicken salad, no mayo, meal prep, healthy lunch, high protein, gluten free, easy recipe, 15 minute meal


