Love this? Save it for later!
Share the inspiration with your friends
“I wasn’t expecting much when I dropped by to borrow a ladder last Thursday,” I remember thinking, “but then that sharp, tangy scent of garlic and dill hit me before I even stepped inside.” Honestly, Lisa wasn’t making a big deal out of it—just casually pulling out a jar from her fridge, like it was no big thing. But that quick garlic dill refrigerator pickles recipe? It stopped me cold right at the doorway.
She shrugged when I asked what was cooking, as if anyone could whip up something so crisp, fresh, and flavorful in just 24 hours. Maybe you’ve been there, caught off guard by a simple magic trick in someone’s kitchen that feels like it takes hours but doesn’t. The jar was a bit chipped, and she almost dropped the lid when we got interrupted by her dog barking, but that little pickle moment stuck with me. It’s the kind of thing you come back to, again and again—because it tastes like effortlessness and comfort all rolled into one crunchy bite.
Since then, I’ve kept a jar of these quick garlic dill refrigerator pickles in my fridge, ready to brighten up sandwiches, salads, and even those random snack cravings. Let me tell you, this recipe is exactly what you need when you want homemade pickles without the fuss or the wait.
Why You’ll Love This Recipe
Having tested this quick garlic dill refrigerator pickles recipe multiple times (including on impatient friends eager for snacks), I can vouch for its simple brilliance. It’s a small kitchen win that feels like a treat every time.
- Quick & Easy: Ready in just 24 hours, this recipe saves you from the weeks-long wait of traditional pickling, perfect for last-minute pickle cravings.
- Simple Ingredients: Uses pantry staples and fresh cucumbers—nothing fancy or hard to find.
- Perfect for Any Occasion: Whether you’re prepping for a casual lunch, a summer picnic, or a cozy dinner, these pickles add a zesty punch.
- Crowd-Pleaser: Kids, picky eaters, and dill lovers alike always ask for seconds.
- Unbelievably Delicious: The sharp garlic blends with bright dill and crisp cucumber for a texture and flavor that hits just right.
What sets this recipe apart? The balance of garlic and dill is just perfect—never overpowering, just that fresh kick you want in every bite. Plus, the quick refrigerator method means you don’t have to wait forever, and the cucumbers stay wonderfully crunchy. Honestly, these pickles make me pause mid-bite, eyes closed, savoring that tangy freshness. This isn’t just another pickle recipe; it’s the kind of homemade pickle that makes you feel like you’ve discovered a little kitchen secret.
What Ingredients You Will Need
This quick garlic dill refrigerator pickles recipe relies on straightforward, fresh ingredients that work together to create that classic pickle punch. You’ll find most of these in your kitchen already.
- Fresh cucumbers: About 4 cups, sliced into spears or rounds (I prefer Kirby cucumbers for their firmness and crunch, but English cucumbers work too)
- Fresh dill: 3-4 sprigs, whole (the star herb—freshness here really matters)
- Garlic cloves: 3-4, peeled and lightly smashed (gives that unmistakable garlicky aroma)
- White vinegar: 1 cup (5% acidity recommended for proper pickling)
- Water: 1 cup (filtered or spring water for the cleanest flavor)
- Pickling salt or kosher salt: 1 tablespoon (avoid iodized salt as it can cloud the brine)
- Black peppercorns: 1 teaspoon (optional, adds subtle spice)
- Red pepper flakes: ¼ teaspoon (optional, for a little heat)
- Mustard seeds: 1 teaspoon (optional, adds a gentle tang)
Feel free to swap out white vinegar for apple cider vinegar if you prefer a milder tang. For a gluten-free option, this recipe is naturally compliant. If you want to experiment, adding a few slices of fresh ginger gives a lovely twist. When I first made these, I got my cucumbers from the local farmers market — nothing beats that fresh crunch.
Equipment Needed
Not much equipment is needed here, which is part of what makes this quick garlic dill refrigerator pickles recipe so appealing.
- Glass jars with lids: Quart-sized mason jars are perfect; they seal well and don’t retain odors.
- Measuring cups and spoons: For precise vinegar, water, and salt measurements (essential for taste balance).
- Sharp knife and cutting board: To slice cucumbers evenly—consistency helps with even pickling.
- Small saucepan: To heat the brine and dissolve salt (you can skip this if you prefer cold brining, but warming helps flavors meld faster).
- Tongs or fork: Handy for packing cucumbers tightly into jars without bruising.
If you don’t have mason jars, any clean glass container with a tight lid works, just keep in mind that plastic containers might absorb flavors over time. I personally prefer mason jars because they’re reusable and dishwasher safe, which keeps cleanup easy. When heating the brine, use a saucepan that you don’t mind dedicating to pickling, as vinegar can be a bit corrosive.
Preparation Method
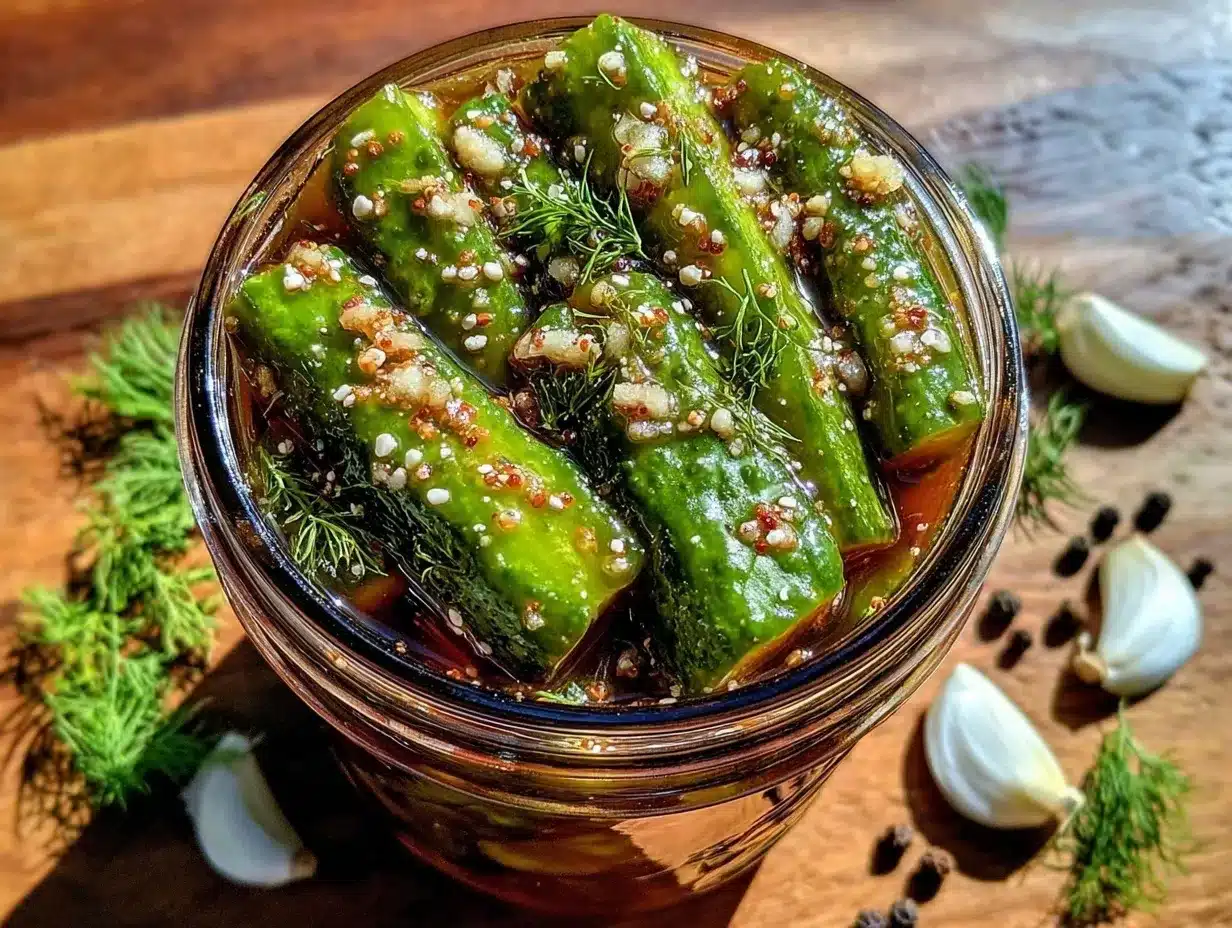
- Prepare the cucumbers: Wash about 4 cups (roughly 3 medium-sized) of fresh cucumbers. Slice them into spears about 3 inches long or into ¼-inch thick rounds, depending on your preference. Aim for uniform pieces so they pickle evenly. This should take about 10 minutes.
- Pack the jars: Place 3-4 sprigs of fresh dill, 3-4 lightly smashed garlic cloves, 1 teaspoon black peppercorns, ¼ teaspoon red pepper flakes, and 1 teaspoon mustard seeds at the bottom of each quart-sized mason jar. Then, tightly pack the cucumber slices into the jars. Don’t overfill; leave about ½ inch of headspace at the top.
- Make the brine: In a small saucepan, combine 1 cup white vinegar, 1 cup water, and 1 tablespoon pickling salt. Heat gently, stirring until the salt is fully dissolved. You don’t need to boil it—just warm enough to dissolve the salt, about 3-5 minutes.
- Pour the brine: Carefully pour the warm brine over the cucumbers in each jar, covering them completely. If needed, press cucumbers down gently with a clean utensil to submerge them fully. Leave that ½ inch of headspace.
- Seal and refrigerate: Screw on the lids tightly and place the jars in the refrigerator. Let the pickles sit for at least 24 hours before opening. The flavor intensifies the longer they chill, but 24 hours is when they really come alive.
- Enjoy: After 24 hours, your pickles are ready to enjoy! Taste test one and adjust seasoning next time if you want more garlic or spice. These pickles keep well in the fridge for up to 2 weeks.
Pro tip: If you want crispier pickles, soak the cucumber slices in ice water for about 30 minutes before packing the jars. I learned this trick after one batch turned out a little too soft for my liking. Also, don’t skip the smashed garlic step; it releases just enough flavor without overwhelming the pickles.
Cooking Tips & Techniques
Handling this quick garlic dill refrigerator pickles recipe is pretty straightforward, but a few tips can make your pickling experience even better.
- Choose firm cucumbers: Freshness is key for crunchy pickles. Avoid cucumbers with soft spots or wrinkles.
- Don’t rush the brine: Warming the vinegar, water, and salt mixture helps dissolve the salt and meld flavors quickly, but boiling can dull the bright vinegar flavor—keep it gentle.
- Pack jars snugly: This minimizes air pockets and ensures even pickling.
- Use the right salt: Pickling salt or kosher salt is best. I once used table salt by accident, and it made the brine cloudy and salty in a weird way.
- Be patient: Even if you want to taste them sooner, 24 hours is the magic number for flavor depth and crispness.
- Multitask: While the pickles chill, prep a quick sandwich or salad to pair with them—trust me, this doubles the satisfaction.
One time, I forgot to smash the garlic and just sliced it thinly; the flavor was milder but still good. It’s all about what you like. Also, if your brine gets cloudy over time, it’s usually harmless; just give the jar a gentle shake before serving.
Variations & Adaptations
This quick garlic dill refrigerator pickles recipe is super flexible and easy to tweak to suit your tastes or dietary needs.
- Spicy Pickles: Add extra red pepper flakes or a sliced jalapeño to each jar for a fiery kick.
- Low-Sodium Option: Reduce the salt slightly and increase the vinegar by a tablespoon to keep the flavor bright without excess sodium.
- Herb Variations: Swap dill for fresh tarragon or add a few coriander seeds for a different herbal note.
- Vinegar Swap: Use apple cider vinegar instead of white vinegar for a subtler, fruity tang.
- Quick Bread and Butter Pickles: Add a tablespoon of sugar and a touch of mustard seed for a sweeter, tangier pickle variety.
Personally, I once tried making these with fresh lemon slices for a citrus twist—surprisingly refreshing and perfect for summer. If you have allergies to garlic or dill, consider using garlic-infused oil and fresh basil instead. And if you want to make smaller batches, just halve the ingredients and use pint-sized jars.
Serving & Storage Suggestions
These quick garlic dill refrigerator pickles are best served chilled straight from the fridge. They add a crisp, tangy punch to sandwiches, burgers, and salads—honestly, just about anything that needs a little zip.
Try pairing them with a hearty turkey sandwich or alongside a fresh cucumber and tomato salad for a light lunch. They also go surprisingly well with rich foods like grilled cheese or fried chicken, cutting through the richness beautifully.
Store the pickles in airtight jars in the refrigerator. They keep their best texture and flavor for up to two weeks, but I dare you to make them last that long! When reheating isn’t really recommended here, but if you want the brine a little warmer, just let the jar sit out for 10 minutes at room temp before serving.
Over time, the flavor deepens and the pickles soften slightly, so if you prefer extra crunch, eat them within the first few days. I like to make a fresh batch every week or so because they never seem to last!
Nutritional Information & Benefits
These quick garlic dill refrigerator pickles are low in calories (about 10-15 calories per spear) and fat-free, making them a guilt-free snack or condiment. The cucumbers provide hydration and small amounts of vitamins K and C.
Garlic and dill bring natural antioxidants and antimicrobial properties, which can support digestion and overall wellness. The vinegar in the brine may help with blood sugar regulation and appetite control.
This recipe is naturally gluten-free, vegan, and low-carb, perfect for a variety of diets. Just watch the salt if you’re on a sodium-restricted plan.
Conclusion
If you’re after a fast, simple way to enjoy homemade pickles without the weeks-long wait, this quick garlic dill refrigerator pickles recipe is your new best friend. It hits that perfect balance of fresh crunch, garlicky punch, and bright dill flavor that feels like a small celebration in your mouth.
Feel free to tweak the spice or herbs to match your mood or pantry. I keep coming back to this recipe because it’s just so reliable, no-fuss, and genuinely delicious every time. Honestly, it’s like having a little jar of happy in my fridge.
Try it out, and I’d love to hear how you make it your own—drop your tweaks and thoughts in the comments or share this recipe with your fellow pickle lovers!
FAQs
How long do quick garlic dill refrigerator pickles last in the fridge?
They typically stay fresh and crisp for up to two weeks when stored in airtight jars in the refrigerator.
Can I use regular salt instead of pickling salt?
While you can, pickling or kosher salt is best to avoid cloudiness and off-flavors in the brine caused by additives in table salt.
Do I need to boil the cucumbers before pickling?
Nope! These are quick refrigerator pickles, so the cucumbers stay raw and crunchy, soaking in the flavorful brine in the fridge.
Can I make this recipe without garlic?
Yes, you can omit garlic or substitute with garlic-infused oil for a milder flavor if you have allergies or prefer less pungency.
What’s the best way to slice cucumbers for pickling?
Both spears and rounds work well; just aim for uniform thickness (about ¼ inch) so they pickle evenly and stay crisp.
Pin This Recipe!
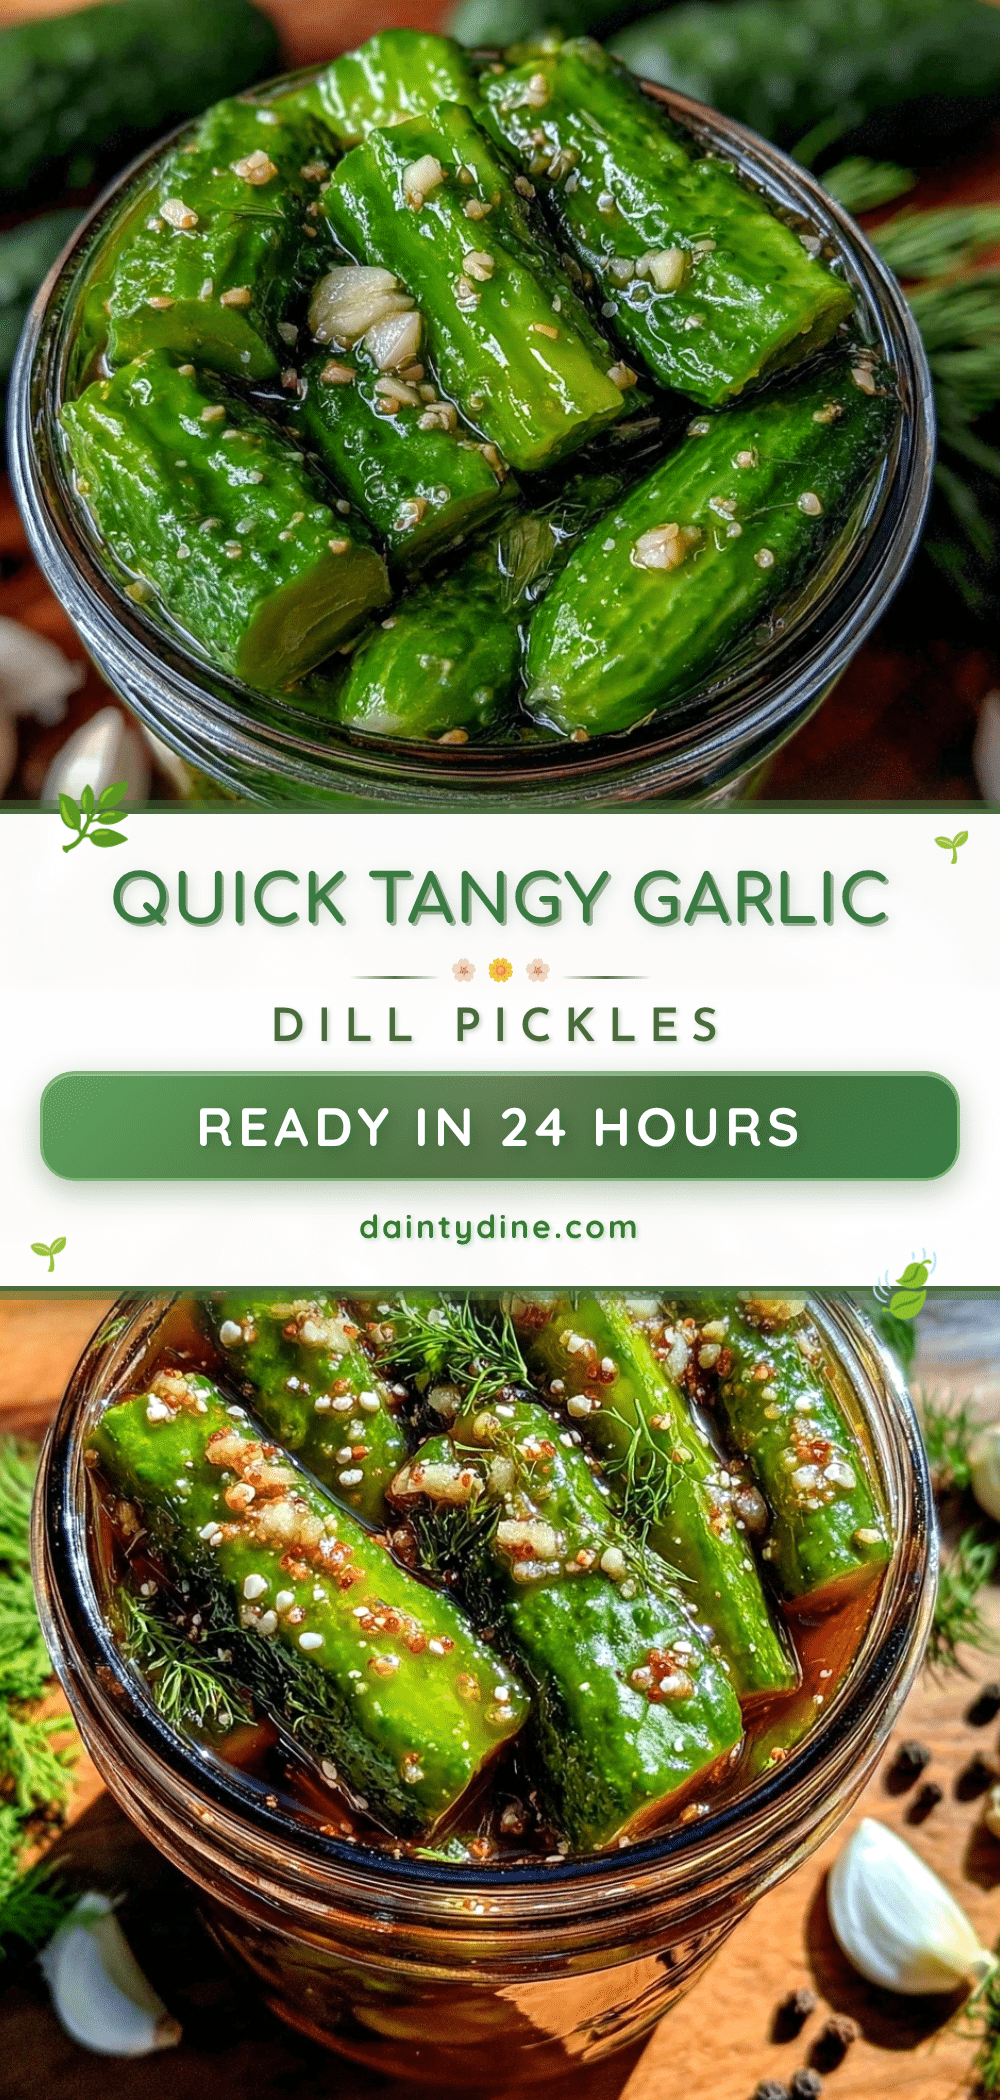
Quick Garlic Dill Refrigerator Pickles Recipe Easy Ready in 24 Hours
A simple and quick refrigerator pickle recipe that delivers crisp, fresh, and flavorful garlic dill pickles ready in just 24 hours.
- Prep Time: 10 minutes
- Cook Time: 5 minutes
- Total Time: 24 hours 15 minutes
- Yield: 4 servings 1x
- Category: Condiment
- Cuisine: American
Ingredients
- 4 cups fresh cucumbers, sliced into spears or rounds
- 3–4 sprigs fresh dill, whole
- 3–4 garlic cloves, peeled and lightly smashed
- 1 cup white vinegar (5% acidity recommended)
- 1 cup water (filtered or spring water)
- 1 tablespoon pickling salt or kosher salt
- 1 teaspoon black peppercorns (optional)
- 1/4 teaspoon red pepper flakes (optional)
- 1 teaspoon mustard seeds (optional)
Instructions
- Wash about 4 cups (roughly 3 medium-sized) of fresh cucumbers. Slice them into spears about 3 inches long or into 1/4-inch thick rounds, depending on your preference. Aim for uniform pieces so they pickle evenly. This should take about 10 minutes.
- Place 3-4 sprigs of fresh dill, 3-4 lightly smashed garlic cloves, 1 teaspoon black peppercorns, 1/4 teaspoon red pepper flakes, and 1 teaspoon mustard seeds at the bottom of each quart-sized mason jar. Then, tightly pack the cucumber slices into the jars. Don’t overfill; leave about 1/2 inch of headspace at the top.
- In a small saucepan, combine 1 cup white vinegar, 1 cup water, and 1 tablespoon pickling salt. Heat gently, stirring until the salt is fully dissolved. You don’t need to boil it—just warm enough to dissolve the salt, about 3-5 minutes.
- Carefully pour the warm brine over the cucumbers in each jar, covering them completely. If needed, press cucumbers down gently with a clean utensil to submerge them fully. Leave that 1/2 inch of headspace.
- Screw on the lids tightly and place the jars in the refrigerator. Let the pickles sit for at least 24 hours before opening. The flavor intensifies the longer they chill, but 24 hours is when they really come alive.
- After 24 hours, your pickles are ready to enjoy! Taste test one and adjust seasoning next time if you want more garlic or spice. These pickles keep well in the fridge for up to 2 weeks.
Notes
For crispier pickles, soak cucumber slices in ice water for 30 minutes before packing jars. Use pickling or kosher salt to avoid cloudy brine. Warm the brine gently to dissolve salt without boiling. Store pickles in airtight jars in the fridge for up to 2 weeks. Flavor improves with time but pickles soften slightly after a few days.
Nutrition
- Serving Size: About 1/2 cup pickle
- Calories: 15
- Sugar: 2
- Sodium: 600
- Carbohydrates: 3
- Fiber: 1
Keywords: quick pickles, garlic dill pickles, refrigerator pickles, easy pickles, homemade pickles, dill pickles, quick refrigerator pickles


