Love this? Save it for later!
Share the inspiration with your friends
“You just have to trust your eyes,” my friend Mark said, flipping a chicken breast on his cast-iron skillet like it was second nature. I wasn’t convinced. The thing is, I always thought cooking chicken perfectly without poking it with a thermometer was some kind of kitchen sorcery reserved for seasoned pros. But there we were, late on a Sunday afternoon, with a half-empty toolbox of gadgets and me glaring suspiciously at my digital thermometer that had just died mid-check.
Mark didn’t skip a beat. He talked me through the cues—the color of the juices, the texture of the meat, even the way the chicken felt under his tongs. Honestly, it felt like a secret too good to be true. I mean, who knew that something as simple as looking for a slight springiness or watching the edges crisp could replace a gadget? That day, I learned that cooking chicken without a thermometer isn’t just possible, it’s kinda freeing. You don’t need gadgets to get juicy, safe, and delicious chicken every time—just a little practice and some keen observation.
Maybe you’ve been there too: second-guessing if the chicken’s done, cutting into it prematurely or nervously waiting for the thermometer beep. Well, let me tell you, this easy visual guide to perfectly cooked chicken without a thermometer changed the game for me. It’s practical, approachable, and the kind of knowledge that sticks with you—especially when you forget your thermometer at the cabin or it simply gives up on you during dinner prep. So, grab your skillet or oven, and let’s get you confident about cooking chicken with nothing but your senses and this step-by-step guide.
Why You’ll Love This Recipe
Having tested this method dozens of times in my own kitchen, I can confidently say it’s a keeper. The easy visual guide to perfectly cooked chicken without a thermometer isn’t just a recipe; it’s a skill set that makes weeknight dinners less stressful and more satisfying. Here’s why you’ll find this approach invaluable:
- Quick & Easy: You can tell when your chicken is done in minutes, with no waiting for gadgets to beep or guesswork.
- Simple Ingredients: This method works with any chicken cut—breasts, thighs, drumsticks—using just your eyes and touch.
- Perfect for Any Occasion: Whether you’re throwing together a casual weeknight meal or prepping for a potluck, this approach fits right in.
- Crowd-Pleaser: Juicy, tender chicken every time, which means fewer complaints and more second helpings at the table.
- Unbelievably Delicious: When you know exactly when to flip and rest your chicken, the flavor and texture hit just right—no dry bites, no undercooked surprises.
What sets this guide apart is the focus on easily observable visual and tactile cues. No fancy gadgets, no guessing games. For example, learning to identify the subtle change in the chicken’s surface from translucent to opaque or noticing when the juices run clear is a game-changer. This isn’t some technical chef-only secret; it’s kitchen wisdom you can pick up today and impress your family with tonight.
Honestly, this method made me more confident in the kitchen—and I bet it will do the same for you. It’s all about trusting yourself and reading the chicken’s story as it cooks. If you’ve ever been intimidated by cooking poultry perfectly, this guide is your new best friend.
What Ingredients You Will Need
This method works beautifully with simple, everyday ingredients. The focus is on the chicken itself and a few basics to bring out the best flavor and texture without complicating things. The ingredients are pantry staples, and you can easily swap or omit based on what you have on hand.
- Chicken pieces: Choose boneless, skinless chicken breasts or thighs for even cooking (about 1 to 1.5 pounds / 450 to 680 grams). Bone-in options work too but may need slightly longer cooking.
- Salt: Kosher salt or sea salt is best for seasoning (about 1 teaspoon / 5 grams). I like Diamond Crystal for its texture, but any good salt works.
- Black pepper: Freshly ground, to taste.
- Olive oil or neutral cooking oil: About 1 to 2 tablespoons (15 to 30 ml) to help with browning and prevent sticking.
- Optional herbs or spices: Garlic powder, smoked paprika, thyme, or rosemary can add depth without overwhelming the chicken.
- Butter (optional): About 1 tablespoon (14 grams) for basting during the last minute of cooking to add richness.
Pro tip: If you want to add a splash of brightness, a squeeze of fresh lemon juice just before serving works wonders. Also, if you prefer, swap olive oil with avocado oil for a higher smoke point, especially if you’re pan-searing.
Remember, the star here is the chicken itself. Choose fresh, high-quality chicken from your trusted butcher or market. If using frozen, thaw completely to ensure even cooking and accurate visual cues.
Equipment Needed
- Heavy skillet or frying pan: A cast iron or stainless steel skillet is ideal for even heat distribution and browning. I’ve found cast iron gives the best crispness without sticking.
- Tongs: Essential for flipping chicken gently without piercing the meat and losing juices.
- Knife: A sharp chef’s knife for slicing chicken to check doneness if you choose.
- Cutting board: Preferably one dedicated for raw meat to avoid cross-contamination.
- Paper towels: To pat chicken dry before cooking, helping with better browning.
If you don’t have a cast iron skillet, a heavy-bottomed non-stick pan works fine, but the sear might be less pronounced. For budget-friendly options, look for a well-reviewed carbon steel pan, which is lighter but offers similar heat retention.
Maintenance tip: Season your cast iron regularly for a naturally non-stick surface that improves over time. I swear by wiping it down with a bit of oil after each use—it keeps the pan happy and your chicken sticking less.
Preparation Method
- Pat the chicken dry: Using paper towels, thoroughly dry the chicken pieces. This step is crucial for achieving a golden-brown crust. Moisture is the enemy of crispiness, honestly.
- Season generously: Sprinkle kosher salt and freshly ground black pepper on both sides. If you like, add a pinch of garlic powder or smoked paprika for a subtle flavor boost. Let the chicken rest at room temperature for 10 minutes to allow the seasoning to settle.
- Heat your skillet: Place your cast iron or heavy skillet on medium-high heat and add the olive oil. You want the oil shimmering but not smoking—around 375°F (190°C) if you have an infrared thermometer handy. If you see tiny wisps of smoke, reduce the heat slightly.
- Place chicken in the pan: Lay the chicken pieces down gently, skin or smooth side first. Avoid overcrowding the pan; cook in batches if needed. You should hear a satisfying sizzle when the chicken hits the oil.
- Watch the edges: This is the visual magic moment. After about 5-6 minutes (for breasts, slightly less for thinner cuts), check the edges of the chicken. They should start turning opaque and develop a golden crust. Peek under the piece with tongs to see that lovely sear—don’t move the chicken around too much or you’ll lose that crust.
- Flip and cook the other side: Turn the chicken over carefully and cook for another 4-5 minutes. You’ll notice the chicken firming up and the surface turning from shiny to matte—this is a good sign it’s cooking through.
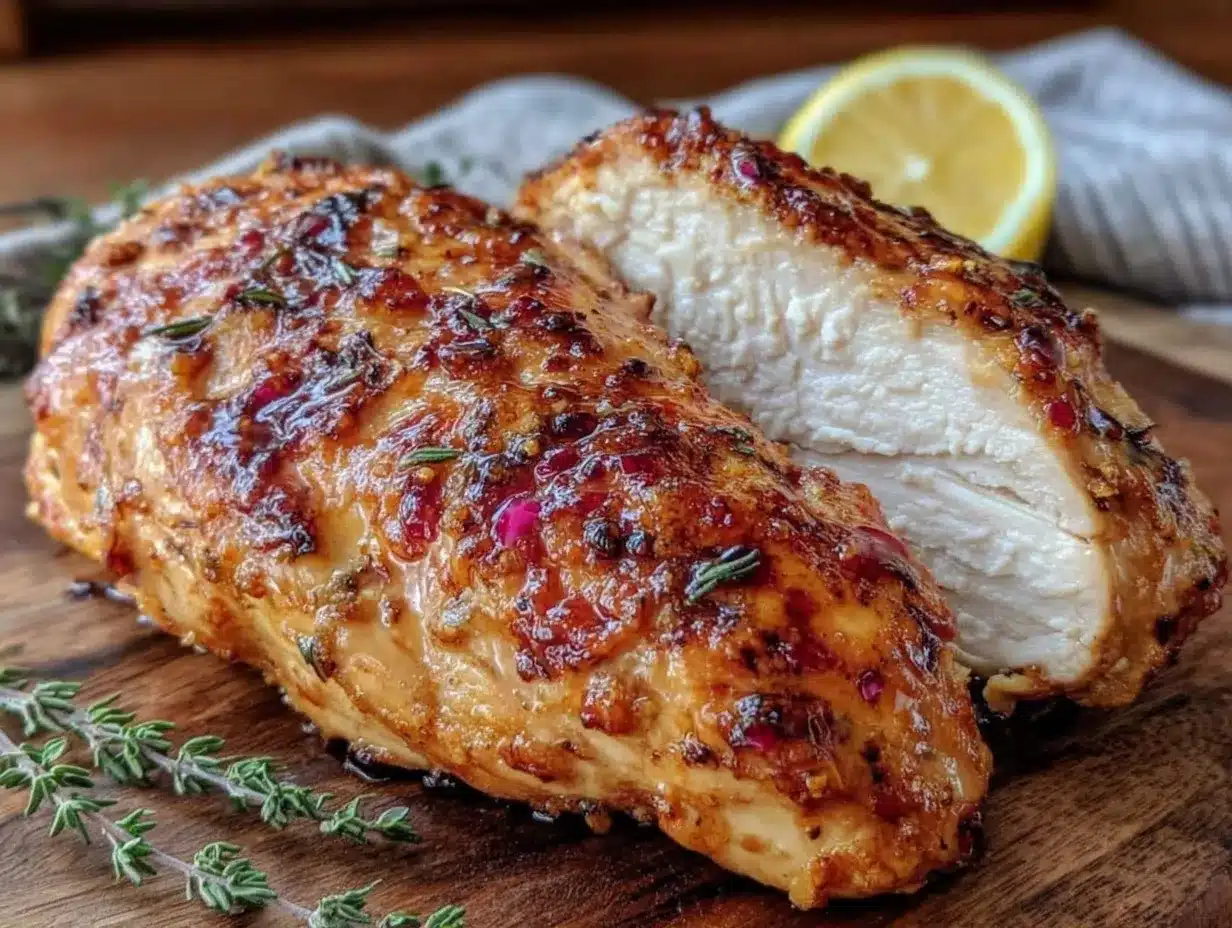
- Check the juices: Gently press the thickest part of the chicken with your finger or tongs. It should feel springy but not squishy. If you see clear juices (not pink or red) oozing out when you press, your chicken is cooked. If the juices are still pink or the meat feels very soft, give it another minute and test again.
- Optional butter baste: For extra flavor, add a tablespoon of butter along with fresh herbs like thyme or rosemary during the last minute of cooking. Tilt the pan and spoon the melted butter over the chicken repeatedly. This adds a golden sheen and richness.
- Rest the chicken: Remove the chicken from the pan and let it rest on a plate for 5 minutes. Resting allows the juices to redistribute, keeping your chicken juicy instead of dry.
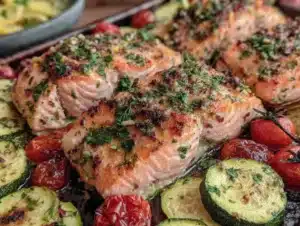
- Slice and serve: If you want to double-check, slice the chicken at the thickest point. The meat should be opaque, white (or light tan for dark meat), with no translucent or raw-looking parts.
Common hiccup? Sometimes the chicken cooks unevenly if the pan is too hot or pieces vary wildly in size. If one piece browns too fast but is raw inside, lower the heat and cover the pan loosely with foil to finish cooking gently.
Cooking Tips & Techniques
Mastering chicken without a thermometer comes down to a few key tricks I’ve picked up over many dinners and a few burnt attempts. First, always start with dry chicken skin or surface. Wetness steams the meat and ruins browning.
Don’t rush the sear! Let the chicken sit undisturbed for at least 5 minutes on each side to develop a crust—you’ll thank me later when you get that caramelized flavor. Moving the chicken too soon is a rookie move that causes sticking and uneven cooking.
If your chicken pieces are uneven, pound thicker parts gently with a meat mallet or rolling pin to get a more uniform thickness; that way, everything cooks evenly. Alternatively, cook larger pieces a few minutes longer on low heat after searing.
Use your senses: press the meat, watch the juices, and observe color changes. It’s like chicken whispering its readiness. I remember one time I ignored the signs and cut too early—dry as a bone, lesson learned.
When multitasking, prepare your sides first or use a timer for flipping chicken, but always rely on your eyes and touch more than the clock. Every stove and cut of chicken is a little different.
Variations & Adaptations
- Herb & Citrus Twist: Add fresh lemon zest and chopped herbs like parsley or thyme to the seasoning for a bright, fresh flavor.
- Spicy Version: Sprinkle smoked paprika, cayenne pepper, and a pinch of cumin for a smoky heat that wakes up your taste buds.
- Oven Finish: After searing both sides, transfer the skillet to a 375°F (190°C) oven for 5-7 minutes to gently finish cooking. Great for thicker bone-in pieces.
- Gluten-Free Option: This method is naturally gluten-free, but if you want a crispy crust, dust the chicken lightly with gluten-free flour or cornstarch before cooking.
- Dairy-Free: Skip the butter basting and use olive oil or avocado oil instead without losing flavor or moisture.
Personally, I’ve tried adding a splash of white wine or chicken broth to the pan near the end and covering it to steam the chicken gently—great for extra juicy thighs without a thermometer guess.
Serving & Storage Suggestions
Serve your perfectly cooked chicken warm, straight from the skillet, or sliced over salads, pasta, or grain bowls. It pairs beautifully with sides like roasted veggies, creamy mashed potatoes, or a fresh green salad.
Leftovers? Store cooled chicken in an airtight container in the fridge for up to 3 days. For longer storage, freeze in freezer-safe bags for up to 3 months. When reheating, avoid the microwave if you can; instead, gently warm in a skillet over low heat or bake covered at 300°F (150°C) until heated through to keep it juicy.
Fun fact: letting the chicken rest overnight in the fridge can deepen the flavor. The seasoning settles and the meat firms up slightly, making it perfect for slicing thin for sandwiches or wraps.
Nutritional Information & Benefits
Per serving (approximately 4 ounces / 113 grams of cooked chicken breast):
| Calories | 165 |
|---|---|
| Protein | 31 grams |
| Fat | 3.6 grams |
| Carbohydrates | 0 grams |
Chicken is a lean, high-quality protein source essential for muscle repair and satiety. Using simple seasonings avoids unnecessary additives or sugars. This recipe is naturally gluten-free and low-carb, making it suitable for many dietary preferences.
From a wellness perspective, cooking chicken without a thermometer reduces kitchen clutter and encourages you to develop intuitive cooking skills—both great for boosting kitchen confidence and reducing food waste (no more cutting early or tossing questionable meat).
Conclusion
Cooking chicken perfectly without a thermometer might have seemed intimidating before, but with this easy visual guide, it’s totally doable—and honestly, kinda fun. You don’t need fancy gadgets to get juicy, flavorful chicken that makes dinner feel special. Just a bit of attention, trust in your senses, and a few simple steps will have you serving up chicken that gets compliments every time.
Feel free to tweak the seasoning or method to suit your taste. I love how this approach gives room for creativity while keeping things straightforward. If you try this out, I’d love to hear how it goes—drop a comment below or share your own tips.
Remember, cooking is as much about enjoying the process as it is about the final dish. So go ahead—trust your eyes, listen to your chicken, and enjoy every bite!
FAQs
How can I tell if chicken is cooked without a thermometer?
Look for opaque, white meat with no pink spots, juices running clear when pressed, and a firm, springy texture. Avoid cutting into the chicken too early to keep it juicy.
Does this visual method work for all chicken cuts?
It works best for boneless, skinless breasts and thighs but can be adapted for bone-in pieces with slight timing adjustments and finishing in the oven.
What if my chicken sticks to the pan?
Make sure the pan and oil are hot before adding chicken and don’t move it too soon. Pat the chicken dry before cooking to reduce sticking.
Can I use this method for frozen chicken?
No, chicken should be fully thawed before cooking to ensure even cooking and accurate visual cues.
Is resting the chicken really necessary?
Yes! Resting for 5 minutes after cooking lets juices redistribute, which keeps the chicken moist and tender.
Pin This Recipe!
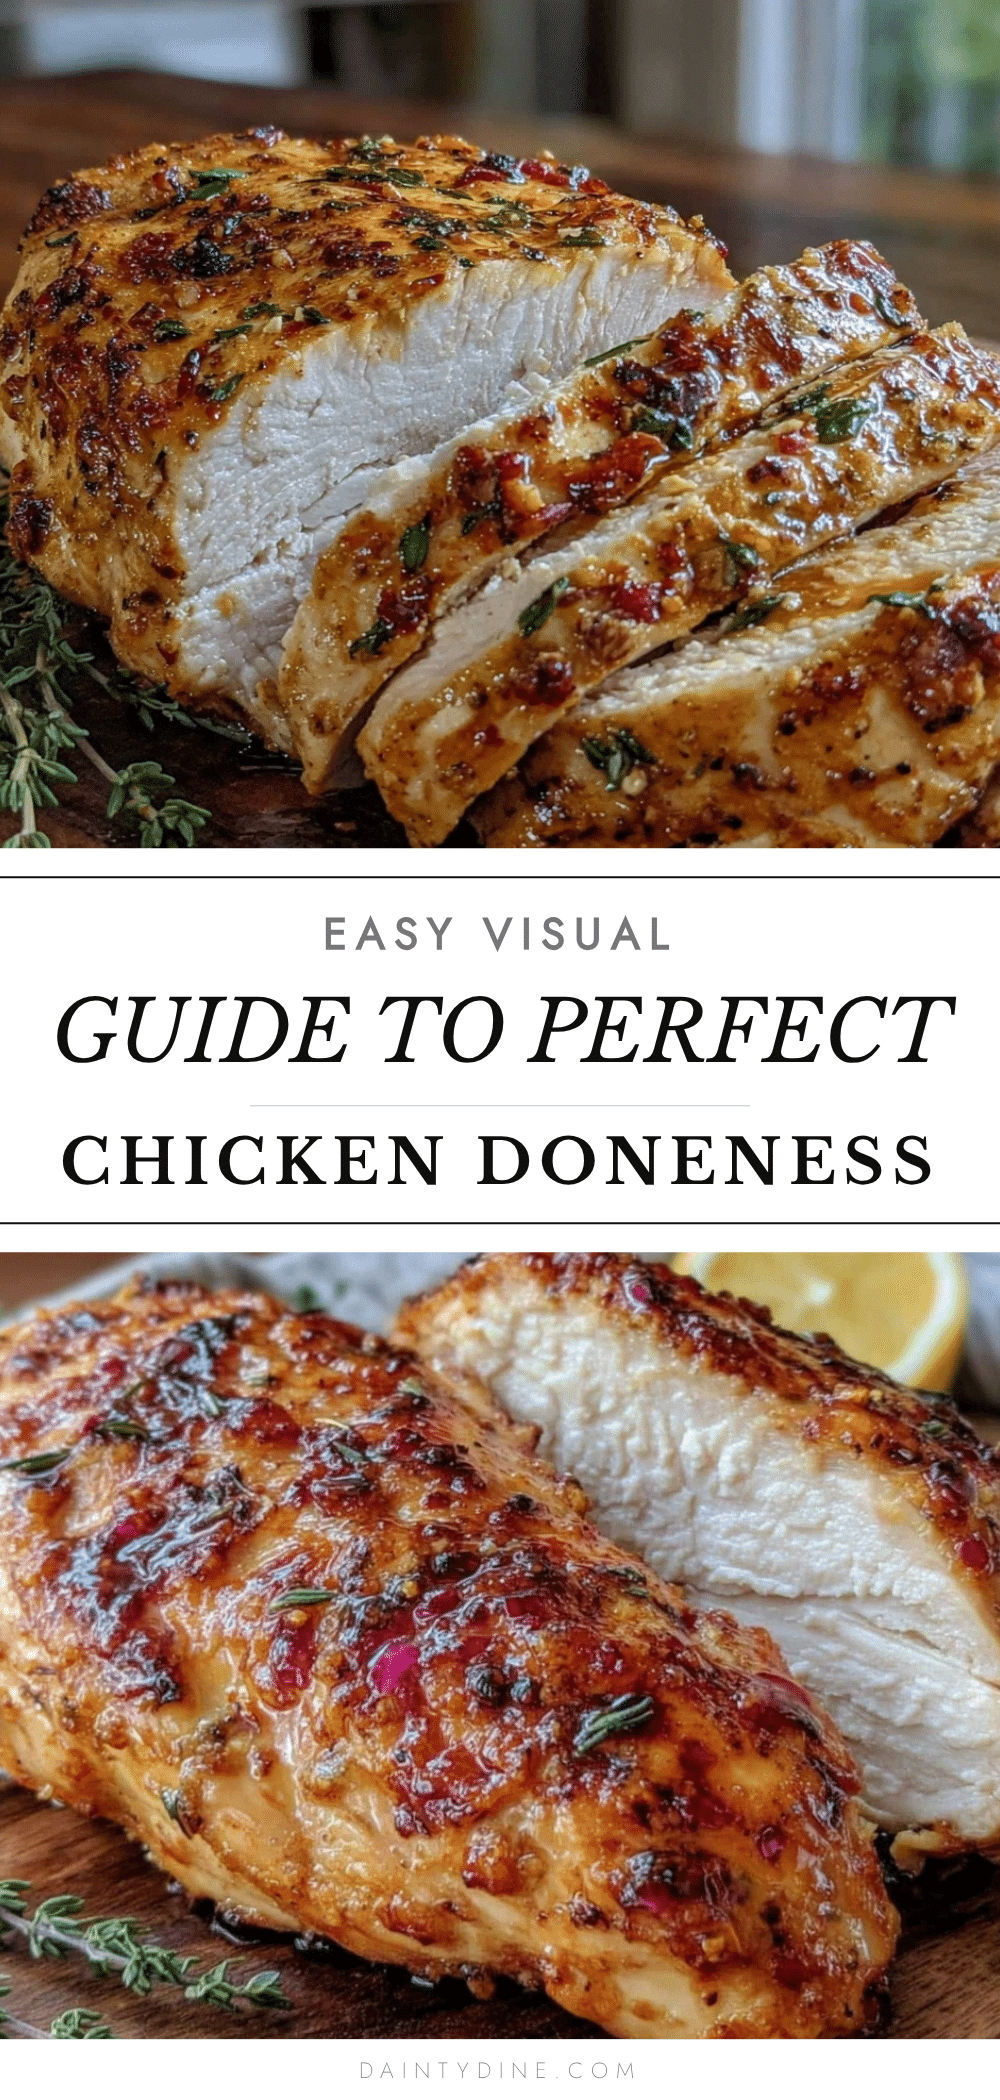
Easy Visual Guide to Perfectly Cooked Chicken Without a Thermometer Step-by-Step

Learn how to cook juicy, tender chicken perfectly without using a thermometer by relying on visual and tactile cues. This method is simple, practical, and works with everyday chicken cuts.
- Prep Time: 10 minutes
- Cook Time: 10-12 minutes
- Total Time: 20-22 minutes
- Yield: 4 servings 1x
- Category: Main Course
- Cuisine: American
Ingredients
- 1 to 1.5 pounds boneless, skinless chicken breasts or thighs (bone-in optional, adjust cooking time)
- 1 teaspoon kosher salt or sea salt
- Freshly ground black pepper, to taste
- 1 to 2 tablespoons olive oil or neutral cooking oil
- Optional: garlic powder, smoked paprika, thyme, or rosemary
- Optional: 1 tablespoon butter for basting
- Optional: fresh lemon juice for brightness
Instructions
- Pat the chicken dry thoroughly with paper towels to ensure a golden-brown crust.
- Season both sides generously with kosher salt and freshly ground black pepper. Optionally add garlic powder or smoked paprika. Let rest at room temperature for 10 minutes.
- Heat a cast iron or heavy skillet over medium-high heat and add olive oil. Heat until shimmering but not smoking (around 375°F).
- Place chicken pieces gently in the pan, skin or smooth side down first. Avoid overcrowding; cook in batches if needed.
- After about 5-6 minutes (less for thinner cuts), check the edges for opacity and golden crust. Peek under with tongs to see the sear. Do not move chicken too much.
- Flip the chicken and cook the other side for 4-5 minutes until the surface turns from shiny to matte and the chicken firms up.
- Press the thickest part gently; it should feel springy but not squishy. Juices should run clear, not pink or red. If not done, cook another minute and test again.
- Optional: Add butter and fresh herbs during the last minute and baste the chicken for extra richness.
- Remove chicken from pan and let rest for 5 minutes to redistribute juices.
- Slice at the thickest point to check doneness; meat should be opaque and white or light tan with no translucent parts.
Notes
Pat chicken dry before cooking to ensure crispiness. Let chicken rest after cooking to keep it juicy. Use visual and tactile cues like color change, clear juices, and springy texture to determine doneness. For uneven pieces, pound to uniform thickness or finish cooking on low heat covered with foil. Optional oven finish at 375°F for 5-7 minutes for bone-in pieces. Butter basting adds richness but can be omitted for dairy-free version.
Nutrition
- Serving Size: Approximately 4 ounc
- Calories: 165
- Fat: 3.6
- Protein: 31
Keywords: chicken, cooked chicken, no thermometer chicken, easy chicken recipe, pan-seared chicken, visual guide chicken, juicy chicken, weeknight dinner