Love this? Save it for later!
Share the inspiration with your friends
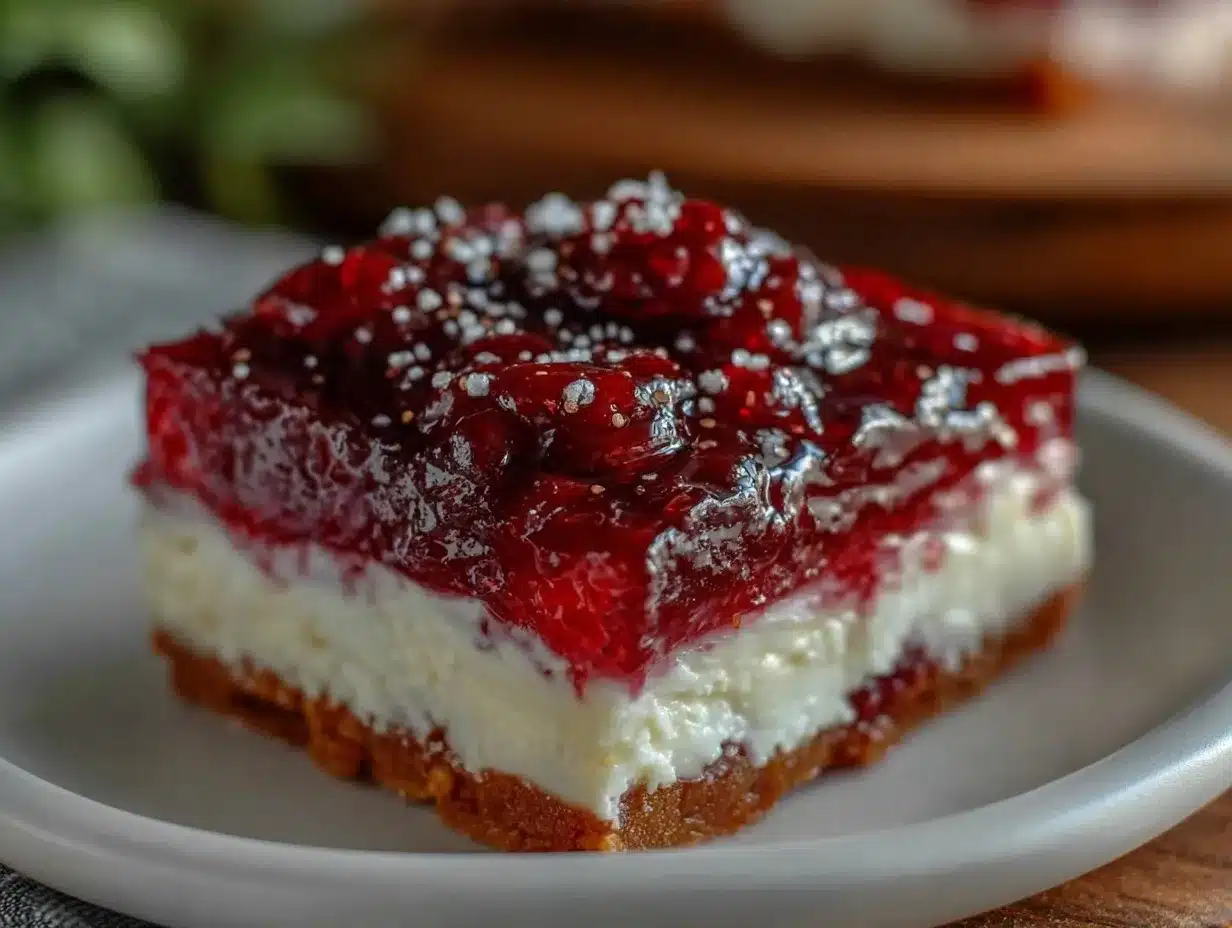
“You know that moment when you open the fridge and spot a jiggly, colorful dessert that just screams celebration? That’s exactly how I felt the first time I nailed the perfect red white blue jello layers with crisp, vibrant colors. It wasn’t at a picnic or a Fourth of July party, but rather a quiet Tuesday evening when I was rummaging through the pantry, looking for something fun to make for a last-minute neighborhood potluck. Honestly, I wasn’t expecting much—just some quick layers thrown together.
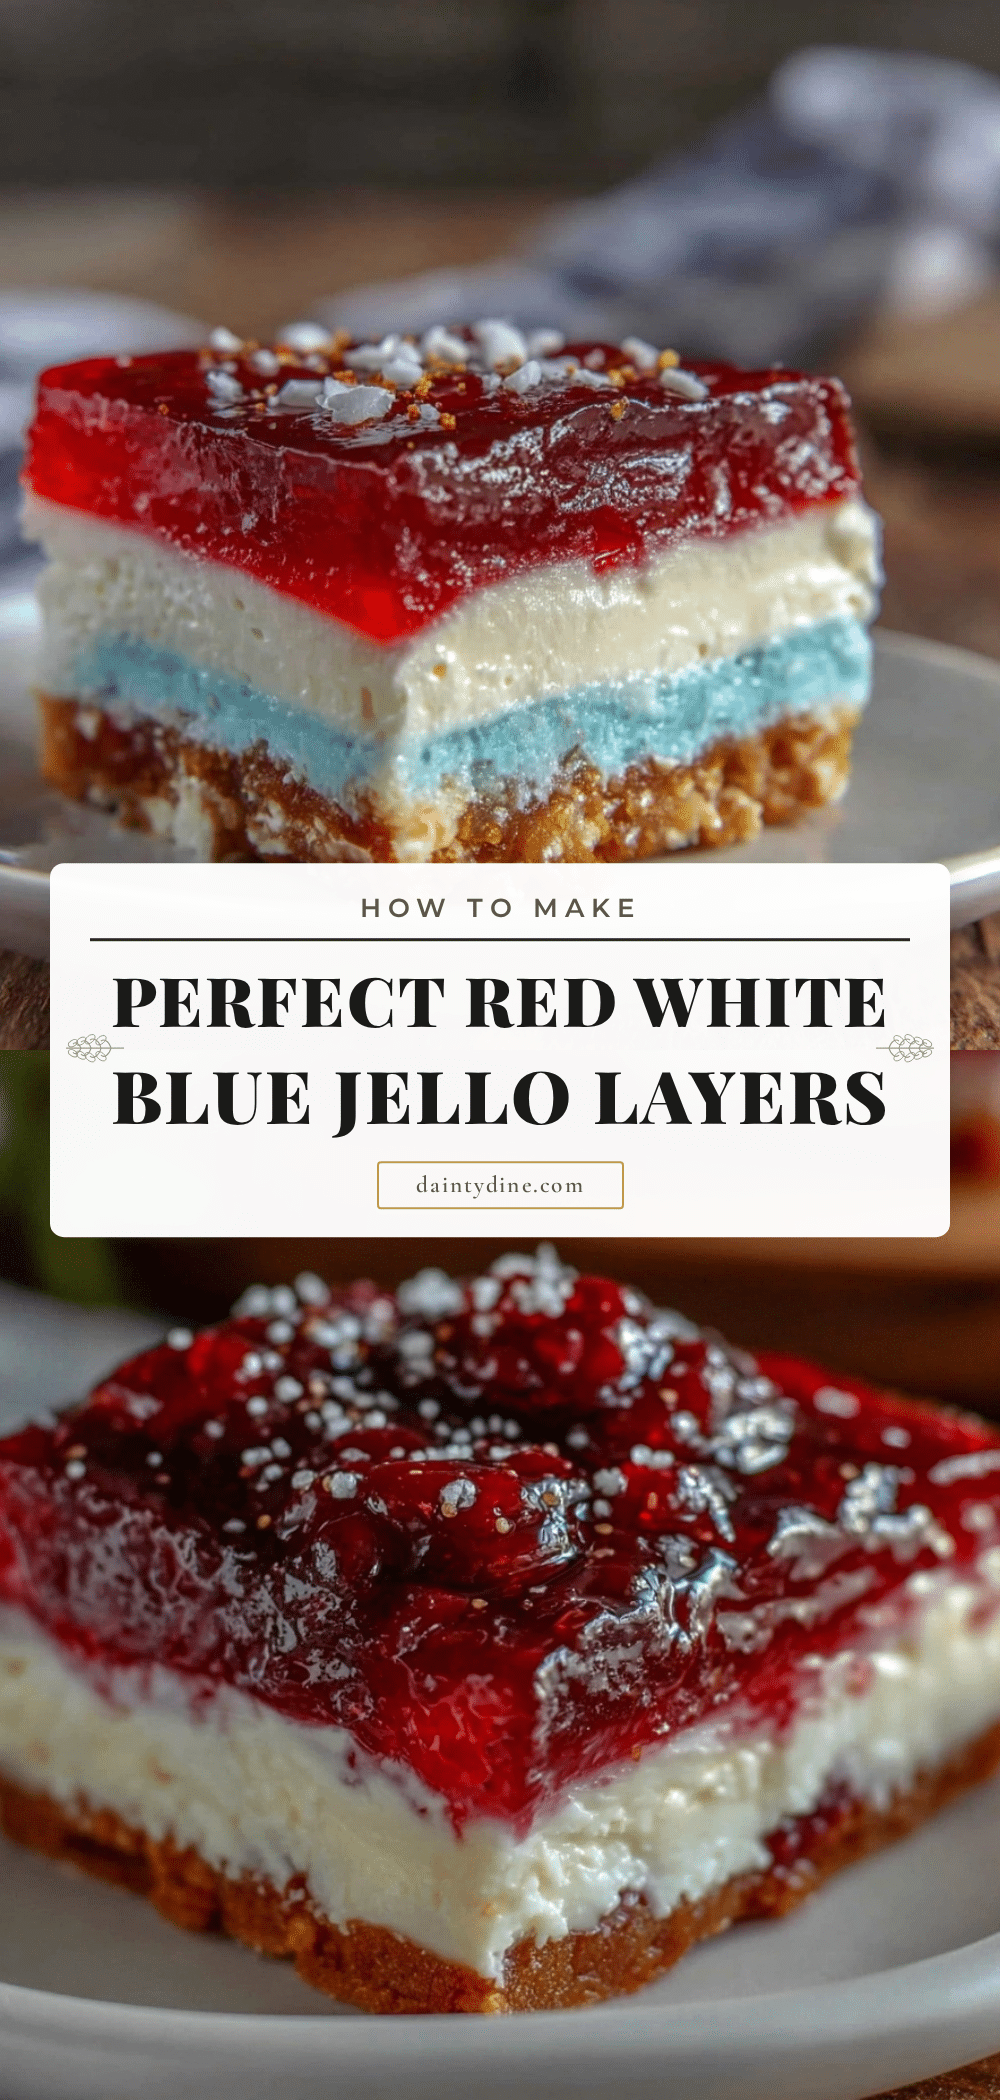
But the surprise came when the layers set with those sharp, unmistakable colors that didn’t bleed into each other. That was a game changer. I mean, I’d tried making layered jello before, but it always turned into a messy, faded mess. This time, though, the reds popped like fireworks, the whites were creamy and pure, and the blues were so vibrant they practically glowed.
There was even a moment when I realized I forgot to check if the gelatin was fully dissolved in the white layer, and I panicked a little. But letting it chill a bit longer saved it, and the result was just as stunning as I’d hoped. Maybe you’ve been there—trying to get those layers perfectly distinct without weeks of prepping or fancy ingredients.
What kept me coming back to this recipe is how it managed to capture that nostalgic Americana spirit while being so easy to pull off. It’s the kind of dessert that turns casual gatherings into something memorable, all without breaking a sweat. Let me tell you, this red white blue jello layers recipe isn’t just dessert; it’s a little burst of joy on a plate that’s perfect for summer barbecues, holiday celebrations, or whenever you want to surprise your guests with a pop of color and flavor.
Why You’ll Love This Recipe
After countless tries and a few hilarious kitchen mishaps, this red white blue jello layers recipe is officially my go-to for any patriotic occasion (or whenever I want to feel festive). Here’s why it’s become a staple in my dessert lineup:
- Quick & Easy: You can have this colorful treat ready in under 2 hours—perfect for last-minute parties or when the craving hits.
- Simple Ingredients: No need for fancy or hard-to-find items. Just classic jello flavors and a few pantry basics.
- Perfect for Summer Celebrations: Whether it’s the Fourth of July, Memorial Day, or a casual backyard barbecue, this dessert fits right in.
- Crowd-Pleaser: Kids and adults alike adore the fun layers and wobbly texture.
- Unbelievably Vibrant & Crisp: The secret technique makes sure the colors stay sharp and distinct, no bleeding or fading.
What makes this version stand out from other layered jello recipes? It’s all about the timing and the layering technique—letting each layer set just enough before adding the next so they don’t mix but still stick together beautifully. Also, swapping out plain gelatin for a mix with some cream cheese in the white layer gives it that silky, creamy texture that feels like a mini dessert upgrade. Honestly, it’s the kind of recipe that makes you pause and savor the first bite.
It’s not just dessert; it’s a little celebration in a dish that somehow manages to be nostalgic and fresh at the same time. And if you’re anything like me, you’ll find yourself making it not only for big holidays but also to brighten up an ordinary day.
What Ingredients You Will Need
This red white blue jello layers recipe uses straightforward ingredients that come together to create those crisp, vibrant layers you want. You probably have most of these in your pantry or fridge already.
- Red Layer:
- 1 package (3 oz / 85g) strawberry or cherry flavored gelatin (I like Jell-O brand for consistent color)
- 1 cup (240 ml) boiling water
- 1 cup (240 ml) cold water
- White Layer:
- 1 package (3 oz / 85g) unflavored gelatin
- 2 cups (480 ml) whole milk or half-and-half (for creamier texture)
- 1 cup (240 ml) granulated sugar
- 4 oz (115g) cream cheese, softened (optional, adds richness and smoothness)
- 1 tsp vanilla extract
- Blue Layer:
- 1 package (3 oz / 85g) blueberry or blue raspberry flavored gelatin
- 1 cup (240 ml) boiling water
- 1 cup (240 ml) cold water
Some tips: For the white layer, I recommend using small-curd cottage cheese if you want a lighter alternative, but cream cheese really gives it that smooth, silky mouthfeel. The red and blue gelatin flavors can be swapped seasonally—like fresh berry jello in summer or cranberry for winter holidays—to keep things interesting. If you need a dairy-free version, swap the milk for coconut milk and use a dairy-free cream cheese substitute.
Equipment Needed
Getting the perfect red white blue jello layers doesn’t demand fancy gear, but a few kitchen tools make the process smoother:
- Glass or plastic rectangular baking dish: About 9×13 inches (23×33 cm) works great for clear, even layers.
- Mixing bowls: At least three, one for each color layer.
- Whisk or fork: For dissolving gelatin completely.
- Measuring cups and spoons: To keep those ratios spot on.
- Rubber spatula: Helpful for mixing cream cheese into the white layer smoothly.
If you don’t have a rectangular dish, a clear trifle dish or even individual clear cups work well and look charming. I once tried using a silicon loaf pan, and while it worked, the layers were a little trickier to slice cleanly. Also, make sure your gelatin packets are fresh—expired ones won’t set properly, and that’s a bummer after all that effort!
Preparation Method
- Prepare the Red Layer: In a mixing bowl, dissolve the red gelatin powder in 1 cup (240 ml) boiling water. Stir until completely dissolved (about 2 minutes). Add 1 cup (240 ml) cold water and mix. Pour the red gelatin mixture evenly into your prepared baking dish. Chill in the refrigerator for 30-40 minutes or until the layer is firm to the touch but not fully set (it should feel slightly tacky).
- Make the White Layer: While the red layer chills, sprinkle the unflavored gelatin over ½ cup (120 ml) cold milk and let it bloom for 5 minutes. In a small saucepan, heat the remaining 1½ cups (360 ml) milk with sugar over medium heat until hot but not boiling. Remove from heat and whisk in the bloomed gelatin until dissolved.
- Mix Cream Cheese and Vanilla: In a separate bowl, soften the cream cheese by whisking it until smooth. Slowly add the warm milk and gelatin mixture to the cream cheese, whisking constantly to avoid lumps. Stir in vanilla extract.
- Layer the White Gelatin: Carefully pour the white mixture over the chilled red layer. Pour slowly over the back of a spoon to avoid disturbing the red layer. Return to the fridge and chill for 45-60 minutes until firm but still slightly tacky.
- Prepare the Blue Layer: Dissolve the blue gelatin powder in 1 cup (240 ml) boiling water until fully dissolved. Add 1 cup (240 ml) cold water and stir. Pour over the white layer gently, again using the back of a spoon to keep layers neat.
- Final Chill: Refrigerate the layered jello for at least 2 hours or until the entire dessert is fully set. The layers should be crisp and distinct, with no bleeding of colors.
- Serve: Use a sharp knife dipped in hot water to slice cleanly. Serve chilled for best texture and flavor.
Pro tip: If you notice any bubbling or mixing of layers, slow down your pouring. Patience is key with layered jello! Also, if the white layer looks grainy or uneven, it usually means the cream cheese wasn’t fully softened—whisk it longer next time, trust me.
Cooking Tips & Techniques
Getting those crisp, vibrant red white blue jello layers can feel tricky, but here are some tips I’ve learned the hard way:
- Timing is everything. Each layer should be chilled until firm but still a bit tacky. Pouring too soon will cause colors to bleed; waiting too long can make layers not stick well.
- Use boiling water to dissolve gelatin thoroughly. Undissolved gelatin can cause lumps or poor setting.
- Pour over the back of a spoon. This slows the flow and prevents layers from mixing.
- Softening cream cheese well is crucial. I once rushed this step and ended up with grainy white layers—no fun.
- Chill in a fridge with a good seal. Avoid opening the door too often, or condensation can cause watery layers.
- Slice with a sharp knife dipped in hot water. It helps cut clean layers without smudging.
Honestly, I’ve had my fair share of jello disasters—like the time I tried to speed things up by freezing a layer and ended up cracking the whole thing. Lesson learned: patience really pays off here. Also, multitasking helps—while a layer chills, prep the next one to save time without rushing.
Variations & Adaptations
This recipe is a great base to tweak to your taste or dietary needs. Here are a few variations I’ve enjoyed:
- Dairy-Free Option: Swap the milk and cream cheese in the white layer for coconut milk and a dairy-free cream cheese alternative. The flavor is slightly tropical but still creamy.
- Fruit-Infused Layers: Add fresh crushed berries to the red and blue gelatin mixtures before chilling for extra texture and natural flavor.
- Less Sweet, More Tart: Use sugar-free gelatin mixes and replace sugar in the white layer with a touch of honey or agave syrup.
- Individual Servings: Prepare in clear mason jars or cups for easy portioning and a cute presentation.
- Alcohol-Infused: For adult gatherings, replace part of the cold water with a complementary liquor like vodka or rum (start with ¼ cup / 60 ml) to give the layers a boozy kick.
One time, I made a version using lime gelatin instead of blue raspberry for a zesty twist that surprised everyone. It also works great to swap flavors seasonally—cranberry for winter or peach in summer. Just keep the layering technique the same for crisp colors.
Serving & Storage Suggestions
Serve this red white blue jello chilled and fresh. The vibrant layers look fantastic on a clear glass platter or individual clear cups, letting those colors shine through. It pairs wonderfully with whipped cream or a scoop of vanilla ice cream for extra indulgence.
If you’re serving at a party, keep the jello covered tightly in the refrigerator to prevent it from absorbing odors or drying out. This dessert keeps well for up to 3 days chilled.
To reheat slightly for easier slicing, dip your knife in hot water before each cut—this keeps edges neat without melting the jello. The flavors and textures actually hold up well over a couple of days, and sometimes the colors seem even more intense after resting overnight.
Nutritional Information & Benefits
This red white blue jello layers recipe is relatively light, especially compared to richer desserts. Here’s a rough estimate per serving (1/12 of the dish):
| Calories | Carbohydrates | Protein | Fat |
|---|---|---|---|
| 120 kcal | 25g | 3g | 2g |
The gelatin provides a good source of protein and is great for joint and skin health. Using whole milk and cream cheese adds a bit of calcium and healthy fats, making this treat a bit more satisfying. For gluten-free eaters, this recipe is naturally free of gluten. Just watch out for dairy if you have allergies, and swap accordingly.
Personally, I like that this dessert feels fun and festive without being heavy or overly sugary—perfect when you want a sweet treat that doesn’t weigh you down.
Conclusion
If you’re looking for a show-stopping yet simple dessert, this perfect red white blue jello layers recipe with crisp, vibrant colors is the way to go. It brings that cheerful Americana spirit to your table with minimal fuss and maximum wow factor. I love how it reminds me that even the simplest ingredients can deliver something special when treated with a little care.
Feel free to tweak the flavors or presentation to suit your taste—this recipe welcomes your personal touch. Let me know how yours turns out or if you tried any fun variations! There’s nothing better than hearing how a recipe becomes part of your own celebrations.
So grab those gelatin packets, clear your fridge shelf, and get ready to impress your family and friends with a dessert that’s as delightful to look at as it is to eat. Happy layering!
FAQs
How do I prevent colors from bleeding between jello layers?
Chill each layer until it’s firm but still a bit tacky before adding the next. Pour the next layer slowly over the back of a spoon to avoid disturbing the set layer.
Can I make this recipe ahead of time?
Yes! Prepare the layers a day ahead, keep covered in the refrigerator, and slice just before serving to keep the layers crisp.
What if I don’t have cream cheese for the white layer?
You can skip the cream cheese and just use milk and sugar with unflavored gelatin. The texture will be less creamy but still delicious.
Can I use different flavors for the red and blue layers?
Absolutely! Feel free to swap in raspberry, cherry, or even lime gelatin to customize the flavor and color.
Is this recipe suitable for kids?
Yes, it’s a kid-friendly dessert. Just avoid alcohol substitutions if serving to children.
Pin This Recipe!
Perfect Red White Blue Jello Layers Recipe with Crisp Vibrant Colors Made Easy
A festive and easy-to-make layered jello dessert with vibrant red, white, and blue colors perfect for patriotic celebrations and casual gatherings.
- Prep Time: 20 minutes
- Cook Time: 0 minutes
- Total Time: 3 hours 20 minutes
- Yield: 12 servings 1x
- Category: Dessert
- Cuisine: American
Ingredients
- Red Layer: 1 package (3 oz / 85g) strawberry or cherry flavored gelatin
- 1 cup (240 ml) boiling water
- 1 cup (240 ml) cold water
- White Layer: 1 package (3 oz / 85g) unflavored gelatin
- 2 cups (480 ml) whole milk or half-and-half
- 1 cup (240 ml) granulated sugar
- 4 oz (115g) cream cheese, softened (optional)
- 1 tsp vanilla extract
- Blue Layer: 1 package (3 oz / 85g) blueberry or blue raspberry flavored gelatin
- 1 cup (240 ml) boiling water
- 1 cup (240 ml) cold water
Instructions
- Prepare the Red Layer: Dissolve the red gelatin powder in 1 cup boiling water. Stir until completely dissolved (about 2 minutes). Add 1 cup cold water and mix. Pour evenly into a prepared 9×13 inch baking dish. Chill in the refrigerator for 30-40 minutes until firm to the touch but slightly tacky.
- Make the White Layer: Sprinkle unflavored gelatin over ½ cup cold milk and let bloom for 5 minutes. Heat remaining 1½ cups milk with sugar over medium heat until hot but not boiling. Remove from heat and whisk in bloomed gelatin until dissolved.
- Mix Cream Cheese and Vanilla: Soften cream cheese by whisking until smooth. Slowly add warm milk and gelatin mixture to cream cheese, whisking constantly to avoid lumps. Stir in vanilla extract.
- Layer the White Gelatin: Carefully pour the white mixture over the chilled red layer using the back of a spoon to avoid disturbing it. Chill for 45-60 minutes until firm but slightly tacky.
- Prepare the Blue Layer: Dissolve blue gelatin powder in 1 cup boiling water until fully dissolved. Add 1 cup cold water and stir. Pour gently over the white layer using the back of a spoon.
- Final Chill: Refrigerate the layered jello for at least 2 hours until fully set with crisp, distinct layers.
- Serve: Use a sharp knife dipped in hot water to slice cleanly. Serve chilled.
Notes
Chill each layer until firm but slightly tacky before adding the next to prevent colors from bleeding. Pour layers slowly over the back of a spoon. Soften cream cheese thoroughly to avoid grainy texture. Use fresh gelatin packets for best results. For dairy-free version, substitute milk and cream cheese with coconut milk and dairy-free cream cheese. Slice with a knife dipped in hot water for clean cuts.
Nutrition
- Serving Size: 1/12 of the dish
- Calories: 120
- Fat: 2
- Carbohydrates: 25
- Protein: 3
Keywords: red white blue jello, layered jello dessert, patriotic dessert, Fourth of July dessert, easy jello recipe, summer dessert