Love this? Save it for later!
Share the inspiration with your friends
“I wasn’t planning on making dessert that day,” I admit. It was the kind of chaotic July 4th where the grill was already smoking, kids were darting through the yard, and the sun was blazing mercilessly. Honestly, turning on the oven felt like a bad idea. So when my neighbor, Mrs. Jenkins, who’s usually all about her elaborate pies, ambled over with a cool tray of these Easy No-Bake 4th of July Dirt Cake Cups, I was hooked immediately.
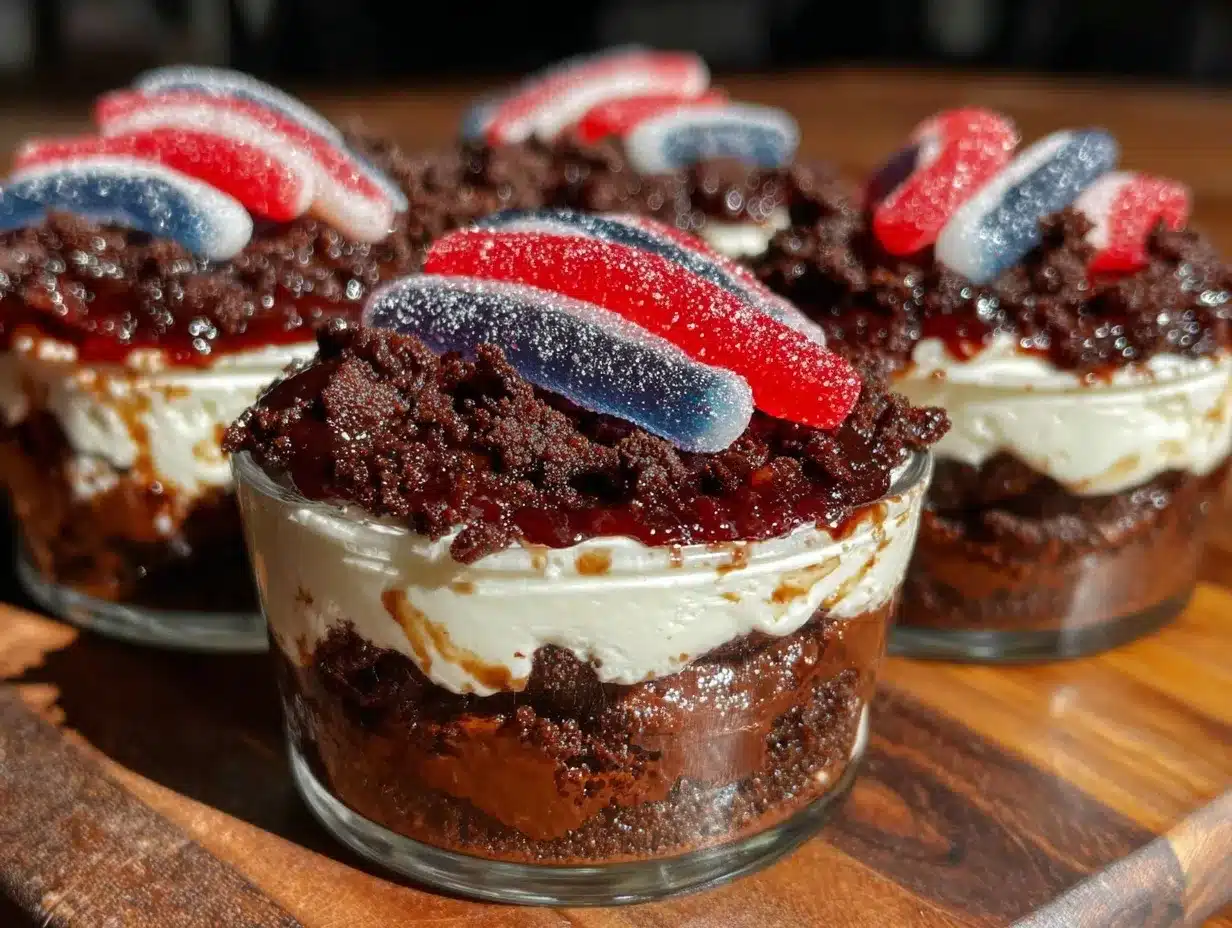
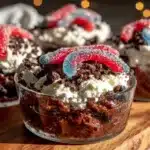
She’d whipped them up in less than 20 minutes, with just a few simple ingredients, and they looked like little patriotic treasures—red, white, and blue layers topped with crushed Oreos and gummy worms (because, of course, you need worms in any “dirt” cake, right?). I remember snagging one before the fireworks even started, the creamy, chocolatey layers melting in my mouth while the crunch of the cookie bits added that perfect texture contrast.
Maybe you’ve been there—fighting the urge to bake when it’s hotter than July noon, or needing a dessert that feels festive but doesn’t demand all day in the kitchen. This recipe stayed with me because it’s simple, fun, and honestly, a crowd-pleaser every single time. Let me tell you, these Dirt Cake Cups aren’t just for kids; adults sneak handfuls when no one’s looking.
Why You’ll Love This Recipe
After testing dozens of no-bake desserts, I can say this Easy No-Bake 4th of July Dirt Cake Cups recipe nails that perfect balance of ease and wow factor. Here’s why it’s become a staple in my summer lineup:
- Quick & Easy: Takes less than 20 minutes to assemble, so you can get back to the party or your book on the porch without breaking a sweat.
- Simple Ingredients: No crazy specialty ingredients here—just basics you probably have in your pantry or fridge.
- Perfect for Summer Celebrations: Whether it’s a backyard BBQ, a picnic, or a laid-back 4th of July, these cups bring fun and festive vibes.
- Crowd-Pleaser: Kids love the gummy worms and adults appreciate the creamy, chocolatey goodness with a hint of vanilla.
- Unbelievably Delicious: The combo of creamy pudding, crushed Oreos, and whipped topping is exactly the kind of comfort food you want on a hot day.
What sets this recipe apart is the layering technique that makes every bite a delightful mix of textures and flavors. Plus, the no-bake aspect means you don’t have to worry about heating up the kitchen or risking a burnt batch. Honestly, it’s my go-to when I want something that feels special but doesn’t require a lot of fuss—a real lifesaver during summer festivities.
What Ingredients You Will Need
This recipe uses simple, wholesome ingredients to deliver bold flavor and satisfying texture without the fuss. Most are pantry staples, and if you want to swap out a few things, I’ll guide you through that too.
- Instant chocolate pudding mix (1 package, 3.9 oz) – I like Jell-O brand for its rich, smooth finish.
- Cold milk (2 cups / 480 ml) – whole milk works best for creaminess, but 2% is fine.
- Whipped topping (8 oz / 227 g, thawed) – store-bought cool whip or homemade whipped cream if you’re feeling fancy.
- Crushed Oreo cookies (about 20 cookies) – classic Oreos give the perfect “dirt” look and crunch.
- Gummy worms (about 15-20 pieces) – for that fun, playful touch everyone loves.
- Fresh strawberries (1 cup, chopped) – adds a bright, juicy pop of red.
- Blueberries (1 cup, fresh) – for the blue layer and antioxidant boost.
Optional but recommended:
- Vanilla extract (1 tsp) – adds warmth and depth to the pudding.
- Powdered sugar (2 tbsp) – if you want a slightly sweeter whipped topping.
Tip: If you need a gluten-free version, you can find gluten-free chocolate sandwich cookies at most grocery stores these days. Also, feel free to swap out the milk for almond or oat milk if you prefer a dairy-free option.
Equipment Needed
- Medium mixing bowl – for pudding mixture.
- Electric mixer or whisk – an electric mixer makes whipping the topping easier, but a sturdy whisk works if you don’t have one.
- Measuring cups and spoons – for precise ingredient amounts.
- Spatula – to fold whipped topping gently into the pudding.
- Clear plastic or glass cups (8-12 oz) – perfect for layering and showing off those pretty red, white, and blue colors.
- Small bowl – to crush Oreos (I use a zip-top bag and a rolling pin). No rolling pin? Just use the bottom of a glass!
If you want to be fancy, a piping bag makes layering whipped topping extra neat, but I usually just spoon it in. When I first made these, I used random mason jars because that’s what I had on hand, and honestly, it gave the dessert an extra rustic charm. So don’t stress about fancy glassware.
Preparation Method
- Prepare the pudding: In your medium bowl, whisk together the instant chocolate pudding mix and cold milk (2 cups / 480 ml) for about 2 minutes until it thickens. You’ll notice it go from liquid to creamy pretty quickly—kind of magic, honestly. Set aside to let it firm up while you prep the next steps (about 5 minutes).
- Whip the topping: If using store-bought whipped topping, give it a gentle stir to loosen it. If you’re whipping cream from scratch, beat 1 cup heavy cream and 2 tablespoons powdered sugar until soft peaks form (about 3-4 minutes). Adding vanilla extract (1 tsp) here really perks up the flavor.
- Fold together: Gently fold about three-quarters of the whipped topping into the pudding mixture. Use a spatula and fold slowly—don’t overmix or you’ll lose that fluffy texture. The result should be light, creamy, and luscious.
- Crush the Oreos: Place about 20 Oreo cookies in a zip-top bag and crush with a rolling pin or the bottom of a glass until you get mostly fine crumbs with some small chunks for texture.
- Assemble the cups: Start with a layer of crushed Oreos at the bottom of each cup (about 2 tablespoons). Next, spoon in a layer of the pudding mixture (about 3 tablespoons). Add a few chopped strawberries and blueberries (about 1 tablespoon each) to get that festive red and blue vibe.
- Repeat layers: Add another Oreo crumb layer, then more pudding mixture, and finally top with the remaining whipped topping. Try to keep the layers neat but don’t stress if it’s a little messy—this is dirt cake, after all!
- Garnish with gummy worms: Place 2-3 gummy worms on top of each cup for a whimsical finish.
- Chill: Refrigerate the dirt cake cups for at least 2 hours before serving. This step is key because it lets the flavors meld and the texture set perfectly.
Pro tip: If you’re short on time, you can chill for just 1 hour, but the texture won’t be quite as firm. Also, if you find your pudding mixture is too thick before folding, a splash of milk can help loosen it up—just a tablespoon or two.
Cooking Tips & Techniques
Making no-bake desserts like these Dirt Cake Cups seems straightforward, but a few tricks make all the difference:
- Don’t skip chilling: The pudding needs time to set up; otherwise, the layers will slide around, and the texture won’t be right.
- Crush Oreos carefully: Too fine, and you lose the delightful crunch; too chunky, and you risk overpowering the creamy layers. Aim for a mix of crumbs and small bits.
- Folding whipped topping: Remember, folding means gently turning the mixture over itself to combine without deflating. If you mix too vigorously, you’ll lose that airy quality.
- Gummy worm placement: Place worms on top just before serving to keep them from melting or getting too sticky.
- Make ahead: These cups can be prepped a day in advance. Just keep them covered tightly in the fridge, and add gummy worms fresh the next day.
One time, I forgot to chill the pudding first and tried layering immediately. The cups were a soggy mess! Lesson learned: patience pays off, especially with no-bake treats.
Variations & Adaptations
Want to mix things up or accommodate different diets? Here are some fun ways to personalize your 4th of July Dirt Cake Cups:
- Fruit swap: Instead of strawberries and blueberries, try raspberries and blackberries for a seasonal twist.
- Peanut butter version: Add a swirl of creamy peanut butter to the pudding mixture for a nutty surprise.
- Dairy-free: Use coconut milk-based pudding and whipped topping alternatives. Gluten-free Oreo-style cookies are available for the crumbs.
- Mini cupcake cups: For a portable option, spoon the layers into mini cupcake liners or muffin tins lined with paper cups.
- Chocolate lover’s delight: Add mini chocolate chips between the layers or on top for extra indulgence.
I once tried adding crushed pretzels to the cookie crumbs for a salty-sweet combo, and it was a surprising hit at a neighborhood potluck. Feel free to experiment with flavors and textures you love!
Serving & Storage Suggestions
These dirt cake cups are best served chilled, straight from the fridge. The layers hold together nicely, and the cool creaminess is perfect for a hot summer day. For presentation, clear plastic or glass cups really show off those vibrant red, white, and blue layers, making them a festive addition to any table.
Pair them with fresh lemonade or iced tea for a refreshing combo. They also work well alongside light grilled dishes like grilled lemon herb chicken or a crisp green salad.
Leftovers keep well covered in the refrigerator for up to 3 days, but the gummy worms are best added fresh to avoid sogginess. To reheat slightly (if you prefer), just let sit at room temperature for 10 minutes—no microwave necessary!
Over time, the flavors meld beautifully, making these cups even tastier the next day. Just remember to keep them chilled and covered.
Nutritional Information & Benefits
Each serving of these Easy No-Bake 4th of July Dirt Cake Cups contains approximately:
| Calories | 320 |
|---|---|
| Fat | 14g |
| Carbohydrates | 45g |
| Protein | 4g |
Key ingredients like milk and whipped topping provide calcium and some protein, while the berries add antioxidants and vitamins. The pudding and Oreos are more of a treat, of course, so enjoy these cups in moderation.
If you’re watching gluten or dairy, substitutions mentioned earlier make this dessert accessible to many diets. Personally, I find it’s a nice way to indulge without spending hours baking or dealing with heavy desserts on a hot day.
Conclusion
If you’re looking for a festive, easy dessert that screams summer and keeps your kitchen cool, these Easy No-Bake 4th of July Dirt Cake Cups are the way to go. They bring that nostalgic fun of dirt cake with a patriotic twist, and honestly, they’re just plain fun to eat.
Feel free to play with the ingredients, swap in your favorite berries or cookie crumbs, and make these cups your own. I keep coming back to this recipe every summer—there’s just something about those creamy layers and gummy worms that makes me smile.
Give it a try, and let me know how your version turns out! Share your tweaks, questions, or favorite toppings in the comments below—I’d love to hear what you think. Here’s to sweet, simple summer celebrations that everyone can enjoy.
FAQs
Can I make these dirt cake cups ahead of time?
Absolutely! They actually taste better after chilling for a few hours or overnight. Just add the gummy worms right before serving to keep them fresh.
What can I use instead of gummy worms?
If gummy worms aren’t your thing, try crushed candy canes for a minty twist or fresh berries for a natural touch.
Is there a gluten-free version of this recipe?
Yes! Use gluten-free chocolate sandwich cookies instead of Oreos, and double-check that your pudding mix is gluten-free.
Can I use homemade whipped cream instead of store-bought?
Definitely! Whipping your own cream with a bit of powdered sugar and vanilla extract gives a fresher, richer taste.
How long do these dirt cake cups last in the fridge?
They keep well for up to 3 days when covered tightly. For best texture and freshness, add gummy worms just before serving.
Pin This Recipe!
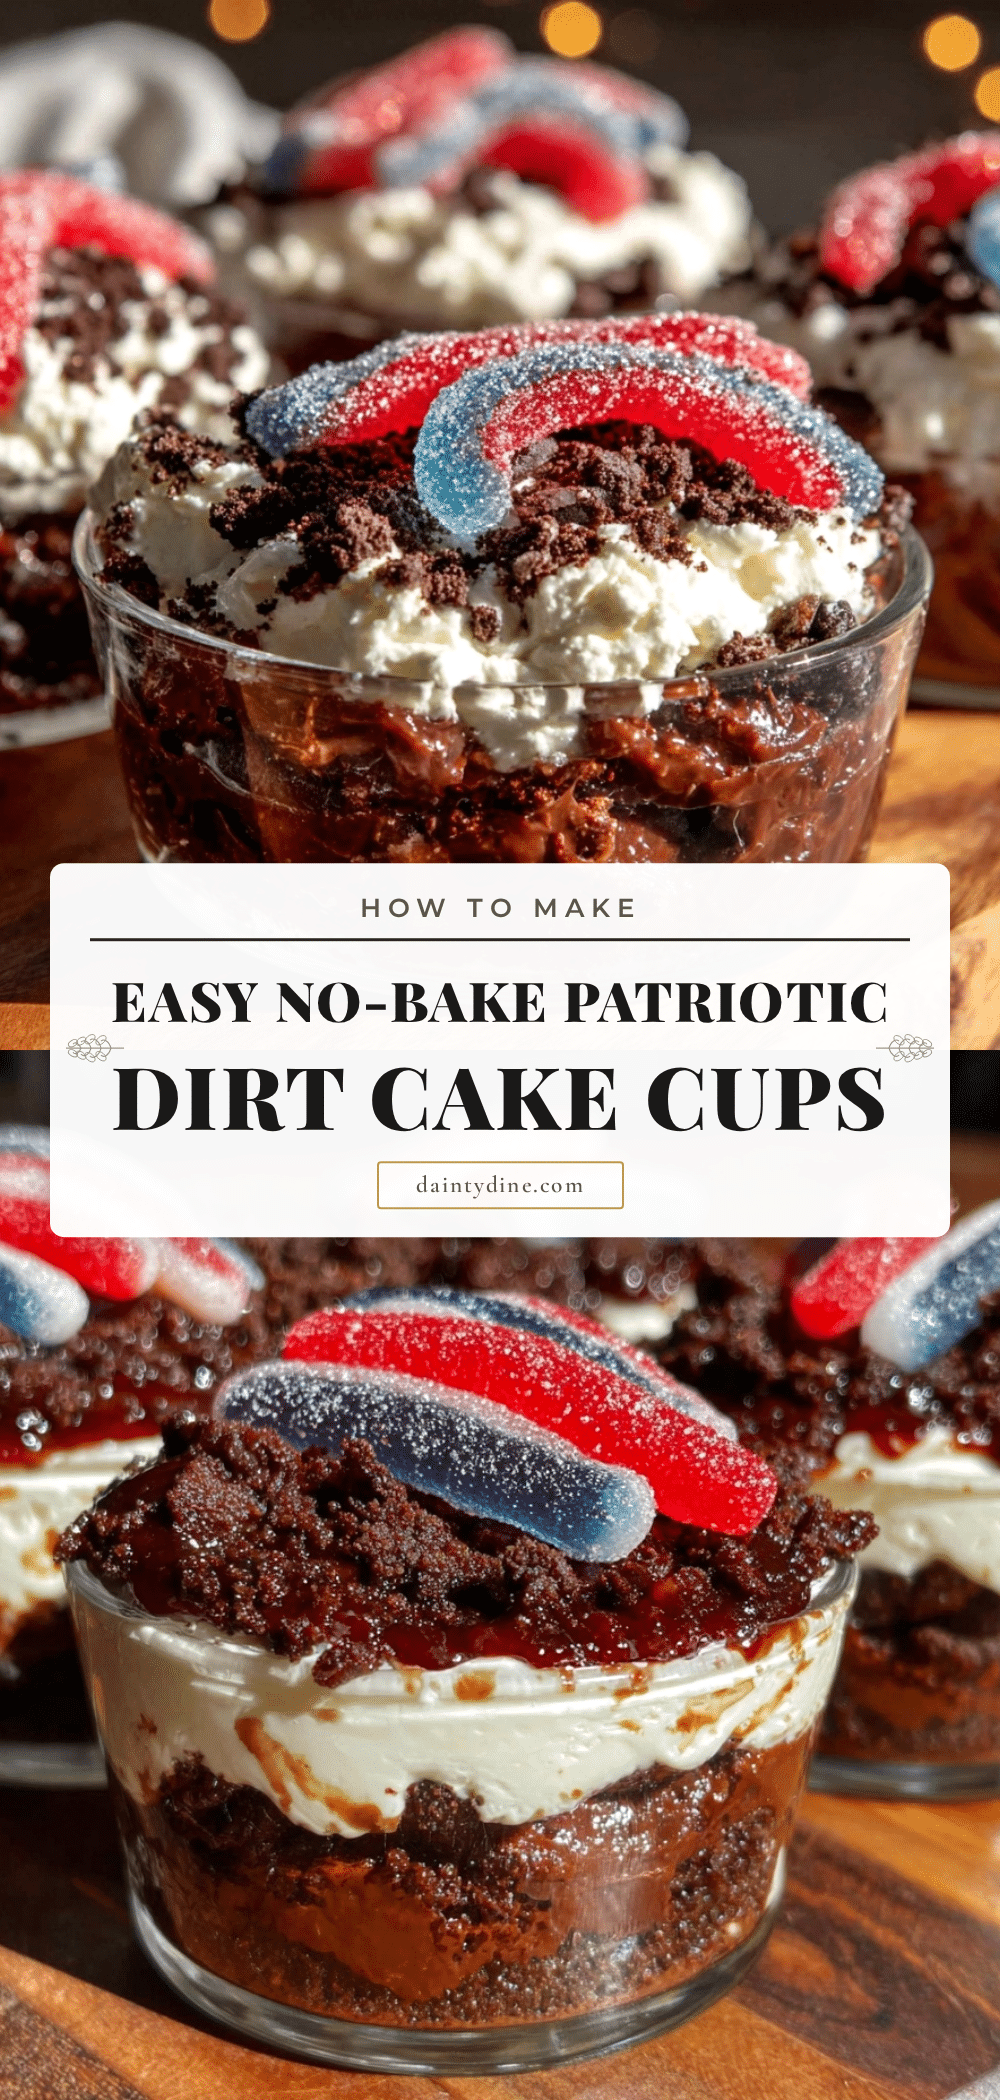
Easy No-Bake 4th of July Dirt Cake Cups
A quick and festive no-bake dessert featuring layers of creamy chocolate pudding, crushed Oreos, whipped topping, and patriotic red, white, and blue fruits, perfect for summer celebrations.
- Prep Time: 15 minutes
- Cook Time: 0 minutes
- Total Time: 2 hours 15 minutes
- Yield: 8 servings 1x
- Category: Dessert
- Cuisine: American
Ingredients
- 1 package (3.9 oz) instant chocolate pudding mix
- 2 cups (480 ml) cold milk (whole or 2%)
- 8 oz (227 g) whipped topping, thawed (store-bought or homemade)
- About 20 crushed Oreo cookies
- 15–20 gummy worms
- 1 cup chopped fresh strawberries
- 1 cup fresh blueberries
- 1 tsp vanilla extract (optional)
- 2 tbsp powdered sugar (optional)
Instructions
- In a medium bowl, whisk together the instant chocolate pudding mix and cold milk for about 2 minutes until thickened. Set aside for about 5 minutes to firm up.
- If using store-bought whipped topping, stir gently to loosen. If making homemade whipped cream, beat 1 cup heavy cream with 2 tablespoons powdered sugar and 1 tsp vanilla extract until soft peaks form (3-4 minutes).
- Gently fold about three-quarters of the whipped topping into the pudding mixture using a spatula, being careful not to overmix.
- Crush about 20 Oreo cookies in a zip-top bag using a rolling pin or the bottom of a glass until mostly fine crumbs with some small chunks remain.
- Assemble the cups by layering about 2 tablespoons of crushed Oreos at the bottom, followed by 3 tablespoons of the pudding mixture, then a tablespoon each of chopped strawberries and blueberries.
- Repeat the layers: crushed Oreos, pudding mixture, and top with the remaining whipped topping.
- Garnish each cup with 2-3 gummy worms on top.
- Refrigerate the dirt cake cups for at least 2 hours before serving to allow flavors to meld and texture to set.
Notes
Chill for at least 2 hours for best texture; gummy worms should be added just before serving to avoid sogginess. For gluten-free, use gluten-free chocolate sandwich cookies and check pudding mix. Dairy-free options include almond or oat milk and coconut milk-based pudding and whipped topping. Folding whipped topping gently preserves fluffiness. Can be made a day ahead and stored covered in the fridge.
Nutrition
- Serving Size: 1 cup (about 1 dirt
- Calories: 320
- Fat: 14
- Carbohydrates: 45
- Protein: 4
Keywords: no-bake dessert, 4th of July dessert, dirt cake, patriotic dessert, summer dessert, easy dessert, Oreo dessert, pudding cups