Love this? Save it for later!
Share the inspiration with your friends
“It was just supposed to be a quick snack before the movie,” I remember telling myself that Friday evening. But there I was, juggling between a cracked wooden tray, half a bottle of wine, and a kitchen counter scattered with bits of cheese and olives. Honestly, I never imagined that throwing together a perfect mini charcuterie snack box for two would turn into one of my favorite little rituals. The idea hit me when my friend Leo casually mentioned how he and his partner loved snacking without the hassle of big platters or complicated recipes. I thought, why not create a simple, elegant snack box just for two? No fuss, just the good stuff.
You know that feeling when you want a little something special, but not the whole party spread? That’s exactly what this recipe captures. I mean, the first time I assembled this mini charcuterie box, I forgot the crackers and had to improvise with breadsticks lying around. It ended up tasting amazing anyway, which just proves how forgiving and fun this snack box can be. Maybe you’ve been there—wanting a cozy treat with someone close, something that feels thoughtful but doesn’t take hours. This mini snack box is all about that: simple ingredients, quick assembly, and a little bit of charm on a plate.
Since then, this mini charcuterie snack box has become my go-to for impromptu date nights, lazy Sunday afternoons, or even a quick pick-me-up when the day’s been long. It’s not just food; it’s a little celebration in a box, a tiny feast for two that’s easy to customize and always hits the spot. Let me tell you, once you try it, you’ll find yourself reaching for this idea over and over again.
Why You’ll Love This Recipe
- Quick & Easy: Comes together in under 15 minutes, perfect for busy weeknights or last-minute cravings.
- Simple Ingredients: No fancy grocery trips needed; you likely already have most of these pantry staples and fresh goodies.
- Perfect for Intimate Occasions: Ideal for date nights, picnics, or casual get-togethers where less is more.
- Crowd-Pleaser: Whether you’re a cheese lover or prefer savory bites, this box hits all the right notes to satisfy diverse tastes.
- Unbelievably Delicious: The balance of creamy, crunchy, salty, and sweet will have you closing your eyes with that first bite.
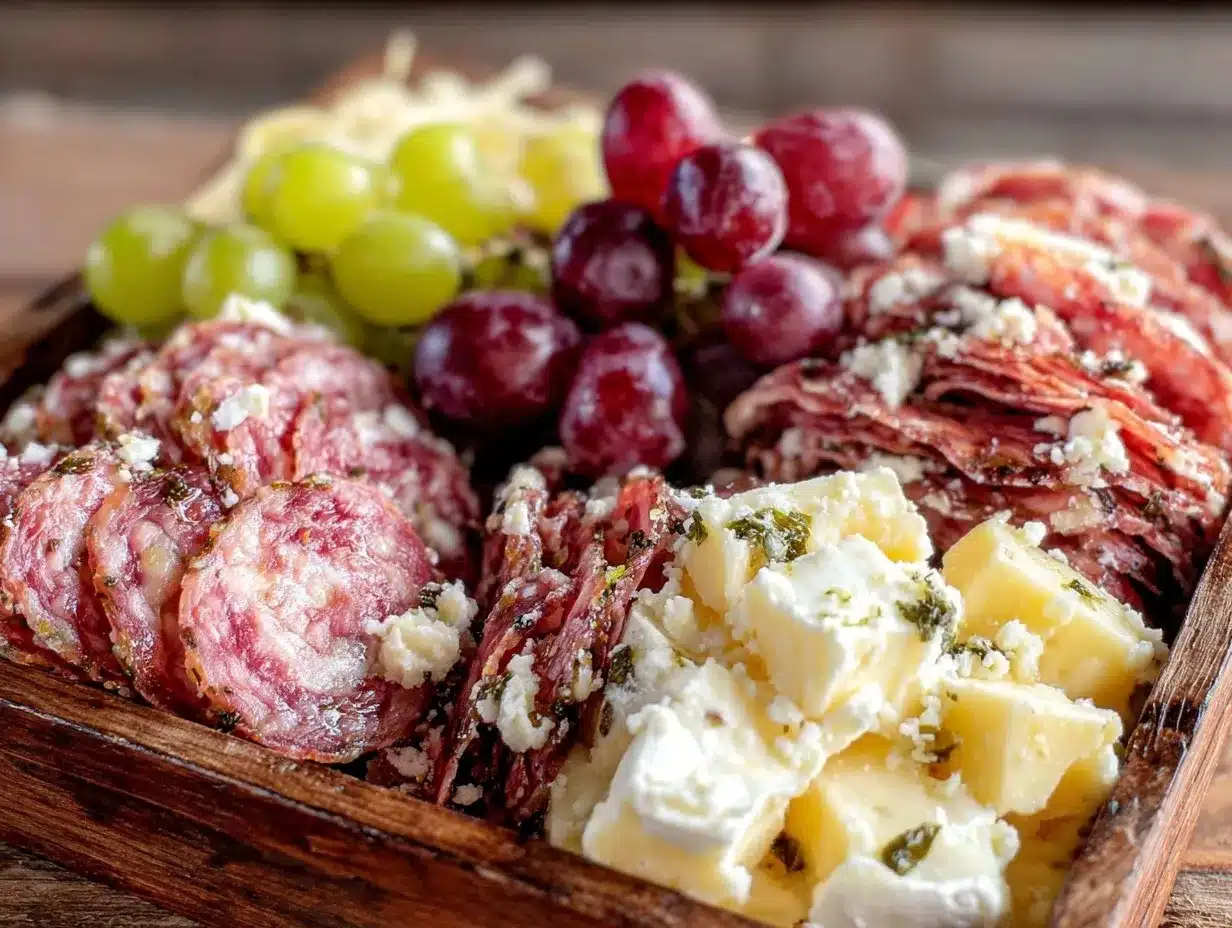
This mini charcuterie snack box is far from just another cheese platter—it’s crafted to bring a perfect harmony of textures and flavors in a compact, inviting form. What makes it stand out is how it combines the timeless charm of cured meats and cheeses with fresh, vibrant accompaniments and a few personal twists I picked up from my culinary experiments. For example, blending a little honeyed fig jam with tangy goat cheese creates a mouthwatering contrast that’s just wow.
Honestly, this recipe isn’t just about eating; it’s about creating a moment. Whether you’re impressing a special guest or treating yourself, the mini snack box feels both thoughtful and easy. It’s comfort food but reimagined to suit today’s fast pace and smaller gatherings. Trust me, once you’ve tried this, you’ll find it hard to go back to ordinary snacking.
What Ingredients You Will Need
This recipe uses simple, wholesome ingredients to deliver bold flavor and satisfying texture without the fuss. Most ingredients are pantry staples or easy-to-find fresh items, making this snack box super accessible. Feel free to swap or tweak based on what’s in your kitchen or your taste preferences.
- Cured Meats (choose 2-3): thinly sliced prosciutto, salami, or soppressata (I like Volpi brand for quality)
- Cheeses (about 3 types): a soft cheese like goat cheese or brie, a firm cheese such as aged cheddar or manchego, and a crumbly cheese like blue cheese or feta
- Crackers & Bread: artisan crackers, baguette slices, or crunchy breadsticks (I recommend Wasa multigrain crackers for texture)
- Fresh Fruit: grapes, apple slices, or fresh figs (seasonal choices add freshness and natural sweetness)
- Dried Fruit & Nuts: dried apricots, figs, or dates and a handful of roasted almonds or walnuts (adds chewiness and crunch)
- Olives & Pickles: Kalamata olives, cornichons, or marinated artichoke hearts (briny contrast balances richness)
- Spreads & Dips: fig jam, honey, or grainy mustard (a little goes a long way to brighten flavors)
- Fresh Herbs (optional): sprigs of rosemary or thyme for garnish and aroma
For a gluten-free option, swap the crackers for rice crackers or gluten-free crisps. You can also replace dairy cheeses with plant-based alternatives if needed—just pick ones with a creamy texture to mimic the real deal. In summer, fresh berries or stone fruits make perfect swaps for dried fruit. It’s all about balance and personal preference here, so don’t hesitate to experiment.
Equipment Needed
- Small Serving Tray or Wooden Board: A compact tray about 10–12 inches works best for the mini snack box. If you don’t have one, a large plate or even a baking sheet lined with parchment will do.
- Cheese Knife: A small, sharp knife for slicing and spreading cheeses. A butter knife can substitute if needed.
- Small Bowls or Ramekins: For olives, nuts, and spreads—helps keep things tidy.
- Tongs or Toothpicks: Handy for picking up small bites and keeping things neat.
- Optional: A small cheese grater or microplane if you want to add fresh zest or finely grate harder cheeses.
I’ve tried assembling this snack box with everything from a cracked vintage cutting board to a shiny new bamboo tray. Honestly, the charm lies in the presentation’s casualness—not perfection. If you’re into budget-friendly options, thrift stores often have great small trays or wooden boards that add character without breaking the bank. Just remember to wash and dry wooden boards properly to maintain them long-term.
Preparation Method
- Prepare the Base: Start by slicing your chosen cheeses into bite-sized pieces—about 1/2-inch cubes or thin wedges (about 1 cm). For soft cheeses like goat cheese or brie, slice gently to avoid crumbling. Arrange these on the tray with enough space between each type so they don’t mix flavors. This step usually takes 5–7 minutes.
- Slice the Meats: Neatly fold or roll your cured meats (prosciutto, salami) and place them beside the cheeses. Rolling adds a nice height and visual interest. If you’re using salami, stacking thin slices in a small pile works too. This should take about 3–5 minutes.
- Add Crackers and Bread: Arrange crackers or baguette slices in a small pile or fan them out around the edges of your tray. Keep them accessible but not overcrowding the meats and cheeses. This step is quick—2 minutes max.
- Place Fresh and Dried Fruits: Scatter grapes or apple slices in one corner, then nestle dried fruit nearby. For seasonal figs or berries, place them on small ramekins to avoid juices spreading. This adds color and sweetness and takes about 3 minutes.
- Fill Small Bowls: Spoon olives, pickles, and nuts into ramekins or small bowls. Position these strategically around the tray to balance the look and ensure easy access. This usually takes 3–4 minutes.
- Add Spreads: Place dollops of fig jam, honey, or mustard in small bowls or directly on the tray if you prefer. Add a tiny spoon or spreader for ease. This step takes 2 minutes.
- Garnish and Final Touch: Add fresh herb sprigs like rosemary or thyme for aroma and a pop of green. Take a moment to check the balance of colors and shapes—sometimes rearranging a cracker or a few grapes makes a big difference. This finishing touch takes about 2 minutes.
- Serve Immediately or Chill: If you’re not serving right away, cover lightly with plastic wrap and refrigerate. Remove 10 minutes before serving to bring flavors to room temperature.
Watch out for overloading the tray—less is more here. I once tried to cram everything on one board, and the flavors got muddied (plus, it looked chaotic). Take your time placing each item thoughtfully and enjoy the process—it’s part of the fun.
Cooking Tips & Techniques
While this recipe doesn’t involve cooking per se, a few pro tips can help you nail the presentation and flavor balance:
- Cheese Temperature: Always serve cheeses at room temperature for the best flavor and creaminess. Take them out about 30 minutes before assembling.
- Meat Handling: Use thin slices of cured meats; thicker cuts can overpower the delicate cheeses and fruits. Rolling meats into rosettes adds elegance and saves space.
- Balancing Flavors: Aim for a balance of salty, sweet, creamy, and crunchy. If your meats are very salty, balance with fresh fruits or a touch of honey.
- Keep it Fresh: Don’t prepare the tray too far in advance—fresh fruit can oxidize and crackers can go stale quickly. Assemble close to serving time when possible.
- Mix Textures: Combining soft cheeses with crunchy nuts and crisp crackers creates a delightful mouthfeel. Avoid too many soft or too many hard items in a row.
- Personal Touches: Don’t hesitate to add a sprinkle of flaky sea salt on softer cheeses or a drizzle of olive oil on olives for extra flavor.
I learned these tricks the hard way—my first few attempts were either too salty or too dry. But now, it’s smooth sailing, and I can whip up a balanced snack box in minutes while chatting with friends or prepping a casual evening.
Variations & Adaptations
- Vegetarian Version: Skip the cured meats and add more veggies like cherry tomatoes, cucumber slices, roasted red peppers, or marinated mushrooms. Include hearty cheeses like halloumi or smoked gouda for richness.
- Seasonal Flavors: Swap fresh fruit based on the season—summer berries, autumn pears, or winter citrus segments work beautifully. You can also add seasonal nuts like candied pecans for a festive touch.
- Spicy Twist: Add a dash of heat with spicy soppressata, pepper jack cheese, or a side of harissa-spiced hummus. This variation is great if you love a little kick.
- Gluten-Free Option: Use gluten-free crackers or crispbread and ensure all processed ingredients are labeled gluten-free.
- Personal Favorite Variation: I love adding a small bowl of honey-roasted almonds and swapping fig jam for tangy cherry preserves. It’s a little sweeter and adds a pop of color that always impresses.
Serving & Storage Suggestions
This mini charcuterie snack box is best enjoyed at room temperature to fully appreciate the flavors. Serve it on a small table with a bottle of your favorite wine, sparkling water, or a refreshing mocktail. Pair it with a simple green salad or light soup if you want to turn it into a light meal.
To store leftovers, wrap cheeses and meats separately in wax paper or airtight containers and refrigerate. Crackers should be kept dry in sealed bags. Most items will keep fresh for 2-3 days. When reheating (if any), bring meats and cheeses back to room temperature before serving; avoid microwaving as it changes texture.
Flavors often deepen a bit when the box sits for a few minutes, so if you’re prepping ahead, cover and chill briefly, then remove before serving. Just remember, fresh fruit is best added last minute to avoid browning.
Nutritional Information & Benefits
This mini charcuterie snack box provides a balanced mix of protein, healthy fats, and fiber, making it a satisfying and nourishing option. Cheeses offer calcium and B vitamins, while cured meats contribute iron and zinc. Fresh fruits add antioxidants and natural sweetness without refined sugars.
For those watching carbs, selecting lower-carb crackers or swapping bread for crisp veggies keeps the snack light. The inclusion of nuts offers heart-healthy fats and a crunchy texture that’s both filling and flavorful.
Keep in mind: this snack box contains dairy and cured meats, so it’s not suitable for vegans or those avoiding sodium-heavy foods. However, simple swaps can tailor it to many dietary needs.
Conclusion
The perfect mini charcuterie snack box for two is more than just a snack—it’s a cozy, effortless way to share good food and good company. It’s versatile, quick, and endlessly customizable, making it a fantastic addition to your recipe collection. Personally, I love how it turns an ordinary moment into something special with minimal effort.
Feel free to tweak the ingredients or presentation based on your mood or what’s in your fridge. I’d love to hear how you make it your own—drop a comment or share your favorite combos. Trust me, once you start making these mini snack boxes, they become a little ritual you’ll look forward to again and again.
So, grab a tray, gather your favorite bites, and enjoy the simple pleasure of snacking well together.
FAQs
What meats work best in a mini charcuterie snack box for two?
Thinly sliced cured meats like prosciutto, salami, and soppressata are ideal. They’re flavorful without being overwhelming and pair well with cheeses and fruit.
Can I prepare the snack box ahead of time?
Yes, but assemble most of it 15–30 minutes before serving to keep crackers crisp and fruits fresh. Keep cheeses and meats refrigerated until ready to serve.
What are good gluten-free crackers or substitutes?
Look for rice crackers, seed-based crackers, or gluten-free crispbreads. You can also use raw veggies like cucumber slices or bell pepper strips as crunchy alternatives.
How do I keep the cheeses from drying out?
Store cheeses wrapped in wax paper or parchment inside airtight containers. At serving time, bring them to room temperature for best taste and texture.
What beverages pair well with this snack box?
Light red wines like Pinot Noir, crisp whites like Sauvignon Blanc, sparkling wine, or even herbal iced teas complement the flavors beautifully.
Pin This Recipe!
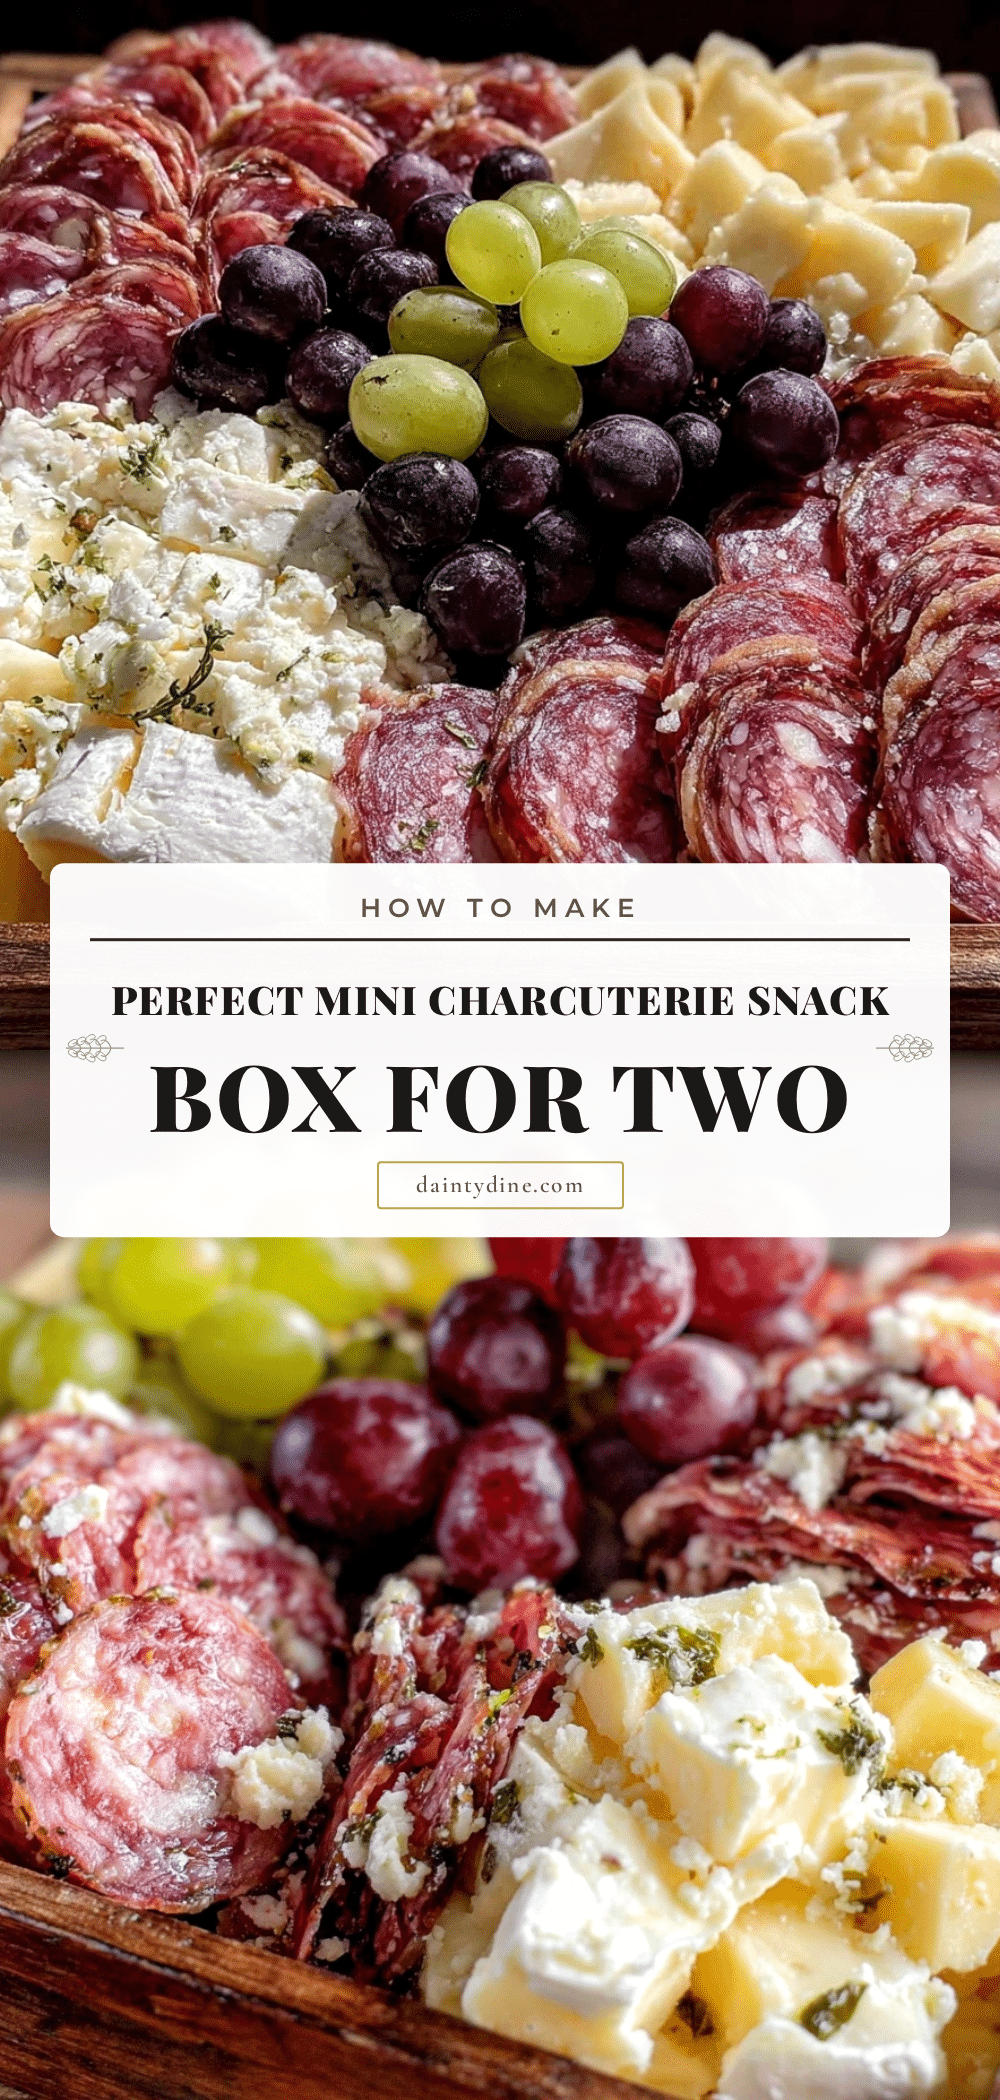
Perfect Mini Charcuterie Snack Box for Two

A quick and easy mini charcuterie snack box perfect for two, featuring a balanced mix of cured meats, cheeses, fruits, nuts, and crackers. Ideal for intimate occasions and customizable to your taste.
- Prep Time: 10 minutes
- Cook Time: 0 minutes
- Total Time: 10 minutes
- Yield: 2 servings 1x
- Category: Snack
- Cuisine: American
Ingredients
- 2–3 types of cured meats: thinly sliced prosciutto, salami, or soppressata
- 3 types of cheeses: soft cheese like goat cheese or brie, firm cheese such as aged cheddar or manchego, crumbly cheese like blue cheese or feta
- Artisan crackers, baguette slices, or crunchy breadsticks (e.g., Wasa multigrain crackers)
- Fresh fruit: grapes, apple slices, or fresh figs (seasonal)
- Dried fruit & nuts: dried apricots, figs, or dates and a handful of roasted almonds or walnuts
- Olives & pickles: Kalamata olives, cornichons, or marinated artichoke hearts
- Spreads & dips: fig jam, honey, or grainy mustard
- Fresh herbs (optional): sprigs of rosemary or thyme
Instructions
- Slice chosen cheeses into bite-sized pieces (about 1/2-inch cubes or thin wedges). Arrange on the tray with space between types.
- Fold or roll cured meats and place beside cheeses, stacking thin slices if using salami.
- Arrange crackers or baguette slices around the edges of the tray without overcrowding.
- Scatter fresh fruit like grapes or apple slices in one corner and nestle dried fruit nearby, using small ramekins for juicy fruits.
- Fill small bowls or ramekins with olives, pickles, and nuts and position them around the tray.
- Add dollops of fig jam, honey, or mustard in small bowls or directly on the tray with a small spoon or spreader.
- Garnish with fresh herb sprigs like rosemary or thyme for aroma and color.
- Serve immediately or cover lightly with plastic wrap and refrigerate. Remove 10 minutes before serving to bring to room temperature.
Notes
Serve cheeses at room temperature for best flavor. Assemble close to serving time to keep crackers crisp and fruit fresh. Rolling meats into rosettes adds elegance and saves space. For gluten-free, use rice crackers or gluten-free crisps. For vegetarian, skip meats and add more veggies and hearty cheeses.
Nutrition
- Serving Size: One mini charcuterie
- Calories: 450
- Sugar: 8
- Sodium: 700
- Fat: 32
- Saturated Fat: 12
- Carbohydrates: 20
- Fiber: 3
- Protein: 18
Keywords: mini charcuterie, snack box, easy snack, quick snack, cheese platter, cured meats, appetizer, date night snack