Love this? Save it for later!
Share the inspiration with your friends
It was the last week of the semester, and honestly? I was wiped out. Finals had drained every ounce of my energy, but friends kept messaging, asking if I could bring some snacks for our study group. I didn’t want to spend a fortune or hours in the kitchen, but I also didn’t want to show up empty-handed with boring chips. What I needed was something quick, simple, and budget-friendly—a snack board that looked impressive but used everyday ingredients I already had on hand.
After rummaging through my pantry and fridge, I pulled together a mix of crunchy, creamy, salty, and sweet items that somehow became the hit of the night. The best part? It cost less than $15 total, and I didn’t have to stress about complicated prep or weird ingredients. This end-of-semester snack board is my go-to now when I want something that feels special but doesn’t break the bank or my time.
If you’re juggling deadlines or just craving a simple way to bring people together with food, this snack board with simple ingredients on a budget is for you. It’s all about layering flavors and textures with what you have—and yes, it’s easier than you think. I’ve pulled together all my tips and tricks below so you can whip one up for your next study sesh, game night, or casual hangout.
Why This Recipe Works
This snack board completely changed my approach to simple gatherings. Here’s why it keeps showing up in my kitchen:
- Budget-Friendly and Accessible — I used mostly pantry staples and affordable fresh items. No fancy cheese or specialty meats needed. This board cost under $15 and fed six hungry friends easily.
- Minimal Prep, Maximum Impact — No cooking, no complicated chopping, no mystery sauces. Just a handful of ingredients arranged with a little love. It came together in under 15 minutes, which made it perfect for last-minute plans.
- Balance of Flavors and Textures — Crunchy crackers, salty olives, creamy spreads, fresh veggies, and sweet fruit all play off each other. This variety keeps everyone nibbling happily rather than grabbing the same thing over and over.
- Flexible and Adaptable — I’ve made this with different crackers, swapped veggies based on what was on sale, and even subbed in a quick homemade dip when I was out of store-bought options. It’s forgiving and fun.
- Perfect for Stressful Times — When I’m buried in work, the last thing I want is extra kitchen stress. This snack board is a lifesaver for those end-of-semester crunches or any busy day.
This snack board has become my secret weapon for easy entertaining that feels thoughtful without the fuss. I’m betting it’ll be yours, too.
Ingredients Breakdown
Here’s the thing: you probably have most of these ingredients already or can grab them quickly without a special trip. I’m picky about a few things, so I’ll explain what I use and why.
Base Items
- Crackers (about 2 cups / 60g) — Choose simple, sturdy crackers that hold up to dips and toppings. I like classic water crackers or multigrain ones. Avoid overly flavored varieties—they compete with other board elements. If you want, check out my tuna Nicoise salad bowl for a fresh contrast to crunchy crackers.
- Vegetables (1-2 cups total) — Carrot sticks, cucumber slices, and cherry tomatoes are my go-tos. They’re affordable, crisp, and add color. For a quick upgrade, I sometimes throw in some smashed avocado slices from my smashed cucumber avocado salad.
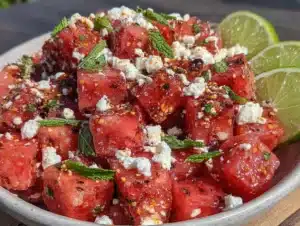
- Fruit (1 cup) — Grapes, apple slices, or even frozen berries (thawed) add sweetness and freshness. I love how they balance the saltiness of the olives and crackers.
Protein & Dairy
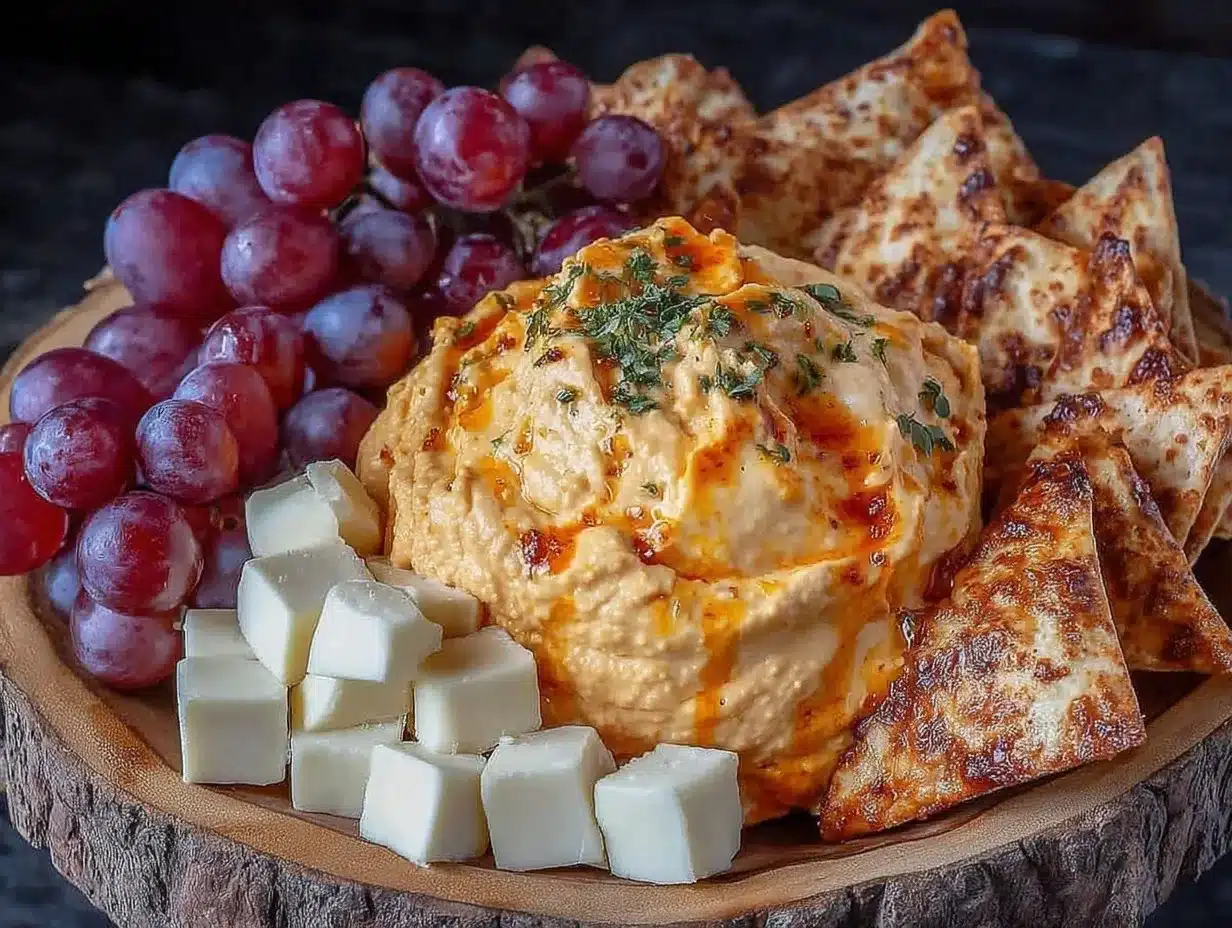
- Cheese (4 oz / 115g) — I keep it simple with a block of cheddar or a soft cream cheese spread. You don’t need fancy artisan cheese here. The cream cheese can be jazzed up with a sprinkle of herbs or a drizzle of olive oil.
- Olives or Pickles (½ cup / 75g) — Briny, salty, and budget-friendly. I usually grab a jar of mixed olives or dill pickles. These add a nice punch without any prep.
Dips & Spreads
- Hummus (½ cup / 125g) — Store-bought or homemade, hummus is an easy creamy dip that pairs well with everything. I’ve found that a plain or roasted red pepper flavor works best for broad appeal.
- Peanut Butter or Nut Butter (optional, ¼ cup / 60g) — For a fun twist, add a small bowl of peanut butter. It’s unexpected but surprisingly good with apple slices and crackers.
Extras
- Fresh Herbs or Lemon Wedges — These add brightness and a pop of color. A few sprigs of parsley or a squeeze of lemon over the veggies can transform the simple into special.
If you want a heartier snack board, you can add some deli meats or roasted nuts, but I kept things simple and affordable here for end-of-semester sanity. Also, if you’re looking for a quick protein-packed dish to serve alongside, consider my rotisserie chicken Caesar wrap—it’s easy and hits the spot.
Equipment You’ll Need
You really don’t need much for this snack board—no fancy gadgets or special tools. Here’s what I use:
- Large serving board or platter — A wooden cutting board or even a large plate works perfectly. The size depends on how many people you’re feeding.
- Small bowls or ramekins — For dips, olives, and nut butter. They keep everything neat and easy to grab.
- Sharp knife — To slice veggies and fruit cleanly.
- Spoons and spreaders — For dips and cheese. Nothing fancy; a butter knife works fine.
- Paper towels or napkins — Because snacks are always better when mess is manageable.
If you don’t have a large board, layering everything on a baking sheet lined with parchment paper works too. I sometimes use small glass bowls I had from my no-heat tuna poke bowl prep—multi-purpose kitchen wins!
Step-by-Step Instructions
- Gather your ingredients (5 minutes). Pull everything from your pantry and fridge. Rinse fresh veggies and fruit.
- Prep the produce (5 minutes). Slice cucumbers and carrots into sticks or rounds. Core and thinly slice apples (toss with a squeeze of lemon if you want to prevent browning). Rinse grapes or thaw frozen berries.
- Arrange the dips (2 minutes). Spoon hummus and peanut butter (if using) into small bowls or ramekins. Place olives or pickles in their own bowl.
- Start building the board (3 minutes). Place bowls on the board, spacing them out.
- Add crackers (2 minutes). Fan them out in clusters around the dips so they’re easy to grab.
- Fill in with veggies and fruit (3 minutes). Arrange carrot sticks, cucumber slices, cherry tomatoes, grapes, and apple slices in colorful groups around the board.
- Add cheese (2 minutes). Slice the cheese block or dollop cream cheese in a small bowl. Place it on the board with a spreader or knife.
- Finish with garnishes (1 minute). Sprinkle fresh herbs or add lemon wedges for a pop of freshness.
- Final touch — Step back and see if anything looks sparse. Fill in gaps with extra crackers or veggies if needed.
Total time is about 15-20 minutes from start to finish, and you’ll have a snack board that looks like you spent way longer on it. The colors, textures, and variety do all the work.
Expert Tips & Troubleshooting
Here’s what I learned from making this snack board over and over during finals season:
- Mix colors and shapes — Don’t just pile crackers on one side and veggies on another. Break it up visually for more impact.
- Use bowls for wet or messy items — Hummus, olives, and nut butter can get messy if they’re just sitting on the board. Keeping them contained keeps the board neat.
- Skip soggy mistakes — If you slice fruit too early, it can get soggy or brown. Prep fresh if possible, or toss apple slices with lemon juice.
- Balance salty and sweet — If you’re using salty crackers and olives, balance with grapes or apple slices to keep things interesting.
- Don’t be afraid of empty space — It looks more elegant if items aren’t jammed in. Gaps make it easier for guests to pick without knocking everything over.
If your crackers get stale, don’t toss them—toast them lightly in a pan with a bit of olive oil for a second life. I’ve done this when prepping for a quick snack board and it totally saves the day.
Variations & Substitutions
Once you’ve nailed the basics, here are some ways to switch it up depending on what you have or your mood:
- Vegan Version — Skip the cheese and use plant-based dips like baba ganoush or guacamole. Add roasted chickpeas for crunch.
- Protein Boost — Add slices of rotisserie chicken or turkey breast from your local grocery store. This pairs perfectly with the simple board, like my one-pan marry me chicken.
- Sweet & Savory — Add a drizzle of honey over cream cheese or a few dark chocolate pieces alongside fruit for a sweet surprise.
- International Twist — Swap crackers for pita chips and add tzatziki or a quick whipped feta dip (like my whipped feta with roasted tomatoes).
- Seasonal Swap — In winter, swap out fresh fruit for dried apricots or figs and add roasted nuts.
Serving & Storage
This snack board is best served fresh, but here’s how I store leftovers and keep things tasty:
- Serving Suggestions — Serve at room temperature with a few small plates and napkins nearby. It pairs beautifully with iced tea or sparkling water for a refreshing break during study marathons.
- Room Temperature — If you’re serving within 2 hours, keep the board covered loosely with plastic wrap.
- Refrigeration — Store leftovers separately in airtight containers—veggies and fruit together, cheese wrapped tightly, crackers in a sealed bag. This keeps the crackers from going stale and the veggies crisp.
- Make Ahead — Prep veggies and fruit slices a day in advance, stored in water or lemon juice to keep fresh. Assemble right before serving.
If you’re looking for a quick, balanced breakfast or snack idea to go alongside, my high-protein Greek yogurt bowl is a perfect complement—simple, nutritious, and ready in minutes.
Nutrition Information
I’m not a nutritionist, but here’s a rough idea of what you get from a typical serving of this snack board (about 1/6th of the whole board):
| Nutrient | Amount |
|---|---|
| Calories | 220 |
| Protein | 6g |
| Total Carbohydrates | 25g |
| Dietary Fiber | 3g |
| Sugars | 7g |
| Total Fat | 10g |
| Saturated Fat | 3g |
| Sodium | 280mg |
The protein mainly comes from cheese and hummus, while fiber comes from the veggies and fruit. It’s not a meal replacement but a balanced snack that keeps you fueled during long study sessions or casual gatherings.
Final Thoughts
So that’s my end-of-semester snack board hack for you: simple, affordable, and surprisingly satisfying. It’s saved me from so many last-minute snack dilemmas and made casual hangouts feel a little more special without any stress. Whether you’re wrapping up finals or just want an easy way to feed friends without breaking the bank, this board has you covered.
Don’t be afraid to play with what you have, swap in your favorite dips or veggies, or add a little extra flair with fresh herbs or a drizzle of honey. And if you make this snack board, let me know how it goes! I love hearing which combos you tried or any tweaks that worked for your crowd.
Happy snacking—and here’s to surviving (and thriving) through those busy weeks!
FAQs
- Can I make this snack board vegan?
Absolutely! Skip the cheese and swap in vegan dips like guacamole or baba ganoush. Roasted chickpeas add crunch and protein. - What if I don’t have hummus or peanut butter?
No worries! Use any creamy spread you have—cream cheese, yogurt-based dip, or even a quick olive oil and garlic mix. I’ve done this with store-bought tzatziki or my creamy Tuscan tortellini soup on the side for extra flavor. - How do I keep cut fruit from browning?
Toss sliced apples or pears with a little lemon juice right after cutting. This slows oxidation and keeps them looking fresh longer. - Can I prepare this board in advance?
You can prep veggies and fruit a day ahead, stored separately in airtight containers or water for crispness. Assemble the board just before serving for best presentation. - What’s a good drink pairing for this snack board?
I like iced tea, sparkling water with lemon, or a light white wine for casual gatherings. It keeps things refreshing and balances the savory snacks well. - Can I add homemade dips?
Definitely! If you have five minutes, whip up a quick tzatziki, whipped feta, or even a simple olive tapenade. It elevates the board with minimal effort. - Is this snack board filling enough for a meal?
It depends on your appetite, but paired with a protein like rotisserie chicken (like in my marry me chicken recipe), it makes a satisfying light meal.
Pin This Recipe!
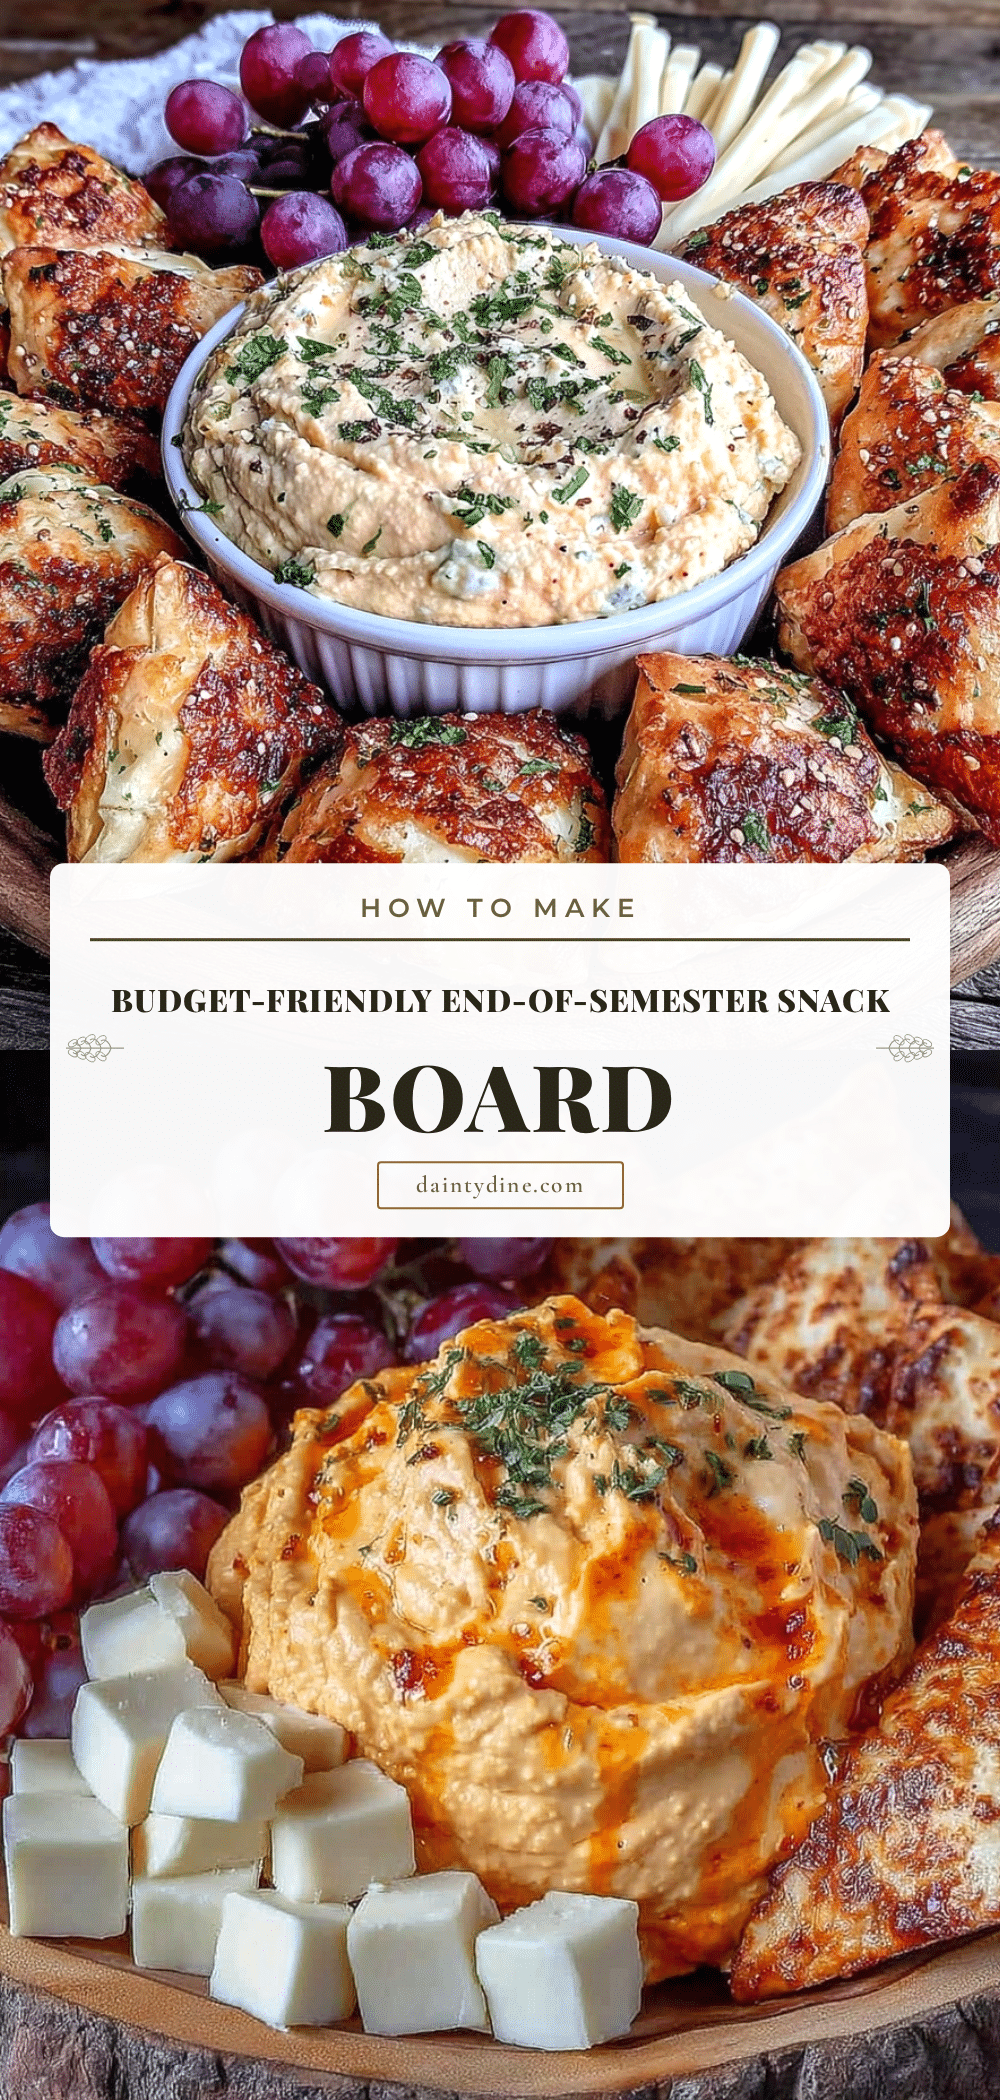
End-of-Semester Snack Board Easy Budget-Friendly Ideas with Simple Ingredients

A quick, simple, and budget-friendly snack board perfect for study groups or casual hangouts, featuring a balance of crunchy, creamy, salty, and sweet items using everyday ingredients.
- Prep Time: 10 minutes
- Cook Time: 0 minutes
- Total Time: 15-20 minutes
- Yield: 6 servings 1x
- Category: Snack
- Cuisine: American
Ingredients
- 2 cups (60g) crackers (water crackers or multigrain)
- 1–2 cups mixed vegetables (carrot sticks, cucumber slices, cherry tomatoes)
- 1 cup fruit (grapes, apple slices, or thawed frozen berries)
- 4 oz (115g) cheese (cheddar block or cream cheese spread)
- ½ cup (75g) olives or pickles (mixed olives or dill pickles)
- ½ cup (125g) hummus (store-bought or homemade, plain or roasted red pepper flavor)
- ¼ cup (60g) peanut butter or nut butter (optional)
- Fresh herbs (parsley) or lemon wedges for garnish
Instructions
- Gather your ingredients (5 minutes). Pull everything from your pantry and fridge. Rinse fresh veggies and fruit.
- Prep the produce (5 minutes). Slice cucumbers and carrots into sticks or rounds. Core and thinly slice apples (toss with a squeeze of lemon to prevent browning). Rinse grapes or thaw frozen berries.
- Arrange the dips (2 minutes). Spoon hummus and peanut butter (if using) into small bowls or ramekins. Place olives or pickles in their own bowl.
- Start building the board (3 minutes). Place bowls on the board, spacing them out.
- Add crackers (2 minutes). Fan them out in clusters around the dips so they’re easy to grab.
- Fill in with veggies and fruit (3 minutes). Arrange carrot sticks, cucumber slices, cherry tomatoes, grapes, and apple slices in colorful groups around the board.
- Add cheese (2 minutes). Slice the cheese block or dollop cream cheese in a small bowl. Place it on the board with a spreader or knife.
- Finish with garnishes (1 minute). Sprinkle fresh herbs or add lemon wedges for a pop of freshness.
- Final touch — Step back and see if anything looks sparse. Fill in gaps with extra crackers or veggies if needed.
Notes
Use bowls for wet or messy items to keep the board neat. Toss apple slices with lemon juice to prevent browning. Toast stale crackers lightly in a pan with olive oil for a fresh crunch. The board is best served fresh but leftovers can be stored separately in airtight containers.
Nutrition
- Serving Size: About 1/6th of the s
- Calories: 220
- Sugar: 7
- Sodium: 280
- Fat: 10
- Saturated Fat: 3
- Carbohydrates: 25
- Fiber: 3
- Protein: 6
Keywords: snack board, budget-friendly snacks, easy snack ideas, study group snacks, simple ingredients, no-cook snack, party platter