Love this? Save it for later!
Share the inspiration with your friends
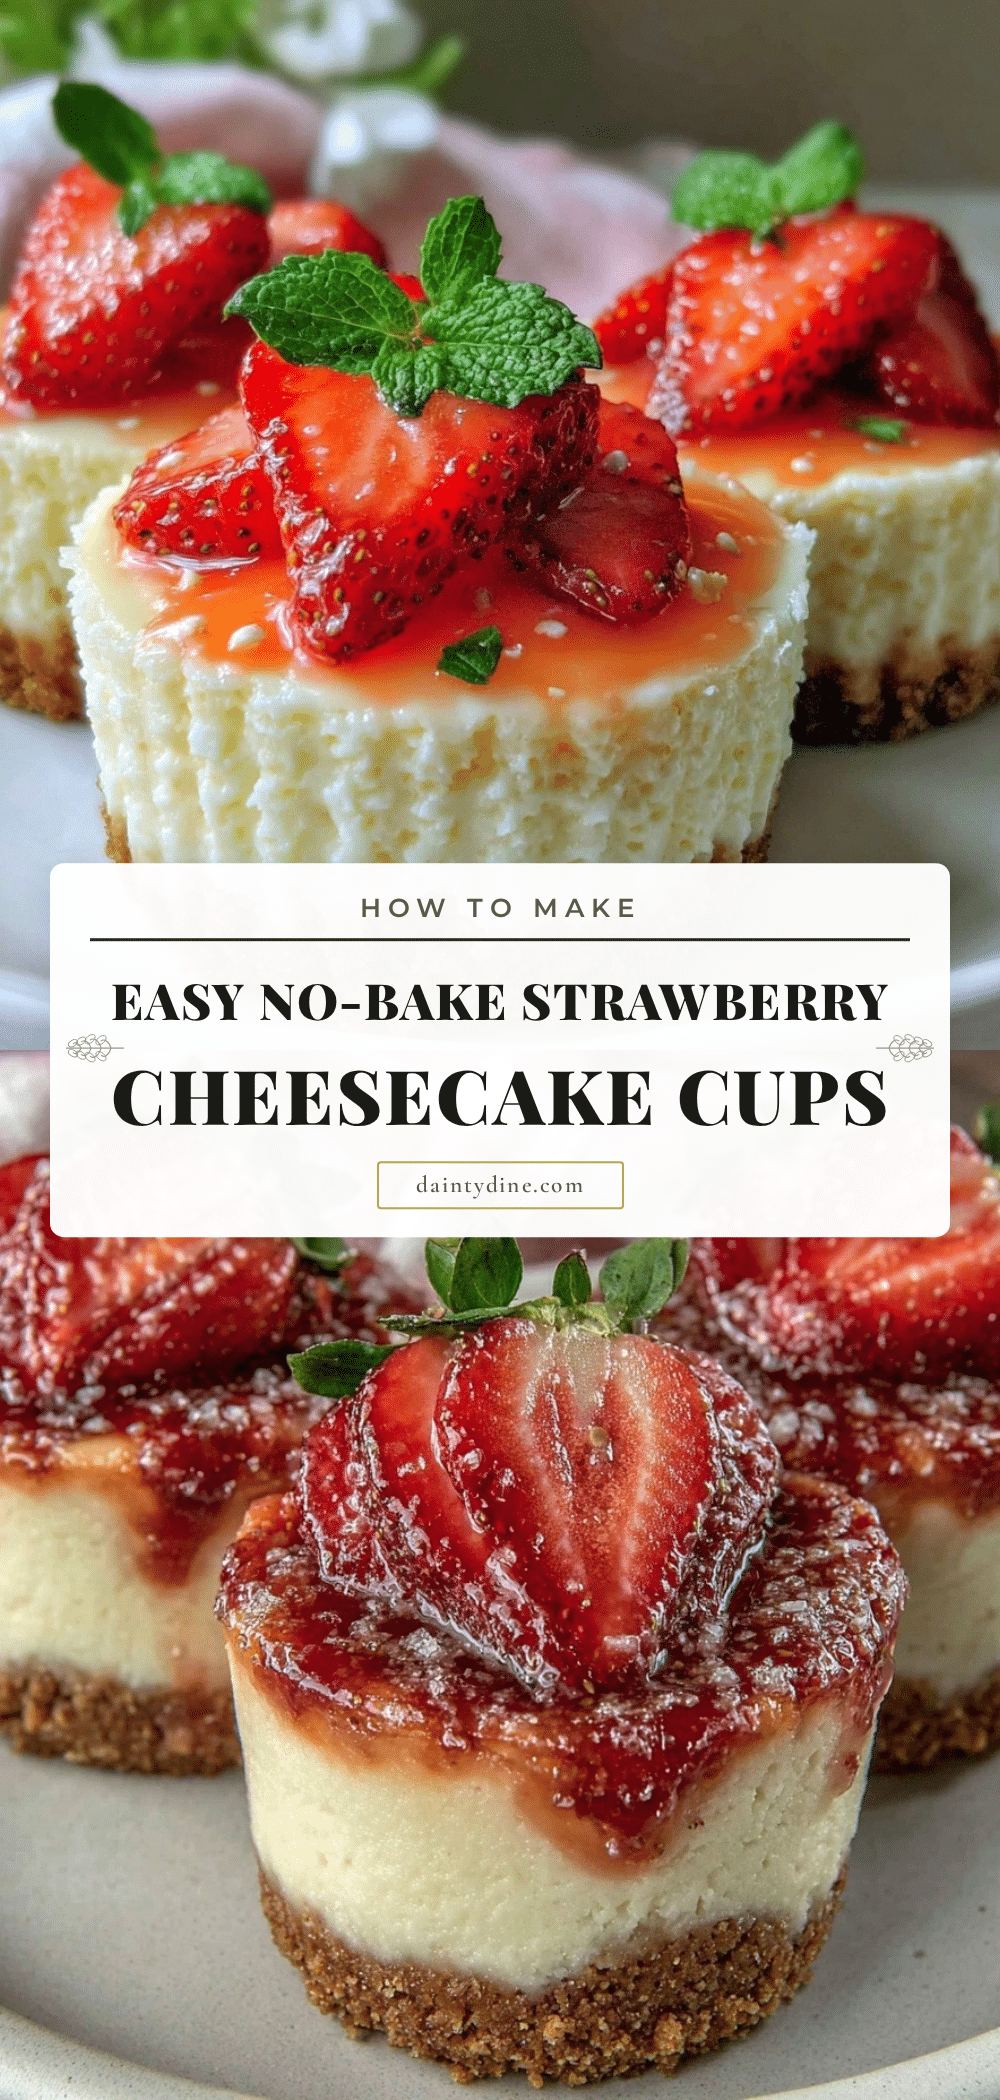
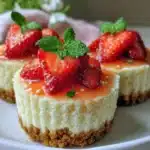
One rainy Saturday afternoon, my kitchen turned into a mini dessert workshop. My kids were restless, begging for something sweet but also wanting to help. I rummaged through the fridge and pantry, pulling out just a handful of simple ingredients—cream cheese, strawberries, a bit of sugar, and some crunchy crackers. What came next was pure magic: strawberry cheesecake cups that were not only easy enough for little hands to assemble but also downright delicious. No oven, no complicated steps, just fun and flavor in a cup.
I’ve made this strawberry cheesecake cups recipe with my kids more times than I can count, and each time it’s a hit. The best part? It’s a no-bake dessert that uses simple ingredients and lets kids take the lead in the kitchen. Whether you’re looking for a quick afterschool treat or a fun party dessert, these cups are a total winner.
Plus, if you love simple, fresh recipes like the smashed cucumber avocado salad or quick meals like the rotisserie chicken Caesar wrap, you’re going to appreciate how straightforward and crowd-pleasing these strawberry cheesecake cups are.
Why This Recipe Works
This strawberry cheesecake cups recipe has completely changed how I think about kid-friendly desserts. It’s so simple, yet it delivers on flavor and fun. Here’s why I keep coming back to it:
- Super Easy for Kids to Make — No baking, no complicated steps. My kids (ages 5 and 8) can handle every part—from crushing the crackers to layering the cheesecake mixture and strawberries. It’s hands-on and keeps them engaged.
- Minimal Ingredients, Maximum Flavor — You only need a handful of staples like cream cheese, strawberries, sugar, and crackers. No fancy stuff required, but the taste feels indulgent.
- Customizable and Kid-Friendly — You can swap in other fruits or add mix-ins like chocolate chips or nuts. My kids love making their own variations, which makes dessert time even more exciting.
- No-Bake Means No Stress — Forget heating up the kitchen or waiting forever. This recipe comes together in about 15 minutes, then chills while you relax or prep dinner.
- Perfect Portion Control — Serving these in cups means no slicing or mess. Each kid gets their own, and leftovers keep well for easy snacking.
Honestly, this recipe is my go-to when I want something quick, fun, and sweet that my kids actually enjoy making themselves. It’s a rare win-win in the kitchen!
Ingredients Breakdown
Here’s the thing about this recipe: it’s built on simple, easy-to-find ingredients you probably already have. But a few choices make a big difference, so I’ll walk you through exactly what to look for and why.
For the Cheesecake Filling:
- Cream Cheese (8 oz / 225g, softened) — The star of the filling, cream cheese gives that classic cheesecake tang and creamy texture. I always use full-fat for the best taste and richness. Leave it out at room temperature for about 30 minutes before mixing so it blends smoothly.
- Powdered Sugar (½ cup / 60g) — This sweetens the cream cheese without gritty texture. I’ve tried granulated sugar, but it doesn’t dissolve as well in this no-bake filling.
- Vanilla Extract (1 teaspoon) — Adds warmth and depth. Use pure vanilla for the best flavor punch.
- Heavy Cream (⅓ cup / 80ml, cold) — Whipped into soft peaks, this lightens the filling and gives it that fluffy, airy feel. You can substitute with whipping cream if that’s what you have.
For the Base and Topping:
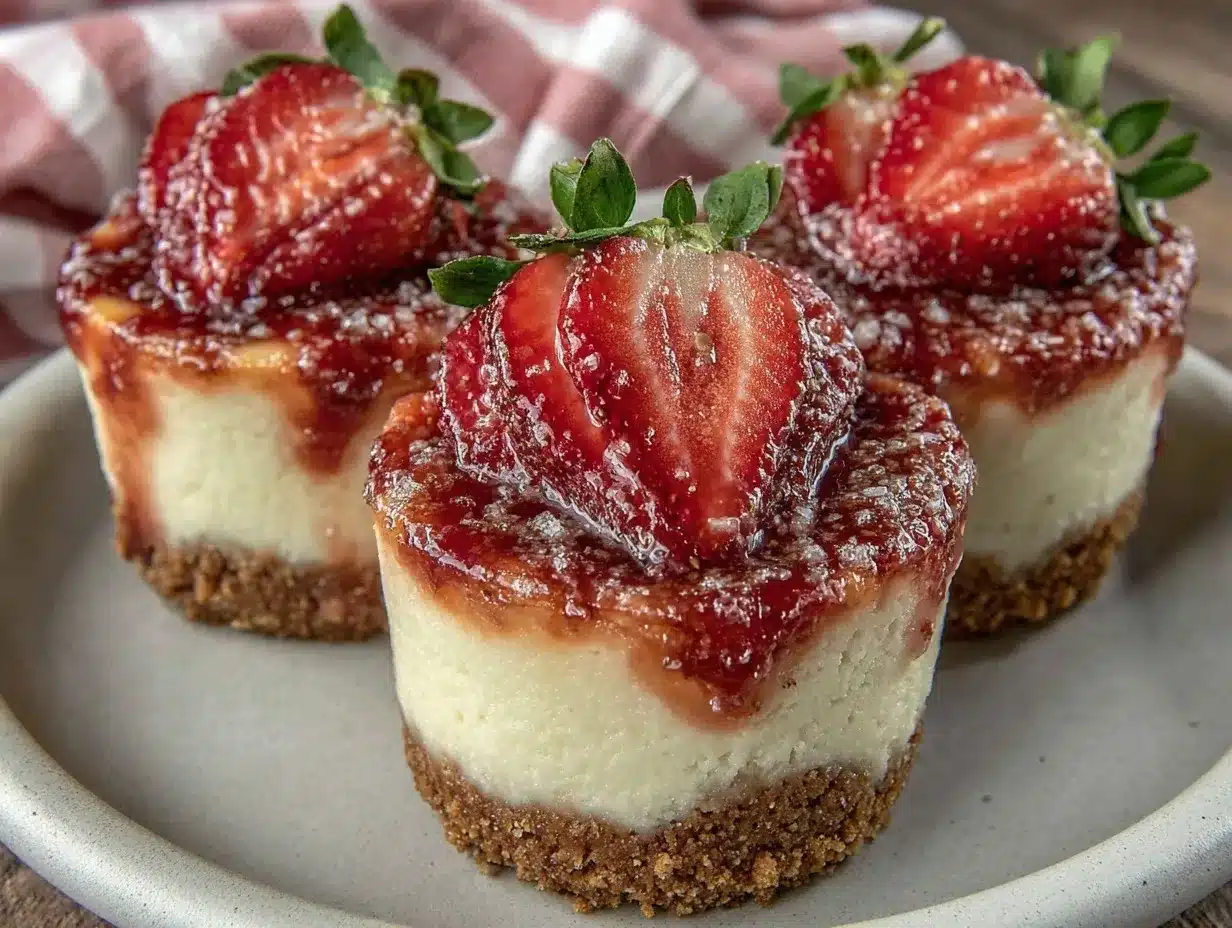
- Strawberries (1 pint / ~350g, hulled and sliced) — Fresh is best here. The natural sweetness and slight tartness balance the creamy filling perfectly. If strawberries aren’t in season, frozen (thawed) or other berries like raspberries work well too.
- Graham Crackers or Digestive Biscuits (1 ½ cups / ~150g, crushed) — These give a buttery, crunchy base that mimics a cheesecake crust. I crush them in a zip-top bag with a rolling pin or use a food processor. For a fun twist, I’ve used vanilla wafers or even shortbread cookies.
- Butter (4 tablespoons / 57g, melted) — Binds the cracker crumbs together. Unsalted works best so you can control saltiness.
Optional Add-ins and Variations:
- Fresh Mint Leaves — For a fresh pop of color and flavor on top.
- Chocolate Chips or Chopped Nuts — Fold into the filling or sprinkle on top for texture variety.
For a no-fuss dessert that’s perfect for kids (and adults!), these ingredients come together in a way that’s simple but satisfying. If you want to explore more quick and fresh recipes, you might enjoy the no-heat tuna poke bowl—another recipe that balances fresh flavors with minimal effort.
Equipment You’ll Need
You don’t need a fancy setup for these strawberry cheesecake cups. Here’s what I use every time:
- Mixing Bowls — One for the cheesecake filling, one for crushing crackers. Any size works.
- Electric Mixer or Hand Whisk — An electric mixer makes whipping the cream easier and faster, but a sturdy whisk works fine if you don’t have one.
- Measuring Cups and Spoons — Baking is more forgiving here, but I like measuring to keep things consistent.
- Rolling Pin or Food Processor — For crushing the crackers. If you don’t have either, put crackers in a zip-top bag and smash with a heavy pan.
- Serving Cups or Small Jars — Small clear cups (4-6 oz) showcase the layers beautifully and are kid-friendly.
- Spoons or Spatulas — For mixing and layering.
That’s it! No oven, no blender, no fancy gadgets. Just a few basic tools and you’re set.
Step-by-Step Instructions
Alright, let’s make these strawberry cheesecake cups. I’m walking you through exactly how I do it, especially the parts that make it easy for kids to join in.
- Prep Your Ingredients (5 minutes)
Start by washing and slicing the strawberries into bite-sized pieces. Set them aside. Next, crush your graham crackers or biscuits into fine crumbs—about 1 ½ cups. Melt the butter and mix it into the cracker crumbs until evenly moistened. - Make the Cheesecake Filling (8 minutes)
In a mixing bowl, beat the softened cream cheese with powdered sugar and vanilla extract until smooth and creamy. This takes about 2-3 minutes with an electric mixer or a bit longer by hand. In a separate bowl, whip the cold heavy cream until soft peaks form—when you lift the whisk, the cream should hold a gentle peak that slightly folds over. - Fold Whipped Cream Into the Cream Cheese (2 minutes)
Gently fold the whipped cream into the cream cheese mixture with a spatula. Use slow, sweeping motions to keep it light and fluffy. This is the easy part kids love to help with, just make sure they’re gentle with the folding. - Assemble the Cups (5 minutes)
Spoon a layer of the buttery cracker crumbs into the bottom of each cup (about 2 tablespoons). Next, add a generous dollop of the cheesecake filling (about 3 tablespoons). Top with sliced strawberries. Repeat layers if your cups are tall enough, or just do one set of layers. Save a few strawberry slices for garnish on top. - Chill Before Serving (At least 1 hour)
Pop the cups into the fridge for at least one hour to let the filling set and the flavors marry. You can make these a day ahead, which makes them perfect for last-minute guests or parties.
These strawberry cheesecake cups come together in about 15 minutes of hands-on time, then you let the fridge do the rest. If you’re into quick, fresh meals, this no-bake dessert fits right in with recipes like the one-pot lemon chicken orzo soup I love for cooler days.
Expert Tips & Troubleshooting
Here’s everything I learned from making these strawberry cheesecake cups with my kids over and over. These tips will save you from the little mishaps we all stumble over.
- Softened Cream Cheese is Key — If your cream cheese is too cold, it won’t mix smoothly. I learned this the hard way when the filling was lumpy. Leave it on the counter for 30 minutes before starting.
- Whip the Cream to Soft Peaks — Underwhipped cream makes the filling dense; overwhipped can turn grainy or separate. The soft peak stage is perfect—test by lifting the whisk and watching how the cream holds shape but still folds.
- Crush Crackers Finely — Large chunks make it hard for kids to spoon layers neatly. I crush mine almost to dust but leave some tiny bits for texture.
- Folding, Not Stirring — Fold the whipped cream into the cream cheese instead of stirring vigorously. This keeps the filling airy and light. Kids usually get the hang of this quickly and love feeling the fluffy mixture.
- Chill Long Enough — Don’t skip chilling. It helps the filling firm up and the flavors blend. I usually make these in the morning for afternoon treats.
- Substitutions Can Affect Texture — Using low-fat cream cheese or skipping the heavy cream will make the filling denser and less creamy. I prefer the full-fat version for that classic cheesecake flavor.
Variations & Substitutions
Once you’ve nailed the basic strawberry cheesecake cups, here’s how you can mix things up and keep dessert time interesting. I’ve tested all these swaps and tricks so you don’t have to guess.
- Berry Medley — Swap strawberries for blueberries, raspberries, or blackberries. Use a mix for a colorful, tangy twist.
- Chocolate Lover’s Cup — Add 2 tablespoons of cocoa powder to the cream cheese mixture and sprinkle mini chocolate chips between layers. It’s like a chocolate strawberry cheesecake in a cup.
- Crust Alternatives — Use crushed pretzels for a salty-sweet combo, or swap graham crackers with crushed vanilla wafers or shortbread cookies.
- Yogurt Cheesecake Filling — For a lighter option, fold in Greek yogurt (about ½ cup) with the cream cheese and reduce powdered sugar to ⅓ cup. The texture will be less rich but pleasantly tangy.
- Nut Toppings — Sprinkle toasted almonds or chopped pistachios on top for crunch and a nutty aroma.
- Vegan Version — Use vegan cream cheese and coconut cream whipped to soft peaks. I haven’t tested this extensively but friends have reported success.
If you want to keep the fresh, no-cook vibe but crave something savory, the tuna Nicoise salad bowl is just as effortless and packed with flavor.
Serving & Storage
These strawberry cheesecake cups are best served chilled and fresh, but here’s what works for enjoying and storing them:
How to Serve
- As a Quick Dessert: Serve straight from the fridge with a sprig of mint or a dusting of powdered sugar.
- Party Style: Arrange cups on a tray with extra berries and small spoons for easy grabbing at gatherings.
- Snack Time: Great for an afternoon pick-me-up or afterschool treat that feels special but isn’t loaded with processed sugar.
Storage Tips
- Refrigerator: Keep covered tightly with plastic wrap or an airtight lid. They last well for up to 3 days. After that, the crust might soften more than you want.
- Freezer: I don’t recommend freezing these because the texture changes and strawberries get mushy. Better to make fresh!
- Make-Ahead: Assemble layers but hold off on adding strawberries until serving day to keep them bright and fresh.
If you’re into easy, no-fuss recipes, storing extras of dishes like the one-pot marry me chicken is another way I save time without sacrificing flavor.
Nutrition Information
I’m not a nutritionist, but here’s a rough idea per cup (makes about 6 cups):
| Nutrient | Amount |
|---|---|
| Calories | 280 |
| Protein | 5g |
| Total Carbohydrates | 28g |
| Sugars | 18g |
| Total Fat | 17g |
| Saturated Fat | 10g |
| Calcium | 80mg |
This dessert has a nice balance of protein from the cream cheese and natural sugars from the strawberries. It’s definitely a treat, but with simple ingredients and fresh fruit, it feels lighter than many store-bought sweets.
Final Thoughts
So there you have it—my favorite strawberry cheesecake cups recipe that’s easy enough for kids to make and delicious enough for adults to devour. I know I’ve shared a lot, but when a recipe hits all the right notes—quick, simple, tasty, and kid-friendly—I can’t help but gush a little.
These cups have become a staple for our family, especially for those days when I want dessert without the oven or a big mess. The fact that my kids proudly assemble and serve them is the icing on the cake (or should I say, cheesecake!).
Try it out, play with the variations, and make it your own. And if you end up loving no-bake treats, you might want to explore my smash burgers recipe for a quick dinner that’s just as fuss-free in the kitchen.
Drop a comment below to tell me how your strawberry cheesecake cups turned out or if you added your own twist—I read every single one and love hearing from you.
Happy no-bake baking!
FAQs
Can kids really make these strawberry cheesecake cups by themselves?
Absolutely! I’ve made this recipe with kids as young as five. They can crush the crackers, mix the filling with a hand whisk, and layer everything into cups. Of course, adult supervision helps, especially with melting butter, but it’s designed to be kid-friendly and hands-on.
Can I substitute Greek yogurt for cream cheese in this recipe?
You can swap some or all of the cream cheese for thick Greek yogurt to lighten the filling. It won’t be as rich or tangy as classic cheesecake, but it’s delicious and higher in protein. Try a 50/50 mix to start, and reduce powdered sugar slightly since yogurt is tangier.
How long can I store strawberry cheesecake cups in the fridge?
They stay fresh and tasty for up to 3 days when covered tightly. After that, the crust tends to soften too much. I recommend adding fresh strawberry slices right before serving if you’re making ahead.
Can I make these cups with other fruits?
Yes! Blueberries, raspberries, blackberries, or even mango chunks work well. Just keep in mind that juicy fruits might make the crust a bit softer over time, so eat within a day or two for best texture.
Why is my cheesecake filling grainy or lumpy?
This usually happens if the cream cheese wasn’t softened enough or if the powdered sugar didn’t mix well. Make sure your cream cheese is at room temperature before mixing and beat it well until smooth. Also, sift powdered sugar if it’s clumpy.
Can I make this recipe vegan or dairy-free?
For a vegan version, use vegan cream cheese and coconut cream whipped to soft peaks. It changes the flavor and texture a bit, but still tasty. I haven’t tested this extensively, so if you try it, let me know how it goes!
Can I make this recipe ahead for a party?
Yes! Assemble the cups a few hours or even a day ahead and store them in the fridge. Just add fresh fruit on top right before serving to keep it bright and fresh.
Pin This Recipe!
Strawberry Cheesecake Cups Recipe Easy No-Bake Dessert for Kids
A simple, no-bake strawberry cheesecake cups recipe perfect for kids to make and enjoy. Uses minimal ingredients and requires no oven, making it a quick and fun dessert.
- Prep Time: 15 minutes
- Cook Time: 0 minutes
- Total Time: 1 hour 15 minutes
- Yield: 6 servings 1x
- Category: Dessert
- Cuisine: American
Ingredients
- 8 oz (225g) cream cheese, softened
- ½ cup (60g) powdered sugar
- 1 teaspoon vanilla extract
- ⅓ cup (80ml) heavy cream, cold
- 1 pint (~350g) strawberries, hulled and sliced
- 1 ½ cups (~150g) graham crackers or digestive biscuits, crushed
- 4 tablespoons (57g) butter, melted
- Optional: fresh mint leaves for garnish
- Optional: chocolate chips or chopped nuts for mix-ins or topping
Instructions
- Wash and slice the strawberries into bite-sized pieces and set aside.
- Crush graham crackers or biscuits into fine crumbs (about 1 ½ cups).
- Melt the butter and mix it into the cracker crumbs until evenly moistened.
- In a mixing bowl, beat the softened cream cheese with powdered sugar and vanilla extract until smooth and creamy (2-3 minutes with electric mixer).
- In a separate bowl, whip the cold heavy cream until soft peaks form.
- Gently fold the whipped cream into the cream cheese mixture using slow, sweeping motions to keep it light and fluffy.
- Spoon a layer of the buttery cracker crumbs (about 2 tablespoons) into the bottom of each serving cup.
- Add a generous dollop of the cheesecake filling (about 3 tablespoons) on top of the crumbs.
- Top with sliced strawberries. Repeat layers if cups are tall enough or do one set of layers.
- Garnish with a few strawberry slices and optional mint leaves or toppings.
- Chill the assembled cups in the refrigerator for at least 1 hour before serving.
Notes
Use full-fat cream cheese for best taste and texture. Make sure cream cheese is softened to room temperature before mixing to avoid lumps. Whip cream to soft peaks for a light filling. Crush crackers finely but leave some small bits for texture. Chill at least 1 hour before serving. Can be made a day ahead and topped with fresh fruit before serving. Avoid freezing as texture changes. Variations include swapping fruits, adding cocoa powder and chocolate chips, or using Greek yogurt for a lighter filling.
Nutrition
- Serving Size: 1 cup (approximate)
- Calories: 280
- Sugar: 18
- Fat: 17
- Saturated Fat: 10
- Carbohydrates: 28
- Protein: 5
Keywords: strawberry cheesecake cups, no-bake dessert, kids dessert, easy cheesecake, no oven dessert, quick dessert, strawberry dessert