Love this? Save it for later!
Share the inspiration with your friends
The woman at the next stall watched me juggle a flat of strawberries, a bag of lemons, and my rapidly melting shopping resolve. She didn’t say anything at first. Then she reached over, plucked a single overripe banana from my basket, and held it up like a prize. “This one,” she said, with a knowing smile, “wants to be something else.” Her name was Gloria, and she ran the herb stall at the Saturday market. We got to talking—about spring, about the way the season sneaks up on you, about how certain flavors just belong together. She told me about a banana pudding her grandmother made for Easter every year, a no-bake thing that sat in the fridge overnight and came out tasting like a cloud. I told her about my obsession with cheesecake bars, and she laughed. “Well,” she said, handing me a bunch of mint she grew herself, “put ’em together. That’s what spring is for.”
Honestly, I almost forgot about the conversation. But the next week, I found myself staring at a bunch of bananas that had gone a little too soft, and I could hear her voice. So I did it. I took the soul of that creamy, old-fashioned banana pudding—the vanilla wafers, the silky pudding, the layers of fresh banana—and married it to a classic cheesecake bar. The result was, and I’m not exaggerating, a total game-changer. The first time I made these Spring Banana Pudding Cheesecake Bars, I was a mess. I forgot to line the pan with parchment, and I spent twenty minutes trying to pry the bars out with a butter knife. But that first bite? Worth every bit of frustration. The crust stayed crunchy, the cheesecake was impossibly smooth, and the banana flavor was everywhere—in the best way.
You know that feeling when a recipe just *clicks*? When it tastes like the season it was made for? That’s these bars. They’re bright without being tart, creamy without being heavy, and they have this nostalgic quality that makes you think of sunny afternoons and screen doors. Maybe you’ve been there, standing in your kitchen with a bunch of spotty bananas and no idea what to do. This is what they want to be.
Why You’ll Love This Recipe
I’ve tested this recipe more times than I care to admit. I’ve made it with different brands of cream cheese, with homemade vanilla wafers (don’t bother), and even with a gluten-free crust. This version is the one. It’s the one that disappeared fastest at a spring brunch, the one that got a text from my sister-in-law saying, “You need to make that again.” Here’s why it works.
- Quick & Easy: The total active time is about 25 minutes. The oven does the rest of the work, and then the fridge finishes it off. Perfect for when you want a showstopper dessert without spending all day in the kitchen.
- Simple Ingredients: You probably have most of these in your kitchen right now. Cream cheese, bananas, vanilla wafers, sugar, eggs—nothing fancy. No trips to a specialty store.
- Perfect for Spring Gatherings: Easter brunch, Mother’s Day, a baby shower, or just a sunny Tuesday. These bars feel celebratory without being fussy. They travel well, too.
- Crowd-Pleaser: I’ve served these to kids who usually pick at dessert and adults who claim they “don’t do sweets.” Empty plate, every time. The combination of textures—crunchy crust, creamy filling, soft banana—just works for everyone.
- Unbelievably Delicious: This isn’t just banana pudding in a different shape. The cheesecake adds a tangy richness that balances the sweetness of the pudding and bananas. The texture is next-level comfort food—smooth, cool, and just a little bit indulgent.
What makes this recipe different from all the other banana pudding cheesecake bars out there? It’s the technique. I blend a small amount of the vanilla wafers into the cheesecake filling itself. It sounds weird, I know, but it adds a subtle vanilla-nutty flavor and helps stabilize the filling so it slices cleanly. Also, I use a water bath. I know, I know—it’s an extra step. But it’s the difference between a dense, cracked cheesecake and one that’s silky smooth and perfectly even. Trust me on this one.
This recipe is the kind that makes you close your eyes after the first bite. It’s comfort food reimagined for the season—lighter than a traditional cheesecake, but with the same soul-soothing satisfaction. Perfect for impressing guests without stress, or turning a simple spring afternoon into something memorable.
What Ingredients You Will Need
This recipe uses simple, wholesome ingredients to deliver that banana-pudding-cheesecake magic without any fuss. Most of these are pantry staples, and the ones that aren’t are easy to find at any grocery store. Here’s what you need, grouped by component.
For the Crust
- 1 ½ cups (about 150g) vanilla wafer crumbs (I use Nilla Wafers—they have that classic flavor and crunch)
- ¼ cup (50g) granulated sugar
- 6 tablespoons (85g) unsalted butter, melted (salted butter works too, just skip the added salt)
- Pinch of salt (only if using unsalted butter)
For the Cheesecake Filling
- 16 ounces (450g) full-fat cream cheese, softened to room temperature (Philadelphia is my go-to for consistent texture)
- ¾ cup (150g) granulated sugar
- 2 large eggs, room temperature
- 1 teaspoon vanilla extract
- ¼ cup (60ml) sour cream, room temperature (adds moisture and tang)
- ¼ cup (about 30g) finely crushed vanilla wafers (yes, in the filling—trust me)
- 2 ripe but firm bananas, mashed (about 1 cup) (not too brown—you want flavor, not mush)
For the Banana Pudding Layer
- 1 box (3.4 ounces) instant vanilla pudding mix
- 1 ½ cups (360ml) cold whole milk
- 1 cup (240ml) heavy cream
- ¼ cup (30g) powdered sugar
- ½ teaspoon vanilla extract
For the Topping
- 1 ½ cups (about 80g) Cool Whip or stabilized whipped cream
- 1 cup (about 20) vanilla wafers, whole or lightly crushed
- 1-2 ripe bananas, sliced (for garnish—add just before serving to avoid browning)
Ingredient Tips & Substitutions
I recommend using full-fat cream cheese for the best texture. Low-fat versions can make the filling grainy. If you’re dairy-free, you can use a good-quality dairy-free cream cheese and coconut cream in place of the heavy cream, but the texture will be slightly different. For a gluten-free option, use gluten-free vanilla wafers. For the pudding, instant is key—cook-and-serve won’t set up the same way. And please, please use ripe bananas. Green bananas don’t have that sweet, aromatic flavor that makes banana pudding so special. If your bananas are a little too ripe (brown spots everywhere), they’ll work fine for the cheesecake filling, but use a firmer banana for the garnish.
Equipment Needed
You don’t need a professional pastry kitchen for these bars, but a few key tools make a big difference. Here’s what I use.
- 9×9-inch baking pan: This is the perfect size for thick, generous bars. An 8×8 will work, but the bars will be taller and may need a few extra minutes of baking time.
- Parchment paper: Non-negotiable. Line the pan with two overlapping strips so you can lift the bars out cleanly. I learned this the hard way.
- Electric hand mixer or stand mixer: You can mix the cheesecake filling by hand, but a mixer ensures it’s smooth and lump-free. I use a hand mixer for less cleanup.
- Food processor or rolling pin: For crushing the vanilla wafers. A food processor is faster, but a zip-top bag and a rolling pin work just fine. I’ve done both.
- Large roasting pan: For the water bath. You need a pan large enough to hold your 9×9 pan.
- Aluminum foil: To wrap the bottom of the 9×9 pan so water doesn’t seep in. Use heavy-duty foil or double-wrap regular foil.
- Mixing bowls: A few different sizes. One for the crust, one for the cheesecake filling, one for the pudding.
- Spatula: A silicone spatula is best for scraping every bit of cheesecake filling into the pan.
If you don’t have a springform pan, don’t worry—a regular 9×9 pan works perfectly. Just line it well with parchment. And if you don’t have a roasting pan for the water bath, you can place the 9×9 pan directly on the oven rack and place a separate pan of hot water on the rack below. It’s not as effective, but it helps.
Preparation Method
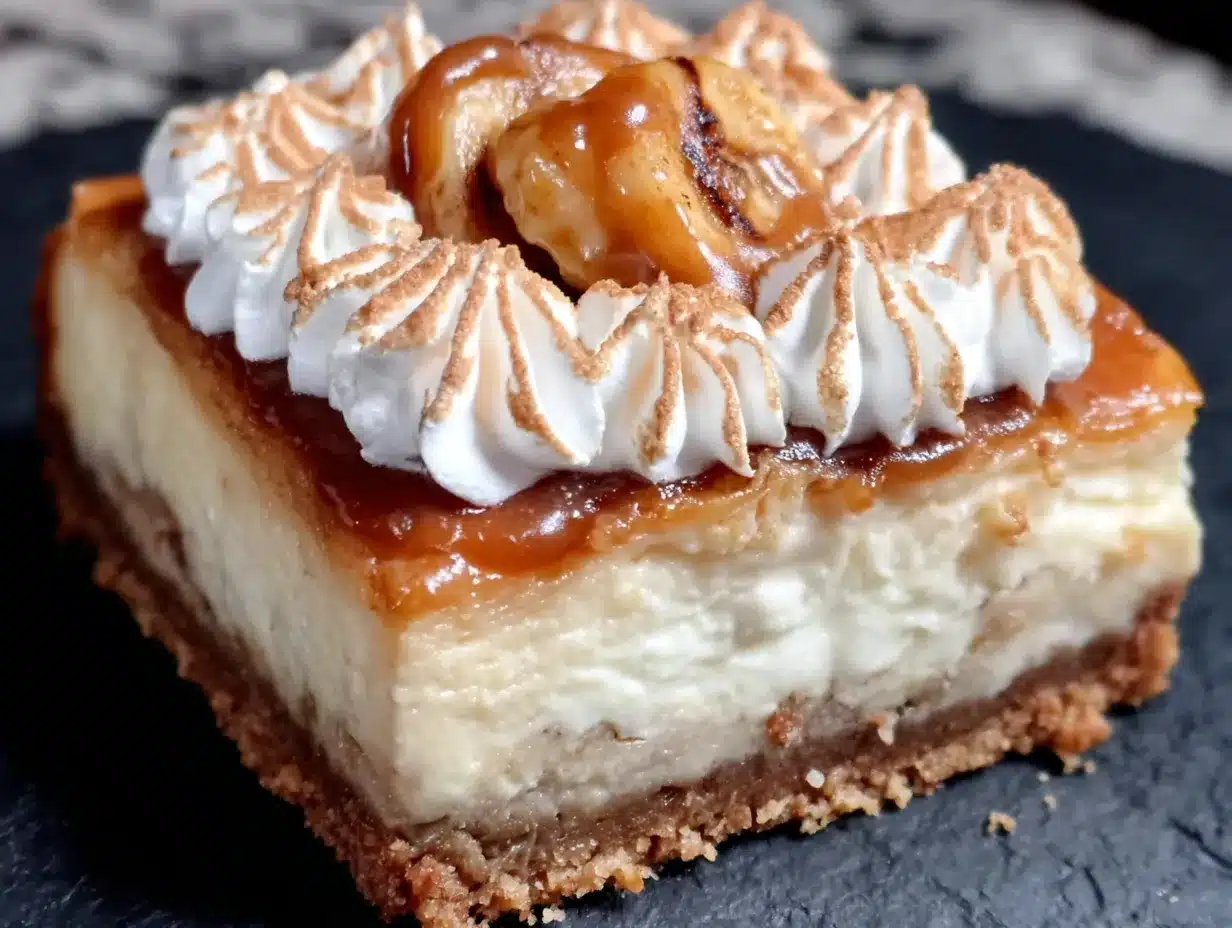
Okay, let’s get into it. This recipe has a few steps, but I promise it’s straightforward. Take your time, read through everything first, and you’ll be fine. Here’s the play-by-play.
Step 1: Prep the Pan and Preheat
Preheat your oven to 325°F (160°C). Line a 9×9-inch baking pan with two strips of parchment paper, leaving an overhang on two opposite sides. This is your lifting handle. Lightly grease the parchment with butter or non-stick spray.
Step 2: Make the Crust
In a medium bowl, combine the vanilla wafer crumbs, sugar, and salt. Pour in the melted butter and stir with a fork until the crumbs are evenly moistened. They should look like wet sand. Press the mixture firmly into the bottom of the prepared pan. Use the bottom of a measuring cup to pack it down evenly. Bake for 10 minutes, then set aside to cool slightly while you make the filling. The crust will firm up as it cools.
Step 3: Make the Cheesecake Filling
In a large bowl, beat the softened cream cheese with an electric mixer on medium speed until smooth and creamy, about 2 minutes. Scrape down the sides and bottom of the bowl. Add the sugar and beat for another minute until well combined. Add the eggs, one at a time, beating on low after each addition until just incorporated. Don’t overmix—you don’t want to incorporate too much air. Add the vanilla extract, sour cream, and the ¼ cup of finely crushed vanilla wafers. Mix on low until smooth. Finally, fold in the mashed bananas by hand with a spatula. The mixture will look slightly speckled—that’s perfect.
Step 4: Assemble and Bake
Pour the cheesecake filling over the pre-baked crust. Spread it evenly with a spatula. Now, prepare the water bath. Wrap the bottom and sides of your 9×9 pan with a double layer of heavy-duty aluminum foil. Place the wrapped pan in a large roasting pan. Carefully pour hot water (from a kettle or tap) into the roasting pan until it reaches about halfway up the sides of the 9×9 pan. This is your water bath. Carefully transfer the whole setup to the oven. Bake for 45-55 minutes, or until the edges are set and the center jiggles slightly when you gently shake the pan. It should look like set Jell-O, not liquid. The internal temperature should be around 150°F (65°C). Remove the pan from the water bath and let it cool completely on a wire rack. Then refrigerate for at least 4 hours, or overnight. This is crucial—the cheesecake needs to set.
Step 5: Make the Banana Pudding Layer
While the cheesecake chills, make the pudding. In a medium bowl, whisk together the instant vanilla pudding mix and cold milk for 2 minutes until thickened. Set aside. In a separate bowl, beat the heavy cream, powdered sugar, and vanilla extract with an electric mixer until stiff peaks form. Gently fold the whipped cream into the pudding mixture until combined. Cover and refrigerate until ready to use.
Step 6: Assemble the Bars
Once the cheesecake is fully chilled and firm, spread the banana pudding mixture evenly over the top. Return to the refrigerator for at least 1 hour to let the pudding set. Before serving, spread the Cool Whip or stabilized whipped cream over the pudding layer. Arrange the sliced bananas and whole or crushed vanilla wafers on top. Slice into 16 squares. Use the parchment overhang to lift the whole block out of the pan, then cut with a sharp knife. Wipe the knife clean between cuts for neat slices.
Cooking Tips & Techniques
I’ve made these bars at least a dozen times, and I’ve made every mistake you can imagine. Here’s what I’ve learned so you don’t have to.
Don’t Skip the Water Bath
I know it’s a pain. But a water bath ensures even, gentle heat that prevents the cheesecake from cracking. If you’re in a hurry, you can skip it and bake the cheesecake directly on the oven rack, but you’ll likely get a dome and some cracks. If that happens, don’t panic—the pudding layer hides a multitude of sins.
Room Temperature Ingredients Are Key
Cold cream cheese and cold eggs create a lumpy, grainy filling. Take them out of the fridge at least 30 minutes before you start. If you forget, you can soften cream cheese in the microwave on low power for 10-15 seconds, and place eggs in a bowl of warm water for 5 minutes.
Don’t Overmix the Cheesecake Filling
Overmixing incorporates too much air, which causes the cheesecake to puff up and then crack as it cools. Mix on low speed and stop as soon as everything is combined.
Banana Timing
Add the sliced bananas to the top just before serving. They’ll brown quickly. If you’re making these a day ahead, skip the banana garnish and add it fresh. The mashed bananas in the filling are fine—they’re baked and won’t discolor.
Clean Slices
For those perfect, Instagram-worthy slices, use a sharp knife and wipe it clean with a damp paper towel between each cut. I also like to run the knife under hot water and dry it before slicing. It glides right through.
Multitasking Strategy
Make the crust while the cream cheese comes to room temperature. While the crust bakes, make the cheesecake filling. While the cheesecake bakes and cools, make the pudding layer. This way, everything flows without a frantic rush.
Variations & Adaptations
This recipe is a fantastic base. Here are some ways to make it your own.
- Chocolate Banana Twist: Add ¼ cup of cocoa powder to the crust mixture for a chocolatey base. You can also fold ½ cup of mini chocolate chips into the cheesecake filling. The chocolate and banana combo is classic for a reason.
- Strawberry Banana: Layer sliced fresh strawberries over the cheesecake filling before adding the pudding layer. Or, swirl ¼ cup of strawberry jam into the cheesecake filling before baking. This is a gorgeous spring variation.
- Gluten-Free Version: Use gluten-free vanilla wafers for both the crust and the topping. The rest of the ingredients are naturally gluten-free. I’ve tested this with a popular gluten-free brand, and the texture is nearly identical.
- Vegan Option: This one takes a bit more work. Use a dairy-free cream cheese (like Kite Hill or Violife), a flax egg (1 tablespoon flaxseed meal + 3 tablespoons water per egg), and coconut cream in place of heavy cream. Use vegan vanilla wafers. The texture will be slightly softer, but the flavor is still fantastic.
- No-Bake Version: For a no-bake option, skip the cheesecake filling and instead use a no-bake cheesecake filling made from cream cheese, sugar, and stabilized whipped cream. Press the crust into the pan, chill, then layer the no-bake filling, the pudding, and the topping. It’s quicker but less dense.
I personally love the strawberry banana variation. I made it last June when strawberries were at their peak, and the sweet-tart berries cut through the richness beautifully. It felt like summer on a plate.
Serving & Storage Suggestions
These bars are best served cold, straight from the refrigerator. The texture is at its peak when the cheesecake is fully chilled and the pudding is firm. I like to let them sit at room temperature for 5 minutes before slicing—just enough to take the chill off without softening the texture.
Presentation Ideas
For a pretty presentation, arrange the sliced bananas in a fan pattern on top, and tuck a few whole vanilla wafers around the edges. A sprinkle of crushed wafers adds a nice crunch. You can also drizzle a little caramel sauce over the top for extra decadence. Serve on a white platter to make the colors pop.
What to Serve With Them
These bars are rich, so they pair well with something light. A cup of black coffee or hot tea is perfect. For a spring brunch, serve them alongside fresh fruit salad or a simple green salad with vinaigrette. A glass of cold milk is also a classic choice—it’s what banana pudding was made for.
Storage Instructions
Store leftover bars in an airtight container in the refrigerator for up to 4 days. The texture is best within the first 2 days. If you’ve added fresh banana slices on top, they’ll brown after a day—just remove them before storing and add fresh slices when serving again.
Freezing Instructions
These bars freeze beautifully. Freeze the whole block (without the pudding and topping) for up to 2 months. Wrap it tightly in plastic wrap and then in aluminum foil. When ready to serve, thaw overnight in the refrigerator, then add the pudding and topping. Alternatively, freeze the fully assembled bars for up to 1 month. Thaw in the fridge and add fresh banana slices before serving.
Reheating
Honestly, I wouldn’t reheat these. They’re meant to be served cold. If you want a warm dessert, try the crust alone—it’s delicious warmed up with a scoop of ice cream.
Flavor Development
The flavors actually get better after a day in the fridge. The banana flavor melds with the cheesecake, and the vanilla wafer crust softens slightly, making it more like a traditional banana pudding. If you can, make these a day ahead.
Nutritional Information & Benefits
Let’s be real—this is a treat. But it’s a treat made with real ingredients, and that counts for something. Here’s a rough estimate per serving (based on 16 bars).
- Calories: 320
- Fat: 18g
- Saturated Fat: 10g
- Carbohydrates: 36g
- Sugar: 24g
- Protein: 4g
- Fiber: 1g
Health Highlights
Bananas are a great source of potassium, which supports heart health and muscle function. They also provide a bit of vitamin C and B6. The cream cheese and milk provide calcium and protein. Of course, this isn’t a health food—it’s a dessert. But using real ingredients means you’re avoiding the artificial flavors and preservatives found in many store-bought desserts.
Dietary Considerations
This recipe contains gluten (from the vanilla wafers), dairy (from the cream cheese, milk, and cream), and eggs. For a gluten-free version, use gluten-free wafers. For a dairy-free version, use the substitutions listed above. This recipe is not suitable for a vegan diet unless modified. It is also not low-carb or keto-friendly due to the sugar and wafers.
Personal Wellness Perspective
I believe in balance. I make these bars for special occasions, and I enjoy every single bite without guilt. Food is about joy, connection, and celebration. These bars deliver all three.
Conclusion
These Spring Banana Pudding Cheesecake Bars are everything I love about spring baking—bright, nostalgic, and just a little bit indulgent. They bring together two classic desserts in a way that feels entirely new, and they’re simple enough for a weekday bake but fancy enough for a holiday table. That first bite, with the crunchy wafer crust, the creamy cheesecake, and the silky banana pudding, is pure magic.
I hope you’ll try them. I hope you’ll make them your own—maybe add some strawberries, or swap in chocolate wafers, or skip the water bath and embrace a few cracks. The best recipes are the ones that work for you. And honestly, I think Gloria would approve.
If you make these bars, I’d love to hear about it. Leave a comment below and tell me how they turned out. Did you try a variation? Did your family devour them in five minutes? Share your stories—I read every single one. And if you’re looking for more spring desserts, check out my lemon lavender shortbread cookies or this strawberry rhubarb crisp for another seasonal treat. Happy baking!
Frequently Asked Questions
Can I use low-fat cream cheese?
You can, but the texture won’t be as rich and creamy. Full-fat cream cheese gives the cheesecake its signature velvety texture. If you use low-fat, expect a slightly softer set and a less indulgent mouthfeel.
Why did my cheesecake crack?
Cracks happen when the cheesecake bakes too quickly or cools too fast. A water bath helps prevent this. Also, avoid overmixing the filling, which incorporates too much air. If it cracks anyway, don’t worry—the pudding and topping layers cover it completely.
Can I make these bars gluten-free?
Absolutely. Use gluten-free vanilla wafers for the crust and the topping. Everything else in the recipe is naturally gluten-free. I’ve tested it with a popular gluten-free brand, and the result was fantastic.
How far ahead can I make these?
You can make the entire recipe (minus the fresh banana garnish) up to 2 days in advance. Store the assembled bars in the refrigerator. Add the sliced bananas just before serving to prevent browning. The flavors actually improve after a day.
Can I use a different type of cookie for the crust?
Sure! Graham crackers, shortbread cookies, or even vanilla sandwich cookies (with the filling removed) would all work. Keep in mind that different cookies have different sweetness levels and textures, so you may need to adjust the butter and sugar slightly. Vanilla wafers are my favorite for that classic banana pudding flavor.
Pin This Recipe!
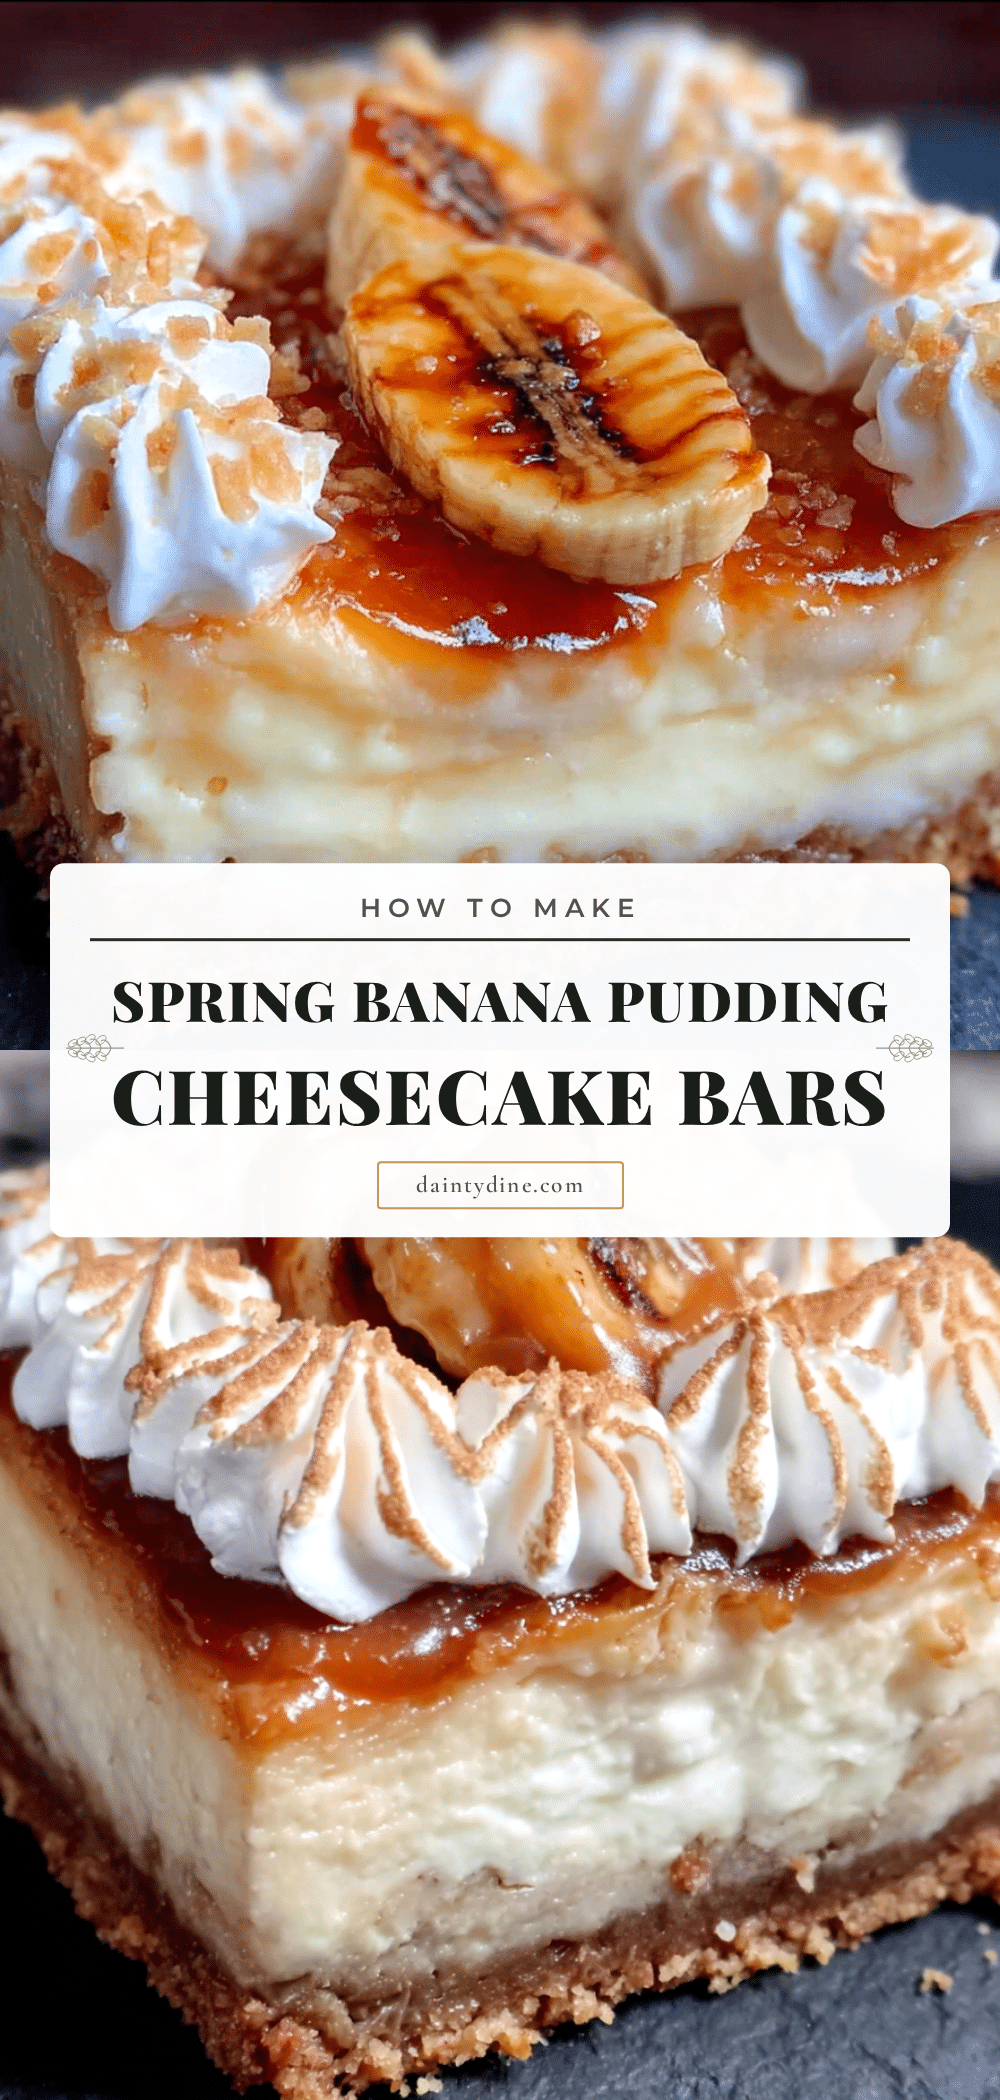
Best Spring Banana Pudding Cheesecake Bars Recipe
These Spring Banana Pudding Cheesecake Bars combine the soul of creamy, old-fashioned banana pudding with a classic cheesecake bar. With a crunchy vanilla wafer crust, silky cheesecake filling, and a luscious banana pudding layer, they’re the perfect spring dessert that’s quick, easy, and a total crowd-pleaser.
- Prep Time: 25 minutes
- Cook Time: 55 minutes
- Total Time: 5 hours 20 minutes (includes chilling time)
- Yield: 16 servings 1x
- Category: Dessert
- Cuisine: American
Ingredients
- 1 ½ cups (about 150g) vanilla wafer crumbs (e.g., Nilla Wafers)
- ¼ cup (50g) granulated sugar
- 6 tablespoons (85g) unsalted butter, melted
- Pinch of salt (if using unsalted butter)
- 16 ounces (450g) full-fat cream cheese, softened to room temperature
- ¾ cup (150g) granulated sugar
- 2 large eggs, room temperature
- 1 teaspoon vanilla extract
- ¼ cup (60ml) sour cream, room temperature
- ¼ cup (about 30g) finely crushed vanilla wafers
- 2 ripe but firm bananas, mashed (about 1 cup)
- 1 box (3.4 ounces) instant vanilla pudding mix
- 1 ½ cups (360ml) cold whole milk
- 1 cup (240ml) heavy cream
- ¼ cup (30g) powdered sugar
- ½ teaspoon vanilla extract
- 1 ½ cups (about 80g) Cool Whip or stabilized whipped cream
- 1 cup (about 20) vanilla wafers, whole or lightly crushed
- 1–2 ripe bananas, sliced (for garnish)
Instructions
- Preheat oven to 325°F (160°C). Line a 9×9-inch baking pan with two strips of parchment paper, leaving overhang on two opposite sides. Lightly grease the parchment.
- Make the crust: In a medium bowl, combine vanilla wafer crumbs, ¼ cup sugar, and salt. Pour in melted butter and stir until crumbs are evenly moistened. Press firmly into the bottom of the prepared pan. Bake for 10 minutes, then set aside to cool slightly.
- Make the cheesecake filling: In a large bowl, beat softened cream cheese with an electric mixer on medium speed until smooth, about 2 minutes. Add ¾ cup sugar and beat for 1 minute. Add eggs one at a time, beating on low after each addition. Mix in vanilla extract, sour cream, and ¼ cup finely crushed vanilla wafers on low until smooth. Fold in mashed bananas by hand with a spatula.
- Assemble and bake: Pour cheesecake filling over pre-baked crust and spread evenly. Wrap bottom and sides of pan with double layer of heavy-duty aluminum foil. Place in a large roasting pan and pour hot water into roasting pan until halfway up sides of 9×9 pan. Bake for 45-55 minutes, until edges are set and center jiggles slightly. Remove from water bath and cool completely on a wire rack. Refrigerate for at least 4 hours or overnight.
- Make the banana pudding layer: In a medium bowl, whisk instant vanilla pudding mix and cold milk for 2 minutes until thickened. In a separate bowl, beat heavy cream, powdered sugar, and ½ teaspoon vanilla extract until stiff peaks form. Gently fold whipped cream into pudding mixture. Cover and refrigerate until ready to use.
- Assemble the bars: Once cheesecake is fully chilled, spread banana pudding mixture evenly over the top. Refrigerate for at least 1 hour. Before serving, spread Cool Whip or stabilized whipped cream over pudding layer. Arrange sliced bananas and vanilla wafers on top. Slice into 16 squares using the parchment overhang to lift the block out of the pan. Wipe knife clean between cuts.
Notes
Don’t skip the water bath to prevent cracking. Use room temperature ingredients for a smooth filling. Add sliced bananas just before serving to avoid browning. For clean slices, wipe knife between cuts. The flavors improve after a day in the fridge.
Nutrition
- Serving Size: 1 bar
- Calories: 320
- Sugar: 24
- Fat: 18
- Saturated Fat: 10
- Carbohydrates: 36
- Fiber: 1
- Protein: 4
Keywords: banana pudding cheesecake bars, spring dessert, banana cheesecake, vanilla wafer crust, no-bake pudding, Easter dessert, Mother's Day dessert