Love this? Save it for later!
Share the inspiration with your friends
The Valentine’s Day bake sale was in 12 hours and I’d completely forgotten. Everyone else would be bringing those picture-perfect layered cakes with fondant hearts and those fancy French macarons that look like they belong in a Parisian bakery window. I had a box of red velvet cake mix that was supposed to be for a lazy Sunday, a block of cream cheese that was about to expire, and honestly? A growing sense of panic that felt a lot like my eighth-grade science fair all over again.
I stood there in my kitchen at 10 PM, staring at my pantry like it had personally betrayed me. The counters were a mess, I’d spilled cocoa powder on my favorite sweater, and somewhere in the back of my mind, I could hear my neighbor Karen bragging about her triple-layer chocolate mousse torte. But here’s the thing about baking under pressure — sometimes the best recipes come from the most chaotic moments. I grabbed a whisk, took a deep breath, and decided to just go for it. No time for fancy techniques, no room for perfectionism. Just butter, sugar, and a whole lot of hope.
These red velvet brownies with cream cheese swirl ended up being the first thing to sell out at that bake sale. I’m not kidding — people were literally asking me for the recipe before I’d even finished setting up my table. The cream cheese swirl created these beautiful marbled patterns that looked way more intentional than they actually were, and the red velvet base had that perfect fudgy texture that everyone loves. Maybe you’ve been in that same spot — scrambling to throw something together at the last minute, convinced it’s going to be a disaster. Let me tell you, this recipe is proof that simple can steal the show.
Why You’ll Love These Red Velvet Brownies
Let’s be real for a second — I’ve tested this recipe about seven times now, and each batch taught me something new. The first time, the cream cheese swirl sank to the bottom like a sad little puddle. The second time, I overbaked them and they turned into hockey pucks. But by round three? Magic happened. These brownies are the result of all those happy accidents and late-night experiments, and I’m genuinely proud of how they turned out.
- Quick & Easy: You can have these in the oven in under 15 minutes. No stand mixer needed, no complicated techniques — just good old-fashioned whisking and folding.
- Simple Ingredients: Most of these are pantry staples. If you’ve got butter, sugar, eggs, and cocoa powder, you’re already halfway there.
- Perfect for Valentine’s Day: The red velvet color is naturally festive, and the cream cheese swirl makes them feel extra special. Great for date nights, Galentine’s parties, or just treating yourself.
- Crowd-Pleaser: I’ve brought these to potlucks, office parties, and family gatherings. They disappear every single time — no exceptions.
- Unbelievably Delicious: That combination of rich chocolate and tangy cream cheese is honestly next-level. The texture is fudgy but not heavy, with those beautiful swirls of creamy goodness throughout.
What makes these different from every other red velvet recipe out there? It’s the ratio. I spent a lot of time tweaking the butter-to-cocoa ratio to get that perfect balance between cake-like and fudgy. Plus, the way I layer the cream cheese mixture ensures it stays right where you want it — swirling through the middle instead of sinking to the bottom. This isn’t just another version of red velvet brownies; it’s the version I’d serve to anyone I wanted to impress, including myself on a random Tuesday night.
What Ingredients You Will Need
This recipe uses simple, honest ingredients that work together to create something pretty special. Most of these are probably already sitting in your kitchen, which is exactly how I like to keep things.
For the Red Velvet Brownie Base
- 1 cup unsalted butter, melted — I use Kerrygold because the higher fat content gives a richer flavor, but any good unsalted butter works fine. Let it cool slightly before using so it doesn’t cook the eggs.
- 1 ½ cups granulated sugar — Regular white sugar is perfect here. It dissolves nicely into the melted butter and creates that crackly top we all love.
- 2 large eggs, room temperature — Cold eggs can seize the butter mixture, so let them sit out for about 20 minutes. Trust me on this one.
- 2 teaspoons vanilla extract — Pure vanilla extract makes a difference here. The artificial stuff has a weird aftertaste that doesn’t play well with the cream cheese.
- 1 tablespoon red food coloring — You can use liquid or gel. I prefer gel because it gives a deeper color without thinning the batter. Start with 1 tablespoon and add more if you want it brighter.
- 1 ½ cups all-purpose flour — Spoon and level your flour. Scooping straight from the bag packs it down and gives you dry brownies.
- ¼ cup unsweetened cocoa powder — Dutch-processed cocoa gives a smoother, more mellow chocolate flavor. Natural cocoa works too, but the color won’t be as dark.
- ½ teaspoon salt — Don’t skip this. Salt makes the chocolate taste more chocolatey and balances the sweetness.
- 1 teaspoon white vinegar — This is the secret ingredient. It reacts with the cocoa to deepen the red color and makes the crumb extra tender.
For the Cream Cheese Swirl
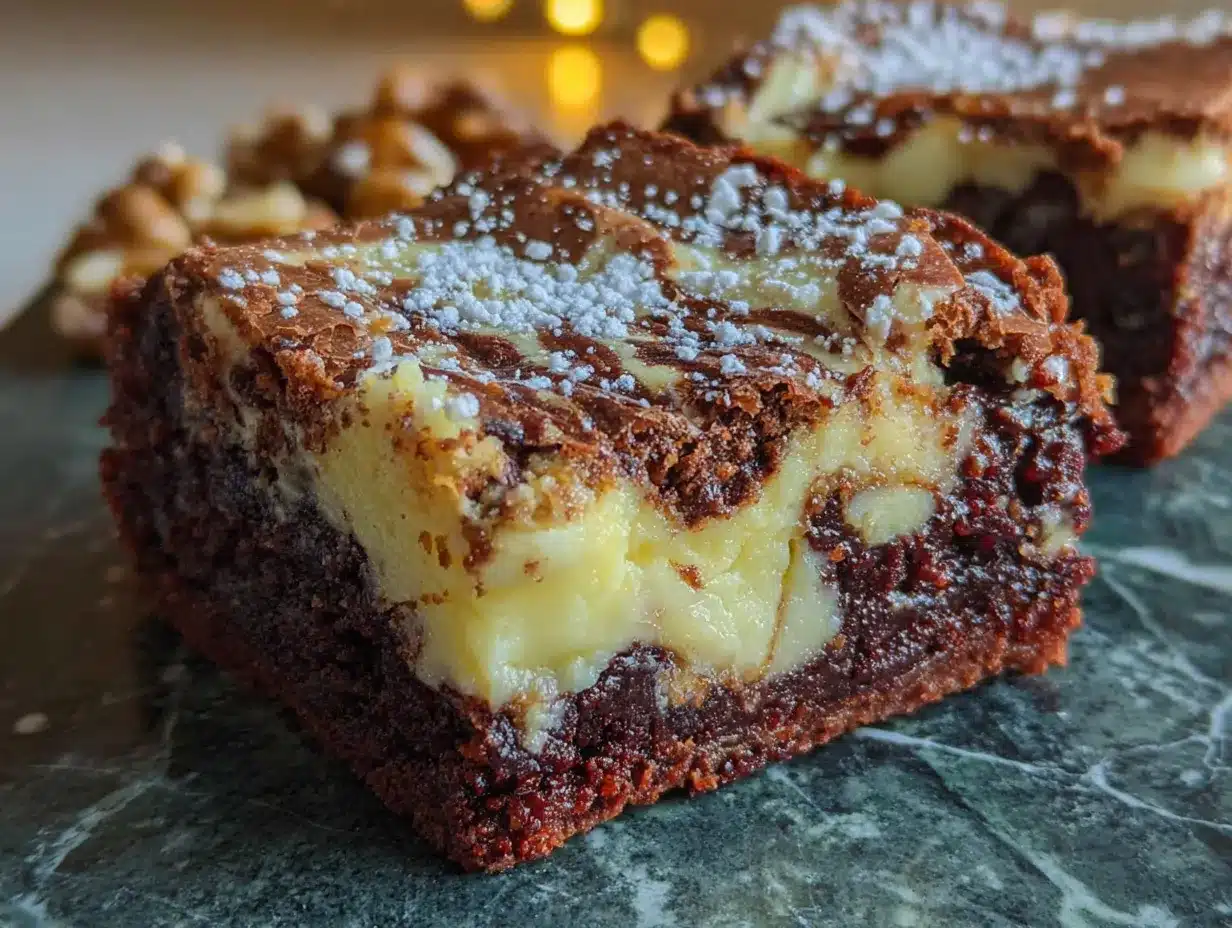
- 8 ounces cream cheese, softened — Full-fat is non-negotiable here. Low-fat cream cheese gets watery and won’t swirl properly. Let it sit out for at least an hour.
- ¼ cup granulated sugar — Just enough to sweeten the cream cheese without making it candy-like.
- 1 large egg yolk — The yolk adds richness and helps the swirl set up nicely. Save the white for your morning omelette.
- ½ teaspoon vanilla extract — A little extra vanilla in the swirl makes the flavor pop against the chocolate base.
Equipment Needed
You don’t need a fancy kitchen to make these brownies. Here’s what I use every time I make them:
- 9×13-inch baking pan — Metal pans give the best results. Glass pans tend to overbake the edges before the middle is done. If you only have glass, reduce the oven temperature by 25 degrees.
- Parchment paper — This is your best friend. It makes lifting the brownies out so much easier, and cleanup is a breeze. Leave some overhang on two sides for handles.
- Large mixing bowls — You’ll need one for the brownie batter and one for the cream cheese mixture. I use my grandmother’s old Pyrex bowls, but anything works.
- Whisk — A good whisk incorporates air into the batter, which gives you that crackly top. I’ve used the same OXO whisk for years and it’s never let me down.
- Rubber spatula — For folding the flour mixture in and scraping every last bit of batter into the pan. The silicone ones are great because they don’t absorb odors.
- Butter knife or skewer — For creating the swirl pattern. A chopstick works too if that’s what you have handy.
Preparation Method
Alright, let’s get to the fun part. Here’s exactly how I make these red velvet brownies, including all the little tricks I’ve picked up along the way.
- Preheat your oven to 350°F (175°C). Line your 9×13-inch baking pan with parchment paper, leaving about 2 inches of overhang on the long sides. This creates handles that make lifting the brownies out super easy later. Lightly spray the parchment with non-stick spray — just a quick spritz.
- Make the cream cheese swirl first. In a medium bowl, beat the softened cream cheese with ¼ cup sugar until it’s smooth and creamy. You want absolutely no lumps here, so take your time. Add the egg yolk and ½ teaspoon vanilla, then beat until everything is combined. Set this aside while you make the brownie batter. It’ll be fine sitting on the counter for a few minutes.
- Melt your butter. I do this in the microwave in 30-second bursts, stirring between each one. You want it completely melted but not hot — just warm enough that it doesn’t solidify when you add the other ingredients. Let it cool for about 5 minutes.
- Mix the wet ingredients. In a large bowl, whisk together the melted butter and 1½ cups sugar until they’re well combined. It should look like wet sand. Add the two eggs, one at a time, whisking well after each addition. The mixture should be smooth and glossy. Stir in 2 teaspoons vanilla and 1 tablespoon red food coloring. The color should be a deep, vibrant red — if it looks pink, add a little more coloring.
- Add the vinegar. This is the step people always ask me about. Stir in 1 teaspoon white vinegar. You’ll see the mixture bubble slightly — that’s the reaction happening. It sounds weird, I know, but it really does help the red color develop during baking.
- Fold in the dry ingredients. In a separate small bowl, whisk together 1½ cups flour, ¼ cup cocoa powder, and ½ teaspoon salt. Add this to the wet mixture in two additions, folding gently with your rubber spatula. Don’t overmix! Stop as soon as you don’t see any more streaks of flour. Overmixing will make your brownies tough instead of tender.
- Layer the batter. Pour about two-thirds of the brownie batter into your prepared pan and spread it evenly with the spatula. It’ll be thick, so take your time. Drop spoonfuls of the cream cheese mixture over the batter — about 8 to 10 dollops spread evenly across the surface. Then drop the remaining brownie batter on top in spoonfuls, trying to cover most of the cream cheese.
- Create the swirl. Here’s where the magic happens. Take a butter knife or skewer and drag it through the batter in a figure-eight pattern. Go from one end of the pan to the other, then do the same thing going the other direction. Don’t over-swirl — about 6 to 8 passes is perfect. You want distinct ribbons of cream cheese, not a muddy pink mess.
- Bake for 28-32 minutes. The edges should look set and slightly pulling away from the pan. The center will still look a little soft and might jiggle slightly when you shake the pan. A toothpick inserted in the center should come out with a few moist crumbs attached — not wet batter, but not completely clean either. Overbaking is the most common mistake, so err on the side of underdone.
- Cool completely before cutting. This is the hardest part, I know. Let them cool in the pan on a wire rack for at least 2 hours. For cleaner cuts, refrigerate them for another hour before slicing. Use a sharp knife and wipe it clean between each cut. You’ll get those beautiful, Instagram-worthy squares with clean edges.
Cooking Tips & Techniques
I’ve made these brownies enough times to know exactly where things can go wrong. Here’s what I’ve learned the hard way so you don’t have to.
Room temperature ingredients matter more than you think. The first time I made these, I used cold cream cheese straight from the fridge. The swirl was lumpy and didn’t spread properly, and the brownies baked unevenly. Now I always set my cream cheese and eggs out at least an hour before I start. If you’re in a hurry, you can soften cream cheese in the microwave at 50% power for about 15 seconds — just watch it carefully so it doesn’t melt.
Don’t overmix the batter. I’m guilty of this one. When you’re folding in the flour, stop as soon as it comes together. Overmixing develops the gluten and gives you cakey brownies instead of fudgy ones. You want that dense, almost fudge-like texture that makes brownies so satisfying.
The swirl technique takes practice. My first few attempts looked like a toddler went crazy with a paintbrush. The trick is to use a light hand and not overwork the batter. Drag your knife through in long, smooth strokes, and don’t go back over the same area multiple times. Less really is more here.
Let them cool completely. I know it’s tempting to cut into warm brownies — I’ve burned my tongue more times than I care to admit. But warm brownies are fragile and will fall apart. The cream cheese swirl needs time to set, and the brownies need to firm up. Patience pays off with perfect squares.
Variations & Adaptations
One of the best things about this recipe is how easy it is to tweak. Here are some variations I’ve tried and loved:
White Chocolate Red Velvet: Fold in ½ cup white chocolate chips before pouring the batter into the pan. The white chocolate adds little pockets of sweetness that pair beautifully with the tangy cream cheese. I did this for a friend’s bridal shower and people lost their minds.
Peppermint Valentine’s Twist: Add ½ teaspoon peppermint extract to the brownie batter along with the vanilla. Top the finished brownies with crushed candy canes for a festive touch. This is perfect if you’re making these for a Valentine’s Day party and want something a little different.
Gluten-Free Version: Substitute the all-purpose flour with a 1:1 gluten-free baking flour blend. I’ve tested this with Bob’s Red Mill and King Arthur brands, and both worked great. The texture is slightly more delicate, so handle them gently when cutting.
Dairy-Free Adaptation: Use vegan butter and dairy-free cream cheese. Miyoko’s cream cheese works really well for the swirl, though the texture is slightly softer. The brownies won’t be quite as rich, but they’re still delicious.
Serving & Storage Suggestions
These brownies are pretty versatile when it comes to serving. Here’s how I like to handle them:
Serving: I prefer these at room temperature — the cream cheese swirl is softer and the brownie texture is at its best. If you want to get fancy, warm them slightly in the microwave for about 10 seconds and serve with a scoop of vanilla ice cream. The warm brownie with cold ice cream is honestly one of life’s great pleasures.
Storage: Keep these in an airtight container in the refrigerator for up to 5 days. The cream cheese needs to stay chilled, so don’t leave them out for more than 2 hours at room temperature. I like to layer them with parchment paper between each row so the swirls don’t smudge together.
Freezing: These freeze beautifully. Wrap individual brownies tightly in plastic wrap, then place them in a freezer-safe bag. They’ll keep for up to 3 months. When you’re ready to eat one, just let it thaw in the refrigerator overnight or at room temperature for about an hour.
Flavor Development: Honestly, these brownies taste even better the next day. The flavors meld together overnight, and the texture becomes even more fudgy. I often make them a day ahead when I’m planning to serve them for a special occasion.
Nutritional Information & Benefits
I’m not a nutritionist, but I do pay attention to what goes into my food. Here’s the breakdown for one brownie (based on 16 servings):
Estimated per serving: 320 calories, 18g fat, 38g carbohydrates, 4g protein, 2g fiber, 22g sugar. These numbers will vary depending on the specific brands you use and any substitutions you make.
Health Benefits: The cocoa powder is actually good for you — it’s packed with antioxidants called flavonoids that support heart health. The cream cheese adds calcium and protein, though let’s be honest, we’re not eating these for the health benefits. Sometimes food is just about joy, and that’s okay.
Dietary Considerations: This recipe contains gluten, dairy, and eggs. For a gluten-free version, check the variations section above. The red food coloring is something to be aware of if you have sensitivities — you can use natural food coloring made from beets if you prefer.
Conclusion
These red velvet brownies with cream cheese swirl have become my go-to recipe for pretty much any occasion. They’re the kind of dessert that looks like you spent hours in the kitchen when really, you just whisked a few things together and let the oven do the work. The red velvet color makes them perfect for Valentine’s Day, but honestly? I make them all year round. They’re that good.
I’d love to hear how yours turn out. Did you try any of the variations? Did you add your own twist? Drop a comment below and let me know — I read every single one and I’m always looking for new ideas to try. And if you share a photo on Pinterest or Instagram, tag me so I can see your beautiful creations. Happy baking, friends!
Frequently Asked Questions
Can I use a different size pan?
Yes, but you’ll need to adjust the baking time. An 8×8-inch pan will give you thicker brownies that need about 35-40 minutes. A 9×9-inch pan works well too, with a baking time around 30-35 minutes. Just keep an eye on them and use the toothpick test to check for doneness.
Why did my cream cheese swirl sink to the bottom?
This usually happens when the cream cheese mixture is too thin or the brownie batter is too warm. Make sure your cream cheese is softened but not melted, and let your melted butter cool slightly before mixing. Also, don’t over-swirl — too much mixing can cause the cream cheese to sink.
Can I make these without red food coloring?
Absolutely. The brownies will be chocolate-colored instead of red, but they’ll taste just as good. You can try using beet powder or natural red food coloring, but the color won’t be as vibrant. The vinegar and cocoa will still give you that tender texture even without the coloring.
How do I get clean cuts on my brownies?
Patience is key here. Let the brownies cool completely, then refrigerate them for at least an hour before cutting. Use a sharp knife and wipe it clean with a damp paper towel between each cut. For the prettiest results, cut them while they’re still cold, then let them come to room temperature before serving.
Can I double this recipe?
Yes, but use two separate pans instead of trying to fit everything into one. A half-sheet pan works well for a double batch, but you’ll need to increase the baking time to about 35-40 minutes. Keep an eye on the edges — they should be set but the center should still look slightly soft.
Pin This Recipe!
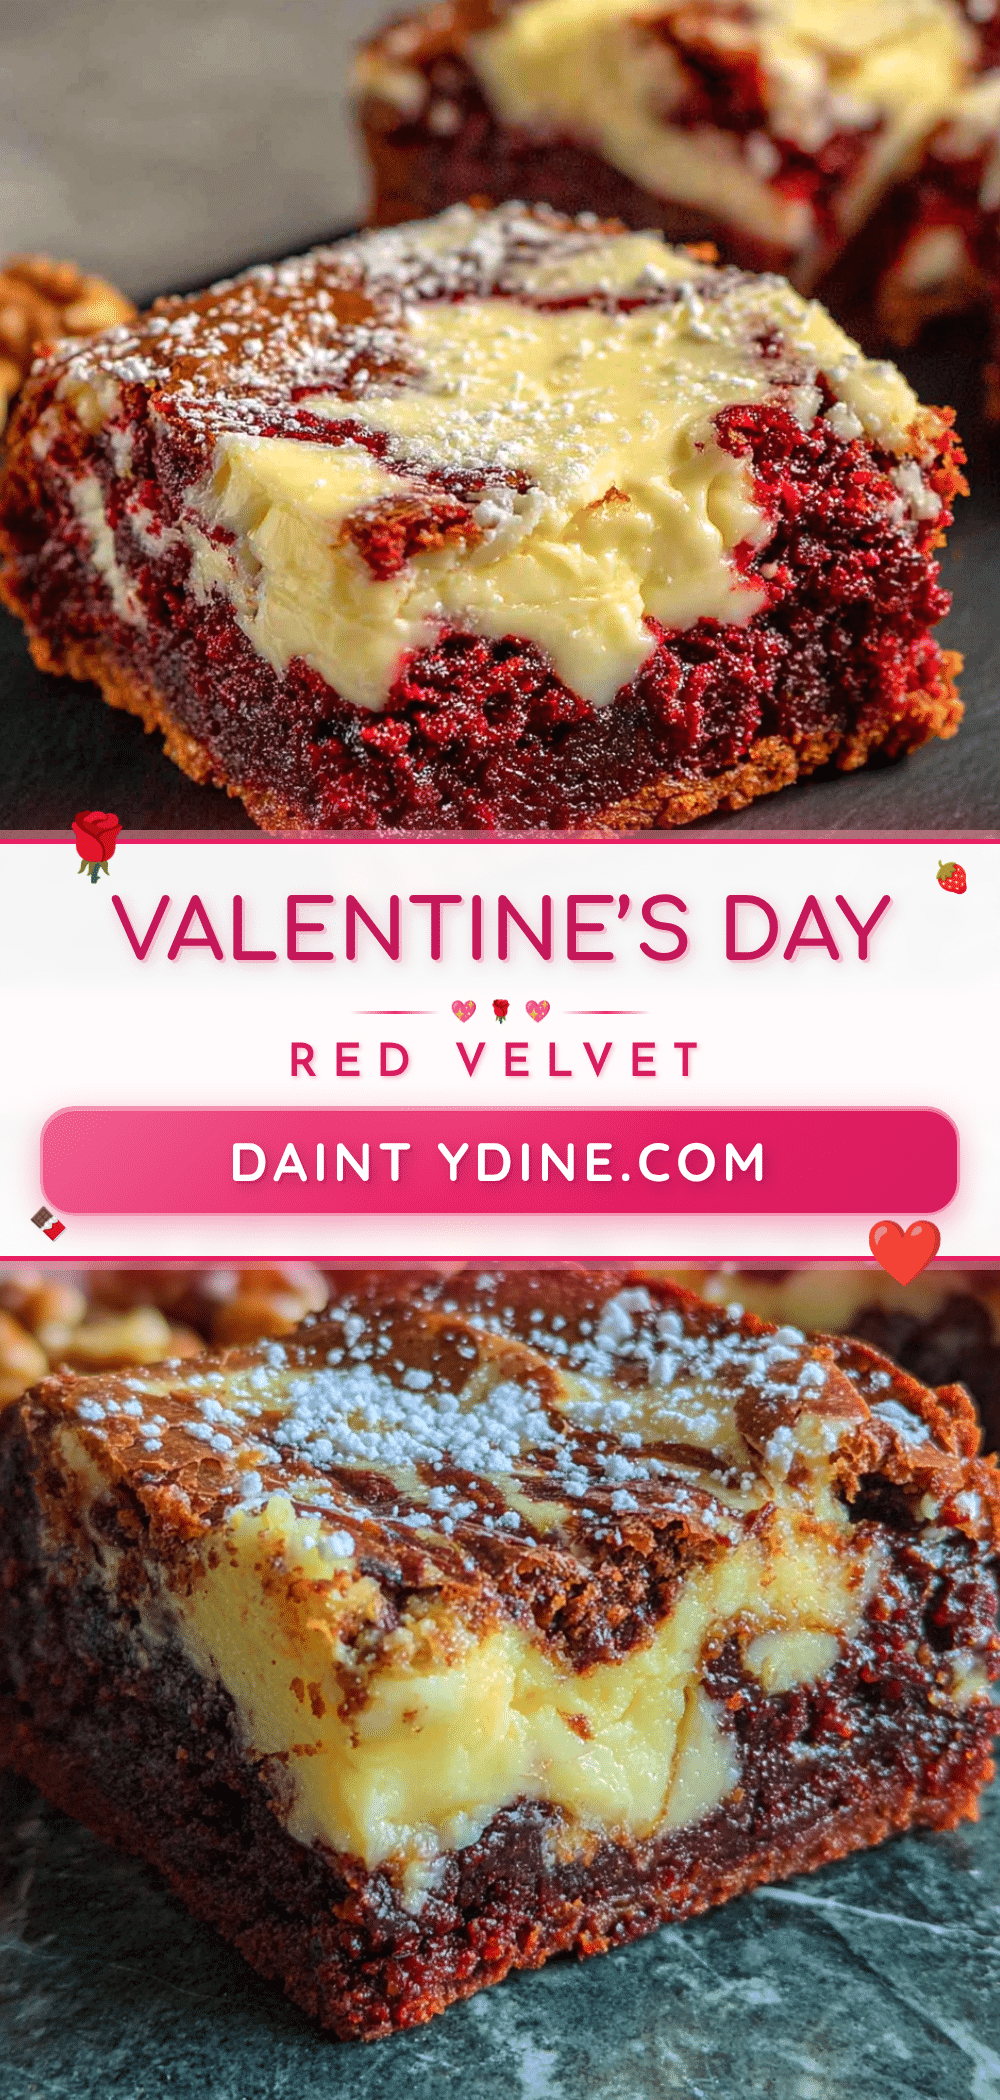
40 Easy Red Velvet Valentine Brownies with Cream Cheese Swirl
These red velvet brownies with cream cheese swirl are the perfect last-minute Valentine’s Day dessert. Fudgy, rich, and topped with a tangy cream cheese swirl, they’re quick to make and always a crowd-pleaser.
- Prep Time: 15 minutes
- Cook Time: 30 minutes
- Total Time: 45 minutes
- Yield: 16 servings 1x
- Category: Dessert
- Cuisine: American
Ingredients
- 1 cup unsalted butter, melted
- 1 ½ cups granulated sugar
- 2 large eggs, room temperature
- 2 teaspoons vanilla extract
- 1 tablespoon red food coloring (gel preferred)
- 1 ½ cups all-purpose flour
- ¼ cup unsweetened cocoa powder (Dutch-processed preferred)
- ½ teaspoon salt
- 1 teaspoon white vinegar
- 8 ounces cream cheese, softened
- ¼ cup granulated sugar (for cream cheese swirl)
- 1 large egg yolk
- ½ teaspoon vanilla extract (for cream cheese swirl)
Instructions
- Preheat your oven to 350°F (175°C). Line a 9×13-inch baking pan with parchment paper, leaving about 2 inches of overhang on the long sides. Lightly spray the parchment with non-stick spray.
- Make the cream cheese swirl: In a medium bowl, beat the softened cream cheese with ¼ cup sugar until smooth and creamy. Add the egg yolk and ½ teaspoon vanilla, then beat until combined. Set aside.
- Melt the butter in the microwave in 30-second bursts, stirring between each. Let it cool for about 5 minutes.
- In a large bowl, whisk together the melted butter and 1½ cups sugar until well combined. Add the two eggs, one at a time, whisking well after each addition. Stir in 2 teaspoons vanilla and 1 tablespoon red food coloring.
- Stir in 1 teaspoon white vinegar. The mixture will bubble slightly.
- In a separate small bowl, whisk together 1½ cups flour, ¼ cup cocoa powder, and ½ teaspoon salt. Add this to the wet mixture in two additions, folding gently with a rubber spatula until just combined. Do not overmix.
- Pour about two-thirds of the brownie batter into the prepared pan and spread evenly. Drop spoonfuls of the cream cheese mixture over the batter (about 8 to 10 dollops). Drop the remaining brownie batter on top in spoonfuls.
- Use a butter knife or skewer to drag through the batter in a figure-eight pattern, going from one end of the pan to the other, then the other direction. Do about 6 to 8 passes total.
- Bake for 28-32 minutes. The edges should look set and slightly pulling away from the pan. The center will still look slightly soft. A toothpick inserted in the center should come out with a few moist crumbs attached.
- Cool completely in the pan on a wire rack for at least 2 hours. For cleaner cuts, refrigerate for another hour before slicing. Use a sharp knife and wipe it clean between each cut.
Notes
Room temperature ingredients are crucial for the cream cheese swirl. Don’t overmix the batter to keep brownies fudgy. Cool completely before cutting for clean slices. Brownies taste even better the next day. For gluten-free, use a 1:1 gluten-free flour blend. For dairy-free, use vegan butter and dairy-free cream cheese.
Nutrition
- Serving Size: 1 brownie
- Calories: 320
- Sugar: 22
- Sodium: 180
- Fat: 18
- Saturated Fat: 11
- Carbohydrates: 38
- Fiber: 2
- Protein: 4
Keywords: red velvet brownies, cream cheese swirl, Valentine's Day dessert, easy brownies, fudgy brownies, red velvet dessert, cream cheese brownies


