Love this? Save it for later!
Share the inspiration with your friends
The neighborhood cookie exchange was in six hours and I’d completely forgotten. Everyone else would be bringing their grandmother’s secret shortbread or those perfectly piped French macarons that take three days. I had a box of Rice Krispies, a tub of cream cheese, and about twenty minutes before I needed to leave. Honestly, I almost just grabbed a bag of store-bought cookies and called it a day. But then I saw the sugar cookie mix in the back of the pantry—leftover from a baking project that never happened—and this weird idea just hit me.
I mean, what if I combined the chewy, buttery flavor of a sugar cookie with the no-bake ease of a Rice Krispie treat? It sounded crazy, even to me. I was frantically melting marshmallows, praying the whole thing wouldn’t turn into a sticky disaster. Let me tell you, there was a moment where I had butter on my elbow and marshmallow on my glasses—it was not pretty. But I pressed on, slathered it with a quick cream cheese frosting because, why not?, and ran out the door, still wiping powdered sugar off my shirt.
And you know what happened? That pan was empty in fifteen minutes. People were actually asking me for the recipe, thinking I’d spent hours on it. The guy who brought the macarons looked genuinely confused. That’s the thing about this recipe—it’s the underdog that wins every time. Maybe you’ve been there, scrambling for a last-minute dish that actually turns out better than the stuff people planned for days. These Easy Sugar Cookie Rice Krispie Treats with Cream Cheese Frosting are that recipe for me, and honestly, they’ve become my go-to for every potluck, bake sale, or Tuesday night craving since.
Why You’ll Love This Recipe
Let me be real with you—I’ve tested this recipe about seven times to get it just right. The first batch was too sweet. The second fell apart. The third? The frosting was too runny. But now? This version is tested, approved by my picky neighbor, and honestly foolproof. Here is why it works for busy people like us:
- Quick & Easy: From start to finish, these come together in under 20 minutes. No oven required. No complicated techniques. Just a pot, a spatula, and a 9×13 pan.
- Simple Ingredients: You likely have everything in your pantry right now. Marshmallows, butter, Rice Krispies cereal, cream cheese, powdered sugar, and a box of sugar cookie mix. That’s it.
- Perfect for Last-Minute Needs: Forgot about the bake sale? Got unexpected guests? This is your lifesaver. No joke—I’ve made these in my pajamas at 10 PM for a school event the next morning.
- Crowd-Pleaser: Kids love the fun, crispy texture. Adults love the nostalgic sugar cookie flavor. I’ve yet to meet someone who doesn’t grab a second square.
- Unbelievably Delicious: The cream cheese frosting is the secret weapon here. It cuts the sweetness of the marshmallow base perfectly and adds this tangy, creamy layer that makes these taste way more fancy than they are.
What makes this different from every other Rice Krispie treat recipe? It is the sugar cookie mix. Stirring it into the marshmallow mixture adds that signature buttery, vanilla flavor that regular treats just don’t have. Plus, the frosting takes it from a kid’s snack to a dessert that feels special. This isn’t just another version—it is my best version, born from a frantic afternoon and perfected over many happy batches.
What Ingredients You Will Need
This recipe uses simple, everyday ingredients to create something that tastes surprisingly gourmet. You don’t need to hunt down anything fancy—most of these are pantry staples or easy to grab at any grocery store.
- For the Rice Krispie Base:
- 6 tablespoons unsalted butter (adds richness and helps the marshmallows melt smoothly)
- 1 (10-ounce) bag mini marshmallows (standard size; don’t use jumbo, they melt unevenly)
- 1/2 cup sugar cookie mix (dry, unprepared—I prefer Betty Crocker or Pillsbury for consistent flavor)
- 6 cups Rice Krispies cereal (or any crispy rice cereal; store brands work fine)
- 1/2 teaspoon vanilla extract (pure, not imitation, for the best flavor)
- Pinch of salt (balances the sweetness)
- For the Cream Cheese Frosting:
- 4 ounces cream cheese, softened (full-fat works best; let it sit out for 30 minutes)
- 1/4 cup unsalted butter, softened
- 1 1/2 cups powdered sugar (sifted if lumpy)
- 1/2 teaspoon vanilla extract
- 1-2 tablespoons milk (to thin the frosting to spreading consistency)
- Sprinkles for topping (optional, but highly recommended for the sugar cookie look)
Ingredient Tips from My Kitchen: I recommend using a good-quality butter like Kerrygold for the base—it really does make a difference in flavor. For the cream cheese, Philadelphia is my go-to because it’s consistently creamy and not too tangy. If you’re dairy-free, you can substitute vegan butter and dairy-free cream cheese, but the texture will be slightly less firm. Also, make sure your marshmallows are fresh. Stale marshmallows get hard and won’t melt into that smooth, gooey consistency you need.
Equipment Needed
You don’t need a fancy kitchen for this recipe. Here is what you’ll need:
- Large pot or Dutch oven: You need room to stir the marshmallows and cereal together. A 5-quart pot works perfectly.
- Wooden spoon or silicone spatula: A sturdy spoon is best for mixing the thick marshmallow mixture. Silicone is great because nothing sticks to it.
- 9×13-inch baking pan: Standard size. If you want thicker treats, use an 8×8-inch pan—just increase the baking time slightly (well, setting time, since these are no-bake).
- Parchment paper: Line your pan with this. It makes lifting the treats out so much easier and saves you from scrubbing a sticky pan.
- Hand mixer or stand mixer: For the cream cheese frosting. You can whisk it by hand, but it takes elbow grease and you might end up with lumps.
- Small bowl: For mixing the frosting.
- Spatula or offset spatula: For spreading the frosting evenly.
If you don’t have a hand mixer, don’t stress. A good whisk and some determination will work. I’ve done it before when my mixer was in the dishwasher. Also, if you don’t have parchment paper, you can grease the pan generously with butter or non-stick spray. Just be careful when cutting and removing the treats.
Preparation Method
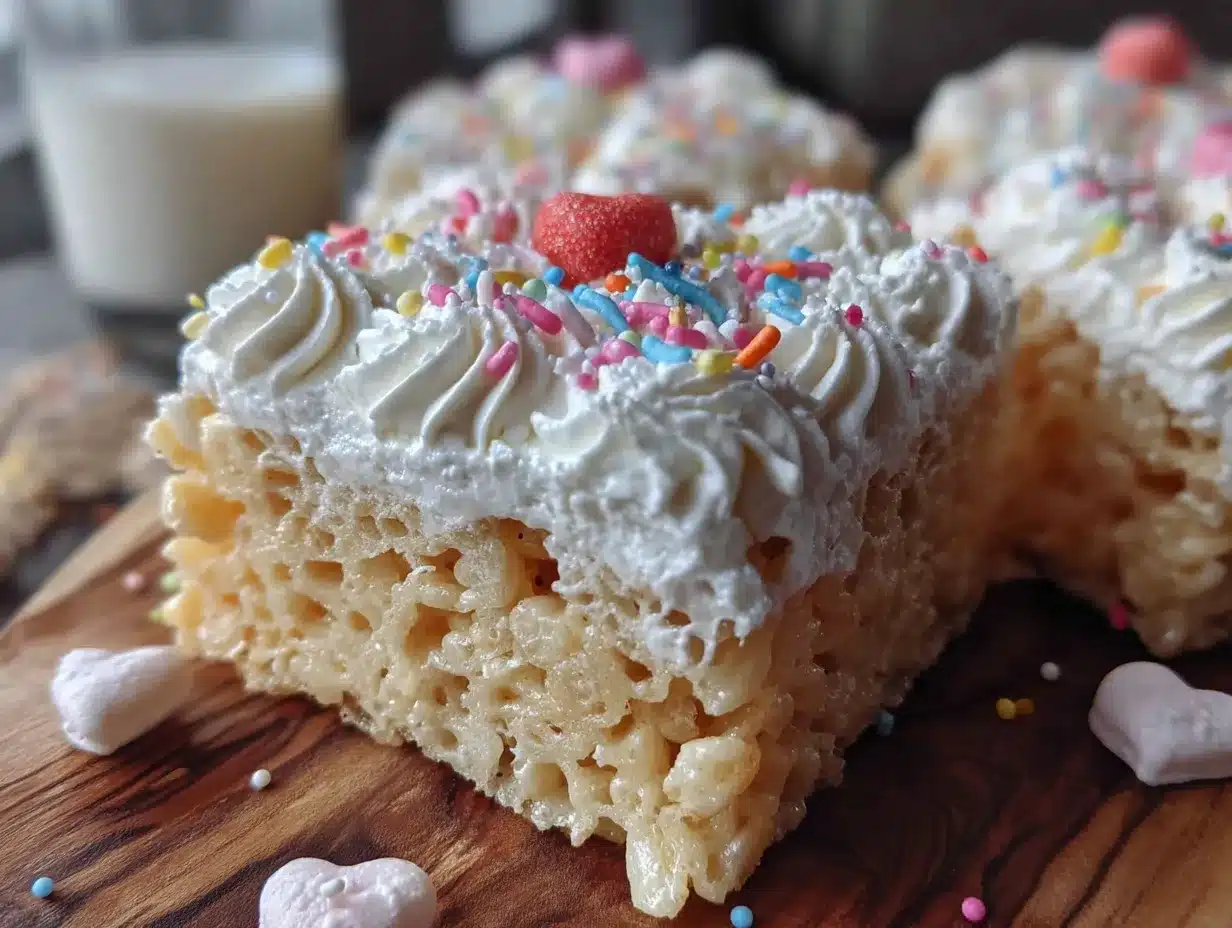
Alright, let’s get to the fun part. Follow these steps, and you’ll have a pan of these incredible treats in no time. I’ve included all the little tricks I learned from my messy first attempts.
- Prep Your Pan: Line a 9×13-inch baking pan with parchment paper. Leave a little overhang on two opposite sides—this creates “handles” to lift the treats out later. Lightly spray the parchment with non-stick cooking spray. This step is crucial, trust me. The first time I skipped it, I spent 20 minutes chiseling marshmallow off the pan.
- Melt the Butter: In a large pot over medium-low heat, melt the 6 tablespoons of unsalted butter. Swirl the pot occasionally so it melts evenly. Don’t rush this—medium-low heat prevents the butter from browning. You want it melted, not browned. If it starts to sizzle loudly, turn the heat down.
- Add the Marshmallows: Once the butter is fully melted, add the entire 10-ounce bag of mini marshmallows. Stir constantly with your wooden spoon or silicone spatula. The marshmallows will start to puff up and then collapse into a smooth, gooey puddle. This takes about 3-4 minutes. Keep stirring—if you walk away, they can scorch on the bottom.
- Incorporate the Sugar Cookie Mix: This is the magic step. Remove the pot from the heat. Immediately stir in the 1/2 cup of dry sugar cookie mix. Whisk it in quickly until it’s fully dissolved into the marshmallow mixture. You shouldn’t see any white streaks. The mixture will thicken slightly. Then add the 1/2 teaspoon vanilla extract and a pinch of salt. Stir to combine. The aroma at this point is incredible—like a bakery in your kitchen.
- Fold in the Cereal: Add the 6 cups of Rice Krispies cereal to the pot. Using a folding motion, gently incorporate the cereal into the marshmallow mixture. Don’t stir too aggressively, or you’ll crush the cereal. You want it evenly coated but still crispy. This should take about 1-2 minutes. If the mixture seems too dry, you can add a tablespoon of butter, but usually, it’s perfect.
- Press into the Pan: Transfer the mixture into your prepared pan. Using a spatula or your hands (lightly greased with butter or non-stick spray), press it into an even layer. Be gentle—press just enough to flatten it. If you press too hard, the treats will be dense and hard. I like to use a piece of parchment paper on top to press down without sticking. Let it cool completely at room temperature, about 30 minutes.
- Make the Frosting: While the base cools, make the cream cheese frosting. In a medium bowl, beat the 4 ounces of softened cream cheese and 1/4 cup of softened butter together with a hand mixer until smooth and creamy. No lumps allowed! Gradually add the 1 1/2 cups of powdered sugar, beating on low speed to avoid a sugar cloud. Add the 1/2 teaspoon vanilla extract. Beat in 1 tablespoon of milk. If the frosting is too thick to spread, add another tablespoon of milk. You want it spreadable but still thick enough to hold its shape.
- Frost the Treats: Once the base is completely cool, spread the cream cheese frosting evenly over the top. Use an offset spatula for a smooth, professional finish. If you’re adding sprinkles, do it now before the frosting sets. I like rainbow sprinkles for a classic sugar cookie look, but red and green for Christmas or pastels for spring work beautifully too.
- Set and Slice: Let the frosted treats set for about 15-20 minutes at room temperature. This makes slicing cleaner. Using the parchment paper handles, lift the entire block out of the pan. Place it on a cutting board. Use a sharp knife to cut into squares. Wipe the knife clean between cuts for neat edges. I usually get 12-16 squares, depending on how big you like them.
Cooking Tips & Techniques
I’ve made this recipe enough times to know exactly where things can go wrong. Here are my hard-earned tips to make sure your treats turn out perfect every time.
Don’t Overheat the Marshmallows: This is the number one mistake. If you cook the marshmallows over high heat or for too long, they become tough and rubbery. Keep the heat on medium-low and stir constantly. The moment they’re smooth and melted, take the pot off the heat. I once left them on for an extra minute while answering a text, and the whole batch was ruined.
Use Fresh Cereal: Stale Rice Krispies go soggy fast. Check the expiration date. If the cereal doesn’t snap when you bite it, don’t use it. Fresh cereal gives you that satisfying crunch that makes these treats so addictive.
Room Temperature Ingredients for Frosting: Cold cream cheese and butter will give you a lumpy frosting. Let them sit on the counter for at least 30 minutes before you start. If you’re in a rush, you can microwave the cream cheese for 10 seconds, but be careful—it melts fast.
Press Gently: I cannot stress this enough. When you press the mixture into the pan, use a light hand. Heavy pressing creates dense, hard treats. You want them to be light and airy. I use a piece of parchment paper and a gentle pressing motion, almost like I’m patting a baby’s back.
Multitasking Strategy: While the base is cooling, make the frosting. That way, everything is ready to go. Also, clean your pot immediately after transferring the mixture. Soaked marshmallow is a nightmare to clean. Fill the pot with hot water and let it sit while you frost the treats. It’ll slide right off later.
Variations & Adaptations
One of the best things about this recipe is how easy it is to change up. Here are some of my favorite variations:
- Chocolate Lovers Version: Stir 1/2 cup of mini chocolate chips into the marshmallow mixture along with the cereal. The chocolate melts slightly and creates these gooey pockets of goodness. Also, swap the vanilla in the frosting for 2 tablespoons of cocoa powder.
- Holiday Sprinkle Bomb: For Christmas, use red and green sprinkles in the base and on top. For Halloween, orange and black. For Valentine’s Day, pink and red hearts. It’s an easy way to make the treats festive without changing the flavor.
- Peanut Butter Twist: Add 1/4 cup of creamy peanut butter to the marshmallow mixture after it melts. Stir until combined. Then proceed as usual. The peanut butter adds a salty, nutty depth that pairs amazingly with the sugar cookie flavor.
- Gluten-Free Option: Use certified gluten-free crispy rice cereal (like Nature’s Path) and a gluten-free sugar cookie mix. The rest of the ingredients are naturally gluten-free. I’ve tested this, and honestly, no one can tell the difference.
- Lemon Sugar Cookie Treats: Add 1 tablespoon of lemon zest to the marshmallow mixture and 1 teaspoon of lemon juice to the frosting. The citrus brightens everything up and makes these feel perfect for spring or summer.
I personally love the lemon version. I made it for a baby shower last spring, and the tangy frosting was such a refreshing surprise. It’s become my warm-weather go-to.
Serving & Storage Suggestions
These treats are best served at room temperature. The frosting is creamy, the base is chewy, and the cereal still has a slight crunch. If you refrigerate them, the treats firm up and the frosting gets a bit harder—still delicious, but different.
Serving Ideas: Cut them into squares and arrange on a platter. For a party, I like to cut them into smaller, bite-sized pieces so people can grab one without committing to a huge square. They pair beautifully with a glass of cold milk, a hot cup of coffee, or even a scoop of vanilla ice cream for an extra indulgent dessert.
Storage: Store any leftovers in an airtight container at room temperature for up to 2 days. If your kitchen is warm, you can refrigerate them, but let them sit out for 10 minutes before serving to soften. For longer storage, you can freeze them. Wrap the entire block (or individual squares) tightly in plastic wrap, then in foil. Freeze for up to 3 months. Thaw at room temperature for about 30 minutes before serving. The texture holds up surprisingly well.
Flavor Development: Honestly, these treats are best on the first day. The cereal stays crispiest, and the frosting is at its peak creaminess. By day two, the cereal softens a bit, but the flavor actually melds together more. Some people prefer them day two—I’m a day-one person myself.
Nutritional Information & Benefits
Let’s be real—these are a treat, not a health food. But here’s a rough estimate per square (based on 16 servings):
- Calories: 280
- Fat: 12g
- Saturated Fat: 7g
- Carbohydrates: 42g
- Sugar: 28g
- Protein: 2g
- Sodium: 180mg
Health Highlights: The cream cheese frosting does offer a small amount of calcium and protein from the dairy. The butter provides vitamin A. And hey, the cereal is fortified with iron and B vitamins—so there’s that! If you’re looking to lighten it up, you can use low-fat cream cheese and a sugar substitute in the frosting, but honestly, for a special occasion, I say go for the real thing.
Dietary Considerations: This recipe contains dairy and gluten. For a dairy-free version, use vegan butter, dairy-free cream cheese, and vegan marshmallows (Dandies are a great brand). For gluten-free, use the substitutions mentioned in the variations section. Always check labels if you have allergies.
Conclusion
These Easy Sugar Cookie Rice Krispie Treats with Cream Cheese Frosting are proof that you don’t need hours in the kitchen or a list of fancy ingredients to make something truly special. They came from a moment of panic and a leap of faith, and now they’re one of my most-requested recipes. The buttery sugar cookie flavor, the crispy cereal texture, and that tangy, creamy frosting—it’s a combination that just works.
I love how forgiving this recipe is. You can mess up the timing, use a different brand of cereal, or forget the sprinkles, and it still turns out delicious. It’s the kind of recipe that makes you look like a hero with almost no effort. So go ahead—give it a try. Customize it with your favorite mix-ins, make it for your next gathering, or just because it’s Tuesday. And when you do, I’d love to hear about it. Drop a comment below and let me know how it turned out, or share your own twist on it. Happy baking, friend!
Frequently Asked Questions
Can I use homemade sugar cookie dough instead of the mix?
Technically, yes, but it changes the texture. The dry mix absorbs moisture from the marshmallows without adding extra fat or liquid, which keeps the treats chewy. Homemade dough is too wet and will make them dense and greasy. Stick with the box mix for the best results.
Why did my treats turn out hard?
This usually happens for two reasons: you pressed the mixture too firmly into the pan, or you overheated the marshmallows. Next time, use a gentle hand when pressing and keep your heat on medium-low. Your treats should be light and airy, not like a brick.
Can I make these ahead of time?
Absolutely. You can make the base a day ahead and store it in an airtight container at room temperature. Frost them the day you plan to serve them for the best texture and appearance. If you frost them too early, the cereal can get soggy.
My frosting is too runny. How do I fix it?
Add more powdered sugar, one tablespoon at a time, until it thickens up. The most common cause of runny frosting is using cream cheese that’s too soft or warm. Next time, make sure it’s just softened, not melted. Also, measure your milk carefully—it doesn’t take much to thin the frosting.
Can I double this recipe?
Yes! Double everything and use a 12×17-inch half-sheet pan. You’ll need a very large pot to melt the marshmallows—a 7-quart or larger works best. The baking time stays the same, but the treats will be slightly thinner. Adjust your cutting accordingly.
Pin This Recipe!
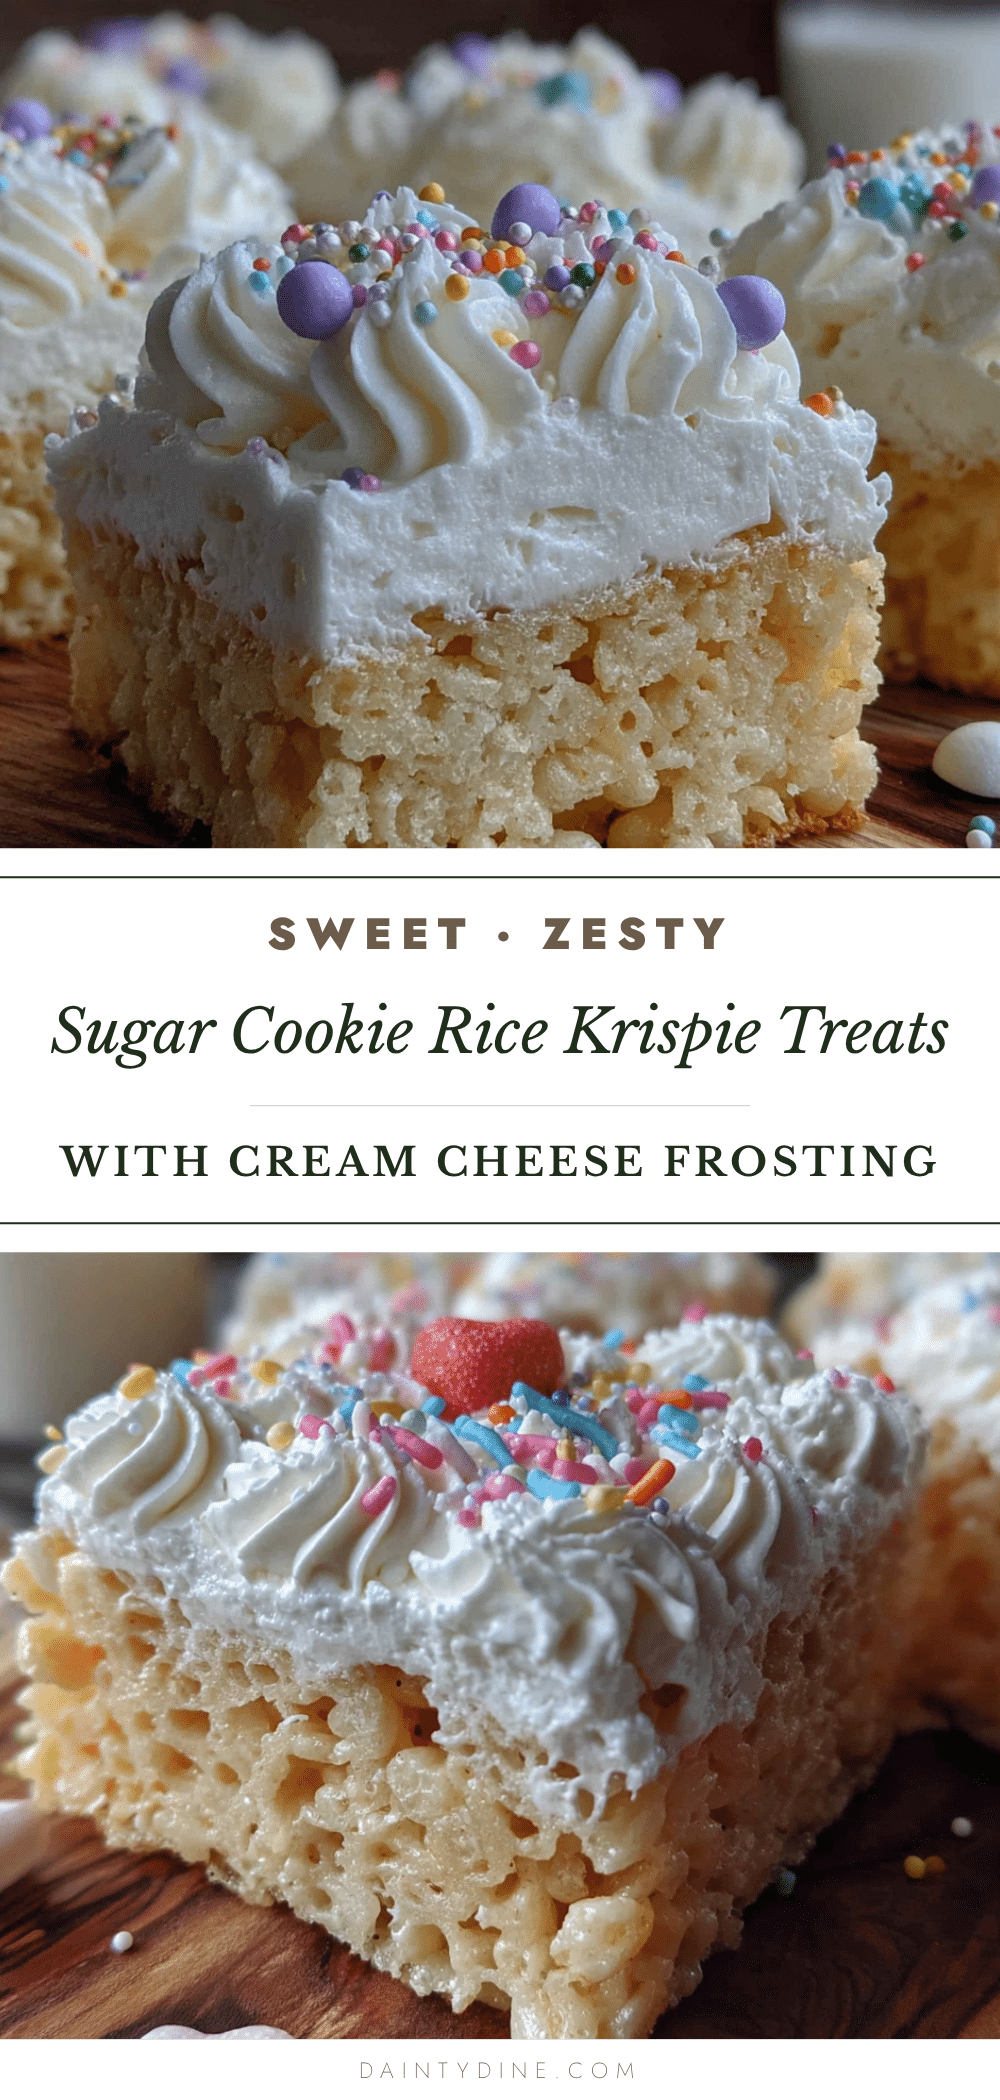
Easy Sugar Cookie Rice Krispie Treats with Cream Cheese Frosting

These no-bake treats combine the buttery flavor of sugar cookies with the crispy texture of Rice Krispie treats, topped with a tangy cream cheese frosting. Perfect for last-minute gatherings, bake sales, or any occasion where you need a quick, crowd-pleasing dessert.
- Prep Time: 10 minutes
- Cook Time: 10 minutes
- Total Time: 20 minutes
- Yield: 12-16 servings 1x
- Category: Dessert
- Cuisine: American
Ingredients
- 6 tablespoons unsalted butter
- 1 (10-ounce) bag mini marshmallows
- 1/2 cup sugar cookie mix (dry, unprepared)
- 6 cups Rice Krispies cereal
- 1/2 teaspoon vanilla extract
- Pinch of salt
- 4 ounces cream cheese, softened
- 1/4 cup unsalted butter, softened
- 1 1/2 cups powdered sugar, sifted if lumpy
- 1/2 teaspoon vanilla extract
- 1–2 tablespoons milk
- Sprinkles for topping (optional)
Instructions
- Line a 9×13-inch baking pan with parchment paper, leaving overhang on two opposite sides. Lightly spray with non-stick cooking spray.
- In a large pot over medium-low heat, melt 6 tablespoons unsalted butter. Swirl occasionally to melt evenly.
- Add the entire 10-ounce bag of mini marshmallows. Stir constantly until marshmallows are fully melted and smooth, about 3-4 minutes.
- Remove pot from heat. Immediately stir in 1/2 cup dry sugar cookie mix until fully dissolved. Add 1/2 teaspoon vanilla extract and a pinch of salt; stir to combine.
- Add 6 cups Rice Krispies cereal. Gently fold until cereal is evenly coated, about 1-2 minutes.
- Transfer mixture to prepared pan. Using a spatula or lightly greased hands, press into an even layer. Let cool completely at room temperature, about 30 minutes.
- While base cools, make frosting: In a medium bowl, beat 4 ounces softened cream cheese and 1/4 cup softened butter with a hand mixer until smooth. Gradually add 1 1/2 cups powdered sugar, beating on low speed. Add 1/2 teaspoon vanilla extract and 1 tablespoon milk. Beat until smooth. Add another tablespoon milk if needed for spreading consistency.
- Once base is completely cool, spread cream cheese frosting evenly over top. Add sprinkles immediately if desired.
- Let frosted treats set for 15-20 minutes at room temperature. Using parchment handles, lift block out of pan. Cut into squares with a sharp knife, wiping blade clean between cuts.
Notes
Don’t overheat marshmallows or they become tough. Use fresh cereal for best crunch. Press mixture gently into pan to keep treats light and airy. For best texture, serve on day one. Store leftovers in an airtight container at room temperature for up to 2 days. Can be frozen for up to 3 months.
Nutrition
- Serving Size: 1 square
- Calories: 280
- Sugar: 28
- Sodium: 180
- Fat: 12
- Saturated Fat: 7
- Carbohydrates: 42
- Protein: 2
Keywords: sugar cookie rice krispie treats, cream cheese frosting, no-bake dessert, easy dessert, last-minute dessert, potluck dessert