Love this? Save it for later!
Share the inspiration with your friends
There used to be a tiny café tucked behind a used bookstore on Main Street called The Copper Mug. It was the kind of place where the floorboards creaked and the barista knew your order by heart. They made a hot cocoa that was nothing short of magical—rich, velvety, with a whisper of vanilla that lingered long after the last sip. When they closed their doors suddenly two winters ago, I felt a genuine pang of loss. I mean, honestly, I mourned that cocoa. After eight tries—eight batches that ranged from grainy to cloyingly sweet—I finally cracked the code. And let me tell you, the secret was simpler than I ever imagined. This recipe became the backbone of my homemade hot cocoa mix jars for gifting, and it has saved me every holiday season since.
I remember the Tuesday afternoon it finally worked. My kitchen looked like a cocoa bomb had gone off—powder on the counter, a whisk in the sink, and a tiny notebook covered in scribbled ratios. My neighbor, Sarah, knocked on the door mid-experiment, and I shoved a mug into her hands before she could even say hello. She took one sip, closed her eyes, and said, “This is it. This is the one.” And she was right. The texture was silky, the chocolate flavor deep without being bitter, and it didn’t leave that weird chalky aftertaste that store-bought mixes always seem to have. From that moment on, I knew this wasn’t just a recipe—it was a gift worth sharing.
What makes these jars so special isn’t just the taste, though that’s certainly the star of the show. It’s the way they make people feel. When you hand someone a beautiful mason jar filled with layers of cocoa mix, marshmallows, and maybe a peppermint stick tucked in the side, you’re giving them a moment of warmth. A little bit of comfort in a world that moves too fast. Maybe you’ve been there—staring at a gift list that keeps growing, feeling the pressure to find something thoughtful but not breaking the bank. These jars are the answer. They’re personal, practical, and honestly, they look stunning on a kitchen counter. I keep making them year after year because they never get old. The joy on someone’s face when they unwrap a jar of homemade hot cocoa mix is the kind of simple happiness that sticks with you.
Why You’ll Love This Recipe
Let me be straight with you—I’ve tested this mix more times than I care to count, and I’ve learned a few things along the way. This isn’t just another hot cocoa recipe thrown together in five minutes. It’s been refined through trial, error, and plenty of taste-testing sessions with friends and family. Here’s why it stands out:
- Quick & Easy : The actual mixing takes about 10 minutes. Seriously. Once you’ve got your ingredients measured, you’re just whisking and layering. Perfect for those December evenings when you realize you need gifts for tomorrow.
- Simple Ingredients : No weird additives or obscure powders. Everything on this list is likely already in your pantry or easy to find at any grocery store. I’m talking basic stuff—sugar, cocoa powder, a little salt.
- Perfect for Gifting : These jars are the ultimate hostess gift, teacher appreciation present, or neighborly gesture. They travel well, they look beautiful, and they show you actually put thought into something.
- Crowd-Pleaser : Kids love it, adults love it, and I’ve yet to meet someone who turns down a warm mug of homemade cocoa. It’s basically impossible to dislike.
- Unbelievably Delicious : The flavor is next-level comfort. The combination of Dutch-process cocoa and a tiny pinch of cinnamon creates a depth that regular cocoa packets just can’t touch.
What makes this recipe different from every other cocoa mix out there is the technique. Most recipes just dump everything in a bowl and call it done. But I’ve found that sifting the cocoa powder and powdered sugar together first makes a world of difference. It eliminates lumps before they even have a chance to form, and the result is a mix that dissolves instantly in hot milk or water. No stirring for five minutes hoping that stubborn clump will break up. This is the version I’d serve to anyone, from my pickiest aunt to a room full of skeptics.
This recipe isn’t just good—it’s the kind that makes people ask for the recipe before they’ve even finished their mug. It’s comfort in a jar, ready to be shared with everyone you care about.
What Ingredients You Will Need
This recipe uses simple, pantry-friendly ingredients that come together to create a rich, satisfying hot cocoa experience. Each component plays a specific role, and I’ve tested enough variations to know what works best. Here’s what you’ll need:
- 2 cups (240g) powdered sugar : This provides the sweetness and helps create that smooth texture. Sift it before using to avoid lumps. I prefer Domino brand for consistent results.
- 1 ½ cups (180g) Dutch-process cocoa powder : This is the star of the show. Dutch-process cocoa is less acidic and has a smoother, more mellow chocolate flavor than natural cocoa. I recommend Droste or Valrhona if you want to splurge—it makes a noticeable difference. (Regular unsweetened cocoa works too, but the flavor will be slightly different.)
- 1 cup (200g) granulated sugar : Adds sweetness and helps balance the bitterness of the cocoa. Don’t skip this—it’s essential for the right flavor profile.
- 1 teaspoon (5g) fine sea salt : A tiny bit of salt enhances the chocolate flavor and prevents the mix from tasting flat. Trust me on this one—you won’t taste the salt, but you’ll miss it if it’s not there.
- 1 teaspoon (2g) ground cinnamon : Optional, but highly recommended. It adds a warm, subtle spice that complements the chocolate beautifully. I add this to every batch I make for gifting—it gives the mix a signature touch.
- 1 cup (about 120g) mini marshmallows, for layering : These are purely decorative and functional. They look cute in the jar and give the recipient instant gratification when they make their first mug. (Use dehydrated marshmallows if you’re worried about freshness over time.)
- Optional add-ins for the jar : A few dark chocolate shavings, a pinch of cayenne pepper for heat, or a vanilla bean split in half tucked into the jar. These little extras make the gift feel even more special.
When selecting cocoa powder, look for one that’s rich and dark in color. I’ve tried generic brands, and while they work in a pinch, the flavor just isn’t as deep. If you’re making these jars for a crowd, buying in bulk from a store like Costco or ordering online saves money without sacrificing quality. For the powdered sugar, avoid the “10X” extra-fine variety if possible—it clumps more easily. Regular powdered sugar sifts beautifully and blends perfectly.
Equipment Needed
You don’t need fancy equipment for this project, which is part of the charm. Here’s what you’ll need:
- Mason jars (pint or quart size) : I prefer wide-mouth pint jars for single-serving gifts. They hold about ¾ cup of mix, which makes roughly 8-10 mugs. Quart jars are great for families. I’ve used both Ball and Kerr brands with no issues.
- Fine-mesh sieve or sifter : Absolutely essential for getting rid of lumps. I’ve made the mistake of skipping this step once, and the clumps were a nightmare. A simple handheld sifter works perfectly.
- Large mixing bowl : Any bowl will do, but a wide one makes sifting and whisking easier. I use a stainless steel bowl because it doesn’t retain odors.
- Whisk : A standard balloon whisk is all you need. No electric mixers required—this is a hands-on, low-tech project.
- Funnel : Not strictly necessary, but it makes filling the jars so much cleaner. I use a small metal funnel I picked up at a kitchen supply store for three dollars. Worth every penny.
- Ribbon, twine, or gift tags : For decorating the jars. I keep a stash of brown kraft paper, jute twine, and small wooden tags for a rustic look. You can also use holiday-themed ribbon for a festive touch.
- Optional: Airtight container for storing leftover mix : If you’re making a big batch, store extra mix in a glass jar or airtight plastic container. It keeps for months.
One tip I learned the hard way—wash and thoroughly dry your jars before using them. Any moisture inside can cause the powdered sugar to clump and ruin the texture. Let them air dry overnight to be safe.
Preparation Method
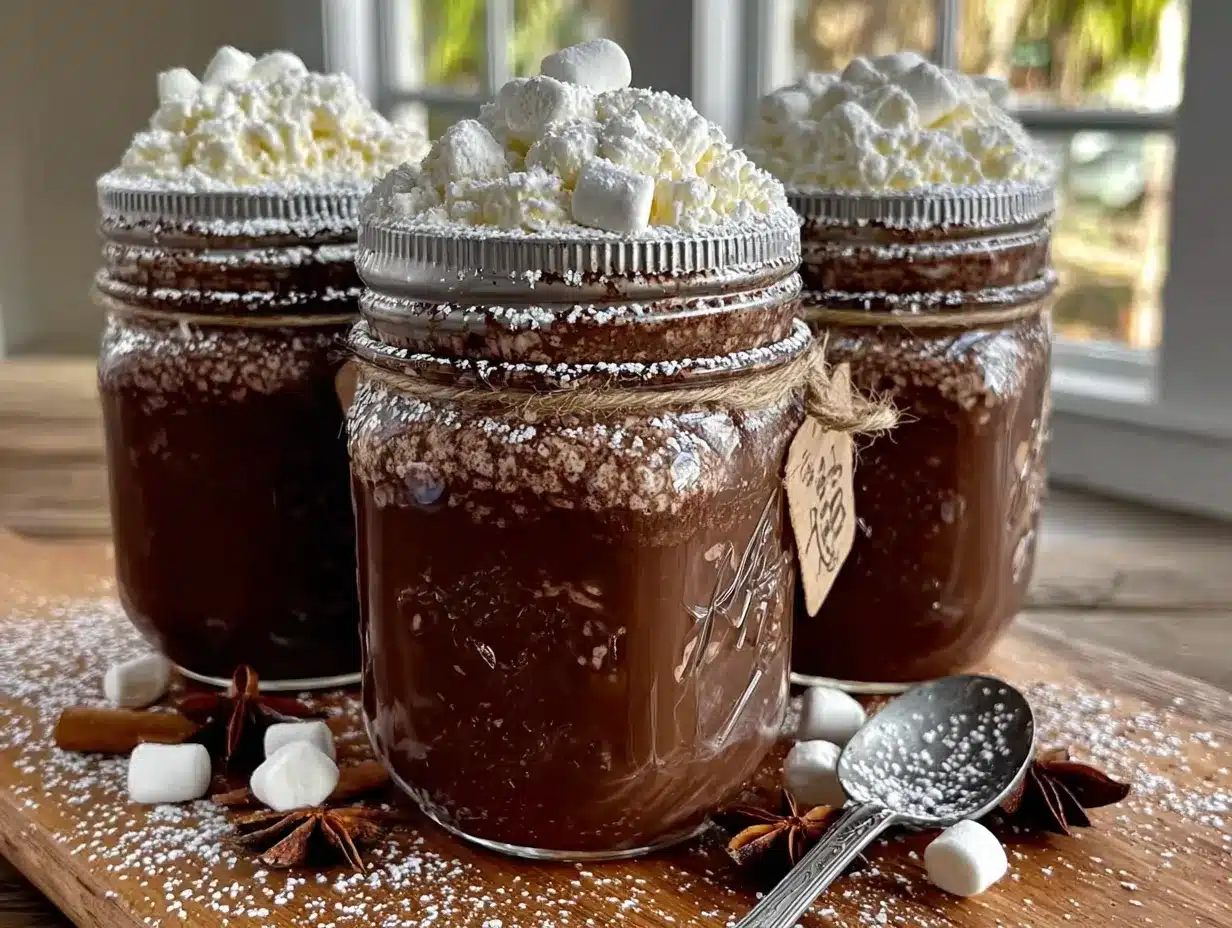
Making this hot cocoa mix is straightforward, but following the steps carefully ensures the best results. Here’s how I do it:
- Sift the dry ingredients together : In your large mixing bowl, combine the powdered sugar, Dutch-process cocoa powder, granulated sugar, fine sea salt, and ground cinnamon (if using). Sift everything through a fine-mesh sieve into the bowl. This step is non-negotiable—it breaks up any lumps and aerates the mixture for a smoother final texture. I usually sift twice if I’m feeling extra particular. (You’ll thank me later when your cocoa dissolves instantly.)
- Whisk thoroughly : Using your balloon whisk, stir the sifted ingredients together for about 30 seconds. Make sure everything is evenly distributed. The color should be a uniform dark brown without any streaks of white powdered sugar. This is your chance to catch any stray lumps you might have missed.
- Prepare your jars : Take your clean, dry mason jars and place them on a flat surface. If you’re using a funnel, set it in the mouth of the first jar. If you don’t have a funnel, you can carefully spoon the mix in—just go slowly to avoid spills.
- Layer the mix and marshmallows : Spoon about ½ cup of the cocoa mix into the bottom of each pint jar. Tap the jar gently on the counter to settle the powder. Add a thin layer of mini marshmallows—about ¼ cup. Repeat with another layer of cocoa mix, then another layer of marshmallows, until the jar is full. The goal is to create visible, attractive layers. For a quart jar, you’ll need about double the amount. (Pro tip: Use the back of a spoon to gently press down each layer so everything fits neatly.)
- Seal and decorate : Screw the lid on tightly. Wipe the outside of the jar with a clean, dry cloth to remove any powder residue. Now comes the fun part—decorating. Tie a piece of ribbon or twine around the neck of the jar. Attach a small gift tag with instructions: “Add 2-3 tablespoons of mix to 8 oz of hot milk or water. Stir well and enjoy!” You can also tuck a peppermint stick or a small chocolate bar into the ribbon for an extra touch.
- Store or gift immediately : If you’re giving them away right away, they’re ready to go. If you’re making them ahead, store the jars in a cool, dry place away from direct sunlight. They’ll keep for up to six months, though the marshmallows may soften slightly over time. I usually make a batch in early December and gift them throughout the month.
A note on measurements—I’ve provided both US cups and metric grams because weighing ingredients is more accurate. If you’re making a large batch, I highly recommend using a kitchen scale. It ensures consistency across all your jars, which matters when you’re gifting to multiple people.
Cooking Tips & Techniques
Over the years, I’ve made plenty of mistakes with this recipe, and I’m sharing them so you don’t have to repeat them. Here are the lessons I’ve learned:
- Don’t skip the sifting : I know it seems like an extra step, but sifting is what separates a smooth cocoa mix from a lumpy one. I once rushed through a batch for a holiday party, skipped the sifting, and ended up with clumps that refused to dissolve. Never again.
- Use hot milk, not water, for the best flavor : While the mix works with water, whole milk or a plant-based alternative like oat milk creates a creamier, richer cup. The fat in the milk carries the chocolate flavor better. I always include this tip on my gift tags.
- Toast the marshmallows for a twist : If you’re making a mug for yourself right away, try floating a few marshmallows on top and broiling them for 30 seconds. It gives you that campfire-style toasted marshmallow flavor without the campfire. My kids go crazy for this.
- Scale up for a crowd : Hosting a holiday party? Make a big batch of the mix and set up a hot cocoa bar. Offer toppings like whipped cream, chocolate shavings, crushed candy canes, and caramel sauce. Let guests customize their own mugs. It’s always a hit.
- Test your mix before gifting : Make one mug from your first batch to taste it. Adjust the sweetness or cocoa level if needed. I learned this after gifting a batch that was too sweet—I had to call everyone and apologize with a corrected version. Now I always taste first.
One more thing—timing matters. If you’re making multiple jars, set up an assembly line. Sift all your dry ingredients into one big bowl, then portion them out into jars. This saves time and keeps the process stress-free. Put on some holiday music, pour yourself a mug of tea, and enjoy the process. It’s supposed to be fun, not frantic.
Variations & Adaptations
This recipe is incredibly versatile, and I’ve experimented with several variations over the years. Here are some of my favorites:
- Spicy Mexican Hot Cocoa : Add ½ teaspoon of cayenne pepper and ½ teaspoon of chili powder to the dry mix. The heat balances beautifully with the sweetness. I made this for a friend who loves spicy food, and she said it was the best cocoa she’d ever had.
- Peppermint Hot Cocoa : Crush 2-3 peppermint candies and mix them into the cocoa powder before sifting. You can also add a drop of peppermint extract to the mix, but be careful—it’s potent. A little goes a long way. This is my go-to for Christmas gifting.
- Vegan & Dairy-Free Version : Use dairy-free chocolate chips (about ¼ cup per batch) and ensure your powdered sugar is vegan-friendly (some brands use bone char in processing). The rest of the ingredients are naturally vegan. Pair with oat milk for the creamiest result.
- White Hot Cocoa : Swap the Dutch-process cocoa powder for 1 cup of white chocolate chips (finely chopped or melted and mixed in). This creates a creamy, vanilla-forward drink that’s completely different but equally delicious. It’s a fun alternative for those who prefer milder flavors.
- Gluten-Free Adaptation : The base recipe is naturally gluten-free, but double-check your cocoa powder and powdered sugar labels to ensure they haven’t been processed in facilities that handle wheat. Most major brands are safe, but it’s worth verifying for celiac friends.
I once tried a salted caramel variation by adding 2 tablespoons of caramel powder and an extra pinch of sea salt. It was good, but the caramel tended to clump. If you try this, sift the caramel powder separately first. Live and learn, right?
Serving & Storage Suggestions
These jars are designed to be gifted, but they’re also perfect for keeping on hand for yourself. Here’s how to serve and store them:
- Serving Temperature : For the best experience, heat your milk or water until it’s steaming but not boiling—around 180°F (82°C). Boiling can scorch the cocoa and make it taste slightly burnt. I use a small saucepan or an electric kettle with temperature control.
- How to Serve : Add 2-3 tablespoons of the mix to 8 ounces of hot liquid. Stir vigorously for about 20 seconds until fully dissolved. Top with marshmallows, whipped cream, or a drizzle of chocolate syrup. For an extra indulgent touch, add a splash of vanilla extract.
- Storage : Keep the jars in a cool, dark place like a pantry or cupboard. Avoid storing them near the stove or in direct sunlight, as heat can cause the powdered sugar to clump and the marshmallows to melt. Properly stored, the mix stays fresh for up to six months.
- Freezing : You can freeze the jars for longer storage—up to a year. Just make sure the jars are airtight and leave a little headspace for expansion. Thaw at room temperature before gifting or using. The texture remains perfect.
- How Flavors Develop : The cocoa mix actually tastes better after a week or two. The flavors meld together, and the cinnamon (if used) becomes more integrated. I usually make my jars at least a week before I plan to give them away.
If you’re serving these at a party, consider making a large batch of the mix and storing it in a big glass jar with a spigot. Set it out with a stack of mugs and let guests help themselves. It’s a self-serve station that looks beautiful and requires minimal effort.
Nutritional Information & Benefits
While this is definitely a treat, there are a few nutritional highlights worth mentioning. Here’s a rough breakdown per serving (2 tablespoons of mix prepared with 8 oz of whole milk):
- Calories : Approximately 180-220 calories per mug, depending on the milk used. Using water or unsweetened almond milk reduces this to about 100-120 calories.
- Fat : 4-6g, mostly from the cocoa butter in the cocoa powder and the milk. Dutch-process cocoa is naturally low in fat compared to some other chocolate products.
- Sugar : 24-28g, primarily from the added sugars. You can reduce this by using a sugar substitute like monk fruit or erythritol, though the texture may change slightly.
- Fiber : 2-3g from the cocoa powder. Cocoa is a good source of dietary fiber, which supports digestive health.
- Antioxidants : Cocoa powder is rich in flavonoids, which are antioxidants that support heart health and reduce inflammation. The darker the cocoa, the higher the flavonoid content.
For those with dietary restrictions, this recipe can be adapted to be vegan, gluten-free, and low-carb (with sugar substitutes). It’s also nut-free in its base form, making it safe for school or office gifting. Just remember to check labels if allergies are a concern. I always include a small note on the gift tag listing the main ingredients for transparency.
Conclusion
This homemade hot cocoa mix has become a staple in my holiday tradition for good reason. It’s simple enough to make in an afternoon, thoughtful enough to impress anyone on your gift list, and delicious enough to become a family favorite. I love that it lets me share a little piece of warmth and comfort with the people I care about, without spending a fortune or stressing over complicated recipes.
I encourage you to make this recipe your own. Play with the spices, try different add-ins, and find the combination that feels like you. Whether you’re gifting it to your child’s teacher, your neighbor, or your cousin who has everything, these jars carry a message that can’t be bought in a store: I thought of you, and I wanted to give you something made with care.
So grab your ingredients, put on your favorite playlist, and start layering those jars. I promise you—the smiles you get in return will be worth every second. And when you taste that first mug on a cold winter night, you’ll understand exactly why I couldn’t stop making this until I got it right.
Have you made these jars before? What’s your favorite add-in? Drop a comment below—I’d love to hear how you make this recipe your own. And if you know someone who could use a little warmth this season, share this post with them. Let’s spread the cocoa love!
Frequently Asked Questions
Can I use natural cocoa powder instead of Dutch-process?
Yes, you can. Natural cocoa powder will work, but the flavor will be slightly more acidic and less smooth. Dutch-process cocoa is alkalized, which gives it a milder, richer taste. If you use natural cocoa, you might want to add a pinch of baking soda to balance the acidity, though this isn’t strictly necessary.
How long does the hot cocoa mix last in the jar?
When stored in an airtight container in a cool, dark place, the mix stays fresh for up to six months. The marshmallows may soften over time, but the cocoa powder itself remains good. If you’re making jars for long-term gifting, consider adding the marshmallows separately in a small bag tied to the jar.
Can I make this mix sugar-free?
Absolutely. Substitute the powdered sugar and granulated sugar with a sugar-free alternative like monk fruit sweetener or erythritol. Keep in mind that the texture may be slightly different, and some sugar substitutes don’t dissolve as easily. I recommend sifting them twice to ensure a smooth mix.
What’s the best milk to use for the richest cocoa?
Whole milk is my top choice for the creamiest, most indulgent cup. If you prefer a dairy-free option, oat milk is the closest in texture and richness. Almond milk works but produces a thinner cocoa. Avoid skim milk—it can make the drink taste watery.
How many servings does one pint jar make?
A pint jar filled with about ¾ cup of mix yields roughly 8-10 servings, depending on how much you use per mug. I recommend 2-3 tablespoons per 8-ounce cup, so a single jar can make about 10 mugs. Quart jars double that amount.
Pin This Recipe!
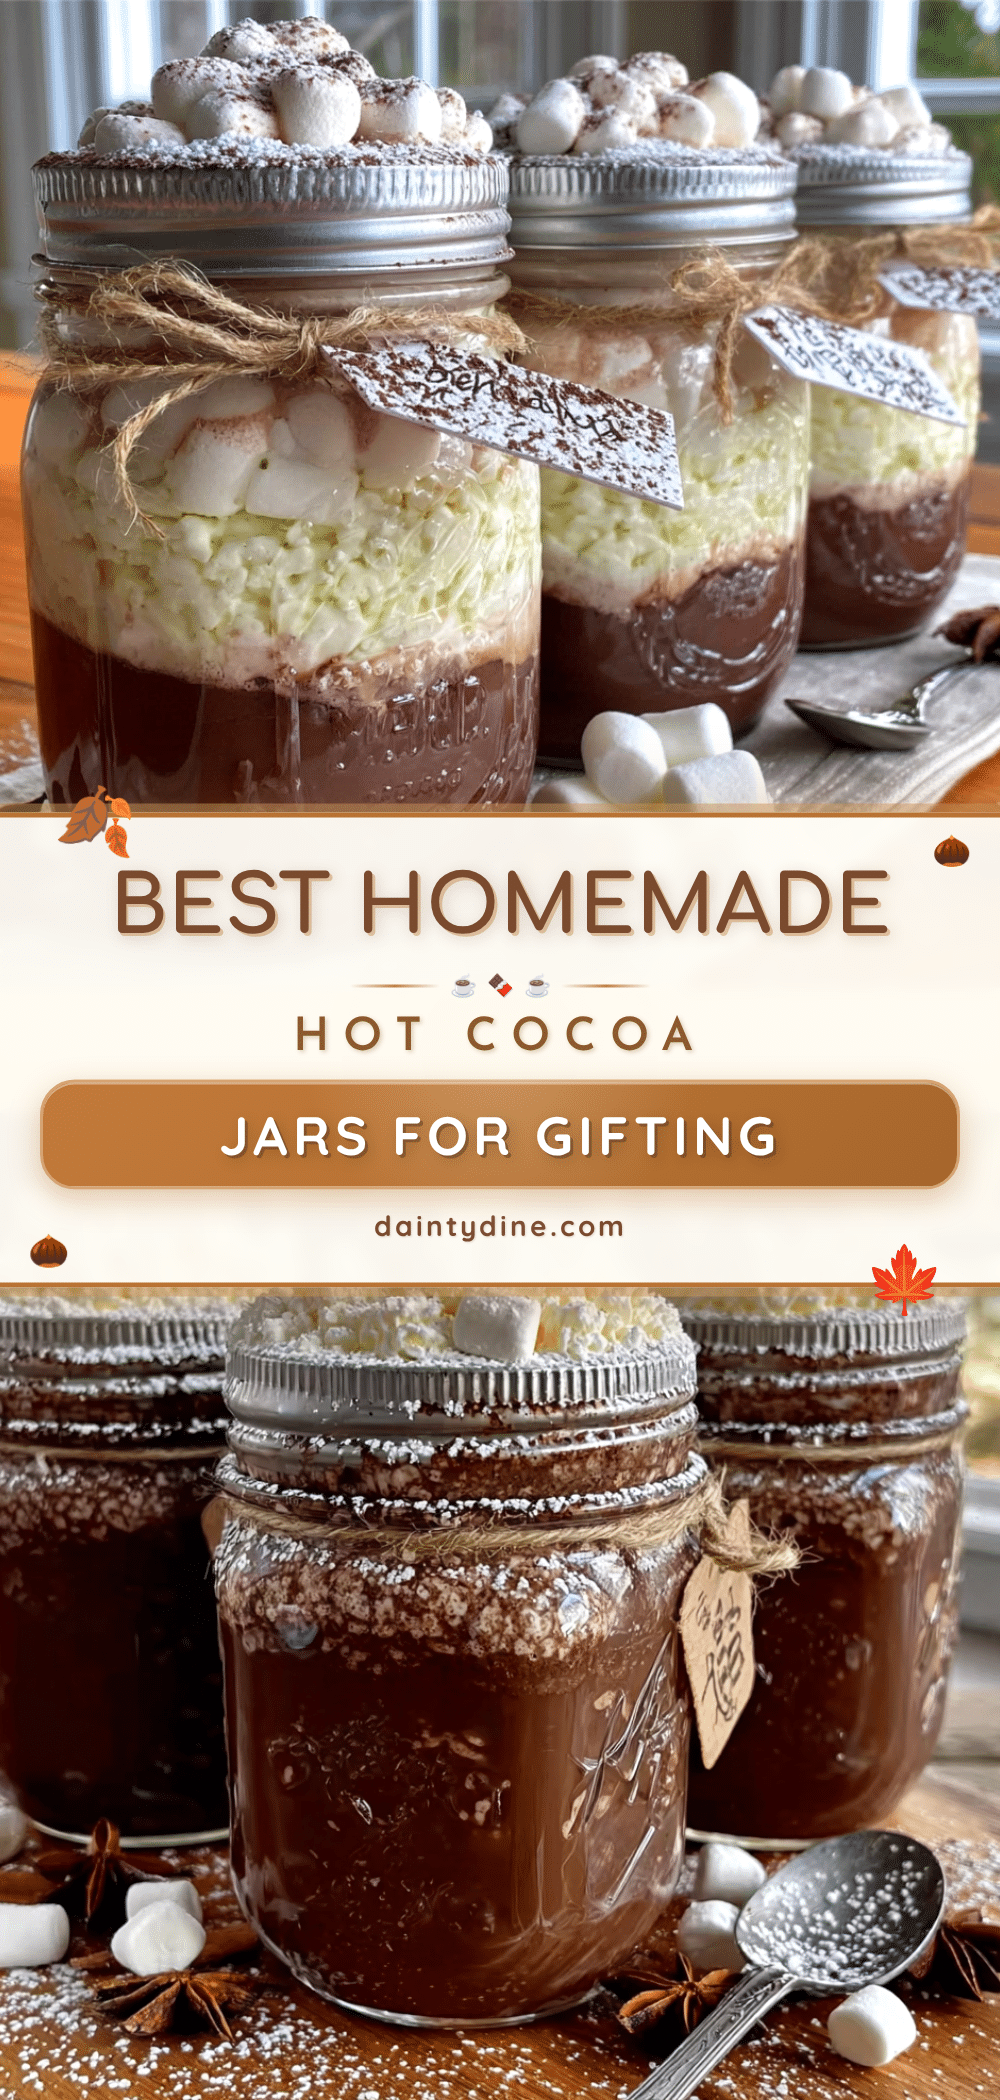
Best Homemade Hot Cocoa Mix Jars for Easy Gifting
This homemade hot cocoa mix is rich, velvety, and perfect for gifting in mason jars. With simple ingredients and easy layering, it’s a thoughtful and delicious present for any occasion.
- Prep Time: 10 minutes
- Cook Time: 0 minutes
- Total Time: 10 minutes
- Yield: 8-10 servings per pint jar 1x
- Category: Beverage
- Cuisine: American
Ingredients
- 2 cups (240g) powdered sugar
- 1 ½ cups (180g) Dutch-process cocoa powder
- 1 cup (200g) granulated sugar
- 1 teaspoon (5g) fine sea salt
- 1 teaspoon (2g) ground cinnamon (optional)
- 1 cup (about 120g) mini marshmallows, for layering
- Optional add-ins: dark chocolate shavings, pinch of cayenne pepper, vanilla bean
Instructions
- Sift the dry ingredients together: In a large mixing bowl, combine the powdered sugar, Dutch-process cocoa powder, granulated sugar, fine sea salt, and ground cinnamon (if using). Sift everything through a fine-mesh sieve into the bowl. Sift twice if desired.
- Whisk thoroughly: Using a balloon whisk, stir the sifted ingredients together for about 30 seconds until evenly distributed and uniform in color.
- Prepare your jars: Place clean, dry mason jars on a flat surface. Use a funnel if available.
- Layer the mix and marshmallows: Spoon about ½ cup of cocoa mix into the bottom of each pint jar. Tap gently to settle. Add a thin layer of mini marshmallows (about ¼ cup). Repeat with another layer of cocoa mix and marshmallows until the jar is full. For quart jars, double the amounts.
- Seal and decorate: Screw the lid on tightly. Wipe the jar clean. Tie ribbon or twine around the neck and attach a gift tag with instructions: ‘Add 2-3 tablespoons of mix to 8 oz of hot milk or water. Stir well and enjoy!’
- Store or gift immediately: Store jars in a cool, dry place away from sunlight. They keep for up to six months.
Notes
Sifting the dry ingredients is essential to avoid lumps. For best flavor, use hot milk instead of water. The mix tastes even better after a week or two as flavors meld. Toasted marshmallows on top add a campfire twist.
Nutrition
- Serving Size: 2-3 tablespoons of m
- Calories: 180220
- Sugar: 2428
- Sodium: 150200
- Fat: 46
- Saturated Fat: 23
- Carbohydrates: 3035
- Fiber: 23
- Protein: 46
Keywords: hot cocoa mix, homemade hot cocoa, gift jars, mason jar gifts, hot chocolate mix, easy holiday gifts