Love this? Save it for later!
Share the inspiration with your friends
I wasn’t expecting cooking advice from my accountant, but there I was, sitting in his cluttered office during tax season, watching him eat lunch out of a Tupperware container. The smell that wafted over his desk—something deeply savory with caramelized onions and tender green beans—made me completely lose my train of thought about deductions. “That’s my wife’s green bean casserole,” he said, noticing me staring. “She makes it the night before every holiday so I’m not hangry during family time.” He laughed, but I was already mentally rewriting my entire Thanksgiving menu. I mean, a make-ahead green bean casserole that actually tastes better the next day? That felt like finding a hidden gem in a pile of receipts.
Now, I’ve had my share of green bean casserole disasters. The soggy ones, the ones where the fried onions turn into a sad, oily paste, the ones that take up precious oven space when you’re already juggling a turkey and three sides. Honestly, I’d almost given up on it entirely. But this version—the one I begged my accountant’s wife for—changed everything. It uses crispy shallots instead of the canned stuff, and the whole thing comes together in about 30 minutes of active time. You just assemble it, pop it in the fridge, and bake it when you’re ready. No last-minute scrambling, no burnt fingers, no stress.
Maybe you’ve been there too—standing in a hot kitchen, wondering how you’re going to get everything on the table at the same time. That’s exactly why this recipe stuck with me. It’s not just good; it’s practical. It’s the kind of dish that makes you look like a hero without the behind-the-scenes chaos. And honestly, that’s the best kind of recipe to have in your back pocket.
Why You’ll Love This Recipe
This isn’t just another green bean casserole. After testing this recipe about seven times (my family is thrilled, by the way), I can confidently say it solves every problem the classic version has. Let me break down why this one’s a winner:
- Truly Make-Ahead Friendly: Assemble it up to 48 hours in advance. The flavors actually meld together and get better. On the day of serving, just bake and top with the crispy shallots.
- No Canned Soup Required: We’re using a simple homemade cream sauce that takes five minutes. It’s richer, creamier, and you control the salt. Plus, no weird ingredients you can’t pronounce.
- Crispy Shallots That Stay Crispy: The secret is adding them right before serving. No more soggy topping! These shallots stay crunchy for hours, even after the casserole sits out.
- 30 Minutes Active Time: Most of the work is just blanching beans and whisking a sauce. The oven does the rest. Perfect for a busy weeknight or a holiday when you’re already doing too much.
- Uses Simple Ingredients: Green beans, butter, mushrooms, cream, chicken broth, and shallots. That’s it. No special trips to a fancy grocery store.
- Always Gets Rave Reviews: I’ve brought this to three different potlucks and two Thanksgivings. Every single time, someone asks for the recipe. It’s that good.
What makes this different from the rest? It’s the texture. The green beans stay bright and tender-crisp because we blanch them first. The sauce is velvety but not gloppy. And those shallots—oh, those shallots. They add a nutty, almost sweet crunch that makes the whole dish feel special. It’s comfort food that doesn’t weigh you down, and it’s the kind of thing that makes you close your eyes after that first bite.
What Ingredients You Will Need
This recipe uses simple, wholesome ingredients to deliver bold flavor and satisfying texture without the fuss. Most of these are probably already in your kitchen, which is exactly what you want on a busy weeknight or holiday morning.
- Fresh Green Beans (2 lbs, trimmed and halved): Look for bright, crisp beans that snap when you bend them. I prefer standard green beans over haricots verts here—they hold up better to the creamy sauce and reheating. If you’re in a rush, frozen green beans work too, just thaw and pat them dry first.
- Large Shallots (4-5, thinly sliced into rings): These are the star of the show. Shallots are milder and sweeter than onions, and they crisp up beautifully. I recommend using at least 4 large ones—you want a generous topping.
- All-Purpose Flour (1/3 cup, divided): We use some for the sauce and some for coating the shallots. It helps thicken the cream sauce and gives the shallots their crunchy coating.
- Unsalted Butter (4 tablespoons, divided): Use unsalted so you can control the salt level. Butter adds richness to the sauce and helps brown the mushrooms.
- Cremini Mushrooms (8 oz, sliced): These have more flavor than white button mushrooms. They add an earthy, savory depth to the sauce. If you’re not a mushroom fan, you can leave them out, but I really think they make the dish.
- Garlic (3 cloves, minced): Fresh garlic is non-negotiable here. It adds a punch of flavor that jarred garlic just can’t match.
- Chicken Broth (1 cup): Use low-sodium so you can season to taste. Vegetable broth works perfectly if you want to keep it vegetarian.
- Heavy Cream (1 cup): This gives the sauce its luxurious texture. For a lighter version, you can use half-and-half, but the sauce won’t be quite as thick.
- Fresh Thyme (1 teaspoon, leaves only): Adds a subtle, earthy note. Dried thyme works in a pinch, use half the amount.
- Salt and Black Pepper (to taste): I use kosher salt and freshly ground black pepper for the best flavor.
- Neutral Oil (for frying shallots, about 1 cup): Vegetable, canola, or grapeseed oil works best. You need enough to submerge the shallots halfway.
Ingredient Selection Tips: For the best texture, choose green beans that are firm and bright green. Avoid any that are limp or have brown spots. For the shallots, look for ones that are firm with papery skin—avoid any that feel soft or are sprouting. I personally prefer Diamond Crystal kosher salt for its even seasoning, but any brand works.
Substitution Guidance: Need a gluten-free option? Use a gluten-free all-purpose flour blend for both the sauce and the shallot coating. The texture will be slightly different, but still delicious. Dairy-free? Substitute the butter with vegan butter, use full-fat canned coconut milk instead of cream, and use vegetable broth. It won’t be exactly the same, but it’s surprisingly good.
Equipment Needed
You don’t need a fancy kitchen to pull this off. Here’s what you’ll need:
- Large Pot (for blanching green beans): Any 6-8 quart pot works. You need enough water to cover the beans.
- Large Skillet or Saute Pan (12-inch): For cooking the mushrooms and making the sauce. A non-stick or stainless steel pan works well.
- 9×13-inch Baking Dish: This is the standard size for this recipe. You can also use a 3-quart casserole dish.
- Small Saucepan or Skillet (for frying shallots): A heavy-bottomed pan helps maintain even heat for crispy shallots.
- Slotted Spoon or Spider Strainer: For removing the fried shallots from the oil. A fork works in a pinch, but it’s messy.
- Paper Towels: For draining the crispy shallots.
- Whisk: For making the sauce smooth and lump-free.
- Large Mixing Bowl: For combining everything before baking.
Budget-Friendly Options: Don’t have a 9×13 dish? Use a large cast-iron skillet instead—it goes from stovetop to oven beautifully. No spider strainer? Use a fine-mesh sieve. Honestly, I’ve made this with just a pot, a pan, and a baking dish, and it turned out great. The key is having a way to fry the shallots, but even that can be done in the microwave if you’re really in a pinch (though the texture won’t be as good).
Preparation Method
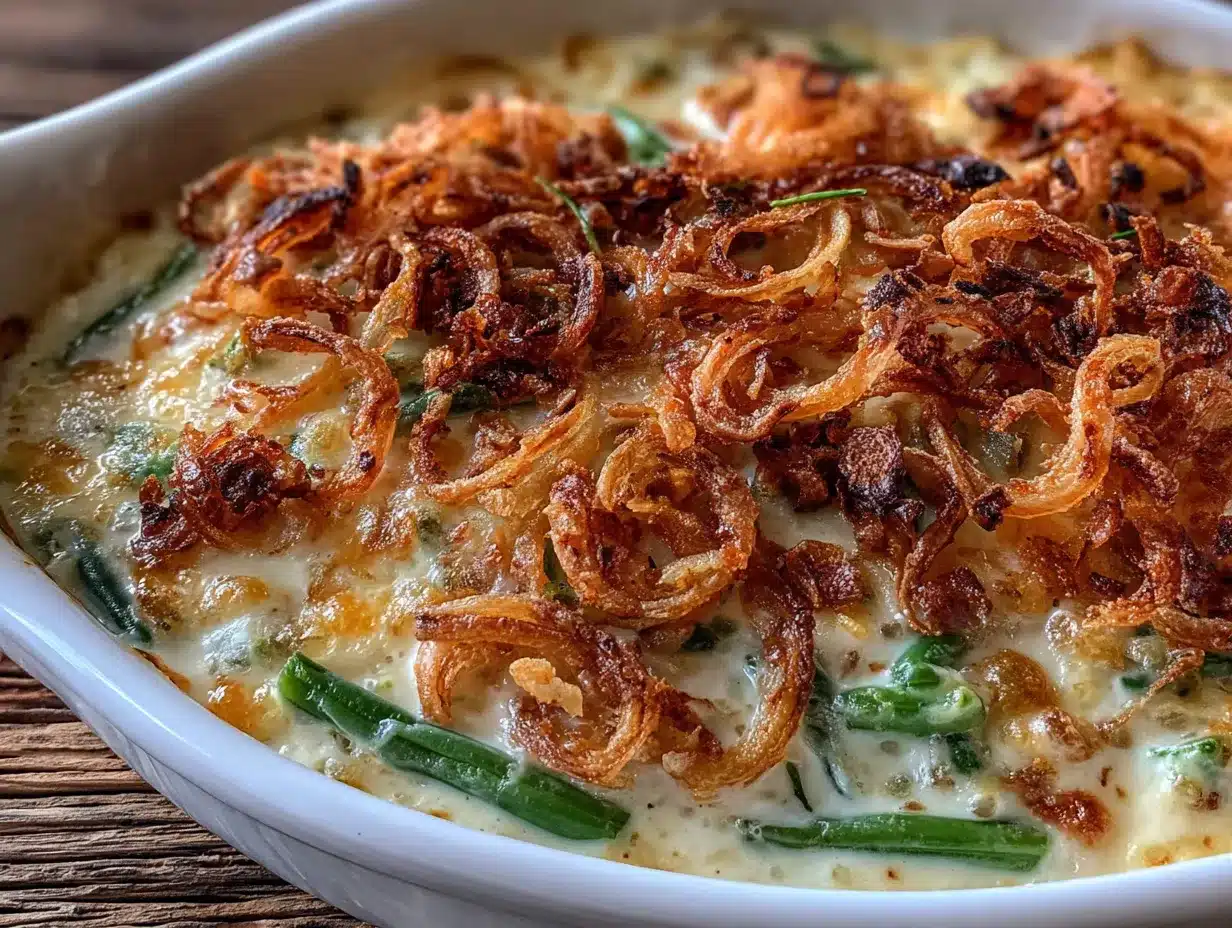
Let’s get cooking! This entire process takes about 30 minutes of active time, plus 25-30 minutes of baking. Here’s how to do it:
- Blanch the Green Beans: Bring a large pot of salted water to a boil. Add the trimmed green beans and cook for 3-4 minutes, until they turn bright green and are just tender-crisp. Drain immediately and transfer to a bowl of ice water to stop the cooking. This step is crucial—it keeps the beans from turning mushy later. Drain again and pat dry with a clean kitchen towel.
- Make the Crispy Shallots: While the beans cool, heat about 1 cup of neutral oil in a small saucepan over medium heat. Toss the sliced shallots with 2 tablespoons of flour, salt, and pepper. When the oil is shimmering (about 350°F if you have a thermometer), add the shallots in batches. Fry for 2-3 minutes, stirring occasionally, until golden brown. Don’t walk away—they burn fast! Use a slotted spoon to transfer them to a paper towel-lined plate. Season immediately with a pinch of salt. Set aside.
- Cook the Mushrooms: In a large skillet, melt 2 tablespoons of butter over medium-high heat. Add the sliced mushrooms and cook without stirring for 3 minutes—this lets them get a nice golden sear. Then stir and cook for another 2-3 minutes until they’re soft and browned. Add the minced garlic and cook for 30 seconds until fragrant.
- Make the Cream Sauce: Reduce the heat to medium. Sprinkle 2 tablespoons of flour over the mushrooms and stir constantly for 1 minute. This cooks out the raw flour taste. Slowly pour in the chicken broth while whisking continuously to prevent lumps. Then add the heavy cream and fresh thyme. Bring to a gentle simmer and cook for 2-3 minutes until the sauce thickens enough to coat the back of a spoon. Season with salt and pepper to taste.
- Combine Everything: In a large mixing bowl, combine the blanched green beans with the mushroom cream sauce. Gently fold until every bean is coated. Transfer the mixture to your greased 9×13 baking dish and spread it into an even layer.
- Make-Ahead Instructions: At this point, cover the dish tightly with foil or plastic wrap and refrigerate for up to 48 hours. The sauce will thicken slightly as it sits, which is exactly what you want.
- Bake and Serve: When you’re ready to bake, preheat your oven to 375°F. If the casserole has been refrigerated, let it sit on the counter for 20 minutes while the oven heats. Bake covered for 20 minutes, then uncover and bake for another 5-10 minutes until bubbly and hot throughout. Top with the crispy shallots just before serving.
Pro Tip: The sauce should look a little thinner than you think it should before baking—it will thicken up in the oven. And don’t skip the ice bath for the beans! I learned this the hard way when my beans turned into mush after baking. That cold shock locks in their color and crunch.
Cooking Tips & Techniques
After making this recipe more times than I can count, I’ve picked up a few tricks that make a real difference. Here’s what I’ve learned:
The Blanching Window: Don’t over-blanch the green beans. Three to four minutes is the sweet spot. They should still have a slight resistance when you bite into them. Why? Because they’ll continue cooking in the oven. Over-blanched beans turn into a sad, limp mess. I once left them in the boiling water while I answered the phone—big mistake. They were basically baby food by the time they came out of the oven.
Shallot Frying Temperature: The oil temperature is everything. Too low, and the shallots absorb oil and get greasy. Too high, and they burn before they’re cooked through. Aim for 350°F. If you don’t have a thermometer, test with one shallot ring—it should sizzle immediately and float to the surface. Also, fry in small batches. Crowding the pan drops the oil temperature and gives you soggy shallots.
Sauce Consistency: When you make the sauce, it should look a bit thin—like heavy cream. It will thicken as it bakes. If it’s already thick before baking, you’ll end up with a gluey casserole. Trust the process. And always taste the sauce before adding it to the beans. It should be well-seasoned because the beans will dilute the salt slightly.
Timing and Multitasking: Here’s my strategy for a smooth workflow. Start the water for blanching first. While it comes to a boil, trim the beans. While the beans blanch, slice the shallots. While the shallots fry, start the mushrooms. By the time the sauce is done, everything else is ready. It’s like a well-choreographed dance, and it saves you about 15 minutes of active time.
Common Mistake to Avoid: Don’t skip the step of patting the green beans dry after blanching. Extra water will make the sauce watery and thin. I know it seems fussy, but it matters. Also, don’t add the crispy shallots before baking. I tried that once thinking it would save time, and they turned into a sad, chewy mess. Always add them fresh.
Variations & Adaptations
One of the best things about this recipe is how adaptable it is. Here are some variations I’ve tried and loved:
- Classic Fried Onion Version: Not a shallot fan? No problem. Use the same method but with thinly sliced yellow onions. They’ll be slightly stronger in flavor but just as crispy. This is the version my mom prefers, and she says it reminds her of the classic casserole from her childhood.
- Mushroom Lover’s Twist: Add an extra 4 oz of mushrooms and mix in some dried porcini mushrooms (rehydrated and chopped) for an intense earthy flavor. I did this for a dinner party once, and everyone thought I’d spent hours on the sauce. The secret is just letting the mushrooms get really brown before adding the flour.
- Bacon and Cheese Version: Cook 4 strips of bacon until crispy, crumble them, and stir into the sauce along with 1/2 cup of shredded Gruyere cheese. The bacon adds smokiness, and the cheese makes the sauce extra creamy. This is my “company’s coming” version, and it never disappoints.
- Dairy-Free Adaptation: Use vegan butter, full-fat canned coconut milk (the creamy part), and vegetable broth. The coconut milk adds a slight sweetness that actually pairs beautifully with the shallots. It’s not exactly the same, but it’s honestly delicious in its own right.
- Gluten-Free Option: Substitute the all-purpose flour with a 1:1 gluten-free flour blend. I like Bob’s Red Mill for this. The sauce will be slightly less thick, so let it simmer an extra minute. For the shallots, use rice flour or cornstarch for a super crispy coating.
- Spicy Kick: Add 1/4 teaspoon of red pepper flakes to the sauce while it simmers. The heat cuts through the creaminess beautifully. My husband loves this version, and it’s perfect for when you want a little excitement in your side dish.
Serving & Storage Suggestions
This casserole is incredibly versatile when it comes to serving. Here’s how to make the most of it:
Serving Temperature and Presentation: Serve it hot, straight from the oven. The crispy shallots should be added right before serving to keep their crunch. I like to sprinkle them generously on top and then add a few extra in the center for visual appeal. A sprinkle of fresh parsley or chives on top adds a pop of color, but it’s optional.
Complementary Dishes: This casserole is a natural side for any holiday meal—perfect roast turkey, fluffy mashed potatoes, and cranberry sauce with orange. But it’s also fantastic alongside a simple roasted chicken or even a pan-seared pork chop on a regular Tuesday night. For a vegetarian meal, serve it with a hearty grain like quinoa or farro.
Storage Instructions: Leftovers can be stored in an airtight container in the refrigerator for up to 4 days. The crispy shallots will soften, so if you have leftover shallots, store them separately in a paper towel-lined container at room temperature. They’ll stay crispy for about 3 days.
Reheating Methods: The best way to reheat is in the oven at 350°F for 10-15 minutes. The microwave works in a pinch, but the texture won’t be as good. If you’re reheating individual portions, the microwave is fine—just add fresh crispy shallots on top. The flavors actually deepen overnight, so leftovers often taste even better the next day.
Freezer Instructions: You can freeze the unbaked casserole for up to 3 months. Assemble it in a freezer-safe dish, wrap tightly with foil and plastic wrap, and freeze. Thaw overnight in the refrigerator before baking. Add 10 minutes to the baking time since it’ll be cold. Don’t freeze the crispy shallots—make fresh ones when you bake.
Nutritional Information & Benefits
Here’s the estimated nutritional breakdown for one serving (based on 8 servings):
| Nutrient | Amount per Serving |
|---|---|
| Calories | 245 |
| Total Fat | 16g |
| Saturated Fat | 8g |
| Cholesterol | 40mg |
| Sodium | 380mg |
| Total Carbohydrates | 18g |
| Dietary Fiber | 4g |
| Sugars | 5g |
| Protein | 5g |
| Vitamin A | 15% DV |
| Vitamin C | 20% DV |
| Calcium | 6% DV |
| Iron | 8% DV |
Health Benefits: Green beans are packed with fiber, which aids digestion and helps you feel full. They’re also rich in Vitamin C and Vitamin K, which support immune function and bone health. Mushrooms provide B vitamins and selenium, an important antioxidant. And while this isn’t a low-calorie dish, it’s a more wholesome version of the classic—no processed soups or preservatives.
Dietary Considerations: This recipe is vegetarian. For a vegan version, use the dairy-free adaptations mentioned above. It’s not gluten-free in its standard form, but the gluten-free adaptation works beautifully. It’s also nut-free and egg-free, making it safe for most common allergies.
Conclusion
This make-ahead green bean casserole with crispy shallots has truly become my go-to side dish for every occasion. It solves the biggest problem of holiday cooking—the timing nightmare—without sacrificing an ounce of flavor. The green beans stay bright and tender, the sauce is rich and creamy, and those crispy shallots are honestly addictive.
I love that this recipe respects your time. Whether you’re feeding a crowd on Thanksgiving or just want a comforting side on a busy Tuesday, it delivers. And the best part? It’s forgiving. You can tweak it, adapt it, make it your own. That’s what cooking should be—flexible and fun, not stressful.
So go ahead, give it a try. Make it the night before your next gathering, and enjoy the peace of mind that comes with having one less thing to worry about. And when you do, I’d love to hear how it turned out. Drop a comment below, share your twist on the recipe, or tag me in your photos. Happy cooking, friend!
Frequently Asked Questions
Can I use frozen green beans instead of fresh?
Yes, you can. Thaw them completely and pat them dry with paper towels before using. Skip the blanching step since frozen beans are already partially cooked. Just toss them directly with the sauce. The texture won’t be quite as crisp, but it’s a great time-saver.
Can I make the crispy shallots ahead of time?
You can make them up to 3 days in advance. Store them in an airtight container lined with paper towels at room temperature. Don’t refrigerate them—the moisture will make them soft. If they lose some crunch, you can re-crisp them in a 300°F oven for 3-4 minutes.
How do I prevent the casserole from being watery?
The key is patting the blanched green beans completely dry before adding the sauce. Also, make sure your sauce is thick enough before baking—it should coat the back of a spoon. If it seems thin, let it simmer an extra minute. And don’t skip the step of cooking the flour for a full minute before adding liquid.
Can I double this recipe?
Absolutely. Double all ingredients and use a larger baking dish (like a 12×17-inch roasting pan). The baking time may increase by 5-10 minutes since there’s more volume. Just make sure the casserole is bubbly and hot in the center before serving.
What can I use instead of heavy cream?
Half-and-half works well, though the sauce will be slightly thinner. For a dairy-free option, full-fat canned coconut milk is excellent. You can also use a mixture of milk and a tablespoon of cream cheese for a similar richness. Just avoid using skim milk—it will make the sauce watery.
Pin This Recipe!
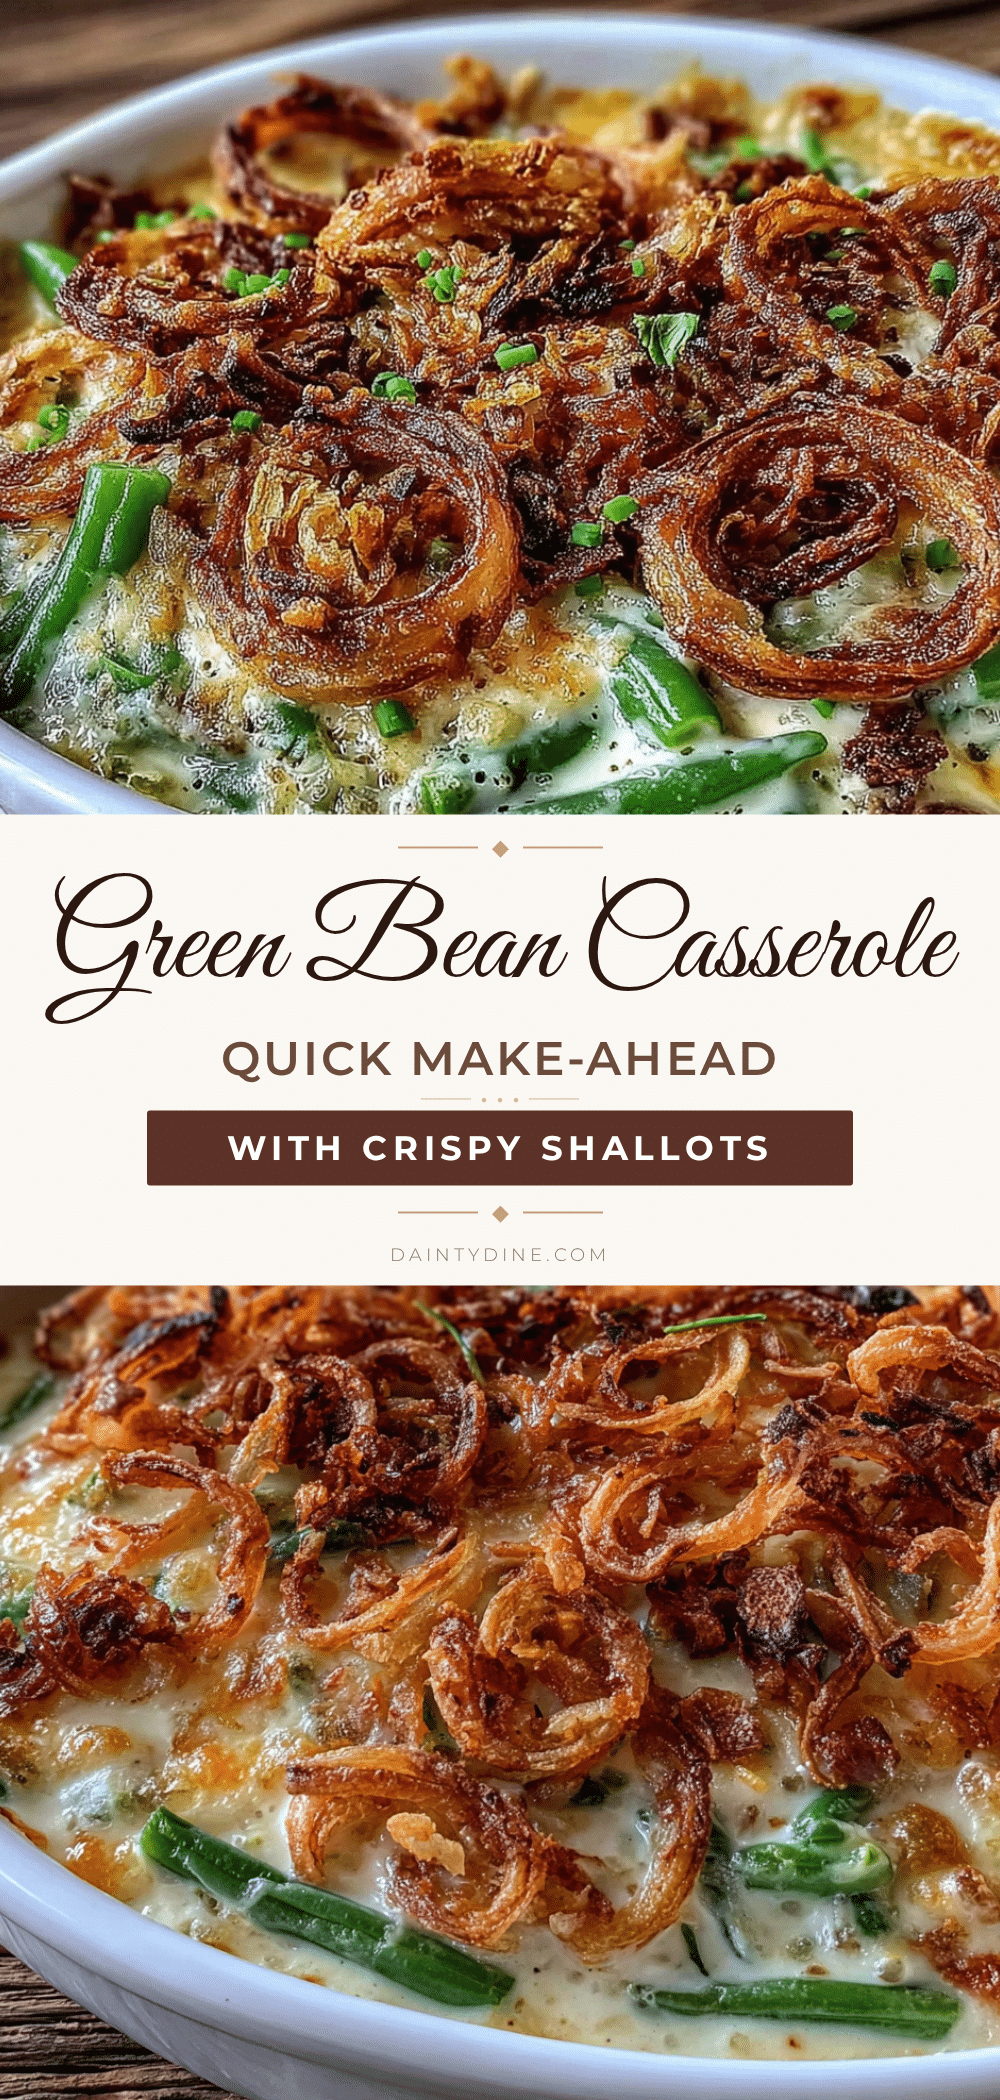
Best Make-Ahead Green Bean Casserole with Crispy Shallots

A make-ahead green bean casserole with crispy shallots that tastes even better the next day. This version uses a homemade cream sauce and crispy shallots instead of canned soup and fried onions, making it a stress-free side dish for holidays or weeknights.
- Prep Time: 30 minutes
- Cook Time: 30 minutes
- Total Time: 1 hour
- Yield: 8 servings 1x
- Category: Side Dish
- Cuisine: American
Ingredients
- 2 lbs fresh green beans, trimmed and halved
- 4–5 large shallots, thinly sliced into rings
- 1/3 cup all-purpose flour, divided
- 4 tablespoons unsalted butter, divided
- 8 oz cremini mushrooms, sliced
- 3 cloves garlic, minced
- 1 cup low-sodium chicken broth
- 1 cup heavy cream
- 1 teaspoon fresh thyme leaves
- Salt and black pepper to taste
- About 1 cup neutral oil (vegetable, canola, or grapeseed) for frying shallots
Instructions
- Blanch the Green Beans: Bring a large pot of salted water to a boil. Add the trimmed green beans and cook for 3-4 minutes until bright green and tender-crisp. Drain and transfer to a bowl of ice water to stop cooking. Drain again and pat dry with a clean kitchen towel.
- Make the Crispy Shallots: While the beans cool, heat about 1 cup of neutral oil in a small saucepan over medium heat. Toss the sliced shallots with 2 tablespoons of flour, salt, and pepper. When the oil is shimmering (about 350°F), add the shallots in batches. Fry for 2-3 minutes, stirring occasionally, until golden brown. Use a slotted spoon to transfer to a paper towel-lined plate. Season immediately with a pinch of salt. Set aside.
- Cook the Mushrooms: In a large skillet, melt 2 tablespoons of butter over medium-high heat. Add the sliced mushrooms and cook without stirring for 3 minutes to get a golden sear. Then stir and cook for another 2-3 minutes until soft and browned. Add the minced garlic and cook for 30 seconds until fragrant.
- Make the Cream Sauce: Reduce heat to medium. Sprinkle 2 tablespoons of flour over the mushrooms and stir constantly for 1 minute. Slowly pour in the chicken broth while whisking continuously to prevent lumps. Then add the heavy cream and fresh thyme. Bring to a gentle simmer and cook for 2-3 minutes until the sauce thickens enough to coat the back of a spoon. Season with salt and pepper to taste.
- Combine Everything: In a large mixing bowl, combine the blanched green beans with the mushroom cream sauce. Gently fold until every bean is coated. Transfer the mixture to a greased 9×13-inch baking dish and spread into an even layer.
- Make-Ahead Instructions: At this point, cover the dish tightly with foil or plastic wrap and refrigerate for up to 48 hours.
- Bake and Serve: When ready to bake, preheat oven to 375°F. If the casserole has been refrigerated, let it sit on the counter for 20 minutes while the oven heats. Bake covered for 20 minutes, then uncover and bake for another 5-10 minutes until bubbly and hot throughout. Top with the crispy shallots just before serving.
Notes
The sauce should look a little thinner than you think before baking—it will thicken in the oven. Don’t skip the ice bath for the beans to keep them crisp. Add crispy shallots just before serving to maintain crunch. For gluten-free, use a 1:1 gluten-free flour blend. For dairy-free, use vegan butter, full-fat canned coconut milk, and vegetable broth.
Nutrition
- Serving Size: 1 serving
- Calories: 245
- Sugar: 5
- Sodium: 380
- Fat: 16
- Saturated Fat: 8
- Carbohydrates: 18
- Fiber: 4
- Protein: 5
Keywords: green bean casserole, make-ahead, crispy shallots, Thanksgiving side, holiday side dish, homemade cream sauce