Love this? Save it for later!
Share the inspiration with your friends
There used to be this tiny bakery in a strip mall near my sister’s house—the kind with a crooked sign and a bell on the door that jingled way too loud. They made these ridiculous Christmas bark treats around the holidays, and my kids called them “snowman poop” the first time they saw them. I know, I know—the name is not exactly gourmet. But honestly, the stuff was addictive. White chocolate drizzled over crunchy cookies, studded with marshmallows and sprinkles, all broken into jagged little pieces. When the bakery closed two years ago—the owner retired, I think—my kids were genuinely upset. They asked me every December if I could make it. After six tries (the first batch was a melty disaster, let me tell you), I finally cracked it. This Kid-Approved Snowman Poop No-Bake Cookie Bark is the exact recreation. It’s got that same salty-sweet crunch, that same snowy white chocolate coating, and it takes about fifteen minutes of actual work. Maybe you’ve been there—chasing a memory from a place that just doesn’t exist anymore. This is that memory, made in your own kitchen.
Why You’ll Love This Recipe
This isn’t just another Christmas bark recipe you’ll find floating around the internet. I tested this version on my own family—two picky eaters, one husband who claims he doesn’t like sweets, and a neighbor who showed up unannounced during a test batch. Everybody went back for seconds. Here’s why this one stands out:
- No baking required: The oven stays off. You just melt, stir, and chill. Perfect for busy December days when you’re already roasting a turkey or wrapping presents.
- Pantry-friendly ingredients: You probably already have most of this stuff—cookies, marshmallows, white chocolate chips. No special trips to a fancy grocery store.
- Kid-approved (obviously): The name alone sells it. But the combo of crunchy cookies, soft marshmallows, and creamy white chocolate is a guaranteed crowd-pleaser for little ones.
- Budget-friendly: This whole batch costs under $8 to make, and it yields enough to fill a gift tin or two. For families watching their holiday spending, that’s a win.
- Freezer-friendly: Make it ahead, stash it in the freezer, and pull it out when guests show up or when you need a quick treat for a school party.
I mean, let’s be real—anything called “snowman poop” is going to get giggles from the kids. But the flavor? That’s what keeps them coming back. It’s the kind of treat that makes you close your eyes after the first bite, because the texture is just right: crunchy, creamy, and a little bit chewy all at once.
What Ingredients You Will Need
This recipe uses simple, everyday ingredients to deliver that bakery-style bark without any fuss. Most of these are staples you probably already have in your pantry or fridge during the holiday season.
For the Bark Base
- 12 ounces white chocolate chips or melting wafers (I prefer Ghirardelli white chocolate chips for the smoothest melt, but any brand works—just avoid white candy melts if you want that real chocolate flavor)
- 4 cups of crispy round cookies (like shortbread cookies, vanilla wafers, or even animal crackers—something crunchy that won’t get soggy)
- 1 cup mini marshmallows (the tiny ones melt slightly into the chocolate and add that chewy texture)
- ½ cup dried cranberries or chopped dried cherries (optional, but the tartness cuts through the sweetness beautifully)
- ¼ cup Christmas sprinkles (jimmies work best—nonpareils can bleed color into the white chocolate)
For the Drizzle (Optional but Recommended)
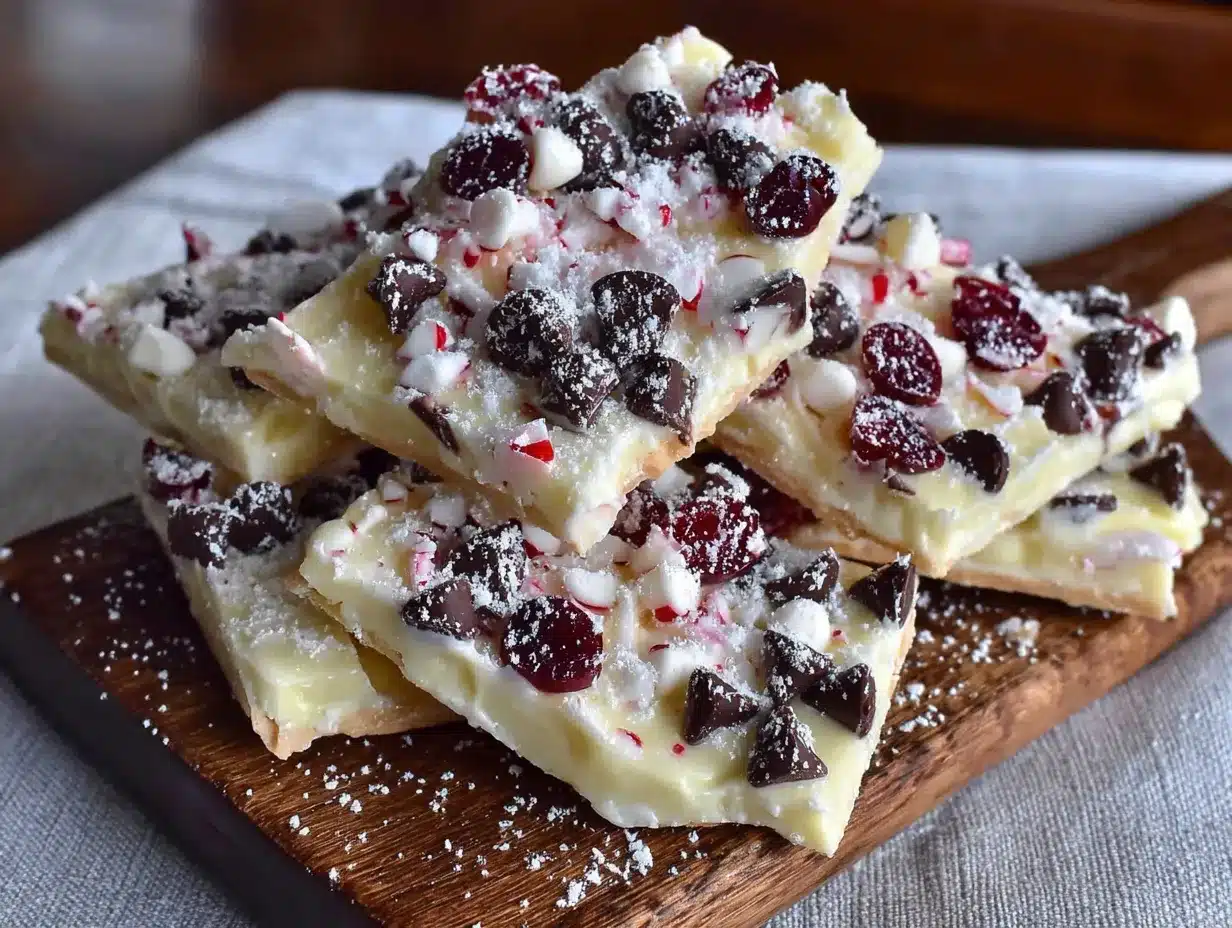
- 2 ounces dark or milk chocolate, melted (adds a pretty contrast and another layer of flavor)
A quick note on white chocolate: Real white chocolate contains cocoa butter, which melts more smoothly and tastes creamier. White baking chips or morsels often contain vegetable oils instead, which can get grainy if overheated. If you can find them, go for the real stuff. But honestly? I’ve made this with regular store-brand chips and it turned out just fine—just keep the heat low and stir constantly.
Cookie substitution tip: If you’re gluten-free, swap the cookies for gluten-free shortbread or even gluten-free pretzels. The salty crunch from pretzels actually works really well here—my neighbor’s kid with celiac disease loved that version.
Marshmallow tip: Don’t use giant marshmallows unless you cut them up. The mini ones distribute more evenly and create that perfect bite-sized bark piece.
Equipment Needed
You don’t need fancy gear for this one. Here’s what you’ll need:
- A microwave-safe bowl (glass or ceramic works best—plastic can get weird with hot chocolate)
- A rubber spatula (for stirring and spreading—silicone ones are great because they don’t scratch your bowls)
- A baking sheet (standard half-sheet size, about 13×18 inches)
- Parchment paper or a silicone baking mat (parchment is cheaper and easier to clean up)
- A small offset spatula or the back of a spoon (for spreading the chocolate mixture evenly)
- A piping bag or a small zip-top bag (for the chocolate drizzle—you can snip the corner off a baggie)
If you don’t have a microwave, you can melt the white chocolate in a double boiler on the stovetop—just be extra careful not to let any steam or water get into the chocolate, or it will seize up and turn into a grainy mess. I learned that one the hard way during attempt number three!
Preparation Method
This comes together fast, so I like to have everything measured and ready before I start melting. Trust me—once that white chocolate is melted, you don’t want to be hunting for the sprinkles.
- Line your baking sheet with parchment paper. Make sure the paper hangs over the edges a little—it’ll make lifting the bark out later so much easier. I usually use a 13×18-inch sheet, but a smaller one will give you thicker pieces.
- Crush the cookies. Place the cookies in a large zip-top bag and gently crush them with a rolling pin or the bottom of a measuring cup. You want a mix of pieces—some as big as a quarter, some as small as crumbs. Don’t pulverize them into dust; the texture is part of the charm. If you prefer less mess, you can just break them by hand, but the bag method is faster.
- Melt the white chocolate. Place the white chocolate chips or wafers in a microwave-safe bowl. Microwave in 30-second intervals at 50% power, stirring thoroughly after each interval. White chocolate burns easily, so don’t rush this step. It usually takes me about 2 to 3 minutes total, depending on my microwave. When it’s almost smooth—just a few lumps left—stop microwaving and stir until it’s completely smooth. The residual heat will finish the job.
- Combine the dry ingredients. Pour the crushed cookies, mini marshmallows, and dried cranberries (if using) into the bowl of melted white chocolate. Stir gently with your rubber spatula until everything is evenly coated. Don’t overmix, or the cookies will break down too much.
- Spread the mixture onto the prepared baking sheet. Pour the mixture onto the parchment-lined sheet and spread it into an even layer about ½-inch thick. Use the back of a spoon or an offset spatula to push it into the corners. It doesn’t have to be perfect—rustic is part of the look. Sprinkle the Christmas sprinkles over the top while the chocolate is still wet so they stick.
- Add the chocolate drizzle (optional). Melt the dark or milk chocolate in a small bowl using the same microwave method—30-second intervals, stirring in between. Transfer the melted chocolate to a small piping bag or a zip-top bag with a tiny corner snipped off. Drizzle it back and forth over the bark in thin lines. If you’re feeling fancy, you can use a fork to flick the chocolate for a more artistic look.
- Chill until set. Place the baking sheet in the refrigerator for at least 30 minutes, or until the bark is firm to the touch. If you’re in a hurry, the freezer works too—about 15 minutes should do it. Don’t skip this step; the bark needs to be fully set before you break it.
- Break into pieces. Once the bark is completely firm, lift it off the baking sheet using the parchment paper. Peel the paper away from the bottom, then break the bark into irregular pieces with your hands. I aim for pieces about 2 to 3 inches across—big enough to feel substantial, but small enough to eat in a few bites.
Pro tip: If the bark cracks unevenly or some pieces are too big, that’s totally fine. You can always break them smaller. The imperfect edges are part of the homemade charm.
Cooking Tips & Techniques
I’ve made this bark more times than I care to count, and I’ve learned a few things along the way. Here’s what I wish someone had told me before attempt number one:
Don’t overheat the white chocolate. This is the number one mistake people make. White chocolate is more sensitive than dark or milk chocolate because of the milk solids. If it gets too hot, it turns into a thick, grainy paste that’s impossible to work with. Keep the microwave power low and stir often. If it does seize up, you can try adding a teaspoon of vegetable oil or coconut oil and stirring vigorously—sometimes that saves it.
Crush the cookies unevenly. I know that sounds weird, but hear me out: if all the cookie pieces are the same size, the bark feels monotonous. You want some bigger chunks for crunch and some smaller bits that blend into the chocolate. I actually leave a few cookies whole and break them by hand at the end, just for variety.
Work quickly once the chocolate is melted. White chocolate starts to thicken as it cools, so have everything ready to go before you start melting. The marshmallows, the cookies, the sprinkles—all of it should be measured and within arm’s reach.
Use parchment, not wax paper. Wax paper can stick to the chocolate, especially if the bark sits in the fridge for a while. Parchment paper is non-stick and makes cleanup a breeze. Silicone mats work too, but they’re more expensive.
Let the bark come to room temperature before serving. Straight out of the fridge, the bark is very hard and can be a little too crunchy. Let it sit on the counter for 5 to 10 minutes, and it softens just enough to be perfectly chewy and creamy.
Variations & Adaptations
This recipe is super flexible—I’ve played around with it more than I’d like to admit. Here are some of my favorite twists:
Peppermint Snowman Poop
Add ½ cup of crushed candy canes or peppermint candies to the mixture along with the cookies. The peppermint pairs beautifully with the white chocolate, and it gives the bark a festive red-and-white speckled look. My kids fight over the pieces with the most peppermint.
Chocolate Lover’s Version
Swap the white chocolate for milk or dark chocolate chips. Use chocolate sandwich cookies (like Oreos) instead of shortbread, and add a handful of chocolate chips to the mix. Drizzle with white chocolate for contrast. This version is less “snowman” and more “yetibut it’s still delicious.
Nutty Crunch
Add ½ cup of chopped pecans, almonds, or walnuts to the mixture. Toast them first in a dry skillet for 3 to 4 minutes to bring out the flavor. The nuts add a savory element that balances the sweetness. Just be mindful if you’re serving this at a school event—nut allergies are common.
Vegan Adaptation
Use vegan white chocolate chips (they’re made with rice milk or oat milk instead of dairy) and vegan marshmallows. Most crispy cookies are accidentally vegan anyway, so this swap is easier than you’d think. My sister-in-law, who’s vegan, loved this version.
Gluten-Free Option
As I mentioned earlier, gluten-free shortbread cookies or gluten-free pretzels work perfectly. Just double-check that your sprinkles are gluten-free too—some brands use wheat starch as a thickener.
Serving & Storage Suggestions
This bark is best served at room temperature, after it’s had a few minutes to soften from the fridge. I like to arrange the pieces on a festive platter or in a wide-mouth jar for a casual, help-yourself vibe. It’s perfect for holiday parties, cookie exchanges, or as a little gift for teachers and neighbors.
For gifting, I layer the bark pieces in a clear cellophane bag or a small tin, tied with a ribbon and a tag that says “Snowman Poop” (the kids get a kick out of that). It’s a cheap and cheerful gift that feels personal without breaking the bank.
Storage: Keep the bark in an airtight container at room temperature for up to 5 days. If your kitchen is warm, store it in the fridge to prevent the chocolate from softening too much. For longer storage, freeze the bark in a freezer-safe bag or container for up to 3 months. To thaw, just transfer it to the fridge overnight or let it sit at room temperature for about 20 minutes.
Reheating tip: You don’t really reheat bark, but if it’s been in the fridge and seems too hard, just let it sit out for 10 minutes. The texture comes back beautifully. I actually think the flavors meld together even better after a day or two in the fridge—the marshmallows get a little chewier, and the chocolate sets up perfectly.
Nutritional Information & Benefits
Let’s be honest—this is a treat, not a health food. But I do think it’s worth knowing what’s in it, especially if you’re making it for kids with dietary restrictions.
Per serving (about 1/12 of the batch):
- Calories: 280
- Fat: 14g (8g saturated)
- Carbohydrates: 36g
- Sugar: 26g
- Fiber: 1g
- Protein: 3g
- Sodium: 95mg
Health highlights: White chocolate contains calcium and a small amount of iron from the milk solids. The dried cranberries add a bit of vitamin C and antioxidants. And the cookies? Well, they provide a little bit of fiber if you use whole-grain varieties. But honestly, this is about joy, not nutrition. It’s a once-a-year treat that brings smiles, and that has its own kind of value.
Allergen note: This recipe contains dairy (white chocolate), gluten (cookies), and may contain traces of nuts depending on the brands you use. For a dairy-free version, use vegan white chocolate. For gluten-free, use certified gluten-free cookies.
Conclusion
This Kid-Approved Snowman Poop No-Bake Cookie Bark is more than just a silly name—it’s a little piece of holiday magic that comes together in under 30 minutes. It’s the kind of treat that makes kids giggle and adults reach for seconds, all while keeping your oven free for the main event. Whether you’re making it for a classroom party, a cookie exchange, or just because it’s Tuesday in December, I promise you’ll love how easy it is.
I’d love to hear how yours turns out! Did you add peppermint? Swap the cookies? Did your kids come up with an even sillier name? Drop a comment below or tag me in your photos—I read every single one. And if you’re looking for more no-bake holiday treats, check out my No-Bake Christmas Cookies and Easy Holiday Desserts for more inspiration.
Happy holidays, and happy snacking!
Frequently Asked Questions
Can I use white chocolate candy melts instead of white chocolate chips?
Yes, you can. Candy melts are designed to melt smoothly and set firmly, so they work great for bark. Just keep in mind that they have a slightly different flavor—more artificial-tasting than real white chocolate. If you’re okay with that, go for it.
Why did my white chocolate seize up?
White chocolate seizes when it gets too hot or when even a tiny drop of water gets into the bowl. To prevent this, microwave at 50% power and stir frequently. If you’re using a double boiler, make sure the bowl doesn’t touch the water, and don’t let any steam get into the chocolate. If it does seize, try stirring in a teaspoon of coconut oil or vegetable oil to smooth it out.
Can I make this ahead of time for Christmas?
Absolutely. This bark keeps well for up to 5 days at room temperature or 3 months in the freezer. I actually prefer making it a few days ahead because the flavors meld together and the texture gets even better. Just store it in an airtight container to keep it fresh.
How do I get the bark to break into neat pieces?
Honestly, perfect pieces are overrated. I just lift the whole sheet of bark off the parchment and break it with my hands. If you want cleaner edges, you can score the bark with a sharp knife while it’s still slightly soft, then let it finish setting before breaking along the lines. But I think the rustic, jagged pieces look more homemade and inviting.
Can I double this recipe?
Yes, but work in batches. Melting more than 12 ounces of white chocolate at once can lead to uneven heating and scorching. Make two separate batches and spread them on two baking sheets. It’s a little more work, but the results are much better.
Pin This Recipe!
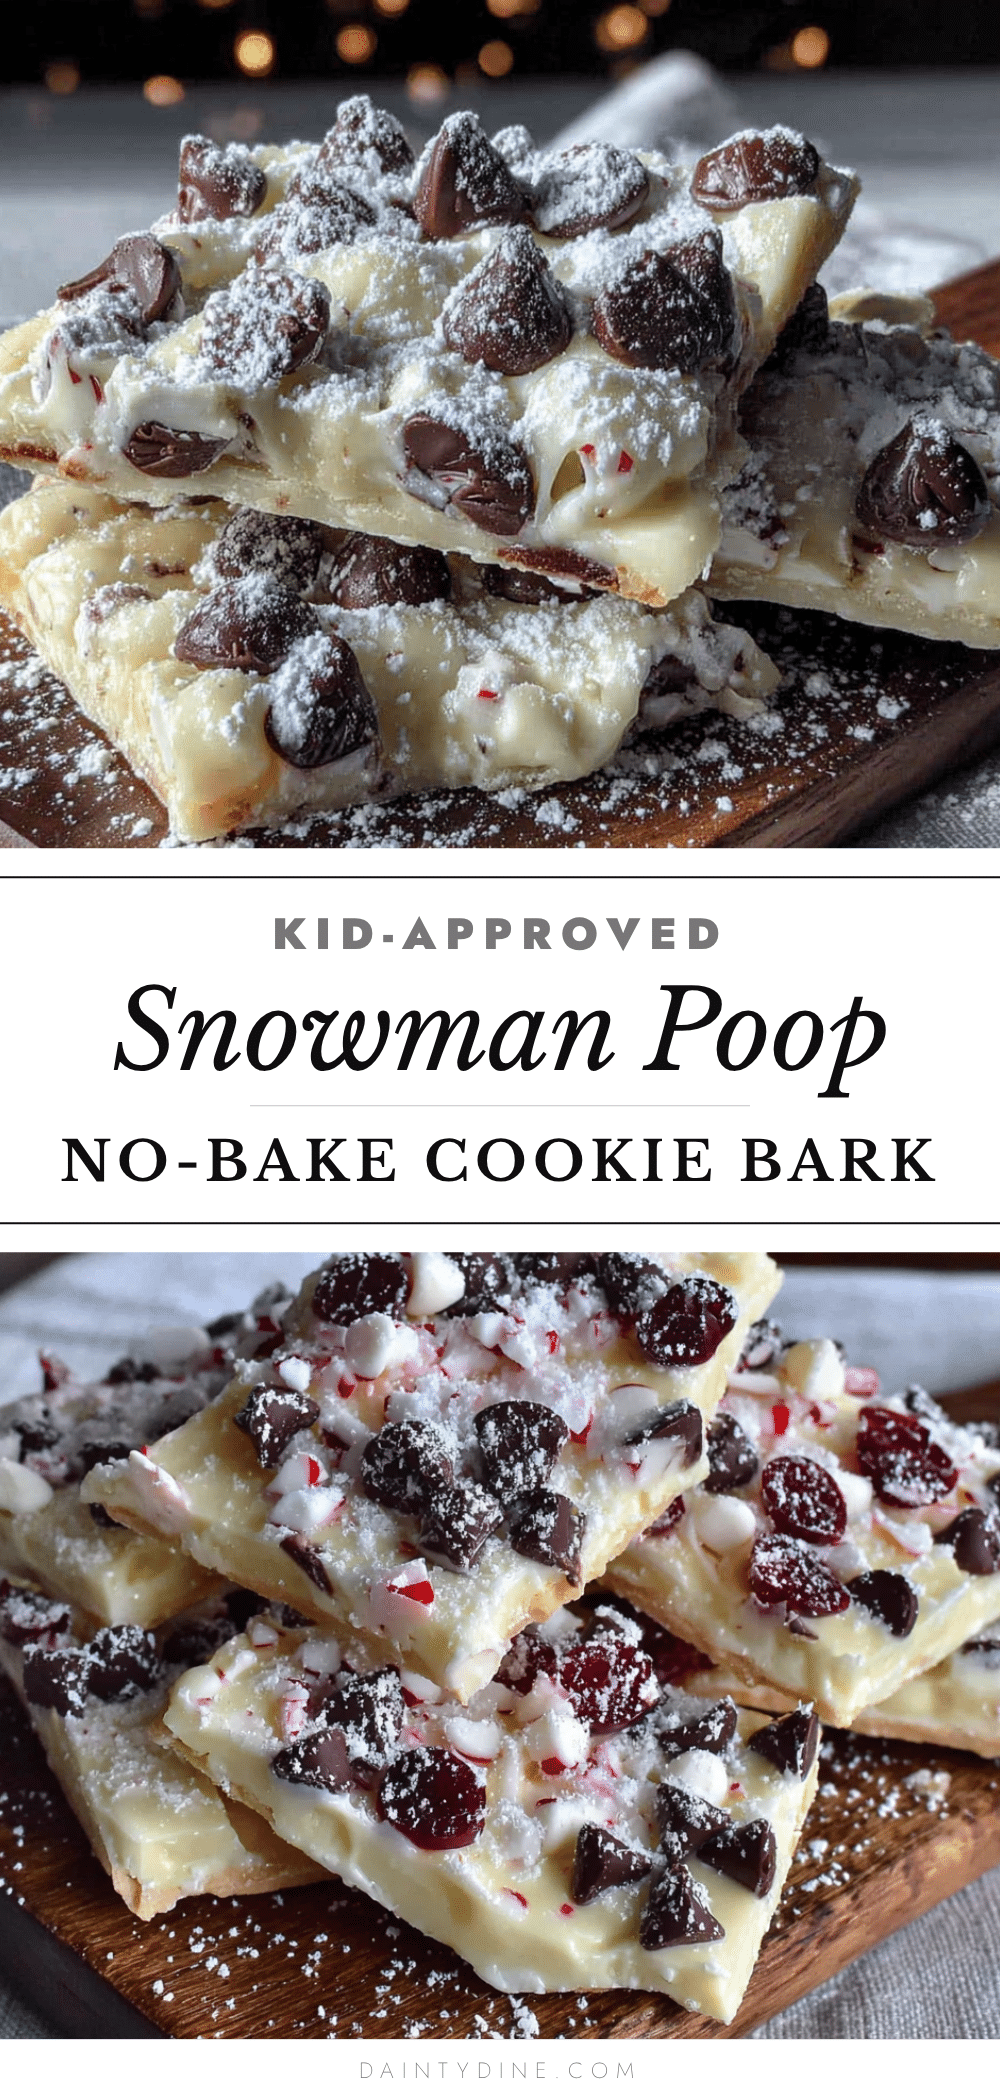
Kid-Approved Snowman Poop No-Bake Cookie Bark: Easy Christmas Treat

This no-bake cookie bark features white chocolate drizzled over crunchy cookies, studded with marshmallows and sprinkles, all broken into jagged pieces. It’s a salty-sweet, crowd-pleasing holiday treat that comes together in about 15 minutes of actual work.
- Prep Time: 15 minutes
- Cook Time: 0 minutes
- Total Time: 45 minutes (including chilling)
- Yield: 12 servings 1x
- Category: Dessert
- Cuisine: American
Ingredients
- 12 ounces white chocolate chips or melting wafers
- 4 cups crispy round cookies (like shortbread cookies, vanilla wafers, or animal crackers)
- 1 cup mini marshmallows
- ½ cup dried cranberries or chopped dried cherries (optional)
- ¼ cup Christmas sprinkles (jimmies work best)
- 2 ounces dark or milk chocolate, melted (optional, for drizzle)
Instructions
- Line your baking sheet with parchment paper, letting it hang over the edges slightly.
- Crush the cookies in a large zip-top bag with a rolling pin or measuring cup, aiming for a mix of pieces (some as big as a quarter, some as small as crumbs).
- Melt the white chocolate in a microwave-safe bowl in 30-second intervals at 50% power, stirring after each interval, until smooth (about 2-3 minutes total).
- Pour the crushed cookies, mini marshmallows, and dried cranberries (if using) into the melted white chocolate and stir gently until evenly coated.
- Spread the mixture onto the prepared baking sheet in an even layer about ½-inch thick. Sprinkle Christmas sprinkles on top while the chocolate is still wet.
- If using, melt the dark or milk chocolate in a small bowl using the same microwave method, then drizzle over the bark using a piping bag or zip-top bag with a snipped corner.
- Chill the baking sheet in the refrigerator for at least 30 minutes (or 15 minutes in the freezer) until firm.
- Lift the bark off the baking sheet using the parchment paper, peel away the paper, and break into irregular pieces with your hands.
Notes
Don’t overheat white chocolate; microwave at 50% power and stir often. Crush cookies unevenly for varied texture. Work quickly once chocolate is melted. Use parchment paper, not wax paper. Let bark come to room temperature before serving for best texture.
Nutrition
- Serving Size: 1/12 of batch
- Calories: 280
- Sugar: 26
- Sodium: 95
- Fat: 14
- Saturated Fat: 8
- Carbohydrates: 36
- Fiber: 1
- Protein: 3
Keywords: snowman poop, no-bake cookie bark, Christmas treat, white chocolate bark, easy holiday dessert, kid-friendly, no-bake dessert


