Love this? Save it for later!
Share the inspiration with your friends
My sister-in-law Jenna wasn’t trying to impress anyone. I’d stopped by to drop off a casserole dish she’d left at my place, and the smell of ginger, cinnamon, and cloves hit me before I even got through the front door. It was a Tuesday afternoon in early December, and she was standing at her kitchen counter in an old sweatshirt, casually sliding a baking sheet out of the oven. “Oh, those are just the house cookies for the kids’ school thing,” she said, like she hadn’t just filled her entire house with the kind of warmth that makes you want to curl up and stay forever. They weren’t perfect rectangles. A few had slightly crooked edges. But honestly, that was the whole point. She wasn’t fussing over royal icing or architectural precision. She was just making gingerbread—gluten-free, no less—because her youngest has celiac, and she refused to let him miss out on the tradition. I stood there for a solid ten minutes, watching her work, learning more from her casual, nonchalant movements than I ever did from a fancy cookbook. These gluten-free gingerbread house cookies are the result of that afternoon, and let me tell you, they taste like the holiday season you actually want to have—cozy, forgiving, and full of flavor. Maybe you’ve been there, standing in someone else’s kitchen, watching them make something that feels like magic without any of the fuss. That’s this recipe.
Why You’ll Love This Recipe
I’ve tested this recipe six times since that December day. Six times, because the first few batches were either too crumbly to hold a shape or too tough to bite into. But this version? This is the one that finally worked. It’s the kind of recipe that makes you feel like a hero in the kitchen without any of the stress.
- Quick & Easy: From start to finish, these cookies come together in under an hour. The dough needs just 30 minutes of chill time, so you’re not waiting around all day.
- Simple Ingredients: No weird gums or obscure flours. You probably already have everything in your pantry—almond flour, oat flour, warm spices, and molasses.
- Perfect for Holiday Gatherings: Whether you’re building a full gingerbread house or just baking cookies for a cozy night in, these fit every occasion.
- Crowd-Pleaser: My gluten-eating husband couldn’t tell the difference. He ate three before I could even get the icing ready.
- Unbelievably Delicious: The texture is that perfect spot between soft and sturdy. Spicy, sweet, and deeply satisfying.
What makes this recipe different from the rest? It’s the blend of almond and oat flours. Most gluten-free gingerbread recipes rely on a store-bought blend that can taste chalky or dry. This one uses whole-food flours that add richness and a tender crumb. It’s not just another version. It’s my best version, tested by a family who doesn’t have to eat gluten-free but chooses to eat these cookies anyway.
This recipe isn’t just good. It’s the kind that makes you close your eyes after the first bite. It’s comfort food reimagined—healthier, faster, but with the same soul-soothing satisfaction of a classic holiday treat. Perfect for impressing guests without stress, or turning a simple Tuesday into something memorable.
What Ingredients You Will Need
This recipe uses simple, wholesome ingredients to deliver bold flavor and satisfying texture without the fuss. Everything is easy to find, and most of it is probably already in your kitchen.
- Almond flour, 2 cups (finely ground, blanched is best for a light texture)
- Oat flour, 1 cup (certified gluten-free if needed; you can grind your own from rolled oats)
- Molasses, ½ cup (dark molasses gives the deepest flavor; I prefer Grandma’s brand)
- Coconut sugar, ½ cup (or brown sugar if you’re not strictly avoiding refined sugar)
- Unsalted butter, ½ cup, softened (or vegan butter for dairy-free; I use Miyoko’s)
- Egg, 1 large, room temperature (or a flax egg for vegan: 1 tbsp flaxseed meal + 3 tbsp water)
- Ground ginger, 1½ teaspoons
- Ground cinnamon, 1 teaspoon
- Ground cloves, ½ teaspoon
- Baking soda, ½ teaspoon
- Salt, ¼ teaspoon
- Vanilla extract, 1 teaspoon
I recommend using Bob’s Red Mill almond flour for the best texture. It’s consistently fine and never clumpy. For the oat flour, I sometimes grind my own from gluten-free rolled oats in a high-speed blender. It takes two minutes and saves a trip to the store. Look for molasses that’s unsulphured—it’s smoother and less bitter. In the summer, I’ve swapped the ginger and cloves for lemon zest and cardamom to make a spring version. But for the holidays, this spice blend is non-negotiable.
Equipment Needed
You don’t need a fancy kitchen to make these cookies. Here’s what you’ll need:
- Mixing bowls: One large, one medium. Glass or stainless steel works best.
- Electric mixer: A hand mixer or stand mixer with paddle attachment. You can do it by hand, but it takes some elbow grease.
- Rolling pin: I use a wooden one, but a silicone rolling pin works too. If you don’t have one, a wine bottle works in a pinch—I’ve done it.
- Parchment paper: Essential for preventing sticking and easy cleanup.
- Cookie cutters: Gingerbread people, houses, stars, or any shape you like. I found a set of mini house cutters on Amazon for $8.
- Baking sheets: Rimmed baking sheets are best. I use Nordic Ware because they don’t warp.
- Cooling rack: Wire racks help cookies cool evenly and prevent soggy bottoms.
- Spatula: A thin metal spatula is great for moving delicate cookies.
If you don’t have a rolling pin, try using a smooth water bottle. Just make sure it’s clean and dry. For the cookie cutters, I’ve even used a knife to freehand shapes. It’s not as pretty, but it works. Budget-friendly tip: check thrift stores for cookie cutters. I found my entire holiday collection for under $5.
Preparation Method

Let’s get baking. This method is broken down into simple steps. Take your time, especially if it’s your first time working with gluten-free dough.
- Mix the dry ingredients: In a medium bowl, whisk together the almond flour, oat flour, ground ginger, cinnamon, cloves, baking soda, and salt. Set aside. The almond flour can be clumpy, so make sure it’s well combined.
- Cream the butter and sugar: In a large bowl, beat the softened butter and coconut sugar together with an electric mixer on medium speed until light and fluffy, about 2 minutes. Scrape down the sides of the bowl with a spatula. The mixture should look pale and slightly grainy.
- Add the wet ingredients: Beat in the molasses, egg, and vanilla extract until smooth. The batter will look a bit loose and smell amazing at this point. Don’t worry if it seems thin—it will firm up with the dry ingredients.
- Combine wet and dry: Gradually add the dry ingredient mixture to the wet mixture, mixing on low speed until just combined. Use a spatula to fold in any remaining flour streaks. The dough will be soft and slightly sticky, but it should hold together when pressed. If it’s too sticky to handle, add another tablespoon of oat flour.
- Chill the dough: Divide the dough in half, flatten each half into a disk, and wrap tightly in plastic wrap. Refrigerate for at least 30 minutes. This is crucial—chilling firms up the butter and makes the dough easier to roll without cracking. I once skipped this step and ended up with a sticky mess on my counter. Don’t be like me.
- Preheat and prep: Preheat your oven to 350°F (175°C). Line two baking sheets with parchment paper.
- Roll and cut: Place one disk of dough between two sheets of parchment paper. Roll it out to about ¼-inch thickness. The parchment prevents sticking without needing extra flour, which can dry out the dough. Use your cookie cutters to cut out shapes. Gather the scraps, re-roll, and cut again. You should get about 12-15 cookies per disk, depending on the size of your cutters.
- Bake: Place cookies about 1 inch apart on the prepared baking sheets. Bake for 10-12 minutes, or until the edges are just golden brown. The centers will look slightly soft. That’s okay—they’ll firm up as they cool. For softer cookies, bake for 10 minutes. For crunchier cookies, go the full 12 minutes.
- Cool: Let the cookies cool on the baking sheet for 5 minutes before transferring to a wire rack to cool completely. They are fragile when warm, so be gentle. A thin metal spatula helps here.
Sensory cues: When you’re rolling the dough, it should feel smooth and pliable, like play dough. When baking, your kitchen will smell like a holiday candle. The cookies should be lightly browned around the edges but still pale in the center. If they look too dark, reduce the baking time next batch.
Cooking Tips & Techniques
I’ve made every mistake in the book with gluten-free gingerbread. Here’s what I learned so you don’t have to.
Don’t overwork the dough. Gluten-free dough doesn’t develop gluten, but overmixing can make the almond flour release its oils, resulting in greasy cookies. Mix until just combined. I learned this the hard way when my first batch came out of the oven looking like oily discs.
Chill the dough twice if needed. If your dough gets too warm while rolling, pop it back in the fridge for 10 minutes. I keep a second baking sheet in the freezer to place cut cookies on before baking. It helps them hold their shape perfectly.
Use a ruler for even thickness. I use two ¼-inch thick wooden dowels placed on either side of the dough to guide my rolling pin. It’s a pro trick that ensures every cookie bakes evenly. No more burnt edges and raw centers.
For house construction: If you’re building a gingerbread house, bake the walls and roof pieces for an extra 2 minutes to make them sturdier. Let them cool completely before assembling. Use royal icing as “glue”—it dries hard and holds better than any store-bought frosting.
Timing and multitasking: While the dough chills, clean up your mixing bowls and prep your baking sheets. While the first batch bakes, roll out the second disk. This keeps the workflow smooth and prevents that frantic “everything is happening at once” feeling.
My biggest failure: I once forgot the baking soda. The cookies came out flat and hard as rocks. Don’t skip the leavening agent—it’s what gives these cookies their tender bite.
Variations & Adaptations
One of the best things about this recipe is how flexible it is. Here are some ways to make it your own.
- Vegan Version: Replace the butter with vegan butter (I like Miyoko’s) and use a flax egg (1 tablespoon flaxseed meal mixed with 3 tablespoons water, let sit for 5 minutes). The texture will be slightly softer but still delicious.
- Nut-Free Option: Swap the almond flour for an equal amount of sunflower seed flour. The color will be a bit darker, but the taste is still great. Just note that sunflower flour can react with baking soda and turn green—it’s safe to eat, just a little surprising.
- Flavor Twist: Add ½ teaspoon of cardamom and ¼ teaspoon of black pepper for a spicier, more complex gingerbread. I tried this last Christmas and it was a hit with the adults.
- Citrus Glaze: Instead of royal icing, make a simple glaze with 1 cup powdered sugar, 2 tablespoons fresh lemon juice, and 1 teaspoon lemon zest. Drizzle over cooled cookies for a bright, tangy finish.
- Chocolate Gingerbread: Replace ¼ cup of the almond flour with ¼ cup of unsweetened cocoa powder. Reduce the molasses to ⅓ cup and add 2 tablespoons of milk. The result is a rich, chocolatey gingerbread that’s perfect for dipping in hot cocoa.
I’ve tried the chocolate version myself, and it’s become my go-to for holiday cookie exchanges. People always ask for the recipe.
Serving & Storage Suggestions
These cookies are best served at room temperature. If you’ve decorated them with royal icing, let the icing set for at least an hour before stacking or serving. They’re perfect alongside a mug of hot apple cider or a cup of spiced chai tea. For a holiday dessert board, arrange them on a wooden platter with fresh cranberries, cinnamon sticks, and star anise.
Storage: Store undecorated cookies in an airtight container at room temperature for up to 2 weeks. Layer them with parchment paper to prevent sticking. If you’ve decorated them, let the icing dry completely before storing. For longer storage, freeze undecorated cookies in a freezer-safe bag for up to 3 months. Thaw at room temperature for 30 minutes before decorating or serving.
Reheating: If you like your cookies warm, pop them in a 300°F (150°C) oven for 3-5 minutes. They’ll soften slightly and smell like fresh baking. Don’t microwave them—it makes them tough.
Flavor development: Here’s a secret—these cookies actually taste better the next day. The spices meld together overnight, creating a deeper, more rounded flavor. So don’t be afraid to bake them a day ahead. Your future self will thank you.
Nutritional Information & Benefits
Per cookie (based on 24 cookies, undecorated): Approximately 120 calories, 8g fat, 12g carbohydrates, 3g protein, 2g fiber, 6g sugar. Values are estimates and may vary based on specific ingredients used.
Health benefits: Almond flour is rich in vitamin E and healthy fats, which support heart health and skin vitality. Oat flour provides soluble fiber that helps with digestion and keeps you full longer. Molasses is a good source of iron, calcium, and magnesium. Coconut sugar has a lower glycemic index than regular sugar, meaning it causes a slower rise in blood sugar.
Dietary considerations: This recipe is naturally gluten-free (when using certified gluten-free oat flour). It can be made vegan and dairy-free with the substitutions listed above. It contains tree nuts from the almond flour and eggs (unless using a flax egg). Always check your ingredient labels for potential cross-contamination if serving someone with celiac disease.
From a wellness perspective, I love that this recipe lets you enjoy a classic holiday treat without the bloated feeling that often comes with traditional gluten-filled baked goods. It’s comfort food that respects your body.
FAQs
Can I use a different flour blend?
Yes, but the texture will change. A 1:1 gluten-free all-purpose flour blend can replace the almond and oat flours. Reduce the butter by 2 tablespoons, as these blends absorb less fat. The cookies will be less tender and more cake-like.
My dough is too sticky. What do I do?
Chill it longer. If it’s still sticky after 30 minutes, add another tablespoon of oat flour and mix gently. Humidity can affect the dough, so adjust as needed. If it’s too dry, add a teaspoon of milk or water.
Can I make these cookies ahead of time for a party?
Absolutely. Bake the cookies up to 2 weeks ahead and store them in an airtight container. Decorate them the day before your event. The royal icing needs about 24 hours to fully harden, so plan accordingly.
Why did my cookies spread while baking?
Several reasons: the dough wasn’t chilled enough, the butter was too soft, or the baking sheet was too warm. Make sure your dough is thoroughly chilled, and let your baking sheets cool between batches. I keep a spare sheet in the fridge to rotate.
Can I freeze the raw dough?
Yes! Form the dough into a disk, wrap it tightly in plastic wrap and then foil, and freeze for up to 3 months. Thaw in the refrigerator overnight before rolling and baking. You can also freeze cut-out cookies on a baking sheet, then transfer them to a freezer bag. Bake from frozen, adding 2-3 minutes to the baking time.
Conclusion
These gluten-free gingerbread house cookies are more than just a recipe. They’re a reminder that holiday traditions don’t have to be perfect to be meaningful. Jenna’s crooked cookies taught me that. Whether you’re building a gingerbread village with your kids, baking for a cookie exchange, or just craving something warm and spicy on a cold December evening, these cookies deliver. They’re forgiving, delicious, and made with ingredients that actually nourish you. I’d love to hear how they turn out in your kitchen. Did you add your own twist? Did your kids eat them before you could decorate them? Drop a comment below and share your story. And if you loved this recipe, share it with a friend who needs a little holiday cheer. Happy baking, friends—may your kitchen smell like gingerbread and your heart feel full.
Pin This Recipe!
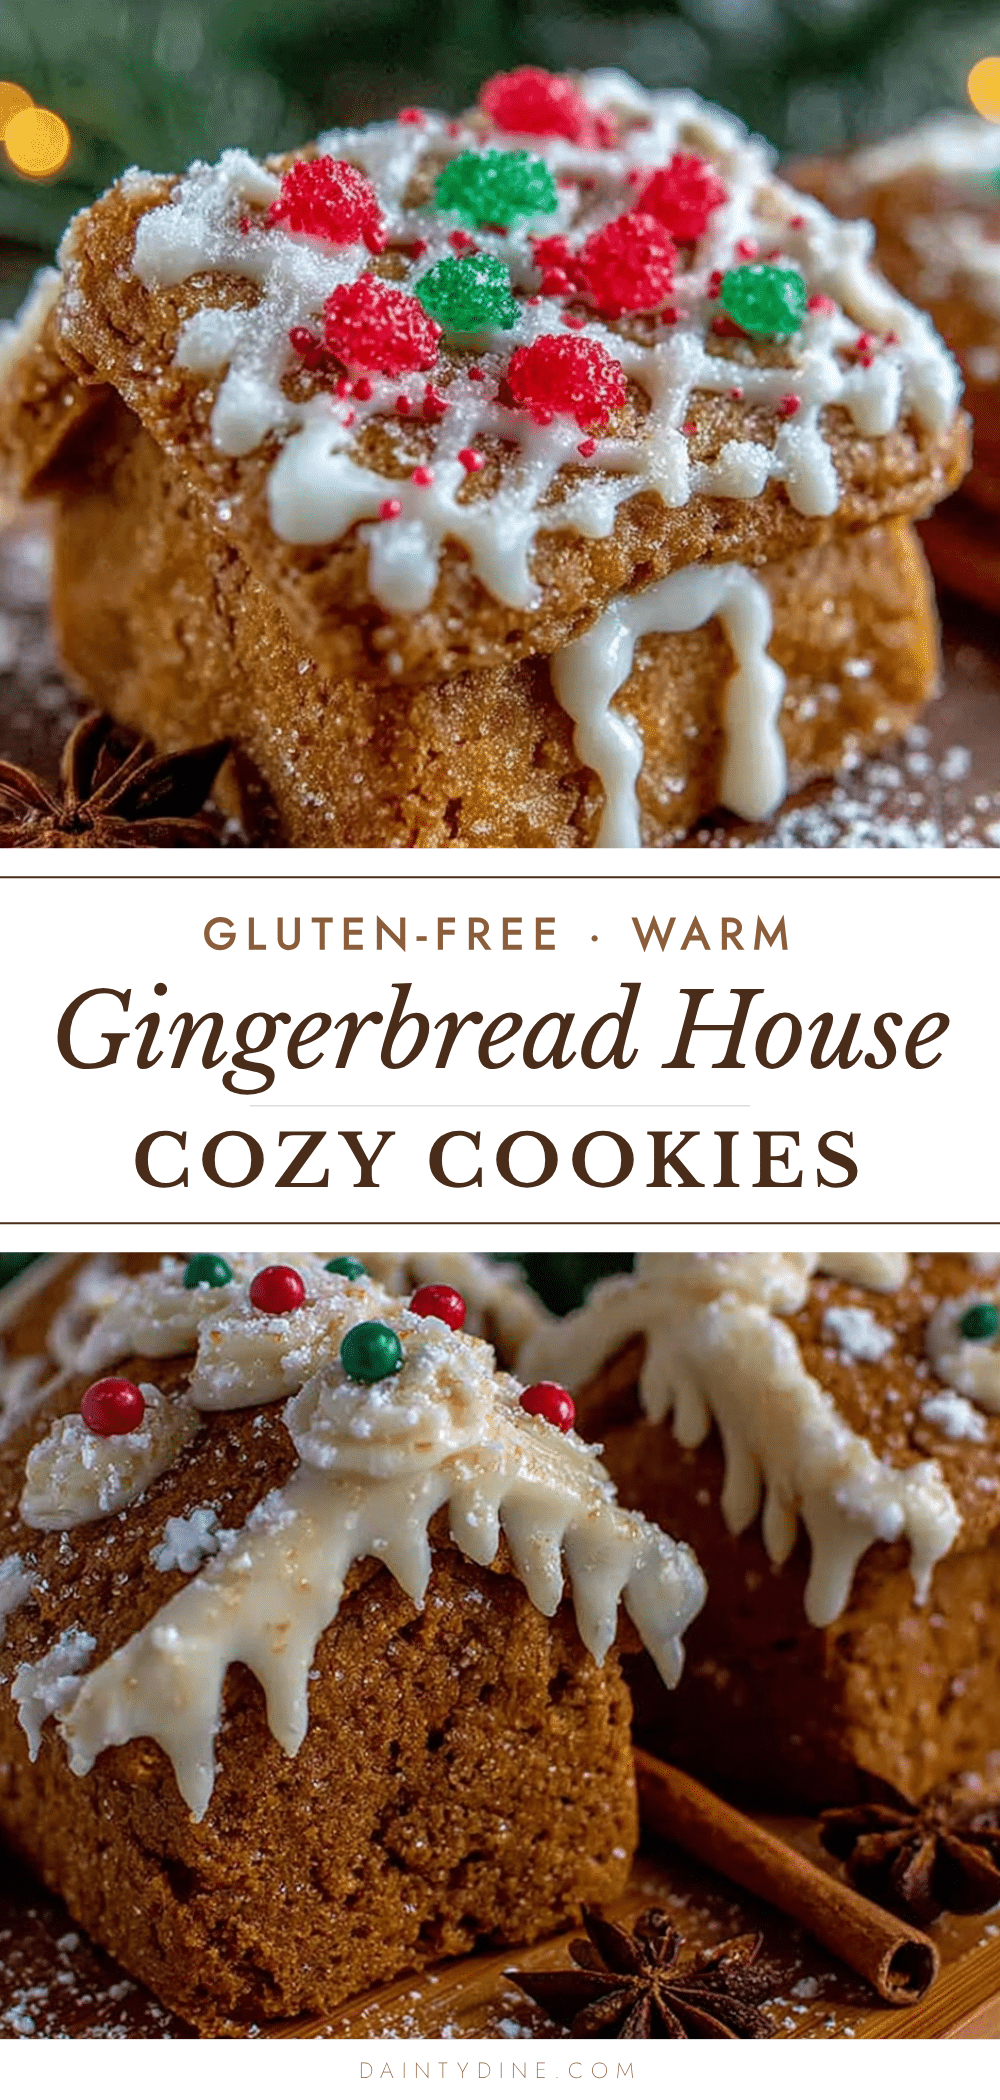
Best Gluten-Free Gingerbread House Cookies Recipe

These gluten-free gingerbread house cookies are forgiving, delicious, and made with simple ingredients. They taste like the holiday season you actually want to have—cozy, full of flavor, and perfect for building gingerbread houses or just enjoying with a cup of tea.
- Prep Time: 15 minutes
- Cook Time: 12 minutes
- Total Time: 57 minutes
- Yield: 24 cookies 1x
- Category: Dessert
- Cuisine: American
Ingredients
- 2 cups almond flour (finely ground, blanched)
- 1 cup oat flour (certified gluten-free if needed)
- ½ cup dark molasses (unsulphured)
- ½ cup coconut sugar (or brown sugar)
- ½ cup unsalted butter, softened (or vegan butter)
- 1 large egg, room temperature (or flax egg: 1 tbsp flaxseed meal + 3 tbsp water)
- 1½ teaspoons ground ginger
- 1 teaspoon ground cinnamon
- ½ teaspoon ground cloves
- ½ teaspoon baking soda
- ¼ teaspoon salt
- 1 teaspoon vanilla extract
Instructions
- Mix the dry ingredients: In a medium bowl, whisk together the almond flour, oat flour, ground ginger, cinnamon, cloves, baking soda, and salt. Set aside.
- Cream the butter and sugar: In a large bowl, beat the softened butter and coconut sugar together with an electric mixer on medium speed until light and fluffy, about 2 minutes. Scrape down the sides of the bowl.
- Add the wet ingredients: Beat in the molasses, egg, and vanilla extract until smooth.
- Combine wet and dry: Gradually add the dry ingredient mixture to the wet mixture, mixing on low speed until just combined. Fold in any remaining flour streaks with a spatula. The dough will be soft and slightly sticky.
- Chill the dough: Divide the dough in half, flatten each half into a disk, and wrap tightly in plastic wrap. Refrigerate for at least 30 minutes.
- Preheat and prep: Preheat your oven to 350°F (175°C). Line two baking sheets with parchment paper.
- Roll and cut: Place one disk of dough between two sheets of parchment paper. Roll it out to about ¼-inch thickness. Use cookie cutters to cut out shapes. Gather scraps, re-roll, and cut again.
- Bake: Place cookies about 1 inch apart on the prepared baking sheets. Bake for 10-12 minutes, or until the edges are just golden brown. The centers will look slightly soft.
- Cool: Let the cookies cool on the baking sheet for 5 minutes before transferring to a wire rack to cool completely.
Notes
Chill the dough for at least 30 minutes to make it easier to roll. If the dough gets too warm while rolling, pop it back in the fridge for 10 minutes. For house construction, bake walls and roof pieces for an extra 2 minutes to make them sturdier. These cookies taste even better the next day as the spices meld together.
Nutrition
- Serving Size: 1 cookie
- Calories: 120
- Sugar: 6
- Sodium: 85
- Fat: 8
- Saturated Fat: 3
- Carbohydrates: 12
- Fiber: 2
- Protein: 3
Keywords: gluten-free gingerbread cookies, gingerbread house cookies, gluten-free Christmas cookies, easy gingerbread recipe, gluten-free holiday baking


