Love this? Save it for later!
Share the inspiration with your friends
I was at my local hardware store last spring, picking up paint samples I had no intention of using, when the woman behind me in line started talking about dessert. Not just any dessert—she was describing these sugar cookie fudge bars with such passion that I almost forgot why I was there. She was the store manager, a no-nonsense woman named Carol who looked like she’d rather discuss power tools than powdered sugar. But there she was, telling me about the bar she brings to every potluck, every family reunion, every neighborhood block party. “They disappear before anything else on the table,” she said, and I believed her. I mean, who expects baking advice from someone holding a caulking gun?
I scribbled her instructions on the back of a receipt, and honestly, I was skeptical at first. A sugar cookie base topped with fudge? It sounded like something that would either be incredible or a complete mess. But Carol was so certain about the method—the way the layers work together, the specific brand of sweetened condensed milk she swears by—that I had to try it. Let me tell you, the first batch I made confirmed everything she said. These bars have that magical quality where people take one bite and their eyes go wide. They ask for the recipe before they’ve even finished chewing. Maybe you’ve been there, watching a dessert disappear and realizing you’re going to have to share the secret.
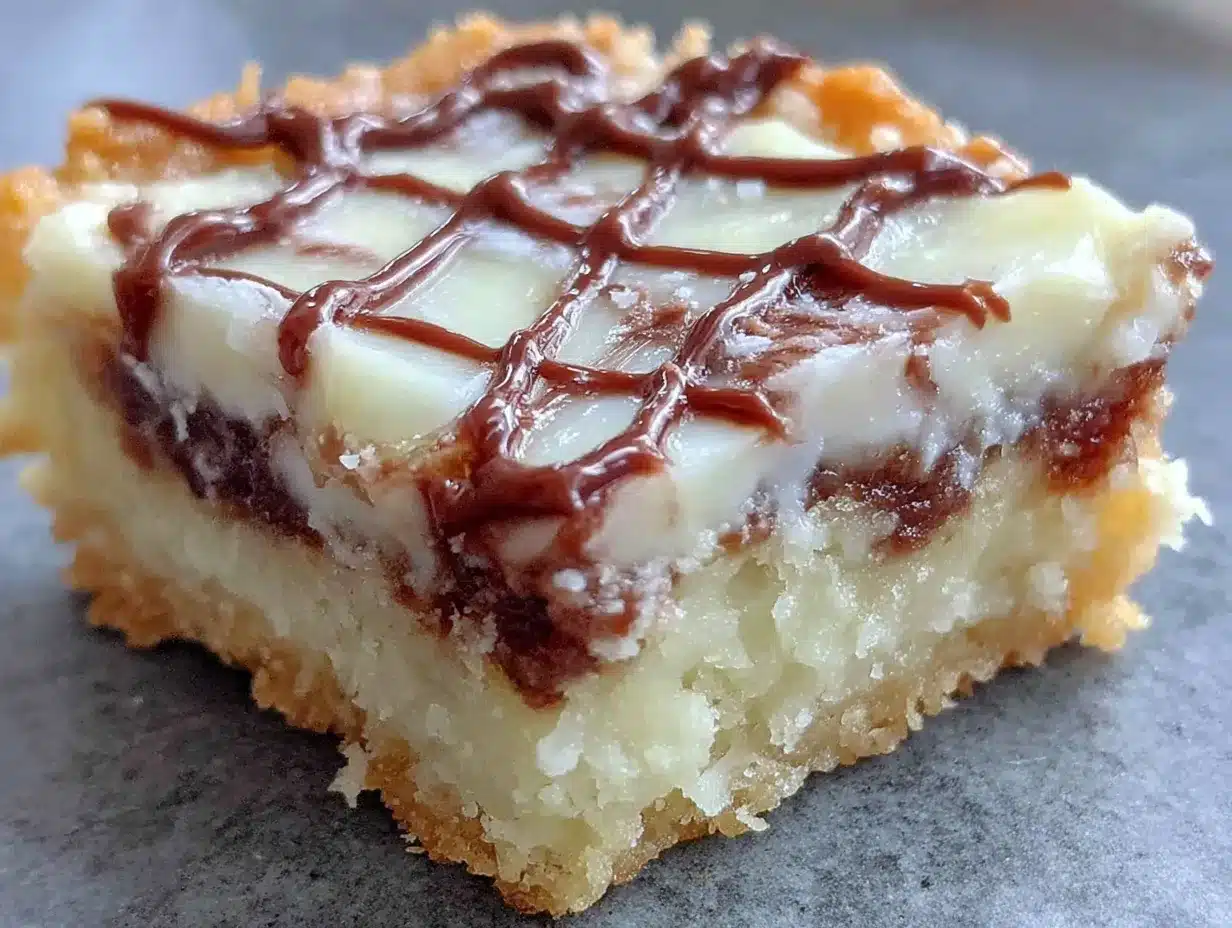
These guest-favorite sugar cookie fudge bars have become my go-to for every gathering. They’re the kind of thing you bring when you want to show off without actually spending hours in the kitchen. The sugar cookie layer is soft and buttery, like the best sugar cookie you’ve ever had, and the fudge topping is rich and creamy without being too heavy. Together, they create this perfect little bar that feels fancy but is honestly so simple to put together. I keep making them because they never fail—every single time, someone asks for the recipe, and I get to tell them about the hardware store manager who changed my dessert game forever.
Why You’ll Love This Recipe
After making these bars for every type of gathering imaginable—from casual backyard barbecues to holiday cookie exchanges to dinner parties where people actually use cloth napkins—I can tell you exactly why they work so well for hosts. I’ve tested this recipe at least a dozen times, tweaking the baking time, adjusting the fudge consistency, and even trying different pans to make sure it’s foolproof. Here’s what makes these sugar cookie fudge bars a winner every single time:
- Comes Together Quickly : From start to finish, you’re looking at about 45 minutes, plus chilling time. The actual hands-on work is maybe 15 minutes, which means you can make these while doing other prep for your gathering.
- Simple Pantry Ingredients : Butter, sugar, flour, sweetened condensed milk, chocolate chips—nothing fancy. You probably have most of this in your kitchen right now, which is perfect for those “I need to bring something” moments.
- Perfect for Entertaining : These bars slice cleanly, stack nicely on a platter, and don’t require any last-minute fuss. You can make them a day ahead and just pull them out when guests arrive.
- Always Gets Rave Reviews : I’ve watched people who claim they don’t like sweets eat three of these in one sitting. The combination of sugar cookie and fudge is universally loved.
- Unbelievably Delicious : The texture is what gets everyone—the cookie base stays soft and tender, while the fudge layer sets up with that perfect, melt-in-your-mouth consistency.
What makes this recipe different from other bar cookies is the technique. Most recipes either have a dry cookie base or a fudge layer that separates. Carol’s method of partially baking the cookie base first, then adding the fudge and finishing the bake, creates layers that actually stick together. It’s not just another version of a bar cookie—it’s the version that works. These sugar cookie fudge bars are the kind of dessert that makes you close your eyes after the first bite, the kind that makes people lean across the table and ask, “Who made these?” Perfect for impressing guests without stress, and for turning a simple get-together into something memorable.
What Ingredients You Will Need
This recipe uses simple, wholesome ingredients to deliver that perfect combination of buttery cookie and creamy fudge. Most of these are pantry staples, which is exactly what you want when you’re hosting and have a million other things to think about. Here’s everything you need, broken down by the two layers:
For the Sugar Cookie Base
- 1 cup (226g) unsalted butter, softened (I prefer Land O’Lakes for consistent results, but any good-quality butter works)
- 1 cup (200g) granulated sugar (regular white sugar gives the best texture)
- 1 large egg, room temperature (cold eggs can make the dough stiff and harder to press into the pan)
- 2 teaspoons vanilla extract (use pure vanilla if you have it—it really makes a difference in the cookie layer)
- 2 cups (250g) all-purpose flour (spoon and level it—don’t scoop directly from the bag or you’ll get too much)
- 1/2 teaspoon baking powder (this gives the cookie base a slight lift without making it cakey)
- 1/4 teaspoon salt (I use fine sea salt; it balances the sweetness perfectly)
For the Fudge Topping
- 1 can (14 ounces/397g) sweetened condensed milk (Eagle Brand is my go-to—Carol specifically recommended this brand and I’ve never strayed)
- 2 cups (340g) semi-sweet chocolate chips (I like Ghirardelli for their smooth melting quality; you can also use milk chocolate if you prefer a sweeter fudge)
- 2 tablespoons (28g) unsalted butter (this helps the fudge set up with a nice shine and prevents it from being too firm)
- 1 teaspoon vanilla extract (adds depth to the chocolate flavor)
- Pinch of salt (trust me on this—it makes the chocolate taste more chocolatey)
Ingredient Tips and Substitutions
For the butter, make sure it’s truly softened—you should be able to press your finger into it easily, but it shouldn’t be melted. If you forget to take it out of the fridge, cut it into small cubes and let it sit for about 15 minutes. For the sweetened condensed milk, don’t substitute evaporated milk—they’re completely different things, and the fudge won’t set properly. If you’re dairy-free, you can use a vegan butter substitute in the cookie base, but I haven’t tested this with dairy-free sweetened condensed milk, so I can’t guarantee the fudge layer will work the same way.
For the chocolate chips, I’ve tried this with dark chocolate and it works, but the semi-sweet gives the best balance against the sweet cookie base. If you’re using milk chocolate chips, reduce the sugar in the cookie base by two tablespoons to keep the whole bar from being too sweet. In summer, I sometimes add a sprinkle of flaky sea salt on top of the fudge before it sets—it looks beautiful and adds that sweet-salty thing everyone loves.
Equipment Needed
- 9×13-inch baking pan (metal works best for even baking; glass will work but you may need to add a few minutes to the baking time)
- Parchment paper (this is non-negotiable—it makes lifting the bars out so much easier, and you won’t have to fight with stuck edges)
- Electric hand mixer or stand mixer (you can cream the butter and sugar by hand, but it takes some elbow grease and you might not get it light enough)
- Medium saucepan (for melting the fudge ingredients; double boiler works too but I’m a fan of keeping things simple)
- Rubber spatula (for scraping every bit of fudge out of the pan—waste not, want not)
- Offset spatula (optional but helpful for spreading the fudge evenly; a regular spatula works fine too)
- Sharp knife (for clean slices; a chef’s knife works better than a butter knife)
I’ve made these sugar cookie fudge bars with a cheap baking pan from the grocery store and they turned out fine. You don’t need fancy equipment—just a good pan and some parchment paper. If you don’t have a hand mixer, a wooden spoon and some determination will work, just cream the butter and sugar for a solid 3-4 minutes until it’s light and fluffy.
Preparation Method
Let me walk you through this step by step. I’ve made these bars so many times that I’ve got the timing down to a science, and I’ll tell you exactly what to look for at each stage so you know you’re on the right track.
- Preheat your oven to 350°F (175°C). Line your 9×13-inch pan with parchment paper, leaving some overhang on the long sides—this creates handles that make lifting the bars out super easy later. Lightly grease the parchment with butter or cooking spray.
- Make the cookie base. In a large bowl, cream together the softened butter and granulated sugar until light and fluffy, about 3-4 minutes with an electric mixer on medium speed. You want it to look pale and almost doubled in volume. Scrape down the sides of the bowl once during mixing.
- Add the egg and vanilla. Beat in the egg and vanilla extract until just combined. Don’t overmix here—you just want everything incorporated. The mixture might look slightly curdled at this point, but that’s normal.
- Mix the dry ingredients. In a separate bowl, whisk together the flour, baking powder, and salt. Gradually add this to the wet mixture, mixing on low speed until just combined. The dough will be soft and slightly sticky—that’s exactly what you want. If it seems too sticky to handle, refrigerate it for 15 minutes.
- Press the dough into the pan. Transfer the cookie dough to your prepared pan. Using lightly floured hands or a piece of parchment paper, press the dough evenly into the bottom of the pan. Try to get it as even as possible—thicker spots will bake differently than thinner ones. I use the bottom of a measuring cup to smooth it out.
- Partially bake the cookie base. Bake for 12-14 minutes, until the edges are just starting to turn golden but the center is still soft and pale. It shouldn’t look fully baked—you’re going to bake it again with the fudge. Remove from the oven and let it cool for 5 minutes while you make the fudge.
- Make the fudge topping. In a medium saucepan over low heat, combine the sweetened condensed milk, chocolate chips, and 2 tablespoons of butter. Stir constantly with a rubber spatula until everything is melted and smooth. This takes about 5-7 minutes. Don’t rush this—if the heat is too high, the chocolate can seize and get grainy. Once it’s smooth, remove from heat and stir in the vanilla and pinch of salt.
- Pour the fudge over the cookie base. Pour the warm fudge over the partially baked cookie base. Use an offset spatula or the back of a spoon to spread it evenly to the edges. The fudge will be thick and glossy—work quickly while it’s still warm.
- Finish baking. Return the pan to the oven and bake for another 12-15 minutes. You’ll know it’s done when the fudge layer is set around the edges but still slightly jiggly in the center. It will continue to set as it cools. Don’t overbake or the fudge can become too firm and lose that creamy texture.
- Cool completely. Let the bars cool in the pan on a wire rack for about 1 hour at room temperature, then transfer to the refrigerator and chill for at least 2 hours. This is crucial—the fudge needs time to set properly. I usually make these the day before and let them chill overnight.
- Slice and serve. Once completely chilled, use the parchment paper handles to lift the entire block out of the pan. Place on a cutting board and use a sharp knife to slice into squares. For clean cuts, wipe the knife clean between each slice. I usually cut 24 bars (4 rows by 6 rows), but you can make them bigger or smaller depending on your crowd.
Cooking Tips & Techniques
After making these sugar cookie fudge bars more times than I can count, I’ve learned a few things the hard way. Let me save you from my mistakes. The biggest one? Not chilling the bars long enough. I once served these after only an hour in the fridge, and the fudge layer was a mess—it stuck to everything and didn’t slice cleanly. Trust the process and give them at least 2 hours, preferably overnight.
Another thing I’ve learned is to watch your oven temperature. Every oven runs differently, and I’ve found that 350°F is perfect for my oven, but yours might run hot or cool. If the edges of the cookie base are getting too dark before the center is set, tent the pan loosely with foil for the last 5 minutes of baking. I had one batch where I walked away and the edges came out almost burnt—still delicious, but not as pretty on the platter.
For the fudge layer, stir constantly and keep the heat low. I’ve made the mistake of cranking up the heat to speed things up, and the chocolate seized into a grainy mess. If that happens, don’t panic—add a tablespoon of heavy cream or coconut oil and stir vigorously over low heat until it smooths out. It won’t be quite as shiny, but it’ll still taste amazing.
When you’re pressing the cookie dough into the pan, use a piece of parchment paper or plastic wrap on top of the dough to prevent it from sticking to your hands. This trick makes the process so much cleaner and gives you a perfectly even layer. I learned this from a pastry chef friend, and it’s one of those small things that makes a big difference.
For hosting, timing is everything. I always make these bars the day before my gathering. They actually taste better the next day—the flavors meld together and the fudge sets to that perfect consistency. Plus, it’s one less thing to worry about when guests are arriving. Just slice them in the morning, arrange them on a platter, and you’re done.
Variations & Adaptations
One of the best things about these sugar cookie fudge bars is how easy they are to customize. I’ve experimented with several variations, and here are my favorites:
Peppermint Holiday Bars : During the winter holidays, I crush about 1/2 cup of candy canes and sprinkle them over the fudge layer right after pouring it into the pan. The peppermint adds a festive crunch and pairs beautifully with the chocolate. Just press the crushed candy lightly into the fudge so it stays put when you slice.
White Chocolate Raspberry Bars : Swap the semi-sweet chocolate chips for white chocolate chips in the fudge layer. After pouring the fudge over the cookie base, drop spoonfuls of raspberry jam (about 1/4 cup) on top and swirl it in with a knife. The tart raspberry cuts through the sweetness of the white chocolate perfectly. This version is always a hit at bridal showers and brunches.
Gluten-Free Version : Use a 1:1 gluten-free flour blend in place of the all-purpose flour. I’ve tested this with Bob’s Red Mill 1:1 Baking Flour and it works beautifully—the texture is slightly more tender, but no one will notice the difference. Just make sure your chocolate chips are certified gluten-free if that’s a concern.
Nutella Swirl Bars : After pouring the fudge layer, drop spoonfuls of Nutella (about 1/3 cup) on top and swirl it in with a knife. The hazelnut flavor adds another dimension, and it looks gorgeous on the platter. I made these for a friend’s birthday and they disappeared in minutes.
Brown Butter Cookie Base : For a more sophisticated flavor, brown the butter before using it in the cookie base. Melt the butter in a saucepan over medium heat, swirling occasionally, until it turns amber and smells nutty—about 5-7 minutes. Let it cool slightly before creaming with the sugar. This adds a toasty depth that pairs amazingly with the chocolate fudge.
Serving & Storage Suggestions
These sugar cookie fudge bars are best served chilled or at room temperature. I prefer them straight from the fridge—the fudge is firmer and the cookie base is perfectly tender. If you’re serving them at a party, let them sit at room temperature for about 15 minutes before serving. They’ll soften slightly and the flavors will be more pronounced.
For presentation, I arrange them on a white platter or cake stand to show off the contrast between the golden cookie base and the dark fudge topping. A dusting of powdered sugar or a sprinkle of flaky sea salt right before serving makes them look extra special. If you’re bringing them to a potluck, stack them in a container with parchment paper between layers to prevent sticking.
These bars pair beautifully with coffee, tea, or a cold glass of milk. For dessert boards, they’re perfect alongside fresh berries, shortbread cookies, and dark chocolate truffles. I also love serving them with a scoop of vanilla ice cream for an extra-indulgent dessert.
Storage : Store the bars in an airtight container in the refrigerator for up to 1 week. They actually get better after a day or two as the flavors meld. For longer storage, you can freeze them for up to 3 months. Wrap individual bars in plastic wrap, then place them in a freezer-safe bag or container. Thaw in the refrigerator overnight or at room temperature for about 30 minutes before serving. I always keep a batch in the freezer for unexpected guests—just pull them out, arrange on a platter, and they look like you spent hours in the kitchen.
If you’re making these for a large gathering, you can easily double the recipe and bake it in a half-sheet pan (18×13 inches). Just increase the baking time by about 5-7 minutes for each stage.
Nutritional Information & Benefits
Let’s be honest—these sugar cookie fudge bars are a treat, not a health food. But here’s the nutritional breakdown for one bar (based on cutting 24 bars from the pan):
| Nutrient | Amount Per Bar |
|---|---|
| Calories | 285 |
| Total Fat | 15g |
| Saturated Fat | 9g |
| Cholesterol | 35mg |
| Sodium | 95mg |
| Total Carbohydrates | 36g |
| Dietary Fiber | 1g |
| Sugars | 27g |
| Protein | 3g |
The good news is that dark chocolate (if you use semi-sweet chips) contains antioxidants, and the butter provides some vitamin A. The cookie base gives you a little bit of iron and B vitamins from the flour. But honestly, these bars are about joy, not nutrition. They’re the kind of treat you make for special occasions, and that’s perfectly okay. When I serve these at gatherings, I remind myself that food is about connection and celebration—and these bars deliver on both fronts.
For those with dietary concerns, this recipe contains dairy, gluten, and eggs. It’s not suitable for vegans or those with dairy allergies, though you could experiment with dairy-free alternatives (I haven’t tested them, so I can’t guarantee results).
Conclusion
These guest-favorite sugar cookie fudge bars have earned a permanent spot in my hosting rotation, and I have a feeling they’ll become a staple in yours too. They’re the kind of dessert that makes people stop mid-conversation to take another bite, the kind that gets requested at every gathering, the kind that makes you look like you spent way more time than you actually did.
What I love most about this recipe is how adaptable it is—you can dress it up for holidays, keep it simple for weeknight cravings, or double it for a crowd. The combination of soft sugar cookie and creamy fudge is just unbeatable, and it’s so simple that anyone can make it. Whether you’re hosting a dinner party, bringing something to a potluck, or just want a treat that feels special, these bars deliver every single time.
I’d love to hear how these turn out for you! Have you tried any variations? Do you have a go-to dessert for gatherings? Drop a comment below and let me know—I read every single one, and I’m always looking for new ideas to try. And if you make these for your next get-together, be prepared to share the recipe. Trust me, people will ask. Happy baking, friends!
Frequently Asked Questions
Can I use a different size pan?
Yes, but the baking time will change. For an 8×8-inch pan, you’ll need to increase the baking time by about 5-8 minutes for each stage, and you’ll have thicker bars. For a 9×9-inch pan, the baking time stays roughly the same. Just keep an eye on the edges—they should be golden but not dark.
Why did my fudge layer turn out grainy?
This usually happens when the heat is too high or the chocolate is overheated. Always melt the fudge ingredients over low heat, stirring constantly. If your fudge seizes, add a tablespoon of heavy cream or coconut oil and stir until smooth. Also, make sure your sweetened condensed milk is fresh—old cans can cause texture issues.
Can I make these bars ahead of time?
Absolutely! In fact, they taste better the next day. Make them up to 3 days in advance and store them in an airtight container in the refrigerator. You can also freeze them for up to 3 months—just wrap individual bars in plastic wrap and store in a freezer bag.
Can I use milk chocolate instead of semi-sweet?
Yes, but the bars will be significantly sweeter. If you use milk chocolate chips, reduce the sugar in the cookie base by 2 tablespoons to balance the sweetness. You can also use dark chocolate for a richer, less sweet fudge.
How do I get clean slices without the fudge cracking?
Use a sharp chef’s knife and wipe it clean between each slice. Make sure the bars are fully chilled—at least 2 hours in the fridge, preferably overnight. If the fudge is still cracking, let the bars sit at room temperature for 5 minutes before slicing, which softens the fudge slightly without making it messy.
Pin This Recipe!
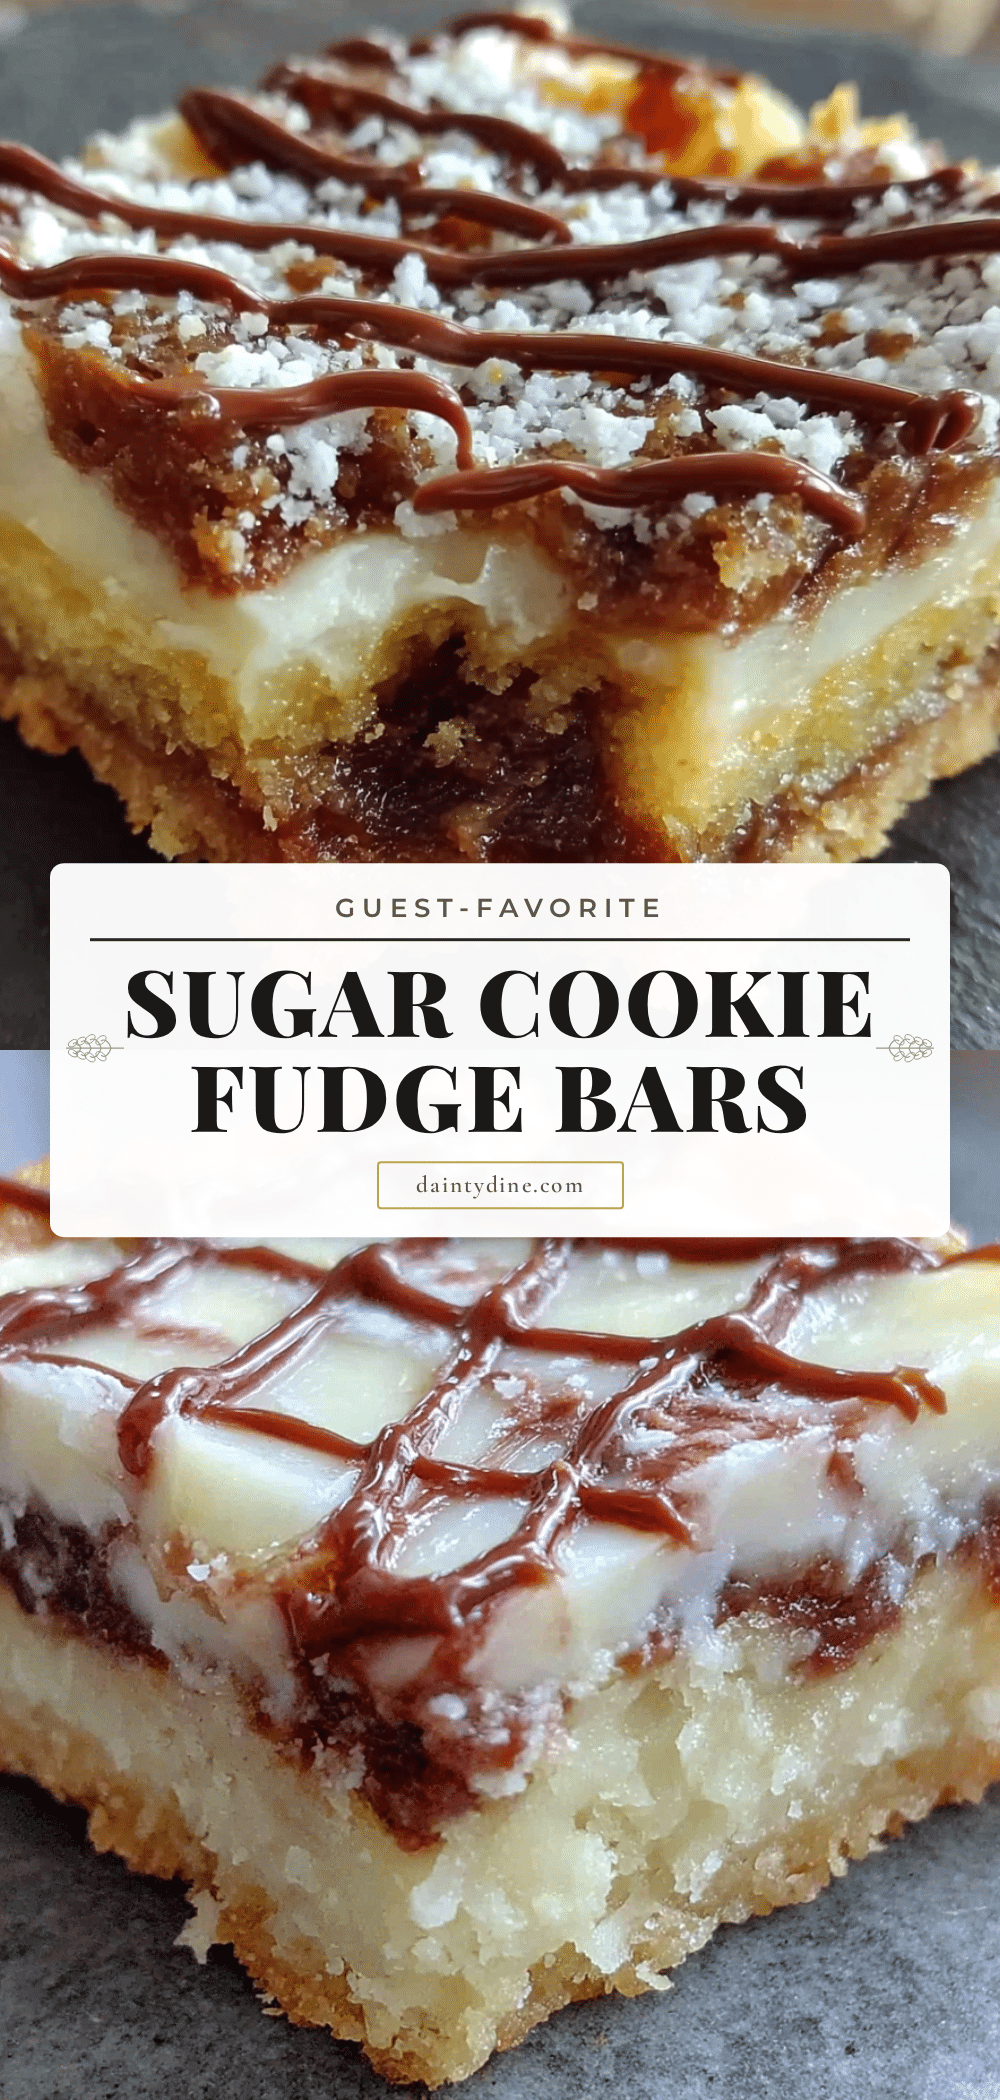
Best Easy Sugar Cookie Fudge Bars – Perfect Guest Favorite

These guest-favorite sugar cookie fudge bars combine a soft, buttery sugar cookie base with a rich, creamy fudge topping. They’re simple to make, perfect for entertaining, and always disappear first at any gathering.
- Prep Time: 15 minutes
- Cook Time: 30 minutes
- Total Time: 45 minutes
- Yield: 24 servings 1x
- Category: Dessert
- Cuisine: American
Ingredients
- 1 cup (226g) unsalted butter, softened
- 1 cup (200g) granulated sugar
- 1 large egg, room temperature
- 2 teaspoons vanilla extract
- 2 cups (250g) all-purpose flour
- 1/2 teaspoon baking powder
- 1/4 teaspoon salt
- 1 can (14 ounces/397g) sweetened condensed milk
- 2 cups (340g) semi-sweet chocolate chips
- 2 tablespoons (28g) unsalted butter
- 1 teaspoon vanilla extract
- Pinch of salt
Instructions
- Preheat your oven to 350°F (175°C). Line your 9×13-inch pan with parchment paper, leaving some overhang on the long sides. Lightly grease the parchment with butter or cooking spray.
- Make the cookie base: In a large bowl, cream together the softened butter and granulated sugar until light and fluffy, about 3-4 minutes with an electric mixer on medium speed.
- Add the egg and vanilla: Beat in the egg and vanilla extract until just combined.
- Mix the dry ingredients: In a separate bowl, whisk together the flour, baking powder, and salt. Gradually add this to the wet mixture, mixing on low speed until just combined. The dough will be soft and slightly sticky.
- Press the dough into the pan: Transfer the cookie dough to your prepared pan. Using lightly floured hands or a piece of parchment paper, press the dough evenly into the bottom of the pan.
- Partially bake the cookie base: Bake for 12-14 minutes, until the edges are just starting to turn golden but the center is still soft and pale. Remove from the oven and let it cool for 5 minutes while you make the fudge.
- Make the fudge topping: In a medium saucepan over low heat, combine the sweetened condensed milk, chocolate chips, and 2 tablespoons of butter. Stir constantly until everything is melted and smooth, about 5-7 minutes. Remove from heat and stir in the vanilla and pinch of salt.
- Pour the fudge over the cookie base: Pour the warm fudge over the partially baked cookie base. Use an offset spatula or the back of a spoon to spread it evenly to the edges.
- Finish baking: Return the pan to the oven and bake for another 12-15 minutes. The fudge layer should be set around the edges but still slightly jiggly in the center.
- Cool completely: Let the bars cool in the pan on a wire rack for about 1 hour at room temperature, then transfer to the refrigerator and chill for at least 2 hours.
- Slice and serve: Once completely chilled, use the parchment paper handles to lift the entire block out of the pan. Place on a cutting board and use a sharp knife to slice into squares. Wipe the knife clean between each slice.
Notes
For best results, chill the bars for at least 2 hours, preferably overnight. The fudge layer will set properly and slice cleanly. If the fudge seizes, add a tablespoon of heavy cream or coconut oil and stir over low heat until smooth. To prevent the cookie dough from sticking to your hands when pressing into the pan, use a piece of parchment paper or plastic wrap on top.
Nutrition
- Serving Size: 1 bar
- Calories: 285
- Sugar: 27
- Sodium: 95
- Fat: 15
- Saturated Fat: 9
- Carbohydrates: 36
- Fiber: 1
- Protein: 3
Keywords: sugar cookie fudge bars, easy dessert, potluck dessert, bar cookies, chocolate fudge bars, guest favorite


