Love this? Save it for later!
Share the inspiration with your friends
I was standing in the grocery store parking lot last Saturday, juggling my keys and a bag of bagged salad, when the wind shifted and carried the sharp, tangy smell of something from the hot dog cart across the lot. And suddenly I was eight years old, wedged between my aunt’s floral sofa cushions at her annual holiday open house, watching her roll something that looked like a snowball but smelled like the most incredible, savory secret. That snowball was her cheese ball, and I hadn’t thought about it in years. My aunt passed away a few winters ago, and with her went that specific recipe—or so I thought. I mean, I tried to recreate it from memory that same week, and honestly, the first attempt was a disaster. Too dry, then too sticky. My kitchen looked like a dairy bomb had gone off. But that second attempt? That third one? That’s the recipe I’m sharing today. It’s the one that finally tasted like her living room felt: warm, welcoming, and just a little bit special. You know that feeling when you taste something and it unlocks a whole room in your memory? That’s what this easy 5-ingredient no-bake cheese ball does for me. And I think it might just become your new go-to for every party, potluck, and get-together, too.
Why You’ll Love This Recipe
Let’s be real for a second. Hosting a party is stressful enough without adding a complicated, multi-step appetizer to your to-do list. You want something that looks like you spent hours on it but actually comes together in minutes. This easy 5-ingredient no-bake cheese ball is that recipe. It’s the hero of the snack table, the thing people hover around, the dish that gets asked for by name.
- Quick & Easy: You can have this ready in under 15 minutes of active time. No oven, no stovetop, no fuss. Just mix, shape, and chill.
- Simple Ingredients: You probably have most of these in your fridge right now. No hunting down obscure spices or specialty cheeses.
- Perfect for Parties: This is a crowd-pleaser in the truest sense. It feeds a crowd, travels well, and looks impressive on a platter. It’s the appetizer that lets you actually enjoy your own party.
- Crowd-Pleaser: I’ve brought this to everything from Super Bowl parties to baby showers, and the bowl is always scraped clean. It’s a universal hit.
- Unbelievably Delicious: The creamy, tangy, savory flavor is next-level comfort food. It’s the kind of thing that makes you close your eyes after the first bite.
What makes this cheese ball different from all the others? It’s the texture. By using the right ratio of cream cheese to sharp cheddar, and letting it chill just long enough, you get this perfectly spreadable, scoopable consistency that clings to a cracker without being a mess. It’s not just another cheese ball—it’s your best version.
This recipe is perfect for impressing guests without stress, or turning a simple gathering into something memorable. It’s comfort food reimagined—faster, simpler, but with the same soul-soothing satisfaction.
What Ingredients You Will Need
This recipe uses simple, pantry-friendly ingredients to deliver bold flavor and satisfying texture without the fuss. You’ll be surprised how such a short list can create something so delicious.
- 16 ounces cream cheese, softened (two 8-ounce blocks). I recommend Philadelphia brand for the creamiest, most reliable texture. Make sure it’s at room temperature—this is crucial for a smooth mix.
- 2 cups sharp cheddar cheese, finely shredded. Pre-shredded cheese is convenient, but honestly, shredding it yourself from a block gives you a much better, melt-in-your-mouth texture. The pre-shredded stuff has anti-caking agents that can make your cheese ball a little grainy.
- 1 packet (1 ounce) dry ranch dressing mix. This is the secret weapon. It adds all the savory, tangy, herby flavor you need. Hidden Valley is my go-to, but any brand works.
- 1/2 cup chopped pecans, finely chopped. These are for the coating. Toast them lightly in a dry pan for 2-3 minutes for extra flavor. You can also use walnuts or even crushed pretzels for a salty twist.
- 1/4 cup fresh chives or green onions, finely chopped. This adds a fresh, oniony pop and a beautiful green speckle. If you don’t have fresh, you can skip them, but they really make a difference.
Equipment Needed
You don’t need a lot of fancy gear for this one, which is part of the beauty of it.
- Large mixing bowl. Any bowl will do, but a wider one makes it easier to mix everything together.
- Hand mixer or stand mixer. A sturdy wooden spoon works in a pinch, but a mixer makes the cream cheese perfectly smooth and fluffy in under a minute. I’ve used both, and the mixer is a game-changer for consistency.
- Plastic wrap. Essential for shaping the ball and keeping it moist in the fridge. I use the pre-cut sheets, but a roll of regular wrap works just fine.
- Spatula. A rubber spatula is best for scraping every last bit of the mixture out of the bowl.
- Parchment paper or a small baking sheet. This makes rolling the cheese ball in the coating much less messy.
If you don’t have a mixer, just let your cream cheese get extra soft and use a fork to mash and stir. It’ll take a little more elbow grease, but it still works beautifully.
Preparation Method
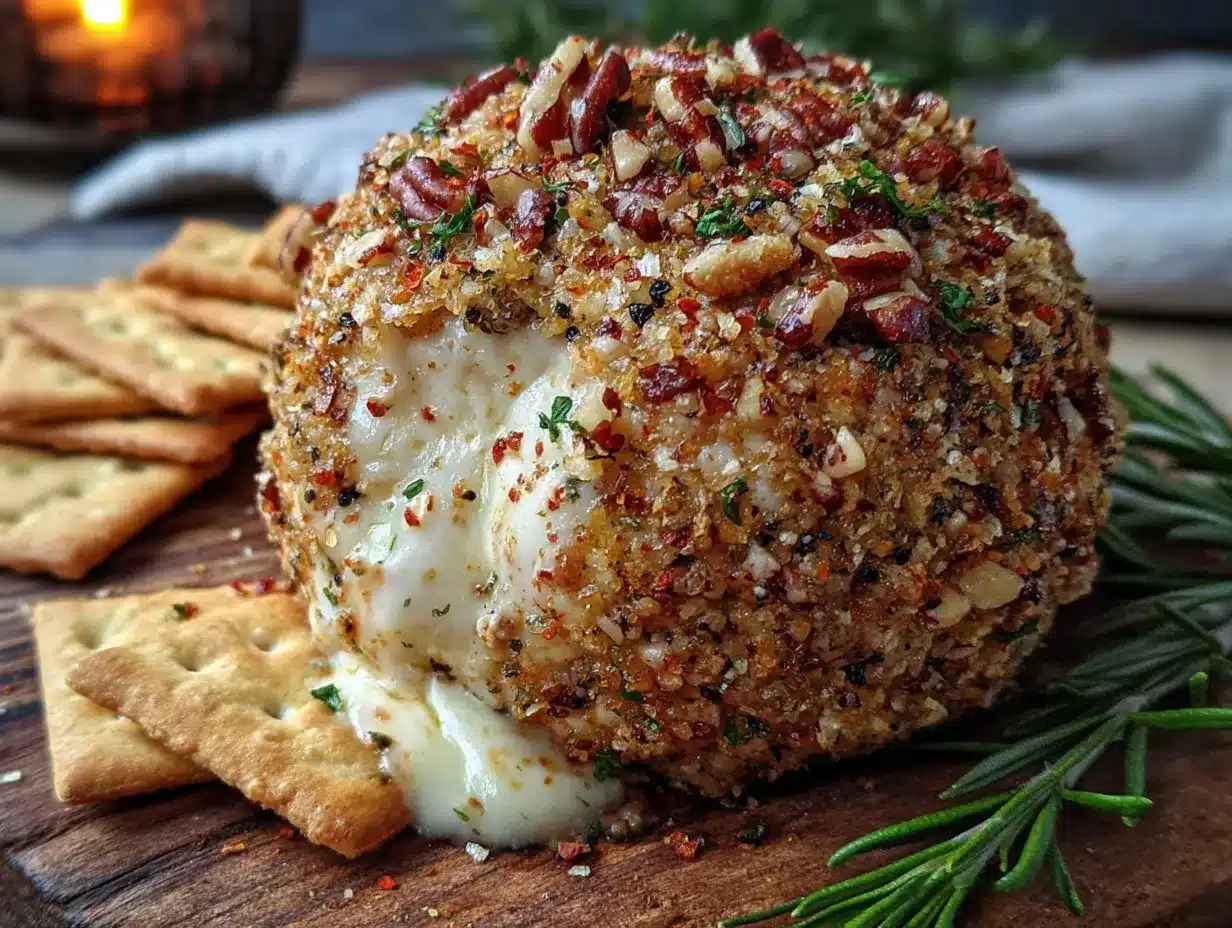
- Soften the cream cheese. This is the most important step. Take your cream cheese out of the fridge at least 30 minutes before you start. It should be soft enough that you can easily press a finger into it. If you’re in a hurry, you can microwave it in 10-second bursts, but be careful—you don’t want it melted, just soft.
- Mix the base. In your large mixing bowl, combine the softened cream cheese, the finely shredded sharp cheddar, and the entire packet of dry ranch dressing mix. Using your hand mixer on medium speed, beat everything together until it’s completely smooth and well-combined. Scrape down the sides of the bowl with your spatula at least once. You’re looking for a uniform, creamy, pale orange color. There should be no streaks of white cream cheese left.
- Add the fresh element. Fold in the chopped fresh chives or green onions using your spatula. Stir until they’re evenly distributed throughout the mixture. This adds a lovely fresh flavor and a pop of color that will be visible when you slice into the finished cheese ball.
- Chill the mixture. This step is non-negotiable. The mixture needs to be firm enough to shape into a ball. Cover the bowl with plastic wrap and pop it in the fridge for at least 2 hours, or up to overnight. I usually make the mixture the night before a party—it saves time and the flavors meld together beautifully.
- Shape the ball. Once the mixture is firm, lay out a large sheet of plastic wrap on your counter. Scoop the chilled cheese mixture onto the center of the plastic wrap. Using the plastic wrap to help you, gather the mixture into a rough ball shape. Then, using your hands (still through the plastic wrap), gently press and shape it into a smooth, round ball. Twist the top of the plastic wrap to seal it tightly. Refrigerate for another 30 minutes to let the shape set.
- Coat the ball. While the ball is chilling, prepare your coating. Place the finely chopped pecans on a plate or a piece of parchment paper. After the 30 minutes are up, unwrap the cheese ball and gently roll it in the chopped pecans, pressing lightly so the nuts stick to all sides. Use your hands to gently pat the coating into place.
- Final chill and serve. Place the coated cheese ball on a serving plate or a piece of parchment paper. Cover it loosely with plastic wrap and refrigerate for at least 1 more hour before serving. This final chill allows the coating to set and the flavors to really come together. Serve it cold with an assortment of crackers, pretzels, or fresh veggie sticks.
Sensory Cue: When you’re mixing the cream cheese and cheddar, you should smell that sharp, tangy ranch aroma immediately. The mixture should feel thick and luscious, not sticky or crumbly. When you roll it in the pecans, you’ll hear that satisfying little crunch as they adhere to the outside.
Troubleshooting Tip: If your mixture is too sticky to shape after the initial 2-hour chill, don’t panic. Just put it back in the fridge for another 30 minutes. Patience is your friend here.
Cooking Tips & Techniques
I’ve made this cheese ball more times than I can count, and I’ve definitely learned a few things the hard way. Here are my best tips to make sure yours turns out perfectly every single time.
Don’t skip the room temperature cream cheese. I know, I know, it’s an extra planning step. But honestly, trying to mix cold cream cheese is a recipe for a lumpy, frustrating mess. It takes forever and you end up with chunks. Room temperature cream cheese blends into a silky, smooth base in about 30 seconds. Trust me on this one.
Shred your own cheese. I used to be a pre-shredded cheese loyalist. It’s so convenient! But the anti-caking powders they coat the shreds with really do affect the texture of a cheese ball. You end up with a slightly grainy, less creamy final product. Buying a block of sharp cheddar and shredding it yourself on the large holes of a box grater takes two minutes and makes a huge difference. It’s one of those small swaps that feels like a pro move.
Toast your nuts. This is a game-changer. Just toss your chopped pecans in a dry skillet over medium heat for 2-3 minutes, shaking the pan frequently, until they’re fragrant and just slightly darkened. Let them cool completely before using. Toasting brings out their natural oils and adds a deeper, nuttier flavor that takes the whole cheese ball to another level. I once forgot to toast them, and the difference was noticeable—the flavor was flat.
Plan your timing. This is the ultimate make-ahead appetizer. You can make the mixture and shape the ball up to two days in advance. Just keep it wrapped tightly in the fridge. Then, about an hour before your guests arrive, roll it in the coating and let it set. This way, you’re not scrambling at the last minute. You can actually enjoy your own party!
Use a cookie scoop for mini versions. If you’re serving a crowd and want to avoid double-dipping, make mini cheese balls! Use a small cookie scoop to portion the chilled mixture into bite-sized balls, then roll them in the coating. They’re perfect for individual servings and look adorable on a platter.
Variations & Adaptations
This recipe is incredibly flexible. Once you have the basic formula down, you can play with it endlessly. Here are a few of my favorite variations.
- Spicy Southwestern: Swap the ranch dressing mix for a packet of taco seasoning. Use a mix of sharp cheddar and pepper jack cheese. Add a 4-ounce can of drained and finely chopped green chiles to the mixture. For the coating, use crushed tortilla chips instead of pecans. This version is a huge hit at game-day parties.
- Everything Bagel: This is my personal favorite for brunch. Use the base recipe, but instead of pecans, roll the cheese ball in a generous coating of everything bagel seasoning. The combination of sesame seeds, poppy seeds, garlic, onion, and salt is incredible with the creamy, tangy cheese. Serve it with bagel chips or cucumber slices.
- Bacon & Cheddar: Because everything is better with bacon. Cook 6 slices of bacon until crispy, let them cool, and crumble them finely. Mix half of the crumbled bacon into the cheese mixture and reserve the other half for the coating. Combine the reserved bacon with the chopped pecans for a salty, smoky, crunchy crust.
- Herb & Garlic: For a more sophisticated flavor, skip the ranch dressing mix. Instead, mince 2 cloves of fresh garlic and mix it into the cream cheese. Then, add 2 tablespoons of finely chopped fresh parsley, 1 tablespoon of fresh dill, and 1 tablespoon of fresh chives. Roll the finished ball in a mixture of toasted walnuts and more fresh herbs.
Don’t be afraid to experiment. The beauty of a no-bake cheese ball is that it’s practically foolproof. If a variation doesn’t work out exactly as you hoped, it’s still going to be delicious spread on a cracker.
Serving & Storage Suggestions
This cheese ball is best served cold, straight from the fridge. The texture is firm enough to scoop but soft enough to spread beautifully. I like to take it out of the fridge about 10-15 minutes before serving to take the chill off, but that’s entirely a personal preference.
What to serve with it: The classic pairing is buttery crackers, like Ritz or Town House. But don’t stop there! It’s also fantastic with pretzel sticks, pita chips, bagel chips, or fresh vegetable crudités like carrot sticks, celery, bell pepper strips, and cucumber rounds. For a low-carb option, use endive leaves or sliced bell peppers as scoops.
Presentation tip: Place the cheese ball in the center of a large wooden board or platter. Arrange your crackers, vegetables, and other dippers around it in an attractive pattern. Garnish the platter with a few extra sprigs of fresh herbs or a small pile of extra chopped pecans. It looks so impressive for almost zero extra effort.
Storage: Leftover cheese ball (if there is any!) should be wrapped tightly in plastic wrap or placed in an airtight container. It will keep in the refrigerator for up to 5 days. The flavor actually gets better after a day or two as the ingredients meld together.
Freezing: You can freeze an unbaked, uncoated cheese ball. Wrap it very tightly in two layers of plastic wrap, then place it in a freezer bag. It will keep for up to 3 months. To thaw, transfer it to the refrigerator for 24 hours. Once thawed, let it come to room temperature for a bit, then shape and coat it as directed. I don’t recommend freezing a coated cheese ball, as the coating can become soggy upon thawing.
Reheating: This is a no-bake recipe, so there’s no reheating involved. Just serve it cold!
Nutritional Information & Benefits
While this is definitely a treat, it’s good to know what’s in it. The following is an approximate nutritional breakdown for one serving (based on 16 servings per cheese ball).
| Nutrient | Amount per Serving |
|---|---|
| Calories | 180 |
| Total Fat | 16g |
| Saturated Fat | 9g |
| Cholesterol | 45mg |
| Sodium | 350mg |
| Total Carbohydrates | 4g |
| Protein | 6g |
Health Benefits: Cheese is a good source of calcium and protein, which are important for bone health and muscle function. Pecans are packed with healthy monounsaturated fats, fiber, and antioxidants. While this is not a health food, it can absolutely be part of a balanced diet when enjoyed in moderation. It’s a much better choice than many processed, store-bought appetizers.
Dietary Considerations: This recipe is naturally gluten-free (always check your ranch dressing mix label to be sure) and low-carb. It contains dairy and tree nuts (pecans). For a nut-free version, you can roll the cheese ball in crushed pretzels, toasted sesame seeds, or finely chopped fresh herbs.
Conclusion
This easy 5-ingredient no-bake cheese ball is more than just a recipe—it’s a shortcut to being a great host. It’s the appetizer that lets you spend more time with your guests and less time in the kitchen. It’s the dish that disappears first, the one people ask for the recipe for, the one that makes you look like you put in way more effort than you actually did.
I love this recipe because it reminds me that the best things in life don’t have to be complicated. A few simple ingredients, a little bit of time, and a whole lot of love can create something truly memorable. It’s a little piece of my aunt’s living room, recreated in my own kitchen, and now I get to share it with you.
So go ahead—give it a try. Make it for your next get-together. Customize it with your favorite mix-ins and coatings. Make it your own. And when your guests are hovering around the snack table, scooping up every last bit, come back and tell me about it. I’d love to hear how it turned out for you.
Happy hosting!
Frequently Asked Questions
Can I make this cheese ball ahead of time?
Absolutely! This is the perfect make-ahead appetizer. You can prepare the mixture and shape the ball up to 2 days in advance. Just keep it tightly wrapped in the fridge. Roll it in the coating about an hour before serving.
Can I use a different type of cheese?
Yes! Sharp cheddar is classic, but you can experiment. A mix of cheddar and Monterey Jack is mild and creamy. Pepper Jack adds a nice kick. For a more sophisticated flavor, try a combination of cheddar and Gruyere. Just make sure any cheese you use is finely shredded for the best texture.
My cheese ball mixture is too sticky to shape. What do I do?
Don’t worry, this is common! It just needs more time to chill. Pop the bowl back in the fridge for another 30-60 minutes. The mixture needs to be firm enough to hold its shape. Patience is key here.
Can I freeze this cheese ball?
Yes, you can freeze the unbaked, uncoated cheese ball. Wrap it very tightly in two layers of plastic wrap and place it in a freezer bag. It will keep for up to 3 months. Thaw it in the refrigerator for 24 hours before shaping and coating.
What can I use instead of pecans for the coating?
You have so many options! Chopped walnuts, toasted almonds, or crushed pretzels all work beautifully. For a nut-free option, try everything bagel seasoning, finely chopped fresh herbs, or even crushed pork rinds for a keto-friendly version.
Pin This Recipe!
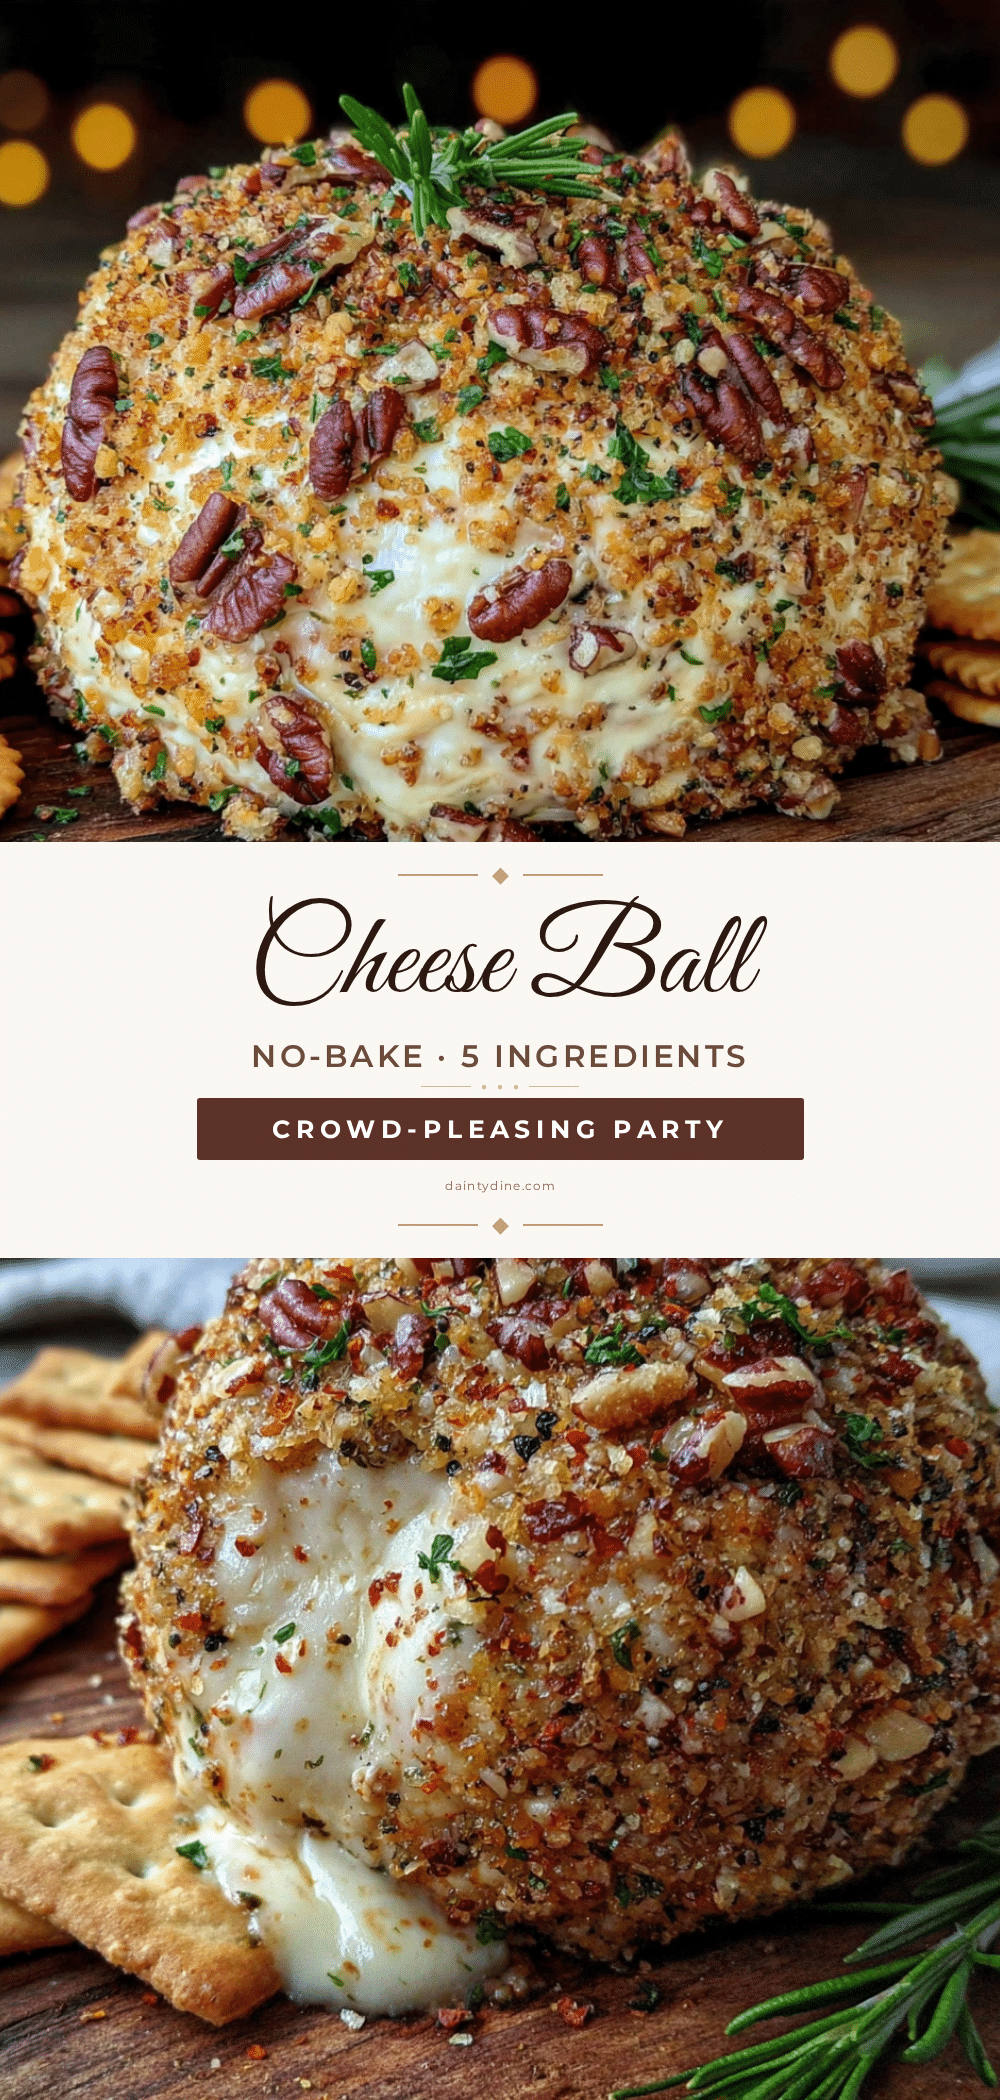
Easy 5-Ingredient No-Bake Cheese Ball: Best Party Appetizer
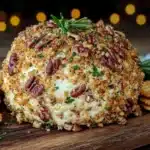
This easy 5-ingredient no-bake cheese ball is the perfect party appetizer. Creamy, tangy, and savory, it comes together in minutes and is a guaranteed crowd-pleaser.
- Prep Time: 15 minutes
- Cook Time: 0 minutes
- Total Time: 3 hours 45 minutes (includes chilling)
- Yield: 16 servings 1x
- Category: Appetizer
- Cuisine: American
Ingredients
- 16 ounces cream cheese, softened (two 8-ounce blocks)
- 2 cups sharp cheddar cheese, finely shredded
- 1 packet (1 ounce) dry ranch dressing mix
- 1/2 cup chopped pecans, finely chopped
- 1/4 cup fresh chives or green onions, finely chopped
Instructions
- Soften the cream cheese: Take cream cheese out of fridge at least 30 minutes before starting; it should be soft enough to press a finger into. Alternatively, microwave in 10-second bursts until soft but not melted.
- Mix the base: In a large mixing bowl, combine softened cream cheese, finely shredded sharp cheddar, and entire packet of dry ranch dressing mix. Beat with a hand mixer on medium speed until completely smooth and well-combined, scraping down sides at least once. Mixture should be uniform, creamy, pale orange with no streaks of white cream cheese.
- Add the fresh element: Fold in chopped fresh chives or green onions using a spatula until evenly distributed.
- Chill the mixture: Cover bowl with plastic wrap and refrigerate for at least 2 hours, or up to overnight, until firm enough to shape.
- Shape the ball: Lay a large sheet of plastic wrap on counter. Scoop chilled cheese mixture onto center of plastic wrap. Using plastic wrap, gather mixture into a rough ball shape, then gently press and shape into a smooth, round ball using hands through the plastic wrap. Twist top of plastic wrap to seal tightly. Refrigerate for another 30 minutes to set shape.
- Coat the ball: While ball chills, place finely chopped pecans on a plate or parchment paper. After 30 minutes, unwrap cheese ball and gently roll in chopped pecans, pressing lightly so nuts stick to all sides. Use hands to gently pat coating into place.
- Final chill and serve: Place coated cheese ball on a serving plate or parchment paper. Cover loosely with plastic wrap and refrigerate for at least 1 more hour before serving. Serve cold with crackers, pretzels, or fresh veggie sticks.
Notes
For best results, use room temperature cream cheese and shred your own cheddar. Toast pecans in a dry skillet for 2-3 minutes for extra flavor. The cheese ball can be made up to 2 days in advance (without coating). For mini cheese balls, use a small cookie scoop to portion the chilled mixture.
Nutrition
- Serving Size: 1 serving (1/16 of c
- Calories: 180
- Sugar: 1
- Sodium: 350
- Fat: 16
- Saturated Fat: 9
- Carbohydrates: 4
- Protein: 6
Keywords: cheese ball, no-bake appetizer, party appetizer, easy cheese ball, 5-ingredient cheese ball, cream cheese appetizer, ranch cheese ball