Love this? Save it for later!
Share the inspiration with your friends
I was scrubbing a sticky ring off my kitchen counter last October when my neighbor across the fence—the one who keeps to himself and grows the most perfect tomatoes—called over, “You ever make those little pumpkin cheesecake cups for your kids?” I stopped mid-scrub. This was the same man who once told me store-bought pie crust was “perfectly acceptable.” I wasn’t expecting dessert advice from the quiet guy with the hedge clippers, but there I was, sponge in hand, listening to him describe exactly how to make these bite-size pumpkin cheesecake cups that his own grandkids went crazy for every fall.
Honestly, I almost didn’t write it down. I mean, the man had just spent twenty minutes telling me about his composting system. But something about the way he said “they disappear before you can blink” made me grab a notepad. I scribbled his recipe on the back of an old grocery list—right next to “more dish soap”—and figured I’d try it when I had a spare moment. Let me tell you, that spare moment came sooner than I expected, and I’ve been making these ever since.
These kid-approved bite-size pumpkin cheesecake cups are exactly what you need when fall hits and you’re craving something sweet but don’t have time to fuss. They come together in about fifteen minutes, use simple ingredients you probably already have, and somehow manage to taste like you spent hours in the kitchen. Maybe you’ve been there—standing in the grocery aisle, staring at pumpkin puree, wondering if you could pull off a Thanksgiving dessert without losing your mind. These cups are your answer.
Why You’ll Love This Recipe
Let me be real with you for a second. I’ve tested this recipe more times than I can count, and each time I tweaked something small to make it better for busy families. My kids have given it the official seal of approval, which honestly means more to me than any cooking award. Here’s why this one’s a keeper:
- Quick & Easy: These come together in under 15 minutes of active prep. No complicated steps, no fancy equipment. Just mix, layer, and chill.
- Simple Ingredients: You probably have most of these in your pantry right now. No hunting down obscure spices or expensive specialty items.
- Perfect for Fall Gatherings: Great for Halloween parties, Thanksgiving dessert tables, or just a fun after-school treat that feels special without the stress.
- Crowd-Pleaser: Kids love the bite-size format, and adults appreciate the pumpkin flavor without it being too heavy. I’ve watched entire platters vanish at potlucks.
- Unbelievably Delicious: The creamy cheesecake layer paired with that spiced pumpkin filling and crunchy crust—it’s comfort food in a tiny cup.
What makes these different from other pumpkin desserts is the texture. The cheesecake layer stays light and fluffy, not dense like some baked versions. And because there’s no baking involved, you don’t have to worry about cracks, water baths, or any of that complicated stuff. It’s the kind of recipe that makes you close your eyes after the first bite—the good kind of surprised.
This isn’t just another pumpkin dessert. It’s the one that’ll have your kids asking when you’re making them again before you’ve even finished cleaning up. And honestly, for a busy parent feeding a family on a sensible budget, that kind of win is priceless.
What Ingredients You Will Need
This recipe uses simple, wholesome ingredients to deliver big flavor without the fuss. Most of these are pantry staples, which means you can whip these up on a whim without a special grocery trip.
For the Crust
- 1 ½ cups graham cracker crumbs (about 10-12 full sheets, crushed fine)
- ¼ cup granulated sugar
- 6 tablespoons unsalted butter, melted (adds richness and helps the crust hold together)
For the Cheesecake Layer
- 8 ounces cream cheese, softened (full-fat works best for creaminess, but Neufchâtel works too)
- ¼ cup granulated sugar
- 1 teaspoon vanilla extract
- ½ cup heavy cream (whipped to soft peaks—this is what makes it light and fluffy)
For the Pumpkin Layer
- ¾ cup pumpkin puree (not pumpkin pie filling—make sure it’s 100% pure pumpkin)
- ¼ cup packed brown sugar
- 1 teaspoon pumpkin pie spice (or mix ½ tsp cinnamon, ¼ tsp nutmeg, ¼ tsp ginger, ⅛ tsp cloves)
- ¼ teaspoon salt (balances the sweetness)
For the Topping (Optional but Recommended)
- ½ cup whipped cream (store-bought or homemade)
- Pinch of cinnamon or pumpkin pie spice for dusting
I recommend using a good-quality pumpkin puree like Libby’s for consistent results. If you’re using a store brand, just check that the ingredient list says “pumpkin” and nothing else. For the cream cheese, Philadelphia is my go-to because it softens evenly and blends smoothly without lumps.
If you need a dairy-free option, you can use dairy-free cream cheese and coconut cream instead of heavy cream. The texture will be slightly different, but still delicious. For a gluten-free crust, swap the graham crackers with gluten-free graham crackers or crushed gluten-free vanilla cookies.
Equipment Needed
You don’t need much for this recipe, which is part of why I love it. Here’s what you’ll need:
- Mini muffin tin: A 24-cup mini muffin tin is ideal. If you don’t have one, you can use small silicone baking cups on a regular baking sheet.
- Mini muffin liners: Paper or foil liners make serving and cleanup a breeze. I prefer foil liners because they hold their shape better.
- Mixing bowls: You’ll need a medium bowl for the crust, a large bowl for the cheesecake layer, and another bowl for the pumpkin layer.
- Electric mixer or whisk: A hand mixer makes whipping the cream and blending the cheesecake layer much easier, but you can do it by hand with a whisk if you’re patient.
- Measuring cups and spoons: For accuracy, especially with the spices.
- Spatula: For scraping every last bit of cheesecake goodness.
- Small cookie scoop or spoon: For portioning the layers evenly into the cups.
If you don’t have a mini muffin tin, don’t worry. You can use shot glasses, small ramekins, or even a regular muffin tin with liners—just adjust the portions and expect fewer, larger cups. I’ve used all of these at different times, and they all work fine.
Preparation Method
Let’s get to the good part. Here’s how to make these kid-approved bite-size pumpkin cheesecake cups step by step.
Step 1: Make the Crust
In a medium bowl, combine 1 ½ cups graham cracker crumbs and ¼ cup granulated sugar. Pour in 6 tablespoons melted butter and stir with a fork until the mixture looks like wet sand and holds together when pressed. You want every crumb to be coated in butter—dry spots mean a crumbly crust later. Set aside about 2 tablespoons of this mixture for topping if you want a little crunch on top.
Step 2: Press the Crust
Line your mini muffin tin with 24 mini muffin liners. Spoon about 1 tablespoon of the crust mixture into each liner. Use the bottom of a small glass or a shot glass to press the crust down firmly and evenly. This step is important—if the crust is too loose, it’ll fall apart when you bite into it. Press until it feels compact and smooth. Pop the tray in the fridge while you make the fillings.
Step 3: Whip the Cream
In a large bowl, pour ½ cup cold heavy cream. Using an electric mixer on medium-high speed, whip the cream until soft peaks form—about 2-3 minutes. You’ll know it’s ready when the cream holds its shape but still looks slightly soft and billowy. Be careful not to overwhip, or you’ll end up with butter. Set this aside for a moment.
Step 4: Make the Cheesecake Layer
In another large bowl, beat 8 ounces softened cream cheese with ¼ cup granulated sugar and 1 teaspoon vanilla extract until smooth and creamy. Scrape down the sides of the bowl halfway through to make sure everything incorporates. Once it’s smooth, gently fold in the whipped cream using a spatula. Fold slowly and carefully—you want to keep as much air in the mixture as possible for that light, fluffy texture. The mixture should look like a thick, silky mousse.
Step 5: Make the Pumpkin Layer
In a separate bowl, whisk together ¾ cup pumpkin puree, ¼ cup packed brown sugar, 1 teaspoon pumpkin pie spice, and ¼ teaspoon salt. Stir until everything is well combined and smooth. Taste it here—if you want more spice, add a pinch more cinnamon. This layer should be thick but spreadable, like a soft pudding.
Step 6: Layer the Cups
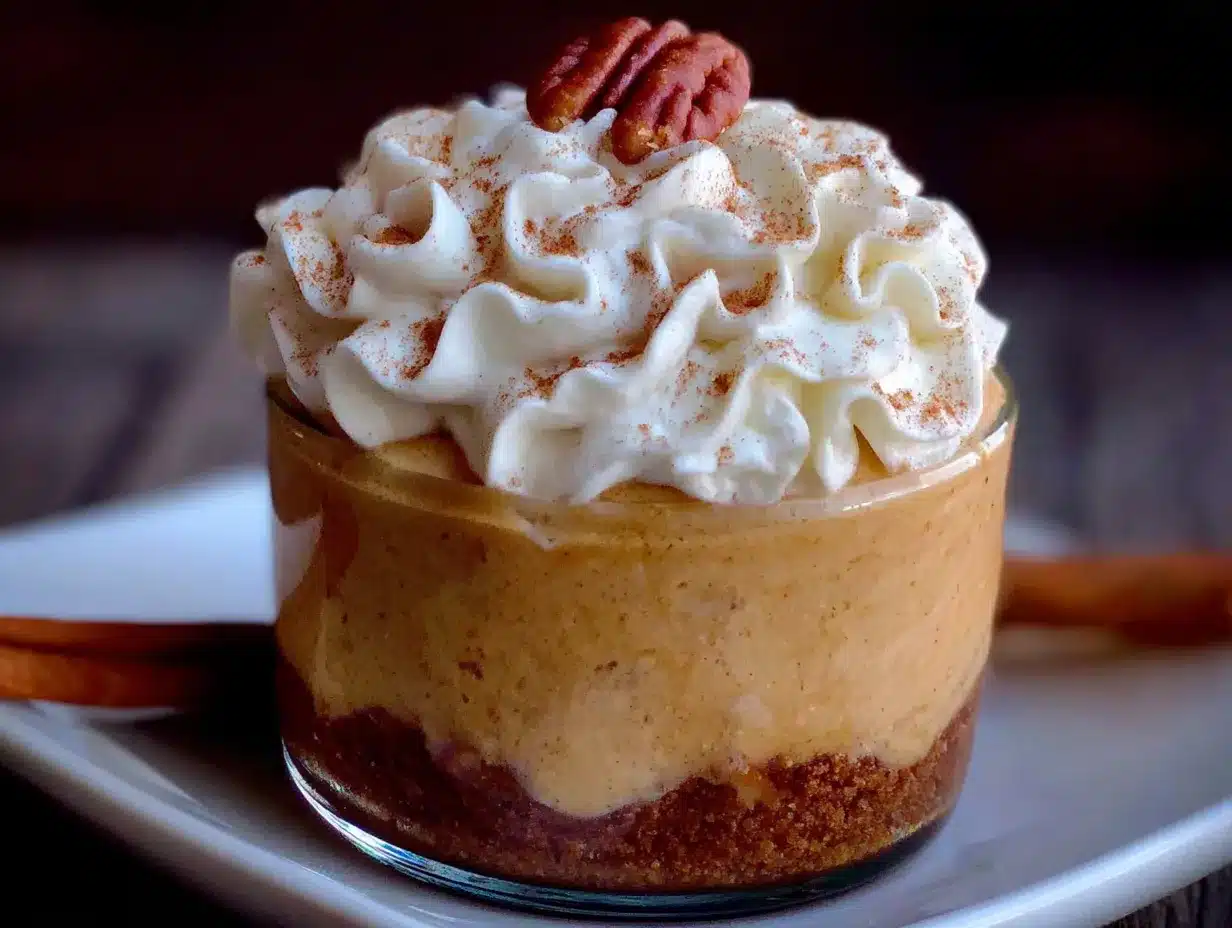
Take the crust-lined muffin tin out of the fridge. Spoon about 1 tablespoon of the cheesecake mixture into each cup on top of the crust. Smooth it out gently with the back of the spoon. Then spoon about 1 teaspoon of the pumpkin mixture on top. You can swirl it with a toothpick if you want a marbled look, or keep the layers separate for a cleaner presentation. I usually leave them layered because my kids like seeing the different colors.
Step 7: Chill
Place the filled muffin tin in the refrigerator for at least 2 hours, or up to overnight. This step is crucial—the cups need time to set and firm up. If you try to eat them too soon, they’ll be too soft and messy. Trust me, I learned this the hard way when I was impatient one afternoon.
Step 8: Serve
Once set, remove the cups from the tin and peel off the liners. Top each with a small dollop of whipped cream and a light dusting of cinnamon or pumpkin pie spice if you like. Serve cold and watch them disappear.
Cooking Tips & Techniques
After making these more times than I can count, I’ve picked up a few tricks that make a real difference.
Room temperature cream cheese is non-negotiable. I know, you’re in a hurry and it’s still cold from the fridge. But cold cream cheese creates lumps that never fully smooth out, no matter how long you beat it. Take it out 30 minutes before you start, or if you’re really in a rush, cut it into small cubes and microwave it for 10 seconds at a time until it’s soft but not hot.
Don’t skip the crust pressing step. I once tried to save time by just sprinkling the crust mixture in and hoping for the best. Big mistake. The crust fell apart when we tried to eat them, and my kids ended up with a mess of crumbs and filling. Take those extra 30 seconds to press firmly. Your future self will thank you.
Whip the cream by hand if you’re nervous about overwhipping. I’ve ruined more than a few batches of whipped cream by walking away for “just a second” and coming back to butter. When I’m distracted—which is often with three kids—I whip by hand. It takes a few extra minutes, but it’s harder to mess up.
Make these a day ahead. Honestly, they taste even better after chilling overnight. The flavors meld together, the crust softens just slightly, and everything becomes perfectly cohesive. This is my secret for holiday entertaining—I make them the night before and just add the whipped cream topping right before serving.
Use a cookie scoop for even portions. A small cookie scoop (about 1 tablespoon size) makes layering so much easier and ensures each cup has the same amount of filling. It’s one of those little tools that makes a big difference in consistency.
Variations & Adaptations
One of the best things about this recipe is how easy it is to change up. Here are some variations I’ve tried and loved.
Gluten-Free Version
Swap the graham crackers for gluten-free graham crackers or crushed gluten-free vanilla cookies. I’ve used Schär’s gluten-free graham crackers with great results. The texture is slightly different but still delicious.
Dairy-Free Version
Use dairy-free cream cheese (Kite Hill or Miyoko’s work well) and replace the heavy cream with full-fat coconut cream. Chill the can of coconut cream overnight, then scoop out the solid part and whip it just like regular cream. The coconut flavor is subtle and actually complements the pumpkin nicely.
Chocolate Lovers’ Twist
Add ¼ cup melted dark chocolate to the cheesecake layer before folding in the whipped cream. Or drizzle melted chocolate over the finished cups for a fancy touch. My oldest son calls these his “Halloween special” and requests them every year.
Pumpkin Spice Extra
If you’re a pumpkin spice fanatic like my sister, add an extra ½ teaspoon of pumpkin pie spice to both the cheesecake layer and the pumpkin layer. You can also sprinkle a little cinnamon sugar on top before serving.
No-Bake Cheesecake Cups
For a simpler version, skip the crust entirely and just layer the cheesecake and pumpkin mixtures in small cups or shot glasses. This works great for parties and looks elegant without any extra effort.
Serving & Storage Suggestions
These little cups are best served cold, straight from the fridge. The texture is firm but creamy, and the flavors are perfectly balanced when they’ve had time to chill. If you’re serving them at a party, arrange them on a platter and add the whipped cream topping just before serving so it stays fresh and fluffy.
They pair beautifully with a cup of hot coffee or spiced apple cider. For a fun fall dessert board, arrange them alongside apple slices, caramel dip, and a few gingersnap cookies. My kids love when I serve them after a cozy soup dinner—it feels like a special treat without being too heavy.
Storage: Keep these in an airtight container in the refrigerator for up to 4 days. The crust will soften slightly over time, but they’ll still taste great. I actually prefer them on day two when the flavors have had more time to meld.
Freezing: You can freeze these for up to 2 months. Place them in a single layer on a baking sheet and freeze until solid, then transfer to a freezer-safe container. Thaw in the refrigerator overnight before serving. Add fresh whipped cream after thawing for best results.
Reheating: These are meant to be served cold, so no reheating needed. If you’ve frozen them, just let them thaw slowly in the fridge. Don’t microwave them—the texture will get weird and the crust will become soggy.
Nutritional Information & Benefits
Here’s the estimated nutrition per cup (based on 24 servings, without optional whipped cream topping):
| Nutrient | Amount per Cup |
|---|---|
| Calories | 115 |
| Total Fat | 8g |
| Saturated Fat | 5g |
| Cholesterol | 25mg |
| Sodium | 85mg |
| Total Carbohydrates | 10g |
| Dietary Fiber | 0.5g |
| Sugars | 7g |
| Protein | 2g |
| Vitamin A | 35% DV |
| Calcium | 3% DV |
Pumpkin is packed with vitamin A, which supports eye health and immune function. It’s also a good source of fiber and antioxidants. The cream cheese adds a bit of calcium and protein, making these a more balanced treat than many other desserts.
These cups are vegetarian and can easily be made gluten-free or dairy-free with the substitutions mentioned earlier. They contain dairy and gluten in their standard form, so keep that in mind if you’re serving guests with allergies.
I love that these feel indulgent but aren’t loaded with sugar. Each cup is just 7 grams of sugar—about the same as a small piece of fruit. That makes them a great option for after-school treats or holiday parties where you want something sweet without going overboard.
Conclusion
These kid-approved bite-size pumpkin cheesecake cups have become a staple in our house every fall, and I have a feeling they’ll become one in yours too. They’re quick enough for a weeknight dessert, impressive enough for a holiday gathering, and simple enough that your kids can help make them. Honestly, that last part might be my favorite—watching my little ones press the crust into the liners with serious concentration, then carefully spooning the layers on top. It’s messy, it’s imperfect, and it’s exactly the kind of cooking I want them to remember.
Don’t be afraid to make this recipe your own. Add more spice, swap the crust, or skip the topping entirely. The beauty of no-bake desserts is that they’re forgiving and flexible. Start with the basic recipe, then tweak it until it feels like yours.
I’d love to hear how these turn out for you. Drop a comment below and let me know if your kids gave them the thumbs up, or share your own twist on the recipe. And if you’re looking for other easy fall desserts, try my easy pumpkin bars with cream cheese frosting or these no-bake apple cheesecake jars—they’re both family favorites around here.
Happy cooking, and don’t forget to save room for dessert!
Frequently Asked Questions
Can I use pumpkin pie filling instead of pumpkin puree?
I wouldn’t recommend it. Pumpkin pie filling already has sugar and spices added, which will throw off the sweetness and texture of the pumpkin layer. Stick with 100% pure pumpkin puree for the best results.
How far in advance can I make these?
You can make these up to 2 days ahead and keep them in the fridge. They actually taste better after chilling overnight. Just add the whipped cream topping right before serving.
Can I use a regular muffin tin instead of a mini one?
Absolutely. You’ll get about 8-10 regular-sized cups instead of 24 mini ones. Increase the chilling time to at least 3-4 hours since the layers are thicker. You might also want to double the crust recipe so each cup has a good base.
My crust keeps falling apart. What am I doing wrong?
Two things to check: make sure you’re pressing the crust firmly enough into the liners, and make sure your butter-to-crumb ratio is right. The mixture should feel like wet sand and hold together when you squeeze it in your hand. If it’s too dry, add another tablespoon of melted butter.
Can I freeze these for later?
Yes! Freeze them in a single layer on a baking sheet, then transfer to a freezer-safe container. They’ll keep for up to 2 months. Thaw overnight in the fridge and add fresh whipped cream before serving.
Pin This Recipe!
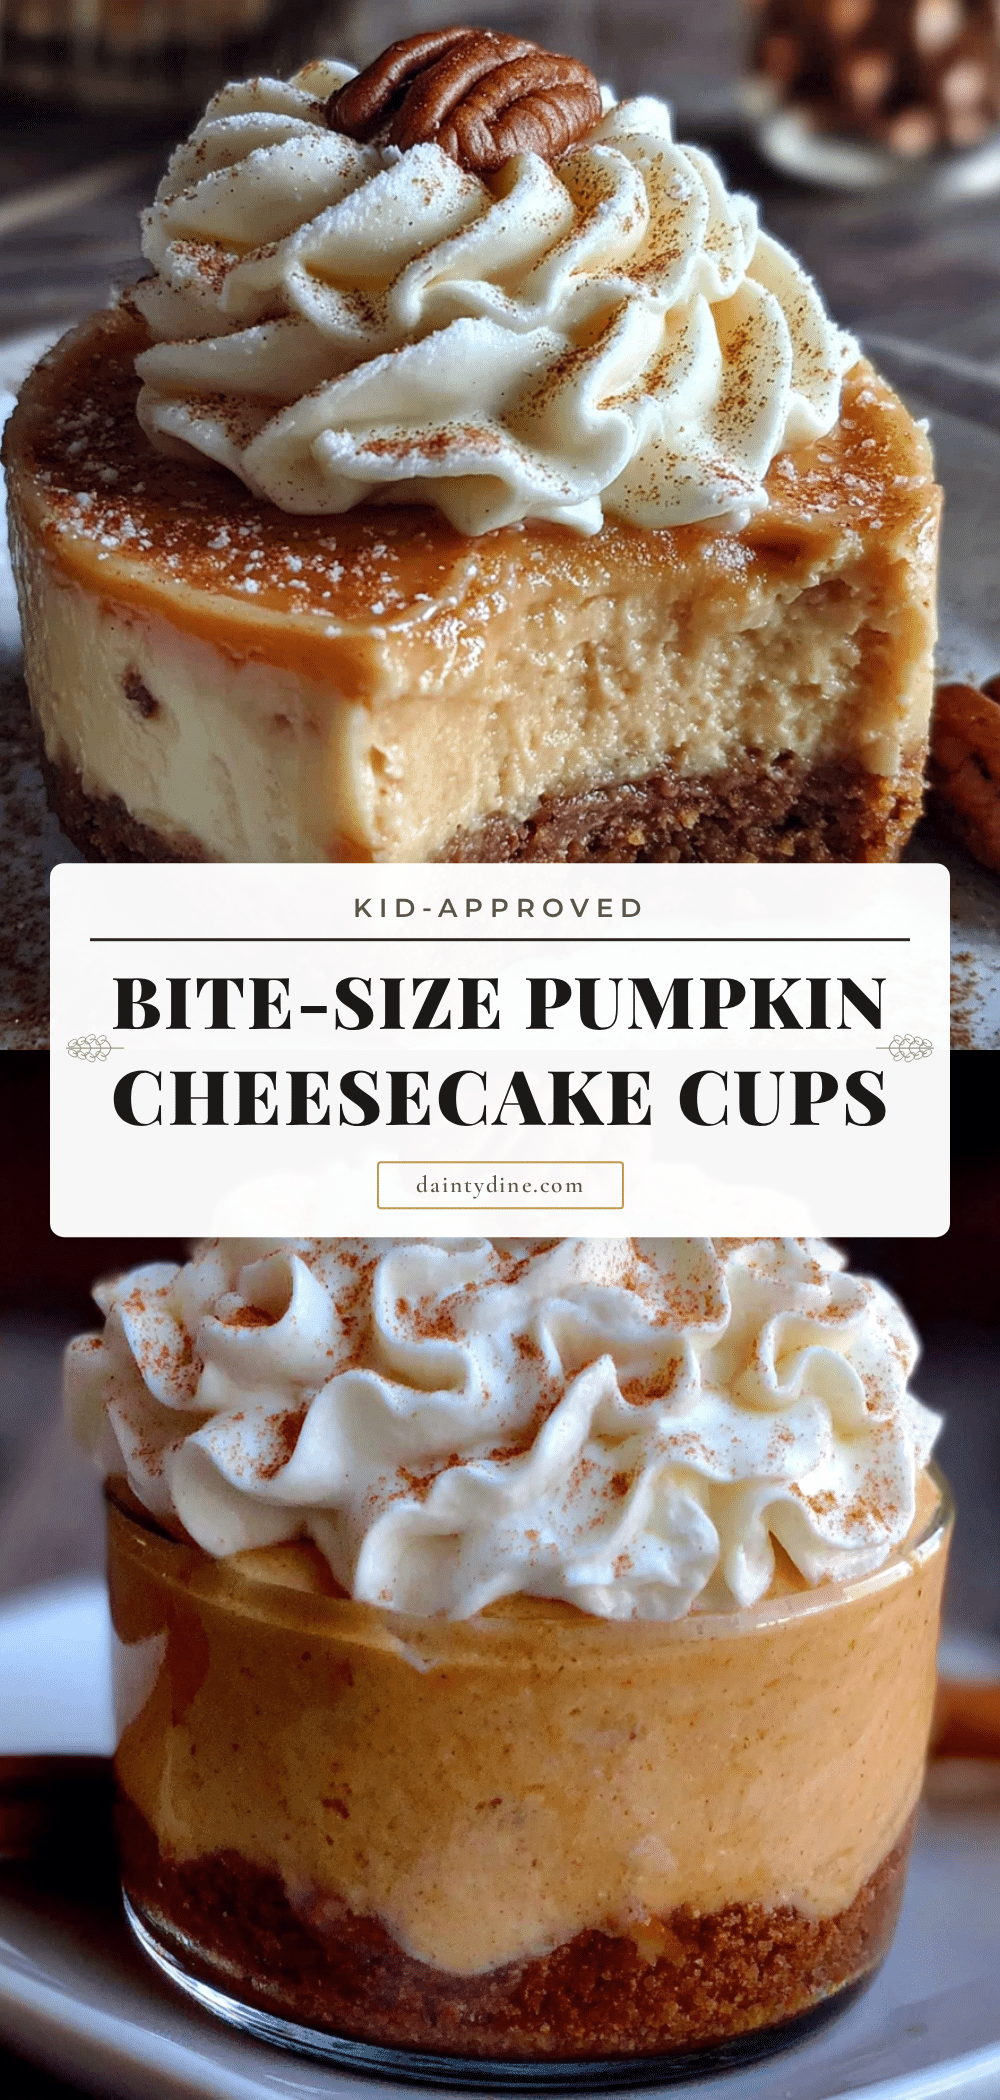
Kid-Approved Bite-Size Pumpkin Cheesecake Cups
These no-bake bite-size pumpkin cheesecake cups are quick, easy, and perfect for fall. Made with simple ingredients, they come together in about 15 minutes and are a crowd-pleaser for kids and adults alike.
- Prep Time: 15 minutes
- Cook Time: 0 minutes
- Total Time: 2 hours 15 minutes (includes chilling time)
- Yield: 24 servings 1x
- Category: Dessert
- Cuisine: American
Ingredients
- 1 ½ cups graham cracker crumbs (about 10–12 full sheets, crushed fine)
- ¼ cup granulated sugar
- 6 tablespoons unsalted butter, melted
- 8 ounces cream cheese, softened
- ¼ cup granulated sugar
- 1 teaspoon vanilla extract
- ½ cup heavy cream
- ¾ cup pumpkin puree (100% pure pumpkin)
- ¼ cup packed brown sugar
- 1 teaspoon pumpkin pie spice (or mix ½ tsp cinnamon, ¼ tsp nutmeg, ¼ tsp ginger, ⅛ tsp cloves)
- ¼ teaspoon salt
- ½ cup whipped cream (optional, for topping)
- Pinch of cinnamon or pumpkin pie spice (optional, for dusting)
Instructions
- In a medium bowl, combine 1 ½ cups graham cracker crumbs and ¼ cup granulated sugar. Pour in 6 tablespoons melted butter and stir with a fork until the mixture looks like wet sand and holds together when pressed. Set aside about 2 tablespoons for topping if desired.
- Line a mini muffin tin with 24 mini muffin liners. Spoon about 1 tablespoon of the crust mixture into each liner. Use the bottom of a small glass or shot glass to press the crust down firmly and evenly. Place the tray in the fridge while you make the fillings.
- In a large bowl, pour ½ cup cold heavy cream. Using an electric mixer on medium-high speed, whip the cream until soft peaks form, about 2-3 minutes. Set aside.
- In another large bowl, beat 8 ounces softened cream cheese with ¼ cup granulated sugar and 1 teaspoon vanilla extract until smooth and creamy. Gently fold in the whipped cream using a spatula until the mixture is light and fluffy.
- In a separate bowl, whisk together ¾ cup pumpkin puree, ¼ cup packed brown sugar, 1 teaspoon pumpkin pie spice, and ¼ teaspoon salt until well combined and smooth.
- Take the crust-lined muffin tin out of the fridge. Spoon about 1 tablespoon of the cheesecake mixture into each cup on top of the crust. Then spoon about 1 teaspoon of the pumpkin mixture on top. Swirl with a toothpick if desired, or keep layers separate.
- Place the filled muffin tin in the refrigerator for at least 2 hours, or up to overnight, to set.
- Once set, remove the cups from the tin and peel off the liners. Top each with a small dollop of whipped cream and a light dusting of cinnamon or pumpkin pie spice if desired. Serve cold.
Notes
Room temperature cream cheese is essential for a smooth texture. Press the crust firmly to prevent crumbling. These taste even better after chilling overnight. For a dairy-free version, use dairy-free cream cheese and coconut cream. For gluten-free, use gluten-free graham crackers.
Nutrition
- Serving Size: 1 cup
- Calories: 115
- Sugar: 7
- Sodium: 85
- Fat: 8
- Saturated Fat: 5
- Carbohydrates: 10
- Fiber: 0.5
- Protein: 2
Keywords: pumpkin cheesecake cups, no-bake pumpkin dessert, bite-size pumpkin cheesecake, easy fall dessert, kid-friendly pumpkin recipe


