Love this? Save it for later!
Share the inspiration with your friends
My neighbor Karen wasn’t trying to impress anyone. I’d stopped by to return her hedge clippers on a random Tuesday afternoon, and the smell of butter and sugar hit me before I even got to her front door. She opened it with flour on her cheek and a baking sheet in her hand, completely unfazed by the fact that she was creating what I now consider the most dangerously addictive snack on the planet.
“Oh, it’s nothing,” she said when I asked what smelled so incredible. “Just something I threw together for the kids’ Halloween party.” She shrugged like she’d made a bowl of cereal, not this gorgeous, candy-studded, buttery popcorn bark that looked like it belonged in a fancy bakery window. I mean, honestly—I’ve spent years perfecting complicated dessert recipes, and here she was, casually tossing together something that made me literally stop in my tracks.
That’s the thing about the best recipes, right? They never come from someone trying to show off. They come from a mom who needed a quick treat for a school party, who grabbed whatever was in her pantry, and who accidentally created magic. This Kid-Approved No-Bake Candy Corn Popcorn Bark is exactly that kind of recipe. It’s the kind of thing you make when you want to look like a hero without breaking a sweat. Maybe you’ve been there—scrambling for a last-minute classroom treat or a weekend movie snack that doesn’t require a trip to the store?
Let me tell you, this recipe has saved me more times than I can count. Every time I make it, I think of Karen’s flour-dusted cheek and her casual shrug. And every time, someone asks for the recipe. So here it is, finally written down—the easiest, most crowd-pleasing treat you’ll make this season.
Why You’ll Love This Recipe
Let’s be real for a second—how many recipes claim to be “easy” and then require seventeen steps and a kitchen full of gadgets you don’t own? This is not that recipe. This is the recipe you make when you have twenty minutes, a microwave, and a desperate desire to be the favorite parent at the school party.
- Truly No-Bake: No turning on the oven, no waiting for things to cool, no complicated candy thermometers. Just melt, stir, and chill. That’s it.
- Budget-Friendly: You need popcorn, candy corn, white chocolate or almond bark, and maybe some sprinkles. These are all things you can grab at the dollar store without blinking.
- Kid-Approved: I’ve tested this on my own picky eaters, neighbor kids, and an entire classroom of second graders. The verdict? Universal love. The candy corn adds that sweet, chewy texture kids go crazy for, and the popcorn gives it that satisfying crunch.
- Perfect for Any Occasion: Halloween parties, fall gatherings, movie nights, classroom treats, or just because it’s Tuesday and you need a win. This bark works for all of it.
- Completely Customizable: Don’t like candy corn? Swap it. Want to add chocolate? Go for it. This recipe is more of a template than a strict set of rules.
What makes this recipe different from every other popcorn treat out there? It’s the texture combination. The crunchy popcorn, the chewy candy corn, the smooth white chocolate—it all comes together in this perfect bite that makes you close your eyes after the first taste. I’m not exaggerating. I’ve watched grown adults do it.
This isn’t just good—it’s the kind of treat that makes people ask for the recipe before they’ve even finished their first piece. And honestly? That’s the best compliment a home cook can get.
What Ingredients You Will Need
This recipe uses simple, pantry-friendly ingredients to create something that tastes way more complicated than it actually is. Most of these are things you might already have on hand, especially if you’ve got kids and a sweet tooth.
For the Popcorn Base
- 10 cups popped popcorn (about 1/2 cup unpopped kernels, or one large bag of plain microwave popcorn) — Make sure it’s unsalted and unbuttered for the best results. I prefer popping my own on the stovetop because it’s cheaper and I can control the salt, but plain microwave popcorn works in a pinch.
- 1/4 teaspoon salt (optional, but I find it helps balance all the sweetness)
For the Coating
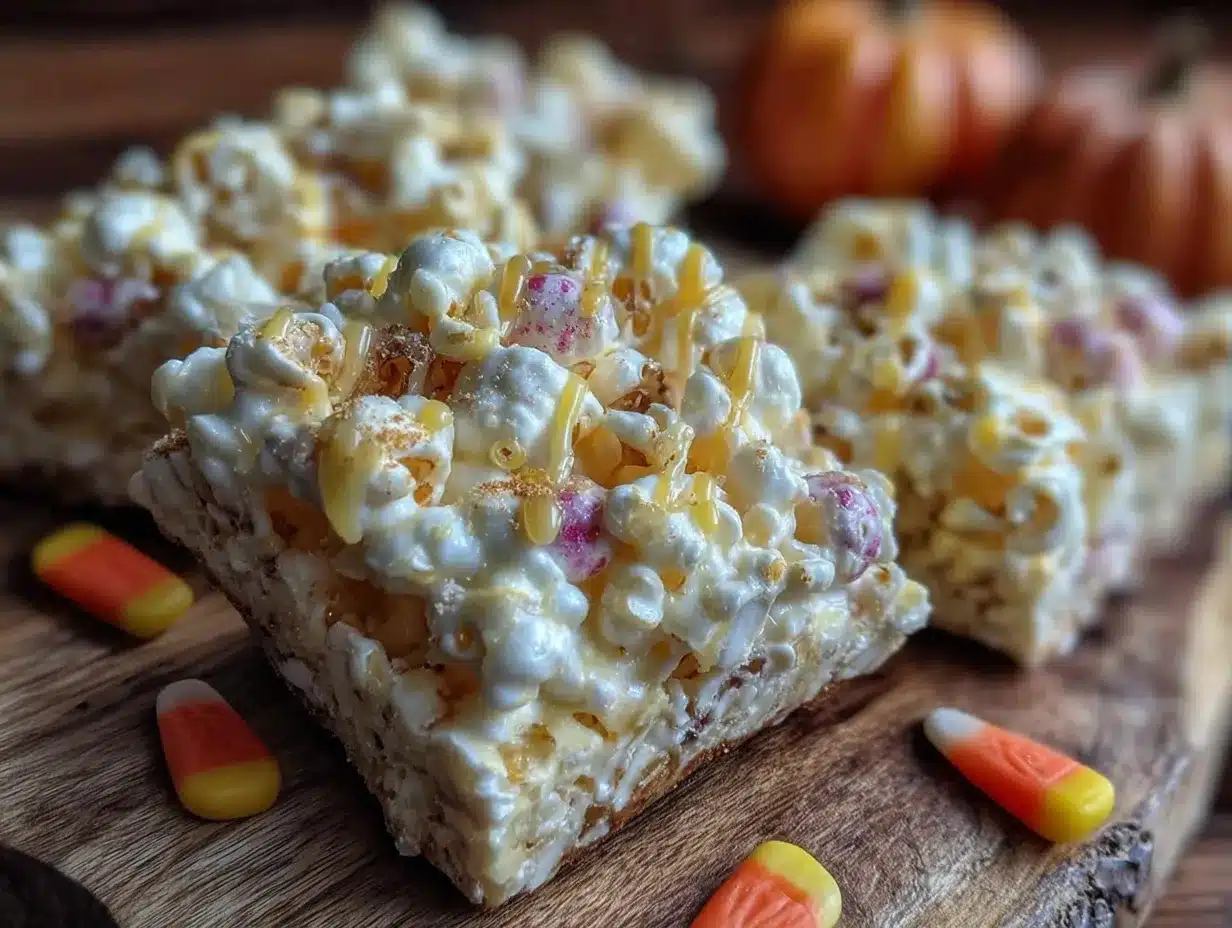
- 24 ounces white chocolate or almond bark (I prefer almond bark for this recipe because it melts more smoothly and sets up harder, but good-quality white chocolate chips work too. Ghirardelli is my go-to brand for white chocolate, but store brands are totally fine)
- 2 tablespoons coconut oil or vegetable shortening (this helps thin out the chocolate and makes it easier to coat the popcorn evenly. Trust me on this one—don’t skip it)
- 1 teaspoon vanilla extract (pure vanilla is better, but imitation works fine for this recipe)
For the Mix-Ins and Toppings
- 1 1/2 cups candy corn (the classic fall candy, obviously. You can also use autumn mix or harvest blend for more color variety)
- 1/2 cup salted peanuts (optional, but the salty crunch is amazing against the sweet coating. Leave them out if you’re making this for a nut-free classroom)
- 1/3 cup fall-colored sprinkles or jimmies (because everything is more fun with sprinkles. My kids insist on this step)
- Optional: 1/4 cup mini chocolate chips or M&Ms (for an extra layer of chocolate goodness)
Ingredient Selection Tips
When choosing your white chocolate, look for brands that contain cocoa butter rather than palm oil—they’ll melt more smoothly and taste better. If you’re using white chocolate chips, be aware that some brands don’t melt as well because they’re designed to hold their shape in cookies. That’s why I recommend almond bark or white melting wafers if you can find them.
For the popcorn, stale popcorn actually works better here because it’s less likely to get chewy when you add the coating. So if you’ve got a bag that’s been sitting in the pantry for a few days, this is the perfect use for it. Just make sure it’s not stale enough to taste bad—you want day-old, not week-old.
And about the candy corn—I know it’s a divisive candy. Some people love it, some people hate it. If you’re in the latter camp, you can substitute with candy pumpkins, autumn M&Ms, or even chopped-up caramel candies. The recipe is flexible, so make it your own.
Equipment Needed
- Large microwave-safe bowl (at least 4-quart capacity for melting the chocolate)
- Extra-large mixing bowl (you need room to toss the popcorn with the coating without making a mess)
- Rubber spatula (for stirring and folding—a wooden spoon works too, but the spatula gets every bit of chocolate)
- Baking sheet or large rimmed pan (for spreading the bark to set)
- Parchment paper or silicone baking mat (absolutely essential—without this, your bark will stick to the pan and you’ll be scraping for days)
- Wax paper (for wrapping or storing the finished bark)
- Measuring cups and spoons
If you don’t have a microwave, you can melt the chocolate on the stovetop using a double boiler. Just put the chocolate in a heat-safe bowl set over a pot of simmering water and stir until smooth. It takes a few extra minutes but works perfectly.
For the baking sheet, a half-sheet pan (about 13×18 inches) is ideal. If yours is smaller, just work in batches or use two pans. I’ve also used a large cutting board covered in parchment in a pinch—get creative with what you have.
Preparation Method
Alright, let’s get to the fun part. This whole process takes about 15 minutes of active time, plus 30 minutes to set. Clear your counter, grab your ingredients, and let’s make some magic.
Step 1: Prep Your Popcorn
Pop your popcorn however you like—stovetop, microwave, air popper, whatever works. You want about 10 cups of popped popcorn. Remove any unpopped kernels you find (trust me, nobody wants to bite into one of those). Spread the popcorn out on your prepared baking sheet and pick out any half-popped or burnt pieces. Sprinkle with the optional salt and toss gently.
Time estimate: 5 minutes
Pro tip: If you’re using microwave popcorn, let it cool completely before adding the chocolate coating. Hot popcorn will melt the chocolate and make everything a sticky mess. I learned this the hard way, and let me tell you, cleaning melted chocolate off a counter is not how I wanted to spend my afternoon.
Step 2: Melt the White Chocolate
Break up your white chocolate or almond bark into small, even pieces and put them in your microwave-safe bowl. Add the coconut oil or shortening. Microwave in 30-second intervals, stirring thoroughly between each interval. It usually takes about 2-3 minutes total, depending on your microwave’s power.
Time estimate: 3 minutes
Visual cue: The chocolate should be completely smooth and glossy when you’re done. If it looks grainy or separated, you’ve overheated it. Next time, try shorter intervals. Once it’s smooth, stir in the vanilla extract.
Warning: White chocolate burns easily. If you see any lumps forming, stop immediately and stir vigorously—sometimes the residual heat is enough to finish melting everything. If it’s still lumpy after stirring, you may need to add another teaspoon of coconut oil to help smooth it out.
Step 3: Combine and Coat
Put your popped popcorn in the extra-large mixing bowl. Pour the melted white chocolate over the top and use your rubber spatula to fold everything together gently. You want every piece of popcorn to get at least a little bit of coating, but you don’t want to break the popcorn into pieces. Work quickly here—the chocolate will start to set as it cools.
Time estimate: 2 minutes
Sensory cue: You should hear a slight sizzle as the warm chocolate hits the popcorn. The smell is incredible—buttery, sweet, and vanilla-y. Your kitchen is about to smell like the world’s best movie theater.
Step 4: Add the Mix-Ins
While the chocolate is still wet, sprinkle in the candy corn and peanuts (if using). Fold gently to distribute everything evenly. You don’t want all the candy corn to sink to the bottom, so try to get it mixed throughout.
Time estimate: 1 minute
Step 5: Spread and Top
Transfer the mixture to your parchment-lined baking sheet. Spread it out in an even layer, about 1/2 to 3/4 inch thick. Don’t press down too hard—you want some air pockets and texture. While the coating is still wet, sprinkle the fall-colored sprinkles and any additional toppings (mini chocolate chips, M&Ms, extra candy corn) over the top. Gently press them in so they stick.
Time estimate: 2 minutes
My personal tip: I like to leave some clusters bigger than others. The uneven pieces look more rustic and homemade, and honestly, the big chunks are everyone’s favorite part. Don’t stress about making it perfect—this is supposed to look like something a real person made in their real kitchen.
Step 6: Set and Break
Place the baking sheet in the refrigerator for at least 30 minutes, or until the chocolate is completely firm and set. You’ll know it’s ready when the surface looks matte instead of shiny, and the bark lifts easily from the parchment. Once set, break it into irregular pieces with your hands. Some pieces will be small, some will be big—that’s exactly how it should be.
Time estimate: 30 minutes to set, 2 minutes to break apart
Total time: About 45 minutes from start to finish, with only 15 minutes of hands-on work.
Cooking Tips & Techniques
I’ve made this recipe probably two dozen times at this point, and I’ve learned a few things along the way. Let me save you from my mistakes.
The Chocolate Situation
Here’s the thing about white chocolate—it’s finicky. It doesn’t like heat, it doesn’t like moisture, and it definitely doesn’t like being rushed. If your chocolate seizes up (gets thick and grainy), you can sometimes save it by adding a tablespoon of coconut oil and stirring vigorously. But honestly? Prevention is better than cure. Use low heat, stir often, and don’t walk away from the microwave.
The Humidity Factor
If you live in a humid climate like I do, your bark might not set as firmly as you’d like. The sugar in the candy corn and chocolate attracts moisture, which can make things sticky. To combat this, let the bark set in the refrigerator for a full hour, and store it in an airtight container with a paper towel at the bottom to absorb any excess moisture. It’s not a perfect solution, but it helps.
Timing and Multitasking
This recipe moves fast once you start. I like to have everything measured and ready to go before I melt the chocolate. Pop the popcorn first, measure the candy corn, get your sprinkles out—do all the prep work. Then when you start melting, you can move through the steps without scrambling. It makes the whole process feel effortless.
The Perfect Texture
If you want extra-crunchy bark, spread the coated popcorn thinner on the baking sheet. For thicker, chewier pieces, pile it up a bit more. I usually go for a mix of both—thin edges that snap when you bite them and thicker middle pieces that have more give. It’s all about personal preference.
My Biggest Failure
I once tried to double this recipe and use a giant roasting pan instead of a baking sheet. The coating didn’t set evenly, the candy corn sank to the bottom, and I ended up with a sad, sticky mess that took forever to clean up. Lesson learned: work in batches if you need more. Don’t overcrowd the pan.
Variations & Adaptations
One of the best things about this recipe is how flexible it is. Here are some of my favorite variations:
Chocolate Lover’s Version
Swap half the white chocolate for milk or dark chocolate. The combination of white and dark chocolate swirled together is gorgeous, and the bitterness of dark chocolate balances the sweet candy corn beautifully. You can also drizzle melted dark chocolate over the finished white bark for a fancy look.
Halloween Candy Swap
Don’t like candy corn? No problem. Use chopped-up Halloween candy instead—Reese’s cups, Kit Kats, Snickers, whatever your kids brought home from trick-or-treating. Just chop them into bite-sized pieces and add them in place of the candy corn. This is also a great way to use up leftover Halloween candy without your kids eating it all in one sitting.
Nut-Free Version
Leave out the peanuts and use sunflower seeds or pumpkin seeds instead for a nut-free crunch. Or skip the nuts entirely and add extra sprinkles or mini marshmallows. My daughter’s class has a nut-free policy, so this is the version I make for school parties.
Seasonal Adaptations
- Christmas: Use red and green sprinkles, add crushed candy canes, and swap candy corn for white chocolate chips or peppermint bits.
- Easter: Pastel sprinkles and chopped Easter egg candies instead of candy corn.
- Fourth of July: Red, white, and blue sprinkles with M&Ms in patriotic colors.
- Valentine’s Day: Pink and red sprinkles with conversation hearts mixed in.
Dietary Adaptations
For a dairy-free version, use dairy-free white chocolate (Enjoy Life makes a good one) and coconut oil instead of shortening. For a gluten-free version, just make sure your candy corn and sprinkles are certified gluten-free—most are, but it’s worth checking the labels.
Serving & Storage Suggestions
This bark is best served at room temperature, straight from the counter. The texture is perfect—crunchy popcorn, chewy candy corn, smooth chocolate. I like to pile it on a pretty plate or in a big bowl and let people grab handfuls. It’s casual, it’s fun, and it disappears fast.
Presentation Ideas
For Halloween parties, I put the bark in clear cellophane bags tied with orange and black ribbon. It makes a great party favor or classroom treat. For a movie night at home, I just pile it in a big bowl and let everyone dig in. No fancy presentation required.
What to Serve With It
This bark is sweet enough to stand on its own, but it pairs beautifully with a cold glass of milk, hot apple cider, or a pumpkin spice latte. If you’re serving it at a party, put it out with other finger foods like caramel apples, popcorn balls, or pumpkin dip with graham crackers.
Storage Instructions
Store the bark in an airtight container at room temperature for up to 5 days. If your kitchen is warm or humid, store it in the refrigerator instead—just let it come to room temperature for 10 minutes before serving so the chocolate softens slightly. I don’t recommend freezing this bark because the popcorn can get chewy and the candy corn can get hard, but if you absolutely must freeze it, wrap it tightly in plastic wrap and then foil, and eat it within a month.
How Flavors Develop
Honestly, this bark is best the day you make it. The popcorn stays crunchy, the chocolate is perfectly set, and everything is fresh. That said, it’s still really good on day two and three. The popcorn softens slightly, which some people actually prefer—it becomes more like a popcorn cluster than a crunchy bark. By day four, it’s still edible but definitely softer. I’ve never had it last longer than that in my house, so I can’t tell you how it holds up after that!
Nutritional Information & Benefits
Let’s be honest—this is a treat, not a health food. But here’s the nutritional breakdown for a rough estimate (based on 12 servings):
| Nutrient | Per Serving (approx) |
|---|---|
| Calories | 280-320 |
| Total Fat | 14-18g |
| Saturated Fat | 8-10g |
| Carbohydrates | 38-42g |
| Sugar | 30-34g |
| Protein | 3-4g |
| Sodium | 80-120mg |
On the bright side, popcorn is a whole grain and provides some fiber. The white chocolate contains calcium, and if you add peanuts, you’re getting protein and healthy fats. But let’s not kid ourselves—this is a dessert, and it’s meant to be enjoyed in moderation. I tell my kids it’s a “sometimes food,” and they’re fine with that because “sometimes” happens pretty often during Halloween season.
Allergen note: This recipe contains dairy (white chocolate) and may contain peanuts and tree nuts depending on your mix-ins. It can be made gluten-free with careful ingredient selection. Always check labels if you’re serving people with allergies.
Conclusion
This Kid-Approved No-Bake Candy Corn Popcorn Bark is the recipe you’ll come back to again and again—not because it’s fancy or complicated, but because it’s easy and it works. Every time I make it, I think of Karen’s casual shrug and her flour-dusted cheek, and I smile. That’s what good recipes do—they connect us to people and moments and make us feel like we’re part of something bigger than just a snack.
I’d love to hear how this turns out for you! Did you add your own twist? Did your kids go crazy for it? Did you use it to win over a classroom of skeptical second graders? Drop a comment below and let me know. And if you share a photo on Pinterest or Instagram, tag me so I can see your beautiful creation.
Go ahead—make this bark. Your kitchen will smell amazing, your family will think you’re a genius, and you’ll have done it all in under an hour with zero oven time. Honestly? That’s a win in my book any day of the week.
Happy snacking, friends!
Frequently Asked Questions
Can I use microwave popcorn for this recipe?
Absolutely! Just make sure you use plain or lightly salted microwave popcorn, not butter-flavored. The butter flavor can clash with the white chocolate and make everything taste a bit greasy. Let the popcorn cool completely before adding the chocolate coating.
Why did my white chocolate seize up?
White chocolate is sensitive to heat and moisture. If it gets too hot or if any water gets into the bowl, it can seize up and become grainy and thick. To prevent this, always use completely dry bowls and utensils, and heat the chocolate in short intervals. If it does seize, try adding a tablespoon of coconut oil and stirring vigorously—sometimes you can save it.
Can I make this recipe ahead of time?
Yes! You can make this bark up to 3 days in advance. Store it in an airtight container at room temperature and it will stay fresh and delicious. Just don’t make it more than 5 days ahead, or the popcorn will start to get stale and chewy.
How do I keep the popcorn from getting soggy?
The key is making sure your popcorn is completely cool and slightly stale before adding the chocolate coating. Freshly popped popcorn has too much moisture and can make the bark soggy. Pop your popcorn the day before, or spread it out on a baking sheet and let it sit for a few hours to dry out slightly.
Can I use colored candy melts instead of white chocolate?
Definitely! Candy melts or melting wafers work great for this recipe and come in lots of fun colors. Orange or purple candy melts would be perfect for Halloween. Just follow the melting instructions on the package, and note that you might not need the extra coconut oil since candy melts are already formulated to melt smoothly.
Pin This Recipe!
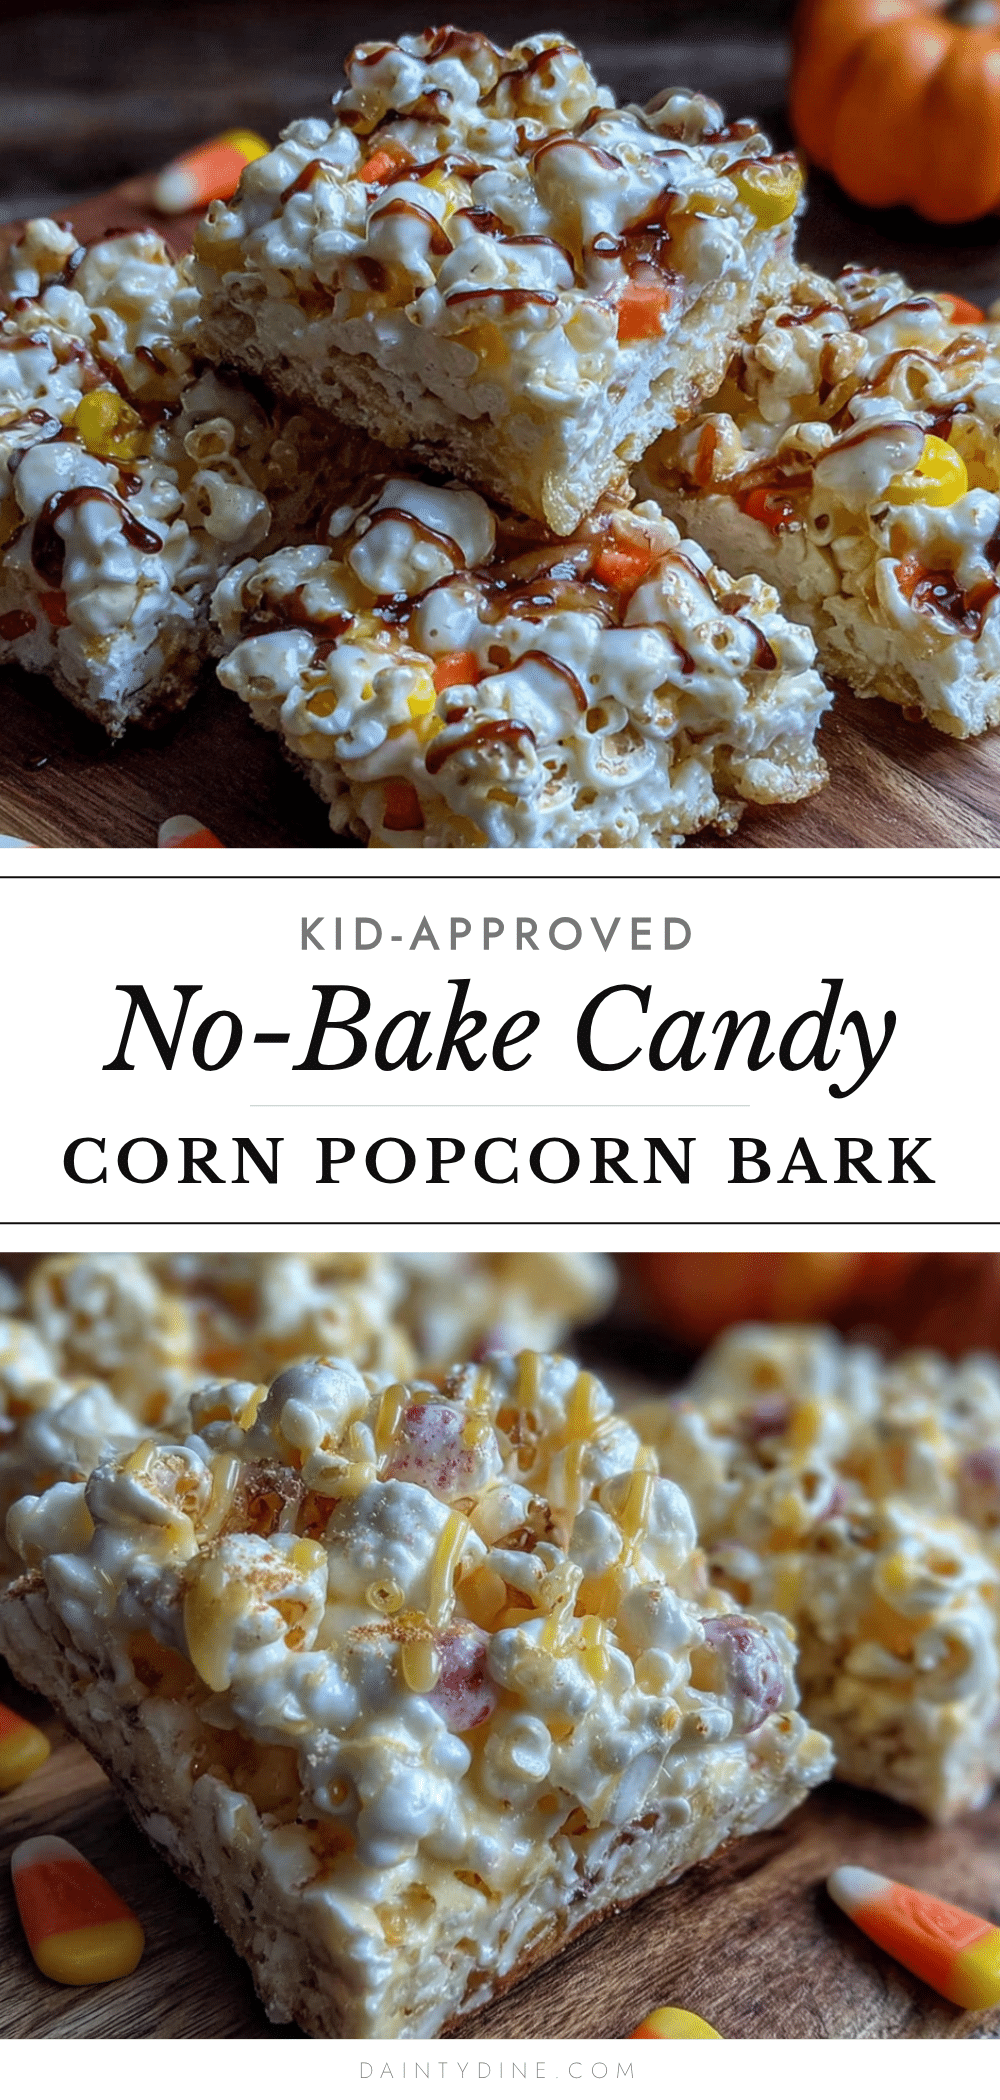
Easy No-Bake Candy Corn Popcorn Bark Recipe
This Kid-Approved No-Bake Candy Corn Popcorn Bark is the easiest, most crowd-pleasing treat you’ll make this season. It’s crunchy, chewy, and perfectly sweet—made in under an hour with zero oven time.
- Prep Time: 15 minutes
- Cook Time: 3 minutes
- Total Time: 45 minutes
- Yield: 12 servings 1x
- Category: Dessert
- Cuisine: American
Ingredients
- 10 cups popped popcorn (about 1/2 cup unpopped kernels, or one large bag of plain microwave popcorn)
- 1/4 teaspoon salt (optional)
- 24 ounces white chocolate or almond bark
- 2 tablespoons coconut oil or vegetable shortening
- 1 teaspoon vanilla extract
- 1 1/2 cups candy corn
- 1/2 cup salted peanuts (optional)
- 1/3 cup fall-colored sprinkles or jimmies
- 1/4 cup mini chocolate chips or M&Ms (optional)
Instructions
- Pop your popcorn to yield about 10 cups. Remove any unpopped kernels and spread on a parchment-lined baking sheet. Sprinkle with optional salt and toss gently. Let cool completely.
- Break white chocolate or almond bark into small pieces and place in a microwave-safe bowl with coconut oil or shortening. Microwave in 30-second intervals, stirring thoroughly between each, until completely smooth and glossy (about 2-3 minutes). Stir in vanilla extract.
- Place popped popcorn in an extra-large mixing bowl. Pour melted white chocolate over the top and fold gently with a rubber spatula until every piece is coated.
- While chocolate is still wet, sprinkle in candy corn and peanuts (if using). Fold gently to distribute evenly.
- Transfer mixture to the parchment-lined baking sheet and spread in an even layer about 1/2 to 3/4 inch thick. Sprinkle fall-colored sprinkles and any additional toppings over the top, gently pressing them in.
- Refrigerate for at least 30 minutes, until chocolate is completely firm and set. Break into irregular pieces with your hands.
Notes
For best results, use slightly stale popcorn (day-old) as it’s less likely to get chewy. White chocolate burns easily—use short microwave intervals. If chocolate seizes, add a tablespoon of coconut oil and stir vigorously. In humid climates, let bark set in refrigerator for a full hour and store with a paper towel in the container. Work in batches if doubling the recipe to avoid overcrowding.
Nutrition
- Serving Size: 1 serving (about 1/1
- Calories: 300
- Sugar: 32
- Sodium: 100
- Fat: 16
- Saturated Fat: 9
- Carbohydrates: 40
- Fiber: 1
- Protein: 3.5
Keywords: no-bake, candy corn, popcorn bark, Halloween treat, easy dessert, kid-friendly, fall recipe


