Love this? Save it for later!
Share the inspiration with your friends
I was standing in line at the DMV—the absolute last place on earth you’d expect to find a recipe worth remembering. My number was 47, and they’d just called 23. I had at least an hour to go. The woman behind me, clutching a folder of paperwork and looking just as defeated as I felt, started talking about Halloween. Not the costumes or the candy, but the baking. “My kids want something spooky but they’re impatient,” she said, sighing. “They won’t wait for a complicated cake.” And then, out of nowhere, she described exactly how to make these Quick Melting Witch Mummy Brownies. She wasn’t a chef, not a food blogger—she was an accountant named Deb who’d figured out a way to get festive treats on the table in under thirty minutes. I scribbled her instructions on the back of an expired coupon I found in my wallet. Honestly, I almost forgot about them. But then Halloween crept up, I was short on time, and I remembered Deb’s brownies. Let me tell you—they saved the night. Maybe you’ve been there, staring at the clock, knowing the kids expect something fun but you’ve got zero energy left. These brownies are the answer.
Why You’ll Love This Recipe
These Quick Melting Witch Mummy Brownies aren’t just another Halloween dessert. They’re the kind of recipe that makes you feel like a holiday hero without actually working that hard. Let me break down why this one’s a keeper.
- Quick & Easy: From start to finish, these come together in about 25 minutes. That’s faster than most store-baked frozen options. Perfect for a Tuesday night when the kids suddenly announce they need treats for the school party tomorrow.
- Simple Ingredients: You likely already have everything in your pantry. No special Halloween-themed candy melts or obscure extracts. Just basic brownie ingredients and a few marshmallows.
- Perfect for Halloween Weeknights: This is the ideal recipe for those busy October evenings when you want to do something fun but don’t have time for elaborate decorating. The kids can even help with the mummy wrapping.
- Crowd-Pleaser: I’ve brought these to two different potlucks and a classroom party. They disappear fast. Kids love the gooey marshmallow “melting” effect, and adults appreciate that they’re not overly sweet.
- Unbelievably Delicious: The combination of fudgy brownie, toasted marshmallow, and a little drizzle of white chocolate is next-level comfort food. It’s like a s’more met a brownie at a Halloween party.
What makes this recipe different from all the other Halloween brownies out there? It’s the texture. The marshmallows melt into the top of the brownie, creating these little pockets of gooeyness that contrast perfectly with the rich, fudgy base. I tested this six times to get the marshmallow-to-brownie ratio just right—too many marshmallows and it’s a sugar bomb, too few and you lose the effect. This version? It’s balanced. It’s the kind of brownie that makes you close your eyes after the first bite, even if you’re standing in a kitchen covered in powdered sugar.
What Ingredients You Will Need
This recipe uses simple, wholesome ingredients to deliver that spooky Halloween vibe without the fuss. Most of these are pantry staples, which is exactly what you want on a busy weeknight.
- Brownie Mix: 1 box (18 oz) of your favorite brand. I personally recommend Ghirardelli for the fudgiest texture, but Duncan Hines works great too. You can also use homemade brownie batter if you have a favorite recipe.
- Eggs: 2 large eggs, room temperature. This helps the brownies rise evenly.
- Vegetable Oil: ½ cup. Adds moisture. You can substitute melted coconut oil if you prefer.
- Water: ¼ cup. Just tap water is fine.
- Marshmallows: 2 cups mini marshmallows. These create the “melting witch” effect. Don’t use jumbo marshmallows—they don’t melt as evenly.
- White Chocolate Chips: ½ cup. For the mummy wrapping drizzle. I like Ghirardelli white chocolate chips for smooth melting.
- Coconut Oil: 1 teaspoon. Added to the white chocolate to help it melt smoothly and drizzle easily.
- Candy Eyes: 12-16 small candy eyeballs. You can find these at most grocery stores in the baking aisle around Halloween. Wilton brand works well.
- Optional Add-Ins: ¼ cup chocolate chips if you want extra chocolatey brownies. A pinch of flaky sea salt on top balances the sweetness.
A quick note on marshmallows: I’ve tried this with both regular and vegan marshmallows. The vegan ones (like Dandies) work perfectly and melt just the same. If you’re making these for a classroom with allergies, that’s a good swap. Also, look for mini marshmallows that are fresh—stale ones don’t puff up as nicely in the oven.
Equipment Needed
You don’t need a fancy kitchen for these brownies. Here’s what you’ll need:
- 8×8-inch Baking Pan: This size gives you nice, thick brownies. A 9×9 works too, but they’ll be slightly thinner and bake a few minutes faster.
- Mixing Bowl: Any medium bowl works. I use a glass one because it’s easy to see if everything’s mixed well.
- Whisk: For combining the wet ingredients. A fork works in a pinch.
- Spatula: Rubber or silicone. Helps get every last bit of batter into the pan.
- Parchment Paper: This is non-negotiable for easy removal. Trust me, I learned the hard way with a stuck brownie disaster.
- Small Microwave-Safe Bowl: For melting the white chocolate chips.
- Measuring Cups and Spoons: Standard set.
If you don’t have a microwave, you can melt the white chocolate in a small saucepan over low heat. Just stir constantly to avoid burning. I’ve done it both ways, and honestly, the microwave is faster and less likely to scorch. Budget tip: Skip the fancy brownie pan—a basic metal one works perfectly. Just line it with parchment paper and you’re good to go.
Preparation Method
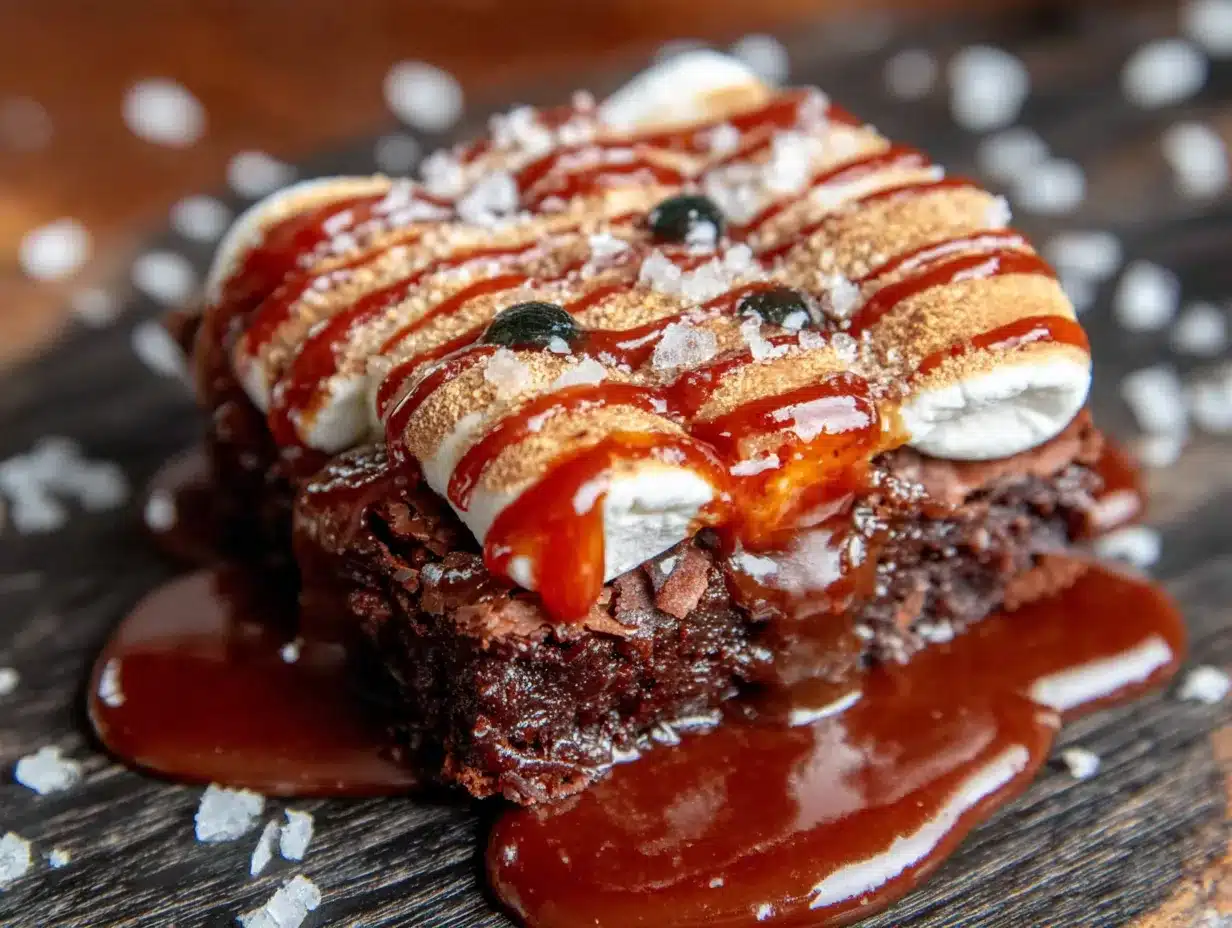
Let’s get these Quick Melting Witch Mummy Brownies into your oven. Follow these steps, and you’ll have a spooky treat in no time.
- Preheat your oven to 350°F (175°C). Line your 8×8-inch baking pan with parchment paper, leaving some overhang on two sides. This makes lifting the brownies out so much easier later.
- Prepare the brownie batter. In your mixing bowl, combine the brownie mix, eggs, vegetable oil, and water. Whisk until smooth, about 30 seconds. Don’t overmix—a few small lumps are fine. The batter should be thick and glossy.
- Pour the batter into the prepared pan. Use your spatula to spread it evenly to the edges. Give the pan a gentle tap on the counter to release any air bubbles.
- Bake for 15 minutes. The brownies should look set around the edges but still slightly soft in the center. A toothpick inserted in the middle should come out with a few moist crumbs.
- Add the marshmallows. Remove the pan from the oven (careful, it’s hot!) and sprinkle the mini marshmallows evenly over the top. Don’t press them in—just let them sit on the surface.
- Return to the oven. Bake for another 3-5 minutes, until the marshmallows are puffed and starting to turn golden brown on top. Watch closely—they can go from perfect to burnt fast. I once walked away for “just a second” and came back to a marshmallow volcano.
- Cool completely. Let the brownies cool in the pan for at least 20 minutes. This is important—the marshmallows need time to set. If you try to cut them too soon, everything will slide around.
- Make the white chocolate drizzle. In a small microwave-safe bowl, combine the white chocolate chips and coconut oil. Microwave in 20-second intervals, stirring between each, until smooth. This usually takes about 60 seconds total.
- Drizzle the mummy wraps. Using a spoon or a small piping bag (or a zip-top bag with the corner snipped off), drizzle the melted white chocolate back and forth over the brownies to create mummy wrapping lines. Don’t cover the whole surface—leave gaps where the “eyes” will go.
- Add the candy eyes. While the white chocolate is still wet, press the candy eyeballs into the gaps. Place two eyes per brownie, about 2 inches apart. Press gently so they stick.
- Let the drizzle set. Allow the white chocolate to harden completely, about 15-20 minutes at room temperature. If you’re in a hurry, pop the pan in the fridge for 10 minutes.
- Cut and serve. Lift the brownies out using the parchment paper overhang. Cut into 9 or 12 squares, making sure each piece has at least one pair of eyes. Serve immediately.
Sensory cues: When the marshmallows are done, they should look like little clouds—puffed up, golden on the peaks, and slightly sticky. The white chocolate drizzle should fall in thin ribbons, not thick blobs. If it’s too thick, microwave it for another 10 seconds.
Cooking Tips & Techniques
I’ve made these Quick Melting Witch Mummy Brownies more times than I care to admit, and I’ve learned a few things along the way. Here are my best tips to make sure yours turn out perfect.
Don’t overbake the base. The brownies need to be slightly underdone when you add the marshmallows because they’ll continue baking. Overbaked brownies turn dry, and the marshmallows won’t have that gooey effect. I once left them in an extra three minutes and ended up with something closer to a cookie. Still tasty, but not the same.
Space the marshmallows evenly. If you dump them all in one spot, you’ll get a marshmallow mountain in one corner and bare brownies everywhere else. Take the extra ten seconds to spread them out. Your future self will thank you when every bite has that gooey pocket.
Use fresh marshmallows. Stale marshmallows don’t puff up. They just sit there, sad and flat. If your bag has been open for more than a week, get a fresh one. Trust me on this—I learned during a particularly disappointing batch last November.
Let the white chocolate set before cutting. This is the hardest part, I know. You want to dig in. But if you cut too soon, the white chocolate smears everywhere and your mummies look like they’ve been in a food fight. Give it that 15-20 minutes. Use the time to clean up your kitchen or pour yourself a drink.
Multitask like a pro. While the brownies are baking, set up your workspace for the decorating step. Have the candy eyes ready, the white chocolate measured, and a spoon or piping bag handy. That way, when the brownies come out, you can decorate while they’re still warm (which helps the marshmallows stay soft).
Variations & Adaptations
These Quick Melting Witch Mummy Brownies are surprisingly flexible. Here are some ways to make them your own.
Gluten-Free Version: Use a gluten-free brownie mix. I’ve tried this with King Arthur’s gluten-free mix, and honestly, nobody noticed the difference. Just follow the package instructions for the base.
Dairy-Free Adaptation: Swap the white chocolate chips for dairy-free white chocolate (Enjoy Life makes a good one) and use dairy-free brownie mix. The coconut oil in the drizzle is already dairy-free, so you’re halfway there.
Extra Spooky Version: Add a drop of green or purple food coloring to the white chocolate drizzle for a witchy effect. I did this last year, and the kids thought it was the coolest thing ever. Just make sure it’s gel food coloring, not liquid, to keep the chocolate from seizing.
Peanut Butter Twist: Swirl ¼ cup of peanut butter into the brownie batter before baking. The salty peanut flavor pairs perfectly with the sweet marshmallow. I tried this on a whim and now it’s my personal favorite version.
Mint Mummy Brownies: Add ½ teaspoon of peppermint extract to the brownie batter. It gives a cool, fresh contrast to the rich chocolate. Great for a Christmas-themed variation too—just swap the eyes for red and green sprinkles.
Serving & Storage Suggestions
These Quick Melting Witch Mummy Brownies are best served at room temperature or slightly warm. The marshmallows are softest when they’re fresh, so I recommend serving them within a few hours of making them.
For presentation, arrange them on a black or orange platter to really make the white mummy wraps pop. A dusting of powdered sugar around the edges creates a “spooky fog” effect that looks great in photos. Pair them with a glass of cold milk or a warm cup of apple cider for the full fall experience.
Storage: Keep leftover brownies in an airtight container at room temperature for up to 3 days. Place a sheet of parchment paper between layers to prevent the marshmallows from sticking together. After day one, the marshmallows will start to firm up, but they’ll still be delicious—just less gooey.
Freezing: You can freeze these brownies for up to 2 months. Wrap each piece individually in plastic wrap, then place them in a freezer-safe bag. To thaw, let them sit at room temperature for about 30 minutes. The marshmallows won’t be as puffy after freezing, but the flavor is still there. I’ve pulled these out for unexpected Halloween visitors more than once.
Reheating: If you want to bring back that fresh-from-the-oven texture, pop a brownie in the microwave for 10-15 seconds. The marshmallows will soften right up. Just don’t overdo it, or the white chocolate drizzle will melt into a puddle.
Nutritional Information & Benefits
Let’s be real—these are a treat, not a health food. But here’s the breakdown so you know what you’re working with.
Per serving (1 brownie, based on 12 servings):
- Calories: 285
- Total Fat: 12g
- Saturated Fat: 4g
- Carbohydrates: 42g
- Sugar: 29g
- Protein: 3g
- Sodium: 180mg
On the bright side, dark chocolate (if you use a mix with higher cacao content) contains antioxidants called flavonoids, which can support heart health. The marshmallows are mostly air and sugar, so they’re not adding much beyond the fun factor. And hey, sometimes we need a little fun.
If you’re watching your sugar intake, you can cut the portion in half or swap the white chocolate drizzle for a dusting of powdered sugar instead. The eyes are purely decorative, so you can skip them if you want to reduce the candy factor. But honestly, Halloween comes once a year. Enjoy the treat.
Conclusion
These Quick Melting Witch Mummy Brownies have become my go-to Halloween recipe for a reason. They’re fast enough for a school night, fun enough to impress the kids, and delicious enough that I’ve caught myself sneaking one before dinner more than once. The best part? You don’t need to be a pastry chef or have a fully stocked baking supply store to pull them off. Just a box of brownie mix, some marshmallows, and a little creativity.
I love that this recipe came from an unexpected source—an accountant at the DMV who just wanted to make her kids smile. It reminds me that the best recipes don’t always come from cookbooks or famous chefs. Sometimes they come from the person standing next to you in line, sharing a tip that makes your life a little easier and a lot sweeter.
I’d love to see your version of these brownies. Did you add extra marshmallows? Try a different drizzle color? Share your photos and tag me—I genuinely get excited seeing how people make recipes their own. And if you have a question, drop it in the comments below. Happy Halloween, and happy baking!
Frequently Asked Questions
Can I use homemade brownie batter instead of a mix?
Absolutely. Use your favorite fudgy brownie recipe, just make sure it’s enough for an 8×8 pan. The baking time might vary slightly, so keep an eye on it.
What if I can’t find candy eyeballs?
No problem. You can use small chocolate chips, M&M’s, or even draw eyes on with a black food-safe marker on white chocolate discs. Get creative with what you have.
Can I make these ahead of time for a party?
Yes, but I recommend adding the white chocolate drizzle and eyes no more than 24 hours ahead. The marshmallows will soften over time, so they’re best within a day of decorating.
My marshmallows didn’t puff up. What went wrong?
Most likely, your marshmallows were stale or you overbaked the brownies before adding them. Make sure your marshmallows are fresh and pull the brownies out when the center is still slightly soft.
Can I use jumbo marshmallows instead of mini?
You can, but cut them into quarters first. Whole jumbo marshmallows take too long to melt and will leave hard, unmelted centers. Mini marshmallows are definitely the way to go.
Pin This Recipe!
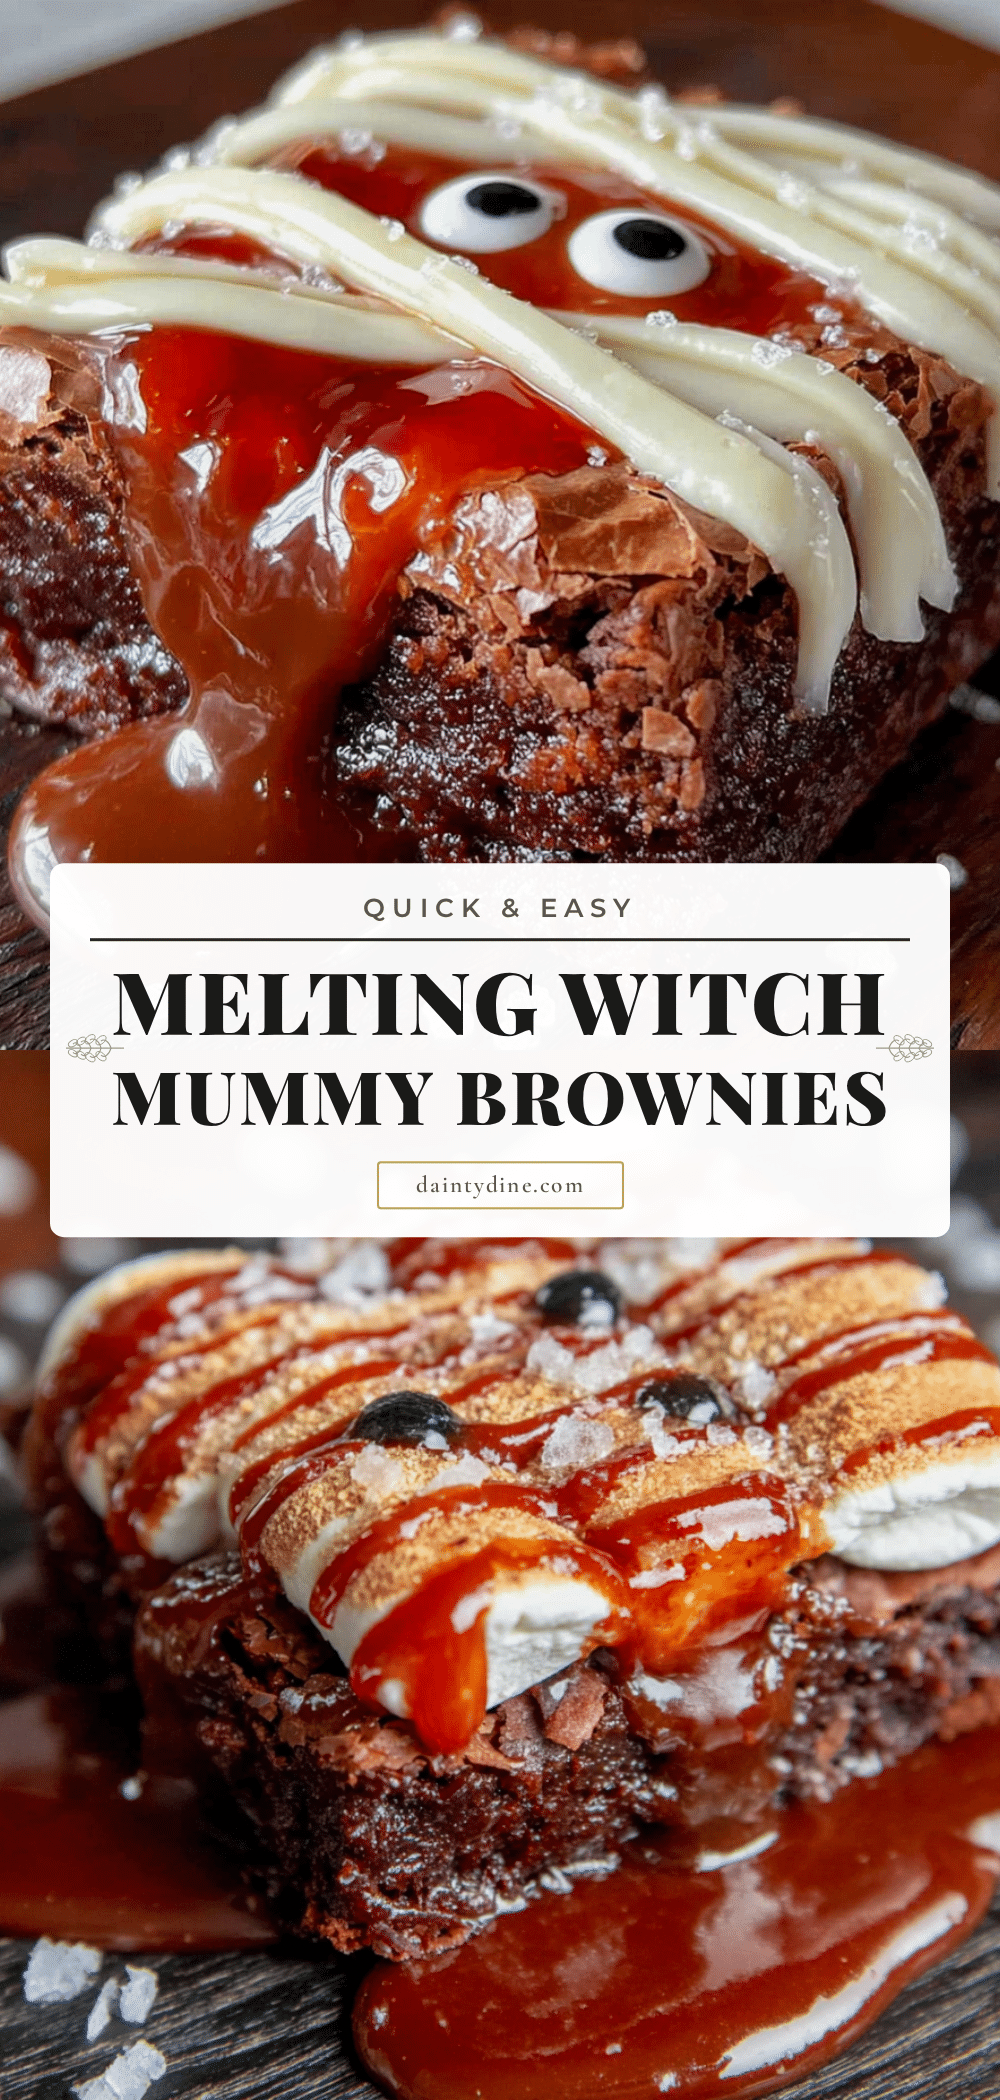
The Best Quick Melting Witch Mummy Brownies
These Quick Melting Witch Mummy Brownies are a fast, fun Halloween treat made with a boxed brownie mix, gooey marshmallows, white chocolate drizzle, and candy eyes. Ready in about 25 minutes, they’re perfect for busy weeknights and guaranteed to delight kids and adults alike.
- Prep Time: 10 minutes
- Cook Time: 18-20 minutes
- Total Time: 25 minutes
- Yield: 12 servings 1x
- Category: Dessert
- Cuisine: American
Ingredients
- 1 box (18 oz) brownie mix (e.g., Ghirardelli or Duncan Hines)
- 2 large eggs, room temperature
- ½ cup vegetable oil (or melted coconut oil)
- ¼ cup water
- 2 cups mini marshmallows (fresh, not stale)
- ½ cup white chocolate chips (e.g., Ghirardelli)
- 1 teaspoon coconut oil
- 12–16 small candy eyeballs (e.g., Wilton)
- Optional: ¼ cup chocolate chips (for extra chocolatey brownies)
- Optional: Pinch of flaky sea salt (to balance sweetness)
Instructions
- Preheat your oven to 350°F (175°C). Line an 8×8-inch baking pan with parchment paper, leaving overhang on two sides.
- In a mixing bowl, combine the brownie mix, eggs, vegetable oil, and water. Whisk until smooth, about 30 seconds. Do not overmix; a few small lumps are fine.
- Pour the batter into the prepared pan and spread evenly with a spatula. Tap the pan gently on the counter to release air bubbles.
- Bake for 15 minutes. The brownies should be set around the edges but still slightly soft in the center. A toothpick inserted in the middle should come out with a few moist crumbs.
- Remove the pan from the oven and sprinkle the mini marshmallows evenly over the top. Do not press them in.
- Return to the oven and bake for another 3-5 minutes, until the marshmallows are puffed and starting to turn golden brown. Watch closely to avoid burning.
- Let the brownies cool in the pan for at least 20 minutes. This allows the marshmallows to set.
- In a small microwave-safe bowl, combine the white chocolate chips and coconut oil. Microwave in 20-second intervals, stirring between each, until smooth (about 60 seconds total).
- Using a spoon or a small piping bag (or a zip-top bag with the corner snipped off), drizzle the melted white chocolate back and forth over the brownies to create mummy wrapping lines. Leave gaps for the eyes.
- While the white chocolate is still wet, press the candy eyeballs into the gaps, placing two eyes per brownie about 2 inches apart. Press gently so they stick.
- Let the white chocolate harden completely, about 15-20 minutes at room temperature (or 10 minutes in the fridge).
- Lift the brownies out using the parchment paper overhang. Cut into 9 or 12 squares, ensuring each piece has at least one pair of eyes. Serve immediately.
Notes
Use fresh mini marshmallows for best puffing. Do not overbake the brownie base; it should be slightly underdone when marshmallows are added. Let white chocolate set before cutting to avoid smearing. For dairy-free, use dairy-free white chocolate and brownie mix. For gluten-free, use a gluten-free brownie mix. Store in an airtight container at room temperature for up to 3 days. Freeze individually wrapped for up to 2 months. Reheat in microwave for 10-15 seconds to soften marshmallows.
Nutrition
- Serving Size: 1 brownie
- Calories: 285
- Sugar: 29
- Sodium: 180
- Fat: 12
- Saturated Fat: 4
- Carbohydrates: 42
- Fiber: 1
- Protein: 3
Keywords: Halloween brownies, mummy brownies, quick brownies, easy Halloween dessert, marshmallow brownies, white chocolate drizzle, candy eyes, spooky treats


