Love this? Save it for later!
Share the inspiration with your friends
The PTA bake sale was in twenty-four hours and I’d completely forgotten. Everyone else would be bringing those perfectly frosted cakes that look like they came from a bakery, or those elaborate cookie platters that some moms apparently have time to make on a Tuesday night. I had a box of yellow cake mix, a stick of butter that was definitely not room temperature, and about an hour before I had to pick up my son from soccer practice. Honestly, I was ready to just stop at the store and grab something. But then I remembered these birthday cake cookies I’d made once for my niece’s party. They were simple, almost embarrassingly simple, and I figured they’d at least be better than nothing. I threw them together in a panic, using a bowl I’d meant to wash earlier and a spatula that had seen better days. The frosting was a last-minute decision—I literally used a piping bag I found crumpled in the back of a drawer. Let me tell you, I walked into that school gym feeling like a total fraud, carrying a plate of cookies next to a woman who had apparently baked a three-tiered cake. But by the end of the night, my plate was empty. Completely empty. And someone asked me for the recipe. That’s the thing about these cookies—they don’t look like they took effort, but they taste like a celebration. Maybe you’ve been there, scrambling for something to bring somewhere and just hoping it works out. These cookies are that moment, but in a good way.
Why You’ll Love This Recipe
These aren’t just cookies. They’re a whole mood, you know? They’ve got that soft, chewy texture that reminds you of the best part of a birthday cake, but in a handheld, shareable form. I’ve tested this recipe at least a dozen times, tweaking the flour ratio and the butter temperature to get it just right. My husband, who is my toughest critic, said these are “dangerously good.” I’ll take that as a win.
- Quick & Easy: From start to finish, you’re looking at about 25 minutes. That includes mixing, baking, and frosting. Perfect for when you need a dessert now.
- Simple Ingredients: You probably have most of this stuff in your pantry already. No weird extracts or hard-to-find sprinkles. Just good, basic baking staples.
- Perfect for Celebrations: These are my go-to for birthday parties, potlucks, and even just a random Tuesday that needs a little cheering up. They bring the party to you.
- Crowd-Pleaser: Kids love the sprinkles. Adults love the nostalgic flavor. And everyone loves how soft they are. I’ve never seen a plate of these last longer than ten minutes.
- Unbelievably Delicious: The texture is what gets me. It’s that perfect balance between a soft sugar cookie and a tender cake crumb. The frosting is just the right amount of sweet, and the sprinkles add that little crunch.
What makes these different from every other birthday cake cookie recipe out there? It’s the technique. I use a little trick with melted butter instead of softened, which makes the cookies stay soft for days. And I don’t overmix the dough—that’s the secret to keeping them tender. This isn’t just another version; it’s the version I’d make for my own birthday, and I’m not sharing that honor lightly. This recipe is comfort food reimagined—faster, easier, but with the same soul-soothing satisfaction of a slice of cake. It’s perfect for impressing guests without stress, or turning a simple afternoon into something memorable.
What Ingredients You Will Need
This recipe uses simple, wholesome ingredients to deliver big flavor and that classic birthday cake taste. Most of these are pantry staples, which is exactly what you want when a craving hits.
For the Cookies
- 1 box (15.25 oz) yellow cake mix (I prefer Betty Crocker or Duncan Hines for the best texture, but any brand works)
- 1/2 cup (1 stick) unsalted butter, melted and slightly cooled (melted butter is key here—it makes the cookies chewier)
- 1 large egg (room temperature is best, but if you’re in a hurry, just let it sit in warm water for 5 minutes)
- 1 teaspoon vanilla extract (use pure vanilla if you have it, but imitation works fine too)
- 1/3 cup rainbow sprinkles (plus more for topping—I use the jimmies style, not the nonpareils, because they hold their color better)
For the Sprinkle Frosting
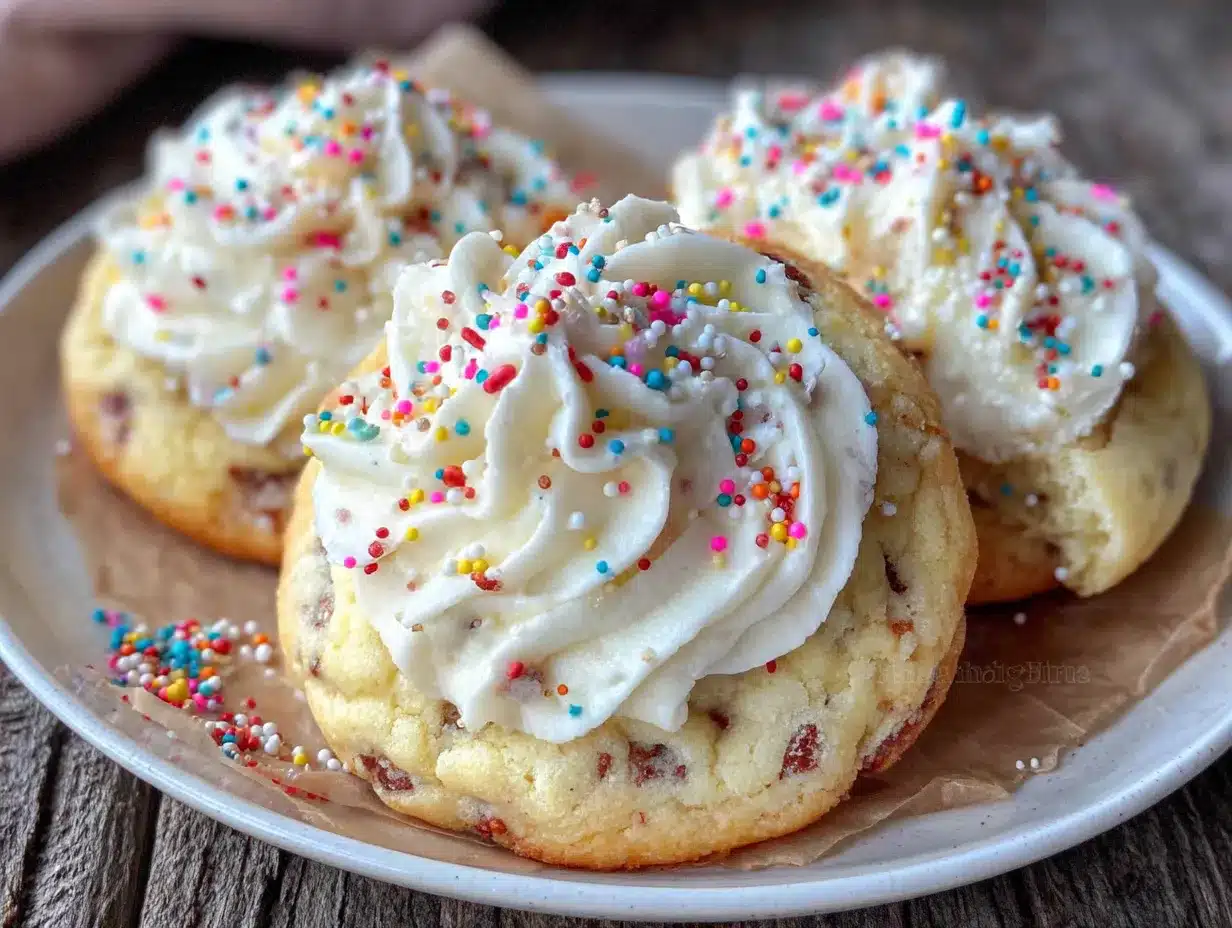
- 1/2 cup (1 stick) unsalted butter, softened (really let it sit out for at least 30 minutes—cold butter makes lumpy frosting)
- 2 cups powdered sugar (sift it if you want a super smooth frosting, but I’m usually too lazy and it still works)
- 2 tablespoons heavy cream (or milk, if that’s what you have—heavy cream makes it richer)
- 1 teaspoon vanilla extract (or clear vanilla extract if you want that classic bakery flavor and a whiter frosting)
- 1/4 cup rainbow sprinkles (for mixing into the frosting and sprinkling on top)
I’ve tested this with gluten-free cake mix and it works perfectly, so don’t worry if you need that option. For a dairy-free version, use a plant-based butter stick and a dairy-free milk alternative in the frosting. Just make sure the butter substitute is a stick form, not the spreadable kind in a tub, or the cookies will spread too much. And one more thing—look for sprinkles that are labeled “color-safe” if you’re worried about them bleeding into the dough. The jimmies style sprinkles are usually the safest bet.
Equipment Needed
You don’t need a lot of fancy equipment for these cookies, which is part of why I love them. Here’s what you’ll need:
- Large mixing bowl (any bowl works, but a glass or ceramic one is best for even mixing)
- Electric hand mixer or stand mixer (you can mix by hand, but the frosting will be much easier with a mixer—I’ve done it with a whisk and my arm was sore for a day)
- Baking sheet (a light-colored, non-stick sheet works best—dark sheets can make the bottoms burn)
- Parchment paper or silicone baking mat (parchment paper is my go-to because it makes cleanup a breeze)
- Cookie scoop or tablespoon (a 1.5-tablespoon scoop is perfect for evenly sized cookies)
- Wire cooling rack (essential for cooling the cookies properly so the frosting doesn’t melt)
- Piping bag or zip-top bag (for the frosting—a zip-top bag with a corner snipped off works perfectly if you don’t have a piping bag)
- Offset spatula or butter knife (for spreading the frosting if you don’t want to pipe it)
If you don’t have a cookie scoop, just use a regular tablespoon and roll the dough into balls with your hands. It’s a little messier, but it works. And if you don’t have a cooling rack, you can let the cookies cool on the baking sheet for a few extra minutes, then carefully transfer them to a plate. Just be gentle—they’re soft when they’re warm.
Preparation Method
Alright, let’s get to the fun part. This is where the magic happens. I’ve broken it down step by step so you don’t miss anything.
- Preheat your oven to 350°F (175°C). Line two baking sheets with parchment paper or silicone baking mats. This is important—don’t skip the parchment, or the cookies will stick and the bottoms might get too dark.
- Make the cookie dough. In a large mixing bowl, combine the yellow cake mix, melted butter, egg, and vanilla extract. Stir with a spatula or wooden spoon until just combined. The dough will be thick and a little sticky. Don’t overmix it—just stir until you don’t see any more dry cake mix. Overmixing will make the cookies tough.
- Fold in the sprinkles. Gently fold in the 1/3 cup of rainbow sprinkles with a spatula. Be careful not to stir too much, or the sprinkles might bleed their color into the dough. You want them to stay bright and distinct.
- Scoop the dough. Using a 1.5-tablespoon cookie scoop or a tablespoon, scoop out balls of dough and place them on the prepared baking sheets, spacing them about 2 inches apart. They will spread a little, so give them room. If you’re using a tablespoon, roll each scoop into a smooth ball with your hands—this helps them bake up round and even.
- Bake the cookies. Bake for 9-11 minutes, or until the edges are set and just barely golden. The centers will look slightly underdone and puffy—that’s exactly what you want. They will continue to set as they cool. If you overbake them, they’ll be dry and cakey instead of soft and chewy. I’ve made that mistake, and trust me, it’s not the same.
- Cool the cookies. Let the cookies cool on the baking sheet for 5 minutes. This step is crucial—they’re too fragile to move right away. After 5 minutes, transfer them to a wire cooling rack to cool completely. Don’t even think about frosting them while they’re warm, or the frosting will turn into a melty mess. I learned that the hard way.
- Make the frosting. While the cookies are cooling, make the frosting. In a medium bowl, beat the softened butter with an electric hand mixer until it’s smooth and creamy, about 1 minute. Add the powdered sugar, heavy cream, and vanilla extract. Beat on low speed until the sugar is incorporated, then increase to medium-high and beat for 2-3 minutes, until the frosting is light and fluffy. If it’s too thick, add another tablespoon of cream. If it’s too thin, add a little more powdered sugar.
- Add sprinkles to the frosting. Gently fold in the 1/4 cup of rainbow sprinkles with a spatula. Don’t overmix, or the color might bleed.
- Frost the cookies. Once the cookies are completely cool, frost them. You can use a piping bag with a star tip for a pretty swirl, or just snip the corner off a zip-top bag and pipe a circle of frosting. If you’re not into piping, just spread the frosting on with an offset spatula or a butter knife. I usually pipe it because it looks fancier, but honestly, spread frosting tastes just as good.
- Top with extra sprinkles. Immediately after frosting each cookie, sprinkle a pinch of extra rainbow sprinkles on top. Press them in gently so they stick. Do this while the frosting is still soft, or they’ll just bounce off.
- Let the frosting set. Let the frosted cookies sit at room temperature for about 15-20 minutes so the frosting can set. If you can’t wait that long, I understand—just be prepared for a little mess.
Cooking Tips & Techniques
I’ve made these cookies more times than I can count, and I’ve picked up a few tricks along the way. Here’s what I’ve learned, sometimes the hard way.
Use melted butter, not softened. This is the biggest secret to getting that soft, chewy texture. Melted butter creates a denser, more tender cookie because it coats the flour proteins differently. Softened butter creates more air pockets, which makes cookies puffier and more cake-like. For these birthday cake cookies, we want the chewy version.
Don’t overbake. I cannot stress this enough. The cookies will look underdone when you take them out of the oven. That’s fine. They’ll continue to bake on the hot baking sheet as they cool. If you wait until they look fully baked in the oven, they’ll be overdone by the time they cool. I once left them in for 12 minutes because I got distracted, and they turned out dry and crumbly. Not my finest moment.
Chill the dough if you have time. If you can, pop the scooped dough balls in the fridge for 15-20 minutes before baking. This helps prevent the cookies from spreading too much and gives them a thicker, more bakery-style shape. I don’t always have time for this step, but when I do, the cookies turn out prettier.
Use a cookie scoop for even sizing. This isn’t just about looks—it’s about even baking. If your cookies are different sizes, some will be overdone while others are underdone. A cookie scoop ensures every cookie is the same size and bakes at the same rate.
Let the frosting come to room temperature. If you’ve stored leftover frosting in the fridge, let it sit out for 15 minutes before using it. Cold frosting is stiff and hard to spread. I’ve tried to rush this step and ended up tearing the tops off my cookies. Not cute.
Variations & Adaptations
One of the best things about this recipe is how easy it is to change it up. Here are some of my favorite variations.
Chocolate Birthday Cake Cookies: Use a chocolate cake mix instead of yellow and swap the rainbow sprinkles for chocolate sprinkles. The frosting stays the same, and you get a chocolate-vanilla combo that’s absolutely killer. I made these for a friend’s birthday and she said they were “the best cookies I’ve ever had.” High praise.
Confetti Cake Cookies: Add 1/4 cup of white chocolate chips to the dough along with the sprinkles. The white chocolate chips add little pockets of sweetness that make the cookies even more indulgent. This is my personal favorite version—I’m a sucker for white chocolate.
Gluten-Free Version: Use a gluten-free yellow cake mix. I’ve tested this with King Arthur’s gluten-free yellow cake mix and it works perfectly. Just make sure your sprinkles are also gluten-free, because some brands use wheat starch.
Funfetti Frosting: Instead of mixing the sprinkles into the frosting, leave the frosting plain white and only sprinkle the sprinkles on top. This gives you a cleaner, more classic funfetti look. I do this when I want the cookies to look extra polished for a party.
Lemon Birthday Cake Cookies: Add 1 tablespoon of lemon zest to the dough and use lemon extract instead of vanilla in the frosting. The lemon flavor cuts through the sweetness and makes the cookies taste brighter. This is perfect for spring or summer celebrations.
I’ve tried all of these variations, and honestly, I don’t have a favorite. They’re all good in different ways. The lemon version is great when you want something a little less sweet, and the chocolate version is perfect for the chocolate lovers in your life. Play around with it and find your own favorite.
Serving & Storage Suggestions
These cookies are best served at room temperature, after the frosting has had time to set. I like to arrange them on a pretty platter or a cake stand for a birthday party. They look so festive with all those sprinkles.
Storage: Store the cookies in an airtight container at room temperature for up to 5 days. I layer them between sheets of parchment paper so the frosting doesn’t stick together. Don’t refrigerate them—the fridge will dry them out and make the frosting hard.
Freezing: You can freeze the unfrosted cookies for up to 3 months. Just bake and cool them completely, then place them in a single layer in a freezer-safe bag or container. When you’re ready to serve them, thaw them at room temperature, then make the frosting and frost them. I’ve done this for holiday parties and it’s a lifesaver.
Reheating: If you want to enjoy a cookie warm, pop it in the microwave for about 10 seconds. The frosting will get a little soft, but it’s still delicious. Honestly, I like them better at room temperature, but sometimes a warm cookie just hits the spot.
Flavor Development: These cookies actually taste better the next day. The flavors meld together overnight, and the texture gets even softer. So if you can resist eating them all right away, they’ll reward you. I’ve never managed to wait that long, but I’ve heard it’s true.
Nutritional Information & Benefits
Let’s be real—these are a treat. They’re not health food, and that’s okay. Sometimes you need a cookie that’s unapologetically indulgent. But here’s what you should know.
Estimated Nutritional Values (per cookie, based on 24 cookies):
- Calories: 185
- Fat: 9g
- Carbohydrates: 25g
- Protein: 2g
- Sugar: 17g
Health Benefits: Okay, so there aren’t many health benefits here, but let’s look on the bright side. The butter does contain some vitamin A, and the egg has protein. The sprinkles? Well, they make you happy, and that counts for something. Sometimes the best thing you can do for your mental health is eat a cookie that tastes like a birthday party.
Dietary Considerations: This recipe contains wheat, dairy, and eggs. For a gluten-free version, use a gluten-free cake mix. For a dairy-free version, use a plant-based butter stick and a dairy-free milk in the frosting. I haven’t tested an egg-free version, but you could try a flax egg (1 tablespoon ground flaxseed mixed with 3 tablespoons water).
Potential Allergens: Wheat, dairy, eggs. The sprinkles might also contain artificial colors, so check the label if that’s a concern.
Conclusion
These birthday cake cookies are more than just a recipe—they’re a little piece of joy that you can make in under 30 minutes. They’re the kind of cookie that makes people smile, that reminds you of childhood birthdays and confetti and the simple pleasure of something sweet. I love that they’re easy enough for a Tuesday night but special enough for a celebration. I love that they use simple ingredients I almost always have on hand. And I love that they never fail to disappear, no matter where I bring them.
I hope you give these a try. Customize them with your favorite sprinkles, your favorite frosting, your favorite everything. Make them your own. And when you do, come back and tell me about it. I’d love to hear how they turned out, what variations you tried, and who you shared them with. Drop a comment below, or tag me in your photos. Let’s spread the birthday cake love, one cookie at a time.
Frequently Asked Questions
Can I use a different cake mix flavor?
Absolutely! I’ve made these with chocolate, strawberry, and even funfetti cake mix. The yellow cake mix gives the most classic birthday cake flavor, but feel free to experiment. Just keep in mind that different flavors might change the texture slightly.
Why did my cookies spread too much?
This usually happens if the butter was too warm or the dough wasn’t chilled. Make sure your melted butter is slightly cooled before you add it to the mix, and try chilling the dough balls for 15-20 minutes before baking. Also, make sure you’re using a cake mix, not a self-rising flour blend—they behave differently.
Can I make the frosting ahead of time?
Yes! You can make the frosting up to 3 days in advance and store it in an airtight container in the fridge. Just let it come to room temperature and give it a quick whip with a mixer before using it. It might seem stiff at first, but it’ll soften up as you beat it.
How do I keep the sprinkles from bleeding into the dough?
Use jimmies-style sprinkles (the long, skinny ones) instead of nonpareils (the tiny round ones). Jimmies hold their color much better. Also, fold them in gently and don’t overmix. If you stir too vigorously, the color will start to bleed. And if you’re really worried about it, you can toss the sprinkles in a little flour before adding them to the dough.
Can I freeze these cookies after frosting them?
I don’t recommend it. The frosting can get grainy and the sprinkles might bleed. It’s much better to freeze the unfrosted cookies and then frost them after they’ve thawed. That way, they’ll taste fresh and look beautiful.
Pin This Recipe!
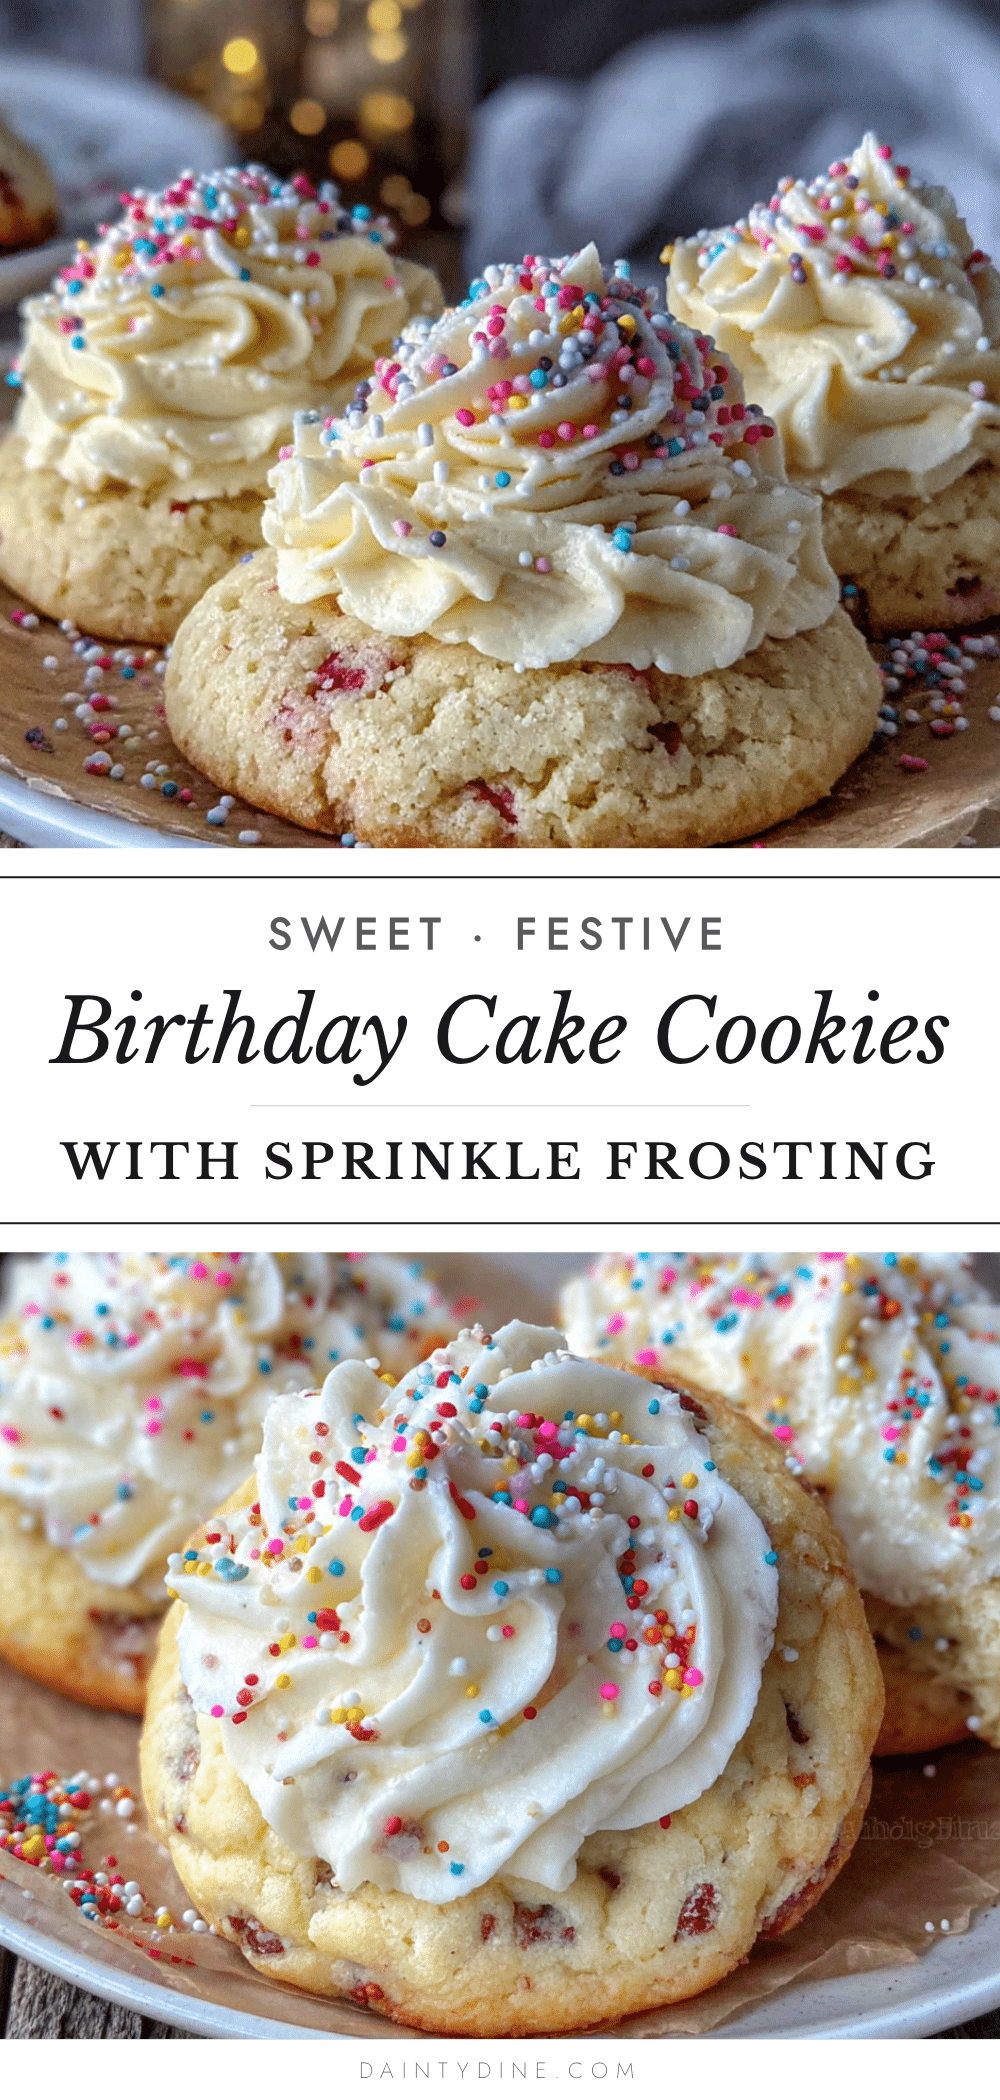
Best Birthday Cake Cookies with Easy Sprinkle Frosting

Soft, chewy birthday cake cookies made with yellow cake mix and topped with a creamy sprinkle frosting. Perfect for celebrations, potlucks, or a quick dessert fix in under 30 minutes.
- Prep Time: 15 minutes
- Cook Time: 10 minutes
- Total Time: 25 minutes
- Yield: 24 cookies 1x
- Category: Dessert
- Cuisine: American
Ingredients
- 1 box (15.25 oz) yellow cake mix
- 1/2 cup (1 stick) unsalted butter, melted and slightly cooled
- 1 large egg, room temperature
- 1 teaspoon vanilla extract
- 1/3 cup rainbow sprinkles (jimmies style)
- 1/2 cup (1 stick) unsalted butter, softened
- 2 cups powdered sugar
- 2 tablespoons heavy cream (or milk)
- 1 teaspoon vanilla extract (or clear vanilla extract)
- 1/4 cup rainbow sprinkles (for frosting and topping)
Instructions
- Preheat oven to 350°F (175°C). Line two baking sheets with parchment paper or silicone baking mats.
- In a large mixing bowl, combine yellow cake mix, melted butter, egg, and vanilla extract. Stir until just combined. Dough will be thick and slightly sticky.
- Gently fold in 1/3 cup rainbow sprinkles. Do not overmix to prevent color bleeding.
- Using a 1.5-tablespoon cookie scoop or tablespoon, scoop dough balls and place on prepared baking sheets, spacing 2 inches apart. Roll into smooth balls if using a tablespoon.
- Bake for 9-11 minutes, until edges are set and just barely golden. Centers will look slightly underdone and puffy.
- Let cookies cool on baking sheet for 5 minutes, then transfer to a wire cooling rack to cool completely.
- While cookies cool, make frosting: In a medium bowl, beat softened butter with an electric mixer until smooth and creamy (about 1 minute). Add powdered sugar, heavy cream, and vanilla extract. Beat on low until incorporated, then increase to medium-high and beat for 2-3 minutes until light and fluffy. Adjust consistency with additional cream or powdered sugar if needed.
- Gently fold in 1/4 cup rainbow sprinkles into the frosting.
- Once cookies are completely cool, frost using a piping bag with a star tip, a zip-top bag with a corner snipped off, or an offset spatula.
- Immediately top each frosted cookie with extra rainbow sprinkles, pressing gently to adhere.
- Let frosted cookies sit at room temperature for 15-20 minutes to allow frosting to set.
Notes
Use melted butter for chewier texture. Do not overbake; cookies will continue to set as they cool. Chill dough for 15-20 minutes before baking for thicker cookies. Use jimmies-style sprinkles to prevent color bleeding. Store in an airtight container at room temperature for up to 5 days. Freeze unfrosted cookies for up to 3 months.
Nutrition
- Serving Size: 1 cookie
- Calories: 185
- Sugar: 17
- Sodium: 180
- Fat: 9
- Saturated Fat: 5
- Carbohydrates: 25
- Protein: 2
Keywords: birthday cake cookies, sprinkle cookies, cake mix cookies, easy cookies, funfetti cookies, soft cookies