Love this? Save it for later!
Share the inspiration with your friends
My neighbor across the hall, a retired nurse named Gladys, watched me fumbling with a splatter screen one Tuesday night. I was trying to sear chicken breasts, and honestly, it looked like a small war zone in my kitchen. She didn’t say anything at first. She just stood in my doorway, arms crossed, shaking her head with this knowing little smile. Then she walked over, turned off the burner, and said, “Put that screen away. You’re working too hard.”
She pulled a cast iron skillet from my cupboard and started pulling things from my fridge—chicken thighs, a sad bell pepper, half an onion, and a knob of garlic. She showed me that night how to make everything come together in a single pan, no fuss, no mess. I mean, I’d been cooking for years, but watching her work was like seeing a magic trick. She never measured anything. She just knew when to add the butter and when to let the chicken rest. That was the first time I made these easy one-pan garlic butter chicken thighs, and I’ve never looked back.
Honestly, that night changed how I think about weeknight dinners. Gladys taught me that you don’t need fifteen dishes or an hour of prep to eat well. You just need a good pan, a little patience, and the right combination of flavors. Since then, I’ve tweaked her method a bit—added more veggies, played with the seasoning—but the heart of it is still hers. Maybe you’ve been there, standing over a hot stove, wondering why dinner has to be so complicated. Let me tell you, this recipe is the answer you’ve been looking for.
Why You’ll Love This Recipe
I’ve tested this recipe more times than I can count, and every single time, it delivers. It’s the kind of meal that makes you look like a hero without actually working like one. Here’s why it works so well for busy folks like us:
- Quick & Easy: Dinner is on the table in about 40 minutes, start to finish. No marinating, no complicated steps—just simple, honest cooking.
- Simple Ingredients: You probably have most of these in your kitchen right now. Chicken thighs, butter, garlic, and whatever veggies are hanging out in your crisper drawer.
- Perfect for Weeknights: This is the definition of a weeknight win. One pan means minimal cleanup, and the whole family will actually eat it without complaint.
- Crowd-Pleaser: I’ve served this to picky kids, foodie friends, and my dad who “doesn’t eat vegetables.” Everyone goes back for seconds.
- Unbelievably Delicious: The garlic butter sauce coats every single bite, and the chicken thighs stay juicy while the veggies caramelize around the edges. It’s comfort food that feels fancy.
What makes this version different from all the other one-pan chicken recipes out there? It’s the technique. Instead of just dumping everything in the pan, you sear the chicken first to build that golden crust, then let the veggies soak up all those drippings. The garlic butter ties it all together, creating a sauce that’s rich without being heavy. I’ve tried shortcuts, and honestly, they never taste as good. This method is the one that works every single time.
This isn’t just another dinner recipe—it’s the one that makes you close your eyes after the first bite. It’s the kind of meal that turns a tired Tuesday into something special, without adding stress to your evening. You deserve that.
What Ingredients You Will Need
This recipe uses simple, pantry-friendly ingredients to create something truly special. The beauty is in how these everyday staples come together in one pan. Here’s what you’ll need:
For the Chicken
- 4 bone-in, skin-on chicken thighs (about 1.5 lbs or 680g) – The skin gets beautifully crispy, and the bone keeps the meat moist. You can use boneless thighs, but reduce cooking time by about 5 minutes.
- 1 teaspoon salt – I prefer kosher salt for better seasoning control. Diamond Crystal is my go-to.
- ½ teaspoon black pepper, freshly ground – Pre-ground works, but fresh makes a noticeable difference.
- 1 teaspoon garlic powder – Adds an extra layer of garlic flavor that complements the fresh garlic later.
- 1 teaspoon paprika – Smoked paprika adds a lovely depth, but sweet paprika works beautifully too.
For the Vegetables
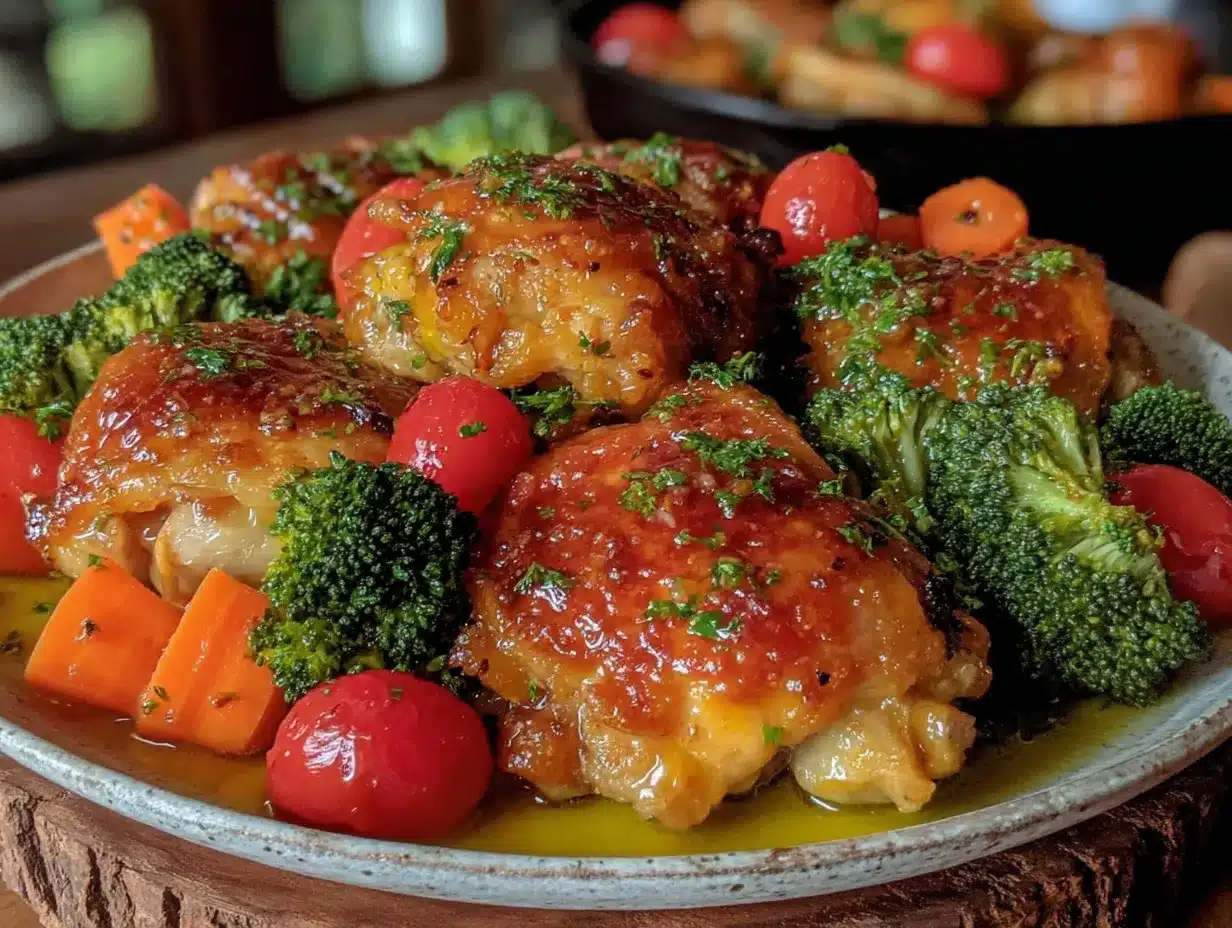
- 2 cups broccoli florets (about 150g) – Cut into bite-sized pieces so they cook evenly. Fresh is best, but frozen works if you thaw and pat them dry first.
- 1 medium zucchini, sliced into half-moons (about 200g) – Adds a tender texture that soaks up the garlic butter beautifully.
- 1 red bell pepper, sliced into strips (about 150g) – For sweetness and color. Any bell pepper color works.
- 1 medium yellow onion, sliced into wedges (about 150g) – Caramelizes beautifully in the pan drippings.
- 3 cloves garlic, minced – Fresh is non-negotiable here. It’s the star of the sauce.
For the Garlic Butter Sauce
- 3 tablespoons unsalted butter (42g) – Salted butter works too, just reduce the added salt slightly.
- 2 tablespoons olive oil (30ml) – Helps the butter brown without burning. Avocado oil is a great substitute.
- 1 tablespoon fresh lemon juice (15ml) – Brightens the whole dish. Bottled works in a pinch, but fresh is noticeably better.
- 2 tablespoons fresh parsley, chopped (optional, for garnish) – Adds a fresh finish and a pop of color.
I recommend using Kerrygold butter for its rich flavor, and if you can find Meyer lemons, their juice is slightly sweeter and less acidic. For the veggies, feel free to swap based on what you have—asparagus, green beans, or cherry tomatoes all work wonderfully. Just keep the total vegetable volume around 4 cups so everything fits in the pan.
Equipment Needed
You don’t need a fancy kitchen to make this recipe work. Here’s what you’ll need:
- Large oven-safe skillet or cast iron pan (12-inch / 30cm) – This is your workhorse. Cast iron gives the best sear, but any oven-safe skillet works. If you don’t have oven-safe, you can finish the dish on the stovetop with a lid.
- Sharp chef’s knife – For cutting veggies and trimming chicken. A dull knife makes prep frustrating and dangerous.
- Cutting board – Preferably a large wooden or plastic board. I use a bamboo board that’s held up for years.
- Measuring spoons – For accurate seasoning. Eyeballing works once you’re confident, but measure when you’re learning.
- Paper towels – For patting the chicken dry. This step is crucial for crispy skin, so don’t skip it.
- Tongs – For flipping the chicken and tossing veggies. Silicone-tipped ones won’t scratch your pan.
- Instant-read thermometer (optional but recommended) – Takes the guesswork out of doneness. Chicken thighs are safe at 165°F (74°C), but I pull them at 170°F for the best texture.
If you don’t have a cast iron skillet, don’t worry. A stainless steel or non-stick oven-safe pan works fine. Just be careful with non-stick at high heat—most are safe up to 450°F. And if you’re on a budget, a basic Lodge cast iron skillet is under $20 and will last forever. I’ve had mine for over a decade, and it only gets better with use.
Preparation Method
Let’s get cooking! This comes together faster than you think, especially if you prep your veggies while the chicken sears.
- Preheat your oven to 400°F (200°C). Position the rack in the middle. This gives you even heat for roasting without burning the butter.
- Pat the chicken thighs dry with paper towels. This is non-negotiable—wet skin won’t crisp up. You want them as dry as possible. Season both sides with salt, pepper, garlic powder, and paprika. Rub the seasoning in gently. Let them sit at room temperature for 10 minutes while you prep the veggies.
- Prep your vegetables while the chicken rests. Cut the broccoli into small florets (about 1-inch pieces). Slice the zucchini into half-moons, about ½-inch thick. Slice the bell pepper into strips and the onion into wedges. Mince the garlic and set it aside. Keep the garlic separate—it goes in later to avoid burning.
- Heat your skillet over medium-high heat for about 2 minutes. Add 1 tablespoon of olive oil and 1 tablespoon of butter. Swirl the pan until the butter melts and starts to foam. The oil helps prevent the butter from burning.
- Sear the chicken thighs, skin-side down, for 5-6 minutes without moving them. You want a deep golden crust. Don’t peek or poke—let the skin develop that beautiful color. Flip and cook for another 3 minutes on the other side. The chicken won’t be cooked through yet, and that’s okay. Transfer the chicken to a plate and set aside.
- Reduce the heat to medium and add the remaining 1 tablespoon of olive oil to the pan. Toss in the broccoli, zucchini, bell pepper, and onion. Season with a pinch of salt and pepper. Cook for 4-5 minutes, stirring occasionally, until the veggies start to soften and get some color. The pan drippings from the chicken will flavor everything beautifully.
- Add the minced garlic and the remaining 2 tablespoons of butter. Stir everything together for about 1 minute until the garlic is fragrant. Be careful not to let the garlic burn—it turns bitter quickly. If it starts browning too fast, remove the pan from the heat temporarily.
- Return the chicken thighs to the skillet, nestling them skin-side up among the vegetables. Pour any accumulated juices from the plate over the chicken. Drizzle the lemon juice over everything.
- Transfer the skillet to the preheated oven and roast for 15-20 minutes, until the chicken reaches an internal temperature of 170°F (77°C) and the veggies are tender with caramelized edges. The skin should be crispy and golden.
- Remove from the oven and let the pan rest for 5 minutes. This allows the juices to redistribute. Sprinkle with fresh parsley if using. Serve directly from the skillet for a rustic presentation—fewer dishes to wash!
A few things to watch for: If your chicken skin isn’t crispy enough after roasting, pop it under the broiler for 1-2 minutes. Keep an eye on it—it can burn fast. And if your veggies seem dry, add a splash of chicken broth or water before roasting. The steam will keep everything tender.
Cooking Tips & Techniques
Over the years, I’ve made this recipe more times than I can count, and I’ve learned a thing or two the hard way. Here are my best tips to make sure your first attempt is a success:
Don’t overcrowd the pan. If your skillet is too small, the chicken will steam instead of sear. Use a 12-inch pan, and if you’re doubling the recipe, use two pans or cook in batches. Trust me, I learned this lesson when I tried to fit six thighs in a 10-inch skillet. The skin was rubbery, and I was so disappointed. Now I know better.
Let the chicken rest before searing. Taking the chill off the chicken helps it cook more evenly. If you put cold chicken in a hot pan, the outside will burn before the inside is done. Ten minutes at room temperature makes a huge difference.
Use a thermometer. I know it feels fussy, but chicken thighs are forgiving—they can handle a little extra time without drying out. But pulling them at exactly 170°F gives you the juiciest results. I’ve ruined plenty of chicken by guessing, and honestly, the thermometer was a game-changer.
Cut veggies to similar sizes. This ensures they cook evenly. If your broccoli is huge and your zucchini is tiny, you’ll end up with mushy zucchini and raw broccoli. Aim for uniform 1-inch pieces. It takes an extra minute of prep but saves you from uneven results.
Make the sauce work for you. After roasting, if you want more sauce, remove the chicken and veggies, then place the skillet over medium heat. Add a splash of chicken broth and scrape up the browned bits from the bottom. Stir in a pat of butter and let it simmer for a minute. Pour it over everything before serving. It’s like magic.
Variations & Adaptations
This recipe is incredibly flexible. Here are some ways to make it your own:
Dairy-Free Version: Swap the butter for a high-quality vegan butter or use all olive oil. The flavor will be slightly different, but still delicious. I’ve used Miyoko’s vegan butter with great results—it browns beautifully.
Low-Carb / Keto: This recipe is naturally low-carb, but you can swap the zucchini for more broccoli or add cauliflower florets. For extra fat, toss in some mushrooms or add a handful of spinach at the end. The garlic butter sauce is already keto-friendly, so you’re good to go.
Change the Protein: Boneless chicken breasts work, but reduce the roasting time to 12-15 minutes. Pork chops are also fantastic—use bone-in chops and follow the same method. I’ve even done this with salmon fillets, cooking them skin-side down first for 4 minutes, then roasting for 8-10 minutes.
Seasonal Veggie Swaps: In spring, use asparagus and snap peas. In summer, cherry tomatoes and eggplant. In fall, butternut squash and Brussels sprouts (cut small so they cook through). The method stays the same—just adjust roasting time based on the veggie density.
Spice It Up: Add ½ teaspoon of red pepper flakes with the garlic for a kick. Or stir in a tablespoon of harissa paste before roasting for a North African twist. My personal favorite is adding a pinch of cumin and coriander with the paprika—it gives the dish a warm, earthy depth.
Serving & Storage Suggestions
This dish is meant to be served straight from the skillet, but here’s how to make the most of it:
Serving: Serve the chicken and veggies hot, spooning any pan juices over the top. It pairs beautifully with crusty bread to soak up the garlic butter sauce. For a heartier meal, serve over rice, quinoa, or mashed potatoes. I love it with a simple side salad dressed with lemon vinaigrette—the acidity cuts through the richness.
Garnishes: A sprinkle of fresh parsley or chives adds color and freshness. For a pop of brightness, add a squeeze of lemon juice just before serving. Grated Parmesan over the veggies is also incredible.
Storage: Store leftovers in an airtight container in the refrigerator for up to 4 days. The flavors actually deepen overnight, so leftovers taste amazing. The chicken might lose some crispiness, but the sauce gets even better.
Reheating: The best way to reheat is in a skillet over medium heat with a splash of chicken broth or water. Cover and cook for 5-7 minutes until heated through. The microwave works in a pinch, but the veggies can get mushy. For crispy skin, reheat in a 375°F oven for 10 minutes.
Freezing: You can freeze the cooked dish for up to 3 months. Let it cool completely, then transfer to a freezer-safe container. Thaw overnight in the refrigerator and reheat as directed. The veggies will be softer after freezing, so consider adding fresh veggies when reheating if texture matters to you.
Nutritional Information & Benefits
Here’s an approximate nutritional breakdown per serving (based on 4 servings, using skin-on chicken thighs and the listed vegetables):
- Calories: 485
- Protein: 32g
- Fat: 36g
- Carbohydrates: 12g
- Fiber: 4g
- Sugar: 6g
- Sodium: 720mg
This dish is packed with nutrition. Chicken thighs are rich in B vitamins, selenium, and iron, which support energy and immune function. Broccoli is a powerhouse of vitamin C, vitamin K, and fiber. Zucchini adds hydration and antioxidants, while bell peppers provide a hefty dose of vitamin A and C. The garlic offers anti-inflammatory benefits, and the butter provides fat-soluble vitamins A, D, and E.
If you’re watching your sodium, reduce the added salt and use unsalted butter. For lower fat, remove the chicken skin before eating (but honestly, the skin is the best part). This recipe is naturally gluten-free and can be made dairy-free with simple swaps. It’s also suitable for low-carb and keto diets as written.
I love that this meal feels indulgent but is actually well-balanced. It’s the kind of dinner that leaves you satisfied without feeling heavy—perfect for a weeknight when you want something comforting but not over-the-top.
Conclusion
This easy one-pan garlic butter chicken thighs recipe is the weeknight dinner you’ve been searching for. It’s quick, simple, and delivers flavor that tastes like you spent hours in the kitchen. The crispy chicken skin, tender veggies, and rich garlic butter sauce come together in one pan, which means less time cleaning and more time enjoying your meal.
I hope you make this your own. Play with the veggies, adjust the spices, and don’t be afraid to experiment. That’s what cooking is all about—finding what works for you and your family. Gladys taught me that the best recipes aren’t about perfection; they’re about connection and joy. This one has brought so much of both to my kitchen, and I know it will do the same for yours.
I’d love to hear how it turns out! Drop a comment below and let me know what variations you tried. Did you add extra garlic? Swap in sweet potatoes? Share your wins and your lessons—we’re all learning together. And if you loved this recipe, share it with a friend who needs an easy dinner win. Happy cooking!
Frequently Asked Questions
Can I use boneless, skinless chicken thighs?
Yes, absolutely. Boneless thighs will cook faster—about 10-12 minutes in the oven instead of 15-20. Just keep an eye on the internal temperature. The skin adds crispiness and flavor, so if you skip it, consider adding a little extra butter or a sprinkle of Parmesan for texture.
What if I don’t have an oven-safe skillet?
No problem! Cook everything on the stovetop. After searing the chicken and sautéing the veggies, cover the pan with a lid and cook on low heat for 15-20 minutes until the chicken is cooked through. The lid traps steam, which keeps everything moist.
Can I prep this ahead of time?
You can chop the veggies and season the chicken up to a day in advance. Store them separately in the fridge. When you’re ready to cook, just pull everything out and start searing. The actual cooking is best done fresh for the crispiest skin.
How do I know when the chicken is done without a thermometer?
Pierce the thickest part of a thigh with a knife. The juices should run clear, not pink. The meat should feel firm to the touch but not hard. If you’re unsure, cut into one—it’s better to check than to serve undercooked chicken.
Can I add more vegetables without overcrowding the pan?
Yes, but keep the total volume to about 4-5 cups. If you add too many veggies, they’ll steam instead of caramelizing. You can also roast extra veggies on a separate sheet pan in the oven and add them to the skillet before serving. That way, everything gets the right texture.
Pin This Recipe!
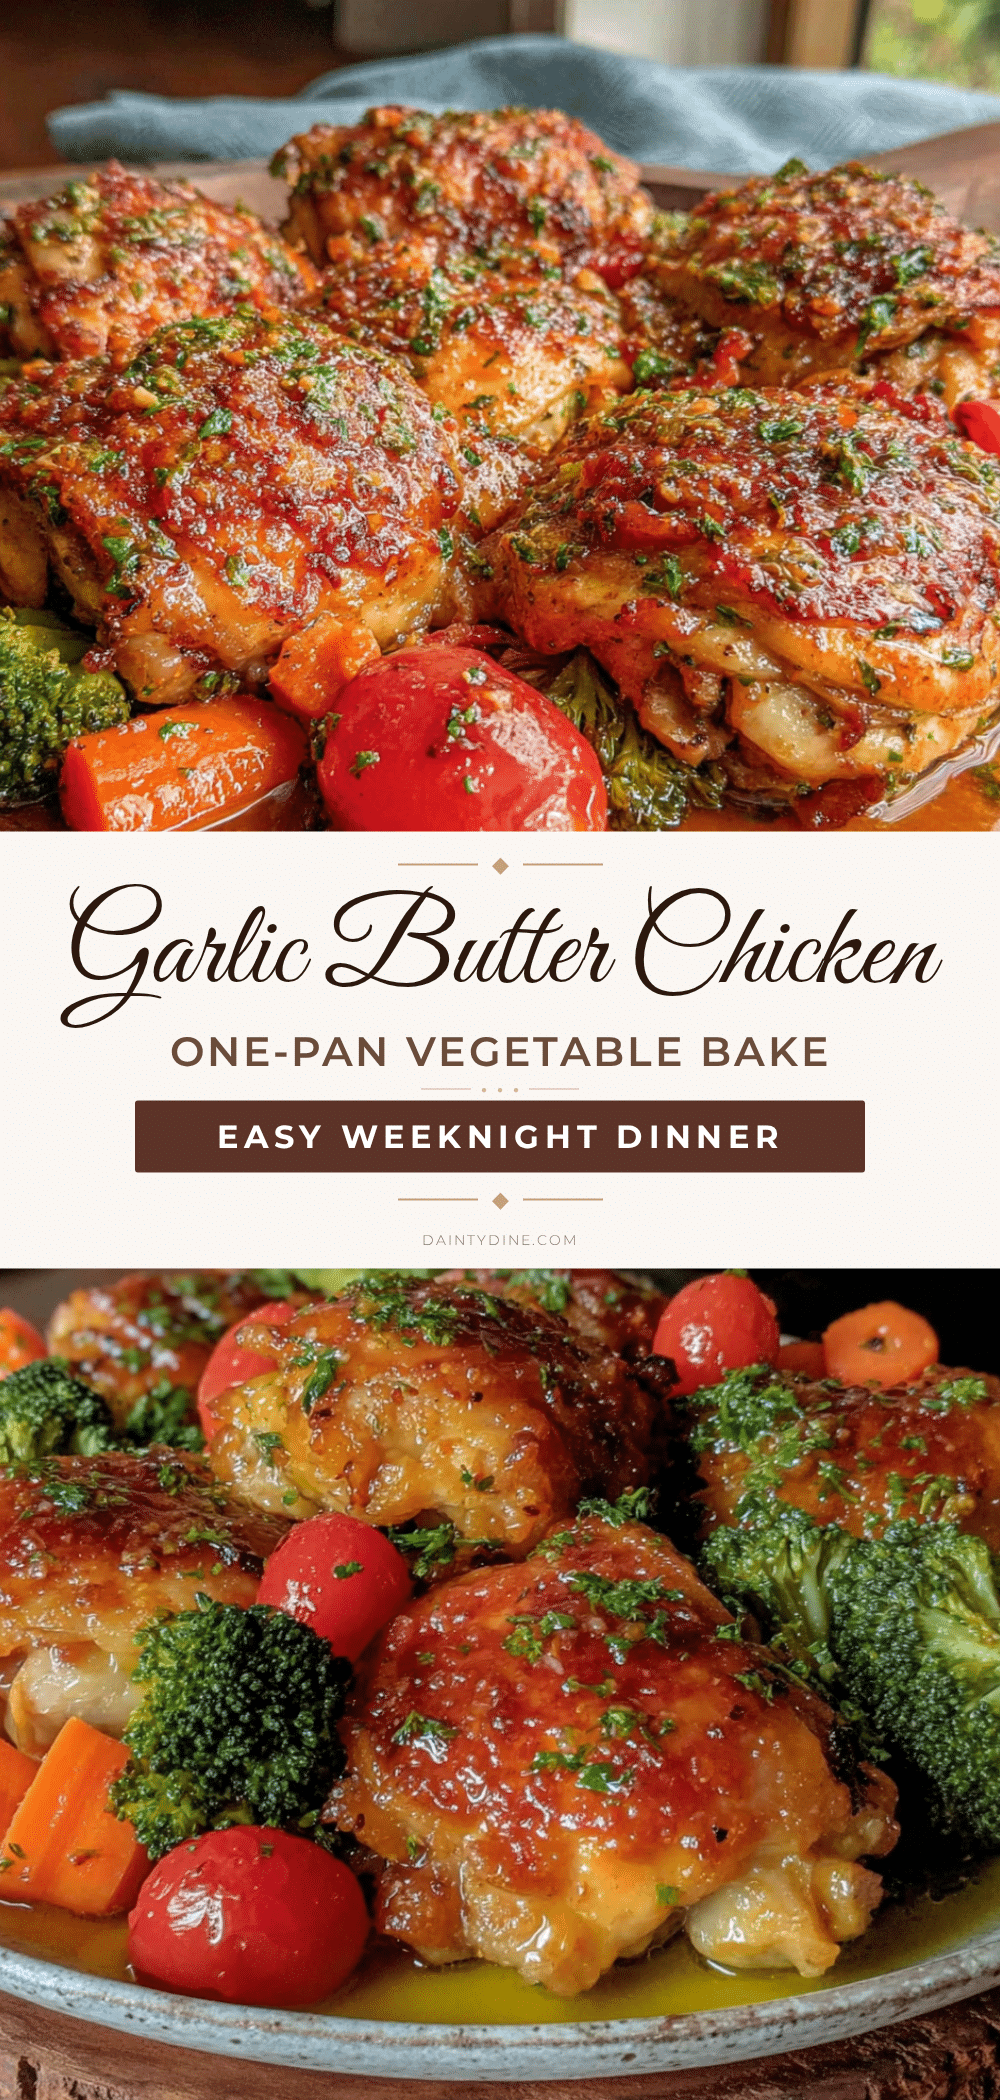
Easy One-Pan Garlic Butter Chicken Thighs with Roasted Veggies

A quick and easy weeknight dinner featuring crispy chicken thighs and tender roasted vegetables, all cooked in one pan with a rich garlic butter sauce. Minimal cleanup and maximum flavor make this a family favorite.
- Prep Time: 15 minutes
- Cook Time: 30 minutes
- Total Time: 45 minutes
- Yield: 4 servings 1x
- Category: Main Course
- Cuisine: American
Ingredients
- 4 bone-in, skin-on chicken thighs (about 1.5 lbs or 680g)
- 1 teaspoon salt
- ½ teaspoon black pepper, freshly ground
- 1 teaspoon garlic powder
- 1 teaspoon paprika
- 2 cups broccoli florets (about 150g)
- 1 medium zucchini, sliced into half-moons (about 200g)
- 1 red bell pepper, sliced into strips (about 150g)
- 1 medium yellow onion, sliced into wedges (about 150g)
- 3 cloves garlic, minced
- 3 tablespoons unsalted butter (42g)
- 2 tablespoons olive oil (30ml)
- 1 tablespoon fresh lemon juice (15ml)
- 2 tablespoons fresh parsley, chopped (optional, for garnish)
Instructions
- Preheat your oven to 400°F (200°C). Position the rack in the middle.
- Pat the chicken thighs dry with paper towels. Season both sides with salt, pepper, garlic powder, and paprika. Let them sit at room temperature for 10 minutes while you prep the veggies.
- Prep your vegetables: cut broccoli into small florets, slice zucchini into half-moons, slice bell pepper into strips, and onion into wedges. Mince the garlic and set aside.
- Heat your skillet over medium-high heat for about 2 minutes. Add 1 tablespoon of olive oil and 1 tablespoon of butter. Swirl until the butter melts and starts to foam.
- Sear the chicken thighs, skin-side down, for 5-6 minutes without moving them. Flip and cook for another 3 minutes on the other side. Transfer the chicken to a plate and set aside.
- Reduce the heat to medium and add the remaining 1 tablespoon of olive oil to the pan. Toss in the broccoli, zucchini, bell pepper, and onion. Season with a pinch of salt and pepper. Cook for 4-5 minutes, stirring occasionally.
- Add the minced garlic and the remaining 2 tablespoons of butter. Stir for about 1 minute until the garlic is fragrant.
- Return the chicken thighs to the skillet, nestling them skin-side up among the vegetables. Pour any accumulated juices from the plate over the chicken. Drizzle the lemon juice over everything.
- Transfer the skillet to the preheated oven and roast for 15-20 minutes, until the chicken reaches an internal temperature of 170°F (77°C) and the veggies are tender with caramelized edges.
- Remove from the oven and let the pan rest for 5 minutes. Sprinkle with fresh parsley if using. Serve directly from the skillet.
Notes
For extra crispy skin, broil for 1-2 minutes after roasting. If veggies seem dry, add a splash of chicken broth before roasting. Let chicken rest at room temperature for 10 minutes before searing for even cooking.
Nutrition
- Serving Size: 1 serving (about 1 c
- Calories: 485
- Sugar: 6
- Sodium: 720
- Fat: 36
- Saturated Fat: 12
- Carbohydrates: 12
- Fiber: 4
- Protein: 32
Keywords: one-pan chicken, garlic butter chicken, roasted vegetables, easy weeknight dinner, chicken thighs


