Love this? Save it for later!
Share the inspiration with your friends
Introduction
My brother-in-law Mark had claimed to hate cauliflower for as long as I’d known him. Fifteen years. That’s a long time to hold a grudge against a vegetable, honestly. He’d make this face—you know the one—whenever it showed up on a plate, like someone had personally offended his taste buds. Then last Thanksgiving, I made this healthy cauliflower mash with chives just for myself, figuring I’d have a side dish that didn’t tempt me to unbutton my pants. I set the bowl on the counter while I finished the gravy, and when I turned around, Mark was standing there with a spoon, mid-bite, eyes wide. “What is this?” he asked, trying to sound casual while clearly plotting a second serving. “Cauliflower,” I said. The look on his face—that was the moment I knew I had something special.
The thing is, I wasn’t trying to convert anyone. I was just tired of heavy mashed potatoes weighing me down at every holiday dinner. I wanted something creamy, buttery, and satisfying that wouldn’t leave me in a food coma before dessert. This cauliflower mash with chives became my secret weapon, and honestly, it works better than any argument I could have made. Now Mark asks for it by name, and last summer, he brought it to a potluck and told everyone it was his recipe. I let him have that one.
Maybe you’ve been there—trying to feed a crowd that includes at least one picky eater, or maybe you’re the one who wants a lighter option without feeling like you’re missing out. This recipe bridges that gap beautifully. It’s the kind of side dish that disappears before the main course, and people always ask for the recipe. Let me show you how to make it.
Why You’ll Love This Recipe
I’ve tested this cauliflower mash more times than I can count, tweaking the ratios, testing different cooking methods, and serving it to everyone from my health-conscious sister to my meat-and-potatoes uncle. Here’s why it’s become my go-to for every gathering:
- Deceptively Creamy : No one believes it’s cauliflower until they see me make it. The texture is silky smooth, thanks to a simple trick I learned after a few failed attempts.
- Make-Ahead Magic : You can prep this entirely before guests arrive. It reheats beautifully, which is a lifesaver when you’re juggling multiple dishes.
- Crowd-Pleasing : I’ve served this at Thanksgiving, Christmas, Easter, and casual summer barbecues. It gets rave reviews every single time, from kids to grandparents.
- Healthier Indulgence : All the comfort of mashed potatoes with a fraction of the carbs and calories. You get to enjoy a generous serving without the guilt.
- Simple Ingredients : Nothing fancy here. You probably have most of these in your kitchen right now, which is exactly what you want when you’re hosting.
What sets this recipe apart is the method. Instead of boiling the cauliflower (which turns it watery and bland), I steam it, then let it drain thoroughly. That extra step makes all the difference between a soupy mess and a fluffy, luxurious mash that could fool any potato lover. I also add a secret ingredient—a tiny splash of reserved cooking liquid—that ties everything together perfectly.
This isn’t just another healthy side dish. It’s the one that makes people close their eyes after the first bite. It’s comfort food reimagined—lighter, faster, but with the same soul-soothing satisfaction. And when you’re hosting, that’s exactly the kind of recipe you need in your back pocket.
What Ingredients You Will Need
This recipe relies on a handful of simple ingredients, each playing a specific role in creating that dreamy texture and rich flavor. I’ve tested these exact amounts multiple times, so trust the measurements.
- 1 large head cauliflower (about 2 pounds / 900g) — Look for a head that’s firm, white, and free of brown spots. The fresher the cauliflower, the sweeter and less sulfurous it will taste. I prefer organic when possible, but conventional works fine too.
- 3 tablespoons unsalted butter (42g) — Butter adds richness and that familiar mashed potato flavor. Use good-quality butter here—it makes a difference. I like Kerrygold for its creaminess, but any unsalted brand works.
- 2 tablespoons cream cheese (30g), softened — This is my secret weapon for extra creaminess and a subtle tang. Full-fat is best for texture, but low-fat works in a pinch.
- ¼ cup heavy cream (60ml) — Or half-and-half for a lighter version. The fat content helps create that silky mouthfeel.
- 3 tablespoons fresh chives, finely chopped — Chives add a mild oniony freshness that brightens the whole dish. Do not skip these—they’re what makes this mash feel special.
- 1 clove garlic, minced — Just a hint of garlic in the background. Don’t overdo it; you want it subtle.
- ½ teaspoon salt, plus more to taste — I use fine sea salt. You’ll need to adjust based on your preference.
- ¼ teaspoon black pepper, freshly ground — Freshly ground pepper makes a noticeable difference here.
- Pinch of nutmeg (optional but recommended) — A tiny amount adds warmth and depth. Trust me on this one.
- 2 tablespoons reserved cooking liquid — This is the key to adjusting consistency without diluting flavor.
For the garnish:
- Extra chives for sprinkling
- A pat of butter right before serving (optional, but pretty)
- Flaky sea salt like Maldon, for finishing
Ingredient tips: If you’re dairy-free, you can substitute the butter with a good vegan butter (I like Miyoko’s), use dairy-free cream cheese, and swap the heavy cream with full-fat coconut cream. The flavor changes slightly but is still delicious. For a whole30 version, use ghee and omit the cream cheese.
Equipment Needed
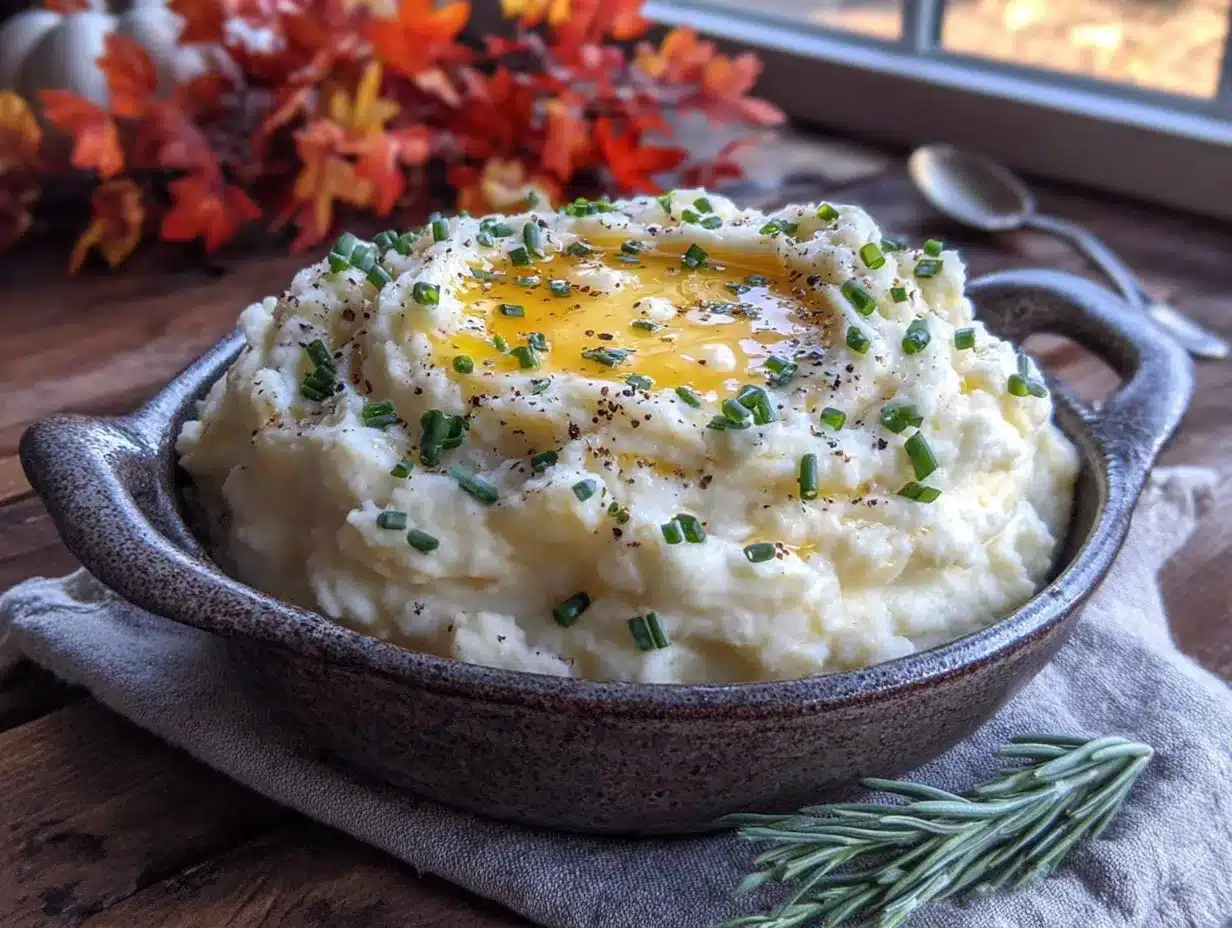
You don’t need anything fancy here, which is part of the beauty of this recipe. Here’s what I use:
- Large pot with a steamer basket — If you don’t have a steamer basket, you can use a colander that fits inside your pot. I’ve also used a metal sieve in a pinch.
- Food processor or high-powered blender — This gives the smoothest texture. I use my Cuisinart food processor, and it works perfectly. A standard blender works too, but you may need to work in batches.
- Sharp knife and cutting board — For breaking down the cauliflower into florets.
- Chef’s knife — For mincing garlic and chopping chives.
- Measuring cups and spoons — Precision matters here, especially with the liquid.
- Potato masher (optional) — If you prefer a chunkier texture, you can mash by hand instead of using a food processor.
- Rubber spatula — For scraping every last bit out of the food processor.
I’ve made this with just a pot and a potato masher before, and it worked fine—just a little more rustic. The food processor gives you that ultra-smooth, restaurant-quality texture, but don’t let a missing appliance stop you.
Preparation Method
Here’s how I make this healthy cauliflower mash with chives, step by step. I’ve included every detail I wish someone had told me when I first started making it.
Step 1: Prepare the Cauliflower
Wash your cauliflower head thoroughly. Remove the green leaves and cut out the tough core at the bottom. Break or cut the cauliflower into uniform florets, about 1 to 2 inches in size. Try to make them roughly the same size so they cook evenly. You’ll get about 5 to 6 cups of florets from one large head.
Step 2: Steam the Cauliflower
Fill a large pot with about an inch of water and bring it to a boil. Place your steamer basket inside, then add the cauliflower florets. Cover the pot and reduce the heat to medium. Steam for 10 to 12 minutes, until the cauliflower is fork-tender. You should be able to pierce a floret easily with no resistance. Do not overcook—mushy cauliflower leads to watery mash.
Step 3: Drain Thoroughly
This is the most important step, and I learned it the hard way. Remove the steamer basket and let the cauliflower cool for a minute. Then transfer the florets to a clean kitchen towel or several layers of paper towels. Gently press to remove as much moisture as possible. You’ll be shocked at how much water comes out. Reserve about 2 tablespoons of the cooking liquid before you dump it.
Step 4: Process the Cauliflower
Transfer the drained cauliflower to your food processor while it’s still warm. Add the butter, softened cream cheese, heavy cream, minced garlic, salt, pepper, and nutmeg. Pulse a few times to break everything down, then process continuously for about 30 seconds. Scrape down the sides with a rubber spatula, then process again until completely smooth and creamy. If it seems too thick, add the reserved cooking liquid 1 tablespoon at a time, pulsing after each addition. You want it thick but spoonable.
Step 5: Add the Chives
Transfer the mash to a serving bowl. Gently fold in the chopped chives with a spatula, reserving a tablespoon for garnish. Taste and adjust seasoning—you might want a pinch more salt or pepper. This is your moment to make it perfect.
Step 6: Serve or Store
If serving immediately, transfer to a warm serving bowl, top with extra chives and a pat of butter if desired, and sprinkle with flaky sea salt. If making ahead, let the mash cool completely, then transfer to an airtight container and refrigerate for up to 3 days.
Cooking Tips & Techniques
After making this cauliflower mash with chives at least two dozen times, I’ve collected a few hard-won lessons. Let me save you some trouble.
Don’t boil the cauliflower. I made this mistake my first three times. Boiling turns cauliflower waterlogged, and no amount of draining can fix it. You end up with thin, sad mash that never thickens properly. Steaming is non-negotiable here.
Dry it like you mean it. I cannot overstate this. After steaming, I spread the florets on a baking sheet lined with a clean kitchen towel and let them sit for 5 minutes. Then I gently press another towel on top. The drier your cauliflower, the creamier your mash. It’s that simple.
Warm ingredients matter. Cold cream cheese straight from the fridge will give you lumpy mash. Let it sit on the counter for 30 minutes before you start, or microwave it for 10 seconds. Same with the heavy cream—I let it sit out while the cauliflower steams.
Taste as you go. Cauliflower varies in size and water content, so seasoning isn’t one-size-fits-all. I always taste after processing and adjust the salt. A little extra pepper at the end brightens everything up.
Make it ahead for hosting. This is a game-changer for dinner parties. Make the mash a day ahead, refrigerate it, then reheat gently in a saucepan over low heat with an extra splash of cream. It tastes even better the next day, honestly.
Variations & Adaptations
This recipe is forgiving, and I’ve tried several variations depending on who I’m feeding and what’s in season.
Garlic Lovers Version : Roast 4 to 5 garlic cloves in foil at 400°F for 20 minutes until soft and golden. Squeeze the roasted garlic into the food processor with the cauliflower. The sweetness of roasted garlic pairs beautifully with the chives.
Cheesy Cauliflower Mash : Add ¼ cup grated Parmesan cheese along with the cream cheese. The saltiness of Parmesan adds another layer of flavor. I’ve also used sharp cheddar for a more indulgent version.
Herb Garden Mash : Swap half the chives for fresh parsley, dill, or tarragon. In summer, I use a mix of chives, parsley, and a tiny bit of fresh thyme. It’s fantastic alongside grilled fish or chicken.
Dairy-Free Adaptation : Use vegan butter, dairy-free cream cheese, and full-fat coconut cream. Add an extra pinch of salt to compensate. The coconut flavor is subtle and actually works well with the chives.
Whole30 & Paleo : Use ghee instead of butter, omit the cream cheese, and use full-fat coconut milk or cashew cream. It’s still incredibly creamy and satisfying.
Spicy Version : Add a pinch of cayenne pepper or red pepper flakes along with the nutmeg. The heat cuts through the richness beautifully.
My personal favorite variation? I add a tablespoon of nutritional yeast for a subtle cheesy flavor without the dairy. It’s not traditional, but it’s become my go-to for weekday dinners.
Serving & Storage Suggestions
This cauliflower mash with chives is incredibly versatile. Here’s how I serve and store it.
Serving Temperature : Serve warm, not piping hot. Let it sit for 5 minutes after reheating so the flavors meld. It’s also surprisingly good at room temperature, which makes it perfect for potlucks.
Presentation Tips for Hosting : Transfer the mash to a warmed serving bowl. Smooth the top with a spatula, then create gentle swirls. Sprinkle with extra chives and a pinch of flaky sea salt. Add a pat of butter in the center—it melts slowly and looks gorgeous. I sometimes garnish with edible flowers for special occasions.
What to Serve Alongside : This mash pairs beautifully with roasted chicken, grilled steak, pan-seared salmon, or herb-crusted pork tenderloin. For vegetarian meals, serve with roasted mushrooms and a green salad. It’s also fantastic under a rich mushroom gravy.
Storage Instructions : Store in an airtight container in the refrigerator for up to 4 days. The flavors actually deepen overnight. Do not freeze—the texture becomes grainy upon thawing.
Reheating Method : The best way to reheat is in a saucepan over low heat, stirring frequently. Add a splash of milk, cream, or reserved cooking liquid to loosen it up. You can also microwave in 30-second bursts, stirring between each, but the stovetop method gives better results. If it seems dry, a pat of butter stirred in at the end works wonders.
Nutritional Information & Benefits
Here’s the thing about this healthy cauliflower mash with chives—it delivers all the comfort of mashed potatoes with a fraction of the carbs and calories. One serving has about 120 calories and 5 grams of net carbs, compared to roughly 200 calories and 30 grams of carbs for traditional mashed potatoes.
Cauliflower is a nutritional powerhouse. It’s packed with vitamin C, vitamin K, folate, and fiber. It also contains compounds called glucosinolates, which have been studied for their potential cancer-fighting properties. The chives add a boost of vitamin A and antioxidants.
This recipe is naturally gluten-free, low-carb, and keto-friendly. With the dairy-free adaptations mentioned above, it can also be vegan and Whole30-compliant. The only potential allergen is dairy, which is easily substituted.
I love that I can serve this to guests with dietary restrictions without anyone feeling like they’re missing out. It’s the kind of dish that makes healthy eating feel like a treat rather than a compromise.
Conclusion
This healthy cauliflower mash with chives has become my signature side dish for good reason. It’s the recipe that converts cauliflower skeptics, satisfies comfort food cravings, and makes hosting feel effortless. Whether you’re planning a holiday feast, a casual dinner party, or just want a lighter side for weeknight dinners, this dish delivers every time.
Don’t be afraid to make it your own. Add more garlic, swap the herbs, or experiment with different cheeses. The base recipe is forgiving and adaptable, which is exactly what you want in a go-to recipe. I’ve made it for picky eaters, health nuts, and everyone in between, and it never fails to impress.
I’d love to hear how this turns out for you. Drop a comment below and let me know if your cauliflower-hating guest had a change of heart. And if you come up with a brilliant variation, please share it—I’m always looking for new ideas. Happy cooking, friends!
Frequently Asked Questions
Can I make this cauliflower mash ahead of time?
Absolutely. This is one of the best make-ahead side dishes for hosting. Prepare it up to 3 days in advance, store it in an airtight container in the refrigerator, and reheat gently on the stovetop with a splash of cream or milk. The flavors actually improve overnight.
Why is my cauliflower mash watery?
This usually happens for two reasons: you boiled instead of steamed the cauliflower, or you didn’t drain it thoroughly enough. Always steam your cauliflower, and after steaming, press out as much moisture as possible using a clean kitchen towel. This extra step makes all the difference.
Can I freeze cauliflower mash?
I don’t recommend it. The texture becomes grainy and watery after thawing because of the high water content in cauliflower. If you need to prep far in advance, make the mash and refrigerate it for up to 3 days instead.
How do I make this dairy-free?
Use vegan butter or ghee, dairy-free cream cheese, and full-fat coconut cream or unsweetened cashew milk. The coconut cream adds a slight sweetness that pairs beautifully with the chives. I’ve tested this version multiple times, and it’s just as creamy and delicious.
Can I use frozen cauliflower instead of fresh?
Yes, but with some adjustments. Frozen cauliflower contains more water, so you’ll need to thaw it completely and press out as much moisture as possible before steaming. I also recommend steaming it for 2 to 3 minutes less than fresh. The texture won’t be quite as smooth, but it works in a pinch.
Pin This Recipe!
Best Healthy Cauliflower Mash Recipe (Guest Favorite)
A creamy, buttery cauliflower mash that converts even the most stubborn cauliflower skeptics. This healthy side dish is perfect for holidays, potlucks, or weeknight dinners, offering all the comfort of mashed potatoes with a fraction of the carbs and calories.
- Prep Time: 15 minutes
- Cook Time: 12 minutes
- Total Time: 27 minutes
- Yield: 4 servings 1x
- Category: Side Dish
- Cuisine: American
Ingredients
- 1 large head cauliflower (about 2 pounds / 900g)
- 3 tablespoons unsalted butter (42g)
- 2 tablespoons cream cheese (30g), softened
- ¼ cup heavy cream (60ml)
- 3 tablespoons fresh chives, finely chopped
- 1 clove garlic, minced
- ½ teaspoon salt, plus more to taste
- ¼ teaspoon black pepper, freshly ground
- Pinch of nutmeg (optional but recommended)
- 2 tablespoons reserved cooking liquid
- Extra chives for garnish
- A pat of butter for garnish (optional)
- Flaky sea salt for finishing
Instructions
- Wash the cauliflower, remove leaves and core, and cut into uniform 1-2 inch florets.
- Fill a large pot with about an inch of water and bring to a boil. Place a steamer basket inside, add the cauliflower florets, cover, and reduce heat to medium. Steam for 10-12 minutes until fork-tender.
- Remove the steamer basket and let the cauliflower cool for a minute. Transfer florets to a clean kitchen towel or paper towels and gently press to remove as much moisture as possible. Reserve 2 tablespoons of the cooking liquid.
- Transfer the drained cauliflower to a food processor while still warm. Add butter, softened cream cheese, heavy cream, minced garlic, salt, pepper, and nutmeg. Pulse a few times, then process continuously for about 30 seconds. Scrape down sides and process again until smooth. If too thick, add reserved cooking liquid 1 tablespoon at a time.
- Transfer mash to a serving bowl and gently fold in chopped chives, reserving a tablespoon for garnish. Taste and adjust seasoning.
- If serving immediately, top with extra chives, a pat of butter, and flaky sea salt. If making ahead, let cool completely, then refrigerate in an airtight container for up to 3 days.
Notes
Do not boil the cauliflower—steaming is essential to avoid watery mash. Dry the cauliflower thoroughly after steaming for the creamiest texture. Warm the cream cheese and heavy cream to room temperature before using to prevent lumps. This mash can be made up to 3 days ahead and reheats beautifully on the stovetop with a splash of cream. For dairy-free, use vegan butter, dairy-free cream cheese, and full-fat coconut cream.
Nutrition
- Serving Size: 1 serving (about 1 c
- Calories: 120
- Sugar: 3
- Sodium: 320
- Fat: 9
- Saturated Fat: 5
- Carbohydrates: 7
- Fiber: 2
- Protein: 3
Keywords: cauliflower mash, healthy side dish, low-carb, keto, gluten-free, vegetarian, holiday side, cauliflower recipe, chives, creamy cauliflower