Love this? Save it for later!
Share the inspiration with your friends
My neighbor, Carol, wasn’t trying to impress anyone last November. I’d stopped by to borrow a cookie sheet—mine was buried somewhere in the chaos of pre-Thanksgiving prep—and the smell of butter and sugar hit me before I even got through the side door. There she was, flour dusted on her favorite old sweater, three kids crowded around her kitchen island, and a mess of sprinkles, frosting, and what looked suspiciously like little hand prints all over the counter. She looked up, wiped her nose with the back of her hand, and said, “Oh, we’re just making the turkey cookies. You know the ones.” Honestly, I didn’t know the ones. But the way her youngest was giggling while pressing his palm into a mound of sugar cookie dough? That image stuck with me. I mean, I’ve made a lot of Thanksgiving desserts in my time, but I’d never seen a kitchen that joyful over a batch of cookies. Carol shrugged when I asked about the recipe. “It’s just sugar cookies. You trace the kid’s hand. It’s nothing.” But it wasn’t nothing. It was the kind of thing that made you wish you’d thought of it yourself. Maybe you’ve been there—standing in someone else’s kitchen, watching a simple idea unfold, and realizing you need that recipe in your life. I left with the cookie sheet and a new tradition.
Why You’ll Love This Recipe
Let me tell you, these Easy Turkey Hand Sugar Cookies have become the non-negotiable centerpiece of our Thanksgiving baking day. They’re the kind of recipe that makes you look like a hero without actually doing anything complicated. Here’s why they work so well for families on a budget:
- Super Simple Ingredients : You probably have everything in your pantry right now. Flour, sugar, butter, eggs—the basics. No fancy extracts, no hard-to-find spices. Just honest, affordable ingredients that won’t blow your grocery budget.
- Zero Stress, All Fun : This isn’t about perfect piping skills or Instagram-worthy decoration. It’s about getting your kids’ hands dirty (literally) and laughing at the mess. The cookies come out looking adorable no matter what.
- Budget-Friendly Baking : One batch of dough makes a dozen or more turkey cookies, depending on hand sizes. Compare that to the cost of a fancy bakery pie, and you’re saving serious cash while making memories.
- Picky Eater Approved : I’ve seen kids who wouldn’t touch a green bean at Thanksgiving dinner devour three of these cookies. There’s something about the hands-on aspect that makes them irresistible to little ones.
- Leftovers That Keep : These cookies stay soft and delicious for days. You can make them ahead, store them in an airtight container, and they’ll be just as good on Thanksgiving morning.
What makes this recipe different from every other sugar cookie out there? It’s the handprint. That simple, personal touch turns a basic cookie into a keepsake. My kids’ hands change a little every year, and I love looking back at the tiny handprints from when they were three. It’s comfort food and memory-making rolled into one. And honestly, it’s the kind of recipe that makes you close your eyes after that first buttery bite—not because it’s fancy, but because it’s exactly what Thanksgiving baking should feel like.
What Ingredients You Will Need
This recipe uses simple, wholesome ingredients that you probably already have in your kitchen. I’ve tested this dough at least a dozen times, and trust me, these exact measurements give you the best texture for handprint cookies.
For the Sugar Cookie Dough
- 1 cup (226g) unsalted butter, softened to room temperature (I use Land O’Lakes—it’s reliable and affordable)
- 1 cup (200g) granulated sugar (adds sweetness and helps the cookies spread just right)
- 1 large egg, room temperature (cold eggs can make the dough seize up)
- 1 teaspoon vanilla extract (pure vanilla is best, but imitation works fine too)
- 2 ½ cups (312g) all-purpose flour (spoon and level it—don’t scoop straight from the bag)
- ½ teaspoon baking powder (helps the cookies puff slightly without losing their shape)
- ¼ teaspoon salt (balances the sweetness, I promise it makes a difference)
For the Decoration
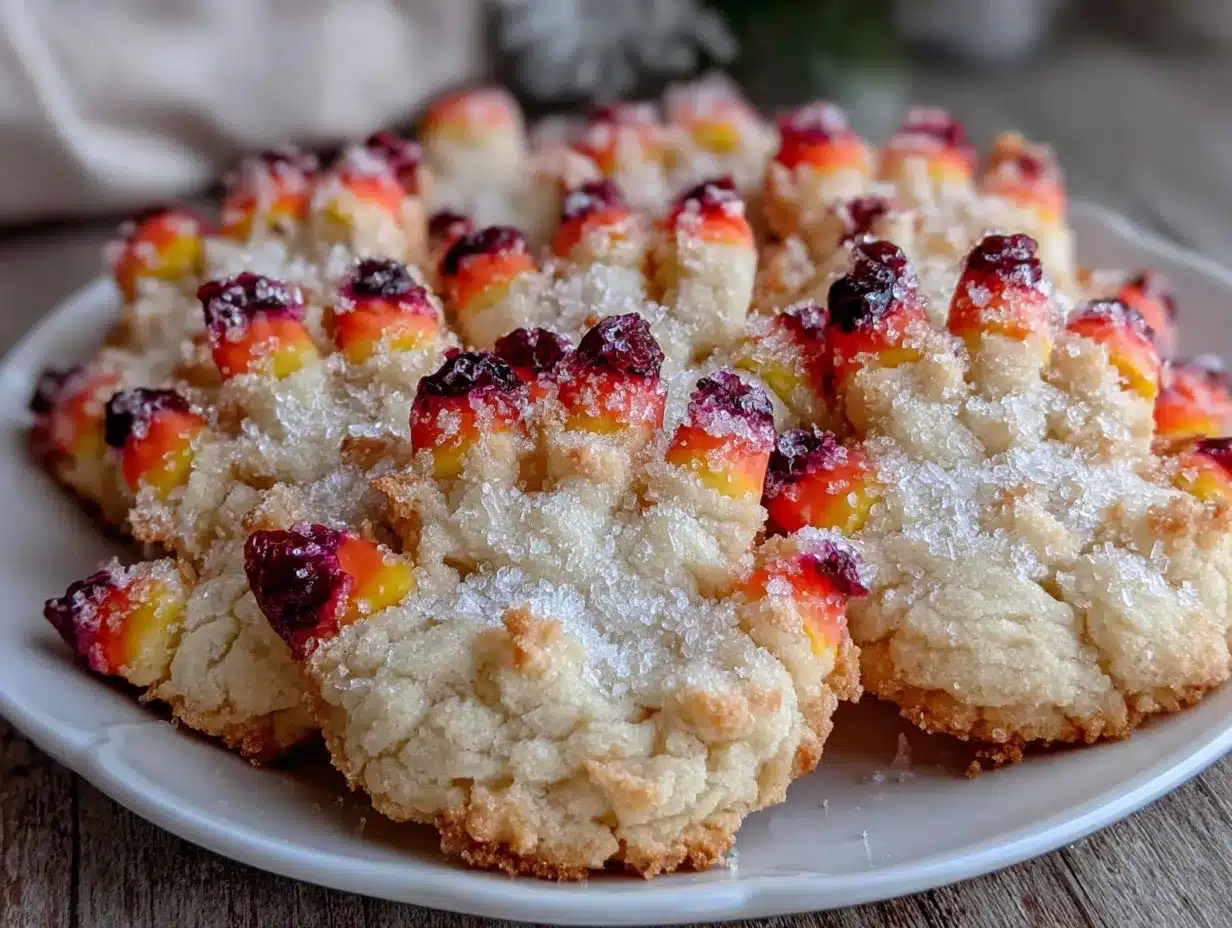
- 1 batch buttercream frosting (or store-bought if you’re short on time—no judgment here)
- Orange food coloring (for the turkey feathers—gel coloring gives the best vibrant color)
- Brown candy melts or chocolate chips (for the turkey body—I prefer Wilton candy melts for smooth melting)
- Small candy eyes (found at most grocery stores near the baking aisle)
- Orange sprinkle or candy corn (for the beak—candy corn works great and it’s seasonal)
- Red sprinkle or red gel icing (for the turkey’s wattle—that little red dangly bit under the beak)
If you’re watching your budget, skip the candy melts and use a simple chocolate frosting instead. The kids won’t care, I promise. For a gluten-free version, swap the all-purpose flour with a good 1:1 gluten-free baking flour. I’ve had great results with King Arthur’s Measure for Measure blend.
Equipment Needed
You don’t need a fancy kitchen to pull these off. Here’s what you’ll actually use:
- Electric mixer (handheld or stand—I use my trusty KitchenAid, but a hand mixer works perfectly)
- Large mixing bowl (one that won’t slide around while you’re creaming butter)
- Baking sheets (I recommend Nordic Ware for even baking, but any light-colored sheet works)
- Parchment paper (non-negotiable—it prevents sticking and makes cleanup a breeze)
- Rolling pin (if you don’t have one, a wine bottle works in a pinch—I’ve done it)
- Sharp knife or pizza cutter (for cutting around the handprint)
- Cooling rack (speeds up cooling so you can frost faster)
- Small piping bags or zip-top bags (for frosting—snip a tiny corner off a zip-top bag and you’re good)
Pro tip from my own mistakes: don’t skip the parchment paper. The first time I made these, I greased the pan and the cookies spread into weird, greasy blobs. Parchment keeps them perfectly shaped.
Preparation Method
Alright, let’s get into the fun part. I’ve broken this down so even a beginner baker can nail it.
Step 1: Make the Dough (10 minutes active time)
In your large mixing bowl, beat the softened butter and granulated sugar together until it’s light and fluffy—about 3 minutes on medium speed. Scrape down the sides halfway through. Add the egg and vanilla extract, then beat until combined. The mixture should look smooth and glossy.
In a separate bowl, whisk together the flour, baking powder, and salt. Gradually add this dry mixture to the wet ingredients, mixing on low speed until a soft dough forms. Don’t overmix—stop as soon as you don’t see any more flour streaks. The dough will be slightly sticky, and that’s exactly what you want.
Step 2: Chill the Dough (30 minutes minimum)
Divide the dough in half, flatten each half into a disc, wrap tightly in plastic wrap, and refrigerate for at least 30 minutes. I know it’s tempting to skip this step, but don’t. Chilled dough is so much easier to roll out and trace hands on. If you’re in a hurry, pop it in the freezer for 15 minutes instead.
Step 3: Roll and Trace (15 minutes active time)
Preheat your oven to 350°F (175°C) and line your baking sheets with parchment paper. Lightly flour your work surface and rolling pin. Roll one disc of dough to about ¼-inch thickness. Here’s the key: don’t roll it too thin, or the handprints will tear. Too thick, and the cookies will puff up and lose the hand shape.
Now for the best part. Have your child wash their hands thoroughly, then gently press their hand into the dough. Press firmly enough to leave an imprint, but don’t smash all the way through. Use a sharp knife or pizza cutter to cut around the handprint, leaving about a ½-inch border around the fingers. Carefully transfer the handprint cookie to your prepared baking sheet using a thin spatula. Repeat with remaining dough, gathering and re-rolling scraps as needed.
Step 4: Bake (8-10 minutes)
Bake the cookies for 8 to 10 minutes, or until the edges are just barely golden brown. The centers should still look slightly soft—they’ll firm up as they cool. Let the cookies cool on the baking sheet for 5 minutes, then transfer to a cooling rack to cool completely. Don’t frost them while they’re warm, or the frosting will slide right off. I learned that one the hard way.
Step 5: Decorate (20-30 minutes)
Once the cookies are completely cool, it’s time to turn them into turkeys. Tint your buttercream frosting with orange food coloring—you want a bright, festive orange. Pipe or spread the orange frosting over the fingers of the handprint to create the turkey feathers. Use a small spatula or the back of a spoon to spread it evenly.
For the turkey body, melt your brown candy melts according to package directions. Spoon a small dollop onto the palm area of the cookie and spread it into a rounded shape. While the chocolate is still wet, press two candy eyes into place. Add an orange sprinkle or a piece of candy corn for the beak, and a small red sprinkle for the wattle. Let the decorations set for about 15 minutes before serving.
Cooking Tips & Techniques
I’ve made these cookies more times than I can count, and I’ve definitely made my share of mistakes. Here’s what I’ve learned so you don’t have to repeat my failures:
Keep the dough cold. If your dough starts getting sticky while you’re rolling it out, pop it back in the fridge for 10 minutes. Warm dough is impossible to trace hands on—it just squishes and tears. I once tried to rush through this step and ended up with a pile of dough blobs instead of handprints.
Don’t skip the flour on your hands. When your child presses their hand into the dough, lightly dust their palm with flour first. This prevents sticking and gives you a cleaner handprint. Trust me, a flour-dusted hand is way easier to clean than a dough-covered one.
Use a thin spatula for transferring. The handprint cookies are fragile before baking. I use a thin metal spatula to gently lift them from the counter to the baking sheet. If they tear, just press the dough back together—it bakes out fine.
Bake one sheet at a time. I know it takes longer, but baking multiple sheets at once leads to uneven baking. The cookies on the bottom rack will brown faster than the ones on top. Rotate your baking sheet halfway through for even color.
Let kids decorate freely. My biggest tip? Let go of perfection. The first year I made these, I tried to make every turkey look identical. It was stressful and no fun. Now I let my kids go wild with the sprinkles, and honestly, those lopsided, over-decorated turkeys are my favorites.
Variations & Adaptations
One of the best things about this recipe is how easy it is to adapt. Here are some variations I’ve tried and loved:
Gluten-Free Version: Substitute the all-purpose flour with a 1:1 gluten-free baking flour. I’ve used Bob’s Red Mill and Cup4Cup with great results. The dough might be a bit more fragile, so chill it extra long—at least 45 minutes.
Dairy-Free Option: Use vegan butter sticks (not the spreadable kind in a tub) and a dairy-free milk alternative in your frosting. Miyoko’s European Style Cultured Vegan Butter works beautifully in this recipe.
Chocolate Turkey Cookies: Replace ¼ cup of the flour with unsweetened cocoa powder for a chocolate version. The chocolate dough is especially delicious with orange cream cheese frosting.
Mini Handprint Cookies: If your kids are toddlers, their tiny handprints make the cutest mini cookies. Just reduce the baking time to 6-8 minutes and watch them closely.
Make It a Craft: Instead of frosting, use colored royal icing that hardens. You can decorate the cookies days ahead, and they’ll stay perfect. Royal icing dries shiny and smooth, which makes the turkeys look extra polished.
Serving & Storage Suggestions
These cookies are best served at room temperature, ideally within a few hours of decorating. The frosting stays soft and the cookies are perfectly tender. I like to arrange them on a big platter with the handprints facing different directions—it looks like a flock of turkeys having a little party.
For storage, place the decorated cookies in a single layer in an airtight container. Separate layers with parchment paper if you need to stack them. They’ll stay fresh at room temperature for up to 5 days. Don’t refrigerate them—the fridge dries out the cookies and makes the frosting hard.
You can freeze the undecorated baked cookies for up to 3 months. Just wrap them tightly in plastic wrap and then foil. When you’re ready to decorate, thaw them at room temperature for about an hour, then frost as usual. The flavors actually get a little better after freezing—the vanilla mellows out and becomes more pronounced.
If you’re making these for Thanksgiving day, bake the cookies and freeze them a week ahead. Then on Thanksgiving morning, pull them out, let the kids decorate, and you’ve got an instant activity that keeps little hands busy while you’re finishing the turkey.
Nutritional Information & Benefits
Let’s be real—these are cookies, not health food. But here’s the approximate nutrition per cookie (based on a recipe that makes 12 large handprint cookies with frosting):
| Nutrient | Amount Per Cookie |
|---|---|
| Calories | 310 |
| Total Fat | 16g |
| Saturated Fat | 10g |
| Carbohydrates | 40g |
| Sugar | 24g |
| Protein | 3g |
That said, there’s something to be said for the emotional benefits of baking together as a family. The act of making these cookies—measuring, mixing, pressing little hands into dough—builds connection and creates memories that last way longer than the sugar rush. Plus, the butter provides a small amount of vitamin A, and the eggs add a bit of protein. If you want to make them slightly healthier, you can reduce the sugar in the dough to ¾ cup without affecting the texture too much.
Conclusion
These Easy Turkey Hand Sugar Cookies have become a staple in our Thanksgiving rotation for one simple reason: they’re pure, unfiltered fun. No stress, no perfectionism, just flour-covered hands and happy kids. The first time I made them, I was nervous they wouldn’t turn out. But watching my kids press their hands into the dough, giggling at the ticklish feeling, and then seeing their faces light up when the turkeys came out of the oven—that’s what this recipe is really about.
I’d love to hear how your turkey cookies turn out! Did your kids go wild with the sprinkles? Did you try a fun variation? Drop a comment below and share your handprint masterpieces. And if you’re looking for more kid-friendly Thanksgiving recipes, be sure to check out our favorite Thanksgiving desserts that are perfect for little helpers. Happy baking, friends—may your kitchen be messy and your hearts be full.
Frequently Asked Questions
Can I make the dough ahead of time?
Absolutely! The sugar cookie dough can be made up to 3 days in advance. Just wrap it tightly in plastic wrap and keep it refrigerated. When you’re ready to bake, let it sit at room temperature for about 10 minutes to soften slightly before rolling.
My child’s handprint didn’t show up well. What went wrong?
This usually happens if the dough is too warm or if you didn’t press firmly enough. Make sure your dough is well-chilled, and press your child’s hand down evenly with gentle but firm pressure. Lightly flouring their hand first helps create a cleaner imprint too.
Can I use store-bought sugar cookie dough?
You can, but I don’t recommend it. Store-bought dough tends to spread more during baking, which can distort the handprint shape. Homemade dough holds its shape much better. If you’re short on time, try using a refrigerated sugar cookie sheet that you can unroll and cut—it works better than tub dough.
How do I keep the cookies from spreading too much?
Make sure your dough is thoroughly chilled before baking. Also, check that your butter isn’t too soft—it should be at room temperature, not melted. Using parchment paper instead of a greased pan also helps control spreading. If your cookies still spread, try adding an extra 2 tablespoons of flour to your dough next time.
Can I freeze the decorated cookies?
I don’t recommend freezing decorated cookies because the frosting can get grainy and the decorations might fall off. However, you can freeze the undecorated baked cookies for up to 3 months. Just thaw, decorate, and serve. The frosting stays much fresher that way.
Pin This Recipe!
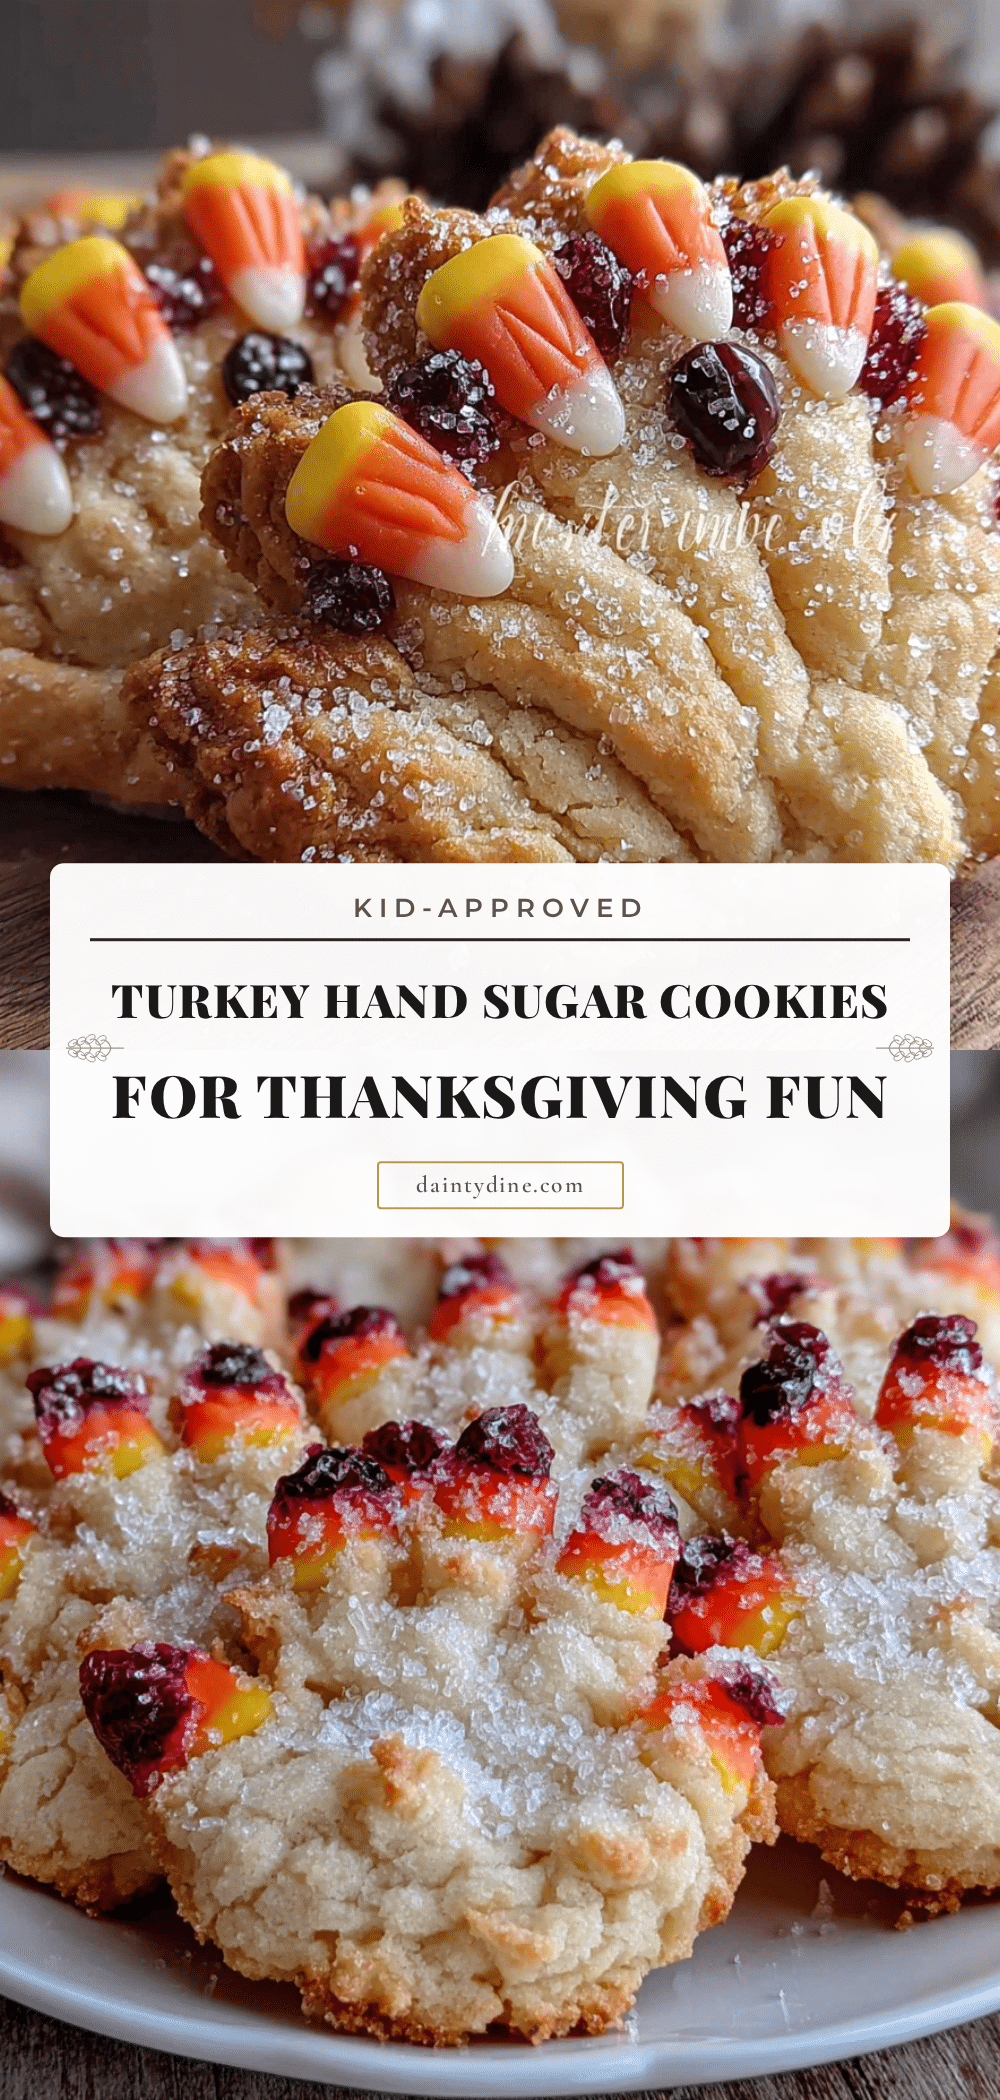
Easy Turkey Hand Sugar Cookies for Thanksgiving Fun
These adorable handprint turkey cookies are a fun and easy Thanksgiving baking project for the whole family. Made with simple ingredients, they create a memorable keepsake and a delicious treat.
- Prep Time: 30 minutes
- Cook Time: 10 minutes
- Total Time: 1 hour 40 minutes
- Yield: 12 servings 1x
- Category: Dessert
- Cuisine: American
Ingredients
- 1 cup (226g) unsalted butter, softened
- 1 cup (200g) granulated sugar
- 1 large egg, room temperature
- 1 teaspoon vanilla extract
- 2 ½ cups (312g) all-purpose flour
- ½ teaspoon baking powder
- ¼ teaspoon salt
- 1 batch buttercream frosting
- Orange food coloring
- Brown candy melts or chocolate chips
- Small candy eyes
- Orange sprinkle or candy corn
- Red sprinkle or red gel icing
Instructions
- In a large bowl, beat softened butter and granulated sugar until light and fluffy, about 3 minutes. Add egg and vanilla extract; beat until combined.
- In a separate bowl, whisk together flour, baking powder, and salt. Gradually add to wet ingredients, mixing on low until a soft dough forms. Do not overmix.
- Divide dough in half, flatten into discs, wrap in plastic wrap, and refrigerate for at least 30 minutes.
- Preheat oven to 350°F (175°C). Line baking sheets with parchment paper.
- On a lightly floured surface, roll one disc of dough to ¼-inch thickness.
- Have child wash hands, lightly dust palm with flour, and gently press hand into dough to leave an imprint. Cut around handprint with a sharp knife or pizza cutter, leaving a ½-inch border.
- Transfer handprint cookies to prepared baking sheets using a thin spatula. Repeat with remaining dough and scraps.
- Bake for 8-10 minutes, until edges are just golden. Cool on baking sheet for 5 minutes, then transfer to a wire rack to cool completely.
- Tint buttercream frosting with orange food coloring. Pipe or spread orange frosting over the fingers of each cookie to create turkey feathers.
- Melt brown candy melts. Spoon a dollop onto the palm area and spread into a rounded shape. While wet, press on candy eyes, an orange sprinkle or candy corn for the beak, and a red sprinkle for the wattle.
- Let decorations set for about 15 minutes before serving.
Notes
Keep dough cold for easier handling. Lightly flour child’s hand before pressing into dough to prevent sticking. Use a thin spatula to transfer fragile cookies. Bake one sheet at a time for even results. Let kids decorate freely for best memories.
Nutrition
- Serving Size: 1 cookie
- Calories: 310
- Sugar: 24
- Sodium: 120
- Fat: 16
- Saturated Fat: 10
- Carbohydrates: 40
- Protein: 3
Keywords: turkey cookies, handprint cookies, Thanksgiving cookies, sugar cookies, kid-friendly baking, easy Thanksgiving dessert


