Love this? Save it for later!
Share the inspiration with your friends
It was 11:47 PM on a random Tuesday in March, and I had a very specific, almost desperate craving for birthday cake. Not just any cake, mind you—the kind with those little rainbow sprinkles baked right in, the kind that tastes like childhood and happiness and zero regrets. The problem? My daughter’s actual birthday was still three months away, and I definitely didn’t have cake flour, buttermilk, or any of the “proper” ingredients a fancy recipe would demand. What I did have was a box of all-purpose flour, a half-used container of rainbow jimmies from a failed cookie experiment, and the stubborn, sleep-deprived idea that maybe—just maybe—I could make a funfetti cake from scratch with what was actually in my pantry. Honestly, I was too tired to overthink it. I just started mixing, hoping the sugar-to-sprinkle ratio would work out in my favor. Let me tell you, the kitchen looked like a unicorn had sneezed everywhere, but that first bite at midnight? Pure, vindicated joy. This is that cake.
This recipe is the one I kept making, tweaking, and perfecting long after that late-night baking session. It became the official birthday cake of our house, not because it’s fancy, but because it works. It uses simple, affordable ingredients you probably already have, it comes together in one bowl, and it bakes up incredibly moist with that perfect tender crumb. The sprinkles stay suspended in the batter instead of sinking to the bottom, which was a happy accident I figured out that very first night. It’s the kind of cake that makes you close your eyes after the first bite, and it’s the kind of recipe that makes you feel like a hero for under ten bucks. Maybe you’ve been there—needing a celebration on a Tuesday, or just wanting to make your kid’s day without breaking the bank. This cake is for those moments.
Why You’ll Love This Recipe
Let’s be real—there are a million cake recipes out there. But this one? It’s different. It’s been tested on actual picky eaters, stressed-out parents, and a few skeptical in-laws, and it’s passed every single time. Here’s why this funfetti birthday cake recipe is the one you’ll come back to again and again:
- Budget-Friendly & Pantry-Ready: No expensive cake flour or specialty extracts needed. This recipe uses all-purpose flour, vegetable oil, and regular sugar—stuff you probably have in the cupboard right now. A box of sprinkles costs about two bucks, and you’ll have plenty left over for decorating.
- Kid-Approved & Adult-Loved: It’s not too sweet, has a soft, tender crumb, and those rainbow sprinkles make everyone smile. My kids actually fight over the corner pieces with the most frosting. I’m not kidding.
- One-Bowl Wonder: You can mix the entire batter in one bowl with a whisk. No stand mixer, no multiple bowls, no complicated steps. Less dishes means more time for actually eating the cake.
- Perfect for Any Occasion: Birthdays, bake sales, school parties, or just a random Tuesday that needs a little joy. This cake is a crowd-pleaser that always gets rave reviews.
- Unbelievably Moist: The secret is using oil instead of butter and adding a little bit of sour cream (or yogurt). It keeps the cake moist for days—if it lasts that long.
I’ve tried box mixes, and I’ve tried complicated bakery-style recipes. This scratch version hits the sweet spot: it’s better than a box, easier than a bakery, and cheaper than both. It’s comfort food reimagined—faster, simpler, but with the same soul-soothing satisfaction. Perfect for impressing your kid’s classmates without stressing yourself out.
What Ingredients You Will Need
This recipe uses simple, wholesome ingredients to deliver that classic birthday cake flavor and soft, fluffy texture. Everything is easy to find and easy on the wallet. Here’s what you’ll need:
For the Cake
- 2 ½ cups (312g) all-purpose flour – Spoon and level it for best results. Don’t scoop directly from the bag or you’ll get too much flour. (I use Gold Medal or store brand—both work fine.)
- 2 teaspoons baking powder – Make sure it’s fresh for the best rise. Test it by dropping a bit in hot water; if it fizzes, it’s good.
- ½ teaspoon baking soda – Helps with browning and tenderness.
- ½ teaspoon salt – Balances the sweetness and enhances flavor. I use fine sea salt.
- 1 cup (200g) granulated sugar – Regular white sugar works perfectly. No need for superfine or caster sugar.
- ½ cup (120ml) vegetable oil – Canola or any neutral oil works. This keeps the cake moist without the expense of butter.
- 2 large eggs, at room temperature – Room temperature eggs mix in more evenly. If you forgot to take them out, place them in a bowl of warm water for 5 minutes.
- 1 tablespoon vanilla extract – Pure vanilla is lovely, but imitation vanilla works great and is much cheaper for baking.
- 1 cup (240ml) buttermilk, at room temperature – Adds tang and tenderness. To make your own, add 1 tablespoon of lemon juice or white vinegar to a measuring cup, then fill with milk to the 1-cup line. Let it sit for 5 minutes.
- ½ cup (120g) sour cream or plain yogurt – This is the secret to a super moist crumb. Full-fat is best, but low-fat works too. (I’ve used both Greek yogurt and store-brand sour cream with equal success.)
- ½ cup (about 80g) rainbow jimmies (sprinkles) – Not the little round ball sprinkles (nonpareils) or sanding sugar. Jimmies are the long, rod-shaped ones. They hold their color and don’t bleed into the batter. Trust me on this—learned that the hard way!
For the Simple Vanilla Buttercream
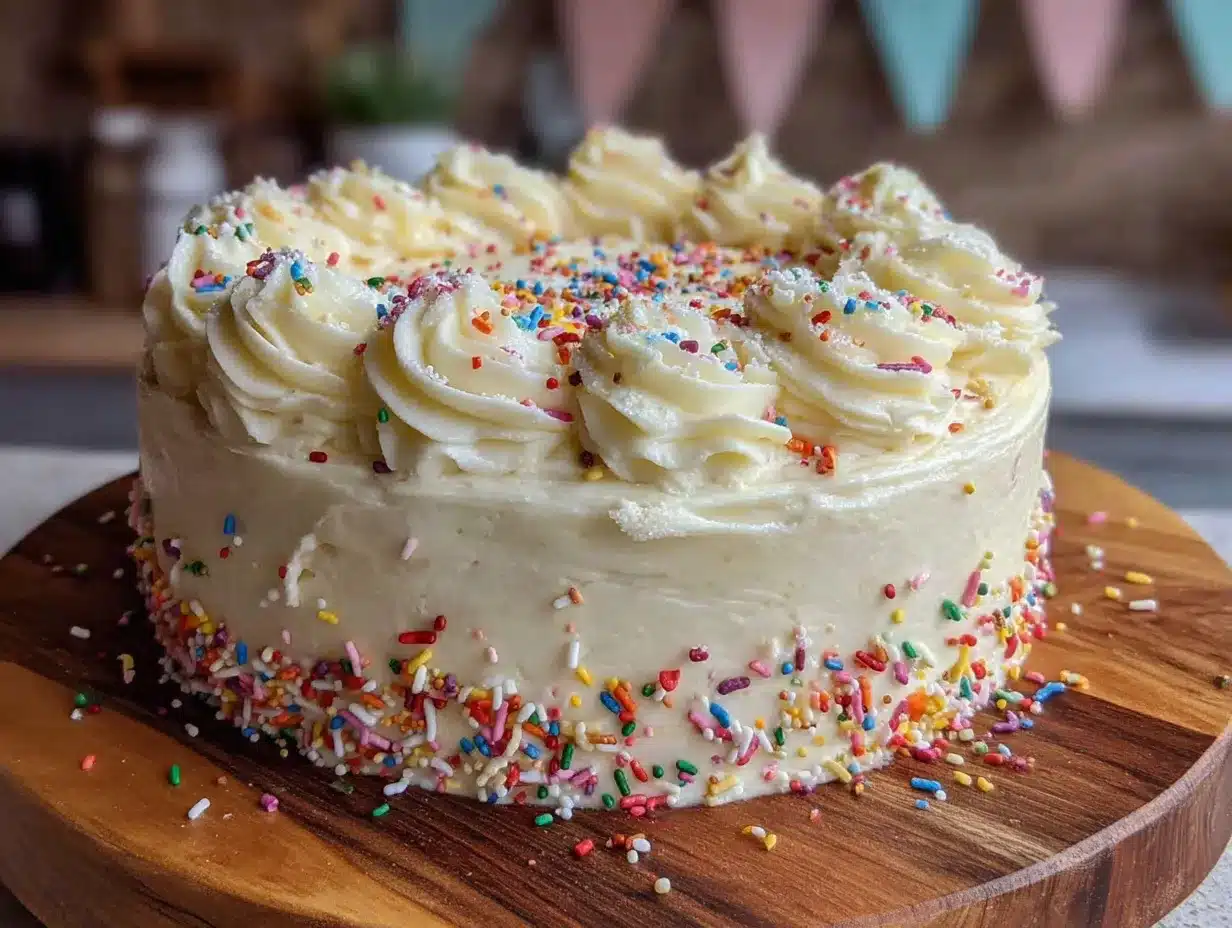
- 1 cup (2 sticks, 226g) unsalted butter, softened – Let it sit out for about an hour. It should be soft but not melty. If you’re on a tight budget, salted butter works—just reduce the added salt to a pinch.
- 4 cups (480g) powdered sugar – Sift it if it’s lumpy. No need for organic or fancy brands—store brand is fine.
- 2 teaspoons vanilla extract – Again, imitation is totally fine here.
- 3-4 tablespoons milk or heavy cream – Whole milk works great. Use as needed to reach your desired consistency.
- A pinch of salt – Just a tiny bit to balance the sweetness.
Substitution Tip: For a dairy-free version, use a neutral oil-based cake recipe or swap the buttermilk for almond milk with lemon juice, and use vegan butter or shortening in the frosting.
Equipment Needed
Nothing fancy here—just basic kitchen tools you probably already own. Here’s what you’ll need:
- Two 9-inch round cake pans – If you don’t have round pans, you can use an 9×13-inch sheet pan and adjust the baking time (about 30-35 minutes). I’ve also used 8-inch pans, but you’ll need to bake them a bit longer and they’ll be taller.
- Mixing bowls – One large bowl for the batter and one medium bowl for the frosting.
- Whisk or electric hand mixer – A whisk works fine for the batter, but a hand mixer makes the frosting much easier. I’ve made the frosting with a whisk before—it’s a good arm workout!
- Measuring cups and spoons – For accuracy.
- Rubber spatula – For scraping the bowl clean and folding in sprinkles gently.
- Cooling rack – Essential for even cooling. If you don’t have one, you can use the wire rack from your oven or even a clean dish towel on the counter.
- Parchment paper – Cut circles to line the bottom of your pans for easy release. Wax paper won’t work—it’ll stick.
- Sprinkles for decorating (optional) – A little extra for the top makes it look festive.
Budget-Friendly Tip: I got my cake pans at a thrift store for two bucks. They’re not fancy, but they work perfectly. Don’t feel pressured to buy expensive equipment—this recipe is forgiving.
Preparation Method
Let’s make some cake! Follow these steps, and you’ll have a beautiful, sprinkle-filled birthday cake that tastes like a celebration.
- Preheat and Prep: Preheat your oven to 350°F (175°C). Grease two 9-inch round cake pans generously with butter or non-stick spray, then line the bottoms with parchment paper circles. This step is non-negotiable for clean release. Grease the parchment too, just to be safe.
- Whisk Dry Ingredients: In a large mixing bowl, whisk together the all-purpose flour, baking powder, baking soda, and salt. This aerates the flour and distributes the leavening agents evenly. Don’t skip this—it takes 30 seconds and makes a difference.
- Combine Wet Ingredients: In the same bowl (yes, one bowl!), make a well in the center. Add the granulated sugar, vegetable oil, eggs, vanilla extract, buttermilk, and sour cream. Whisk everything together until the batter is smooth and well combined. Don’t overmix—just until no streaks of flour remain. A few small lumps are okay.
- Fold in the Sprinkles: This is the crucial part. Gently fold the rainbow jimmies into the batter using a rubber spatula. Use a light hand—overmixing can cause the sprinkles to bleed their color. You want them distributed evenly throughout the batter. The batter will be thick and creamy, like a milkshake.
- Divide and Bake: Divide the batter evenly between the two prepared pans. Use a kitchen scale for accuracy if you have one (about 450g per pan). Smooth the tops with a spatula. Bake for 25-30 minutes, or until a toothpick inserted into the center comes out clean or with a few moist crumbs. The tops should be golden and spring back when lightly touched.
- Cool Completely: Let the cakes cool in the pans on a wire rack for 10 minutes. Then, run a knife around the edges, invert onto the rack, peel off the parchment, and let them cool completely. This is important—warm cake will melt your frosting into a puddle. I usually wait at least an hour, sometimes two.
- Make the Frosting: While the cakes cool, make the buttercream. In a medium bowl, beat the softened butter with an electric mixer until creamy and smooth, about 2 minutes. Gradually add the powdered sugar, one cup at a time, beating on low speed until incorporated. Add the vanilla extract, a pinch of salt, and 2 tablespoons of milk. Beat on medium-high speed for 3-4 minutes until light and fluffy. Add more milk, one tablespoon at a time, until you reach your desired spreading consistency. It should be spreadable but not runny.
- Assemble the Cake: Place one cooled cake layer on your serving plate or cake stand. Spread about ¾ cup of frosting evenly over the top. Place the second layer on top, upside down (flat side up) for a perfectly level top. Apply a thin crumb coat of frosting all over the cake—just a thin layer to seal in crumbs. Refrigerate for 15-20 minutes to set. Then, apply the remaining frosting in a thick, beautiful layer. Use an offset spatula for smooth sides, or leave it rustic and swirly—both look great.
- Decorate: Top with extra rainbow sprinkles while the frosting is still soft. Press them gently into the sides if you like. For a funfetti look, you can also press sprinkles into the bottom edge of the cake.
Pro Tip: If your cake domes on top, use a serrated knife to level the tops before stacking. This gives you a flat, professional-looking cake. Save the scraps for a cook’s snack!
Cooking Tips & Techniques
After making this cake more times than I can count (including a few spectacular failures), I’ve picked up some tricks that make all the difference. Here’s what I’ve learned:
- Room Temperature Ingredients Matter: I know, I know—it’s an extra step. But cold eggs and cold buttermilk won’t emulsify properly with the oil, leading to a denser cake. Set everything out 30-60 minutes before you start. If you’re in a hurry, warm the buttermilk in the microwave for 15 seconds and place the eggs in a bowl of warm water for 5 minutes.
- Don’t Overmix the Batter: Overmixing develops gluten, which makes the cake tough. Mix just until the flour disappears. A few tiny lumps are totally fine—they’ll bake out. I speak from experience when I say that a tough funfetti cake is a sad thing.
- The Sprinkle Situation: Use jimmies, not nonpareils (the little round balls) or sanding sugar. Nonpareils tend to bleed their color into the batter, turning it a weird grayish-pink. Jimmies hold their shape and color perfectly. I learned this the hard way when I made a “mystery color” cake for my son’s birthday—it was pink and gray, and he still loved it, but it wasn’t pretty.
- Check for Doneness Early: Ovens vary wildly. Start checking your cake at the 22-minute mark. A toothpick inserted in the center should come out clean or with a few moist crumbs. If it’s wet batter, give it 3 more minutes and check again. Overbaked cake is dry cake.
- Leveling for the Win: If your cakes dome, don’t panic. Let them cool completely, then use a serrated knife to slice off the dome. This gives you a flat surface for stacking. I keep a small serrated bread knife just for this purpose.
Variations & Adaptations
This funfetti cake is wonderfully adaptable. Here are some ways to make it your own:
- Chocolate Funfetti Cake: Replace ¼ cup of the flour with ¼ cup of unsweetened cocoa powder. The chocolate-sprinkle combo is amazing, and kids go wild for it. I made this for a school bake sale once, and it sold out in 20 minutes.
- Gluten-Free Version: Use a 1:1 gluten-free all-purpose flour blend (like Bob’s Red Mill or King Arthur). Add 1 teaspoon of xanthan gum if your blend doesn’t already include it. The texture will be slightly more tender, but still delicious. My gluten-free friend said it was “the best cake she’s had in years.”
- Lemon Funfetti Cake: Add the zest of one lemon to the batter and replace 2 tablespoons of the buttermilk with fresh lemon juice. The bright citrus flavor pairs beautifully with the vanilla frosting. It’s perfect for spring birthdays.
- Cupcake Version: Divide the batter among 24 lined muffin tins. Bake at 350°F (175°C) for 18-22 minutes. This makes about 2 dozen cupcakes—perfect for classroom parties. I usually get exactly 24 cupcakes with this batter.
- Dairy-Free Option: Use a neutral oil (the recipe already uses oil, so you’re halfway there), replace the buttermilk with almond milk plus 1 tablespoon of lemon juice, and use a dairy-free yogurt or applesauce in place of the sour cream. For the frosting, use vegan butter or shortening.
My Personal Favorite: I once made this as a lemon funfetti cake with a raspberry filling (just spread a thin layer of seedless raspberry jam between the layers). It was for my mom’s birthday, and she still talks about it. Sometimes the best variations come from what you have on hand.
Serving & Storage Suggestions
This cake is best served at room temperature, which allows the buttercream to soften to that perfect, creamy texture. Here’s how to serve and store it:
- Serving: Slice with a sharp, thin-bladed knife. Wipe the blade clean between cuts for neat slices. Serve with a glass of cold milk for the kids or a cup of coffee for the adults. It’s also fantastic with a scoop of vanilla ice cream.
- Storing at Room Temperature: Cover the cake with a cake dome or an inverted bowl. It will keep at room temperature for up to 3 days. The moisture from the sour cream and oil keeps it soft.
- Refrigerating: If you need to store it longer, cover it tightly and refrigerate for up to 5 days. Let it come to room temperature for about 30 minutes before serving—cold cake tastes less flavorful and the frosting gets hard.
- Freezing: This cake freezes beautifully! Wrap the unfrosted cake layers tightly in plastic wrap, then foil, and freeze for up to 3 months. Thaw at room temperature (still wrapped) before frosting. You can also freeze the frosted cake whole. Place it in the freezer unwrapped for an hour to harden the frosting, then wrap it well. Thaw overnight in the refrigerator.
- Flavor Development: Honestly, this cake tastes even better the next day. The flavors meld together, and the texture becomes even more moist. If you can resist eating it all on day one, you’re in for a treat on day two.
Nutritional Information & Benefits
Let’s be honest—this is a celebration cake, not a health food. But here’s a rough estimate and a few bright spots:
- Per Serving (1/12 of cake with frosting): Approximately 480 calories, 22g fat, 68g carbohydrates, 4g protein, 45g sugar. This varies based on your specific ingredients and frosting amount.
- Healthier Highlights: The sour cream or yogurt adds a bit of protein and calcium. Using oil instead of butter reduces saturated fat slightly. And hey—there’s a whole cup of buttermilk in there, which is a good source of B vitamins.
- Dietary Considerations: This recipe contains gluten, dairy, and eggs. For a nut-free version, it’s naturally nut-free as written. For a lower-sugar option, you can reduce the sugar in the cake to ¾ cup (it will be slightly less tender) and use a lighter frosting.
- My Perspective: I believe in balance. This cake is for birthdays, celebrations, and the occasional random Tuesday. It’s made with real ingredients, it brings joy, and it’s worth every single calorie. Enjoy it, share it, and don’t feel guilty. That’s my philosophy.
Conclusion
This homemade funfetti birthday cake is everything you want in a celebration dessert: it’s moist, tender, packed with rainbow sprinkles, and topped with a silky vanilla buttercream that’s pure heaven. It’s also budget-friendly, uses simple ingredients, and comes together in one bowl. Whether you’re making it for your kid’s birthday party, a school bake sale, or just because it’s Wednesday, this recipe delivers every single time.
I love this cake because it reminds me that you don’t need fancy ingredients or professional skills to create something truly special. You just need a little bit of time, a lot of sprinkles, and the willingness to make a mess in the name of joy. So go ahead—preheat that oven, dig out the sprinkles, and make someone’s day. And when you do, come back and tell me about it. I’d love to hear how your cake turned out, what variations you tried, or if your kids fought over the corner pieces too.
Now go bake something that makes you happy!
Frequently Asked Questions
Can I use a boxed cake mix instead of making it from scratch?
Absolutely, but the texture and flavor won’t be the same. This scratch recipe is actually just as easy as a box mix (one bowl, no mixer needed) and tastes so much better. Plus, you have full control over the ingredients—no preservatives or artificial flavors. If you’re in a real pinch, use a white cake mix and add ½ cup of sour cream and ½ cup of sprinkles to the batter. It’s a nice upgrade.
Why did my sprinkles sink to the bottom of the cake?
This usually happens if the batter is too thin or if you used the wrong type of sprinkles. Make sure you’re using jimmies (the long, rod-shaped sprinkles), not nonpareils or sanding sugar. Also, toss the sprinkles in a tablespoon of flour before folding them into the batter—this helps suspend them. And fold gently; overmixing can deflate the batter, making it too thin to hold the sprinkles.
Can I make this cake ahead of time?
Yes! You have a few options. Bake the cake layers up to 2 days in advance, wrap them tightly in plastic wrap, and store at room temperature. Or freeze the unfrosted layers for up to 3 months. The frosting can be made 3 days ahead and stored in the fridge—just let it come to room temperature and re-whip before using. I often bake the cakes on a Friday, frost on Saturday, and serve on Sunday.
How do I get a really flat cake top without doming?
To reduce doming, make sure your oven temperature is accurate (use an oven thermometer). You can also wrap the outside of your cake pans with damp cake strips (or a wet paper towel wrapped in foil). This insulates the pans and helps the cakes bake more evenly. Also, don’t overfill the pans—fill them no more than ⅔ full. If all else fails, just level the domes with a serrated knife after they cool.
Can I use this recipe to make a sheet cake?
Definitely. Pour the batter into a greased 9×13-inch baking pan and bake at 350°F (175°C) for 30-35 minutes, or until a toothpick comes out clean. This is perfect for larger gatherings or if you don’t want to fuss with stacking layers. You’ll need about 1 ½ times the frosting recipe to cover a sheet cake generously.
Pin This Recipe!
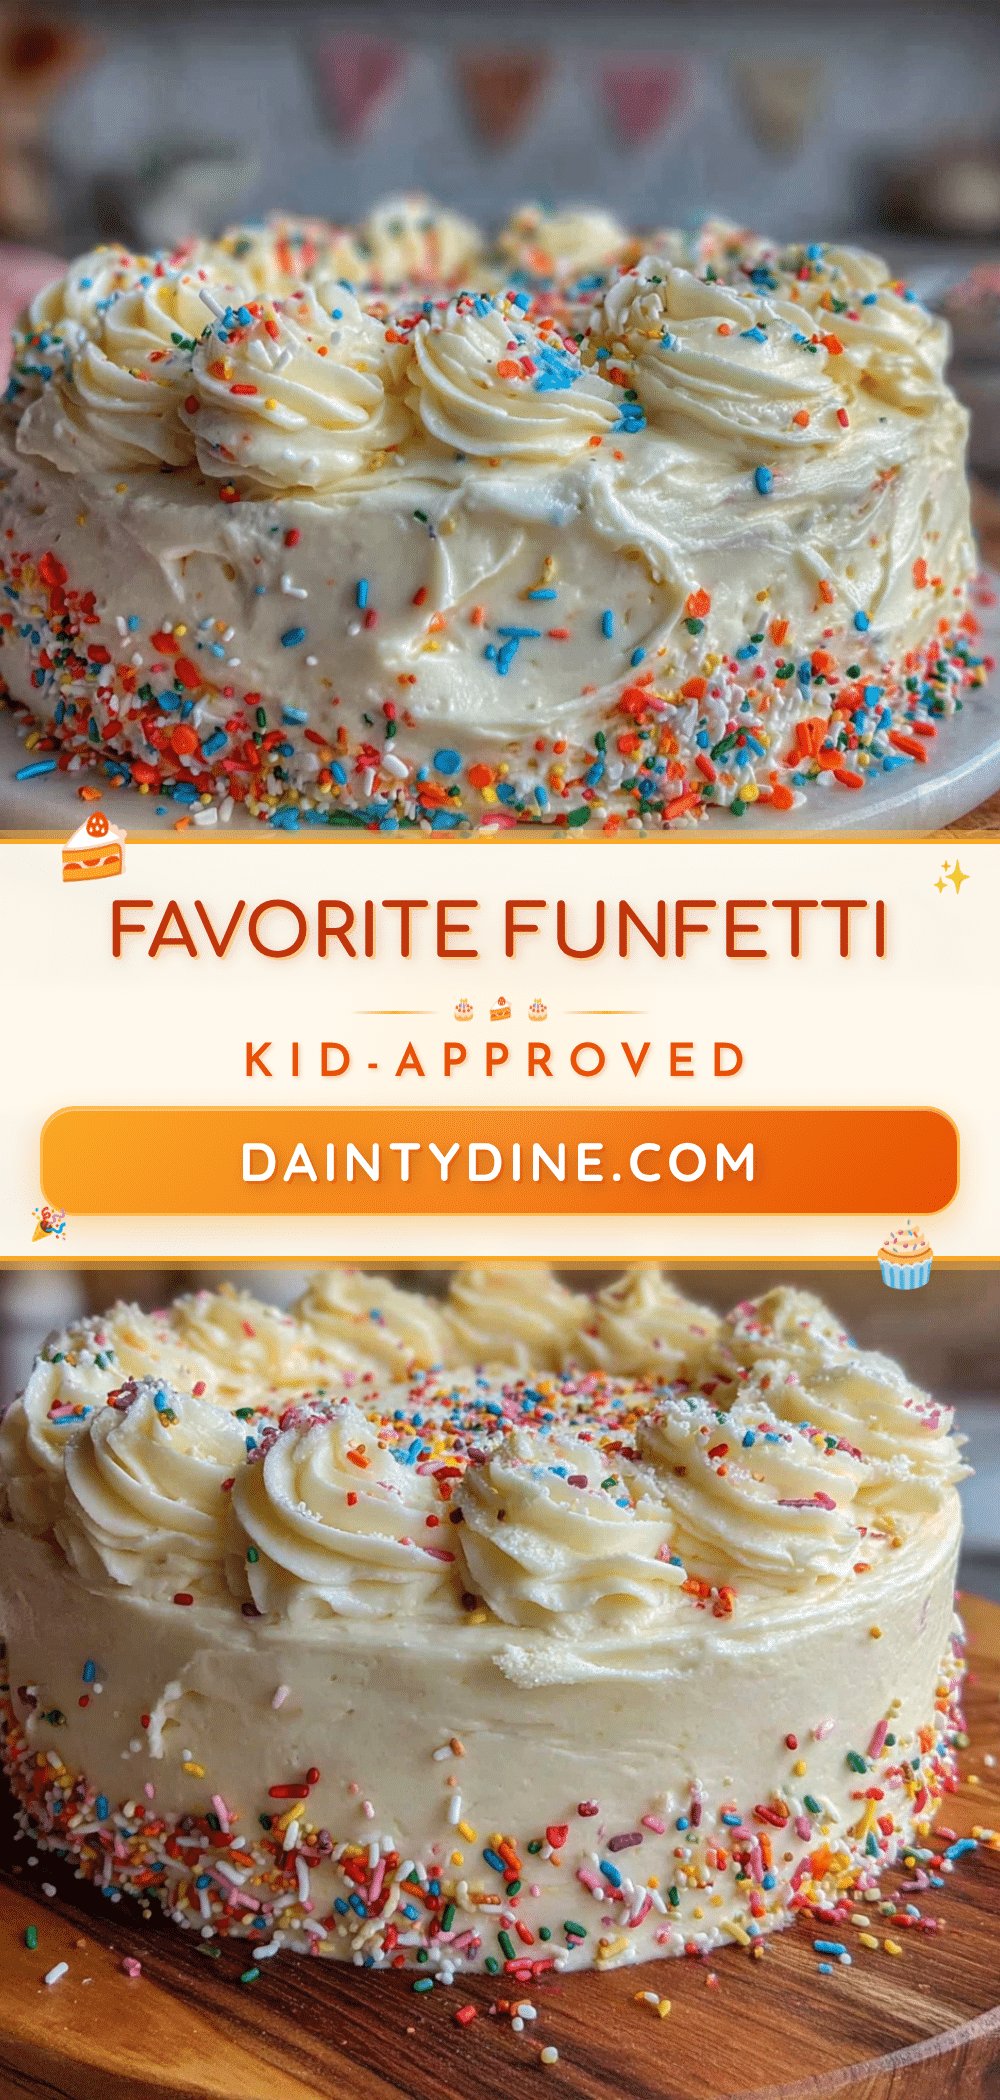
Best Homemade Funfetti Birthday Cake Recipe (Kid-Approved)
This moist, tender funfetti cake is packed with rainbow sprinkles and topped with a silky vanilla buttercream. It’s budget-friendly, uses simple ingredients, and comes together in one bowl—perfect for birthdays, bake sales, or any celebration.
- Prep Time: 20 minutes
- Cook Time: 30 minutes
- Total Time: 50 minutes
- Yield: 12 servings 1x
- Category: Dessert
- Cuisine: American
Ingredients
- 2 ½ cups (312g) all-purpose flour
- 2 teaspoons baking powder
- ½ teaspoon baking soda
- ½ teaspoon salt
- 1 cup (200g) granulated sugar
- ½ cup (120ml) vegetable oil
- 2 large eggs, at room temperature
- 1 tablespoon vanilla extract
- 1 cup (240ml) buttermilk, at room temperature
- ½ cup (120g) sour cream or plain yogurt
- ½ cup (about 80g) rainbow jimmies (sprinkles)
- 1 cup (2 sticks, 226g) unsalted butter, softened
- 4 cups (480g) powdered sugar
- 2 teaspoons vanilla extract
- 3–4 tablespoons milk or heavy cream
- A pinch of salt
Instructions
- Preheat your oven to 350°F (175°C). Grease two 9-inch round cake pans generously with butter or non-stick spray, then line the bottoms with parchment paper circles. Grease the parchment too.
- In a large mixing bowl, whisk together the all-purpose flour, baking powder, baking soda, and salt.
- In the same bowl, make a well in the center. Add the granulated sugar, vegetable oil, eggs, vanilla extract, buttermilk, and sour cream. Whisk until smooth and well combined. Do not overmix.
- Gently fold the rainbow jimmies into the batter using a rubber spatula. Use a light hand to avoid color bleeding.
- Divide the batter evenly between the two prepared pans. Smooth the tops with a spatula. Bake for 25-30 minutes, or until a toothpick inserted into the center comes out clean or with a few moist crumbs.
- Let the cakes cool in the pans on a wire rack for 10 minutes. Then, run a knife around the edges, invert onto the rack, peel off the parchment, and let them cool completely.
- While the cakes cool, make the buttercream. In a medium bowl, beat the softened butter with an electric mixer until creamy and smooth, about 2 minutes. Gradually add the powdered sugar, one cup at a time, beating on low speed. Add the vanilla extract, a pinch of salt, and 2 tablespoons of milk. Beat on medium-high speed for 3-4 minutes until light and fluffy. Add more milk, one tablespoon at a time, until you reach your desired spreading consistency.
- Place one cooled cake layer on your serving plate. Spread about ¾ cup of frosting evenly over the top. Place the second layer on top, upside down. Apply a thin crumb coat of frosting all over the cake. Refrigerate for 15-20 minutes to set. Then, apply the remaining frosting in a thick layer.
- Top with extra rainbow sprinkles while the frosting is still soft. Press them gently into the sides if desired.
Notes
Use jimmies (long rod-shaped sprinkles) to prevent color bleeding. Room temperature ingredients are key for proper emulsification. For a dairy-free version, use almond milk with lemon juice and vegan butter. The cake tastes even better the next day.
Nutrition
- Serving Size: 1 slice (1/12 of cak
- Calories: 480
- Sugar: 45
- Sodium: 320
- Fat: 22
- Saturated Fat: 10
- Carbohydrates: 68
- Fiber: 1
- Protein: 4
Keywords: funfetti cake, birthday cake, homemade cake, sprinkle cake, kid-friendly cake, one-bowl cake, easy cake recipe


