Love this? Save it for later!
Share the inspiration with your friends
I was elbow-deep in a pile of tax receipts—yes, really—when my accountant, Mr. Henderson, started talking about chicken thighs. Mr. Henderson is a man of few words, usually just a nod and a “sign here.” But that afternoon, as he stamped “PAID” on a folder, he said, “You know, the trick to a quick weeknight dinner is getting the skin crispy without any fuss. I just use garlic, parmesan, and a hot pan.” I nearly dropped my calculator. Here was this quiet, number-crunching guy, giving me the blueprint for the easiest, most satisfying chicken dinner I’d ever make. I mean, honestly, I was half-expecting him to hand me a spreadsheet, not a recipe. But there I was, in his tiny office surrounded by file cabinets, jotting down his method on a sticky note. It was the last place I expected to find dinner inspiration, but let me tell you, it was a game-changer.
That sticky note sat on my fridge for a week before I finally tried it. I was skeptical—how good could a recipe that simple be? But I was also tired, hungry, and staring at a pack of chicken thighs I needed to cook. So I gave it a shot. The sizzle when those seasoned thighs hit the hot skillet was the first good sign. Then the smell of garlic and melting parmesan filled the kitchen, and I knew I was onto something. The result? Golden, crispy skin with a cheesy, garlicky crust, and juicy meat underneath. No marinating, no complicated steps, just pure, unapologetic deliciousness. Maybe you’ve been there—standing in your kitchen, wondering how to turn a few basic ingredients into something that actually feels special. This is that recipe.
What makes this dish stick with me isn’t just the flavor, though that’s incredible. It’s the memory of Mr. Henderson, the accountant, sharing his secret weapon for a busy weeknight. It’s the realization that the best recipes often come from the most unexpected places. And it’s the fact that I can get dinner on the table in about 40 minutes with minimal cleanup. These Easy Crispy Garlic Parmesan Chicken Thighs have become my go-to for those nights when I need a win. They’re proof that you don’t need a fancy culinary degree or a pantry full of exotic spices to create something memorable. You just need a good pan, a few simple ingredients, and maybe a chat with your accountant.
Why You’ll Love This Recipe
Let’s face it—weeknights are chaos. Between work, school runs, and everything else, the last thing you need is a complicated recipe that leaves you with a mountain of dishes. These Easy Crispy Garlic Parmesan Chicken Thighs are designed to be your weeknight hero. They come together quickly, use ingredients you probably already have, and deliver restaurant-quality results without the stress. I’ve tested this recipe more times than I can count, tweaking the heat and the timing to get that perfect balance of crispy skin and tender meat. It’s chef-tested and family-approved, which in my book is the highest compliment.
- Quick & Easy: From start to finish, you’re looking at about 40 minutes. Most of that is hands-off cooking time, so you can prep a quick side or just take a breather.
- Simple Ingredients: No fancy grocery trips needed. Chicken thighs, garlic, parmesan, butter, and a few pantry staples—that’s it. You probably have everything right now.
- Perfect for Busy Weeknights: This is the kind of meal that saves the day when you’re tired and hungry. It’s hearty, satisfying, and doesn’t require a lot of active effort.
- Crowd-Pleaser: I’ve served these to picky kids, skeptical in-laws, and dinner guests, and they’ve disappeared every single time. The crispy, cheesy crust is universally loved.
- Unbelievably Delicious: The combination of crispy skin, savory garlic, and nutty parmesan is pure comfort food magic. It’s the kind of dish that makes you close your eyes after the first bite.
What sets this recipe apart is the technique. Instead of a complicated breading or dredging process, we’re creating a simple garlic-parmesan butter that melts over the chicken as it cooks, forming a golden, crispy crust. It’s a smart shortcut that delivers maximum flavor with minimum effort. And because we’re searing the chicken first, you get that satisfying crunch without drying out the meat. This isn’t just another chicken recipe—it’s the one you’ll come back to again and again. Honestly, it’s comfort food reimagined: faster, easier, but with the same soul-soothing satisfaction. Perfect for impressing your family on a Tuesday night without breaking a sweat.
What Ingredients You Will Need
This recipe relies on a handful of simple, wholesome ingredients to create something truly special. The beauty of it is that everything comes together to deliver bold flavor and satisfying texture without any fuss. Most of these are pantry staples, which makes it perfect for those last-minute dinner decisions.
- Chicken Thighs (bone-in, skin-on): About 1.5 to 2 pounds (680-900 grams). The bone and skin are key here—they keep the meat juicy and create that irresistible crispy skin. I prefer organic or free-range chicken for better flavor and texture, but any good-quality thigh will work.
- Garlic (4-5 cloves, minced): Fresh garlic is non-negotiable here. It provides a pungent, aromatic base that infuses the butter and coats the chicken. Pre-minced jarred garlic won’t give you the same punch.
- Parmesan Cheese (1/2 cup, freshly grated): Please, please grate it yourself. Pre-shredded parmesan contains anti-caking agents that prevent it from melting smoothly. Freshly grated parmesan melts into a luscious, nutty crust that’s pure gold.
- Butter (3 tablespoons, unsalted): Butter is the vehicle for all that garlic and parmesan goodness. Unsalted lets you control the salt level, which is important since parmesan is already salty.
- Olive Oil (1 tablespoon): A little olive oil helps the butter brown without burning, giving you a higher smoke point for that perfect sear.
- Salt (1 teaspoon): I use kosher salt for its clean flavor and easy handling. It seasons the chicken evenly and helps draw out moisture for crispier skin.
- Black Pepper (1/2 teaspoon, freshly ground): Freshly ground pepper adds a subtle warmth that complements the garlic and parmesan.
- Paprika (1 teaspoon): This is my little secret. Paprika adds a smoky depth and a beautiful golden color to the crust. Smoked paprika works wonderfully here if you have it.
- Dried Italian Seasoning (1/2 teaspoon): A blend of oregano, basil, and thyme adds an herby note that ties everything together. You can use a mix of dried herbs if you don’t have a pre-made blend.
- Fresh Parsley (for garnish, optional): A sprinkle of fresh parsley right before serving adds a pop of color and a fresh, clean finish. It’s not essential, but it makes the dish look gorgeous.
Substitution Guidance: If you’re out of chicken thighs, bone-in, skin-on chicken breasts or drumsticks will work, but adjust the cooking time accordingly. For a dairy-free version, you can use a high-quality vegan butter and nutritional yeast in place of parmesan (though the texture will be slightly different). And if you don’t have paprika, a pinch of cayenne or chili powder can add a different kind of warmth. I’ve tried it with a mix of garlic powder and onion powder in a pinch, and it was still delicious—just not quite as complex.
Equipment Needed
You don’t need a lot of fancy gadgets for this recipe, which is part of its charm. Here’s what you’ll need to get the job done:
- Large Oven-Safe Skillet (12-inch): This is your main tool. A cast-iron skillet is ideal because it holds heat beautifully and gives you that perfect sear. But any heavy-bottomed, oven-safe skillet will work. I use my trusty Lodge cast iron—it’s been with me for years and only gets better with age.
- Tongs: For flipping the chicken without piercing the skin. A good pair of tongs is worth its weight in gold in the kitchen. I prefer the ones with silicone tips for a better grip.
- Small Bowl: For mixing the garlic, parmesan, butter, and seasonings together. Nothing fancy needed—any small bowl will do.
- Cutting Board and Chef’s Knife: For mincing the garlic and chopping the parsley. A sharp knife makes all the difference here.
- Paper Towels: For patting the chicken dry. This step is crucial for crispy skin, so don’t skip it.
- Meat Thermometer (optional but recommended): To ensure the chicken reaches an internal temperature of 165°F (74°C). It takes the guesswork out of cooking and guarantees juicy meat every time.
If you don’t have an oven-safe skillet, you can sear the chicken in a regular skillet and then transfer it to a baking dish for the oven. Just make sure the baking dish is oven-safe and large enough to hold the chicken in a single layer. I’ve done this in a pinch, and it works fine—you just lose a bit of that beautiful fond (the browned bits) that develops in the skillet. Budget-wise, don’t feel you need to buy a fancy cast-iron pan. A well-seasoned, affordable one from a thrift store can be a fantastic find. Just give it a good scrub and re-season it before using.
Preparation Method
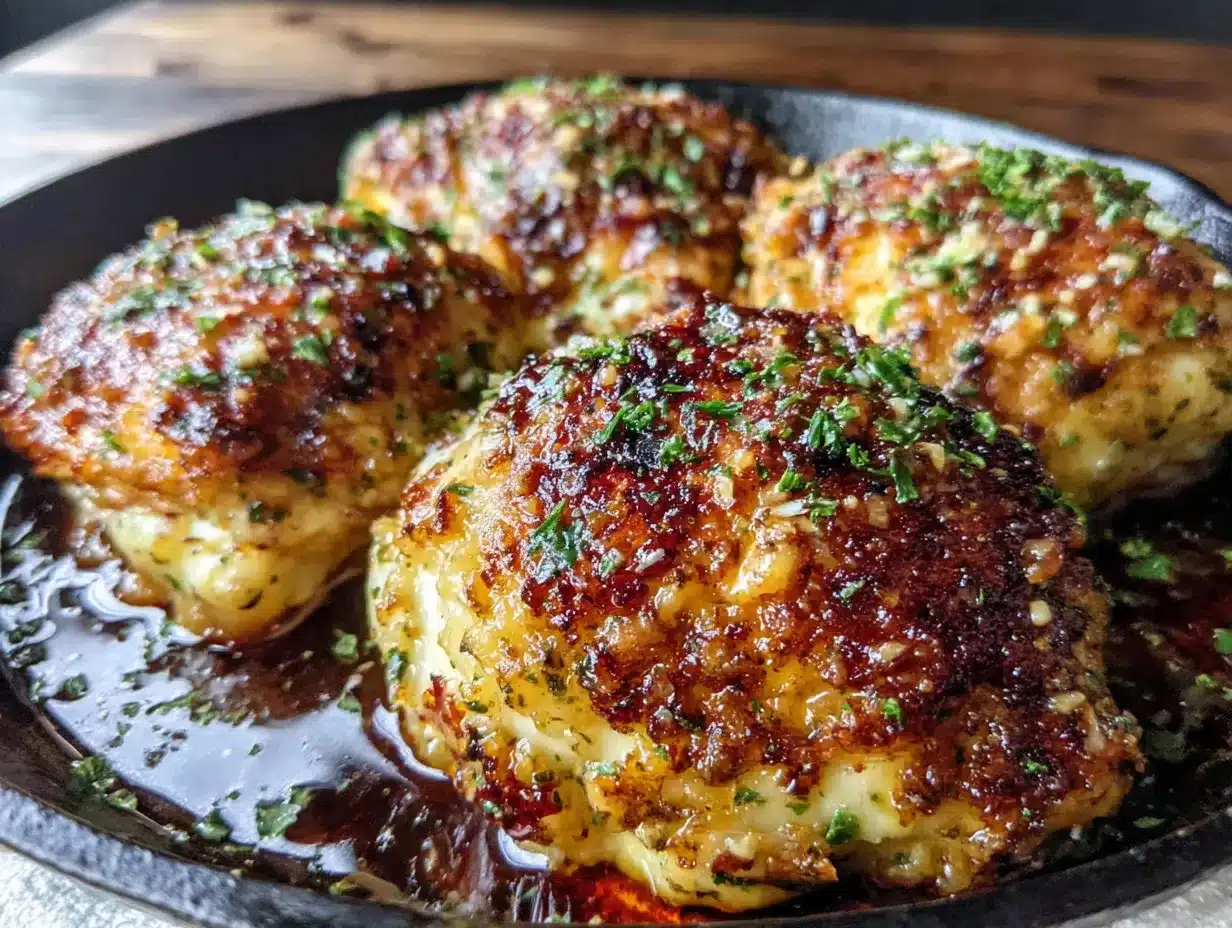
Alright, let’s get cooking. This method is straightforward, but each step is designed to build flavor and texture. Follow along, and you’ll have crispy, juicy chicken thighs that taste like you spent hours in the kitchen.
- Preheat and Prep: Preheat your oven to 400°F (200°C). While it’s heating, take your chicken thighs out of the fridge and pat them completely dry with paper towels. This is the single most important step for crispy skin. Moisture is the enemy of crunch! Let them sit on a plate while you prepare the garlic-parmesan butter.
- Make the Garlic-Parmesan Butter: In a small bowl, combine the 3 tablespoons of softened unsalted butter, 4-5 minced garlic cloves, 1/2 cup of freshly grated parmesan cheese, 1 teaspoon of paprika, 1/2 teaspoon of dried Italian seasoning, and a pinch of black pepper. Mash it all together with a fork until it forms a rough paste. It doesn’t have to be perfectly smooth—little bits of butter and cheese are totally fine. Set it aside.
- Season the Chicken: Season the dried chicken thighs generously on both sides with 1 teaspoon of salt and a few grinds of black pepper. Don’t be shy—the salt helps the skin crisp up and seasons the meat all the way through.
- Heat the Skillet: Place your large oven-safe skillet over medium-high heat and add 1 tablespoon of olive oil. Let it heat up until the oil shimmers—about 2 minutes. You want the pan hot enough to get a good sear but not so hot that the butter burns later.
- Sear the Chicken: Carefully place the chicken thighs skin-side down in the hot skillet. They should sizzle immediately. Let them cook undisturbed for 5-6 minutes, until the skin is deep golden brown and crispy. Don’t move them around—let the heat do its job. Use your tongs to peek under one thigh to check the color. You’re looking for a rich, amber-brown crust.
- Flip and Top: Flip the chicken thighs over using your tongs. The skin side should be beautifully browned. Turn the heat down to low. Now, take your garlic-parmesan butter mixture and spoon it evenly over the top of each chicken thigh, spreading it gently with the back of the spoon. Don’t worry if some falls into the pan—that’s just bonus flavor.
- Bake to Perfection: Transfer the skillet to the preheated oven. Bake for 18-22 minutes, or until the chicken reaches an internal temperature of 165°F (74°C) when tested with a meat thermometer inserted into the thickest part (without touching the bone). The butter will melt and bubble, creating a gorgeous, cheesy, garlicky crust. The smell at this point is absolutely intoxicating.
- Rest and Serve: Remove the skillet from the oven (use oven mitts—the handle is hot!). Let the chicken rest in the pan for 5 minutes. This allows the juices to redistribute, ensuring every bite is tender and moist. Sprinkle with fresh parsley if you’re using it, and serve immediately.
Troubleshooting Tips: If your skin isn’t browning during the sear, your pan might not be hot enough. Give it another minute or two before adding the chicken. If the garlic-parmesan butter starts to burn in the pan while baking, your oven might run hot. Check the chicken at the 15-minute mark. And if you’re worried about sticking, make sure your skillet is well-seasoned or has a good non-stick surface. A little patience goes a long way here.
Cooking Tips & Techniques
Over the years, I’ve learned a few things about getting chicken thighs just right. Here are my best tips, born from both successes and a few spectacular failures.
The Drying Secret: I cannot stress this enough—pat those chicken thighs dry. I once skipped this step because I was in a hurry, and the skin turned out rubbery and sad. The moisture creates steam, which prevents browning. Take the extra 30 seconds. Your taste buds will thank you.
Room Temperature Matters: If you have time, let the seasoned chicken sit at room temperature for 15-20 minutes before searing. This helps it cook more evenly. Cold chicken hitting a hot pan can cause the skin to seize up and not brown as well. I learned this the hard way when I pulled chicken straight from the fridge and ended up with a pale, uneven crust.
Don’t Crowd the Pan: If you’re making a double batch, sear the chicken in batches. Crowding the pan lowers the temperature and leads to steaming instead of searing. Give each thigh a little breathing room. Trust me, it’s worth the extra few minutes.
The Butter Balancing Act: Butter adds incredible flavor, but it can burn if the heat is too high. That’s why we sear on medium-high, then lower the heat before adding the butter mixture. This way, you get the browning without the bitterness of burnt garlic. I learned this after a particularly smoky incident that set off the smoke alarm. My neighbor still jokes about it.
Timing is Everything: Use a meat thermometer. It’s the only way to guarantee perfectly cooked chicken every time. Chicken thighs are forgiving, but they can still dry out if overcooked. Aim for 165°F (74°C) and you’ll have juicy, tender meat. I used to guess by cutting into the thickest part, but that lets the juices escape. The thermometer is a game-changer.
Multitasking Like a Pro: While the chicken is searing, you can prep a quick side dish—like steamed broccoli or a simple salad. While it’s baking, set the table or pour yourself a glass of wine. This recipe is designed to let you relax while it does the heavy lifting.
Variations & Adaptations
One of the best things about this recipe is how easily it adapts to different tastes and dietary needs. Here are a few variations I’ve tried and loved:
- Spicy Kick: Add 1/2 teaspoon of red pepper flakes to the garlic-parmesan butter for a subtle heat that cuts through the richness. I did this on a whim one night, and it was a huge hit. The warmth lingers just enough to keep things interesting.
- Lemon-Herb Twist: Swap the Italian seasoning for 1 teaspoon of fresh thyme or rosemary, and add the zest of one lemon to the butter mixture. Squeeze a little lemon juice over the finished chicken for a bright, fresh finish. This version is perfect for spring or summer dinners.
- Gluten-Free Option: This recipe is naturally gluten-free, so no changes needed! Just double-check that your Italian seasoning blend doesn’t contain any wheat-based additives. Most are safe, but it’s always good to verify.
- Dairy-Free Adaptation: Use a high-quality vegan butter (like Miyoko’s) and replace the parmesan with 3 tablespoons of nutritional yeast mixed with 1/4 teaspoon of salt. The texture won’t be exactly the same, but the flavor is surprisingly close. I tested this for a friend with a dairy allergy, and she gave it two thumbs up.
- Air Fryer Method: For an even faster version, sear the chicken skin-side down in a hot skillet for 3-4 minutes, then transfer to an air fryer basket. Top with the garlic-parmesan butter and air fry at 375°F (190°C) for 12-15 minutes, until the internal temperature reaches 165°F (74°C). The skin gets incredibly crispy this way.
I’ve also experimented with different cheeses. A mix of parmesan and pecorino romano adds a sharper, saltier edge. And once, when I was out of parmesan, I used shredded asiago—it was deliciously nutty. Don’t be afraid to play around with what you have on hand. Cooking is about making it your own.
Serving & Storage Suggestions
These chicken thighs are incredibly versatile when it comes to serving. Here’s how I like to enjoy them, along with tips for keeping them just as good the next day.
Serving Temperature and Presentation: Serve the chicken hot from the oven, straight from the skillet to the table for a rustic, family-style presentation. The crispy skin is at its best within the first 15 minutes of coming out of the oven. Garnish with a sprinkle of fresh parsley and maybe a few extra shavings of parmesan for a restaurant-worthy look.
Complementary Dishes: These thighs pair beautifully with simple sides that let them shine. I love serving them with creamy mashed potatoes, roasted asparagus, or a crisp green salad with a lemon vinaigrette. For a low-carb option, try cauliflower mash or roasted Brussels sprouts. And if you’re feeling indulgent, a side of buttery egg noodles is pure comfort.
Storage Instructions: Leftover chicken thighs can be stored in an airtight container in the refrigerator for up to 3-4 days. The skin will soften slightly, but the flavor will still be incredible. I actually love the leftovers cold, sliced over a salad for lunch the next day.
Reheating Methods: To bring back some of that crispy skin, reheat the thighs in a 375°F (190°C) oven for 10-12 minutes, or in an air fryer at 350°F (175°C) for 5-7 minutes. Avoid the microwave—it will make the skin rubbery. If you’re in a hurry, you can reheat them in a hot skillet with a tiny bit of oil, skin-side down, for 2-3 minutes.
Freezer Instructions: These chicken thighs freeze beautifully. Let them cool completely, then wrap each thigh individually in plastic wrap and place them in a freezer-safe bag. They’ll keep for up to 3 months. To reheat, thaw overnight in the refrigerator and then follow the oven or air fryer reheating instructions above. The flavors actually deepen a bit after freezing, which is a nice bonus.
Flavor Development: Honestly, these chicken thighs taste even better the next day. The garlic and parmesan have time to meld together, creating an even richer flavor. I’ve been known to make a double batch just for the leftovers. They’re fantastic cold, sliced over a salad, or shredded into a quick pasta dish.
Nutritional Information & Benefits
While this recipe is undeniably indulgent, it also offers some surprising nutritional benefits. Here’s a rough breakdown per serving (based on two chicken thighs):
Estimated Nutritional Values (per serving):
- Calories: 450-500
- Protein: 35-40g
- Fat: 30-35g (mostly from healthy chicken fat and butter)
- Carbohydrates: 2-3g
- Fiber: 0g
- Sugar: 0g
Health Benefits of Key Ingredients: Chicken thighs are a fantastic source of high-quality protein, which is essential for muscle repair and keeping you full and satisfied. They also provide B vitamins, particularly B6 and B12, which support energy metabolism and brain health. Garlic is known for its immune-boosting properties and anti-inflammatory effects. And parmesan cheese, while rich, is a good source of calcium and protein. Plus, the butter provides fat-soluble vitamins A, D, E, and K, which are important for overall health.
Dietary Considerations: This recipe is naturally low-carb and keto-friendly, with only 2-3 grams of carbs per serving. It’s also gluten-free and nut-free, making it suitable for many dietary restrictions. However, it is not dairy-free (due to the butter and parmesan) and is relatively high in saturated fat, so enjoy it in moderation as part of a balanced diet.
Potential Allergens: Milk (from butter and parmesan). If you’re avoiding dairy, check the variations section above for a dairy-free adaptation.
My Personal Wellness Perspective: I believe in balance. This recipe is a celebration food for me—something I make when I want to feel comforted and satisfied. It’s not an everyday meal, but it’s a wonderful way to enjoy real, whole ingredients without guilt. Pair it with a big green salad or some roasted vegetables, and you’ve got a meal that nourishes both body and soul.
Conclusion
So there you have it—Easy Crispy Garlic Parmesan Chicken Thighs that come together in about 40 minutes, using simple ingredients and a technique that anyone can master. This recipe has become a staple in my kitchen, and I have a feeling it will become one in yours too. It’s the kind of dish that makes you look like a hero on a busy weeknight, without all the stress and mess.
I encourage you to make this recipe your own. Play with the seasonings, try different cheeses, or add a squeeze of lemon. Cooking is about experimentation and joy, and this chicken is the perfect canvas for your creativity. Honestly, every time I make it, I think of Mr. Henderson and his unexpected cooking advice. It’s a reminder that the best recipes often come from the most surprising places.
Now I want to hear from you! Have you tried this recipe? Did you add your own twist? Drop a comment below and let me know how it turned out. Share your photos on Pinterest and tag me—I love seeing your creations. And if you have a friend who’s always looking for easy weeknight dinners, send them this recipe. Trust me, they’ll thank you. Until next time, happy cooking!
Frequently Asked Questions
Can I use boneless, skinless chicken thighs for this recipe?
You can, but you’ll miss out on the crispy skin and the juiciness that the bone provides. The cooking time will also be shorter—about 15-18 minutes in the oven. If you go this route, I recommend searing them well and keeping a close eye on the internal temperature to prevent drying out.
How do I keep the garlic from burning?
The key is to lower the heat before adding the garlic-parmesan butter. After searing the chicken, turn the heat down to low before spooning the butter mixture over the top. This way, the garlic cooks gently in the oven without burning. If your oven runs hot, check the chicken at the 15-minute mark.
Can I prepare this recipe ahead of time?
Absolutely! You can make the garlic-parmesan butter up to 3 days in advance and store it in the fridge. You can also season the chicken a few hours ahead and keep it in the fridge. When you’re ready to cook, just let the chicken sit at room temperature for 15 minutes before searing. The actual cooking should be done fresh for the best texture.
What’s the best way to reheat leftovers without losing the crispiness?
The oven or air fryer is your best bet. Reheat in a 375°F (190°C) oven for 10-12 minutes, or in an air fryer at 350°F (175°C) for 5-7 minutes. Avoid the microwave—it will make the skin soft and rubbery. If you’re in a real hurry, a hot skillet with a tiny bit of oil works well too.
Can I use chicken breasts instead of thighs?
Yes, but bone-in, skin-on chicken breasts will work best. They’ll need a slightly longer cooking time—about 25-30 minutes in the oven—until they reach 165°F (74°C). Keep in mind that breasts are leaner, so they’re less forgiving if overcooked. A meat thermometer is essential here. The crispy skin will still be fantastic!
Pin This Recipe!
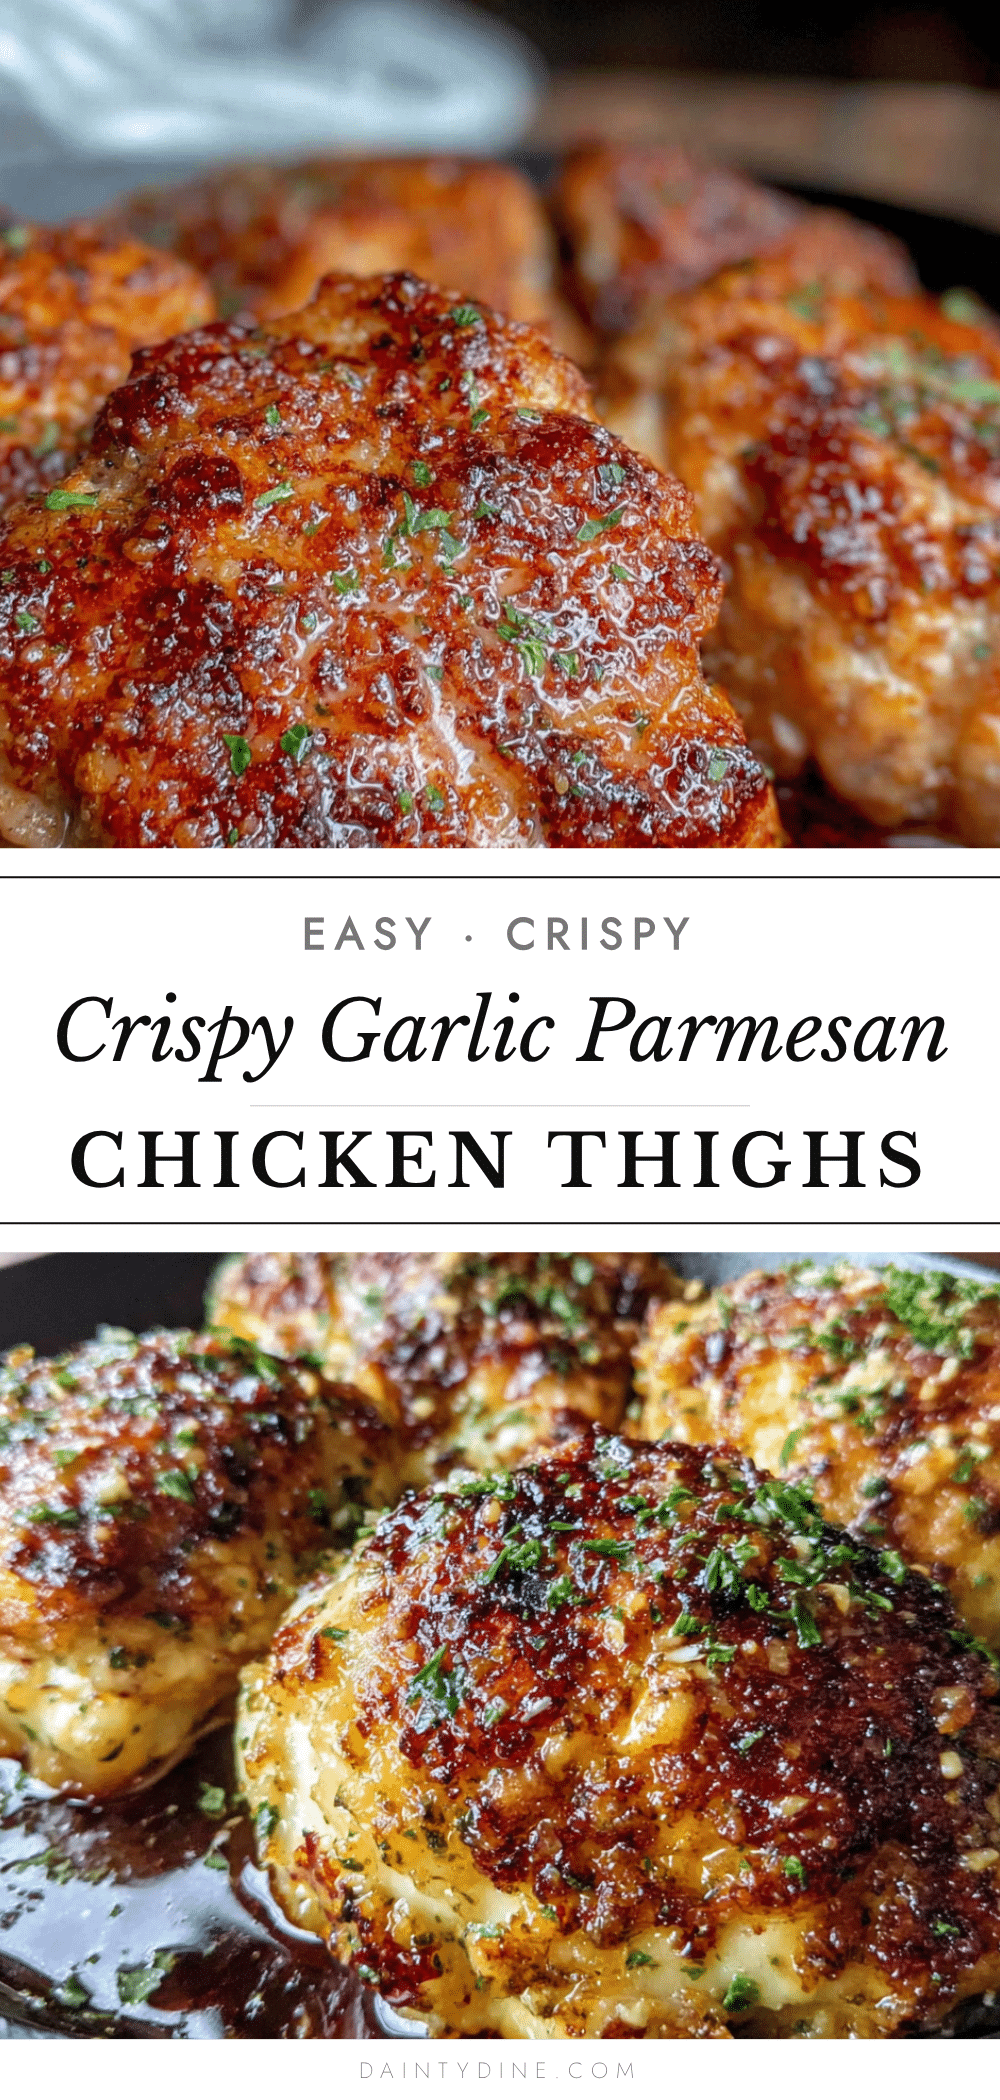
Easy Crispy Garlic Parmesan Chicken Thighs

Golden, crispy chicken thighs with a cheesy, garlicky crust, ready in about 40 minutes. A simple, no-fuss weeknight dinner that delivers restaurant-quality results with minimal effort.
- Prep Time: 10 minutes
- Cook Time: 30 minutes
- Total Time: 40 minutes
- Yield: 4 servings 1x
- Category: Main Course
- Cuisine: American
Ingredients
- 1.5 to 2 pounds (680–900 grams) bone-in, skin-on chicken thighs
- 4–5 cloves garlic, minced
- 1/2 cup freshly grated Parmesan cheese
- 3 tablespoons unsalted butter, softened
- 1 tablespoon olive oil
- 1 teaspoon kosher salt
- 1/2 teaspoon freshly ground black pepper
- 1 teaspoon paprika
- 1/2 teaspoon dried Italian seasoning
- Fresh parsley for garnish (optional)
Instructions
- Preheat your oven to 400°F (200°C). Pat the chicken thighs completely dry with paper towels.
- In a small bowl, combine the softened butter, minced garlic, grated Parmesan, paprika, Italian seasoning, and a pinch of black pepper. Mash together with a fork until it forms a rough paste.
- Season the dried chicken thighs generously on both sides with salt and black pepper.
- Place a large oven-safe skillet over medium-high heat and add the olive oil. Heat until the oil shimmers, about 2 minutes.
- Carefully place the chicken thighs skin-side down in the hot skillet. Cook undisturbed for 5-6 minutes, until the skin is deep golden brown and crispy.
- Flip the chicken thighs over using tongs. Reduce the heat to low. Spoon the garlic-Parmesan butter mixture evenly over the top of each chicken thigh.
- Transfer the skillet to the preheated oven. Bake for 18-22 minutes, or until the chicken reaches an internal temperature of 165°F (74°C) when tested with a meat thermometer inserted into the thickest part without touching the bone.
- Remove the skillet from the oven and let the chicken rest in the pan for 5 minutes. Sprinkle with fresh parsley if desired, and serve immediately.
Notes
Pat the chicken thighs completely dry for the crispiest skin. Let the seasoned chicken sit at room temperature for 15-20 minutes before searing for more even cooking. Don’t crowd the pan when searing; work in batches if needed. Use a meat thermometer to ensure perfectly cooked chicken every time. Leftovers can be stored in an airtight container in the refrigerator for up to 3-4 days. Reheat in a 375°F oven for 10-12 minutes or in an air fryer at 350°F for 5-7 minutes to restore crispiness.
Nutrition
- Serving Size: 2 chicken thighs
- Calories: 475
- Sodium: 780
- Fat: 32
- Saturated Fat: 12
- Carbohydrates: 2
- Protein: 38
Keywords: crispy chicken thighs, garlic parmesan chicken, easy weeknight dinner, baked chicken thighs, crispy skin chicken


