Love this? Save it for later!
Share the inspiration with your friends
It was 10:47 PM on a drizzly Wednesday in late October, and I had a very specific craving for that classic pumpkin pie feeling — the warm spice, the soft custard — but not the commitment of a full 9-inch pie. I didn’t have a proper pie dish clean, honestly, my kitchen was a wreck from testing a soup recipe earlier. But I had a jumbo muffin tin, a single can of pumpkin puree I’d stashed for “emergencies,” and this wild idea that maybe, just maybe, smaller portions meant I could justify eating three. I was tired, my hands smelled like onions, and I was absolutely convinced this late-night experiment was either going to be genius or a total flop. Maybe you’ve been there — standing in a dim kitchen, spatula in hand, betting on a hunch. What came out of the oven that night were these little golden cups of pure comfort. They were lighter than I expected, cozier than a full-sized slice, and somehow perfect for sharing. That’s the thing about a good idea at a weird hour — it sticks with you. These mini pumpkin pies became my go-to for Friendsgiving, and honestly, they might just change your holiday dessert game too.
Why You’ll Love This Recipe
These aren’t just mini pies — they are the result of several seasons of trial and error in my own kitchen. I wanted something that felt indulgent but didn’t leave you in a sugar coma, something that looked impressive but was secretly simple to pull off. Here is why they have become my most-requested Friendsgiving contribution:
- Quick & Easy: From start to finish, you are looking at about 45 minutes. The filling comes together in one bowl, and the individual crusts press right into a muffin tin — no rolling pins or pie weights required.
- Simple Ingredients: You likely have everything in your pantry right now. Canned pumpkin, eggs, a little cream, and your favorite pie spices. The crust uses basic butter and flour, but I have a trick to keep it light and flaky.
- Perfect for Friendsgiving: Individual portions mean no slicing, no fighting over the corner piece, and everyone gets their own little pie. It’s the ultimate low-stress dessert for a crowd.
- Crowd-Pleaser: I have brought these to potlucks where they vanished in minutes. Kids love the size, and adults appreciate not having to commit to a giant slice.
- Unbelievably Delicious: The texture is what gets me every time. The filling is silky, not too dense, with a warm spice blend that makes the whole kitchen smell like autumn. The crust stays tender and buttery, cradling that creamy center perfectly.
This recipe is different because I use a touch of Greek yogurt in the filling to lighten it up — a trick I picked up from a pastry chef friend. It adds a subtle tang that balances the sweetness and keeps the texture from getting heavy. It is comfort food reimagined: lighter, faster, but with the same soul-soothing satisfaction that makes you close your eyes after the first bite.
What Ingredients You Will Need
This recipe uses simple, wholesome ingredients to deliver that classic pumpkin pie flavor without the fuss. Most of these are pantry staples, especially if you do any fall baking. Here is what you will need and why each one matters:
For the Crust
- All-purpose flour, 1 ¼ cups (150g) — Provides the structure. I prefer King Arthur Flour for consistent results, but any brand works.
- Cold unsalted butter, ½ cup (113g), cut into small cubes — The key to a flaky crust. Keep it very cold until you use it.
- Ice water, 3-4 tablespoons (45-60ml) — Just enough to bring the dough together. Don’t overdo it.
- Salt, ¼ teaspoon — Enhances the flavor and balances the sweet filling.
- Granulated sugar, 1 tablespoon (12g) — Adds a hint of sweetness to the crust.
For the Filling
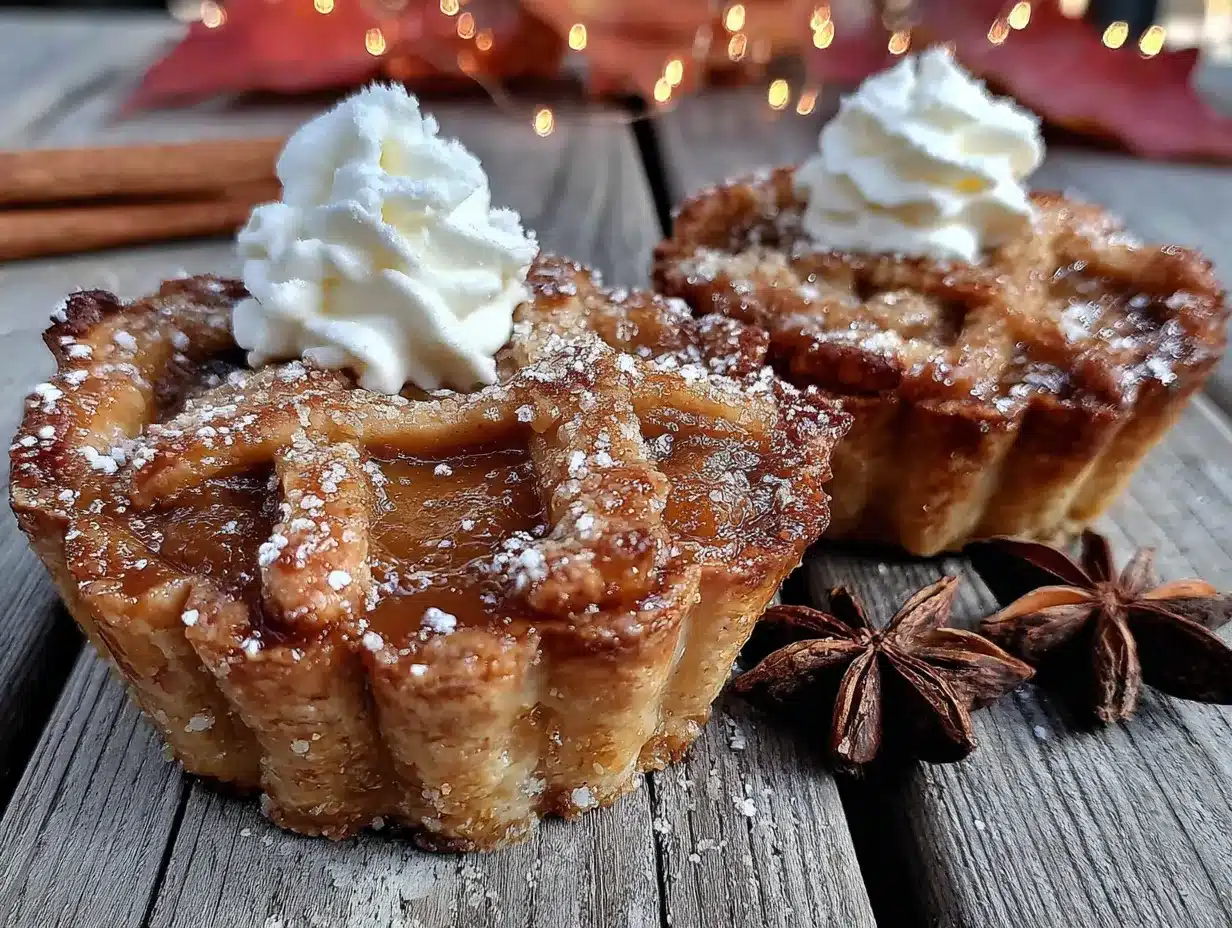
- Pumpkin puree, 1 can (15 oz or 425g) — Not pumpkin pie filling. Look for 100% pure pumpkin. Libby’s is my go-to for its consistent texture.
- Large eggs, 2 — Room temperature works best for a smooth, cohesive filling.
- Plain Greek yogurt, ¼ cup (60g) — This is my secret ingredient. It adds creaminess and a light tang, replacing some of the heavy cream. Use full-fat for the best texture.
- Heavy cream or half-and-half, ¼ cup (60ml) — Adds richness. For a lighter version, use all half-and-half.
- Brown sugar, packed, ½ cup (100g) — Adds deep, molasses-like sweetness. Light or dark brown sugar both work.
- Granulated sugar, ¼ cup (50g) — Balances the brown sugar and helps with texture.
- Pumpkin pie spice, 2 teaspoons — You can use store-bought or make your own blend (see note below).
- Vanilla extract, 1 teaspoon — Enhances the warm spices.
- Salt, ¼ teaspoon — Essential for balancing flavors.
Note on Pumpkin Pie Spice: If you want to make your own, mix 1 teaspoon cinnamon, ½ teaspoon ginger, ¼ teaspoon nutmeg, ¼ teaspoon allspice, and a pinch of cloves. I often do this because I can adjust the ginger up a little — I love that extra warmth.
Equipment Needed
You do not need a fancy kitchen to pull these off. Here is what you will need:
- Standard 12-cup muffin tin — This is non-negotiable. It gives the pies their perfect individual shape.
- Mixing bowls — One medium for the crust, one large for the filling.
- Pastry cutter or two forks — For cutting the butter into the flour. You can also use a food processor if you are in a hurry.
- Rolling pin — Optional. I often just press the dough into the muffin cups with my fingers.
- Measuring cups and spoons — Precision matters in baking.
- Whisk — For a smooth filling.
- Cooling rack — Lets the pies cool evenly so the bottoms don’t get soggy.
Budget Tip: If you do not have a pastry cutter, two knives work fine. Just cut the butter into the flour in a crisscross motion until it looks like coarse meal. I used that method for years before I bought a proper cutter.
Preparation Method
Let’s get baking. This process is straightforward, but I have added some notes from my own kitchen mishaps to help you avoid them.
- Preheat your oven to 375°F (190°C). Position a rack in the center of the oven. While it heats, start your crust.
- Make the crust dough. In a medium bowl, whisk together the flour, sugar, and salt. Add the cold butter cubes. Using a pastry cutter or your fingertips, work the butter into the flour until the mixture looks like coarse sand with some pea-sized butter pieces remaining. This is crucial — those little butter lumps create steam pockets that make the crust flaky. Drizzle in 3 tablespoons of ice water and stir with a fork. If the dough seems dry, add the remaining tablespoon. It should just hold together when squeezed.
- Shape the crusts. Divide the dough into 12 equal portions (about 1.5 tablespoons each). Press each portion into the bottom and up the sides of a muffin cup. Don’t worry about perfection — a rustic edge is part of the charm. Use your thumb to create a slight rim. Place the muffin tin in the refrigerator while you make the filling. This chills the butter again, which helps prevent a tough crust.
- Prepare the filling. In a large bowl, whisk together the pumpkin puree, eggs, Greek yogurt, and heavy cream until smooth. Add the brown sugar, granulated sugar, pumpkin pie spice, vanilla, and salt. Whisk until everything is fully combined and the mixture is silky. Taste a tiny bit — it should be well-spiced and not overly sweet. If it tastes flat, add a pinch more salt.
- Fill the crusts. Remove the muffin tin from the fridge. Use a small ladle or a measuring cup with a spout to divide the filling evenly among the 12 cups. Fill them almost to the top — the filling will puff up slightly but won’t overflow if you leave a tiny gap (about ⅛ inch).
- Bake the pies. Place the tin in the preheated oven. Bake for 18-22 minutes, or until the edges of the filling are set and the centers jiggle just slightly when you gently shake the pan. The crusts should be golden brown. My first batch came out overbaked because I waited for the centers to be completely firm — they set further as they cool.
- Cool completely. Transfer the muffin tin to a wire rack and let the pies cool in the pan for 10 minutes. Then, carefully run a thin knife around the edge of each pie to loosen it. Lift them out and place them directly on the cooling rack. Let them cool completely, about 30 minutes. This is the hardest part, I know. But they need this time to set properly.
Sensory Cue: When the pies are done, your kitchen will smell like a cozy autumn day — warm cinnamon, nutmeg, and a hint of butter. The tops should look slightly matte, not wet.
Cooking Tips & Techniques
I have made these mini pies more times than I can count, and I have learned a few things the hard way. Here are my best tips:
- Keep everything cold for the crust. This is the number one rule for a flaky crust. If your butter softens, pop the dough in the fridge for 10 minutes. I once tried to rush this step on a warm day, and the crust turned out tough and greasy. Never again.
- Do not overmix the filling. Whisk until just combined. Over-whisking incorporates too much air, which can cause the filling to puff up too much and then crack as it cools. You want a smooth, dense custard.
- Use a light hand with the crust. When pressing the dough into the muffin cups, don’t compress it too much. You want it to be even but not packed tight. Think of it like molding a sandcastle — gentle pressure is best.
- Check for doneness early. Ovens vary wildly. Start checking your pies at 16 minutes. The edges should be set, and the center should have a slight wobble, like Jell-O. If you insert a toothpick near the center, it should come out mostly clean with a few moist crumbs.
- Cool completely before serving. I know it is tempting to dig in while they are warm, but the filling needs time to set. Warm pies will be runny and the crust might crumble. Patience pays off here.
Variations & Adaptations
One of the best things about this recipe is how easy it is to adapt. Here are some variations I have tried and loved:
- Gluten-Free Version: Substitute the all-purpose flour with a 1:1 gluten-free baking blend. I have used Bob’s Red Mill with great success. Add an extra tablespoon of ice water as gluten-free flours can be more absorbent.
- Dairy-Free Option: Use a high-quality vegan butter (I like Miyoko’s) for the crust. Replace the Greek yogurt with a plain dairy-free yogurt (coconut or soy work well) and use full-fat coconut cream instead of heavy cream. The texture will be slightly different but still delicious.
- Spice It Up: Add a pinch of cayenne pepper or a teaspoon of orange zest to the filling for a surprising twist. I tried this last year for a Friendsgiving with a “spicy” theme, and it was a hit. The orange zest brightens the pumpkin flavor beautifully.
- Mini Pecan Pumpkin Pies: Before baking, sprinkle a few chopped pecans on top of each pie. They toast as the pies bake, adding a lovely crunch. Drizzle with a little maple syrup after cooling for extra decadence.
- No-Crust Option: For a lighter version, skip the crust entirely. Grease the muffin tin well and pour the filling directly in. Bake for 12-15 minutes. These are essentially crustless mini pumpkin custards — perfect for a low-carb or gluten-free diet.
Serving & Storage Suggestions
These mini pies are incredibly versatile when it comes to serving. Here is how I like to present and store them:
- Serving Temperature: They are best served at room temperature or slightly chilled. If you refrigerate them, let them sit out for 15 minutes before serving to take the chill off and let the flavors come alive.
- Presentation Ideas: Arrange them on a large wooden board or a simple white platter. Add a dollop of lightly sweetened whipped cream or a spoonful of Greek yogurt on each one. Dust with a little extra cinnamon or a sprinkle of flaky sea salt for contrast. For Friendsgiving, I sometimes place a few small sage leaves on the board for a pop of green.
- Complementary Dishes: These pies pair beautifully with a cup of hot apple cider or a spiced chai latte. For a full dessert spread, serve them alongside a plate of crispy garlic chicken for a savory-sweet balance, or with a simple apple crisp.
- Storage Instructions: Store leftover pies in an airtight container in the refrigerator for up to 4 days. Place a sheet of wax paper between layers to prevent sticking. The flavors actually meld and deepen after a day in the fridge — they might taste even better the next day.
- Freezing Instructions: These freeze beautifully. Place the cooled pies on a baking sheet and freeze until solid, about 2 hours. Then transfer them to a freezer-safe bag or container. They will keep for up to 2 months. To serve, thaw in the refrigerator overnight and bring to room temperature before serving.
Reheating Tip: If you prefer them warm, reheat individual pies in a 300°F (150°C) oven for 5-7 minutes. Do not use the microwave — it will make the crust soggy and the filling rubbery.
Nutritional Information & Benefits
While these are still a dessert, using Greek yogurt and a modest amount of sugar makes them a lighter option compared to traditional pumpkin pie. Here is the estimated nutritional breakdown per mini pie (based on 12 servings):
- Calories: ~185 per pie
- Fat: 9g (5g saturated)
- Carbohydrates: 23g (11g sugar)
- Protein: 4g
- Fiber: 2g
Health Benefits: Pumpkin is packed with vitamin A (from beta-carotene), which is great for eye health and immune function. It is also a good source of fiber, which helps with digestion. The Greek yogurt adds a boost of protein and probiotics, which support gut health. The warm spices — cinnamon, ginger, nutmeg — have anti-inflammatory properties. So while you are enjoying a treat, you are also getting some real nutritional perks.
Dietary Considerations: This recipe is vegetarian. For gluten-free and dairy-free variations, see the section above. These pies are also lower in sugar than many store-bought desserts, making them a better choice for those watching their intake.
FAQs
Can I use fresh pumpkin instead of canned?
Yes, you can. Roast a small sugar pumpkin until tender, then puree the flesh in a food processor until smooth. You will need about 1 ¾ cups of puree. Make sure to drain off any excess liquid by letting it sit in a fine-mesh strainer for 30 minutes. Fresh pumpkin has more water than canned, which can make the filling runny.
Why did my crust turn out tough?
A tough crust usually means the dough was overworked or the butter got too warm. The key is to handle the dough as little as possible and keep everything cold. If your kitchen is warm, chill the dough for 15 minutes before pressing it into the muffin tin. Also, avoid adding too much water — just enough to bring it together.
Can I make these ahead of time for Friendsgiving?
Absolutely. You can make them up to 2 days in advance. Store them in the refrigerator in an airtight container. I actually think they taste even better the next day because the spices have time to meld. Just bring them to room temperature before serving, or warm them gently in the oven.
My filling cracked on top. What happened?
Cracks happen when the filling is overbaked or the oven temperature is too high. The filling should still have a slight jiggle in the center when you take it out of the oven. It will continue to set as it cools. Also, make sure your oven temperature is accurate — an oven thermometer is a cheap and invaluable tool.
Can I use a different type of sugar?
Yes. You can substitute the brown sugar with coconut sugar for a less refined option. Keep in mind that coconut sugar is less sweet and has a slightly different flavor. For the granulated sugar, you can use a natural cane sugar. Avoid liquid sweeteners like honey or maple syrup as they will change the liquid balance of the filling and might make it too wet.
Conclusion
These light and cozy mini pumpkin pies have become a staple in my Friendsgiving rotation, and I honestly think they deserve a spot in yours too. They capture everything I love about fall baking — warm spices, tender crust, that creamy pumpkin filling — without the stress of a full-sized pie. They are forgiving, adaptable, and genuinely delicious. I love that I can make them ahead, that they travel well, and that they always, always get eaten. So go ahead, give them a try. Customize them with your favorite toppings, swap in a gluten-free flour, or double the spice if you are feeling bold. And when you make them, I would love to hear how they turned out. Leave a comment below or tag me in your photos — nothing makes my day like seeing these little pies in your kitchen. Happy Friendsgiving, friends. You have got this.
Pin This Recipe!
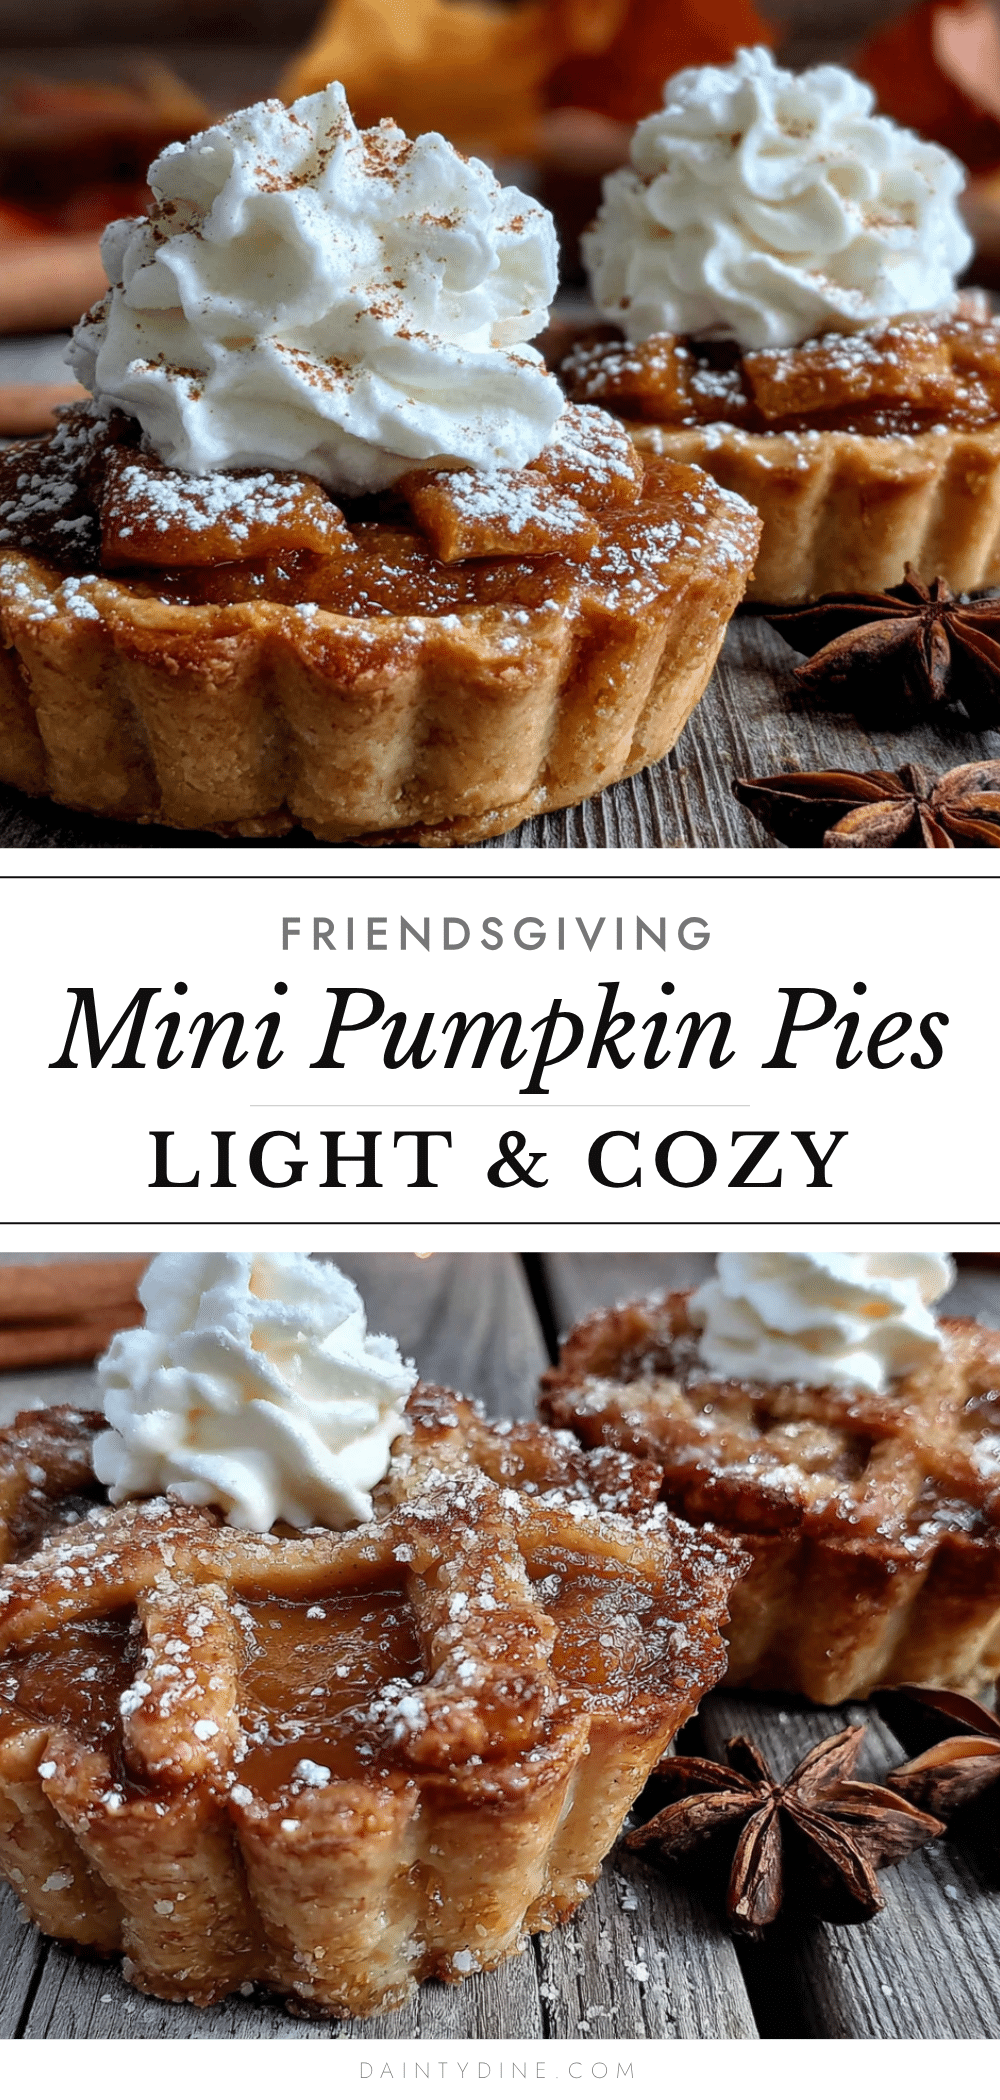
Light & Easy Mini Pumpkin Pies Perfect for Friendsgiving
These mini pumpkin pies are the perfect individual dessert for Friendsgiving. Made with a secret ingredient—Greek yogurt—for a lighter, silkier filling, they come together in about 45 minutes and are sure to be a crowd-pleaser.
- Prep Time: 15 minutes
- Cook Time: 20 minutes
- Total Time: 45 minutes
- Yield: 12 servings
- Category: Dessert
- Cuisine: American
Ingredients
- All-purpose flour, 1 ¼ cups (150g)
- Cold unsalted butter, ½ cup (113g), cut into small cubes
- Ice water, 3-4 tablespoons (45-60ml)
- Salt, ¼ teaspoon
- Granulated sugar, 1 tablespoon (12g)
- Pumpkin puree, 1 can (15 oz or 425g)
- Large eggs, 2
- Plain Greek yogurt, ¼ cup (60g)
- Heavy cream or half-and-half, ¼ cup (60ml)
- Brown sugar, packed, ½ cup (100g)
- Granulated sugar, ¼ cup (50g)
- Pumpkin pie spice, 2 teaspoons
- Vanilla extract, 1 teaspoon
- Salt, ¼ teaspoon
Instructions
- Preheat your oven to 375°F (190°C). Position a rack in the center of the oven.
- Make the crust dough: In a medium bowl, whisk together the flour, sugar, and salt. Add the cold butter cubes. Using a pastry cutter or your fingertips, work the butter into the flour until the mixture looks like coarse sand with some pea-sized butter pieces remaining. Drizzle in 3 tablespoons of ice water and stir with a fork. If the dough seems dry, add the remaining tablespoon. It should just hold together when squeezed.
- Shape the crusts: Divide the dough into 12 equal portions (about 1.5 tablespoons each). Press each portion into the bottom and up the sides of a muffin cup. Use your thumb to create a slight rim. Place the muffin tin in the refrigerator while you make the filling.
- Prepare the filling: In a large bowl, whisk together the pumpkin puree, eggs, Greek yogurt, and heavy cream until smooth. Add the brown sugar, granulated sugar, pumpkin pie spice, vanilla, and salt. Whisk until everything is fully combined and the mixture is silky.
- Fill the crusts: Remove the muffin tin from the fridge. Use a small ladle or a measuring cup with a spout to divide the filling evenly among the 12 cups. Fill them almost to the top, leaving about ⅛ inch gap.
- Bake the pies: Place the tin in the preheated oven. Bake for 18-22 minutes, or until the edges of the filling are set and the centers jiggle just slightly when you gently shake the pan. The crusts should be golden brown.
- Cool completely: Transfer the muffin tin to a wire rack and let the pies cool in the pan for 10 minutes. Then, carefully run a thin knife around the edge of each pie to loosen it. Lift them out and place them directly on the cooling rack. Let them cool completely, about 30 minutes.
Notes
Keep everything cold for the crust to ensure flakiness. Do not overmix the filling to avoid cracks. Check for doneness early; the centers should jiggle slightly. Cool completely before serving to allow the filling to set. For a gluten-free version, use a 1:1 gluten-free baking blend. For a dairy-free option, use vegan butter, dairy-free yogurt, and coconut cream. Store in an airtight container in the refrigerator for up to 4 days or freeze for up to 2 months.
Nutrition
- Serving Size: 1 mini pie
- Calories: 185
- Sugar: 11
- Sodium: 150
- Fat: 9
- Saturated Fat: 5
- Carbohydrates: 23
- Fiber: 2
- Protein: 4
Keywords: mini pumpkin pies, Friendsgiving dessert, individual pumpkin pie, easy pumpkin pie, light pumpkin pie, Greek yogurt pumpkin pie


