Love this? Save it for later!
Share the inspiration with your friends
I was at the hardware store last Saturday, of all places, picking up a new showerhead, when the woman in front of me in line started talking about ice cream. Not just any ice cream, mind you. She was describing a no-churn salted caramel ice cream with such specific, loving detail that I almost forgot why I was there. She was maybe seventy, with flour dusted on her sweater like she had just come from baking, and she was telling the cashier how she had been making this particular recipe for thirty years without a single ice cream machine. “You just whip the cream,” she said, waving her hand, “and you make the caramel on the stove. It’s not complicated. It’s just good.” She paid for her lightbulbs and walked out, and I stood there holding my showerhead, completely distracted. I mean, I had to try it.
That afternoon, I got home and immediately started digging through my pantry. I had heavy cream, sweetened condensed milk, butter, brown sugar, and salt. That was it. Five ingredients. The woman from the hardware store was right—this was almost too simple to be real. I made the caramel first, watching it bubble and turn that deep amber color, and I honestly held my breath for a second because caramel can be tricky. But it came together perfectly. I folded it into the whipped cream, poured it into a loaf pan, and stuck it in the freezer. The next day, I took it out, let it sit for five minutes, and scooped it. The texture was unbelievable—creamy, rich, with those little ribbons of salted caramel running through it. I texted my sister a picture, and she called me immediately. “You made that? From scratch?” she asked. “Without a machine?” I told her about the hardware store woman, and she laughed. “That’s the best kind of recipe,” she said. “The one you weren’t looking for.”
And honestly, she was right. This easy no-churn salted caramel ice cream has become my go-to for summer evenings, movie nights, and just about any time I need a little sweetness without a lot of fuss. It’s the kind of recipe that makes you feel like you’ve discovered a secret shortcut—no ice cream maker, no weird ingredients, just real food that tastes incredible. Maybe you’ve been there, standing in an unexpected place, overhearing a stranger talk about food with so much love that you just had to try it. That was my moment. And I keep making this ice cream because it reminds me that the best recipes don’t come from fancy kitchens. They come from people who just know how to make something good.
Why You’ll Love This Recipe
I have tested this recipe more times than I care to admit, and I can tell you with complete confidence that this is the best easy no-churn salted caramel ice cream you will ever make at home. It has that perfect balance of sweet and salty, with a texture so creamy you would swear it came from a professional ice cream shop. Here is why you are going to love it:
- Quick & Easy: Comes together in about 20 minutes of active prep time. No ice cream machine needed, no tempering eggs, no complicated steps. Just whip, fold, and freeze.
- Simple Ingredients: You likely have most of these in your kitchen right now. Heavy cream, sweetened condensed milk, butter, brown sugar, vanilla, and salt. That is it.
- Perfect for Summer: Great for backyard barbecues, birthday parties, or just a quiet night on the couch. It is a crowd-pleaser that always gets compliments.
- Crowd-Pleaser: Kids love the sweet caramel, and adults love that sophisticated salted finish. I have yet to meet someone who did not go back for seconds.
- Unbelievably Delicious: The texture is the real star here. It is creamy, scoopable, and has those gorgeous ribbons of salted caramel running through every bite. It is next-level comfort food.
What makes this recipe different from the rest is the technique. Most no-churn recipes just dump caramel into the cream, but I take an extra step. I swirl the caramel in at the very end, creating distinct ribbons that stay soft even after freezing. The salt is not an afterthought either—I use flaky sea salt on top for that perfect crunch and pop of flavor. This is not just another version of no-churn ice cream. This is the best version.
This recipe is not just good—it is the kind that makes you close your eyes after the first bite. It is comfort food reimagined: faster, easier, but with the same soul-soothing satisfaction. Perfect for impressing guests without stress, or turning a simple weeknight into something memorable.
What Ingredients You Will Need
This recipe uses simple, wholesome ingredients to deliver bold flavor and satisfying texture without the fuss. Most of these are pantry staples, which makes this easy no-churn salted caramel ice cream perfect for spontaneous cravings. Here is what you will need:
For the Salted Caramel Sauce
- 1 cup (200g) granulated sugar – Regular white sugar works best here. Do not use brown sugar for the caramel itself, as it can crystallize differently.
- 6 tablespoons (85g) unsalted butter, cut into small pieces (adds richness and helps create that smooth texture)
- 1/2 cup (120ml) heavy cream, room temperature (use full-fat for best results)
- 1 teaspoon flaky sea salt, plus more for sprinkling (I recommend Maldon or a similar finishing salt)
- 1 teaspoon vanilla extract (pure vanilla extract gives the best flavor)
For the Ice Cream Base
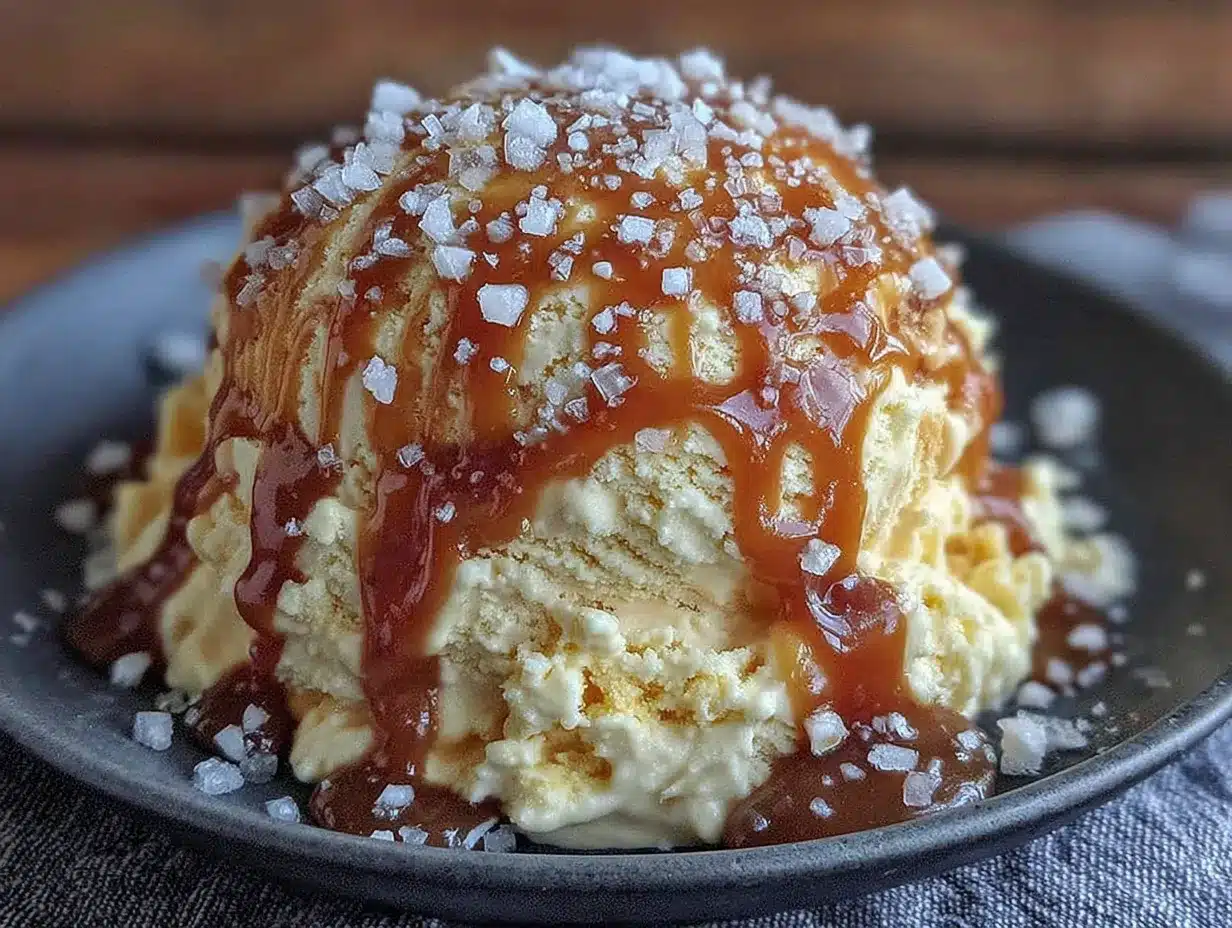
- 2 cups (480ml) heavy cream, cold (this is the backbone of your ice cream—do not substitute with half-and-half)
- 1 can (14 ounces or 397g) sweetened condensed milk (this replaces the need for an ice cream machine and creates that creamy texture)
- 1 teaspoon vanilla extract (optional but recommended for depth of flavor)
Ingredient Selection Tips: For the best results, use a high-quality brand of sweetened condensed milk like Eagle Brand or Borden. I have tried store-brand versions, and they work fine, but the texture is slightly less creamy. For the heavy cream, look for one with at least 36% milk fat—this ensures your ice cream stays scoopable even after freezing. If you can find it, organic heavy cream tends to whip up a bit stiffer.
Substitution Guidance: If you are dairy-free, you can substitute the heavy cream with full-fat coconut cream (chilled overnight) and use a dairy-free sweetened condensed milk alternative. The texture will be slightly different—a bit icier—but still delicious. For a lighter version, you can use half-and-half, but the ice cream will be less creamy and may develop ice crystals faster. I do not recommend using low-fat milk for this recipe.
Equipment Needed
You do not need much for this recipe, which is part of its charm. Here is what you will need:
- Medium saucepan – For making the caramel. A heavy-bottomed saucepan works best to prevent scorching.
- Large mixing bowl – For whipping the cream. Make sure it is big enough to hold the cream as it doubles in volume.
- Hand mixer or stand mixer – You can whip the cream by hand with a whisk, but it will take about 8-10 minutes of serious elbow grease. A hand mixer makes it much easier.
- Loaf pan or freezer-safe container – An 8×4-inch loaf pan works perfectly. You can also use a 9×5-inch pan for a slightly thinner ice cream layer.
- Rubber spatula – For folding the caramel into the cream without deflating it.
- Parchment paper or plastic wrap – To cover the surface of the ice cream and prevent freezer burn.
Budget-Friendly Options: Do not have a hand mixer? A whisk and some determination will get the job done. Just make sure your cream is very cold, and take breaks if your arm gets tired. I have done it both ways, and honestly, the whisk method gives you a great arm workout. For the container, any freezer-safe bowl or even a metal cake pan will work. The key is to cover it tightly so the ice cream does not absorb odors from the freezer.
Preparation Method
Making this easy no-churn salted caramel ice cream is simpler than you might think. Follow these steps carefully, and you will have a dessert that tastes like it came from a fancy creamery.
- Make the salted caramel sauce (about 10 minutes): Place the granulated sugar in a medium saucepan over medium heat. Stir constantly with a wooden spoon or heat-resistant spatula. The sugar will start to clump, then melt into a golden liquid. Keep stirring until it turns a deep amber color—about 5-7 minutes. Watch it closely, because sugar can go from perfect to burnt in seconds. Once it is amber, remove the pan from heat immediately. Add the butter pieces and stir vigorously until melted. The mixture will bubble up—this is normal. Slowly pour in the heavy cream while stirring constantly. It will bubble again, so be careful. Stir in the salt and vanilla. Let the caramel cool for about 15 minutes at room temperature, then transfer to a bowl and refrigerate until completely cool, about 30 minutes. Tip: If your caramel seizes up or forms lumps, do not panic. Return it to low heat and stir gently until smooth.
- Whip the cream (about 5 minutes): In a large mixing bowl, pour the cold heavy cream. Using a hand mixer or stand mixer fitted with the whisk attachment, beat the cream on medium-high speed until stiff peaks form. You will know it is ready when you lift the beaters and the cream holds its shape without collapsing. Be careful not to over-whip, or you will end up with butter. Sensory cue: The cream should look thick and billowy, like clouds. When you stop the mixer, the cream should not slide around in the bowl.
- Fold in the sweetened condensed milk (about 2 minutes): Pour the sweetened condensed milk and vanilla extract over the whipped cream. Using a rubber spatula, gently fold the mixture together. Start from the bottom of the bowl and bring the spatula up and over, rotating the bowl as you go. Fold until just combined—you should not see streaks of white and beige. The mixture will look like a thick, creamy mousse. Warning: Do not stir vigorously, or you will deflate the air you just whipped into the cream. Gentle folds only.
- Swirl in the caramel (about 3 minutes): Take your cooled caramel sauce and give it a stir. It should be thick but pourable, like room-temperature honey. Pour about two-thirds of the caramel into the cream mixture. Use a knife or skewer to gently swirl it through—do not fully mix it in. You want distinct ribbons of caramel running through the white base. Reserve the remaining caramel for drizzling on top later.
- Freeze the ice cream (at least 6 hours or overnight): Pour the mixture into your loaf pan or freezer-safe container. Smooth the top with a spatula. Drizzle the reserved caramel over the top and use a knife to create a few more swirls. Sprinkle a pinch of flaky sea salt over the surface. Cover tightly with plastic wrap or parchment paper pressed directly onto the surface of the ice cream to prevent ice crystals from forming. Place in the freezer for at least 6 hours, but overnight is best. The longer it freezes, the firmer and creamier it becomes.
- Serve and enjoy (about 5 minutes): When you are ready to serve, remove the ice cream from the freezer and let it sit at room temperature for 5-10 minutes. This softens it just enough for easy scooping. Use a warm ice cream scoop (run it under hot water and dry it off) for the cleanest scoops. Sprinkle a little extra flaky salt on top before serving for that perfect finish.
Cooking Tips & Techniques
After making this easy no-churn salted caramel ice cream more times than I can count, I have learned a few things the hard way. Here are my best tips to ensure your ice cream turns out perfectly every time.
Caramel troubleshooting: The first time I made caramel, I walked away for “just a second” and came back to a black, smoking mess. Do not do that. Caramel goes from perfect to burnt in about 30 seconds. Stay at the stove, watch it constantly, and trust your eyes more than the clock. If you see wisps of smoke, you have gone too far. Also, if your caramel crystallizes and turns grainy, you likely stirred too aggressively or introduced sugar crystals from the side of the pan. Use a clean, wet pastry brush to wash down the sides of the pan while the sugar is melting. This prevents crystallization.
Whip cream like a pro: Cold cream whips better than room-temperature cream. Keep your cream in the refrigerator until the moment you are ready to whip it. If your kitchen is warm, you can even chill your mixing bowl and beaters in the freezer for 10 minutes before starting. This makes a noticeable difference in how quickly the cream whips and how stiff the peaks become. And remember, stiff peaks mean the cream holds its shape when you lift the beaters—not that it looks like a rock. Over-whipped cream turns grainy and eventually becomes butter.
Timing and multitasking: Make the caramel first and let it cool while you whip the cream. This way, everything comes together in a smooth flow. If you try to make the caramel while the cream is already whipped, the cream might start to deflate while you wait. I have made this mistake, and it results in a denser, less creamy ice cream. Plan your timing so the caramel is cool but still pourable when you are ready to swirl it in.
Texture secrets: For the creamiest texture, do not skip the step of pressing plastic wrap directly onto the surface of the ice cream before freezing. This prevents ice crystals from forming on top. Also, if you have the time, let the ice cream sit in the freezer for a full 24 hours. The flavors meld together beautifully, and the texture becomes even creamier. I know it is hard to wait, but trust me—it is worth it.
Variations & Adaptations
This easy no-churn salted caramel ice cream is wonderfully adaptable. Here are some variations I have tried and loved:
Chocolate Salted Caramel: Add 1/4 cup of unsweetened cocoa powder to the sweetened condensed milk before folding it into the whipped cream. The chocolate pairs beautifully with the salted caramel. I made this version for a friend’s birthday, and she said it was better than any store-bought chocolate ice cream she had ever had.
Vegan Coconut Caramel: For a dairy-free version, use full-fat coconut cream (chilled overnight) instead of heavy cream, and use a dairy-free sweetened condensed coconut milk. The caramel can be made with coconut oil instead of butter. The texture is slightly different—a bit icier—but the flavor is still incredible. I made this for a vegan friend, and she asked for the recipe immediately.
Boozy Bourbon Caramel: Add 2 tablespoons of bourbon or dark rum to the caramel sauce after you remove it from the heat. The alcohol does not freeze solid, so it keeps the ice cream slightly softer and adds a warm, complex flavor. This is my personal favorite for adult gatherings. Just be aware that the alcohol content means the ice cream will not freeze as hard, so it is best eaten within a week.
Nutty Crunch: Fold in 1/2 cup of toasted pecans or walnuts after swirling in the caramel. The nuts add a wonderful crunch that contrasts with the creamy ice cream. Toast the nuts in a dry skillet over medium heat for 3-4 minutes until fragrant, then let them cool completely before adding. I have also used candied pecans for an extra layer of sweetness.
Seasonal Swirls: In the summer, swirl in 1/2 cup of fresh strawberry puree along with the caramel. In the fall, add a teaspoon of pumpkin pie spice to the caramel sauce. The possibilities are endless, and that is what makes this recipe so fun. I have made a pumpkin salted caramel version for Thanksgiving, and it was a hit.
Serving & Storage Suggestions
This easy no-churn salted caramel ice cream is best served slightly softened. Take it out of the freezer about 5-10 minutes before scooping. The texture should be creamy and smooth, not rock hard. If you have ever struggled to scoop rock-solid homemade ice cream, this extra wait time is a game-changer.
Serving Ideas: Scoop it into bowls and top with an extra drizzle of caramel sauce and a sprinkle of flaky sea salt. It is also fantastic served alongside a warm brownie or a slice of apple pie. For a special treat, make ice cream sandwiches by placing a scoop between two soft chocolate chip cookies. I have done this for summer parties, and people lose their minds over it. You can also serve it in waffle cones or sugar cones for that classic ice cream parlor feel.
Storage Instructions: Store the ice cream in an airtight container in the freezer for up to 2 weeks. Press a piece of plastic wrap or parchment paper directly onto the surface of the ice cream before sealing the container. This prevents ice crystals from forming and keeps the texture creamy. If you notice ice crystals forming after a few days, it is usually because the container was not sealed tightly enough. You can scrape off the top layer and the ice cream underneath will still be good.
Reheating Tips: If the ice cream becomes too hard after a few days in the freezer, let it sit at room temperature for 10-15 minutes before scooping. You can also microwave the container for 10-15 seconds on low power to soften it slightly. Do not overdo it, or you will end up with soup. The caramel swirls will soften faster than the ice cream base, so give it a gentle stir if needed before serving.
Flavor Development: Interestingly, the flavors of this ice cream develop and deepen over time. The first day, it tastes fresh and bright. By day three, the caramel flavor has melded more thoroughly with the cream, and the saltiness is more pronounced. I actually prefer it on day two or three. Something to keep in mind if you are making it ahead for a special occasion.
Nutritional Information & Benefits
While this easy no-churn salted caramel ice cream is definitely a treat, it is made with real, recognizable ingredients. Here is a rough estimate of the nutritional values per serving (based on 8 servings):
- Calories: Approximately 450-500 per serving
- Fat: 30-35g (mostly from heavy cream and butter)
- Carbohydrates: 40-45g (from sugar and sweetened condensed milk)
- Protein: 5-7g
- Sugar: 35-40g
- Sodium: 250-300mg (from added salt)
Health Benefits of Key Ingredients: Believe it or not, there are a few redeeming qualities here. The heavy cream provides calcium and vitamin A, which are good for bone health and vision. The butter contains butyrate, a fatty acid that supports gut health. And the flaky sea salt provides trace minerals like magnesium and potassium. Of course, this is still a dessert, so enjoy it in moderation. But it is nice to know that every ingredient serves a purpose beyond just taste.
Dietary Considerations: This recipe is gluten-free and contains no artificial preservatives or stabilizers. It does contain dairy and sugar, so it is not suitable for vegans or those on a strict low-carb diet. However, with the substitutions mentioned earlier (coconut cream and dairy-free condensed milk), it can be made vegan-friendly. The sugar content is high, so if you are watching your sugar intake, consider using a sugar substitute in the caramel, though the texture may change slightly.
Personal Wellness Perspective: I believe in the power of homemade treats. When you make your own ice cream, you control exactly what goes into it. No weird gums, no high-fructose corn syrup, no artificial flavors. Just real food that tastes amazing. And honestly, a small bowl of this ice cream after a long day is one of life’s simple pleasures. It is good for the soul, if not for the waistline.
Conclusion
This easy no-churn salted caramel ice cream is proof that you do not need fancy equipment or complicated techniques to make something truly special. It is creamy, rich, perfectly sweet and salty, and comes together with just a handful of ingredients and a little bit of patience. Whether you are making it for a summer barbecue, a family movie night, or just because you deserve a treat, this recipe delivers every single time.
I love this recipe because it reminds me that the best things in life are often the simplest. That woman at the hardware store did not have a blog or a cookbook or a fancy kitchen. She just had a recipe she loved and wanted to share. And now I am sharing it with you. I encourage you to make this your own—add your favorite mix-ins, play with the flavors, and serve it in a way that makes you happy. That is what cooking is all about.
If you try this recipe, I would love to hear about it. Leave a comment below and let me know how it turned out, or share your own variation. Did you add chocolate? Bourbon? Nuts? I want to know. And do not forget to pin this recipe for later or share it with a friend who needs a little sweetness in their life. Happy scooping!
Frequently Asked Questions
Can I make this without an ice cream machine?
Absolutely. That is the whole point of this recipe. The combination of whipped cream and sweetened condensed milk creates a creamy texture without the need for churning. No ice cream machine required.
Why did my caramel turn grainy?
Grainy caramel is usually caused by crystallization. This happens when sugar crystals form on the sides of the pan and fall back into the melting sugar. To prevent this, use a wet pastry brush to wash down the sides of the pan while the sugar is melting, and avoid stirring too vigorously once the sugar has dissolved.
How long does this ice cream keep in the freezer?
Properly stored in an airtight container with plastic wrap pressed onto the surface, this ice cream will keep for up to 2 weeks. After that, it may develop ice crystals and lose some of its creamy texture. It is still safe to eat, just not as good.
Can I use salted butter instead of unsalted?
You can, but I recommend using unsalted butter so you have full control over the salt level. If you use salted butter, reduce the added salt in the caramel to 1/2 teaspoon instead of 1 teaspoon. Taste as you go, and adjust accordingly.
Can I double this recipe?
Yes, this recipe doubles beautifully. Just make sure you have a large enough mixing bowl for the whipped cream, and use a bigger container for freezing. A 9×13-inch baking dish works well for a double batch. The freezing time may be slightly longer since there is more volume to freeze.
Pin This Recipe!
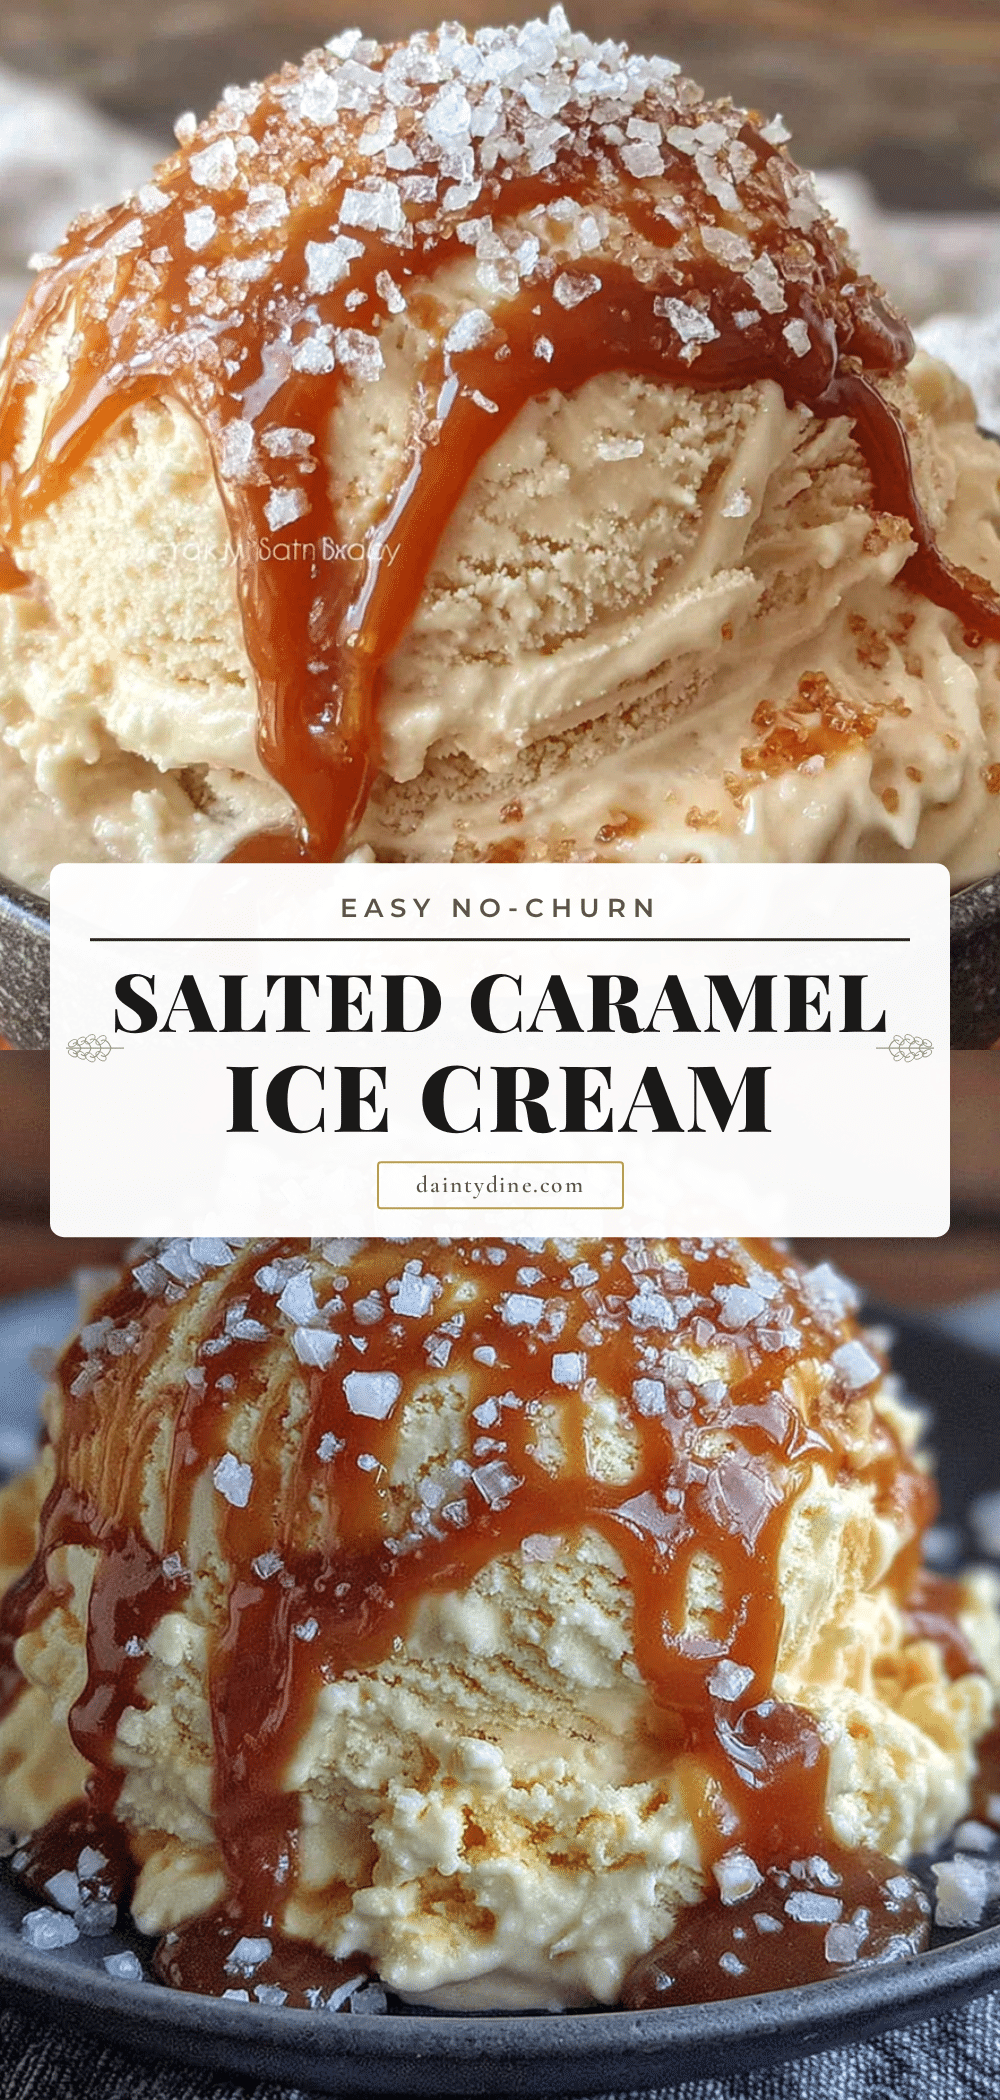
Easy No-Churn Salted Caramel Ice Cream: Best Homemade Recipe
This easy no-churn salted caramel ice cream is creamy, rich, and perfectly sweet and salty. Made with just five simple ingredients and no ice cream machine, it’s the perfect summer treat that comes together in minutes.
- Prep Time: 20 minutes
- Cook Time: 10 minutes
- Total Time: 6 hours 30 minutes (including freezing time)
- Yield: 8 servings 1x
- Category: Dessert
- Cuisine: American
Ingredients
- 1 cup (200g) granulated sugar
- 6 tablespoons (85g) unsalted butter, cut into small pieces
- 1/2 cup (120ml) heavy cream, room temperature
- 1 teaspoon flaky sea salt, plus more for sprinkling
- 1 teaspoon vanilla extract
- 2 cups (480ml) heavy cream, cold
- 1 can (14 ounces or 397g) sweetened condensed milk
- 1 teaspoon vanilla extract (optional but recommended)
Instructions
- Make the salted caramel sauce: Place the granulated sugar in a medium saucepan over medium heat. Stir constantly with a wooden spoon or heat-resistant spatula. The sugar will start to clump, then melt into a golden liquid. Keep stirring until it turns a deep amber color—about 5-7 minutes. Watch it closely, because sugar can go from perfect to burnt in seconds. Once it is amber, remove the pan from heat immediately. Add the butter pieces and stir vigorously until melted. The mixture will bubble u…
- Whip the cream: In a large mixing bowl, pour the cold heavy cream. Using a hand mixer or stand mixer fitted with the whisk attachment, beat the cream on medium-high speed until stiff peaks form. You will know it is ready when you lift the beaters and the cream holds its shape without collapsing. Be careful not to over-whip, or you will end up with butter.
- Fold in the sweetened condensed milk: Pour the sweetened condensed milk and vanilla extract over the whipped cream. Using a rubber spatula, gently fold the mixture together. Start from the bottom of the bowl and bring the spatula up and over, rotating the bowl as you go. Fold until just combined—you should not see streaks of white and beige. The mixture will look like a thick, creamy mousse.
- Swirl in the caramel: Take your cooled caramel sauce and give it a stir. It should be thick but pourable, like room-temperature honey. Pour about two-thirds of the caramel into the cream mixture. Use a knife or skewer to gently swirl it through—do not fully mix it in. You want distinct ribbons of caramel running through the white base. Reserve the remaining caramel for drizzling on top later.
- Freeze the ice cream: Pour the mixture into your loaf pan or freezer-safe container. Smooth the top with a spatula. Drizzle the reserved caramel over the top and use a knife to create a few more swirls. Sprinkle a pinch of flaky sea salt over the surface. Cover tightly with plastic wrap or parchment paper pressed directly onto the surface of the ice cream to prevent ice crystals from forming. Place in the freezer for at least 6 hours, but overnight is best.
- Serve and enjoy: When you are ready to serve, remove the ice cream from the freezer and let it sit at room temperature for 5-10 minutes. This softens it just enough for easy scooping. Use a warm ice cream scoop (run it under hot water and dry it off) for the cleanest scoops. Sprinkle a little extra flaky salt on top before serving for that perfect finish.
Notes
For the creamiest texture, press plastic wrap directly onto the surface of the ice cream before freezing to prevent ice crystals. Let the ice cream sit at room temperature for 5-10 minutes before scooping. The flavors develop and deepen over time, with day two or three being the best. If caramel crystallizes, return it to low heat and stir gently until smooth.
Nutrition
- Serving Size: 1 scoop (about 1/2 c
- Calories: 475
- Sugar: 38
- Sodium: 275
- Fat: 33
- Saturated Fat: 20
- Carbohydrates: 43
- Protein: 6
Keywords: no-churn ice cream, salted caramel, homemade ice cream, easy ice cream, no machine ice cream, summer dessert


