Love this? Save it for later!
Share the inspiration with your friends
There used to be a tiny Southern diner off Highway 17 in coastal Georgia called The Whistle Stop that made a green bean casserole that defied logic. When they closed in 2018—the owner retired after forty-two years—I literally stood in the parking lot feeling like I’d lost a friend. After twelve attempts—some so watery they belonged in a soup bowl, others so gluey they could’ve patched drywall—I finally cracked the code. And honestly? It took me moving three states away and missing that casserole with a physical ache to really understand what made it work.
The secret wasn’t some fancy technique or imported ingredient. It was patience—the kind of patience that lets you toast your own gluten-free breadcrumbs until they smell like buttered toast from heaven, the kind that lets your mushroom gravy bubble and thicken until it coats the back of a spoon like velvet. My first attempt was a disaster—I used canned cream of mushroom soup without checking the label, and let me tell you, the look on my gluten-intolerant aunt’s face was something I’ll never forget. She tried to be polite, but that first bite told the whole story.
Maybe you’ve been there—standing in the grocery aisle, flipping over can after can, realizing that almost every shortcut option contains wheat flour. It’s frustrating, right? Especially during the holidays when you just want everything to taste like childhood memories. That’s exactly why I became obsessed with recreating this dish. Not just a gluten-free version, but the version—the one that makes people close their eyes and forget to talk for a second. This classic gluten-free green bean casserole for the holidays is the result of all those failures, all those late-night kitchen experiments, and one very patient husband who ate a lot of mediocre casseroles along the way.
Why You’ll Love This Recipe
This isn’t just another gluten-free recipe that you make because you have to. This is the casserole that converts skeptics and makes people ask for the recipe without even knowing it’s gluten-free. Here’s what makes it stand out:
- No Special Ingredients Required : Everything comes from regular grocery stores—no weird flours or expensive substitutes. You’ll use simple ingredients that actually taste like the real thing.
- Make-Ahead Friendly : Assemble it the day before, pop it in the fridge, and bake when you’re ready. Your holiday self will thank you when everyone else is running around like headless chickens.
- Crowd-Pleasing Comfort : My gluten-eating father-in-law asked for seconds before I even told him it was gluten-free. That’s the kind of win we’re talking about here.
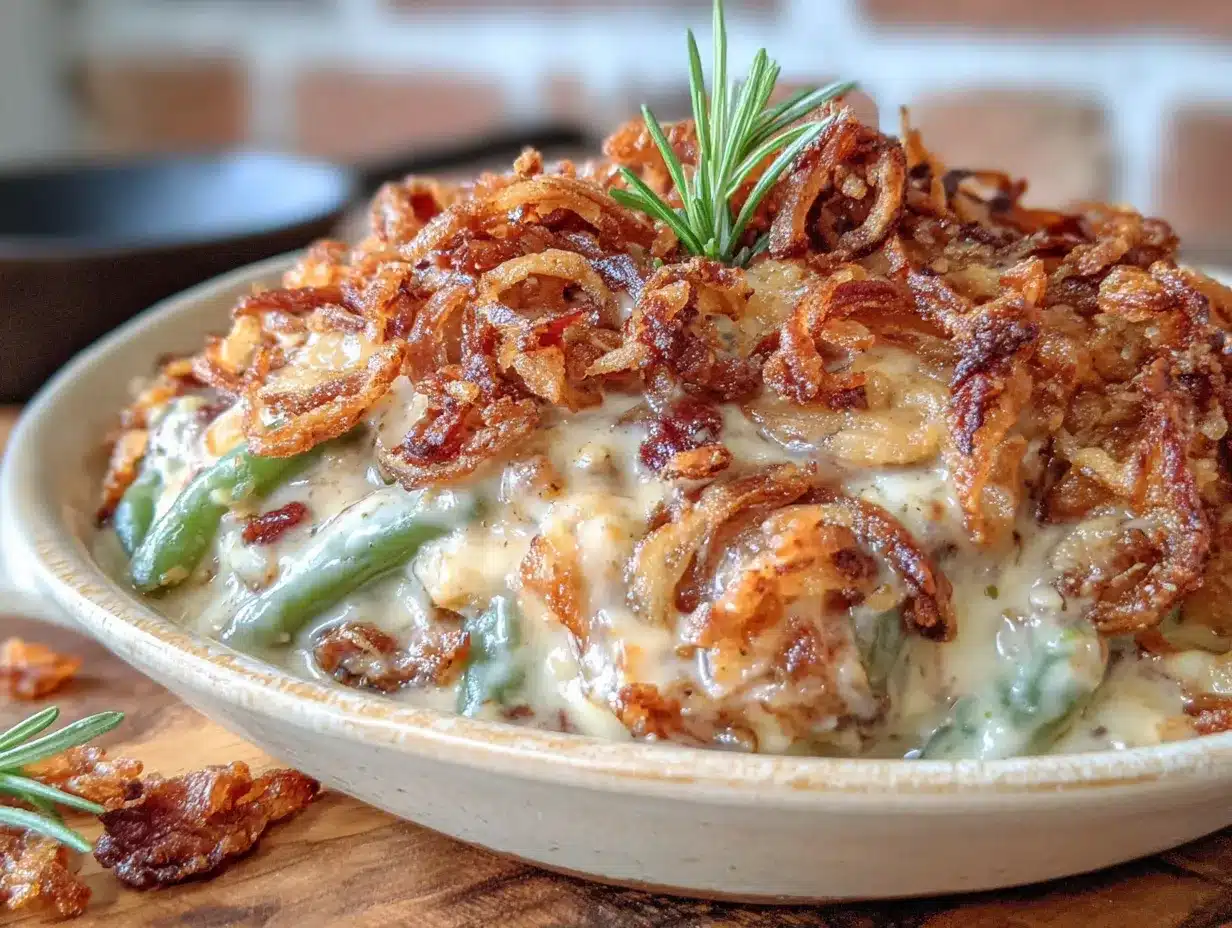
- Perfectly Crispy Topping : No soggy, sad topping here. The homemade gluten-free crispy onions stay crunchy even after baking, which honestly took me five tries to figure out.
- Real Cream of Mushroom Flavor : We’re making the sauce from scratch, and it tastes nothing like the canned stuff. It’s richer, creamier, and actually tastes like mushrooms.
What makes this recipe different from all the others I tried? It’s the technique—toasting the gluten-free flour before making the roux eliminates that gritty texture that plagues so many gluten-free cream sauces. Plus, we’re using a blend of fresh and dried mushrooms for depth that you just can’t get any other way. This classic gluten-free green bean casserole for the holidays has been tested at three different Thanksgivings, two Christmas dinners, and one very memorable Friendsgiving where someone accidentally brought three desserts and no vegetables. Trust me, this one’s a keeper.
What Ingredients You Will Need
This recipe uses simple, wholesome ingredients that work together to create that nostalgic flavor without any gluten. Most of these are pantry staples, though a few deserve a special mention for their role in making this dish truly shine.
For the Casserole Base
- 2 pounds fresh green beans, trimmed and cut into 2-inch pieces (look for bright, snappy beans—if they bend without breaking, they’re past their prime)
- 8 ounces cremini mushrooms, thinly sliced (baby bellas work perfectly here; their earthy flavor is what makes this taste homemade)
- 1 medium yellow onion, diced (about 1 cup)
- 3 cloves garlic, minced (fresh only—don’t even think about the jarred stuff for this)
- 4 tablespoons unsalted butter (use a high-quality brand like Kerrygold for best flavor)
- 1/4 cup gluten-free all-purpose flour (I prefer King Arthur Measure for Measure or Bob’s Red Mill 1-to-1—they behave most like regular flour)
- 2 cups whole milk (room temperature works best to prevent lumps)
- 1 cup chicken or vegetable broth (low-sodium, so you control the salt)
- 1/2 cup heavy cream (adds that luxurious texture you’re craving)
- 1 teaspoon dried thyme
- 1/2 teaspoon smoked paprika
- Salt and black pepper to taste
- 1/4 teaspoon ground nutmeg (trust me on this—it’s the secret ingredient that makes everyone wonder what’s different)
For the Crispy Onion Topping
- 2 large yellow onions, thinly sliced into rings
- 1 cup buttermilk (or 1 cup milk mixed with 1 tablespoon lemon juice, let sit 5 minutes)
- 1 cup gluten-free all-purpose flour
- 1/2 cup fine cornmeal (adds extra crunch that store-bought versions lack)
- 1 teaspoon garlic powder
- 1 teaspoon salt
- 1/2 teaspoon cayenne pepper (optional, but gives a lovely warmth)
- Vegetable oil for frying (about 2 cups)
Ingredient Selection Tips
When choosing your gluten-free flour blend, avoid anything with bean flours—they’ll make your sauce taste, well, beany. I learned this the hard way during attempt number seven. For the green beans, fresh is non-negotiable here. Frozen beans get mushy, and canned beans are already cooked and will turn to paste during baking. Look for beans that snap cleanly when bent—that’s how you know they’re fresh enough.
Substitution Notes
If you’re dairy-free, use a good quality plant-based butter and unsweetened oat milk (it has the closest consistency to whole milk). Coconut milk works in a pinch but will add a slight sweetness that changes the flavor profile. For the crispy onions, you can absolutely use store-bought gluten-free fried onions if you’re short on time—just check the label carefully because many brands use wheat flour as a coating.
Equipment Needed
You don’t need a professional kitchen to pull this off, but having the right tools makes everything smoother. Here’s what you’ll need:
- Large pot for blanching the green beans (a 6-quart pot works perfectly)
- Large skillet or sauté pan for the mushroom gravy (a 12-inch pan with high sides is ideal)
- 9×13-inch baking dish (glass or ceramic—metal can react with the dairy and leave a metallic taste)
- Medium saucepan for frying the onions
- Slotted spoon or spider strainer for removing crispy onions from oil
- Whisk (a good balloon whisk prevents lumps in your gravy)
- Sharp knife and cutting board (dull knives crush onions and make them weepy)
- Paper towels for draining the fried onions
- Mixing bowls in various sizes
If you don’t have a deep-fry thermometer, don’t worry—I’ve been frying without one for years. Just drop a small piece of onion in the oil; if it sizzles immediately and floats to the top, you’re at the right temperature. Also, I recommend using a heavy-bottomed pot for frying—thin pots create hot spots that burn your onions before they’re cooked through. My first batch of crispy onions looked like charcoal briquettes, and my kitchen smelled like a campfire for three days.
Preparation Method
- Blanch the green beans (10 minutes) : Bring a large pot of salted water to a rolling boil. Add the trimmed green beans and cook for exactly 3 minutes—no longer. You want them bright green and still crisp. Immediately transfer them to a bowl of ice water to stop the cooking process. This step is non-negotiable; it sets the color and texture so your casserole doesn’t turn into a mushy mess. Drain well and pat dry with paper towels.
- Start the crispy onions (20 minutes active, 30 minutes soaking) : While the beans cool, place the sliced onions in a bowl and cover with buttermilk. Let them soak for at least 30 minutes—this tenderizes the onions and helps the coating stick. In a separate bowl, whisk together the gluten-free flour, cornmeal, garlic powder, salt, and cayenne.
- Fry the onions (15 minutes) : Heat about 2 inches of vegetable oil in a medium saucepan to 350°F. Working in batches, lift onions from the buttermilk (let excess drip off), toss them in the flour mixture until well coated, and carefully lower them into the hot oil. Fry for 2-3 minutes, stirring occasionally, until deep golden brown. Transfer to a paper towel-lined plate and season immediately with a pinch of salt. This is the step where patience pays off—crowding the pan drops the oil temperature and gives you greasy onions instead of crispy ones.
- Make the mushroom gravy (20 minutes) : In a large skillet, melt 2 tablespoons of butter over medium heat. Add the sliced mushrooms and cook without stirring for 4 minutes—let them get brown and caramelized. Stir and cook another 3 minutes until they’re deeply golden. Add the diced onion and cook until translucent, about 5 minutes. Add the garlic and cook until fragrant, about 30 seconds.
- Build the roux (5 minutes) : Sprinkle the gluten-free flour over the mushroom mixture and stir constantly for 2 minutes. This toasting step is crucial—it cooks out the raw flour taste and prevents that gritty texture. The mixture will look dry and clumpy; that’s exactly what you want.
- Finish the gravy (10 minutes) : Slowly pour in the milk while whisking constantly. Then add the broth, whisking until smooth. Bring to a gentle simmer—you’ll see bubbles around the edges of the pan. Add the heavy cream, thyme, smoked paprika, nutmeg, and a generous pinch of salt and pepper. Cook, stirring occasionally, until the sauce thickens enough to coat the back of a spoon, about 5-7 minutes. Taste and adjust seasoning—this is your moment to make it perfect.
- Assemble the casserole (5 minutes) : Preheat your oven to 375°F. Grease your 9×13 baking dish. Spread the blanched green beans evenly in the dish. Pour the mushroom gravy over the top and gently toss to coat every bean. Spread everything into an even layer.
- Bake and top (25 minutes) : Bake the casserole uncovered for 15 minutes until bubbly and hot. Remove from the oven, sprinkle the crispy onions evenly over the top, and return to the oven for another 10 minutes until the topping is deeply golden and the edges are bubbling. Let rest for 5 minutes before serving—this lets the sauce set up so you get clean servings instead of a soupy mess.
Cooking Tips & Techniques
Let me save you from the mistakes I made so you don’t have to learn them the hard way. First, don’t skip the blanching step—I know it’s tempting to just throw raw beans in the casserole and hope for the best, but they’ll end up undercooked and tough while the sauce breaks from the extra cooking time. I made this mistake on attempt number three, and my grandmother’s comment was, “Well, at least it’s crunchy.” She was being kind.
Temperature matters more than you think. When making the roux, keep the heat at medium—too high and the flour will burn before it’s cooked through, giving you a bitter, brown-spotted sauce. Too low and it won’t thicken properly. You’re looking for that moment when the mixture smells nutty and looks like wet sand. Speaking of the roux, whisk constantly. I mean constantly. I answered my phone once while making this and ended up with lumpy gravy that took twenty minutes of vigorous whisking to salvage.
For the crispy onions, the buttermilk soak is non-negotiable. Without it, the coating slides right off during frying and you end up with naked, soggy onions. I learned this when I was rushing through attempt number five and skipped the soak. The result was a sad pile of flour-coated onion strings that looked like they’d been through a washing machine. Also, fry in small batches—I know it’s tedious, but each batch needs room to move in the oil. When you crowd the pan, the temperature drops, the onions absorb oil instead of cooking in it, and you get greasy sadness instead of crispy perfection.
One more thing—let the casserole rest after baking. I know the smell is intoxicating and everyone’s hovering with plates, but those five minutes of resting time are what separate a perfect casserole from a runny one. The sauce needs time to thicken and set, and the flavors need a moment to meld together. Use that time to set the table or pour yourself a well-deserved glass of wine.
Variations & Adaptations
This classic gluten-free green bean casserole for the holidays is wonderfully adaptable. Here are some of my favorite variations:
- Dairy-Free Version : Substitute the butter with plant-based butter (I like Miyoko’s for its creamy texture), use unsweetened oat milk instead of whole milk, and replace the heavy cream with full-fat coconut cream. The flavor changes slightly—coconut adds a subtle sweetness—but it’s still absolutely delicious.
- Add Bacon : Because everything’s better with bacon, right? Cook 6 slices of bacon until crispy, crumble them, and sprinkle half into the gravy before baking. Reserve the rest for topping along with the crispy onions. My brother-in-law requests this version every year, and he’s not even gluten-free.
- Mushroom Medley : Replace the cremini mushrooms with a mix of shiitake, oyster, and cremini for a more complex, earthy flavor. This version feels fancier and is perfect for Christmas dinner when you want to impress. Just slice the shiitakes thin since they’re chewier than other mushrooms.
- Make It Vegan : Use the dairy-free substitutions above plus replace the chicken broth with vegetable broth. For the crispy onions, use a flax egg (1 tablespoon ground flaxseed mixed with 3 tablespoons water) instead of buttermilk. The texture won’t be quite as crispy, but it’s still satisfying.
- Add Some Heat : If your family likes spicy food, add a diced jalapeño to the mushroom mixture when cooking the onions, or stir in 1/2 teaspoon of red pepper flakes with the seasonings. The heat cuts through the creamy sauce beautifully.
I once tried a version with roasted garlic instead of fresh—I roasted a whole head of garlic, squeezed the soft cloves into the gravy, and it added this incredible sweet, mellow depth. It was a hit, but it added an extra 45 minutes to the prep time, so save that for a weekend when you’re not racing against the turkey timer.
Serving & Storage Suggestions
This casserole is best served hot, right out of the oven, with that glorious steam rising and the crispy onions still audibly crunching. I like to place it on a trivet in the center of the table so everyone can admire it before diving in. It pairs beautifully with roasted turkey, honey-glazed ham, or even a simple roast chicken if you’re making it for a non-holiday dinner.
For storage, let the casserole cool completely before covering. It will keep in the refrigerator for up to 4 days in an airtight container. Here’s the thing, though—the crispy onions will soften over time. If you’re planning leftovers, I recommend storing the crispy onions separately and adding them fresh when reheating. This little trick has saved many a leftover lunch for me.
To reheat, place individual portions in a 350°F oven for 10-15 minutes, or microwave for 2-3 minutes if you’re in a hurry. The microwave will make the onions softer, but the flavor is still there. You can also reheat the entire casserole in a 350°F oven for 20 minutes, covered with foil to prevent drying out. Add extra crispy onions on top for that fresh crunch.
This casserole also freezes beautifully—assemble it completely but don’t add the crispy onions. Wrap tightly in plastic wrap, then foil, and freeze for up to 3 months. When you’re ready to serve, thaw overnight in the refrigerator, add the crispy onions, and bake as directed. I’ve done this for two Thanksgivings now, and honestly, no one could tell the difference.
Nutritional Information & Benefits
Per serving (about 1 cup), this classic gluten-free green bean casserole for the holidays contains approximately 280 calories, 18g fat, 28g carbohydrates, 6g protein, and 4g fiber. These values will vary based on your specific ingredients and portion sizes.
Green beans are packed with vitamins A, C, and K, plus they’re a good source of fiber and folate. Mushrooms provide immune-boosting beta-glucans and are one of the few natural food sources of vitamin D. The crispy onions, while indulgent, do contain quercetin—a powerful antioxidant found in onions that supports heart health. And by making this dish from scratch, you’re avoiding the preservatives and additives found in canned cream of mushroom soup, which is a win in my book.
This recipe is naturally gluten-free, nut-free, and can easily be made dairy-free or vegan with the substitutions listed above. It contains dairy in its standard form, so if you’re serving someone with a dairy allergy, be sure to use the dairy-free version. And while it’s not low-calorie by any stretch, it’s a holiday dish—sometimes you just need to enjoy the moment and worry about the salad tomorrow.
Conclusion
This classic gluten-free green bean casserole for the holidays is more than just a recipe—it’s a way to bring back that nostalgic comfort food feeling without leaving anyone out. Whether you’re cooking for someone with celiac disease, a gluten sensitivity, or just want a homemade version that tastes infinitely better than the canned stuff, this recipe delivers every single time.
I’ve made this casserole for potlucks, holiday dinners, and even just a random Tuesday when I needed comfort food. Each time, someone asks for the recipe, and each time, I smile remembering those twelve failed attempts that led to this perfect version. The Whistle Stop may be gone, but their casserole legacy lives on in my kitchen—and now in yours.
I’d love to hear how this turns out for you! Drop a comment below and let me know if you tried any variations, if your family loved it, or if you have any questions. Don’t forget to pin this recipe for later and share it with someone who needs a gluten-free holiday win. Happy cooking, friends—you’ve got this!
Frequently Asked Questions
Can I use frozen green beans instead of fresh?
I don’t recommend it. Frozen green beans are blanched before freezing, so they’re already partially cooked. When you blanch them again and then bake them, they turn mushy and lose their structure. Fresh green beans give you that perfect tender-crisp texture that makes this casserole so satisfying.
Can I make the crispy onions ahead of time?
Absolutely! You can fry the onions up to 3 days in advance. Store them in an airtight container at room temperature—not in the fridge, where they’ll absorb moisture and go soft. If they lose some crunch, just spread them on a baking sheet and warm them in a 300°F oven for 5 minutes before adding to the casserole.
What’s the best gluten-free flour blend for this recipe?
I’ve tested this with several blends, and King Arthur Measure for Measure gives the best results. Bob’s Red Mill 1-to-1 Baking Flour is a close second. Avoid blends that contain bean flours (like chickpea or fava bean) because they’ll give your gravy an unpleasant earthy taste. Also, don’t use almond flour or coconut flour—they behave completely differently and won’t thicken properly.
Can I add cheese to this casserole?
You can, but I’d recommend keeping it simple. Sprinkle 1/2 cup of grated Parmesan over the top before adding the crispy onions for a savory, salty kick. Gruyère also works beautifully—it melts into the sauce and adds a nutty flavor. Just be aware that cheese changes the texture slightly and makes the casserole richer, so adjust the cream accordingly if you’re watching calories.
Why did my gravy turn out lumpy?
Lumpy gravy usually happens for one of three reasons: you added the liquid too quickly, you stopped whisking, or your milk was cold. Always add the liquid slowly while whisking constantly, and make sure your milk is at room temperature. If you do end up with lumps, don’t panic—pour the gravy through a fine-mesh strainer into a clean bowl, pressing on the lumps with a spatula. It won’t be perfectly smooth, but it’ll be close enough for comfort food.
Pin This Recipe!
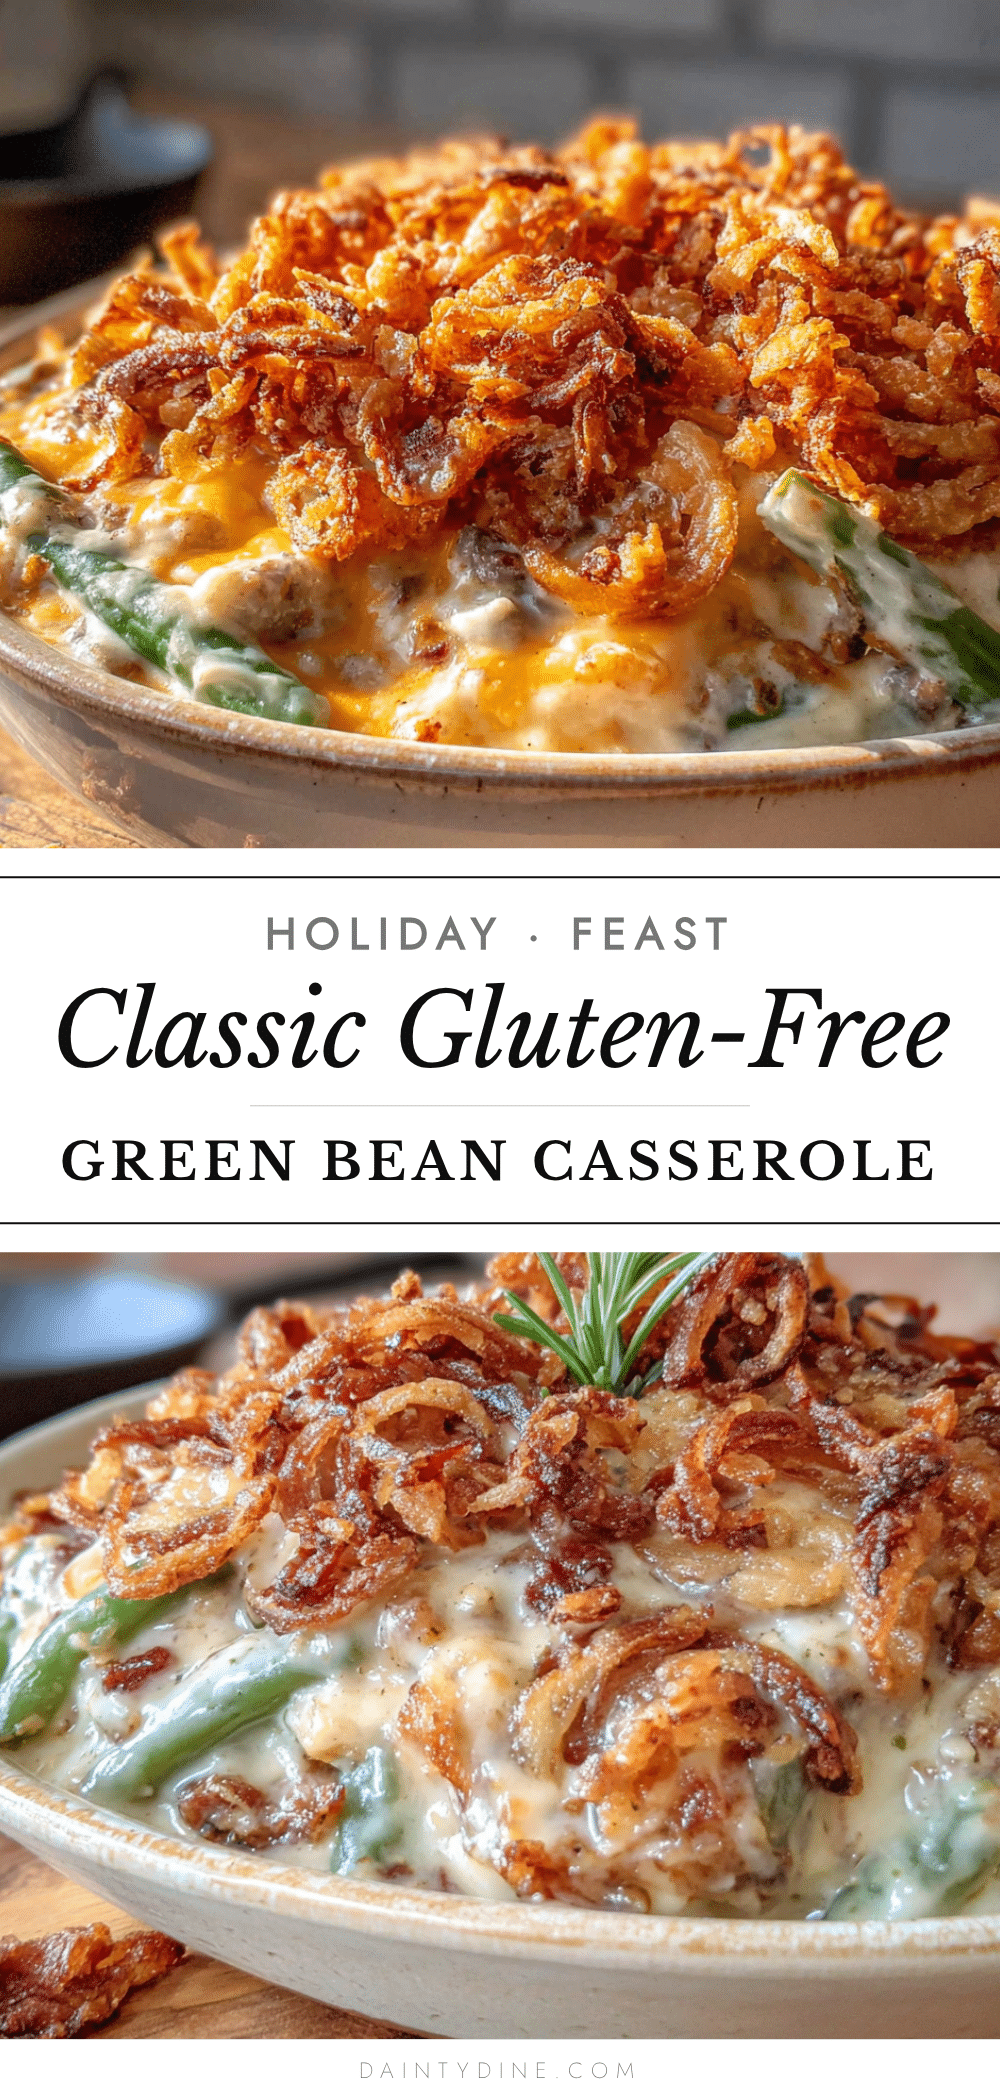
Classic Gluten-Free Green Bean Casserole Holiday Recipe

A rich, creamy green bean casserole with homemade mushroom gravy and crispy onion topping, completely gluten-free and perfect for holiday gatherings.
- Prep Time: 30 minutes
- Cook Time: 45 minutes
- Total Time: 1 hour 15 minutes
- Yield: 8 servings 1x
- Category: Side Dish
- Cuisine: American
Ingredients
- 2 pounds fresh green beans, trimmed and cut into 2-inch pieces
- 8 ounces cremini mushrooms, thinly sliced
- 1 medium yellow onion, diced (about 1 cup)
- 3 cloves garlic, minced
- 4 tablespoons unsalted butter
- 1/4 cup gluten-free all-purpose flour
- 2 cups whole milk, room temperature
- 1 cup low-sodium chicken or vegetable broth
- 1/2 cup heavy cream
- 1 teaspoon dried thyme
- 1/2 teaspoon smoked paprika
- Salt and black pepper to taste
- 1/4 teaspoon ground nutmeg
- 2 large yellow onions, thinly sliced into rings
- 1 cup buttermilk
- 1 cup gluten-free all-purpose flour
- 1/2 cup fine cornmeal
- 1 teaspoon garlic powder
- 1 teaspoon salt
- 1/2 teaspoon cayenne pepper (optional)
- Vegetable oil for frying (about 2 cups)
Instructions
- Blanch the green beans: Bring a large pot of salted water to a rolling boil. Add the trimmed green beans and cook for exactly 3 minutes. Immediately transfer to a bowl of ice water to stop cooking. Drain well and pat dry.
- Start the crispy onions: Place sliced onions in a bowl and cover with buttermilk. Let soak for at least 30 minutes. In a separate bowl, whisk together gluten-free flour, cornmeal, garlic powder, salt, and cayenne.
- Fry the onions: Heat about 2 inches of vegetable oil in a medium saucepan to 350°F. Working in batches, lift onions from buttermilk, toss in flour mixture, and fry for 2-3 minutes until deep golden brown. Transfer to paper towel-lined plate and season with salt.
- Make the mushroom gravy: In a large skillet, melt 2 tablespoons butter over medium heat. Add sliced mushrooms and cook without stirring for 4 minutes, then stir and cook another 3 minutes until golden. Add diced onion and cook until translucent, about 5 minutes. Add garlic and cook until fragrant, about 30 seconds.
- Build the roux: Sprinkle gluten-free flour over mushroom mixture and stir constantly for 2 minutes until mixture looks dry and clumpy.
- Finish the gravy: Slowly pour in milk while whisking constantly, then add broth. Bring to a gentle simmer. Add heavy cream, thyme, smoked paprika, nutmeg, and salt and pepper. Cook, stirring occasionally, until sauce thickens enough to coat the back of a spoon, about 5-7 minutes.
- Assemble the casserole: Preheat oven to 375°F. Grease a 9×13 baking dish. Spread blanched green beans evenly in dish. Pour mushroom gravy over top and gently toss to coat. Spread into an even layer.
- Bake and top: Bake casserole uncovered for 15 minutes until bubbly. Remove from oven, sprinkle crispy onions evenly over top, and return to oven for another 10 minutes until topping is deeply golden and edges are bubbling. Let rest for 5 minutes before serving.
Notes
For best results, use fresh green beans and avoid frozen or canned. Toasting the gluten-free flour before making the roux prevents a gritty texture. The buttermilk soak for onions is essential for coating adhesion. Let casserole rest 5 minutes after baking to allow sauce to set.
Nutrition
- Serving Size: 1 cup
- Calories: 280
- Sugar: 8
- Sodium: 480
- Fat: 18
- Saturated Fat: 10
- Carbohydrates: 28
- Fiber: 4
- Protein: 6
Keywords: gluten-free green bean casserole, holiday side dish, gluten-free Thanksgiving, crispy onion topping, homemade mushroom gravy


