Love this? Save it for later!
Share the inspiration with your friends
I had sworn off winter squash for years. Let me tell you, it wasn’t a dramatic declaration or anything—just a quiet, firm refusal that settled in sometime after college and never really left. The stringy textures, the way they took forever to soften, that slightly watery sweetness that always felt like a compromise. Honestly, I’d grab a bag of green beans or a bunch of broccoli without a second thought. Then last Tuesday, standing in the cramped produce aisle of my local market, a tiny, wrinkled honeynut squash practically rolled into my hand. I almost put it back. But the cashier—a woman named Deb who always remembers my coffee order—caught me eyeing it and said, “Roast that thing with some butter, you won’t regret it.” I bought it mostly out of politeness, figuring it would sit on my counter for a week before I quietly tossed it.
The next night, exhausted from back-to-back meetings and hungry enough to eat the fridge, I remembered the little squash. I was in no mood for a project. So I halved it, scooped out the seeds with a spoon that was definitely too big for the job, and threw it face-down on a baking sheet. I melted some butter in a pan, let it go a second too long (which, I learned later, was actually the whole point), and drizzled it over the squash with some thyme I found wilting in the crisper drawer. Twenty-five minutes later, the kitchen smelled like a cozy restaurant I couldn’t afford. The edges were caramelized and sticky, the flesh was so tender it practically fell apart when I looked at it, and that brown butter—nutty, toasty, almost caramel-sweet—had soaked into every crevice. I ate the whole half standing at the counter, burning my fingers and not caring one bit. That was the moment I had to admit I’d been wrong about squash. Maybe you’ve been there too—stubborn about a food for no real reason, until one version just hits different. This one stays in my rotation because it’s fast, it’s forgiving, and it makes a weeknight feel like you actually tried.
Why You’ll Love This Recipe
This quick brown butter honeynut squash with thyme isn’t just another side dish. It’s the kind of recipe that makes you look like a hero on a Tuesday night with almost zero effort. Here’s why it works so hard for you:
- Fast & Easy: From start to table in under 30 minutes. No peeling, no chopping into perfect cubes—just halve, scoop, and roast.
- Simple Ingredients: You likely have butter and thyme on hand already. Honeynut squash is showing up in more grocery stores, but if you can’t find it, butternut squash works too.
- Perfect for Busy Weeknights: This is real food for real schedules. It roasts while you throw together a quick protein or set the table.
- Crowd-Pleaser: I’ve served this to kids, picky eaters, and people who “don’t like squash.” The brown butter does the heavy lifting, and the caramelized edges win everyone over.
- Unbelievably Delicious: That nutty brown butter combined with the natural sweetness of the squash and the earthy thyme? It’s comfort food that feels a little fancy without trying.
What makes this version different from the rest is the technique. Most recipes tell you to toss cubed squash in oil and roast it for 45 minutes. Here, you’re browning the butter first—just a minute or two of active time—which adds a deep, almost toasty flavor that plain melted butter can’t match. And because you’re roasting the squash halves cut-side down, you get that gorgeous caramelization without any flipping or fussing. It’s not just another roasted squash recipe. It’s the one that will make you close your eyes after the first bite, even on a chaotic Wednesday.
What Ingredients You Will Need
This recipe keeps it simple. You only need a handful of ingredients, and they all pull their weight. No long shopping list or obscure spices required.
- Honeynut squash (2 medium, about 1 pound / 450g each): These little guys are smaller and sweeter than butternut squash, with thinner skin that’s perfectly edible after roasting. Look for ones that feel heavy for their size and have a deep orange color. If you can’t find honeynut, use a small butternut squash—just peel it first, as the skin is tougher.
- Unsalted butter (4 tablespoons / 56g): This is the star of the show. Using unsalted butter lets you control the salt level. I prefer Kerrygold or any European-style butter for its higher fat content, which browns more evenly and tastes richer.
- Fresh thyme (6-8 sprigs): Fresh thyme is non-negotiable here. Dried thyme just doesn’t have the same aromatic punch. You’ll use most of it for roasting, then save a few leaves for garnish. If you’re in a pinch, fresh rosemary also works beautifully.
- Kosher salt (1 teaspoon / 5g, plus more to taste): I use Diamond Crystal kosher salt. It’s less salty by volume than Morton’s, so if you’re using a different brand, start with less and adjust. The salt balances the sweetness of the squash and the richness of the butter.
- Black pepper (½ teaspoon / 1g, freshly ground): Freshly ground pepper adds a subtle warmth that pre-ground stuff just can’t match. Don’t skip it—it helps cut through the butter.
- Flaky sea salt (for finishing, optional but recommended): A sprinkle of Maldon or another flaky salt right before serving adds a little crunch and a burst of saltiness that makes the flavors pop. It’s a small touch that makes a big difference.
- Maple syrup (1 tablespoon / 15ml, optional): If your squash isn’t as sweet as you’d like, a light drizzle of maple syrup before roasting can boost the natural sugars. I only add this when my squash feels a little underwhelming at the market.
That’s it. Seven ingredients, most of which you probably already have. The beauty of this recipe is that it lets the squash and butter do the talking.
Equipment Needed
You don’t need a fancy kitchen to pull this off. Here’s what you’ll need:
- Baking sheet (half-sheet pan, 18×13 inches / 46x33cm): A rimmed baking sheet is best to catch any butter that might drip. I use my trusty Nordic Ware—it’s sturdy, doesn’t warp, and cleans up easily. If you don’t have one, any oven-safe dish with a rim will work.
- Parchment paper or aluminum foil: Lining the pan makes cleanup a breeze. The brown butter can get sticky, and scrubbing a pan after a long day is the last thing you want.
- Small skillet or saucepan: For browning the butter. A light-colored pan (stainless steel or enamel) is ideal because you can see the butter change color. Dark nonstick pans make it harder to judge doneness.
- Chef’s knife and cutting board: A sharp knife is crucial for safely halving the squash. Honeynut squash is small, but it’s dense. A dull knife can slip, and that’s no fun.
- Spoon or melon baller: For scooping out the seeds. A regular spoon works fine, but a melon baller is oddly satisfying for this job.
- Pastry brush (optional): For brushing the brown butter mixture onto the squash. You can also just drizzle it on and tilt the pan to coat.
I’ve made this recipe with a dollar-store baking sheet and a butter knife. It still turned out great. Don’t overthink the equipment.
Preparation Method
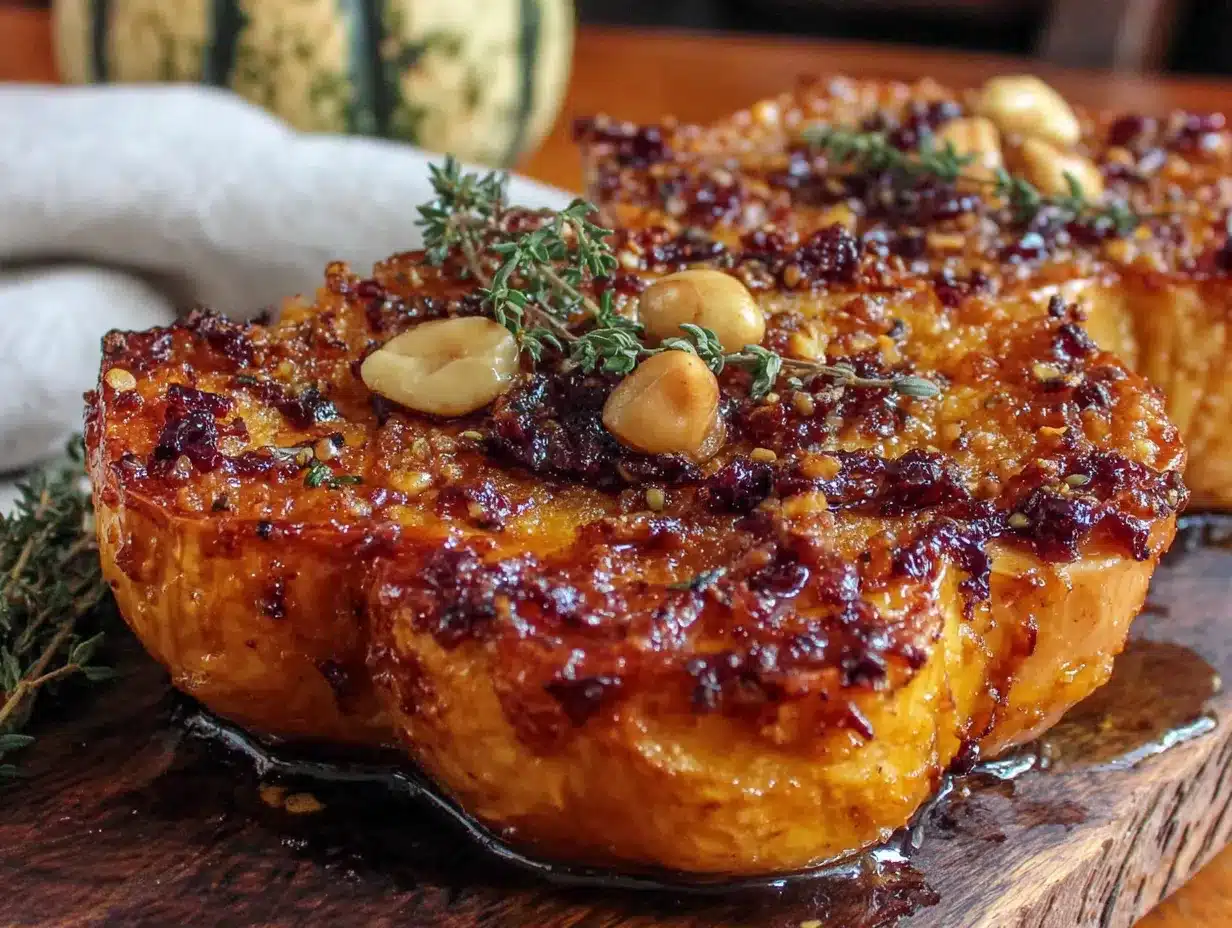
This comes together fast, so read through the steps once before you start. The oven does most of the work.
- Preheat your oven to 400°F (200°C). Position a rack in the middle. While it’s heating, line your baking sheet with parchment paper or foil. This isn’t just for easy cleanup—it also prevents the squash from sticking to the pan.
- Halve the squash. Place one honeynut squash on your cutting board. Using a sharp chef’s knife, carefully cut it in half lengthwise from the stem end down through the bottom. Go slow and steady—these little guys are dense. If the knife gets stuck, rock it gently. Repeat with the second squash. You’ll have four halves total.
- Scoop out the seeds. Use a sturdy spoon or a melon baller to scrape out the seeds and stringy pulp from the center of each half. Don’t worry about getting every last bit—a few stray seeds won’t hurt. Discard the seeds or save them for roasting later (they make a great snack).
- Brown the butter. Cut the 4 tablespoons of butter into small pieces and add them to your small skillet or saucepan. Place it over medium heat. Stir constantly with a spatula or wooden spoon. The butter will melt, then foam, then start to turn golden. After about 3-4 minutes, you’ll see little brown specks forming at the bottom, and it will smell nutty and amazing. Remove it from the heat immediately—it can go from brown to burnt in seconds. Pour the browned butter into a small bowl to stop the cooking process. Be careful, it’s hot.
- Season the butter. Add the 1 teaspoon of kosher salt and ½ teaspoon of black pepper to the browned butter. Stir to combine. If you’re using the optional maple syrup, stir it in now. The butter will seize up slightly—that’s normal. Just keep stirring.
- Brush the squash. Using a pastry brush or a spoon, coat the cut sides of each squash half with the brown butter mixture. Make sure you get it into all the nooks and crannies. Don’t be shy—this is where all the flavor lives. Reserve any leftover butter for basting later.
- Add the thyme. Place 2-3 sprigs of fresh thyme on each squash half, pressing them gently into the butter. The thyme will infuse the squash as it roasts. Don’t worry about the leaves falling off—they’ll crisp up and become part of the dish.
- Roast cut-side down. Place the squash halves cut-side down on the prepared baking sheet. This is the secret to getting those gorgeous caramelized edges. The direct contact with the hot pan creates a golden, almost sticky surface. Roast for 20-25 minutes, or until the squash is tender when pierced with a fork. The exact time depends on the size of your squash—smaller ones might be done in 18 minutes, larger ones might need 28.
- Flip and baste (optional but recommended). After 20 minutes, carefully flip the squash halves over using tongs. If you reserved any brown butter, brush it over the cut sides now. If not, just use the juices that have collected on the pan. Return to the oven for another 3-5 minutes to let the tops caramelize slightly.
- Finish and serve. Remove from the oven. The squash should be fork-tender and the edges should be deep golden brown. Sprinkle with flaky sea salt if using, and garnish with a few fresh thyme leaves. Serve hot, warm, or at room temperature—it’s delicious any way.
One note: if you’re making this for a crowd, you can double the recipe easily. Just use two baking sheets and rotate them halfway through roasting.
Cooking Tips & Techniques
I’ve made this recipe more times than I can count, and I’ve learned a few things along the way. Here are the tricks that make it foolproof.
Don’t walk away from the butter. I burned my first batch of brown butter because I thought I could chop an onion while it cooked. You can’t. Brown butter goes from perfect to acrid in about 15 seconds. Stay at the stove, watch it, and trust your nose. When it smells like toasted nuts, it’s done.
Use a light-colored pan for browning butter. The first time I tried this in a black nonstick skillet, I couldn’t see the color change at all. I ended up with burnt butter and a smoky kitchen. A stainless steel or enamel pan makes it easy to see those golden brown specks forming.
Roasting cut-side down is non-negotiable. I know it’s tempting to lay the squash face-up so you can see it, but trust me on this. The direct contact with the hot pan creates a caramelized crust that you just can’t get any other way. The squash steams from the inside while the outside gets all crispy and sweet.
Don’t overcrowd the pan. Give each squash half a little breathing room. If they’re touching, they’ll steam instead of roast, and you’ll lose that caramelization. If you’re making a double batch, use two pans.
Let the squash rest before serving. I know you’re hungry. I am too. But letting the squash sit for 5 minutes after roasting allows the juices to redistribute. If you cut into it immediately, all that buttery goodness will run out onto the cutting board instead of staying in the squash.
Save the thyme sprigs for garnish. After roasting, the thyme leaves will be crispy and delicious. I like to pluck them off the stems and sprinkle them over the squash. They add a little texture and a concentrated herbal punch.
One mistake I still make sometimes: using cold butter straight from the fridge. It browns unevenly and takes longer to melt. Let your butter sit at room temperature for 10 minutes before you start. It makes a difference.
Variations & Adaptations
This recipe is flexible. Here are a few ways to change it up based on what you have or what you’re craving.
Maple-Bourbon Version: Add 1 tablespoon of bourbon and 1 tablespoon of maple syrup to the brown butter before brushing it on the squash. The bourbon adds a smoky warmth that pairs beautifully with the thyme. Just be careful—the alcohol can cause the butter to splutter a little when you add it.
Spicy Harissa Twist: Stir 1 teaspoon of harissa paste into the brown butter before brushing it on the squash. The heat cuts through the sweetness and adds a lovely complexity. Top with a dollop of yogurt and some fresh cilantro for a different vibe entirely.
Vegan Option: Substitute the butter with a high-quality vegan butter (I like Miyoko’s or Earth Balance) or use coconut oil. The coconut oil version will have a slight coconut flavor, which actually works well with the squash and thyme. Just make sure to brown the vegan butter the same way—it works, I promise.
Air Fryer Method: If you’re short on time or don’t want to heat up the whole oven, this works beautifully in an air fryer. Cook the halved squash at 375°F (190°C) for 12-15 minutes, cut-side down. Check for doneness at 12 minutes—air fryers run hot and fast.
Different Squash Options: Can’t find honeynut? Use acorn squash, delicata squash, or even small butternut squash. Acorn squash has a slightly more fibrous texture but takes the brown butter beautifully. Delicata has edible skin like honeynut and roasts in about the same time. Butternut will need an extra 5-10 minutes and should be peeled first.
Herb Swaps: No thyme? Use fresh rosemary, sage, or even a few bay leaves. Each herb brings its own personality. Rosemary is piney and bold, sage is earthy and slightly peppery, and bay leaves add a subtle floral note.
I once made this with a mix of honeynut and delicata squash when I couldn’t decide which to buy. It was the best decision. The different textures and shapes made the dish look beautiful on the plate, and nobody complained about having options.
Serving & Storage Suggestions
This squash is versatile enough to pair with almost anything. Here’s how I like to serve it and keep it for later.
Serving Temperature: Serve it hot out of the oven for the best texture, but honestly, it’s almost as good at room temperature. The brown butter soaks into the squash as it cools, making every bite rich and flavorful. I’ve even eaten it cold straight from the fridge the next day—don’t judge me.
Presentation: Place the squash halves on a platter cut-side up. Drizzle any remaining pan juices over the top. Sprinkle with flaky sea salt and fresh thyme leaves. For a dinner party, I sometimes add a sprinkle of pomegranate seeds or toasted pecans for color and crunch.
What to Serve With It: This squash is a natural side for roasted chicken, pork chops, or grilled steak. It also works well alongside a simple green salad with a tangy vinaigrette to cut through the richness. For a vegetarian meal, serve it over a bed of farro or quinoa with some crumbled feta cheese.
Storage: Store leftover squash in an airtight container in the refrigerator for up to 4 days. The texture will soften slightly, but the flavor actually gets better as it sits. I’ve found that the thyme flavor becomes more pronounced after a day or two.
Reheating: The best way to reheat is in the oven at 350°F (175°C) for 5-7 minutes. This restores some of the caramelization. You can also use an air fryer at 350°F (175°C) for 3-4 minutes. The microwave works in a pinch, but it will make the squash softer and less crispy.
Freezing: You can freeze roasted squash for up to 3 months. Let it cool completely, then transfer to a freezer-safe bag or container. To reheat, thaw in the refrigerator overnight and warm in the oven. The texture won’t be quite as firm as fresh, but it’s still delicious in soups or as a side.
One thing I’ve noticed: the flavors really develop overnight. If you’re meal prepping, make this a day ahead and reheat it. It somehow tastes even better the second time around.
Nutritional Information & Benefits
This dish is as good for you as it is delicious. Here’s a rough breakdown per serving (one squash half, using the full amount of butter divided among four servings):
| Nutrient | Amount per Serving |
|---|---|
| Calories | 180 |
| Total Fat | 12g |
| Saturated Fat | 7g |
| Carbohydrates | 18g |
| Fiber | 3g |
| Sugar | 6g |
| Protein | 2g |
| Vitamin A | 250% DV |
| Vitamin C | 30% DV |
| Potassium | 450mg |
Health Benefits: Honeynut squash is packed with vitamin A (from beta-carotene), which supports eye health and immune function. It’s also a good source of fiber, which helps with digestion and keeps you feeling full. The brown butter adds healthy fats that help your body absorb the fat-soluble vitamins in the squash. Thyme is rich in antioxidants and has antimicrobial properties. This isn’t just a tasty side—it’s a nutrient-dense one.
Dietary Considerations: This recipe is naturally gluten-free and can be made vegan with a butter substitute. It’s also low-carb friendly if you watch your portion size. The main allergen is dairy (butter), but as mentioned, a vegan alternative works well.
I’m not a nutritionist, but I feel good about eating this. It’s real food, made with simple ingredients, and it fills you up without weighing you down.
Conclusion
This quick brown butter honeynut squash with thyme is the kind of recipe that makes you wonder why you ever bothered with complicated side dishes. It’s fast enough for a Tuesday night, fancy enough for a holiday table, and forgiving enough for the days when you just can’t be bothered to measure things perfectly. The brown butter does all the heavy lifting—it transforms a humble squash into something that tastes like you spent hours in the kitchen.
I make this at least twice a month, and it never gets old. Sometimes I add maple syrup, sometimes I throw in some chili flakes, and sometimes I just let the butter and thyme shine. It always works. That’s the beauty of a recipe that’s built on good technique and quality ingredients—you can’t really mess it up.
Give it a try this week. I promise you’ll be surprised at how something so simple can feel so special. And when you do, I’d love to hear about it. Leave a comment below, share your photos on Pinterest, or tag me in your creations. Let me know what variations you tried, what you served it with, or if you finally converted a squash skeptic like I did. Happy cooking!
Frequently Asked Questions
Can I use butternut squash instead of honeynut?
Absolutely. Butternut squash is a great substitute, but you’ll need to peel it first since the skin is too tough to eat. Cut it into cubes or wedges instead of halves, and add about 5-10 minutes to the roasting time.
Do I have to brown the butter, or can I just melt it?
You can just melt it, but you’ll miss out on the nutty, toasty flavor that makes this recipe special. Browning takes less than 5 minutes and adds a depth of flavor that plain melted butter can’t match. It’s worth the extra minute.
Can I make this ahead of time for a dinner party?
Yes! Roast the squash up to a day in advance, then reheat it in the oven at 350°F (175°C) for 5-7 minutes before serving. The flavors actually get better overnight. Just don’t add the flaky sea salt until right before serving.
How do I know when the squash is done?
Pierce the thickest part of the squash with a fork. It should slide in easily with no resistance. The edges should be caramelized and golden brown. If the fork meets resistance, give it another 3-5 minutes and check again.
Can I eat the skin of honeynut squash?
Yes! That’s one of the best things about honeynut squash. The skin is thin and tender, especially after roasting. It’s packed with fiber and nutrients, so there’s no need to peel it. Just wash the squash well before cutting.
Pin This Recipe!
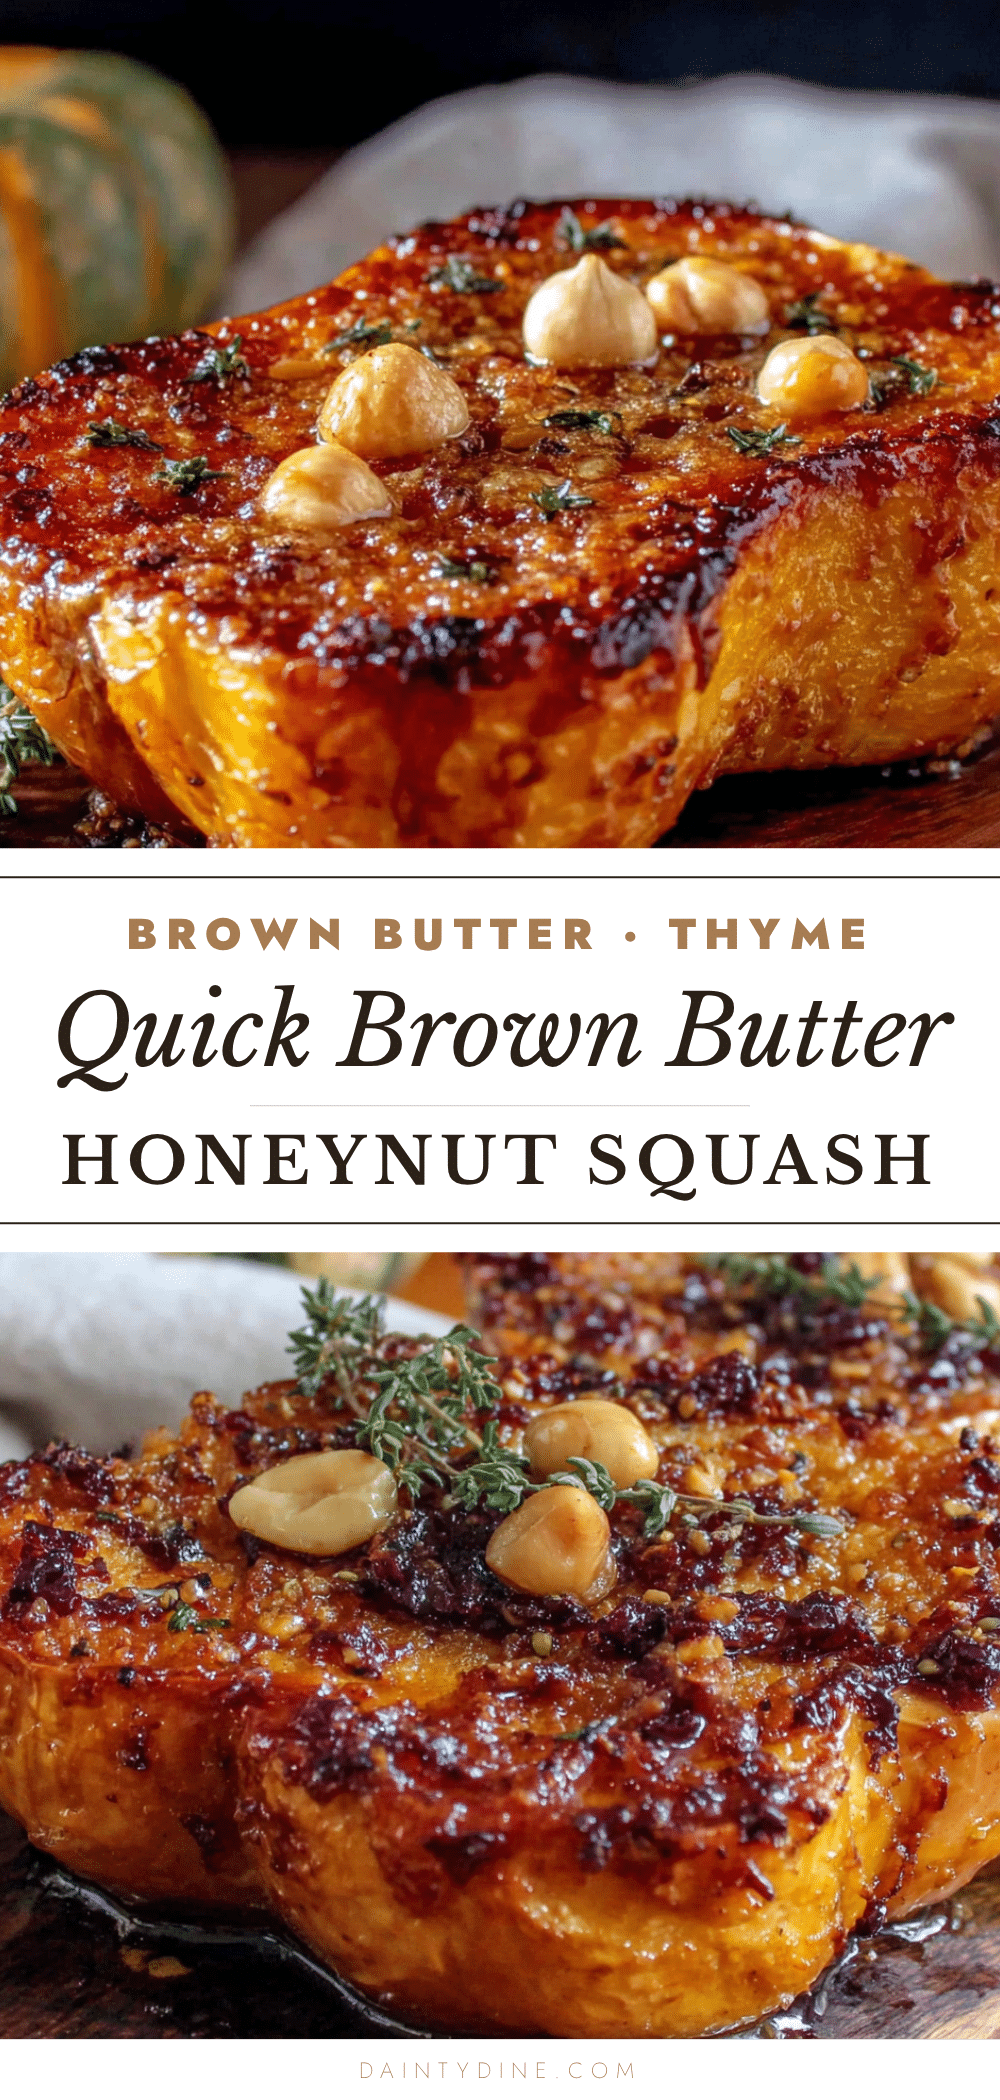
Quick & Easy Brown Butter Honeynut Squash with Thyme

A fast and forgiving weeknight side dish featuring caramelized honeynut squash halves drizzled with nutty brown butter and fresh thyme. Ready in under 30 minutes, it transforms a humble squash into a restaurant-worthy dish with minimal effort.
- Prep Time: 10 minutes
- Cook Time: 25 minutes
- Total Time: 35 minutes
- Yield: 4 servings 1x
- Category: Side Dish
- Cuisine: American
Ingredients
- 2 medium honeynut squash (about 1 pound / 450g each)
- 4 tablespoons unsalted butter (56g)
- 6–8 sprigs fresh thyme
- 1 teaspoon kosher salt (5g), plus more to taste
- ½ teaspoon freshly ground black pepper (1g)
- Flaky sea salt for finishing (optional but recommended)
- 1 tablespoon maple syrup (15ml, optional)
Instructions
- Preheat your oven to 400°F (200°C). Position a rack in the middle. Line a baking sheet with parchment paper or foil.
- Halve the squash: Place one honeynut squash on a cutting board. Using a sharp chef’s knife, carefully cut it in half lengthwise from the stem end down through the bottom. Repeat with the second squash to get four halves total.
- Scoop out the seeds: Use a sturdy spoon or melon baller to scrape out the seeds and stringy pulp from the center of each half. Discard or save seeds for roasting.
- Brown the butter: Cut the 4 tablespoons of butter into small pieces and add them to a small skillet or saucepan over medium heat. Stir constantly. The butter will melt, foam, then turn golden. After about 3-4 minutes, when you see little brown specks and smell a nutty aroma, remove from heat immediately. Pour into a small bowl to stop cooking.
- Season the butter: Add 1 teaspoon kosher salt and ½ teaspoon black pepper to the browned butter. Stir to combine. If using maple syrup, stir it in now.
- Brush the squash: Using a pastry brush or spoon, coat the cut sides of each squash half with the brown butter mixture, getting into all the nooks and crannies. Reserve any leftover butter for basting.
- Add the thyme: Place 2-3 sprigs of fresh thyme on each squash half, pressing gently into the butter.
- Roast cut-side down: Place the squash halves cut-side down on the prepared baking sheet. Roast for 20-25 minutes, until tender when pierced with a fork.
- Flip and baste (optional): After 20 minutes, carefully flip the squash halves over using tongs. If you reserved any brown butter, brush it over the cut sides. Return to the oven for another 3-5 minutes to caramelize the tops.
- Finish and serve: Remove from the oven. Sprinkle with flaky sea salt if using, and garnish with fresh thyme leaves. Serve hot, warm, or at room temperature.
Notes
Don’t walk away from the butter while browning—it can go from perfect to burnt in seconds. Use a light-colored pan to see the color change. Roasting cut-side down is essential for caramelization. Let the squash rest for 5 minutes before serving to allow juices to redistribute. For best results, let butter sit at room temperature for 10 minutes before browning.
Nutrition
- Serving Size: 1 squash half
- Calories: 180
- Sugar: 6
- Sodium: 450
- Fat: 12
- Saturated Fat: 7
- Carbohydrates: 18
- Fiber: 3
- Protein: 2
Keywords: brown butter, honeynut squash, thyme, roasted squash, easy side dish, weeknight dinner, gluten-free, vegetarian


