Love this? Save it for later!
Share the inspiration with your friends
There used to be a tiny bakery tucked into the back of an antique shop in my hometown, the kind of place that smelled like cinnamon and old wood. They made these incredible pumpkin cookies that were soft, chewy, and topped with a glaze that crackled just a little when you bit into it. When the antique shop closed and the bakery vanished, I felt a real, honest-to-goodness pang of loss. I mean, I actually drove by three times hoping it was a mistake. For two years, I tried to recreate them. After 12 tries — some were hockey pucks, others were cakey disasters — I finally got it.
The secret, let me tell you, was all in the texture. I wanted that specific snickerdoodle chew, not a fluffy pumpkin muffin masquerading as a cookie. I wanted that tangy cream cheese glaze that the bakery always drizzled in a zigzag. Honestly, I was getting a little obsessive. I’d wake up at 6 AM on a Saturday just to test a new batch, my kitchen looking like a flour bomb had gone off. My neighbor, a sweet older lady named Mrs. Gable, started knocking on my door whenever she smelled the cinnamon baking. “Are you still working on those cookies?” she’d ask, peeking her head in.
This recipe is the one. It’s the one where the cookies finally had that perfect snickerdoodle crackle on top, the one where the pumpkin flavor was there but not screaming for attention, and the icing was just thick enough to set into a beautiful, glossy finish. Maybe you’ve been there, chasing a ghost from a restaurant or bakery that closed down. It’s a special kind of culinary heartbreak. Well, this post is the story of how I got that ghost back. And let me tell you, it was worth every single messy, flour-covered attempt.
Why You’ll Love This Recipe
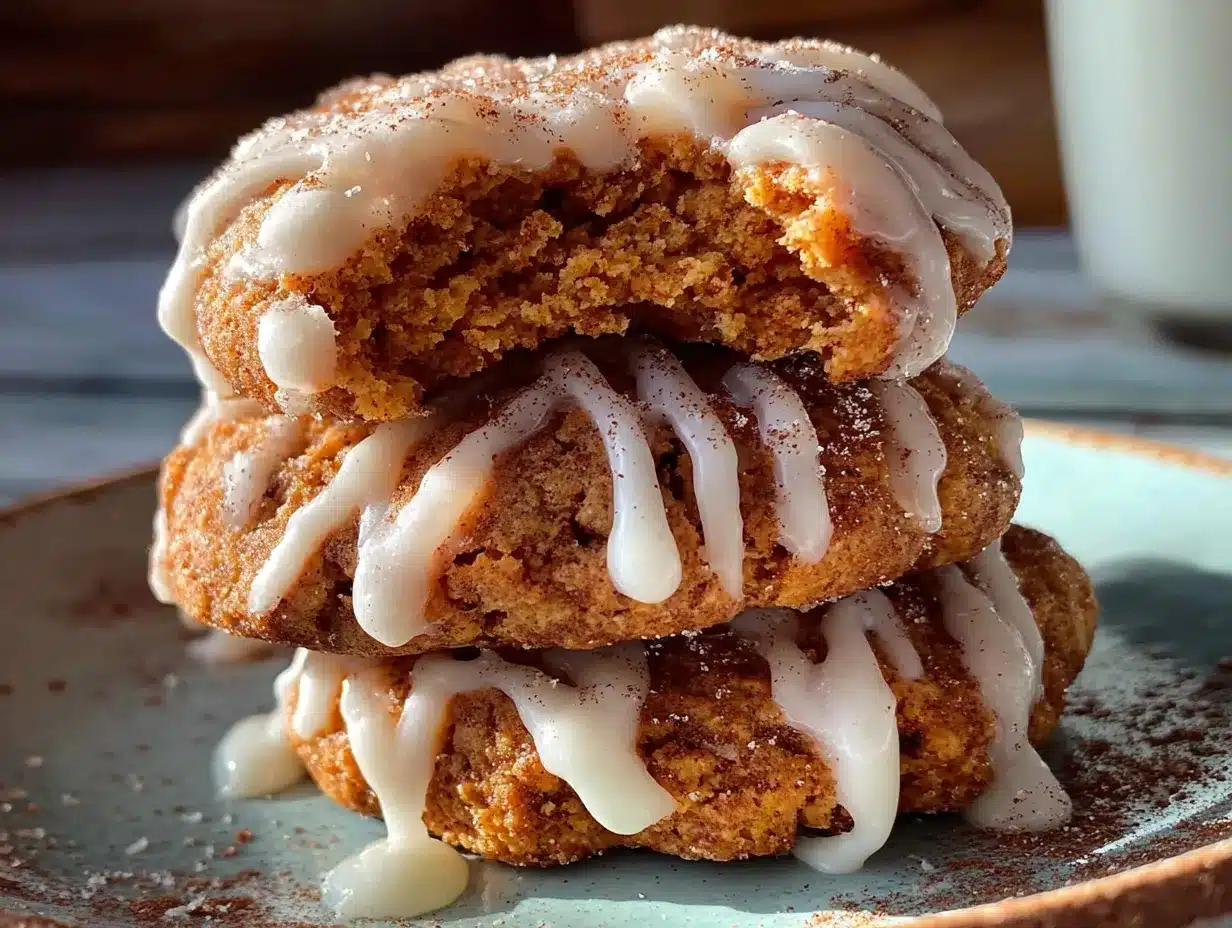
These aren’t your average pumpkin cookies. They are a perfect hybrid — the classic, buttery snickerdoodle you grew up with, but infused with the warm, cozy soul of pumpkin pie. They are the kind of cookie that makes you want to put on a chunky sweater and pour a glass of cold milk.
- Quick & Easy: From mixing bowl to cooling rack in under 30 minutes. No chilling required, which is a total game-changer for spontaneous baking cravings.
- Simple Ingredients: You probably have most of this in your pantry right now. No weird, hard-to-find extracts or specialty flours.
- Perfect for Fall: Great for Thanksgiving dessert tables, Halloween parties, or just a Tuesday night when you need a little seasonal magic.
- Crowd-Pleaser: I brought these to a potluck last fall, and they were gone before the main course. Seriously. People were hovering by the dessert table.
- Unbelievably Delicious: The texture is the star. It’s soft, chewy, and has that signature snickerdoodle crackle. The cream cheese icing is the perfect tangy finish.
What makes this recipe different is the technique. Most pumpkin cookie recipes are cakey because of all the moisture. I’ve balanced the wet and dry ingredients perfectly, using a specific ratio of butter to pumpkin puree to get that dense, chewy snickerdoodle texture we all crave. It’s not another version of a pumpkin cookie—it’s the best version.
This recipe isn’t just good—it’s the kind that makes you close your eyes after the first bite. It’s comfort food reimagined—faster, easier, but with the same soul-soothing satisfaction. Perfect for impressing guests without stress, or turning a simple evening into something memorable.
What Ingredients You Will Need
This recipe uses simple, wholesome ingredients to deliver that bold pumpkin and cinnamon flavor without the fuss. Most of these are pantry staples, which makes this an easy last-minute bake.
For the Cookies
- Unsalted butter, softened (1 cup, or 2 sticks) — I always use unsalted to control the salt level. Let it sit out for about 30 minutes.
- Granulated sugar (1 cup) — Adds sweetness and helps create that beautiful crackly top.
- Brown sugar, packed (1/2 cup) — Adds moisture and a deeper, caramel-like flavor.
- Pumpkin puree (3/4 cup) — Be sure to get 100% pure pumpkin, not pumpkin pie filling. I like Libby’s for its consistent texture.
- Large egg (1) — Room temperature is best for even mixing.
- Vanilla extract (1 teaspoon) — Pure vanilla makes a difference, but imitation works in a pinch.
- All-purpose flour (2 1/2 cups) — Spoon and level it into your measuring cup for accuracy.
- Cream of tartar (2 teaspoons) — This is the secret to the snickerdoodle tang and texture. Don’t skip it!
- Baking soda (1 teaspoon) — Helps the cookies spread just right.
- Pumpkin pie spice (1 1/2 teaspoons) — Store-bought is fine, or make your own with cinnamon, nutmeg, ginger, and cloves.
- Cinnamon (1 teaspoon) — For that classic snickerdoodle warmth.
- Salt (1/2 teaspoon) — Balances the sweetness.
For the Cinnamon Sugar Coating
- Granulated sugar (3 tablespoons)
- Ground cinnamon (1 tablespoon)
For the Cream Cheese Icing
- Powdered sugar (1 1/2 cups)
- Cream cheese, softened (2 ounces, or 1/4 of a block) — Let it soften fully for a smooth icing.
- Unsalted butter, softened (2 tablespoons)
- Vanilla extract (1/2 teaspoon)
- Milk (2-3 tablespoons) — Use whole milk or a dairy-free alternative like oat milk for the best consistency.
Ingredient Tip: For the best texture, make sure your pumpkin puree isn’t watery. If it looks a little loose, pat it dry with a paper towel before adding it to the batter. This little step can save you from flat cookies!
Equipment Needed
You don’t need a fancy kitchen for these. Here’s what I use:
- Large mixing bowls (2) — One for wet, one for dry.
- Electric hand mixer or stand mixer — You can do this by hand, but a mixer makes creaming the butter and sugar so much easier.
- Baking sheets (2) — I recommend light-colored ones for even baking. Dark pans can make the bottoms burn.
- Parchment paper or silicone baking mats — Absolute must for easy cleanup and preventing sticking.
- Cookie scoop (about 1.5 tablespoons) — This ensures all your cookies are the same size and bake evenly.
- Cooling rack — Lets air circulate so the bottoms don’t get soggy.
- Small bowl — For mixing the cinnamon sugar coating.
- Whisk — For the icing, a whisk works better than a fork to get out the lumps.
If you don’t have a cookie scoop, just use two spoons to drop the dough. It’s a little less precise, but it works! I actually used spoons for years until I finally bought a scoop. It was a game-changer for consistency.
Preparation Method
Let’s get to the fun part. I’ll walk you through each step so you get perfect cookies every time.
- Preheat and Prep. Preheat your oven to 350°F (175°C). Line two baking sheets with parchment paper or silicone mats. This is non-negotiable for me—parchment paper saves my sanity.
- Make the Cinnamon Sugar Coating. In a small bowl, whisk together the 3 tablespoons of granulated sugar and 1 tablespoon of cinnamon. Set it aside for later.
- Cream the Butter and Sugars. In a large bowl, beat the softened butter, granulated sugar, and brown sugar together with an electric mixer on medium speed until it’s light and fluffy. This takes about 2-3 minutes. Scrape down the sides of the bowl with a spatula.
- Add the Wet Ingredients. Beat in the pumpkin puree, egg, and vanilla extract until just combined. Don’t overmix here. The mixture might look a little curdled—that’s totally fine. It’s the pumpkin doing its thing.
- Combine the Dry Ingredients. In a separate bowl, whisk together the flour, cream of tartar, baking soda, pumpkin pie spice, cinnamon, and salt. This ensures the leavening agents and spices are evenly distributed.
- Mix Wet and Dry. Gradually add the dry ingredients to the wet mixture, mixing on low speed. Stop as soon as the flour disappears. Overmixing at this stage will make the cookies tough. The dough will be soft and slightly sticky—that’s what we want.
- Shape and Coat. Using your cookie scoop (or a spoon), scoop out rounded tablespoons of dough. Roll each ball between your palms to make it smooth. Then, roll each ball generously in the cinnamon-sugar mixture. Place them about 2 inches apart on the prepared baking sheets.
- Bake. Bake for 10-12 minutes. The edges should look set and lightly golden, but the centers will still look a little soft and puffy. Don’t overbake! They will continue to set on the hot baking sheet. I usually pull mine out at exactly 11 minutes.
- Cool. Let the cookies cool on the baking sheet for 5 minutes. This is crucial—they are fragile right out of the oven. After 5 minutes, transfer them to a wire cooling rack to cool completely before icing.
- Make the Icing. While the cookies cool, make the cream cheese icing. In a medium bowl, beat the softened cream cheese and butter together until smooth. Gradually beat in the powdered sugar and vanilla extract. Add milk, one tablespoon at a time, until the icing is thick but pourable. You want it to be like a thick ribbon.
- Ice the Cookies. Once the cookies are completely cool, drizzle the icing over the tops using a spoon or a piping bag with the tip snipped off. Let the icing set for about 15 minutes before serving. The wait is hard, but trust me.
Cooking Tips & Techniques
I’ve made a lot of mistakes with these cookies so you don’t have to. Here are the biggest lessons I learned.
The Cream of Tartar is Your Friend. This is what gives snickerdoodles their signature tangy flavor and chewy texture. I once tried to make these without it, thinking I could just use extra baking soda. Big mistake. The cookies were flat and flavorless. Don’t skip it.
Don’t Overmix the Dough. I know it’s tempting to keep beating until everything is perfectly smooth, but that develops the gluten and makes the cookies tough. Mix just until the flour is incorporated. A few streaks are okay.
Chill the Dough (If You Have Time). While this recipe works without chilling, popping the dough balls in the fridge for 15-20 minutes before baking helps prevent them from spreading too much. I do this when I want a thicker, puffier cookie. On a busy day, I skip it and they’re still fantastic.
Use a Light-Colored Pan. I learned this the hard way when I used my dark non-stick pan and the bottoms of my cookies were burnt before the tops were done. Light-colored, aluminum baking sheets are best for even baking.
Let Them Cool on the Pan. This is the hardest part for me because I want to eat them immediately. But if you try to move them too soon, they will fall apart. The 5-minute rest on the hot pan lets them finish setting up.
Variations & Adaptations
This recipe is super flexible. Here are a few ways I’ve played with it over the years.
- Gluten-Free Option: Substitute the all-purpose flour with a 1:1 gluten-free baking flour blend. I’ve used Bob’s Red Mill with great results. The texture is slightly more tender, but still delicious.
- Dairy-Free Adaptation: Use vegan butter (like Miyoko’s) and a dairy-free cream cheese alternative for the icing. Oat milk works perfectly in the glaze.
- Spice It Up: Add a pinch of cayenne pepper or a 1/4 teaspoon of ground ginger to the dry ingredients for a little warmth. It doesn’t make them spicy, just more complex.
- Chocolate Lover’s Version: Fold in 1/2 cup of white chocolate chips or butterscotch chips to the dough before shaping. The sweetness pairs beautifully with the pumpkin.
- Maple Glaze: Swap the vanilla in the icing for 1 teaspoon of maple extract and use maple syrup instead of some of the milk. It gives a cozy, woodsy fall flavor.
My personal favorite variation is adding a handful of toasted pecans to the dough. The crunch is a lovely contrast to the soft cookie. I did this for a Friendsgiving last year, and people were asking for the recipe all night.
Serving & Storage Suggestions
These cookies are best enjoyed at room temperature with a tall glass of cold milk or a hot cup of spiced chai. The cream cheese icing softens a bit at room temp, which is just perfect.
Serving: Arrange them on a beautiful platter for a fall gathering. They look stunning with the white icing against the cinnamon-sugar speckled cookie. I like to add a few cinnamon sticks and star anise to the platter for a rustic, cozy look.
Storage: Store the cookies in an airtight container at room temperature for up to 3 days. If you stack them, place a sheet of parchment paper between the layers to prevent the icing from sticking. The flavors actually get better on the second day as the spices meld together.
Freezing: You can freeze the baked, un-iced cookies for up to 3 months. Just wrap them tightly in plastic wrap and then foil. When you’re ready to serve, thaw them at room temperature and whip up a fresh batch of icing. Alternatively, you can freeze the cookie dough balls. Scoop them, roll them in the cinnamon sugar, and freeze them on a baking sheet. Once solid, transfer them to a freezer bag. Bake from frozen, adding 2-3 minutes to the baking time.
Reheating: Pop a cookie in the microwave for 10 seconds for that fresh-from-the-oven softness. It’s a little slice of heaven on a cold afternoon.
Nutritional Information & Benefits
Let’s be real—these are a treat. But they do have a few redeeming qualities!
- Estimated per cookie (makes about 24): 180 calories, 8g fat, 26g carbs, 2g protein, 15g sugar.
- Pumpkin Power: Pumpkin puree is packed with Vitamin A, which is great for your eyes and immune system. It also adds fiber, which helps keep you full.
- Spice Benefits: Cinnamon is known for its anti-inflammatory properties and can help regulate blood sugar.
- Dietary Considerations: This recipe can easily be made gluten-free or dairy-free with simple swaps.
- Potential Allergens: Contains wheat, dairy, and eggs.
I’m not a nutritionist, but I feel a little better about eating three of these knowing there’s actual pumpkin in them. It’s all about balance, right? A little indulgence, a little vegetable. It works for me.
Conclusion
These Cozy Iced Pumpkin Snickerdoodle Cookies are more than just a recipe—they are a memory in the making. They are the taste of a chilly autumn afternoon, the smell of a kitchen filled with cinnamon, and the satisfaction of finally cracking that elusive bakery recipe. I hope you give them a try and make them your own.
Don’t be afraid to adjust the spices, play with the icing, or add your favorite mix-ins. That’s the beauty of baking. And if you nail that first batch, you’ll feel like a total rockstar. If you don’t, well, you still have cookies. It’s a win-win.
I’d love to hear how they turn out for you! Drop a comment below and tell me about your favorite fall baking memory, or tag me in your photos on Pinterest. Happy baking, friends. May your cookies be chewy and your heart be full.
Frequently Asked Questions
Why are my pumpkin cookies cakey instead of chewy?
This usually happens because there’s too much moisture. Make sure you’re using pure pumpkin puree, not pumpkin pie filling. You can also try patting the puree dry with a paper towel before mixing. The cream of tartar also helps create a chewier texture, so don’t skip it!
Can I use pumpkin pie spice instead of individual spices?
Absolutely! I actually prefer using a good pumpkin pie spice blend because it’s balanced perfectly. Just use 1 1/2 teaspoons in the dough and you’re good to go. It’s a great shortcut.
My dough is very sticky. What should I do?
Pumpkin cookie dough is naturally stickier than regular cookie dough. That’s normal! If it’s unmanageable, chill the dough in the refrigerator for 20-30 minutes. This will firm up the butter and make the dough much easier to roll into balls.
Can I skip the cream cheese icing?
You can, but I wouldn’t recommend it! The tangy cream cheese icing is what makes these cookies truly special. It balances the sweetness of the cookie perfectly. If you really want to skip it, try dusting them with extra powdered sugar after they cool.
How do I know when the cookies are done baking?
Look for the edges to be set and lightly golden. The centers will look puffy and slightly soft. They will continue to bake on the hot pan as they cool. If you wait until the centers are fully firm, they will be overbaked and dry. Trust the 10-12 minute window!
Pin This Recipe!
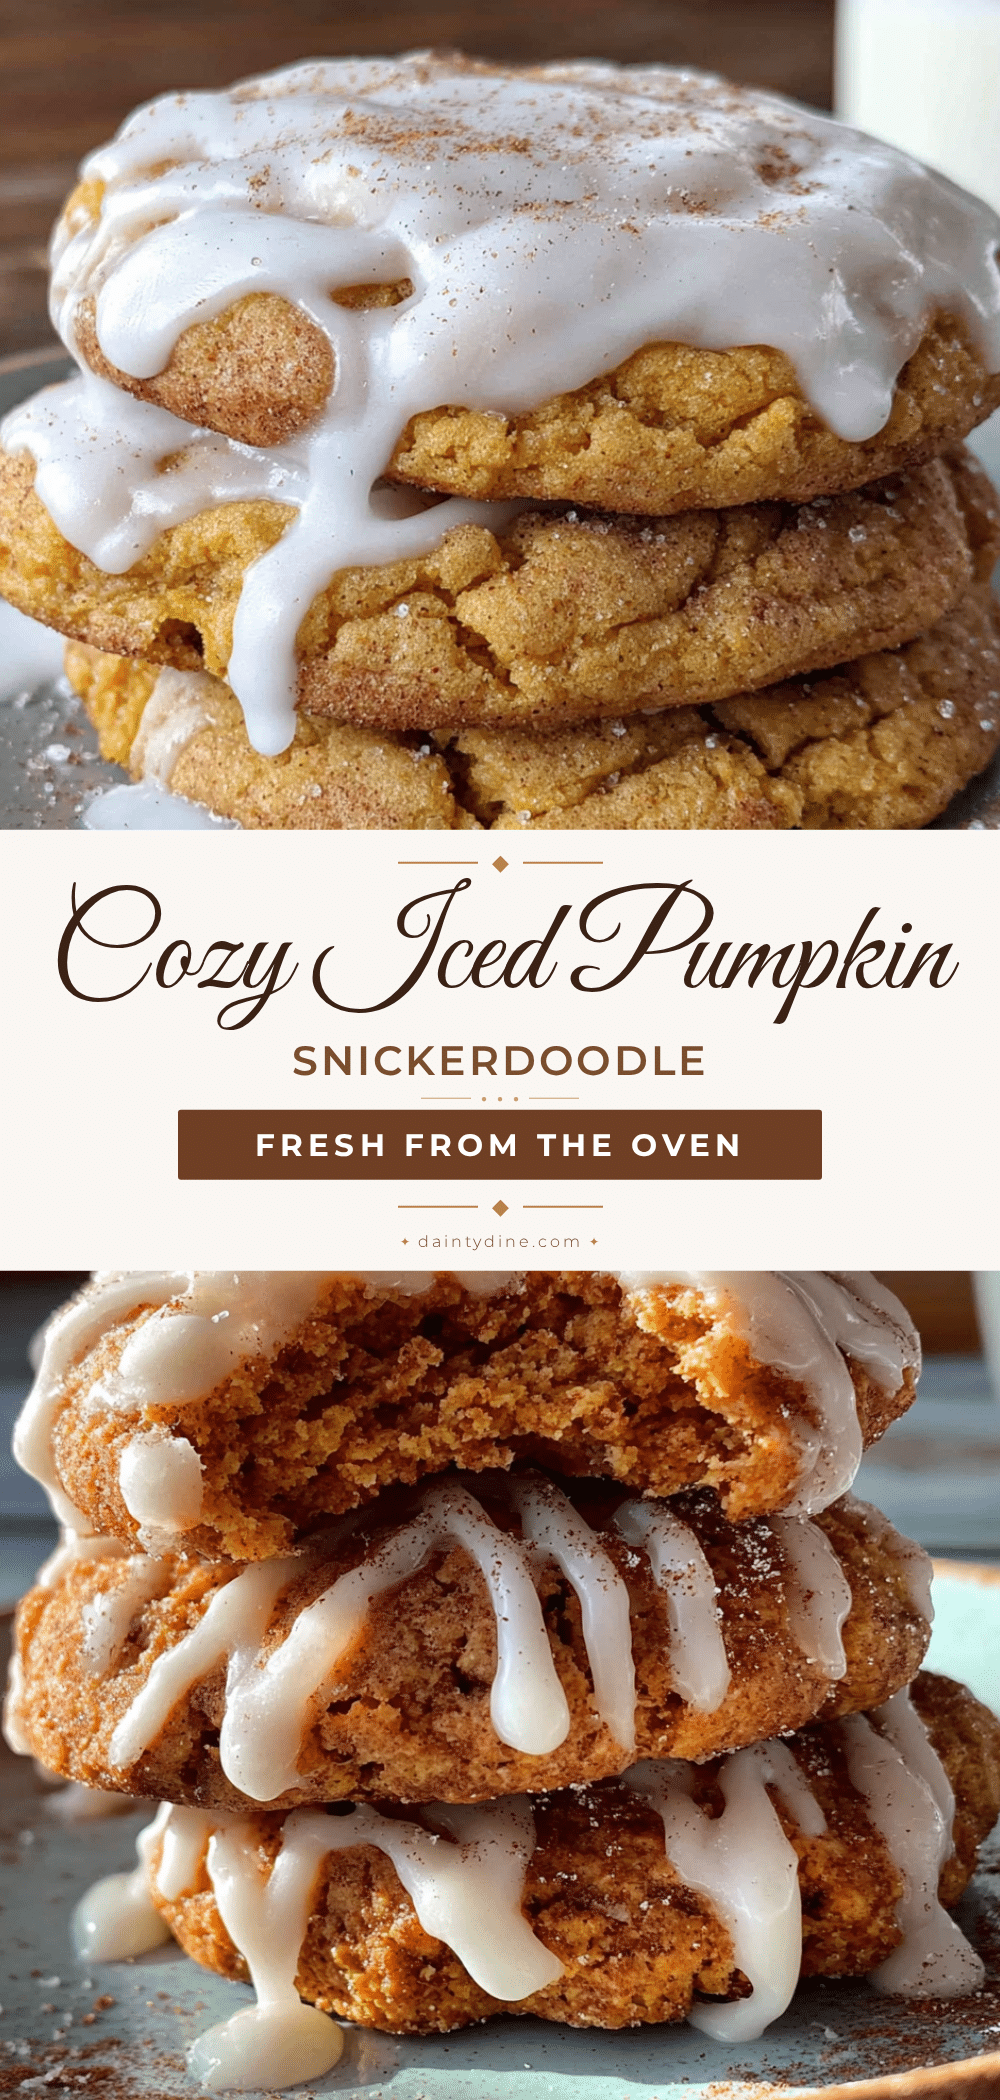
Cozy Iced Pumpkin Snickerdoodle Cookies
These aren’t your average pumpkin cookies. They are a perfect hybrid — the classic, buttery snickerdoodle you grew up with, but infused with the warm, cozy soul of pumpkin pie. They are the kind of cookie that makes you want to put on a chunky sweater and pour a glass of cold milk.
- Prep Time: 15 minutes
- Cook Time: 11 minutes
- Total Time: 26 minutes
- Yield: 24 servings 1x
- Category: Dessert
- Cuisine: American
Ingredients
- 1 cup unsalted butter, softened (2 sticks)
- 1 cup granulated sugar
- 1/2 cup brown sugar, packed
- 3/4 cup pumpkin puree (100% pure pumpkin, not pie filling)
- 1 large egg, room temperature
- 1 teaspoon vanilla extract
- 2 1/2 cups all-purpose flour, spooned and leveled
- 2 teaspoons cream of tartar
- 1 teaspoon baking soda
- 1 1/2 teaspoons pumpkin pie spice
- 1 teaspoon ground cinnamon
- 1/2 teaspoon salt
- 3 tablespoons granulated sugar (for coating)
- 1 tablespoon ground cinnamon (for coating)
- 1 1/2 cups powdered sugar (for icing)
- 2 ounces cream cheese, softened (1/4 of a block)
- 2 tablespoons unsalted butter, softened (for icing)
- 1/2 teaspoon vanilla extract (for icing)
- 2–3 tablespoons milk (whole milk or dairy-free alternative)
Instructions
- Preheat oven to 350°F (175°C). Line two baking sheets with parchment paper or silicone baking mats.
- In a small bowl, whisk together 3 tablespoons granulated sugar and 1 tablespoon cinnamon for the coating. Set aside.
- In a large bowl, beat softened butter, 1 cup granulated sugar, and brown sugar together with an electric mixer on medium speed until light and fluffy, about 2-3 minutes. Scrape down sides.
- Beat in pumpkin puree, egg, and 1 teaspoon vanilla extract until just combined. Mixture may look slightly curdled.
- In a separate bowl, whisk together flour, cream of tartar, baking soda, pumpkin pie spice, 1 teaspoon cinnamon, and salt.
- Gradually add dry ingredients to wet mixture, mixing on low speed until just combined. Do not overmix. Dough will be soft and slightly sticky.
- Using a cookie scoop (about 1.5 tablespoons), scoop dough and roll into smooth balls. Roll each ball generously in the cinnamon-sugar coating.
- Place dough balls about 2 inches apart on prepared baking sheets.
- Bake for 10-12 minutes, until edges are set and lightly golden but centers still look soft and puffy. Do not overbake.
- Let cookies cool on baking sheet for 5 minutes, then transfer to a wire cooling rack to cool completely.
- For the icing: In a medium bowl, beat softened cream cheese and 2 tablespoons butter until smooth. Gradually beat in powdered sugar and 1/2 teaspoon vanilla. Add milk, 1 tablespoon at a time, until icing is thick but pourable (like a thick ribbon).
- Once cookies are completely cool, drizzle icing over tops using a spoon or piping bag. Let icing set for about 15 minutes before serving.
Notes
For best texture, pat pumpkin puree dry with a paper towel if it looks watery. Cream of tartar is essential for the signature snickerdoodle tang and chewy texture. Do not overmix the dough. For thicker cookies, chill dough balls for 15-20 minutes before baking. Use light-colored baking sheets for even baking. Let cookies cool on the pan for 5 minutes before moving. Cookies can be stored in an airtight container at room temperature for up to 3 days. Freeze baked un-iced cookies for up to 3 months, or freeze dough balls for up to 3 months.
Nutrition
- Serving Size: 1 cookie
- Calories: 180
- Sugar: 15
- Sodium: 120
- Fat: 8
- Saturated Fat: 5
- Carbohydrates: 26
- Fiber: 1
- Protein: 2
Keywords: pumpkin snickerdoodle cookies, iced pumpkin cookies, fall cookies, pumpkin dessert, cream cheese icing cookies, snickerdoodle recipe, easy pumpkin cookies


